#how to use stencil on canvas
Explore tagged Tumblr posts
Visit Tumblr Blog
Explore Tumblr blogs with no restrictions, modern design and the best experience.
Last Seen Tumblr Blogs


Fun Fact
Tumblr has 16.74 million mobile monthly users in the US.
Text
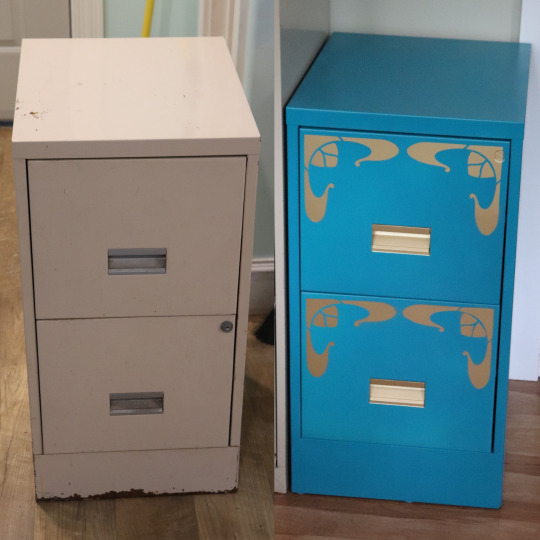


I got this sad little filing cabinet at an estate sale last month and I would have put it in my sewing room as is, but it had so so much rust on the bottom and I didn't want it staining anything.
I cleaned and sanded it as best I could, and I also removed the lock and glued in a piece of can lid to fill in the hole.
I painted it a nice blueish teal colour, which did not go as well as it could have because I have almost no experience with spray paint. I kept having to wait for the dry weather to line up with my days off work, the wind and bright sunlight made it hard to get an even coat and I had to go back and redo some spots I missed, and then I ran out of paint and had to get more to finish the drawers. The paint has cost much more than the filing cabinet.
I already had a can of gold paint (for a pair of lamps that aren't done yet) so I used that on the handles, and I figured I may as well add some decoration while I was at it, so I made a simple flower stencil for the corners. I tried sticking it down with a glue stick to keep the paint from getting underneath the edges, but it must have dried very quickly because it didn't stick well no matter how much I re-glued it and I got some bleed, especially on the first one I did. I put that drawer on the bottom and it's not too terribly noticeable from a distance. Very glad I had the good sense to not overcomplicate the stencil, it could have looked quite bad if I'd done a lot of fine details!
I put spray varnish on the fronts of the drawers because the gold paint rubs off just the teeniest tiniest bit when you touch it.
The paint job isn't perfect, but neither is the cabinet itself, it's got some dents and big scratches. It's much better than it was and it won't get rust stains on anything, so I'm happy with it. It's the perfect size for right next to the door. I think I will put things like buckram and canvas and twill tape in it.
819 notes
·
View notes
Text
THE BATTLE JACKET MASTERPOST
FINALLY PUNKS IT'S HERE
a battle jacket (also called battle vest, cut-off, punk jacket, patch jacket, and probably other stuff) is a jacket (duh) usually made from denim or leather with DIY additions of patches, studs, flags, painted panels, chains, and other bonuses, used to signify subculture. Punk, metal, and biker scenes all use patch jackets, but I'll only go into specifics about how they're used in the punk scene. Metalheads, I think, almost solely personalise with music/band shit. Bikers use them to signifying which club you're riding with. Punks started using them in the 70s and they've remained a staple of the subculture's style since. They're good for signalling your politics, bands you like, and other information you might want to get across. They also look cool.
HOW TO START
If you're here I assume you wanna learn how to make your own so I'll cut the history lesson short and get on to the practicals.
1: first you're going to want to get a plain jacket, probably denim or leather, but you could get a canvas jacket if you're nervous and new to the scene because it's way easier to stitch canvas, so you could experiment with that as you're building confidence. The jacket should be at least a bit oversized because with all the stitching and painting or whatever you'll be doing, you could run into fit issues with a very form fitting jacket. also, this jacket might frequently be worn over other jackets or layers so that will help with that too
2: start making choices. namely whether you want to keep the sleeves. obviously you can remove or reattatch the sleeves later but I think making that big mod first is a good starting point to help you feel like it's a work in progress. so if you're going to chop the sleeves I say do it now
3: brainstorm. I know, I know, coming up with your own ideas is hard, but this is your own totally literally unique piece, so think about what sorta look you want
4: you don't have to brainstorm alone though. search tumblr or pinterest for punk jackets, punk patches, punk clothes ect for inspiration. you might get a good idea for an individual patch, or for a broader layout
PATCHES
1: the big deal. this is what will make your jacket into a battle jacket. there are some unofficial rules/sayings in the scene about what sort of patches you should put on your jacket. some people get dickish sometimes about if you put a non-punk band on your jacket? however i think that is bollocks and you should do whatever you want forever. one saying i do personally mostly stick to is "politics up front, bands on the back" with the idea you stick your politics on your front so you can see the punches coming
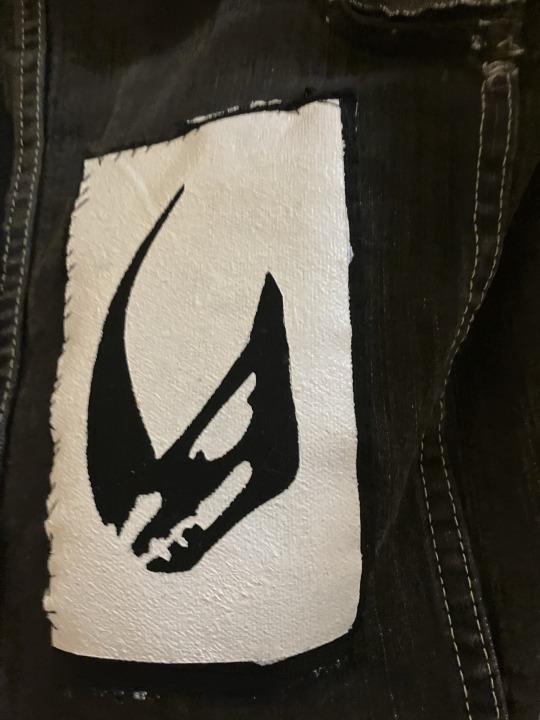
2: where do you get the patches? you make them yourself. You can buy ofc but don't get shit off amazon or shein or whatever the fuck. If your fav band or small artist is selling patches go for it though. You will have the most choice if you make your own patches. Do you have scrap fabric (maybe the sleeves of the jacket, which is where i got a lot of my patch material)? Do you have paint and paintbrush? good. you can make a patch
3: how do you do that? well depends on whether you stencil or freehand. stencil means you cut out an outline, of say a band logo, out of card, and use that as a stencil. freehand means you paint whatever tf you like
4: paint?? yes paint. messy as you like. start maybe with simple slogans or symbols often found in the punk scene like "ACAB" or "eat the rich". maybe an anarchy symbol. i also like to paint a layer of mod podge over my designs to waterproof them.
5: great, you've got a patch, what are you going to do with it? sew it onto the jacket. unless ofc you bought an iron-on in step 2, in which case iron that shit on and be careful punks. most likely though, you're sewing it on. a lot of punks use tooth floss to sew on because its cheaper, easier to find, readily waxed and waterproof, and does a better job sewing shit down onto heavy duty material like leather or denim. I use a combined running stitch and whip stitch personally
STUDS n SPIKES
1: all those punks you've seen have metal sticking out their jacket eh? yeah, theres a whole lot of options here. spikes of many different sizes and shapes, which within that can be stitch on, screwback, or have fold down prongs on the back of them
2: where do you put them? probably the front or top of the jacket. you can put them on the back but that might be uncomfortable, or rip up someone's upholstery
3: where do you get them? you can still DIY these by cutting up a metal drinks can [whole other post] but BE CAREFUL. i suggest checking out the internet for these, same buying rules as patches though. no shein. no amazon.
OTHER SHIT??
1: go wild
2: other common additions would be chains, lighter caps, badges, and can tabs
HAVE FUN PLS ASK ME QUESTIONS AND SHARE IF YOU START A BATTLE JACKET
1K notes
·
View notes
Text
Continuation of this from @honeybunnnnie of Tattoo Artist!Simon
To start off they obvs all get matching 141 tattoos and yes it’s on their hip bones.
Simon def started out tracing the lines on his own faded tattoos too
Ok ok now you’re walking around the convention and every booth is the same but different. The old school tatters don’t look your way bc either not enough tattoos or they don’t like your tattoos. And the same from the micro tattoo people or the realism people. And all the artists that have their specialty and scoff at any other form of the art. You meet a few nice artists with good work but you are gonna let someone put you in physical pain and permanently alter your body. It’s a big decision and each time you wait in line for an artist your gut tells you nope not them. So you keep walking and you get to Simon’s booth. No big sign. No rack of shop tshirts or merch to sell. Just Simon sitting in his fold out chair next to a basic massage table and he’s got an arm rest if he needs it. He’s sitting quiet as you flip through his flash book and his photos of healed work. You ask a few questions. Are the flash designs one offs or repeatable? He just looks at you for a moment before answering. It’s been 2 hours already and you’re the first to speak to him. “Uhh so far just one offs but I wouldn’t mind doin ‘em again” you nod and keep flipping. You ask if he does color and he stands to walk up to you and his book of work. Oh he’s big now that he’s towering over you. With a “pardon me” He flips to the pages of color tattoos and shows you examples on different skin types. Not just your own. That makes you smile and now he’s trying not to stutter bc wow you’re pretty. You take his card and repeat his name back to him when he tells you it and he’s trying not to blush.
Maybe a week later you text him (bc we all now that idiot doesn’t have a social media for his tattoos) and set up a time for an appointment. You did not expect his “shop” to be in a garage office on a military base. Maybe this wasn’t such a good idea. But you get ushered by people in uniform to the space where Simon has his supplies set up. Your escort then runs to yap about how Liutenant Riley has a client. The room is small and he’s got a few different lamps around including a high grade bright as hell one that looks like it’s used to light up a football stadium. No ring light or anything remotely new, but the space is organized and clean. The familiar scent of cleaning supplies that you get in every other tattoo shop is present. You two talk and you tell him what you want or maybe just pick a flash piece and he begins his set up. (For the sake of the story we are doing a tattoo high on the side of your thigh. Borderline hip borderline ass). When he asked you where you wanted it and you said “here” so plain and simple as you lifted the side of your skirt up to expose the skin where the art would go and he was swallowing hard. As he was prepping to place the stencil your skirt kept dropping in the way so you tucked the part that was falling up into your underwear to keep it still and now he could see the pink lace you were wearing. Simon never knew he needed focus so hard on holding a piece of paper. Hands shaking trying to keep his eyes on the skin that would be his canvas and not the skin he wanted to sink his teeth into. Every time he needed to touch you, he’d ask. “Gonna put the cream on for the stencil. That alright?” He’s sitting in his chair looking up at you and the sweetest lil “ya of course” came out. “Stand relaxed and normal I’m gonna place the stencil” and he’d stick the paper to you and add “it alright if I rub it on” “yes Simon it’s alright”. You’re almost giggling bc this is his job he is allowed to touch you but it’s sweet and makes you feel more comfortable every time he asks. You watch his brows furrow in focus as he lines up the stencil and then relax when he starts to smooth out the paper before so delicately peeling it off. He’s handsome. You stand still and let the stencil dry as he starts pouring the ink in to the small cups and peeling his needles from their sanitary packs. Every one of his movements is smooth and calculated. “Go ‘head and lay day for me” he nods his head toward the table before moving back to finish the set up but the “yes sir” that you respond with has him freezing on the spot (and pants tightening). He turns around in his chair and there you are laying in front of him like a meal ready to be eaten. Facing away from him your thighs and the side of your ass exposed waiting for him to mark it. He takes a deep breath before giving the spiel about letting him know if you need a break and what not.
He turns his machine on and you can hear the buzzing for a minute before asking if you’re ready to start. (He’s prepping himself more than you) When you agree his large hand comes up to your thigh to keep the skin taught. You can feel the warm seeping through his latex glove and into your skin. His strong grip had you holding your breath even before the needle touched your skin. His hands feel so nice you never want him to let go. For the first 15 minutes or so he’d check in on you every few lines and you promised you were doing just fine. The higher up on your thigh the needles got, the more your breathing picked up. The pain growing a little more with each inch. Simon noticed you trying to control your breathing, the tapping of your fingers together trying to distract yourself from the pain. “You’re taking it real well.” Simon heard the way into sounded and cringed when he heard you let out a little gasp. (Bc that’s not Simon). Fuck he was gonna be labeled as a tattoo creep. Gotta salvage. “I mean when I tattooed my mate Johnny on his hip he was whimpering and whining the whole time and it was a tiny little thing too.” That made you giggle. After that you two started a conversation.
He only does this as a hobby that’s why he’s set up a lil shop here. You have a couple other tattoos but the experiences at the shops or with the artists never felt all that great but so far you really like Simon. “Glad to hear it”. He tells you he’s almost done maybe just 10 more minutes when there is a knock only a millisecond before the door swings open. You don’t move just let your head turn every so slightly to see who’s coming in but Simon jumps up to stand in front of you. “Tavish what’s the fucking deal mate.” Simon has his hands out to cover the section of your ass that’s exposed from the onlooker. “Jus’ wanted to see what yer werkin’ on is all” you tell Simon that it’s alright he can come see and now Simon is a little mad bc he knows Johnny is only here bc Simon had been talking about the pretty bird coming in for some work. And now Johnny gets to see your skirt hiked up too. Simon finished the tattoo while Johnny keeps you occupied showing off his tattoos by Simon. Ever so eager to pull his shirt up and the side of his pants down to expose his own hip tattoo (and abs and happy trail and sexy skin) he started joking about how “shite” he was when he first started as Simon wipes down the tattoo. You go to take a look in the mirror and let out a lil squeal of excited bc damn it looks so good. Simon has you walk over to him so he can wrap it up. Sitting legs spread in his chair he motions for you to stand between his legs so he can put the wrap on when johnnys hand makes its way to you only to be slapped away by Simon bc “it’s fucking fresh and not for you to touch”. Johnny is sent out of the room after that (to run to Kyle to tell him about it). You pay Simon and he charged you a fraction of what it was worth but you promised to come back soon. And now he and Johnny are both scheming of ways to get their hands on you
#weird paragraphs breaks bc tumblr made me#blurb#cod modern warfare#simon ghost riley#john soap mactavish#tf 141#kyle gaz garrick#john price#ghost#cod x reader#tattoo artist!simon
315 notes
·
View notes
Note
Patch making tutorials?
and here i am once again, with a patch making tutorial
how to make stenciled patches:
i'll post a part two in the future which will cover freehanding and stamping ur patches
-
first some general info that might be useful:
i get my patch design inspo from pinterest, etsy, and tumblr. if sell your patches make sure you arent ripping off another artists patch design when using etsy for inspo. anarchostencilism also has tons of stencils both on deviantart and reddit which are free to use.
i use acrylic paint for my patches, but if you can afford it id advise fabric paint. to seal paint into the fabric iron the patches, it helps em last longer. some acrylic paint survives very well in the washing machine, but wash your stuff by hand the first time to see how well it holds up.
if you make your patches multiple colors, dont first make the whole patch one color and then paint over it with the other colors. if the paint starts cracking the base color will show through. (if you like that however then dont mind this)
i paint my patches on jean fabric, cause it makes the patches sturdy yet flexible. but shirt fabric or canvas both work very well too. anything except really plasticy/slippery or textured fabric can be used
i pin my patches down with pins onto multiple layers of taped together cartboard, to prevent the fabric from moving around and distorting the print
-
there's two ways in which i make my stencils
1. with paper covered in tape
2. with the plastic folder you put in your binders
-
option 1:
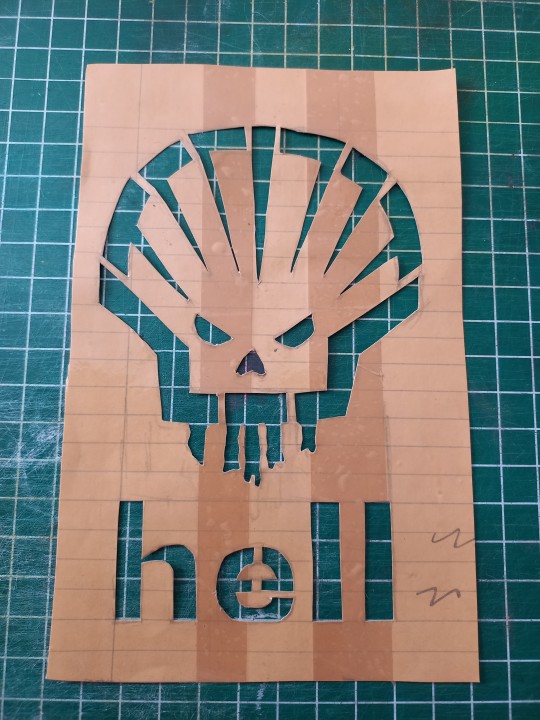
draw out your design onto some paper, make sure there arent any "loose" parts in the design that will get lost when cutting out the stencil

cover the paper in tape front and back, make sure you can still see your design through the tape
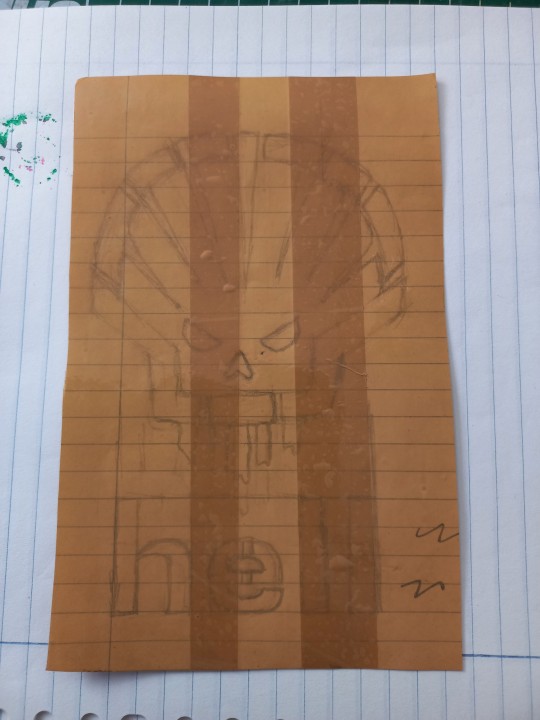
cut out your design, i use scissors and an exacto knife
-
option 2:
draw out your design (you can also draw the design directly onto the plastic folder)
cut a piece of plastic out of the folder big enough to cover your drawing and tape it down.
trace the design onto the plastic with pen or marker (any mistakes can be wiped out)
cut out your stencil
-
continuation from both option 1 and 2
after finishing your stencil you can pin them down on some fabric
dap on your paint with the point of a big brush or a sponge, depending on the paint it'll take 2-3 layers.
make sure your previous layer dried completely before adding the next one

after the paint has fully dried you can carefully take off your stencil.
!!dont unpin the patch before it fully dried, or the drying paint may cause the fabric to warp!!

thats it, questions are always welcome, now go and make stuff!!
#punk diy#diy fashion#punk#queer punk#diy punk#punk clothes#punk style#punk patches#patches#tutorial#my stuff
2K notes
·
View notes
Text

This typeset of Pentimento by orange_crushed was created by @teleportbooks for me in the 2022 @renegadeguild typeset exchange! (And bound as part of my Binderary 2023 stack, and look, I am REALLY behind at posting right now, and going to schedule some posts to catch up.)
This fic is a MDZS Wangxian modern AU set in a museum, where Lan Wangji is an art conservator, and Wei Wuxian is an art handler. (Drama! Tension! Meeting after years apart!) One of the joys of a well-constructed AU is seeing how the author recontextualizes canon, and I really enjoyed how the pieces fit together in this fic, as well as Lan Wangji's voice and point of view.


I raided my wife's art supplies for this one (also for the most themed photo op I've done to date) and used two different types of canvas for the book cloth. The lighter cover is just untreated canvas, backed with fusible interfacing and tissue, run through a home laser printer for the cover, and the title on both the cover and spine is acrylic paint using a Cricut-cut stencil. The darker canvas on the spine was gessoed and had a backing on it, and it did NOT want to stick with wheat starch paste, and only held with great reluctance with straight PVA glue. But it worked in the end! The endpapers are some of my wife's gelli-plate printing experiments, for a modern art vibe.


The typeset is lovely and elegant, with a title page set up like a gallery placard, and @teleportbooks included all of the artwork referenced in the fic as if they were colour plates in an art book! Look at this gorgeousness...


I'm pretty happy with how this one turned out overall, and the setting was definitely fun to riff off with the materials used. (Although I will only use that darker canvas again under duress... or for something else where it's the perfect fit, honestly.)
#fanbinding#ficbinding#mdzs fic#binderary2023#pentimento#orange_crushed#modern au#wangxian fic#just another elaborate fic rec
120 notes
·
View notes
Text
How to Print Embroidery Stencils Directly onto Fabric
This was requested, and I'm often asked how I do this so here's a short how to! I do almost all my stencils this way, and avoid "stick and stitch" wash away stabilizers as much as possible. I work with a lot of detail, and I've found this is the best way to capture it all. I use a basic canon inkjet printer. Nothing fancy. I make all my stencils in procreate from reference photos.

Firstly you're going to need regular 8x11 sheets of label paper. Find the fabric you want to use and stick the whole sheet straight on. Smooth out your fabric as much as possible to ensure there's no folds or wrinkles so your pattern doesn't distort or your sheet doesn't jam your printer. Lint roll it too to get rid of any extra fuzz or hair.
Cut off the edges of excess fabric to the exact size of your sheet. Make sure there are no threads hanging off. This fabric is going to stay on this sheet until you're done.


BEFORE I load the fabric into my printer, I have to format how I want the stencil to print. I want to adjust the margins to center the image, and then I play with the scale to figure out how big I want to work. I was going to be finishing this piece in a 6 inch hoop, so I had to ensure it would frame how I wanted it to. However, when I'm actually working, I work with a 7 inch hoop(it's easier on my hands). The one downside to this method is that I cannot go any larger than this(personally I don't usually work larger than 6 so it works). You need to make sure you have margins all around your working hoop so that you can tighten the fabric.
Once you've got your desired size and centered presets, load the fabric, still on the label paper, into the printer. For most printers this will be fabric side down. Then, print! Voila, you have your stencil directly on your fabric. Peel it off the sticker paper (this is the hardest part tbh), it's normal to end up with really frayed edges to the fabric sheet during this process. You won't see those on your finished piece.
There you have it. Stencils, printed right onto fabric. Happy stitching!

Side thoughts:
-i have never had this jam or screw up my printer. That's not to say it's impossible. I take the risk because so far it's worked great for me.
-i do not ever wash my pieces or get them wet. So I cannot say if the ink would or would not run on the fabric or thread. Keep that in mind.
-the fabric I use is either Kona cotton or a slightly thicker canvas material. I've never tried with anything else.
#hand embroidery#embroidery#fiber arts#tutorials#modern embroidery#needlework#handmade art#fiber art
98 notes
·
View notes
Text
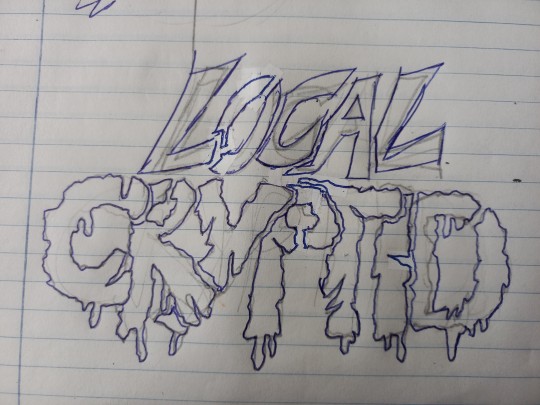
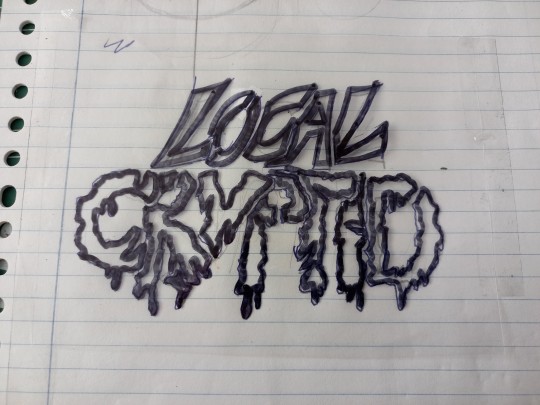
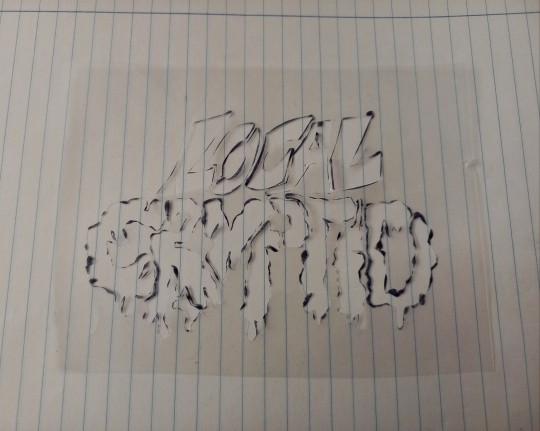
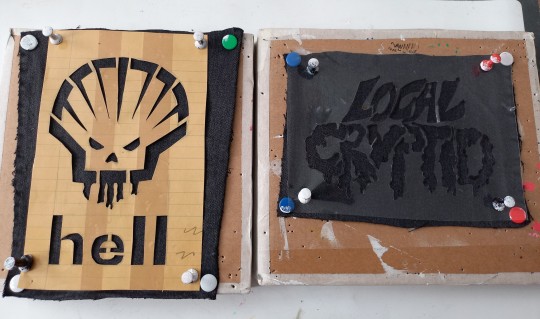
Learning how to make patches
Based on the tutorial by the wonderful @coveredinredpaint
I started following his tutorial, but the initial results weren't super good so I'm sharing some thoughts on it.
1: Don't use a sponge. At least in my experience the results with those ended up disastrous. A cheap dabbing brush will do you wonders.
2: Add two layers of tape per side of the stencil. It'll make cutting it a little finnickier but will keep it more rigid during painting which will lessen the amount leaking paint under it.
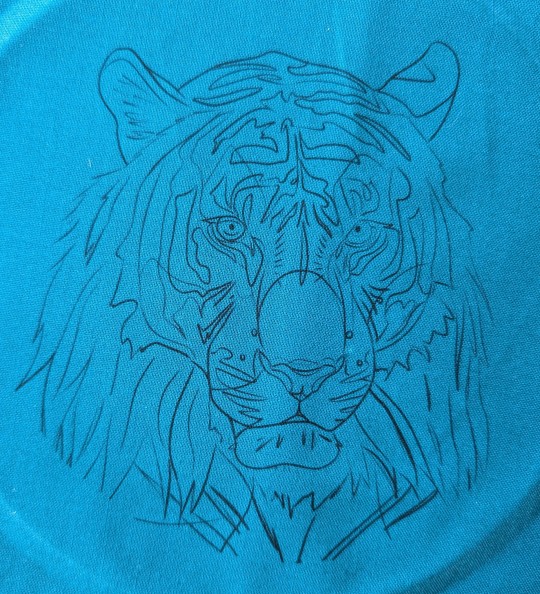
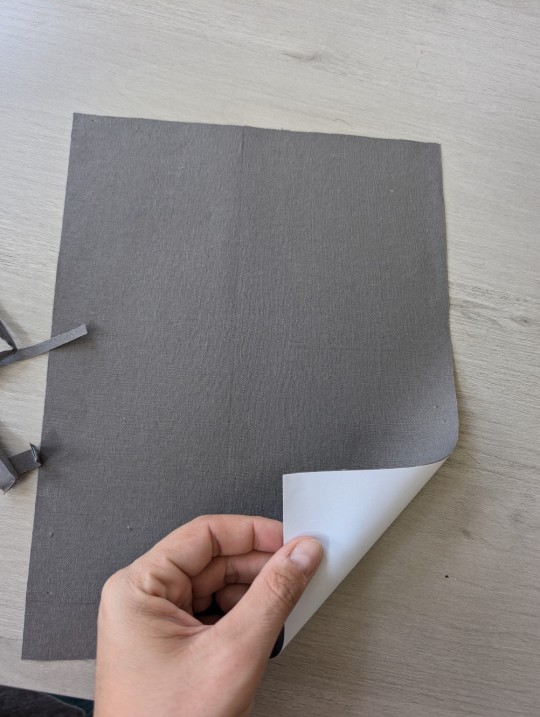
3: I couldn't find denim so I grabbed some canvas, worked just fine.
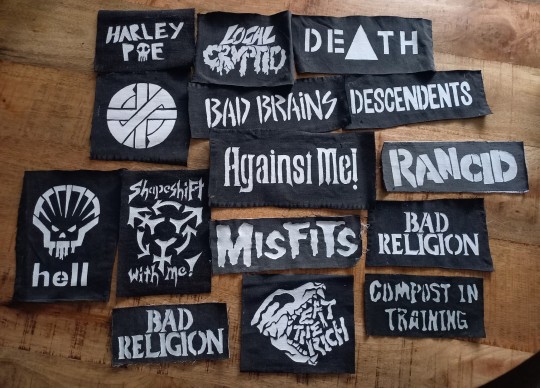
Here's the results:
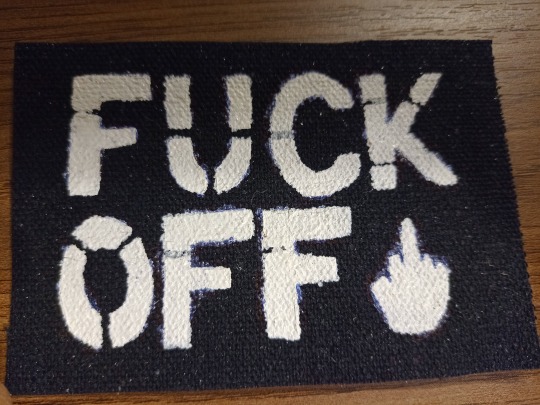
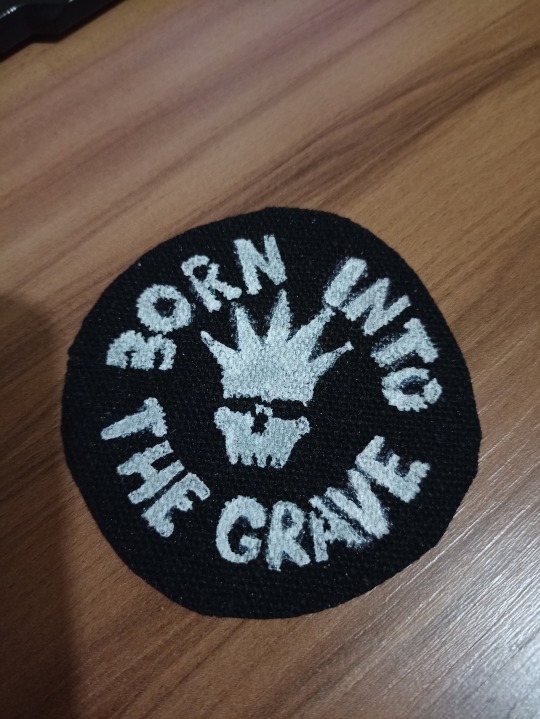
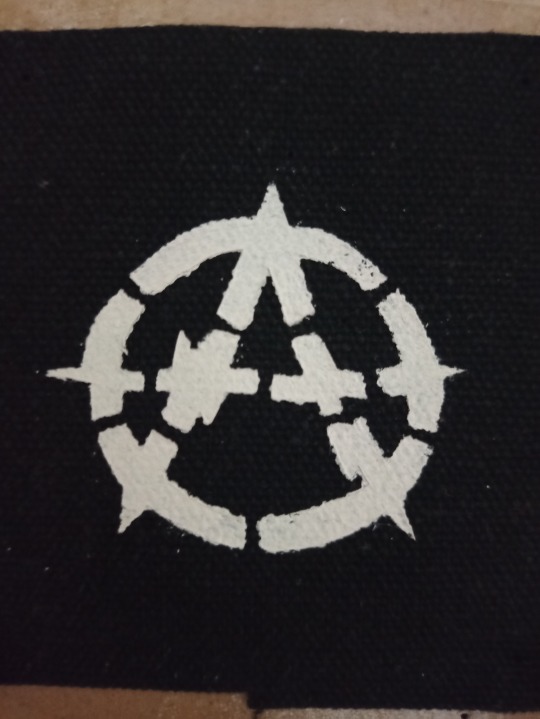
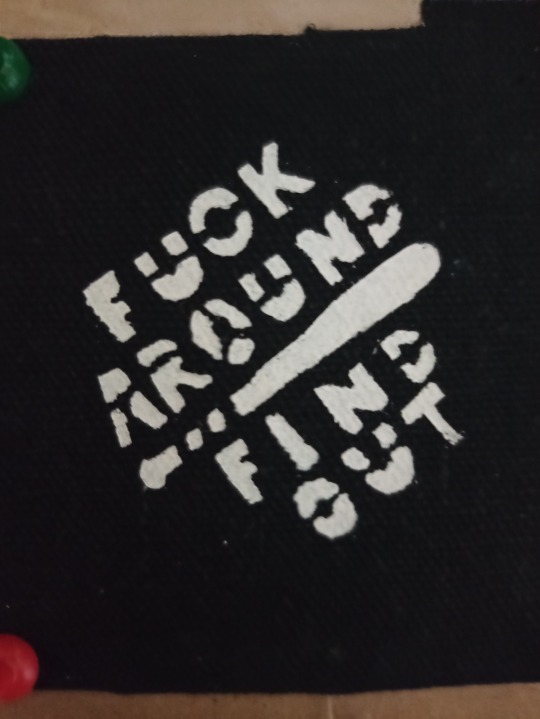
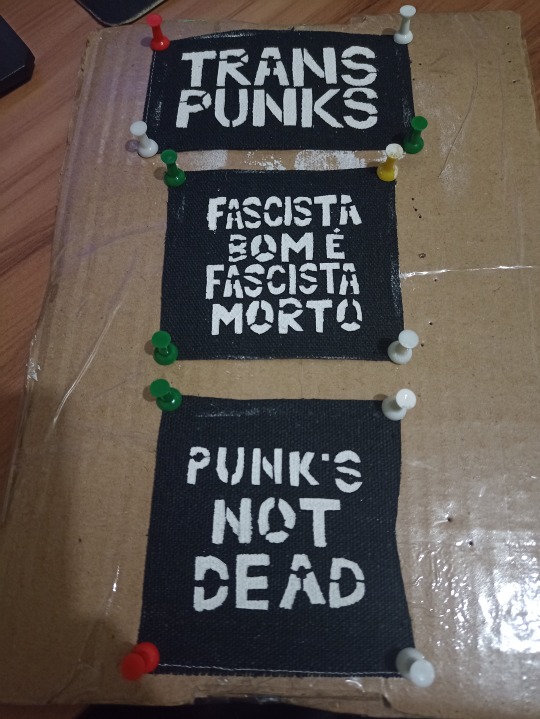
I already sewed those first two onto my battle jacket, the middle two are ready for it and the latter three need a layer of varnish first. Notice how there's a bit of bleed on the last three ones, I experimented with one layer of tape per side for those and found it bends too easily when pinned down and risks exactly that happening.
Anyway, thanks for the tutorial, gonna be making tons of these now.
111 notes
·
View notes
Note
Are there any arts and crafts that you recommend?
It's all up to personal taste but here's some off the top of my head.
You probably have the means to do this at home rn
Drawing, just grab a pencil or pen and a piece of paper and doodle, draw shapes! You can do abstract stuff or geometric patterns or stuff like mandalas that you can color later, it doesn't have to be a masterpiece.
Paper crafts in general. Collage. Scrapbooks. Greeting/birthday cards. Origami - I personally really like folding birds and cranes.
Inexpensive/not too expensive (to my knowledge)
Coloring books, I don't personally like coloring but I follow people who enjoy this and I've seen really cute coloring from them. You can color with crayons, markers, pencils. Whatever you like.
Sewing* (beginner :tm:) learn stitches to fix your clothes and things. It's really rewarding long term. Once you know your stitches you can learn to make lil things like simple plushies with scrap fabric.
Embroidery*. Well, if you start sewing you got needles now! congrats, you can try embroidering. I absolutely recommend an embroidery hoop because it will make things a lot easier, it can also help with mending clothes. You'll need some scrap fabric that's fit for the job but when it comes to threads, to start, you can pretty much use whatever - I've used all sorts of yarn and sewing threads.
Jewelry making. There's different materials both for the beads and the thread so prices vary but it's nice and it's something you can do for yourself or for gifting.
*by hand.
You really gotta buy stuff for this (but maybe someone you know can lend you some of it to practice and see if you like it? or they could be down to teach you, who knows.)
Crochet.** You need yarn and the correct crochet needle/hook to crochet. There's a lot of begginer friendly tutorials so the learning process isn't too terrible. I've made amigurumis and coasters. Lots of people make blankets out of granny squares (and there's tons of free patterns online!)
Knitting.** I haven't personally tried this one but same as above. And again, tons of free patterns online.
Sewing (machine :tm:). My sister has a sewing machine and she's done tons of things. It's a more expensive hobby though since you have to invest more and learn how to properly use the machine but you can make stuff faster than you can by hand. It really makes sewing clothes together a lot easier.
**you will def find blogs and videos with tutorials but I also recommend ravelry because it let's you filter results and people sometimes rate how easy/hard patterns are.
Other stuff that I've done once or twice: paper mache, sculpting, stamps! and stamp making, mosaics, flower pressing, stencils, watercolors, acrylics, canvas painting, embossing... and I'm probably forgetting some.
#anon#ask#reply#sorry this got long but my family has had lots of arts and crafts phases so ive tried tons of things / have supplies for many available
7 notes
·
View notes
Text
I did the thing and made the rug

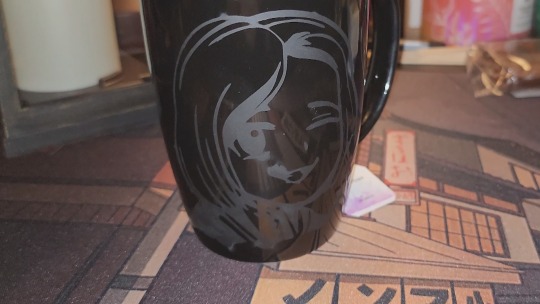
At the end of my playthrough I said I was going to make a P-smug rug. Twas not just a throwaway line, mate. I actually did it. But I thought P-Sip is a lot meme-ier so I made that instead (I didn't have the exact colors but close enough)
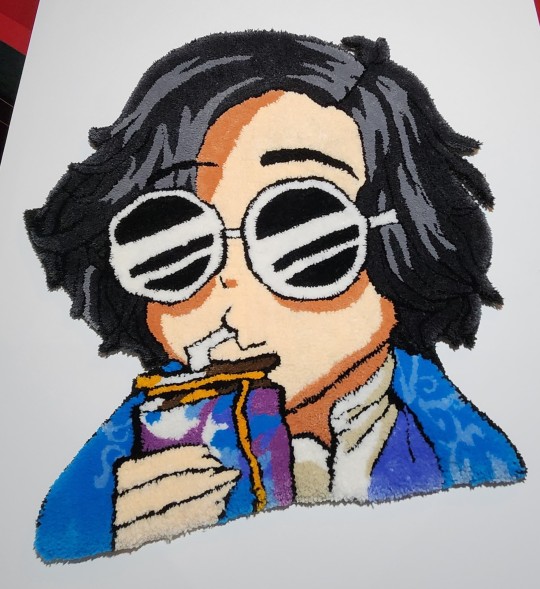

and made a P-smug mug (with bonus Romeo on the other side, kind of messed up because the stencil didn't fold well.)

If you wanna make one for yourself because I always get told this is the most random eggs dee hobby - you need:
lots of yarn, preferably acrylic, silk sucks to use - double thread it
a tufting gun
canvas big enough to cover your frame
a frame, doesn't matter the size, just needs nails that are angled outward to hold the canvas
a projector
hot glue, spray glue, and indoor/outdoor carpet glue
some backing
a shaver/scissors
a tetanus shot (forreal the damn nails...)
space and a lot of time

Put the canvas taught over your frame, drum tight
project your image onto the canvas (mirror it)
trace it, fill in your color labels
thread your gun with your desired colors (repeat)
put on some tunes and go to town (note the gun will always go UP, NEVER drag it down! It'll cut your canvas....)
take frequent breaks because it'll hurt your wrist/thumb bad
pull out any mistakes, and go over it again til you're happy with it
put the carpet glue all over nice and good and slathered so it doesn't fall apart
let dry for a day, 2, 3, depends on the size/how much glue you used
cut it out
hot glue the canvas to the back of the rug for a waterfall edge
put on the backing
tidy up edges with hot glue/scissors
shave it/vacuum
clean up with scissors again
done.


It's soft and cute (~‾⌣‾)~ almost 3ftx3ft
42 notes
·
View notes
Text
The Ultimate Guide to Tattoo Design: From Concept to Creation — Robin’s Tattoo
Tattoos are more than just ink on the skin — they are personal stories, bold expressions of style, and a powerful part of identity. At Robins Tattoo, we specialize in helping men turn their ideas into timeless works of art. Whether you’re considering your first tattoo design for men or looking to expand your existing ink, this ultimate guide will walk you through the journey from concept to creation.
Why Tattoo Design Matters for Men
Men’s tattoo designs have evolved beyond tribal arms and anchor symbols. Today’s tattoo choices reflect personality, beliefs, passions, and life milestones. The right design makes a statement — whether it’s minimalist, meaningful, or full-sleeve mastery. That’s why investing time in the concept is just as important as the ink itself.
Step 1: Finding Inspiration for Your Tattoo Design
Start by exploring the most popular and trending tattoos for men:
Popular Tattoo Designs for Men:
Tribal Tattoos: Bold, masculine, and timeless.
Geometric Tattoos: Clean lines with deep symbolic meaning.
Skull Tattoos: Representing strength and life’s duality.
Lion Tattoos: Power, leadership, and courage.
Clock & Compass Tattoos: Time, direction, and purpose.
Quote Tattoos for Men: Personalized messages that motivate or remind.
Religious & Spiritual Tattoos: Crosses, Om, mandalas, and more.
Tip: Browse our portfolio at Robins Tattoo or platforms like Instagram and Pinterest using keywords like “masculine tattoo design,” “men’s tattoo ideas,” or “modern tattoos for men.
Step 2: Choosing the Right Placement
Tattoo placement matters as much as the design. Here are the most popular tattoo spots for men:
Forearm Tattoos — Easy to show off, great for detailed work.
Bicep Tattoos — Ideal for bold designs and tribal art.
Chest Tattoos — A canvas for meaningful or large artwork.
Back Tattoos — Great for full-scale, intricate storytelling.
Leg Tattoos — Quads and calves are rising trends in men’s body art.
Neck Tattoos — Edgy and bold for those confident in their style.
Step 3: Customizing Your Tattoo Concept
Every tattoo should tell your story. At Robins Tattoo, we encourage you to sit with our artists to personalize your design. Bring references, discuss your ideas, and let us help you blend creativity with craftsmanship.
Things to consider:
What message or meaning do you want your tattoo to carry?
Are you looking for a small tattoo for men or a full-sleeve tattoo?
Do you want your tattoo in black & grey or full colour?
Step 4: Choosing the Right Artist
Your tattoo is only as good as the artist who creates it.
At Robins Tattoo, our experienced tattoo artists specialize in a wide range of men’s tattoo styles — from intricate realism to bold traditional designs. We maintain the highest hygiene standards and use premium-quality inks and tools for every session.
Step 5: The Tattooing Process — What to Expect
Here’s what happens once your design is ready:
Stencil Placement — We apply a sketch to check positioning.
Needle & Ink Work — Outline first, followed by shading and colouring.
Breaks & Comfort — We ensure you’re comfortable throughout.
Aftercare Guidance — You’ll get expert instructions on how to heal properly.
Step 6: Tattoo Aftercare Tips for Men
Proper care keeps your tattoo sharp and vibrant:
Wash gently with mild soap.
Apply fragrance-free moisturizer or healing ointment.
Avoid direct sunlight, swimming, or sweating excessively.
Wear loose clothes around the tattoo area.
We also recommend booking a follow-up appointment at Robins Tattoo to check healing and touch-ups if needed.
Conclusion: Your Tattoo Journey Starts Here
Tattooing is a deeply personal and powerful form of expression. At Robins Tattoo, we’re here to help men create bold, meaningful, and high-quality tattoo designs that last a lifetime.
Whether you’re into masculine tribal tattoos, sleeve designs, or minimalistic symbols, our team ensures that every step, from concept to creation, is guided by skill, passion, and precision.
Ready to Ink Your Story?
Visit Robins Tattoo Studio today or book a free design consultation. Let’s bring your vision to life with the perfect tattoo design for men.
2 notes
·
View notes
Note
okokokok. picture this.
chifuyu who loves to read his manga with you. he cuddles up to you as you two read the pages, and looks away where some kind of suggestive panel comes up. you giggle and tell him he doesn't have to do that, yet he doesn't care. your pictures are the only suggestive ones he dares to look at
baji who loves baths with you. he never makes them sexual, and they're always so sweet. he washes your pretty hair and rinses it, all while making sure no soap gets in your eyes. of course, it wouldn't matter if he did. he buys the tear-free stuff <3
tattoo artist!wakasa who loves practicing on his baby. their body is like a canvas ready to be explored. tries every new trend on you. his personal favorite tatto though? his initals on the back of your neck. he knows you two will be together forever, and so do you. that's why you have it, and he has a matching one on his collarbone with your initials.
bonten!koko who puts up with too much bitching and whining from the girls at his work, so he's always so relieved to come home to a warm meal and tell you about his day. You know your spot as number one in his heart, so you never feel jealous
-p.s, i will come back whenever i can with these if you enjoy them <3 feel free to give me a name, and i will happily go by it!
i am absolutely picturing these and im going to cry they are so fucking cute !!!
chifuyu probably makes it a point to look away or change the channel when something a little too suggestive comes on the tv because !!!! he doesn't wanna see that !!!! and he pouts and hides in the blankets when you tease him for it !!
and i learned baji canonically uses 3-in-1 for his own hair 😭😭 poor guy didn't know body wash and shampoo shouldn't be combined in the same bottle until he met you !! and DEF buys the Good Stuff now that you've shown him just how soft leave in conditioner can make his hair.
imagine so many matching tattoos w wakasa god im gonna puke. you see cute little designs online and show him and he's already setting up new needles and getting a pair of stencils ready <3
bonten!koko my beloved <3 probably adores being able to come home to you and the after dinner cuddles you provide, how you pull him to bed after he showers and just lay with him to tell him about your day until you're drifting off to sleep in the middle of talk of the show you'd started.
i haven't gotten a named anon yet i'm gonna cry !! how does 🧸 anon sound !! i'd love for you to keep coming by <3
#salmon rowe#chifuyu matsuno x reader#baji keisuke x reader#wakasa imaushi x reader#kokonoi hajime x reader#🧸 anon#? <3#i absolutely adore all of these
89 notes
·
View notes
Text
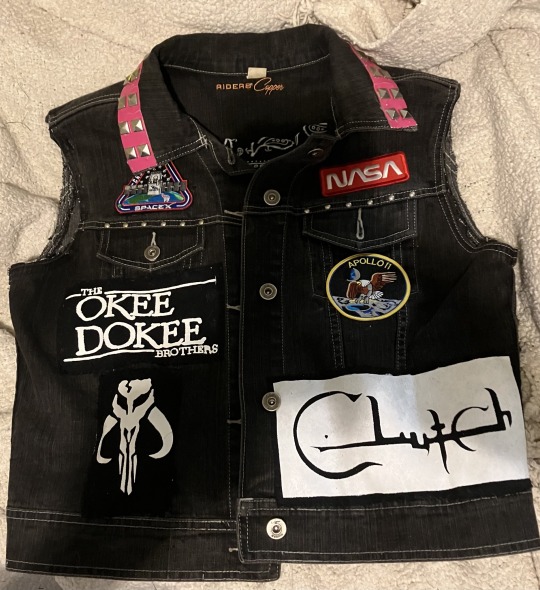
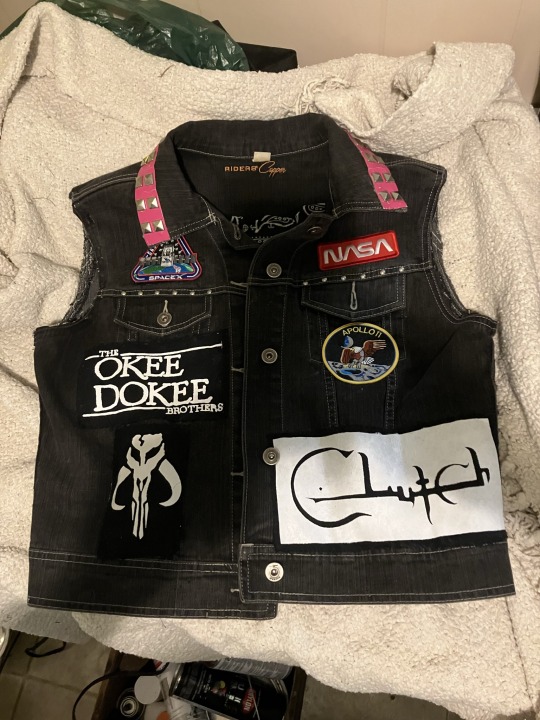

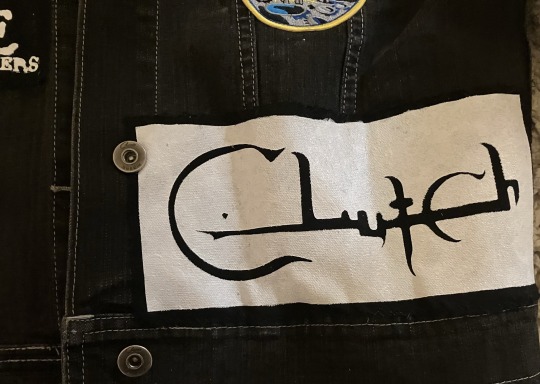
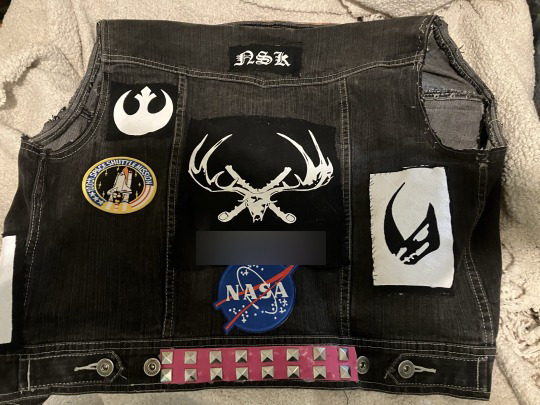
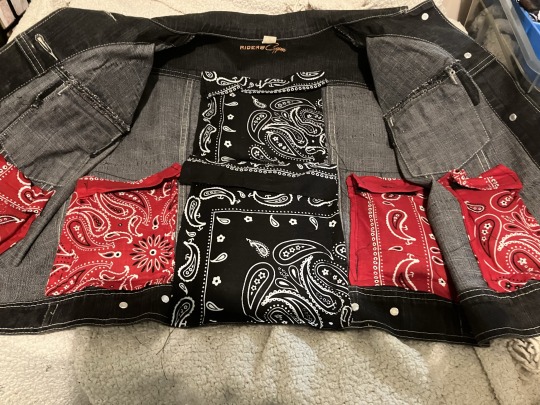
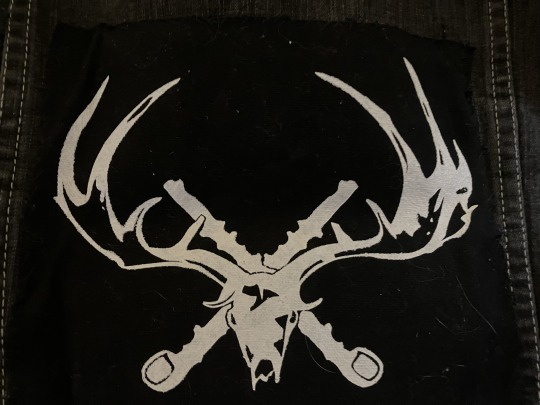
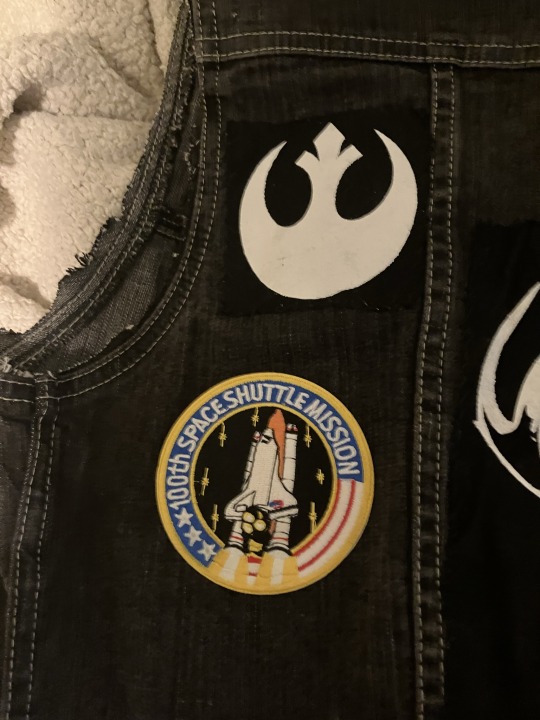
I made my little boy a custom weighted vest for Christmas. I got the jacket from the thrift store and modified it. The studded vinyl comes from an old belt that i took apart. The boy's favorite color is pink. I made the canvas patches. I cut vinyl stencils using one of the machines at my job. I blurred out part of the back patch because it has our family name on it. The back graphic is an Irish Elk (Irish Great Deer) skull with two shillelaghs crossed behind it. A shillelagh is a walking stick that is also a weapon. He is a big space nerd so I got him an assortment of NASA and SpaceX iron on patches. (i know i know Elon sucks but my boy is 9 and he loves rockets) I used aquarium gravel for the weight filler. The weights are removable so he can wear it without them if he wants to.
I'm pretty happy with how this turned out. I can't wait to give it to him.
22 notes
·
View notes
Note
I love your buffy and vampire patch jackets! But how do you get the face refs? I know how to make a stencil but how do you find the pictures to trace into a stencil? I hope I did a good enough job explaining my question
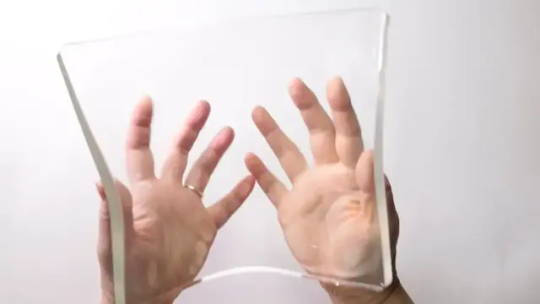
Hi! Thanks! I have a video which goes into depth of the whole process which explains it clearly (I think? And shows how to pick good photos and stuff) you can watch it here :-) https://youtu.be/g1bnLEHyCCQ?si=Lqd6o6pIFmI6mswp
But in short , I mostly use google ? Like I just look up “Willow Rosenberg” and scroll till I find a good photo :-) I also will screenshot good gif sets or nice stills I see on tumblr, and use canva/google docs to edit until the picture is easier to stencil
I also have a weird habit of keeping an eye out when I watch shows now for nice still screens where the lighting would make a good stencil, like I’ll watch angel and be like whoa charisma carpenter looks so good here I gotta screenshot this for later , so I do that now 😅
Lastly, if you have the DVDs, the cast photo gallery is gold for high quality high contrast photos , but I didn’t find out about that till I was mostly done lol
Sorry for the ramble - hope that answered the Q!
youtube
#ask#asks#if there’s a weird double post in here it’s cause Tumblr fucked up I didn’t mean to repeat myself#diy#stencil
13 notes
·
View notes
Text
a painting on the refrigerator door
should i pack my bags now? i know i can't have that world again when i showed up in ripped jeans and hand-me-down sweaters a half-hearted painting in my hand the one you pasted on the refrigerator door a gentle reminder that i was young, i was fire where are you now? i am still pouring out the watercolours the blood dries on the parchment skin people watch horrified but i call it art like you showed me how to draw perfect circles without any stencil so i'll hold up the masterpiece and watch as the crowd passes by they can see it all -- every stitch that's coming undone every girl that's sitting alone on the last bench of high school but they won't stop the river that's flowing flowing eyes that scan over my face do they remember my name? a passing note, a forgotten myth can i ever have the youth you saw in me in my smile when you held me up so high but i never grew wings flying felt so ideal when i had a hand to hold but the world is cruel and it wants me to stand on two limbs, not four; what if i lose my balance? the canvas is melting under the burning heat the paint is being washed away in september rain a momentary bliss forever hidden under the city of dreams under the stars that shine just a little brighter so what do i do if i cannot be that? should i learn to pack my bags now? that glory is not coming back anytime soon when the whole world would see me paint the town yellow and applaud, it's buried under the rubble and the rumours stained with what never happened and what truly happened my brain's in knots, i cannot sort it out so how can they? and i know, this is the isolation i chose but god why is there not a single soul to witness the way my heart falls apart? if i leave without a note, can someone notice? will someone put up "lost" banners with my face on them? the garage is begging to be shut and paintbrushes are washed clean from the terror i put them through the words keep tumbling out of me in waves in shadows, in tears and i collect them all afraid of running out of them but you used to admire the repetition and mistakes unlike them you saw the diamonds in the skies where i saw dead stars constellations when i couldn't make sense of the mess of my art and if this is what it's like to be a poor painter on famous side-streets of france and italy hoping someone will take my pain home is this life worth living? is this art worth loving? when no one puts me on their refrigerator door am i the girl i claim to be?
-- dandelion.
13 notes
·
View notes
Text
Well. Why not? With Dawntrail dropping Friday, its gonna get real quiet on my page. So might as well throw this on here.
Everyone is familiar with the journal and map by now that I've made for my FFXIV character. My map is absolutely lovely, and I think I'm going to finish inking in Tural tomorrow. My journal has been added to again and again as my OC sails along the worlds coastlines to make the map, visiting Thavnair finally.
I like to add little touches here and there. A pressed leaf from Gridania, drawings from his room as he convalesces after an injury, a lotus bracelet from a vendor during a trip to Radz-at-Han. Beads hand made in his village hang on the cover. I'm pretty proud of the Triple Triad card I made from his visit to the Manderville Gold Saucer.
Ever since I started the journal, I've been playing with this idea of putting some kind of textile from Ul'Dah in the journal. I've talked about it with Kenna for months now. So we finally went out a couple weeks ago and got the materials to make it (because why would I just buy a little cloth swatch? Who would do that?)
We got canvas bags, thread, needles, and a needlepoint frame. Originally I was going to use needlepoint yarn, but didn't like the way it looked. First thing I did was cut up the canvas bag into the size I wanted, and aged it using coffee. Then I stenciled on the pattern. Yesterday, I finally worked up the nerve to start.
For literally no reason other than I find it entertaining and I think it's going to look good in my journal, I am trying my hand at needlepoint. The avenues these two projects have taken my down fascinate me. Things I never thought I would try to do, I have successfully done.
(I wasn't sure if I wanted to post pics, cause the stencil looks like shit. But once its all done, it'll look waaaaaay better.)
So, ignore how terrible the stencil lines look. I freehanded it and I cannot draw to save my life. First pic: 1 hour of needle point. Second: 4 hours. Third pic: 6.5 hours. It's tough to tell at this point, but the lines in the center are red thread, and the birds are orange. I wanted to get some of everything on there instead of doing each color to completion so I can better see how its going to come out.
It is by no means perfect, this is my first needlepoint project, but I honestly love how its coming already.
Probably wont make much progress on it tomorrow since I want to finish the coastlines on the map before I get completely distracted by Dawntrail. But its a really relaxing way to spend a few hours in the evening before sleep.


#crafty fox#rp crafting#ffxiv#ffxiv rp#ffxiv crafting#kinda doing this#because i am playing#with the idea of cosplaying my wol
2 notes
·
View notes
Text
What is Gelli Plate Printing?
Gelli plate printing is a monoprinting technique that uses a soft, gelatin-like plate to create unique and vibrant prints. It's a fantastic medium for artists, crafters, and anyone who loves to experiment with colors and textures. Unlike traditional printing methods, each Gelli print is one-of-a-kind, offering endless possibilities for creativity.
Brief History of Gelli Plates
The concept of gelatin printing has been around for a while, but modern Gelli plates were popularized in the early 2000s. These reusable plates are made from a durable, non-toxic gel-like material that mimics the texture of gelatin, allowing for repeated use without degradation.
Materials Needed for Gelli Plate Printing
Before diving into the process, let’s gather the essential materials:
Gel Plates For Printing
The gel plates for printing is the heart of this printing technique. Available in various sizes, these plates are flexible, reusable, and easy to clean.
Paints and Inks
Acrylic paints are the most popular choice for Gelli printing, but you can also use water-based inks. These mediums work well on the Gelli plate and produce vibrant results.
Brayers and Rollers
A brayer or roller is used to spread paint evenly across the Gelli plate. It helps create smooth, even layers of color.
Stencils and Masks
Stencils and masks are essential for creating patterns and designs. They add complexity and interest to your prints.
Paper and Fabrics
You can print on a variety of surfaces, including different types of paper and fabric. Experiment with materials to find what works best for your projects.
How to Make a Gelli Print
Creating a Gelli print is a fun and straightforward process. Here’s a step-by-step guide to get you started:
Preparing Your Workspace
Set up a clean, flat workspace with plenty of room for your Gelli plate, paints, and paper. Lay down some newspaper or a protective mat to catch any spills.
Choosing Your Paints
Select your favorite acrylic paints. You can use a single color or mix several to create a gradient effect.
Applying Paint to the Gelli Plate
Squeeze a small amount of paint onto the Gelli plate. Use your brayer to spread the paint evenly across the surface. The paint layer should be thin and smooth.
Creating Textures and Patterns
Use stencils, masks, or found objects to create patterns in the paint. You can also use tools like combs or brushes to add texture.
Printing on Paper or Fabric
Carefully lay your paper or fabric onto the painted Gelli plate. Press down gently but firmly to transfer the paint. Peel the paper off to reveal your print.
Tips for Layering and Combining Colors
For more complex designs, let each layer dry before applying the next. Experiment with different color combinations and layering techniques to achieve unique effects.
Techniques for Gelli Plate Printing
Enhance your Gelli prints with these creative techniques:
Using Stencils and Masks
Stencils and masks can help you create intricate patterns and designs. Place them on the Gelli plate before applying paint, then remove them to reveal negative space in your print.
Creating Abstract Patterns
Play with colors and shapes to create abstract designs. Use tools like brushes, sponges, or even your fingers to manipulate the paint.
Incorporating Found Objects
Use everyday items like leaves, string, or bubble wrap to add texture and interest to your prints.
Printing with Natural Elements
Experiment with printing leaves, flowers, or other natural elements. These can add organic shapes and textures to your artwork.
Experimenting with Different Papers and Fabrics
Different papers and fabrics will absorb paint differently, affecting the final look of your print. Try rice paper, canvas, or even old book pages for varied effects.
Cleaning and Maintaining Your Gelli Plate
Proper care will extend the life of your Gelli plate.
Immediate Cleaning After Use
After each session, clean your Gelli plate with a baby wipe or a damp cloth. This prevents paint from building up and affecting future prints.
Deep Cleaning Methods
For a deeper clean, use mild soap and water. Avoid harsh chemicals that can damage the plate. Let it air dry completely before storing.
Storing Your Gelli Plate
Store your Gelli plate flat in a cool, dry place. Keep it in its original packaging or between sheets of wax paper to prevent dust and debris from sticking.
Creative Projects with Gelli Prints
Once you've mastered the basics, use your Gelli prints in various creative projects:
Making Greeting Cards
Personalize your greeting cards with unique Gelli prints. They add a special touch to any occasion.
Designing Custom Stationery
Create beautiful stationery sets by printing matching designs on notepaper and envelopes.
Creating Art Journals
Incorporate your prints into art journals. They make excellent backgrounds for drawings, writings, and collages.
Crafting Decorative Home Items
Use your prints to cover boxes, frames, or even create wall art. They add a vibrant touch to your home décor.
Using Gelli Prints in Mixed Media Art
Combine your Gelli prints with other art mediums like painting, drawing, or collage to create complex and layered artworks.
Advanced Gelli Plate Printing Techniques
Take your Gelli printing to the next level with these advanced techniques:
Layering Multiple Prints
Layer several prints on top of each other for depth and complexity. Each layer adds a new dimension to your artwork.
Using Metallic and Neon Paints
Experiment with metallic or neon paints for a bold, eye-catching effect. These paints can make your prints stand out.
Gel Medium Transfers
Use gel medium to transfer images onto your Gelli prints. This technique adds interesting textures and layers to your work.
Collage Techniques
Combine cut-out sections of your Gelli prints with other materials to create collages. This adds a new level of creativity to your projects.
Conclusion
Gelli plate printing is a versatile and exciting art form that offers endless possibilities for creativity. With the right materials and a bit of practice, you can create stunning, unique prints. So, grab your Gelli plate and start experimenting today!
3 notes
·
View notes