#html embed youtube video
Explore tagged Tumblr posts
Visit Tumblr Blog
Explore Tumblr blogs with no restrictions, modern design and the best experience.
Last Seen Tumblr Blogs


Fun Fact
25% of US internet users with an annual income of $80-100K use Tumblr.
Text
[Video description: In Playstation 1 graphics, an old man walks onto a snowboard course with his walker. He clips the snowboard through his walker, holding it for a second, and blasts off into the sky. Electronic music plays throughout; the beat drops when he flies away.
/End description]
I beg my followers to check out Battle Tapes' music video for their song "Brand New" - since I figure most people don't click on Youtube links, I took the liberty of using some tools to clip just the beat drop.
The rest of the video is just as good as this.
Here's the link; it's inline instead of embedded because it's 3am and I'm paranoid that people on Tumblr go "ew an embedded Youtube link": https://www.youtube.com/watch?v=Tp6an4eVzP8
#battle tapes#battle tapes - brand new#you would definitely believe how much trouble I had with VLC getting this to clip correctly#once I tried getting a 3-second long clip and it kept getting it wrong even though I KNEW what timestamps I was hitting “record” on#thankfully this clip is longer and a little more flexible on what timestamps are fine to record and which ones completely miss the highligh#and the ending timestamp was just...right on. Right on.#anyway VLC doesn't know how to convert files for the casual user#I had to use a web-browser based thing to do it#the tools I used:#4K Video downloader Plus (free): to get the full Youtube video because VLC couldn't stream it from the link#VLC: to clip the video down to just 10-ish seconds#Free Convert (website): to convert from .asf to .mp4 because VLC couldn't do it for me#siiiiigggh anyway hope you all enjoy this beat drop#maybe it's just recency bias that makes me think this music video is so good#oddly enough getting that inline link to work also took some doing#it either didn't create a link or it automatically embedded; couldn't choose like I can with links to other sites#Opened up a new tab. Draft a new post with its own link. Turned to HTML editor. Copied and pasted it here in this post (also turned to HTML#editor) and then replaced the link reference and the text.#and strangely during that time period I tried using AO3 links which weren't embedding either.#Link that I ended up using to get an inline link was the link to download VLC which. ha. Been having trouble there as I've said in the post#oh and by the way: all links embed at first. But in the lower-right corner there's a little bubble you can click to turn it to inline.#but for some reason that doesn't work with youtube links#aaaaaanyway#I'm done. Finally.#music#videos runnerpost#has description
15 notes
·
View notes
Text
Making a personal website
Why do it?
Having a website is a great creative outlet, and gives you way more control over your space than social media. You are in full control of the content you host on your site, and, if you ever need to migrate to a new host for it, you won’t have to worry about losing a bunch of stuff (for the most part)
Make a page that's just a bunch of pictures of wizards! Turn it into an ARG! Use it as a portfolio! Make it dedicated to your OC Verse(s)! The world's your oyster! HTML and CSS may seem like a lot at first but it's honestly not very hard to learn!
You don't need to be an expert to have a good looking website!
Sections:
Where to Host + File Hosting
Actually Making a Website
What to write your code IN
Keeping Your Site Accessible
Preventing Scrapping with a robots.txt
Etiquette and Useful Terms
Where to Host
There are a few places around the net you can find, but for a personal, fully customizable site you’ll want to avoid commercial places like Squarespace. Squarespace is aimed at people who don’t want to make a site from scratch and are specifically looking at something professional for a portfolio or business. You won't have the rights to the code!
Neocities is the biggest name in the indie web space right now, but Nekoweb has gained some attention lately. You can even use both as a mirror of one another, and if you ever need to move hosts, you can download all your files from either of them.
Differences Between Neocities and Nekoweb:
Neocities offers 1 GB of storage
Nekoweb offers 50MB of storage (half of neocities)
Nekoweb does NOT restrict what file types you can host
Neocities restricts file types to non-supporters. Most files are fine, you'll probably only run into issue with video or audio files (but those eat up a lot of space anyway...) Full list here
IMO Neocities is also just more beginner friendly
NOTE: nekoweb has a robots.txt on their server by default, neocities does not but AFAIK new sites will be given a robots.txt for which they can set the allowed/disallowed themselves. There has been some misinfo about this: this is not neocities giving your data to ai, this is really just the default state of the internet, unfortunately. Either way, you can set up a robots.txt yourself to say whatever you want!
Alternate File Hosting
It’s best to host everything you can on the same host as your site, but if you're limited in space or type, you can host it somewhere else.
Make sure to use something dedicated to hosting files, otherwise your links may end up breaking (so don't use discord). I use file garden, which I have liked, though it's slow sometimes. I know others around neocities who have used catbox.moe… but those links always break for me, for some reason.
If you don’t mind hosting on youtube or soundcloud, there are ways you can embed those players onto your site as well!
I host audio and my art gallery on file garden; everything else is directly on my site and it only takes up 2.5% of my 1 GB of space!
Nekoweb and Neocities aren't meant to be used as file hosts, so don't try to use your neocities as "extra storage" for your nekoweb site, or visa versa.
The Actual “Making a Website” Part
For designing your website, I recommend to browse around personal sites on neocities and nekoweb for inspiration before drawing something out. If you don’t want to design a site yourself, there are plenty of templates, including the classic sadgrl.online site generator (and this guide to tweaking it).
Neocities Guides for Absolute Beginners (if you've never used any html, this is a good starting place)
Making a layout from start to finish (if you know what an html tag is, this should be fine for you; it's what I used!)
Making your website responsive (I swear it’s so easy to make your website mobile accessible unless you’re doing something totally crazy with it)
Sadgrls other guides
The Mozilla and W3Schools documentation are useful resources, but may be confusing to you at first. I myself learned basic HTML, CSS, and Javascript ages ago on Khan Academy, but as Khan Academy started using AI at some point, I have no idea how those hold up.
Take it in pieces, you’ll get a hang of it!
Relative Links
You don't need to link your full URL to link an image; you can link files relatively. For example, if I have a page in my main directory, and an image in folder titled "images" within that directory, I can just link it like this: "/images/image.png" You may or may not need the slash in the beginning, depending on your host. For neocities, I typically don't.
But what if you have a page in a folder and want to access a link in the main directory? Just add two dots for each folder you want to move backwards from: "../image.png" (1 folder backwards) "../../image.png" (2 folders backwards)
Avoid using relative links on your "not_found.html" page, because that page displays anytime a user tries to access a page that doesn't exist, and it will attempt to retrieve links from whatever the user typed into the bar. eg, if a user typed in "your-url/folder/page", it will treat relative links as though it is in that folder.
What to Write Your Code IN
If you make a file for all your website files and organize it in the same way as it is on your website host, you can open your html files in your browser offline and preview how they work and function.
Codepen is a great free code editor for html, css, and js specifically, which also allows a live preview of your site.
I've tried Dreamweaver and it's super buggy (and definitely not worth the price). I know some people use Visual Code Studio but I've never tried it myself.
Keeping Your Site Accessible
Many websites on the indie web right now, are unfortunately, accessibility nightmares… But, it’s actually not that hard to make your website more accessible without sacrificing your artistic intent
Semantic tags are tags that don’t have a specified style but help screen readers interpret content. You should also be careful not to use tags for something other than their intended purpose. Here’s a guide to semantic tags.
Alt text can describe elements to screen readers, but for decorative content like dividers, it's unnecessary. To let a screen reader just pass over them, set the alt property to an empty string ("")
Alt text furthermore should be descriptive but concise. Focus on the most important details and meaning/purpose of the image, not all the little details. Descriptions should also be objective, not subjective.
Color Contrast: text with low contrast against the background may be difficult or even impossible for some people to read. You can check color contrast using firefox’s developer tools, or through this website.
Flashing imagery and bright colors should, at the very least, be warned against. There is a way to use Javascript to freeze gifs, but it’s a bit complicated
Many people make their index page list content warnings so people can prepare themselves ahead of time, or turn back if content on the site may be harmful to them.
These are just the major things I’ve run into myself, but I’m still learning how to make my pages more accessible. For more info on things you can do to make your site more accessible check out these resources.
Prevent Scraping with a Robots.txt
This is not a foolproof method, in fact, bad actors will scrap your files anyway. All a “robots.txt” does is politely request that robots don’t scrap your site for anything… It’s up to the programmers to make their robots LISTEN. Here’s an article that has a blocklist for a bunch of the major bots.
I know this may be demoralizing, but unfortunately the only way you can “protect” your files against ai is to never share them. But, ai can never replace the way you feel about your work or the desire other people have to connect with it. AI can only ever produce a stale, easily digestible imitation… Basically, I know it's scary right now, but keep making your stuff. Do what you can to protect it…. But please don’t let ai stop your spirit!
Etiquette and Useful Terms
88x31 buttons were a staple of the old web, so many people make buttons for their site so other people can link to it!
Hotlinking refers to linking a file from someone else’s site to your own. This isn’t a big problem for big websites like tumblr or twitter, but hotlinking a file from someone’s personal site uses THEIR bandwidth anytime someone loads YOUR site and is frowned upon. This is only applicable to FILES on someone’s page, just linking to their page is fine!
i had an example but tumblr thought it was actual code...
Most browsers allow you to look at the source code for a website by right clicking and choosing "view source". This is a great way to learn how people do certain things... but they may not take kindly if you copy their code. Use it as a guide; don't copy huge chunks of code unless they have said it's okay to.
A webring is a collection of websites with some shared trait/topic that link to each other so that it forms a ring (i.e: Website 1 <--> Website 2 <--> Website 3 <--> Website 1). Web listings and web cliques are similar concepts; it’s basically like joining a club.
An RSS feed is basically like a “following” tab…but for the whole internet (well…any site that has an RSS feed). That way, people who don’t have a neocities or nekoweb (or other) account can get updated whenever your site does. To subscribe to an RSS feed, you’ll need a feed reader, which you can find as an extension for whatever browser you use. As for making a RSS feed, here’s a simple guide.
Javascript’s pretty complicated and I just look up what I want to know and learn from there so I'm not confident to give you help. But, I had to learn that scripts are very picky about where you declare them. If they aren't working, try moving them around.
I'm not an expert, so apologies if I've said anything wrong/confusing. These are resources I found useful or WISH I had when I started. Happy coding!
15 notes
·
View notes
Text
- tumblr has removed the ability to directly upload a video to a reblog (puzzling as to what this accomplished for them)
- must embed external video via html post
- html5 <video>: no
- <embed>: no
- fine what does youtube give you?
- fucking <iframe> wtf, but it works
- replace source with url to self-hosted video: no
- what the fuck maybe it only takes exactly the same container/codec as youtube
- ffmpeg (ffmpreg lol) matched codec: NO
- fine i’ll just fake the fucking headers: nope it’s tls-only
- FINE ILL JUST KILL MYSELF UPLOAD IT TO FUCKING YOUTUBE
- result is a “youtube short”, gay, how to change
- “vertical videos under 60 seconds are always youtube shorts”
- equip dynamite vest
- try one more thing that works for a direct embed from my domain
- works
- wtf
- try above with<script> javascript instead of <video> mp4
- also works
- use tumblr.com js url that you can still upload for extremely outdated theme editor
- alert(session_token)
- yep that’s my session key alright
- alt account following blog loads dashboard and my post
- YEP THATS ITS SESSION KEY ALRIGHT
some of you guys are alright. don’t allow any other javascript than what’s loaded for a safe text post at school tomorrow.
76 notes
·
View notes
Text
Tumblr Growth - Its tough trying to face the world from inside Tumblr.
I used a service called Make | Automation Software | Connect Apps & Design Workflows | Make to push my Youtube videos (All of them that I could on a free plan) to Tumblr - ive been also forming connections and commenting and being part of the community. I had issues where it would post the link to the video, well the ID and I had to manually push the you tube url video = [VideoID] but it didnt embed so I have been editing them one by one to properly embed them and tag them. Its paying off slowly, also pushing thebritbeardo.tumblr.com to the world, frustrated that tumblr is blocking bing bot and @tumblrsupport in a reddit thread said speak to Bing, Bing does not control robots.txt for my site so I kindly asked and will continue to ask tumblr support to remove the block to bingbot, I have sent screenshots from bing webmaster tools. Also, Google is not properly indexing britbeardo.tumblr.com because its not the canonical URL and no matter the tags I put in the html it seems that there is a tumblr controlled canonical url that is set to tumblr.com/accountname. All the canonical testers tell me this.
It seems they are really focusing on users using internal tumblr network and not reaching out to potentially new tumblr users. Its a shame as if you configure Tumblr correctly, follow the right people its actually a much better social environment that Facebook or X, Threads, Masterdon etc. I use them all pretty much and found Tumblr to be a breath of fresh air except for these few frustrations.
@TumblrSupport please allow users more control of blocked search engines in the robots.txt, even if its a check box for allow Yandex, Allow BingBot etc. And give us control of the canonical URL, if I put a Tag in my HTML to override please honor my request to use account.tumblr.com I considered buying a domain but in still concerned that using a domain will cause me to still blocked by bingbot and not have control of the canonical settings.

3 notes
·
View notes
Text
This was something like the vision i had for My Utopian Ideal Of Playlist Website btw:
Plays music through youtube and soundcloud or something so it wouldn't have to host things (other than images, I guess...) , I think Universal Music Group doesn't let you play songs from youtube in embeds or something so this would singlehandedly ruin everything. I also thought of maybe you could link externally hosted mp3s but that sounds like it could get scary, somehow. This is all irrelevant hypotheticals because I would never know how to make this anyways.
I kind of wouldn't want to deal with like a social media angle to it (The idea of "front pages" makes me shy.) so maybe it would just make like standalone pages that could be shared only through linking people to them. Like carrd but for only this specific purpose? Maybe there would be profile pages. The idea of moderating a website sounds like the scariest thing in the world though so I would never do all this
(Maybe if I wanted this to exist but not have to deal with moderating it a sort of static html generator would make more sense (and not have to deal with hosting images !), but that just doesn't seem the same...then it nerfs the audience to just people that are making websites. and in my ideal world my Utopian Playlist Website would be for the purpose of encouraging tiktok children to be better at giving video game characters music so the average neocities user is not really my entirely fictional base for my entirely fictional website.)
ANNOTATIONS!!! ON THE SONGS!!! I MISS THEM!!!!!
I made a picture
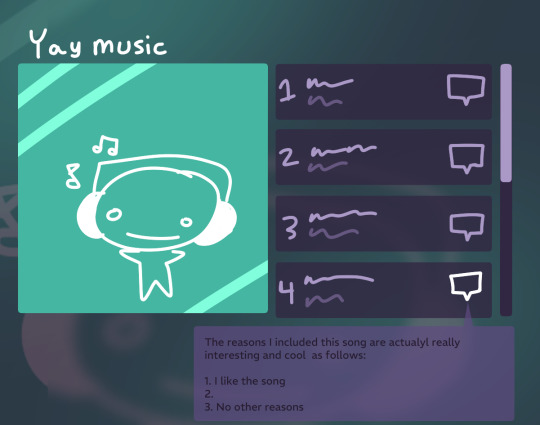
Further notes on this:
Sorry it's like very modern website ambient blur rounded corners that's just what it looked like in my head. I made the annotation too low contrast and hard to read accidentally. Maybe if this were real I would want the colors to be customizable but i do kind of mistrust people with the ability to change every color on a webpage sometimes...
I kind of wasn't sure how the actual playlist should be displayed, I initially thought of it just going down the page but then I realized it'd make more sense to keep the cover art in view so i enclosed them in a little box (also it was easier to do in a mockup drawing). Feels a little claustrophobic the way i did it though, wouldn't be that good for playlists that have a lot of songs (mine are usually around 8-14 songs long so i didn't really think of people that might genuinely just be able to make extremely long playlists)
Also in my excitement to include individual song annotations I forgot to make any space for a playlist description. Oops
None of this will ever happen. Because I am not even remotely a web developer. When I was supposed to demonstrate an ability to use javascript for the final of a web design class i took in high school i just didn't do that because i didn't understand javascript and the person reviewing the assignment was my mom and i figured she wouldn't notice. She did notice
2 notes
·
View notes
Text
Want to start earning from Google Ads ? Here’s how ?
1. Understanding Google Ads: Google Ads, previously known as Google AdWords, stands as an online advertising platform developed by Google. It enables advertisers to display ads across Google’s extensive network, encompassing search results, websites, YouTube videos, and more. Through a pay-per-click (PPC) model, advertisers bid on keywords pertinent to their target audience, with ads displayed to users based on factors like search queries, browsing behavior, and demographics.
2. Getting Started with Google Ads via BeStarHost: Begin your journey of earning from Google Ads with these steps, hosted on BeStarHost.com:
Sign up for a Google Ads account: Navigate to the Google Ads website and create your account.
Set up your payment method: Provide billing details to fund your advertising endeavors.
Craft ad units: Design ad units to grace your website or other digital platforms.
Generate ad code: Utilize Google’s provided HTML code snippets for your ad units, which you can seamlessly embed on your website.
Implement ad code: Strategically place the ad code within your website’s HTML structure, maximizing visibility and engagement, all on BeStarHost.com’s reliable platform.
3. Optimizing Ad Placement and Formats with BeStarHost: Maximize revenue from Google Ads with these optimization strategies tailored for BeStarHost:
Strategic ad placement: Position ads where they are most visible to your audience, such as above-the-fold content areas and within high-traffic pages, all hosted on BeStarHost.com.
Experiment with ad formats: Test various ad formats, including text ads, display ads, and responsive ads, to discern the best performer with your audience.
Customize ad settings: Leverage Google Ads’ targeting options to display relevant ads to your audience based on their interests, demographics, and browsing behavior, all through BeStarHost.com’s reliable hosting platform.
To Learn More, Click this Link:
3 notes
·
View notes
Text
It shouldn't escape notice that the content that's being pushed the hardest by corporations is video. You know, the most resource-intensive per unit of time media format that we have. Community- and self-hosted websites could usually only dream of hosting video. When YouTube arrived and provided easy HTML embeds, then smaller sites could have videos.
AO3 is able to survive on donations because of its format. Written text takes a long time to read and very little bandwidth to serve. Likewise, while Wikimedia Commons does host a substantial number of videos, you almost never see them embedded in Wikipedia. In fact, their style guide heavily discourages them. To embed them in more articles would dramatically increase the bandwidth required to run the site and therefore its cost.
Corporations are pushing you towards media consumption habits that are the hardest for independent websites to answer.
Support AO3.
Absolutely amazing how AO3 is a part of the internet that doesn't sneak in any ads and doesn't have an algorithm and doesn't watch you or record how much time you spend looking at each fic or whatever. It's just right there to use for free. Legend
141K notes
·
View notes
Text
How to Embed a YouTube Short That Actually Looks Good on Your Website
Let’s face it—most embedded videos look like random blocks dropped in the middle of your page. But when you know how to embed a YouTube Short with the right layout, aspect ratio, and styling, it becomes a seamless part of your content experience.
Think 9:16 vertical orientation, autoplay off, loop on, with proper spacing and mobile responsiveness. YouTube Shorts are built for quick engagement—but if they’re poorly placed, they become distractions instead of conversions.

Whether you're using Elementor, a page builder, or raw HTML, putting thought into your design is key. The best part? It doesn’t take a developer to make it happen—just a little creativity and understanding of how to embed a YouTube Short the right way.
0 notes
Text
HTML Interview Questions: Crack Your Web Developer Interview

HTML (HyperText Markup Language) is the foundation of every website you see on the internet. Whether you're a fresher stepping into the tech world or an experienced developer preparing for a job switch, mastering HTML interview questions is crucial for clearing any web developer interview.
In this guide, we’ll explore the most commonly asked HTML interview questions, along with clear explanations and examples. These questions are ideal for both beginners and intermediate developers aiming to showcase their front-end knowledge.
Why HTML is Important in Web Development Interviews
HTML is the standard markup language used to create the structure of web pages. It forms the base upon which CSS and JavaScript work. Employers test HTML skills in interviews to evaluate a candidate’s understanding of webpage structure, semantic elements, accessibility, and proper coding practices.
Basic HTML Interview Questions and Answers
1. What is HTML?
Answer: HTML stands for HyperText Markup Language. It is used to structure content on the web using elements like headings, paragraphs, links, lists, and images.
2. What are HTML tags and elements?
Answer: HTML tags are the building blocks used to create HTML elements. Tags are enclosed in angle brackets, like <p> for paragraphs. An element includes the start tag, content, and end tag, e.g., <p>This is a paragraph</p>.
3. What is the difference between HTML and HTML5?
Answer:
HTML5 is the latest version of HTML.
HTML5 supports semantic elements like <article>, <section>, and <nav>.
It introduces multimedia tags like <audio> and <video>.
HTML5 supports APIs for geolocation, local storage, and canvas graphics.
4. What is a semantic HTML element?
Answer: Semantic HTML elements clearly describe their meaning to both the browser and developer. Examples include <header>, <footer>, <article>, and <aside>. These improve SEO and accessibility.
5. What is the difference between <div> and <span>?
Answer:
<div> is a block-level element used for grouping content.
<span> is an inline element used for styling small pieces of text or elements.
Intermediate HTML Interview Questions
6. How do you create a hyperlink in HTML?
Answer: Use the <a> tag with the href attribute. Example: <a href="https://example.com">Visit Example</a>
7. How can you insert an image in HTML?
Answer: Use the <img> tag with the src and alt attributes. Example: <img src="image.jpg" alt="Description of image">
8. What is the purpose of the alt attribute in images?
Answer: The alt attribute provides alternative text if the image can't load and improves accessibility for screen readers.
9. What is the use of the <meta> tag?
Answer: <meta> provides metadata about the HTML document such as character encoding, page description, keywords, and author. It is placed inside the <head> tag.
10. What are void (self-closing) elements in HTML?
Answer: Void elements do not require a closing tag. Examples include <img>, <br>, <hr>, <input>, and <meta>.
Advanced HTML Interview Questions
11. What is the difference between id and class attributes in HTML?
Answer:
id is unique and used to target one specific element.
class can be used on multiple elements for grouping and styling.
12. How do you create a form in HTML?
Answer:<form action="/submit" method="post"> <input type="text" name="username"> <input type="password" name="password"> <input type="submit" value="Login"> </form>
This creates a form that takes input and submits data to a server.
13. What are some new input types in HTML5?
Answer: HTML5 introduced new input types such as:
email
date
time
number
range
color These enhance validation and user experience.
14. What is the use of <iframe> in HTML?
Answer: <iframe> is used to embed another HTML page or external content (like YouTube videos) within a current webpage.
Example:<iframe src="https://example.com" width="600" height="400"></iframe>
15. How does HTML handle accessibility?
Answer: HTML supports accessibility through:
Semantic tags
alt attributes for images
ARIA (Accessible Rich Internet Applications) roles
Proper use of forms and labels
These features make content more usable for screen readers and assistive technologies.
Bonus Tips to Crack HTML Interviews
Practice Real Code: Use platforms like CodePen or JSFiddle to experiment with HTML structures.
Understand Semantic HTML: Many companies focus on code that is SEO- and accessibility-friendly.
Be Clear with Fundamentals: Interviewers often focus on basic but important questions.
Combine with CSS & JavaScript: Know how HTML works in combination with styling and scripting.
Ask Clarifying Questions: If you're given a coding task, ask questions before you begin coding.
Final Thoughts
Cracking a web developer interview starts with having a strong grip on the basics, and HTML is at the core of front-end development. This guide — “HTML Interview Questions: Crack Your Web Developer Interview” — has walked you through a range of frequently asked questions from beginner to advanced levels.
By preparing these questions and practicing real-world HTML code, you’ll be well-equipped to confidently answer your interviewer and demonstrate your understanding of webpage structure, elements, and best practices.
So, keep coding, stay curious, and crack that web developer interview!
0 notes
Video
youtube
【HTML×CSS×JS】サイトにYouTube動画を埋め込んでクリックで再生!初心者でも簡単にできる実装方法 [HTML x CSS x JS] Embed YouTube videos on your site and play them with a click! Easy implementation even for beginners
0 notes
Text
Step-by-Step Guide to Setting Up Odoo Learning Management System (LMS)
Odoo offers a powerful eLearning module that allows businesses, educators, and trainers to manage courses, lessons, quizzes, and certifications in one place. Whether you're setting up a training portal for employees or an online academy for learners, Odoo makes it easy to organize and deliver high-quality content. This step-by-step guide will walk you through how to set up your Odoo Learning Management System.
Step 1: Install the eLearning Module
To begin, you need to install the eLearning app in Odoo:
Log in to your Odoo backend with administrator rights.
Go to the Apps module.
Search for eLearning or a Learning Management System.
Click Install on the eLearning module.
Once installed, you will see a new menu called eLearning or Courses on your dashboard.
Step 2: Create a Course
After installing the module, the next step is to create your first course:
Navigate to the eLearning app.
Click Create to add a new course.
Fill in the basic course details:
Title: Name of your course.
Responsible: Assign a person or department.
Description: Write an overview of what the course covers.
Tags: Add categories to group similar courses.
Turn on or off features like Forums, Quizzes, and Certifications as needed.
Once done, click Save.
Step 3: Add Course Content (Lessons)
Courses in Odoo are structured with lessons or content blocks. Here's how to add them:
Open the course you created.
Scroll down to the Content tab.
Click Add Content.
Choose the type of content:
Document (PDF, Word files)
Video (YouTube or upload)
Quiz
Web Page (HTML content)
Enter a title, upload your content, and add any notes or instructions.
You can reorder lessons using drag and drop to match your preferred sequence.
Step 4: Create Quizzes
Quizzes help reinforce learning. To create one:
Go to the Content section of a course.
Click Add Content and select Quiz.
Name the quiz and add a short introduction if needed.
In the Questions tab, click Add a Question.
Choose question type:
Multiple choice
Single choice
Text input
Add answers and mark the correct one(s).
Quizzes can be scored, and you can define passing criteria.
Step 5: Set Up Certification (Optional)
You can provide certificates for course completion:
In the course form, enable the Certification option.
Define the criteria (e.g., complete all lessons or pass the final quiz).
Choose a certification template or create your own.
Certificates will be auto-generated and available for download in the learner's portal.
Step 6: Assign Courses to Users
You can assign users manually or allow them to enrol via the website.
Manual Assignment:
Go to the course.
Under the Participants tab, click Add.
Select users from the list.
Public Access:
Make the course Published.
Set the course as Free or Paid.
Share the link with users or embed it on your site.
Step 7: View Learner's Progress
Track how learners are engaging with your courses:
Go to the eLearning dashboard.
Click on Reports.
View:
Course completions
Quiz scores
Certification status
Time spent on lessons
You can also export reports in Excel or PDF for sharing.
Step 8: Customize the Learning Portal
Odoo allows customization of the portal interface:
Go to Website > eLearning.
Use Odoo's website builder tools to:
Customize fonts, colours, and banners
Organize course listings by categories
Add filters and search options
You can also add a blog, testimonials, or FAQ section to support learners.
Step 9: Enable Email Notifications
Keep learners informed with automated notifications:
Use Automated Actions or Marketing Automation to:
Send welcome emails
Notify learners of new content
Remind about upcoming quizzes or deadlines
Set the conditions and templates for each scenario.
Step 10: Monitor and Improve
After setup, continue improving your LMS:
Collect feedback using forms or surveys.
Analyze popular courses and content.
Update lessons regularly based on learner performance.
Offer new certifications or advanced training.
Conclusion
Odoo Learning Management System is a flexible and user-friendly tool to train employees, teach students, or deliver professional courses. With features like quizzes, certificates, progress tracking, and detailed reporting, you can build a complete learning platform that fits your business needs. Follow these steps to get started and make learning accessible, engaging, and effective for everyone involved.
#odoo learning#odoo learning software#odoo learning software management#Odoo eLearning management software#odoo#odoo app#odoo erp
1 note
·
View note
Text
How to Speed Up Your WordPress Theme Without Plugins
Let’s be real—plugins are great, but sometimes you just don’t want to rely on too many of them. They can slow things down, conflict with each other, or even break your site. So, the big question is:
Can you speed up your WordPress theme without plugins? Short answer: Absolutely. Longer answer: Let’s show you how.
If you’re using a decent WordPress theme already, you’re halfway there. The rest comes down to a few smart tweaks that make a huge difference in load time.
1. Use a Lightweight Theme (It Matters More Than You Think)
Before you even start tweaking, the best thing you can do is start with a theme that’s already fast. Some themes are built with speed in mind—others are packed with bloat.
Look for WordPress themes that don’t load unnecessary scripts, use clean code, and keep things simple. Avoid themes that try to do everything—because they’ll end up slowing everything down.
2. Clean Up Your Media
No plugins needed—just common sense.
Resize your images before uploading
Use JPGs for photos and PNGs for graphics with transparency
Avoid uploading videos directly—embed them from YouTube or Vimeo
Large media files are one of the biggest reasons a site feels slow. The more your WordPress theme has to load on a page, the slower it’ll be.
3. Reduce External Fonts and Icons
Here’s something not many people think about: Every time your site loads a Google Font or an icon library, it’s making an external request.
Stick to one or two font styles max. And if your WordPress theme lets you disable icon packs you’re not using (like Font Awesome), do it.
Bonus tip: Consider using system fonts. They look clean and load instantly.
4. Trim the Fat (Widgets, Animations, and Stuff You Don’t Need)
Take a good, hard look at your pages. Are you really using everything in your header? Do you need that image slider?
Sometimes, the best way to make your WordPress theme faster is to simply… use less.
✅ Disable unused sections ✅ Avoid autoplay sliders and videos ✅ Keep your homepage clean and focused
Less stuff = faster load = happier visitors.
5. Minify CSS and JavaScript (Manually)
Yes, it’s easier with plugins—but you can do it by hand, too.
If you're comfortable editing theme files, combine and minify your CSS and JS. Tools like Minifier.org or Toptal’s Minifier can help.
Once you’ve compressed the files, replace the originals in your theme’s directory.
⚠️ Pro tip: Always back up your theme before making changes.
6. Enable GZIP Compression and Browser Caching
This one happens server-side—but again, no plugin needed.
Most hosting providers let you enable GZIP compression and set browser caching rules via .htaccess or your control panel. These changes make your WordPress theme load assets faster and more efficiently.
Not sure how? Ask your host—they’ll usually help in minutes.
7. Lazy Load Images (The Native Way)
Modern browsers now support native lazy loading. All you need to do is add:
html
CopyEdit
<img src="image.jpg" loading="lazy" alt="..." />
Some WordPress themes already do this by default. If yours doesn’t, a few tweaks in your theme’s image functions or templates can add it.
Result? Images won’t load until they’re actually needed—speeding up the initial load time.
8. Disable Emoji and Embed Scripts
WordPress loads extra scripts for emojis and embeds—even if you’re not using them. You can disable them by adding a few lines to your functions.php file:
php
CopyEdit
remove_action('wp_head', 'print_emoji_detection_script', 7); remove_action('wp_print_styles', 'print_emoji_styles'); remove_action('wp_head', 'wp_oembed_add_discovery_links');
Just like that, your WordPress theme sheds some extra weight.
And Finally… Choose the Right Theme Provider
All the tweaks in the world can’t fix a poorly built theme. That’s why starting with a solid, optimized foundation is key.
At webxThemes, all our WordPress themes are designed with speed, performance, and SEO in mind. They’re clean, lightweight, and made for people who care about quality—whether or not they use plugins.
Wrap Up
So yes—you can speed up your WordPress theme without plugins. It just takes a bit of manual effort, some smart design decisions, and a focus on what really matters.
Start light. Cut the fluff. And keep your visitors (and Google) happy.
Need help finding a theme that doesn’t slow you down? Check out webxThemes—we’ve got you covered.
1 note
·
View note
Text
How to Index Backlinks Faster in 2025?
Building backlinks for your website is very important. Backlinks give authority to your website. Backlinks help rank on Google’s search engine, increase traffic, and more. Backlink building is a long-term process, and indexing backlinks on search engines is also a slow process. But there are some ways which you can use to index backlinks faster in 2025.
Here are 9 ways to index backlinks faster in 2025:
1. Web 2.0 Platforms
Web 2.0 platforms are websites which allow users to create, share, and collaborate on content. You can use web 2.0 platforms for indexing your backlinks faster. You need to post your backlinks on web 2.0 platforms and encourage the search engine to index your backlinks.
Examples of web 2.0 websites are:
Medium
Blogger
Tumblr
2. Pinging Tools
The next method of indexing backlinks is using pinging tools. Pinging is a tool that notifies Google that you have updated your website or about new content. After using the pinging tool, Google crawls the website and updates it with recent data. You can easily index your backlinks using pinging. You can use Google backlink indexer software or other free and paid tools for backlink indexing.
Free Pinging tools are:
SolarWinds Engineer’s Toolset
SmallSEOTools
Pingdom
PrePostSEO
ManageEngine OpUtils
3. Share Backlinks on Social Media
A simple way to index backlinks faster is posting your articles, blogs, and backlink pages URLs on social media like Facebook, Twitter (X), Quora, YouTube, etc. You can also use Pinterest to index your backlinks. You need to share visual content on Pinterest with a page link that contains your backlinks. Social media platforms are updated regularly, that’s why Google crawls these websites regularly. That’s why it becomes a high chance to index your backlinks.
Examples:
Post a short update with backlink on Twitter.
Share a backlink in Facebook groups related to your niche.
Posting an informative article on LinkedIn with a backlink.
4. High Quality Backlink Building
High quality backlinks are very important to increase search engine ranking. Google prioritizes websites that have high quality backlinks. High quality backlinks means getting backlinks from high authority websites. The websites that give you high-quality backlinks have good organic traffic and also high-quality backlinks. If you have quality content on your website, then you can easily get high-quality backlinks.
How to get high quality backlinks:
Guest post on high authority blogs.
Get backlinks from News websites.
Collaborate with influencers who can link to your content.
5. IndexNow Protocol
IndexNow is a new protocol which helps to notify search engines about new updates, including backlinks. If your website is built on WordPress, you can easily integrate the IndexNow protocol on your website. Couldflare also support the IndexNow protocol.
How to use IndexNow Protocol:
Enable IndexNow in your website settings (If supported)
Use IndexNow API to submit new backlinks.
6. Submit a Video Sitemap to Google
Google gives priority to crawling and indexing video content. You can take advantage of it to index your backlinks. You can use videos from platforms like YouTube and Vimeo.
How to submit video sitemap:
Embed Video: Embed a random video from YouTube or Vimeo. Copy embed code and paste it on your webpage’s HTML.
Create Video Sitemap: Use XML sitemap generator to create an XML sitemap for your embedded video.
Edit Sitemap: Open sitemap in a text editor like Notepad and replace the video URLs with backlink URLs. Each URL must be correctly formatted and valid.
Upload to GSC: Upload edited sitemap to GSC under the ‘sitemap’ section.
7. Use Third-Party Tools
There are so many third-party tools available in the market which help us to index backlinks faster. These tools use various methods to make our backlinks visible for the search engine.
Some of the famous third-party tools for index backlinks faster are:
Google Cloud Platform: It uses Google’s infrastructure to improve indexing by leveraging Google’s Services.
Google Bot Redirection: Google Bot Redirection is a third-party tool which redirects Google bot towards your backlinks using various methods.
Google URL Inspection API: This tool automates the process of URL inspection. It allows for bulk requests.
Other Methods: Some other methods include techniques like using Google Slides, Google Ads Campaigns, Google Maps, Google My Business, YouTube Descriptions, and many more.
8. Submit RSS feeds:
Google’s search engine also crawled RSS feeds frequently, that’s why we can use RSS feeds to index backlinks faster. RSS feeds notify search engines for new content.
How to use RSS feeds for indexing backlinks:
Create an RSS feed: You can use an RSS feed generator to create a feed which contains your backlinks URLs. You will get a lot of tools on Google like Feedity or FerchRSS. This tool helps to generate an RSS feed from a list of URLs.
Submit the Feed: After creating an RSS feed, submit the feed to feed directories and aggregators like Feedburner, Technorati.
9. Building Tier 2 Links:
In simple words, tier 2 backlinks are backlinks to your existing backlinks. This process improves the backlinks indexing rate. In this process, you submit your backlinks URLs in a website where you already create a backlink and that backlink is already indexed or crawled by a search engine.
There is another benefit of tier 2 link. Tiered link-building improves your existing backlinks with more link juice, which will help you to rank on search engine results.
Conclusion:
It is important to understand how backlinks indexing works. You can implement the above methods, which help you to make your backlinks recognized and credited by search engines, this boosts your website’s SEO performance.
By using Web 2.0 platforms, Pinging tools, sharing on social media platforms, Quality backlinks building, IndexNow protocol, and more helps you to index backlinks faster.
#backlink strategy#backlinks#seo services#backlink#backlink building#seo#search engine optimization#search engine marketing
0 notes
Text
Embedding a Video Player: Best Practices for Performance and Compatibility

Introduction
Embedding a video player on your website is essential for delivering high-quality video content while ensuring optimal performance and compatibility across different devices and browsers. A well-optimized video player enhances user experience, improves engagement, and boosts SEO rankings. This guide will cover best practices for embedding a video player while maintaining high performance and broad compatibility.
Best Practices for Embedding a Video Player
1. Choose the Right Video Player
Selecting the right video player depends on your specific needs, such as customization, monetization, and security. Popular options include:
HTML5 Video Player (Built-in browser support, no plugins required)
YouTube and Vimeo Players (Easy embedding, reliable streaming)
Self-hosted Video Players (Complete control over content and branding)
When you embed video player solutions, ensure they align with your website's performance requirements and audience needs.
2. Optimize Video File Sizes
Large video files can slow down page load times, negatively impacting user experience and SEO. Use compression tools like:
HandBrake (Free video compression software)
FFmpeg (Command-line video processing)
Cloud-based encoding services (e.g., AWS MediaConvert, Cloudflare Stream)
3. Use Adaptive Bitrate Streaming
Adaptive streaming adjusts video quality based on the user’s internet speed, reducing buffering and ensuring smooth playback. Technologies such as HLS (HTTP Live Streaming) and MPEG-DASH improve performance across different devices.
4. Ensure Cross-Browser and Device Compatibility
Test video playback on multiple browsers and devices to ensure a seamless experience. Use formats like MP4 (H.264) for the widest compatibility, and include fallback options for older browsers.
5. Enable Lazy Loading
Lazy loading delays video loading until the user interacts with it, improving page speed and performance. Implement lazy loading using:
Native HTML loading="lazy" attribute
JavaScript libraries like Lozad.js
6. Optimize Video SEO
To improve search rankings, follow these video SEO best practices:
Add schema markup for video content
Use descriptive titles and alt text
Include transcripts and captions for accessibility
Generate a video sitemap for search engines
7. Secure Video Content
If you need to protect your video content from unauthorized access, consider:
Digital Rights Management (DRM) protection
Token-based authentication
Domain and IP-based restrictions
Conclusion
Embedding a video player with best practices for performance and compatibility ensures an optimal viewing experience for your audience. By selecting the right video player, optimizing file sizes, using adaptive streaming, and following SEO guidelines, you can maximize engagement while maintaining fast load times and accessibility. When you embed video player functionalities, ensure they align with both user experience and website performance to create a seamless and engaging multimedia experience. Implement these strategies to enhance your video content’s impact on your website.
0 notes
Video
youtube
How to Create an AI-Generated Blog on Medium: A Step-by-Step Guide
Welcome to this comprehensive guide on creating an AI-generated blog on Medium. In this blog post, we'll walk you through the process used in a recent YouTube video where the creator demonstrated how to automate blog posts using AI tools. Let's dive right into it. First, you need to log into your Make.com account to begin creating your new scenario. Make.com is the platform where we'll set up our automation workflow. If you're not familiar with Make.com, it's similar to tools like Zapier or IFTTT, but with more advanced integration capabilities. To start, create a new scenario in Make.com. We'll begin by showcasing an automated blog setup for Medium, but the creator also mentioned setups for Blogger, Shopify, and WordPress, noting that each platform might require slightly different configurations based on their image hosting policies. For platforms where you need to host your images, the creator uses Google Photos for streamlined image management. The setup for an automated blog consists of two primary elements: an OpenAI module for content generation and the blogging platform module for publishing. Here's how you can set it up: 1. **Add the OpenAI Module:** - **First Module - Title Generation:** Begin by adding an OpenAI module. Choose 'Create a Completion' and configure it later for generating a title or subject for your blog post. - **Second Module - Image Generation:** Add another OpenAI module by clicking the plus icon. This time, use it for image generation. The creator used DALL-E 3 for this, mentioning that DALL-E 2 is simpler but DALL-E 3 offers better quality images. Make sure to configure the prompt to reference the title you just created for thematic consistency. - **Third Module - Article Generation:** The final OpenAI module should generate the blog post itself. Here, switch to a model like GPT-4 for better long-form content creation. Your prompt should instruct the AI to generate a blog post about the title you created, aiming for around 2500 characters or less. 2. **Configuring the OpenAI Modules:** - For the title generation, use model 3.5 Turbo for cost-effectiveness. Set the system role to 'come up with a random topic about earning passive income online' and limit the response to 100 tokens, which translates to about 100 characters. - When generating an image, prompt DALL-E 3 to 'create an image about' the previously generated title. Adjust settings for image size and style as needed, choosing 'Image File' for Medium to allow direct image uploads. - For the article, set the tokens to 3000 to ensure enough space for a comprehensive blog post. Ensure the response is set to text format. 3. **Setting Up the Medium Module:** - Now, add the Medium module to your scenario. You'll first need to upload the image generated by the OpenAI module. This step is crucial as Medium requires the image to be uploaded before referencing it in the post. - Next, add another Medium module to create the post. Reference the title from the first OpenAI module and the content from the third. Make sure you're uploading the content as a draft first to review before publishing. - Remember to embed the image at the top of the article using HTML. The correct format is ``. 4. **Finalizing and Scheduling:** - After setting up your modules, run the process to ensure everything works. You should see a title generated, an image created, and a blog post drafted. - Edit the draft in Medium for better formatting, adding spaces, additional graphics, or refining the content to make it your own. - Schedule your blog post creation. In the video, the creator set it to run once every day at 8 a.m. This automation ensures a fresh post is generated and posted daily. 5. **Publishing Strategy:** - The creator advises against automatic publishing without review for quality control. For personal branding, manually curate posts to maintain high standards. However, for less personal projects, like promoting Amazon products, automated publishing might be acceptable if you're not attaching your brand identity directly. By following these steps, you can leverage AI to generate content efficiently, allowing you to focus on curation and strategy. This automation reduces the workload while still providing you with control over the final product. Remember, while AI can automate the creation, your touch in editing and strategizing ensures the content aligns with your brand and audience expectations. Don't forget to engage with your audience by asking for likes, comments, and subscriptions, much like the video creator recommended. Keep experimenting with different prompts and platforms to see what works best for your niche. Finally, stay updated with the latest AI tools and platforms by joining communities or watching tutorial videos. Happy blogging!
0 notes