#html header tag tutorial
Explore tagged Tumblr posts
Visit Tumblr Blog
Explore Tumblr blogs with no restrictions, modern design and the best experience.
Last Seen Tumblr Blogs


Fun Fact
Post activity is at the highest at 4:00 pm EDT; notes peak at 10:00 pm EDT.
Text
Tags Masterlist on this blog. Click to find posts.
Updated 31 October 2024.
General tags:
themes - patterns - resources - navigation - sidebar - interactive - header - fansite - contained - fandom - tools - tags - pixels - gif - graphics - dividers - pages - all in one - blinkies - code - colours - html - javascript - no javascript - neocities - templates - tutorial -
Specific tags:
kingdom hearts - seashells - splatoon - summer - steven universe - book - cats - colourful - computer - constellation - cute - eyestrain - facebook - fish - hexagon - horizontal - metal gear solid - music player - particles - pokemon - reddit - simple - social media - space - spongebob - tarot - undertale - water - webcore - writing -
You can also search tags by year of creation from 2013 to 2024.
Full masterlist page:
More will be added later. Feel free to suggest anything!
#masterlist#themes#sidebar#fandom#dividers#gif#header#resources#patterns#navigation#interactive#fansite#contained#tools#tags#graphics#music player#pages#html#neocities#blinkies#all in one#code#colours#javascript#no javascript#templates#tutorial
110 notes
·
View notes
Note
Hi!! I wanted to say that I loved reading about your journey of creating a personal website. I'm still unsure between Vercel and Netlify. I have a small question to ask. See, one of the reasons I want to make a website is to archive drawings and journal/sketchbook. Would you have any tips for creating an area on my website just for the diary/journal, which has tags, files for each entry, etc.?
Bello!

Really happy to hear about your interest in websites! I want everyone to make their own site so I don't have to log into social media and get instant tummyaches ♥
Vercel vs Netlify: I think I settled on Vercel for absolutely no reason whatsoever. I just made a site on Netlify, then tested on Vercel, and now I have like 5 websites on Vercel so I just kept using it LOL. I'm sure a more tech-savvy person would know the difference - I think they have certain integrations with specific programs.
Creating a diary or journal with tags:
There's a couple of different ways you can do that, with different levels of work needed.
you got me yapping again:
This sadgrl tutorial might be outdated and may or may not work, but explains the process better than I can.
Easiest: make a journal on Dreamwidth, or another blogging site (wordpress??) that allows easy tags and RSS feed, and embed that RSS feed onto your site.
This requires almost no HTML set-up, and the easiest to organize tags, but you don't truly have the data on your own site since it's just embedded.
When I snuck into a web design class at college, this was one of the methods that the professor used for a blog within a portfolio site LOL.
Shit like wordpress is what a LOT of ~professional~ sites do for their blog section. They code it separately from the main site haha. It's the most popular thing, but not necessarily the best. And wait til you read on what the CEO of wordpress has been having meltdowns about... he owns tumblr too!
It's made with a tutorial for Neocities if that's what you use.
Medium: Set up zonelets.
It will require some HTML and JS editing, but will help automate making headers/footers for each page of a blog.
I've never used it myself, but I see other people speak highly of it.
HARD FOR ME CUZ I'M A GORILLA: I believe a lot of professional web devs will slap your face with their coding cock until you use a static site generator (SSG) to make your site.
You will need some coding knowledge to set up the tagging system since it doesn't come with it enabled by default. But it's made explicitly to be an alternative to big Static Site Generators which are...
It requires some more intimidating knowledge, because it's a lot of scripts that turn files that are not HTML/CSS/JS into plain HTML.
Also you have to use the command line, and that doesn't come with buttons that tell you what you can do. You have to copy/paste all that shit or memorize the code to 'dev build astro' and it all looks silly.
I've used Eleventy, and now am using Astro. Other people use Hugo or Jekyll or some other stuff with crazy names like Glup Shitto. I hate all these sites cuz none of the words mean anything to me. This is a common theme for me and tech. I don't know what NODES or CONTENT or ISLANDS are!!!
I had the most success attempting to learn how to use a SSG by downloading a template and altering it with github + VScodium. Here's the template page for Astro. You click on a theme you like, and it takes you to its github page. (If you don't want to use evil Microsoft stuff sorry. Skip this entire section.) Follow the instructions on the page for "forking" the glup shitto. When it tells you to run commands, I run those commands through the terminal window in VScodium. These tutorials never tell you what these commands do cuz they assume you already know. Usually those commands automatically install the files you need onto your computer, and create the final files.
You can see my wip here for a "tag system" that SHOULD show members of a web listing haha but I don't know what I'm doing and I have a reading disorder AND don't know cumputer good.
THEORETICALLY this will be the simplest and easiest way to maintain tags and files, because after you set it up you just have to write the "content" of the blog page. And you don't have to set up the header/footer ever again. I see the vision, and potential, but I am not there yet when it takes me 5 hours a day to figure out what any of the words in the documentation mean and I don't want to ask an actual tech person cuz they will be like 'obviously just press the Blip on the Repository and then Suck My Ass in the command line".
(side note I haven't updated fujofans in like a year cuz I'm struggling with this part to make updating easier).
Con: the final HTML/CSS code is really ugly if it's "minified", and a lot of themes use """"""professional"""""" CSS libraries like Bootstrap and Tailwind that I honestly think are ugly cuz that's what every fuckin' tech website uses to style their pages and make them look Professional and Minimalist with stupid code like style="500-w dark-gray-balls D-cup-bra" on every single element. Even Toyhouse uses Bootstrap. Eugh!
But maybe you're smarter than me and can wrangle these things better!
That was really long. Woops. I hope you can slug through this wall of text and find something helpful. Feel free to email me if you have any more specific questions. I may or may not be helpful.
If someone else sees this and has better suggestions for making BLOGS, please chime in. I'm begging you.
64 notes
·
View notes
Text

— COMO JOGAR PELO TUMBLR MOBILE?
Tutorial básico de como jogar rpg pelo aplicativo mobile do tumblr.

Recebi essa ask aqui me pedindo um guia pra jogar rpg pelo mobile, e como disse, eu nunca joguei pelo celular. Fui dar uma procurada em tutoriais e tentei explorar o app pra jogar, e trago boas e más notícias. A boa notícia é que é possível sim jogar pelo celular, mas além de ser um pouco mais complexo, você precisa usar o navegador pra isso e para formatar, usar o html.
É obrigatório formatar usando html? Não. Eu vou explicar o que eu usei aqui, mas são detalhes opcionais e preferências minhas. Você pode pular essas partes.
Já adianto também que, felizmente, não muda muita coisa entre mobile e desktop, além de alguns detalhes específicos que vou colocar aqui. Então é totalmente possível jogar.
De qualquer forma, se tiverem dúvidas, minha askbox está aberta!
Primeiro, a forma de jogar não vai mudar. Você vai reblogar posts e postar posts, como eu expliquei no primeiro guia de como jogar no tumblr.
Nesse guia, vou repassar as mesmas informações, usando o aplicativo, mas recomendo a leitura do primeiro guia para mais detalhes.
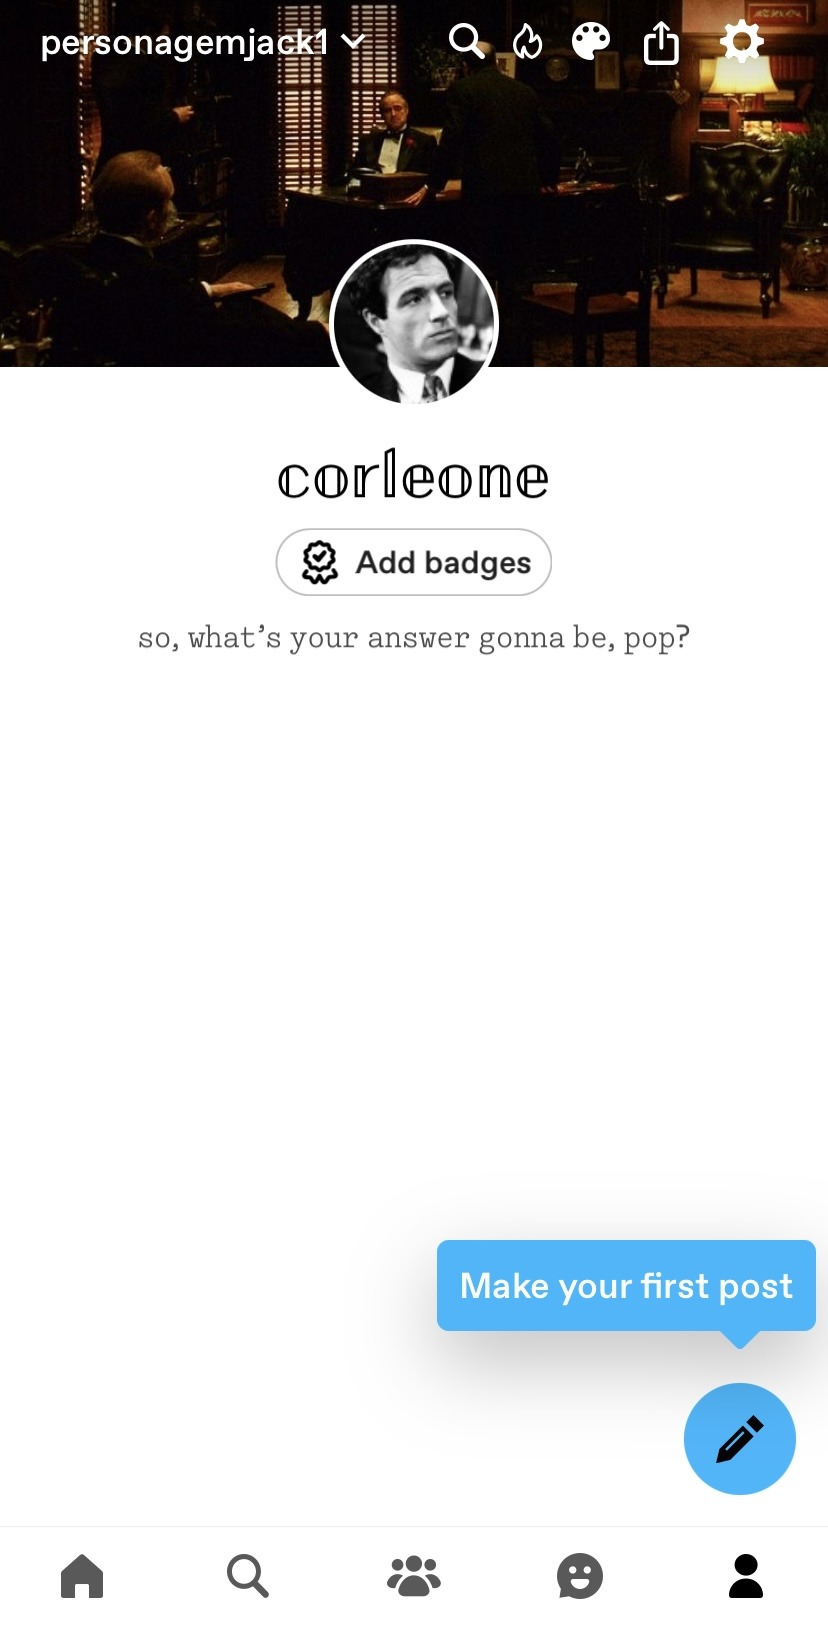
Customização e fixado:
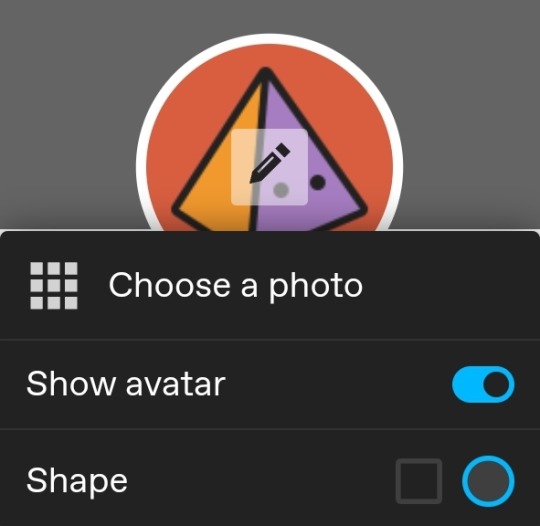
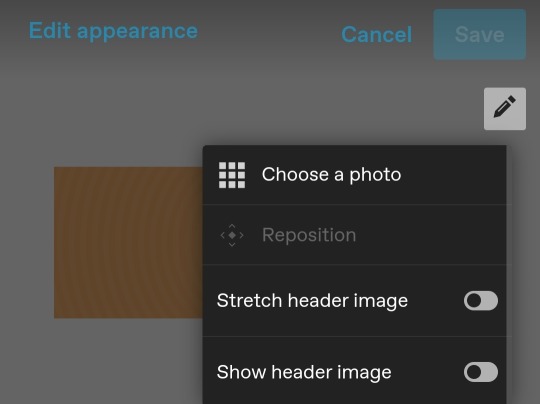
No aplicativo, a opção de customização é diretamente no seu perfil. Você vai entrar no blog, clicar na paleta de tintas e vai abrir a seleção para customização do icon, header, cor de fundo e de realce.
Eu acredito que, quando você cria um tumblr diretamente pelo mobile, a opção de theme customizado já vai estar desativada, então você só precisa customizar normalmente. Eu vou usar o app do pinterest pra buscar as imagens e o lingojam para as fontes.
No final, vou ter algo assim:
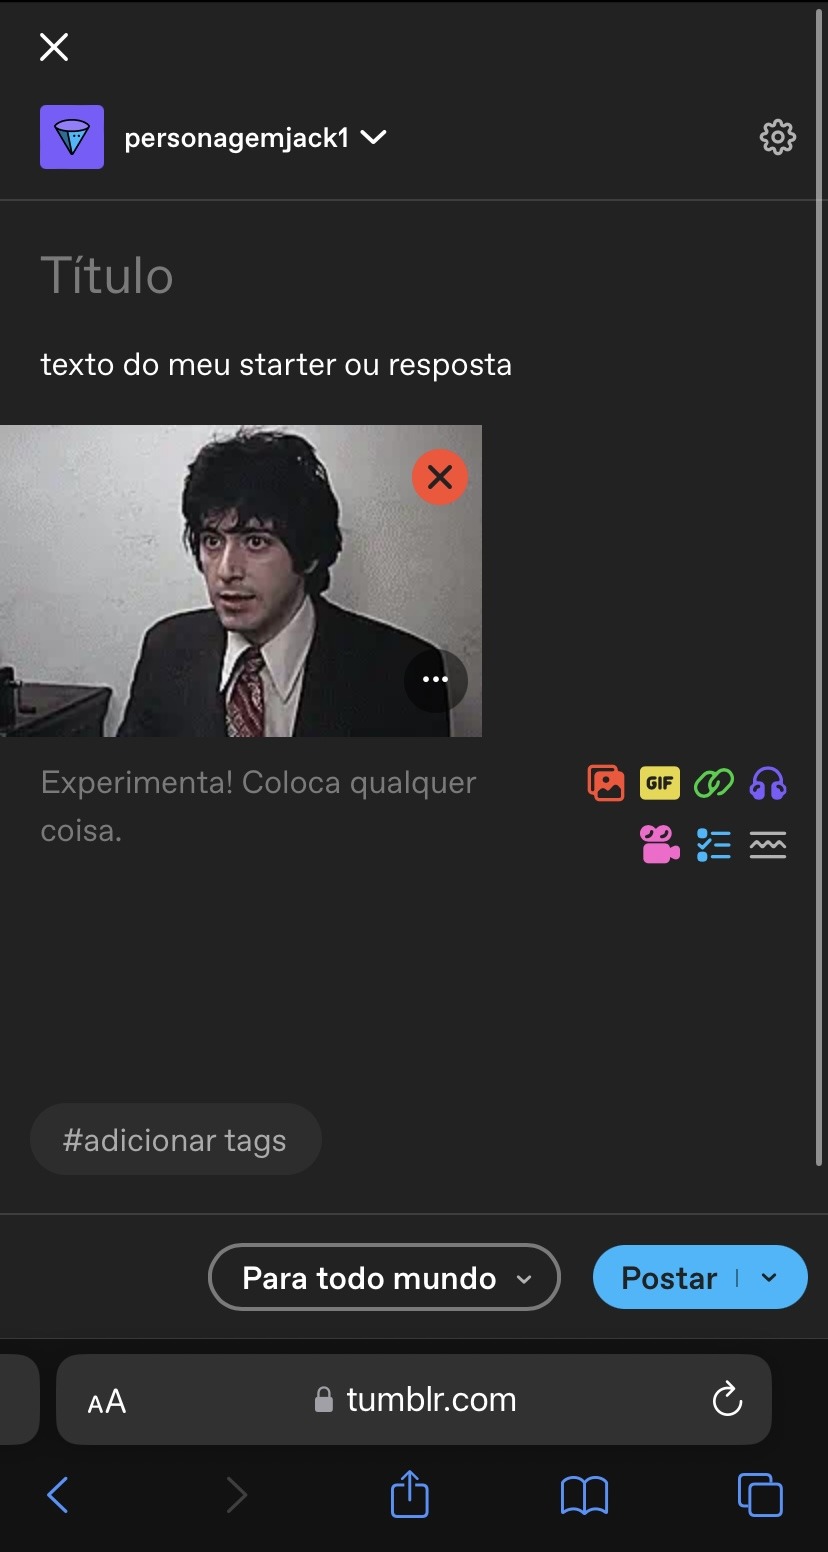
Agora, vamos para o nosso fixado. Para criar posts você vai selecionar o lápis, e para ser um post de imagem, é só selecionar a sua foto de header primeiro, já que o app não permite escolher um formato específico como no desktop.
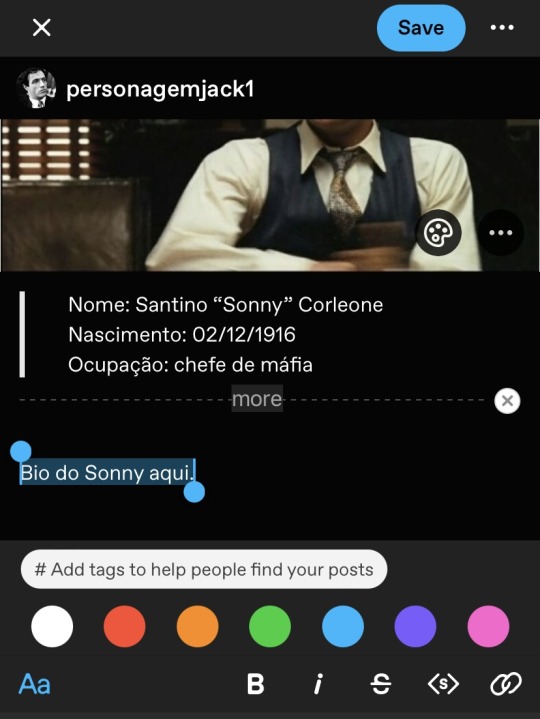
Feito, vou colocar a minha descrição inicial, e depois o readmore com esse ícone na barra inferior:
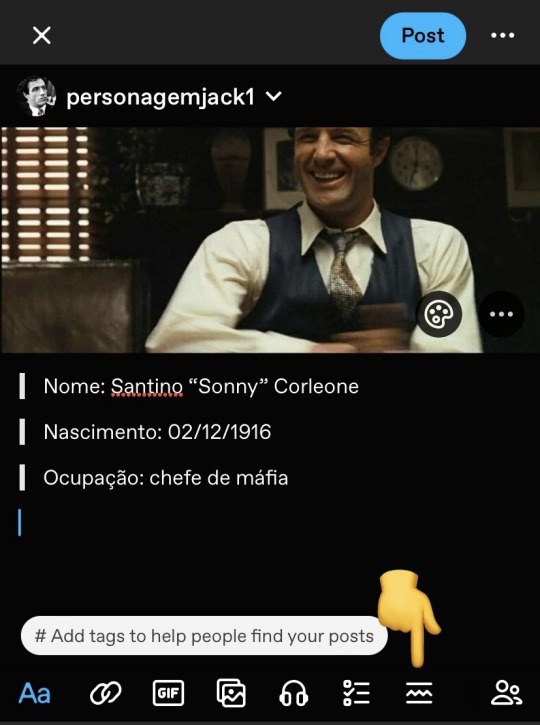
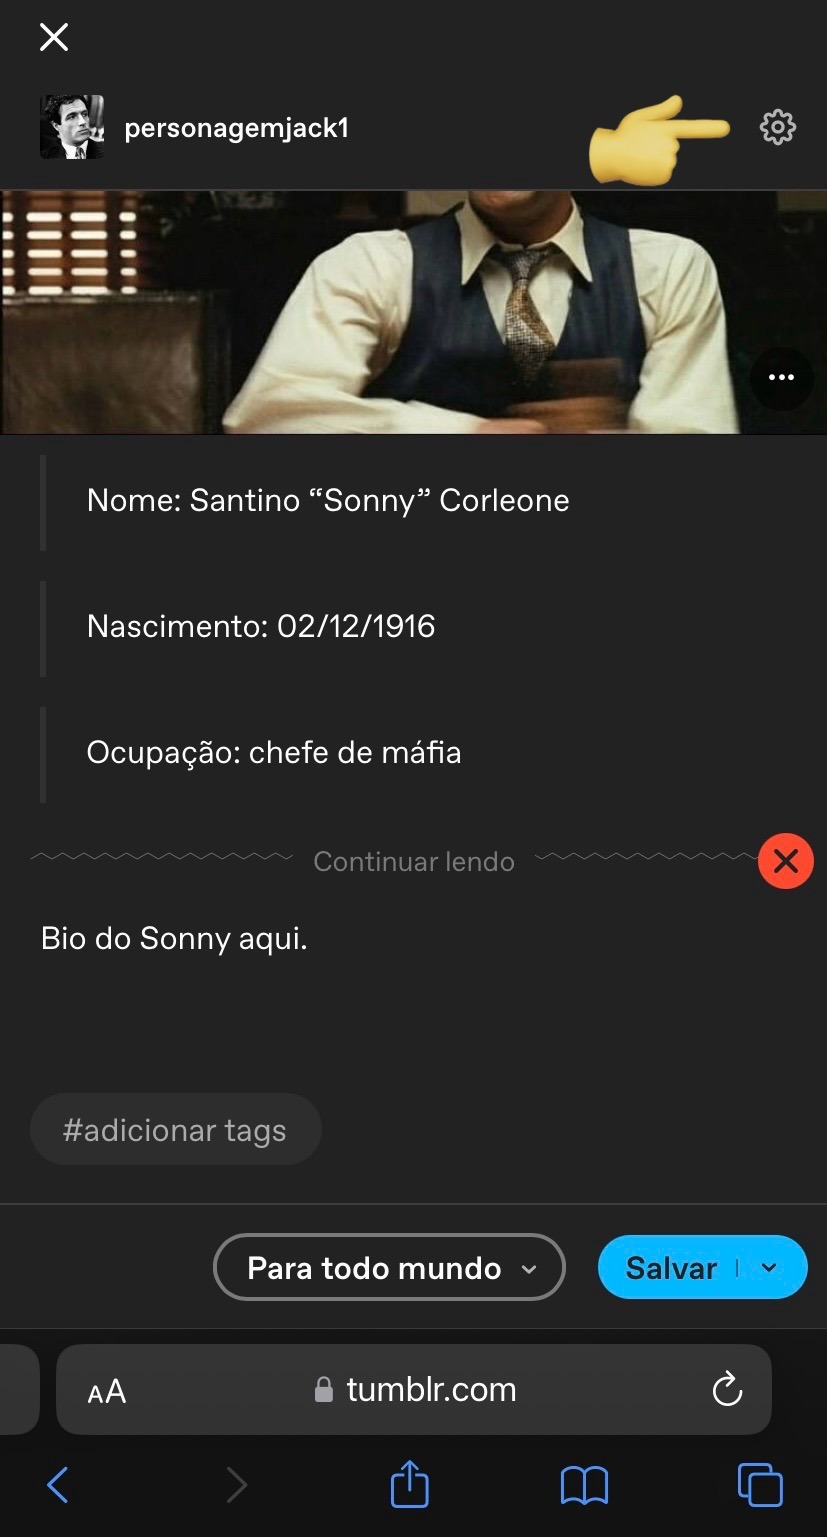
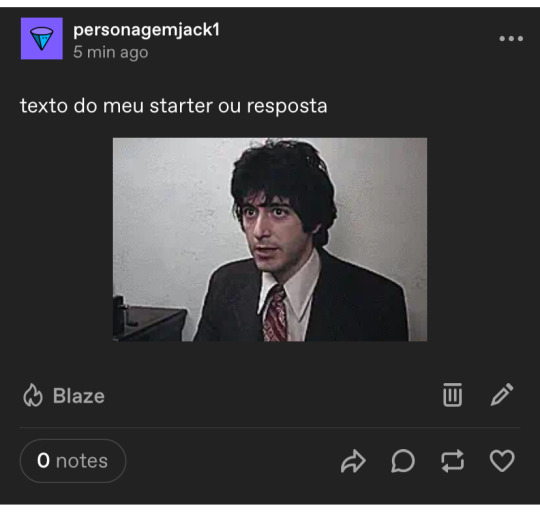
E depois adicionar a bio. Igual ao post no desktop, nós vamos ter algo assim depois de postado:

Você seleciona os três pontos no topo direito, e clica em fixar. Pronto!
Um detalhe: toda vez que você der enter, o app vai iniciar um novo parágrafo, dando espaço entre as duas linhas. Por isso os cortes no recuado.
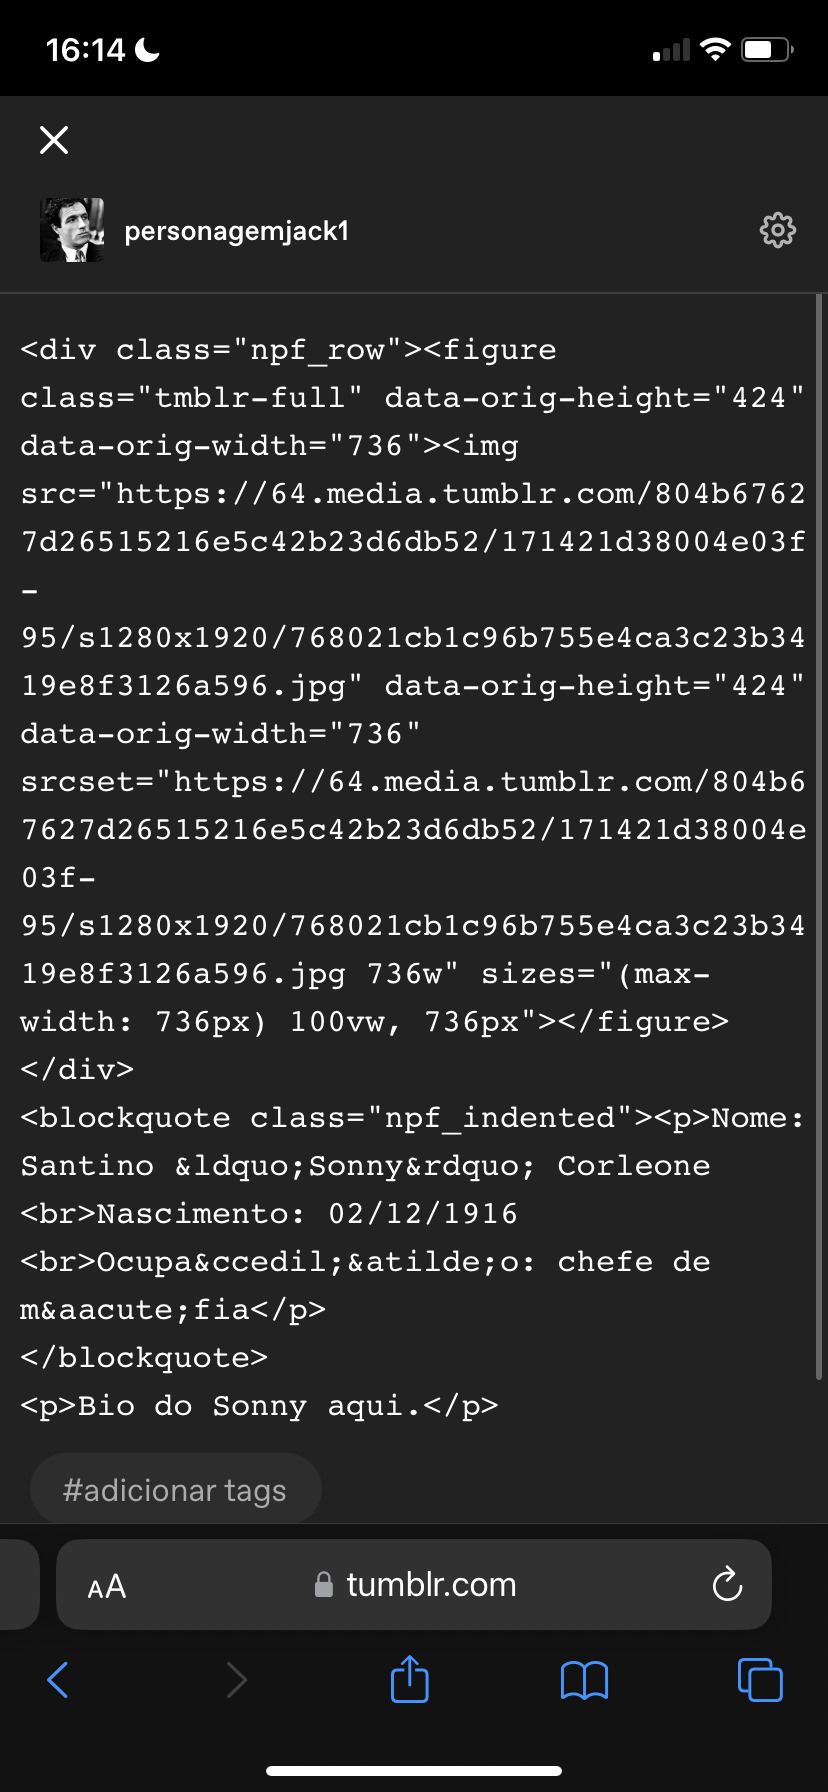
OPCIONAL: Pra retirar esses espaços, você vai precisar usar o navegador, ir até o post e editar ele. Você entra no menu do canto superior direito, rola até encontrar editor de texto e muda de rich text para html:

Depois que seu post for transformado em html, você precisa alterar duas coisas: os parágrafos e os blockquotes. Deixei marcado em amarelo o que precisa retirar e mais abaixo vou explicar o que significa:
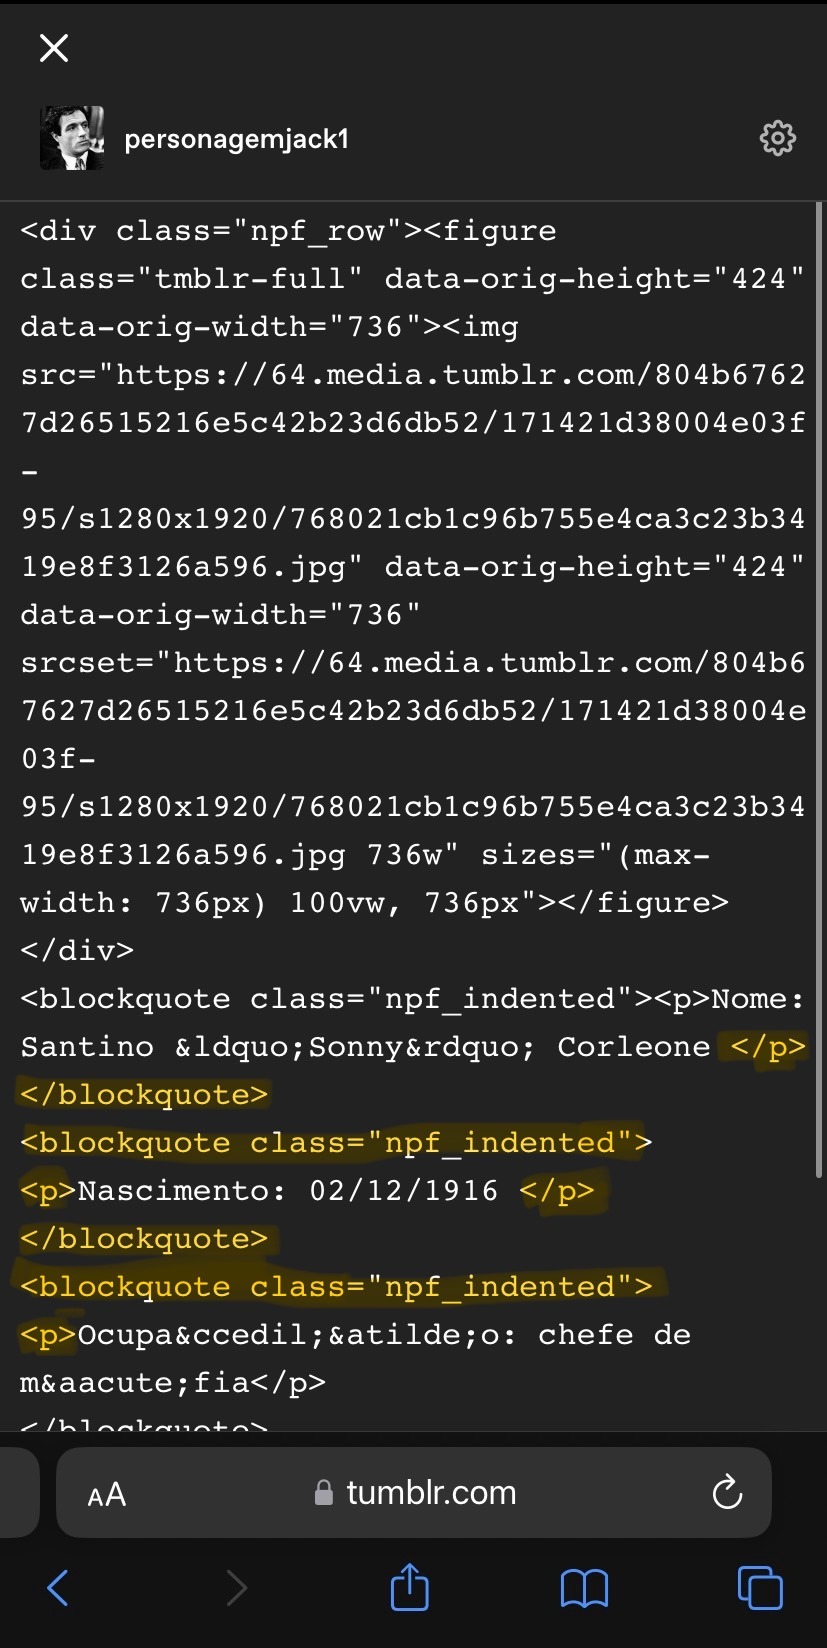
A tag <p> significa o início de um novo parágrafo, e </p> o fim dele. Perceba que no meu post essa tag está entre todas as linhas, justamente porque o app adicionou um novo parágrafo toda vez que eu iniciei uma nova. Primeiro, então, eu preciso retirar as tags de parágrafo, exceto a primeira e a última, e apenas no início das linhas novas eu adiciono a tag <br>, que significa uma quebra de linha.
Agora, <blockquote class="npf_indented"> é onde começa um novo recuado, e </blockquote> é onde finaliza. Da mesma forma que a tag de parágrafo, eu vou retirar todas elas do meio do texto, deixando a primeira e a última.
No final, meu código vai ficar assim:
Note a posição do <br> no início de onde quero começar uma nova linha.
Salvo o post assim e volto pro app pra editar o post e adicionar o read more novamente. Se você seguiu esse passo, vai ficar assim:

Tumblr pronto!
Para ilustrar, é assim que os users de desktop vão ver o seu tumblr:
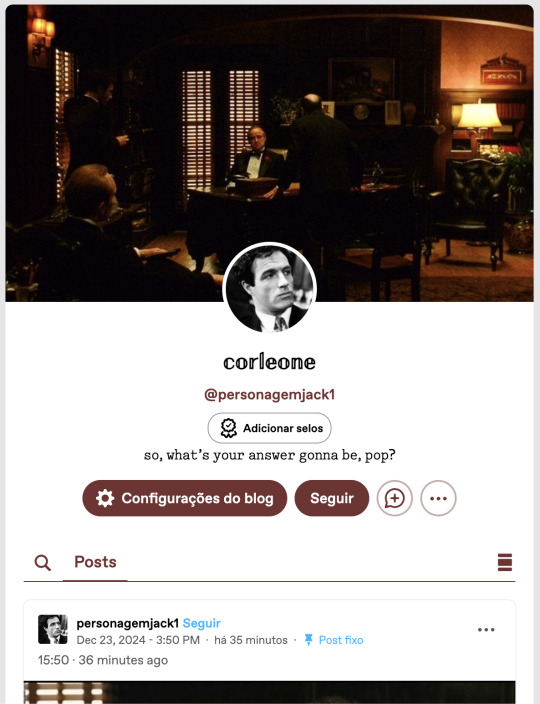

Tudo normal, nenhuma diferença de ter customizado ele pelo mobile.
Como jogar:
O básico continua o mesmo do meu tutorial inicial: posts de textos e reblogs. O tumblr mobile tem as mesmas funções que no desktop quanto a isso, então não tem muito o que explicar. Você vai seguir o padrão do tutorial inicial, mas o detalhe do mobile é que não tem como cortar os posts.
Eu testei vários tutoriais, adicionando código ao link, tentando baixar o firefox e editando no navegador, mas todos os tutoriais tem mais de 2 anos e desde então o tumblr atualizou algumas vezes, e isso não funciona mais.
Portanto, a única opção para os users do mobile é pedir para o seu parceiro de jogos para cortar o post na vez dele. Ninguém vai se incomodar com esse pedido, já que o outro player teria que fazer isso de qualquer forma. Se alguém souber de uma maneira de cortar posts no mobile, por favor me avise que eu incluo aqui.
Depois, é claro, temos o detalhe dos gifs, que também vai ser precisar feito pelo navegador.
Antes de começar, você pode escrever a sua resposta pelo aplicativo e salvar nos rascunhos.
Eu aconselho que você já tenha as suas gifhunts salvas no navegador, então só vai precisar abrir ela quando for editar. Meu exemplo vai ser essa aqui:
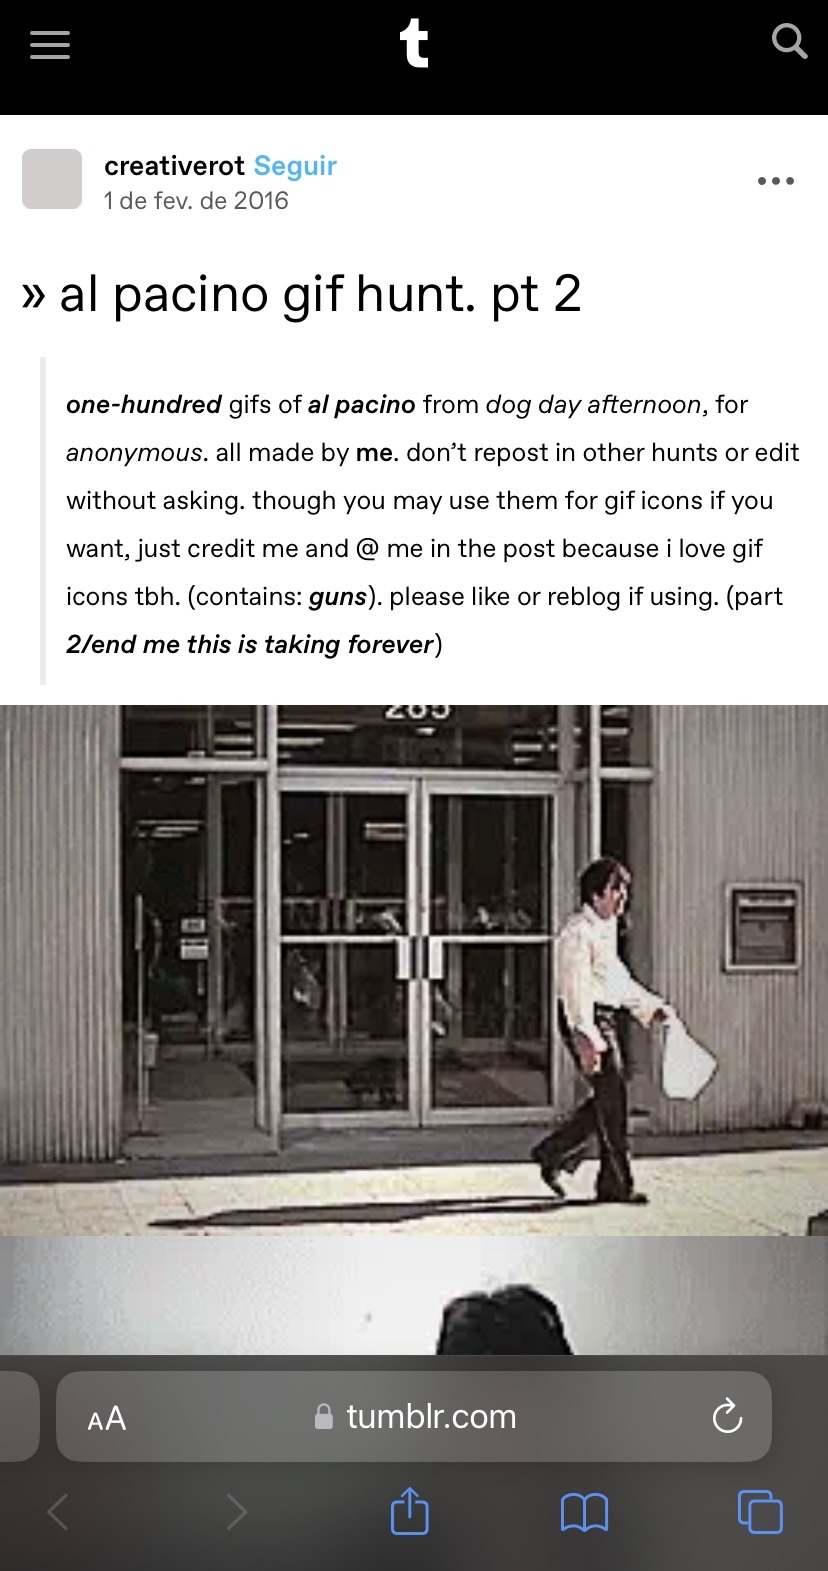
Selecione o gif que vai usar e salve no seu celular. Depois vá até o navegador e abra o post nos rascunhos. Selecione o ícone de foto vermelho, o gif que você salvou da gif hunt e pronto:
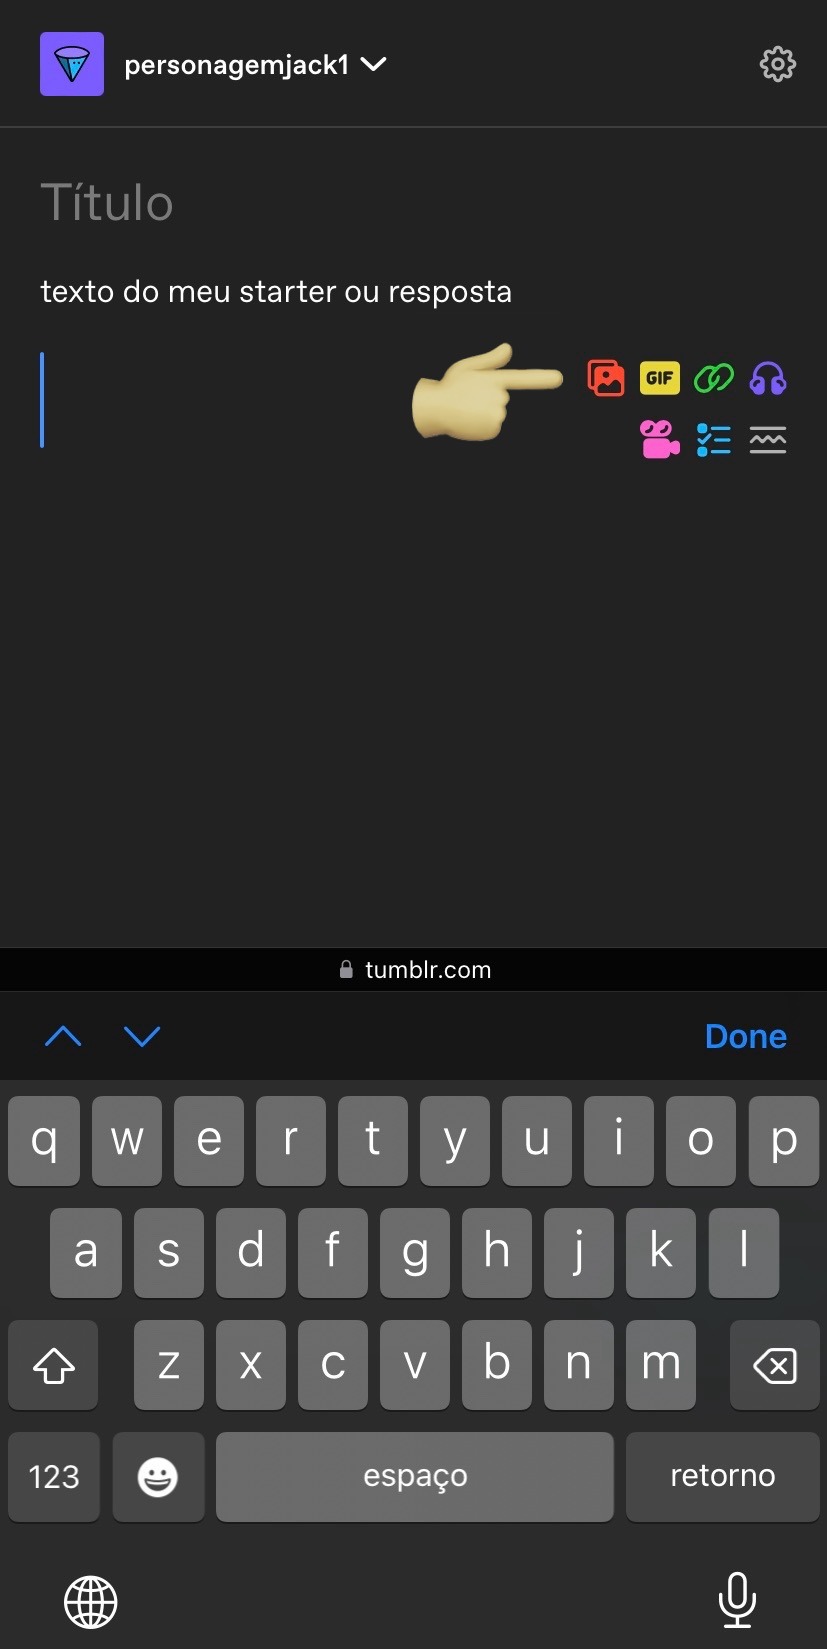
Ele vai ser adicionado no tamanho correto e funcionando. Depois é só salvar, ou postar. Vai ficar assim:
Edição: recebi esse comentário e não precisa salvar o gif! Você pode só copiar e colar o link, como explicado.

"Posso fazer isso pelo app do tumblr?" Não. O gif não abre corretamente, ficando travado no primeiro frame. Aconselho vocês a testarem, mas essa foi a minha experiência tentando adicionar um gif pelo app.
Agora, então, sabemos como reblogar e adicionar gifs. Para entender a dinâmica e tudo mais, recomendo a segunda parte do guia.
Nele eu falei brevemente sobre formatação dos turnos, e o app do tumblr tem as mesmas funções, basta selecionar o texto ou clicar em Aa:
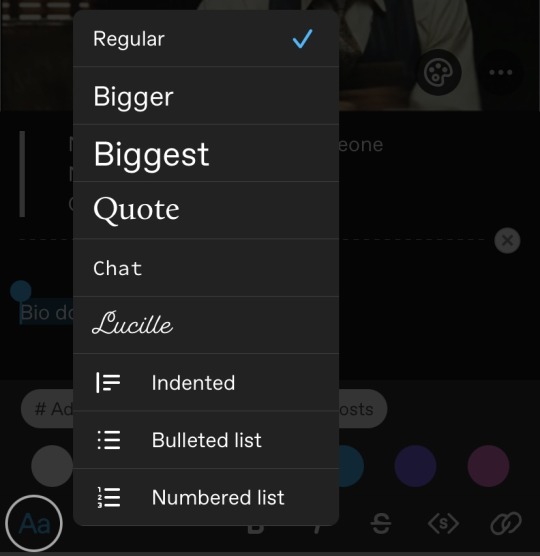
Para deixar as letras pequenas, você seleciona o texto e clica em <s>, da mesma forma que no desktop. E para adicionar o recuo, você vai clicar em Aa e selecionar 'indented', ou em português recuo mesmo.
No geral, as diferenças entre mobile e desktop não são gritantes. Eu pessoalmente acho um tanto inconveniente jogar pelo mobile por ter que ir até o navegador e tudo mais, mas não é algo que me impediria de jogar se fosse a única opção. Além disso, como eu já falei no outro guia, algumas centrais não cobram que você use gif obrigatoriamente, então é só um detalhe também.
A questão de html ali pra retirar os parágrafos é totalmente opcional, e sobre cortar posts, não há problema nenhum em explicar para seus parceiros de jogo que está no mobile e não consegue fazer isso. Eu já fiz algumas vezes no 1x1, por exemplo, e todos compreendem (a não ser que você dê o azar de encontrar algum player babaca, mas nesse caso aconselho até evitar interação em geral).
Espero que esse tutorial tenha ajudado de alguma forma, qualquer dúvida, a inbox está aberta!
29 notes
·
View notes
Note
Do you have any tips or tutorial recommendations for making your own website?
I actually really do like the Wordpress client now I've gotten the hang of it!
I did tell 1000 of my subscribers to kill themselves in an email header by accident, and also battered those poor 1000 people with something like 100 emails in increasingly frantically apologised for errors over the course of the same three days, but that was before I really Got it.
With the above oopsies in mind, if you want to import previous newsletters or posts, for the love of God, do not import your existing newsletter subscribers until after all of your backposts have been imported across. That is the main lesson I have learned.
I had such a vision in mind of a triumphant surprise email going "Hey, look what I did! Surprise! Isn't it sexy?!" and instead everyone got 30 notifications about chapter updates from 2 years ago and an email that said "It's Your Responsibility to Kill Yourself" followed by multiple deranged apologies from me.
So. Don't do that.
Other than that, I'd actually wanted a proper website for quite a few years even before Patreon got so antsy with hiding my content - I tried to set one up a few years back with Wix, and I cannot recommend that less, it's a fucking awful site to use, and it's far less user intuitive than Wordpress.
Part of my issues with Wordpress were actually that a lot of website clients, unless you're building from scratch in HTML/CSS or another code, give you everything in Blocks, and because I remembered like 10 years ago where you didn't have to do that, and you mostly altered everything on the website with like, 10000 options tickboxes and sliders, I was like "wow this is awful". I will admit now, crotchety bastard that I am, that the Blocks system is better and more intuitive once you start to understand it. I just don't always do well thinking of things in three dimensions, so to speak, and I was shooting myself in the foot by going "WELL BACK IN MY DAY--"
Wix doesn't have a very good help section because they want you to talk to their people for help, but most sites for stuff like this do have really robust FAQ and help sections, and obviously, rely on those as much as possible.
At one point I was so upset with my inability to do something that Lorenzo literally came over and told me to leave the apartment (that was the day that I went to Pets at Home and spent a ridiculous amount of money on gifts for the cat), and while I was very grumpy about doing it at the time, taking breaks is crucial, especially if you get as frustrated as I do.
I realise that most of what I have said so far is niche tips for if you're stubborn and mentally ill, so in terms of actual website building, I would say it's important to have an idea of what you want the site to do.
Do you just want a landing page, so that if people search for your name or whatever, that this is the first result? That it links people to your books or your store, your socials? Do you want to have a gallery of work on display, or an archive of writing like I've made? Do you want people to be able to contact you, give tips?
I always wanted a robustly tagged archive with an in-depth tag page like the one I've set up now, and the goal for my Directory of Work on Medium and elsewhere was always that it would later be transferred to my website once it was built.
Then, I have an about page for people who are just curious about who I am and who I look like; commission info and information about booking me for events or inviting me to cons and such; the books I have for sale, publications I've been a part of, interviews and presentations on YouTube; my events calendar with conventions and such; the gallery where I'm showing off both art of my characters and where I'll later show art that I buy for my home and myself, such as the stuff framed in the stairwell or jewellery I buy from makers at markets and such; and then, of course, the subscriber benefits.
All of the above to go my goals which are, in order, to encourage people to read my work and make it easy for them to do so, to pay me money for my existing work or to offer me money for new work, and to show support for other events, artists, friends, and queer creators.
I would definitely advise thinking carefully about how visual or how word-based you want your site to be - I had to look for a recipe blog theme to find one that was stripped back in terms of images. Especially for adult websites, I'd be careful about payment providers and so forth.
Stripe is the default on the site, and I've been very careful about making sure none of my titles or descriptions that the Stripe client will see have words like erotica or adult in them - if someone from Stripe clicks through and sees the site, they might take issue with it, but that's another thing. I do get paid by Stripe through Medium, so I do already use them.
Most payment providers hate any kind of adult content, but are willing to give a tiny bit more wiggle room on erotica, or at least, they just don't notice it in the same way they do Real Porn, but there's nothing I can say other than "be careful and more importantly, be lucky" on that front.
Most of all, I'd say to try to have fun with it and try to enjoy the actual building process if you can - make something pretty and fun to navigate as much as you can, and if you can get some enjoyment out of it, your site users will as well.
18 notes
·
View notes
Text
So I know how to code websites now, but idk how to upload it to the internet. My plan is to give you all a post that will update with a string of code to sort of visit the website(s?) that I am curating. I will reblog a post that had the original, and include a more patched version as time goes on. I am so sorry in advance.
Because of this.... Lemme show you how html and css works!!
For Project Our Realities, it will all be in html and css since that's what I'm learning so far. JavaScript will be included later.
HTML and CSS basics below!!
HTML, or Hyper-Text Markup Language is the basics of coding a website. It describes how a website will look. It unfortunately doesn't get you too far in terms of digital design, which is why we have languages like Css and javascript.
All HTML files start with <!DOCTYPE html>. This declares to the file that you will be coding in html rather than something like lua.
Each HTML file, after declaring it as an html file, starts with <HTML> and </HTML>. To end a tag, you must close it by adding a forward slash before writing its name (unless it is <br> or <hr>, or similar).
The <head> tag lets you add a title (silly little tab name), a favicon (silly little icon next to the name of the tab) and ways to link your CSS to the HTML.
An HTML file will look like this <!DOCTYPE html>
<html>
<head>
</head>
<body>
</body>
</html>
In the body, you can write the rest of your page, using headers (<h>/<h1-6>), paragraphs (<p>), and even forms (<form>).
--
CSS, also known as Cascading Style Sheets, is a type of coding language that is often used to create websites. No, it is not C++.
Rather than <>, CSS uses brackets {} to code.
CSS is used to style html websites, so it addresses html tags and lets you style their appearance. There is something known as inline CSS, where you can use the <style> tag to style something in your HTML file. HTML was never meant to have colors in its code, but you can change the color of text with inline css. Let's say you would like to style a header.
In your HTML file, it would say:
<!DOCTYPE html>
<html>
<head>
<link rel="stylesheet" href="(name of .css file goes here)">
</head>
<body>
<h1> My first header!!! :> </h1>
</body>
</html>
Now that we have our header, let's turn it red.
In your CSS file, it should say...
h1 {
color: red;
}
The H1 addresses that it will select all h1 elements. The code in the brackets shows that all those addressed will be the color red.
CSS has no starting or finishing lines, all elements will by stylized with {}.
--
To create an HTML file, you must end it with .HTML
To create a CSS file, you must end it with .css
Sometimes, when I create a link for the Css, the required name for the file will be in the HTML code already. Make sure that both files are in the same folder, and not one in a different folder within the same parent folder. This will not work.
--
Wanna test this out? Make a new notepad file on Windows, title it as "firsthtml.html", and create another file called "firstcss.css".
Place this in the .HTML file: <!DOCTYPE html>
<html>
<head>
<title> First HTML </title> <link rel="icon" type="image/x-icon" href="https://i.pinimg.com/736x/1a/8d/9d/1a8d9d26cdca15285d217c817f6953ec.jpg">
<link rel="stylesheet" href="firstcss.css">
</head>
<body> <h1>Welcome, traveler!!</h1>
<h3><I>Thank you for reading the tutorial!! Follow the blog to keep up with our news.</I><h3>
</body>
</html>
Now, for your .css file, write this down:
h1 {
color: dark blue;
}
h3 {
color: orange;
}
--
Thank you so much for following this tutorial. I mainly learned about this from w3schools and in my school course. Happy coding!!! :>
-ava
#.io#ava#ava our realities#io our realities#eps foundation#entertainment productions studio#project our realities#our realities#coding#html#HTML stuff#css#Css stuff#hyper text markup language#cascading style sheets#there will be more coding to come#I hope this helps you guys get into coding
3 notes
·
View notes
Note
idk if you can help but ive been using your theme Requested for a few months but now when i go to change anything like colour/font/etc i just get a message saying "HTML tags are not allowed in custom CSS code" do you know what that means and how to get around it, tysm
Hi, sorry for the late reply. I was busy, but I also tried looking for solutions to your problem but didn't find much.
I tried the code, and everything seems to work fine, but I couldn't find anything related? like it doesn't seem to be a problem within Tumblr, so my solution would be to try resetting your blog theme settings, following this tutorial (from step three (3)) by glenthemes, then copy the code from GitHub using the little icon on the top right of the top bar.

[transcript. Screenshot of Github site showcasing some repository and highlighting the button on the code header wich allows you to direct copy the raw file, used as reference to the sentence above.]
Also, don't know if this could help you, but I'm gonna share some links regarding the "HTML Invalid" trouble, maybe try checking some out and see if it works for you too (:
theme-hunter/psa-invalid-html-message-if-you-are-receiving
nyctothemes/hello-there-i-am-trying-to-use-your-amethyst
megscoding/invalid-html
Invalid html Tumblr tag
I do hope this helps you and please do not hesitate to reach out again if there seems to be another problem with any code. Have a nice day xx
3 notes
·
View notes
Text
CSS Tutorial for Beginners: Build Stylish Web Pages

In the digital world, design is everything. A clean, stylish website can make a powerful first impression, keeping users engaged and encouraging them to return. While HTML is responsible for the structure of a web page, it is CSS (Cascading Style Sheets) that gives it life, color, and personality. If you're looking to create beautiful, modern websites, this CSS tutorial for beginners is the perfect place to start.
Whether you're new to web development or just want to improve your front-end skills, this tutorial will help you build stylish web pages using CSS. We'll walk through the fundamentals of CSS, explore how it works with HTML, and give you real examples to apply immediately.
What Is CSS?
CSS (Cascading Style Sheets) is the language used to describe the presentation of a document written in HTML. It defines how elements like text, images, and layouts should appear on a webpage—everything from font sizes and colors to spacing and positioning.
Without CSS, all websites would look plain and unstyled. CSS separates content (HTML) from design, making web pages easier to manage and more visually appealing.
Why Learn CSS?
Learning CSS offers several benefits, especially for beginners:
Design freedom: Customize any website with colors, fonts, layouts, and animations.
Responsive design: Make your web pages look great on all screen sizes and devices.
Better user experience: Improve readability, navigation, and visual appeal.
Easy maintenance: Update styles quickly without altering the content.
Career advantage: Front-end developers, designers, and content creators all use CSS.
How CSS Works with HTML
CSS works hand-in-hand with HTML by selecting specific HTML elements and applying styles to them. There are three main ways to use CSS in an HTML document:
Inline CSS – inside HTML elements
Internal CSS – inside a <style> tag in the head section
External CSS – in a separate .css file linked to your HTML
Here’s a simple example of internal CSS:<!DOCTYPE html> <html> <head> <style> h1 { color: blue; text-align: center; } p { font-size: 16px; color: gray; } </style> </head> <body> <h1>Welcome to My Website</h1> <p>This is a styled paragraph using CSS.</p> </body> </html>
CSS Syntax Explained
CSS consists of selectors and declarations. Here's the basic structure:selector { property: value; }
Example:p { color: green; font-size: 18px; }
p is the selector (targets <p> tags)
color and font-size are properties
green and 18px are values
You can apply multiple styles to one element by including multiple property-value pairs inside the braces.
Key CSS Concepts Every Beginner Should Know
1. Selectors
Selectors define which HTML elements you want to style. Common types include:
* – universal selector
p, h1, div – element selectors
.className – class selector
#idName – ID selector
Example:#main { background-color: #f0f0f0; }
2. Colors and Fonts
CSS allows full control over colors and typography.body { background-color: white; color: #333; font-family: Arial, sans-serif; }
3. Box Model
Every HTML element is a rectangular box, made up of:
Content
Padding
Border
Margin
Understanding the box model is key to layout and spacing.div { padding: 10px; border: 1px solid #ccc; margin: 20px; }
4. Positioning and Layout
Use CSS properties like position, display, flex, and grid to control layout..container { display: flex; justify-content: space-between; }
5. Responsive Design
Make your site mobile-friendly using media queries.@media (max-width: 600px) { body { font-size: 14px; } }
Build a Simple Styled Web Page
Let’s build a simple web page using HTML and CSS:
HTML (index.html)<!DOCTYPE html> <html> <head> <link rel="stylesheet" href="style.css"> <title>My Stylish Page</title> </head> <body> <header> <h1>My Stylish Web Page</h1> </header> <main> <p>This is a simple paragraph styled with CSS.</p> </main> </body> </html>
CSS (style.css)body { background-color: #f9f9f9; color: #333; font-family: 'Segoe UI', sans-serif; } header { background-color: #007BFF; color: white; padding: 20px; text-align: center; } main { padding: 20px; }
Save both files in the same folder, open index.html in a browser, and admire your styled page!
Tools to Help You Learn CSS
CodePen – Try CSS code snippets online.
MDN Web Docs – Comprehensive documentation for CSS.
Visual Studio Code – A great editor with live preview extensions.
CSS Zen Garden – Explore examples of what’s possible with CSS.
Final Thoughts
This CSS Tutorial for Beginners is your gateway to designing elegant, responsive, and professional-looking web pages. By learning CSS, you gain control over how content appears and interacts with users. Start small, practice consistently, and experiment with real-world projects.
Once you master the basics, explore advanced topics like animations, transitions, flexbox, grid, and preprocessors like SASS.
0 notes
Text
Mastering On-Page SEO: How to Build a Search-Optimized Website from the Ground Up
Whether you're launching a new website or trying to improve your existing SEO strategy, one thing remains clear: On-Page SEO is your foundation.
Without it, your content won’t reach the right audience—no matter how great it is. In this detailed guide, we’ll walk you through how to structure your content and website architecture so that both users and search engines love it.
🧱 What Is On-Page SEO?
On-Page SEO is the process of optimizing your website’s pages to improve their visibility in search engine results. It covers everything you control on your own website—unlike Off-Page SEO, which focuses on backlinks and external signals.
On-Page SEO includes:
Keyword placement
Page structure
Content quality
Internal linking
UX and mobile performance
Site speed
Accessibility
🧭 The SEO Framework: Three Dimensions of On-Page SEO
To understand On-Page SEO fully, think of it in three dimensions:
1. Content Optimization
Creating valuable content that addresses user intent.
2. HTML Optimization
Using meta tags, header tags, and schema markup to help search engines understand your content.
3. Site Architecture
Designing a structure that enhances crawling, indexing, and user navigation.
Let’s dive into each.
📚 Part 1: Content Optimization
🎯 Targeting the Right Keywords
Start with search intent. Before you write, ask:
What is the user trying to accomplish?
Are they looking for information, a product, a tutorial?
Tips:
Use long-tail keywords to reduce competition.
Use tools like Ubersuggest, SEMrush, or Google Keyword Planner.
✍️ Writing SEO-Friendly Content
Great content does three things:
Informs or solves a problem
Keeps readers engaged
Encourages action or next steps
Best practices:
Use your main keyword within the first 100 words.
Use subheadings (H2/H3) to break content into sections.
Answer related questions users may have (good for featured snippets).
🧠 Semantic SEO: Go Beyond Keywords
Google is smart. It now ranks pages that cover a topic comprehensively, not just those stuffed with exact-match keywords.
Use tools like:
LSIGraph: To find semantically related keywords.
Surfer SEO: To see what top-ranking pages include.
🛠️ Part 2: HTML Optimization
📌 Meta Tags
Title Tag
Include the primary keyword close to the beginning.
Keep it under 60 characters.
Meta Description
Summarize the page with a compelling CTA.
Keep it under 155–160 characters.
🧩 Header Tags (H1 to H6)
Use headers to create a clear hierarchy:
H1: Page title (only once).
H2/H3: Subsections and supporting content.
Pro tip: Include keywords naturally in headers.
🧼 Clean, SEO-Friendly URLs
URLs should be:
Short and descriptive
Include your keyword
Use hyphens for spacing
Bad: yourwebsite.com/page?id=4589§ion=abc
Good: yourwebsite.com/seo/on-page-optimization
📷 Alt Tags for Images
Describe each image using keywords appropriately. This helps:
Search engines understand images.
Improve accessibility for screen readers.
Boost traffic through Google Image Search.
📚 Structured Data / Schema Markup
Add schema to support:
FAQs
Reviews
Products
Recipes
Events
Use Google’s Structured Data Markup Helper to implement it.
🏗️ Part 3: Site Architecture & UX
🗺️ Internal Linking
Link to other relevant pages on your site:
Boosts page authority
Improves crawlability
Encourages longer sessions
Use descriptive anchor text (not “click here”).
📱 Mobile Optimization
Google uses mobile-first indexing.
Ensure:
Responsive design
Touch-friendly navigation
Readable font sizes
Use Google’s Mobile-Friendly Test to evaluate your site.
⚡ Page Speed
A slow site hurts both UX and rankings.
Boost speed by:
Compressing images
Using a CDN
Minifying CSS/JavaScript
Enabling lazy loading
Test your speed with:
Google PageSpeed Insights
GTmetrix
WebPageTest
🔐 HTTPS and Secure Site Structure
Google considers HTTPS a ranking factor. Ensure your site has an SSL certificate.
Also, structure your site logically:
Homepage → Categories → Subcategories → Content
Use breadcrumbs and clear menus
📊 Tools to Supercharge Your On-Page SEO
ToolFunctionYoast SEO / Rank MathSEO analysis, meta tags (WordPress)Ahrefs / SEMrushKeyword and competitor researchSurfer SEOContent editor based on SERP dataScreaming FrogOn-page auditsGoogle Search ConsolePerformance, indexing, crawl errorsHotjarAnalyze user behavior and heatmaps
🚫 Common On-Page SEO Pitfalls
🟥 Duplicate meta tags and content
🟥 Broken internal links
🟥 Ignoring mobile UX
🟥 Not optimizing for featured snippets
🟥 Poor page layout (walls of text, no images)
🟥 Outdated or thin content
📌 On-Page SEO Checklist (Quick Reference)
✅ Keyword in title ✅ Keyword in meta description ✅ One H1 per page ✅ Use H2/H3 for subheadings ✅ Short, readable URL ✅ Internal links to related pages ✅ External links to credible sources ✅ Image alt tags with keywords ✅ Schema markup added ✅ Fast loading time ✅ Mobile-friendly layout ✅ No duplicate content
🧠 Frequently Asked Questions
Q: Does Google still use meta keywords? A: No. They’ve been deprecated for years.
Q: How often should I update on-page content? A: Aim to refresh every 6–12 months for important pages.
Q: Can I rank without backlinks if my On-Page SEO is strong? A: You can rank for low-competition keywords, but backlinks help in competitive spaces.
🚀 Conclusion
On-Page SEO is the heart of your website’s visibility. It’s where your SEO journey begins—and without a strong foundation, no amount of link building or social shares will help you rank long term.
By mastering content optimization, HTML improvements, and site architecture, you position your site to climb the search engine ladder—organically, sustainably, and strategically.
1 note
·
View note
Text
How to Optimize Your Website for Featured Snippets
Introduction
In the fast-paced world of SEO, featured snippets have become a game-changer. These special search results appear at the very top of Google’s results page, providing users with quick and direct answers. But how do you secure these coveted spots?
Read More- SEO Services in Manchester
Optimizing your website for featured snippets can significantly boost visibility, increase organic traffic, and establish your site as an authority in your industry. In this guide, we’ll break down everything you need to know about featured snippets, their benefits, and how to optimize your content to win them.
Read More- SEO Services in Bristol
Types of Featured Snippets
Google displays several types of featured snippets, each requiring different optimization strategies.
1. Paragraph Snippets
These are the most common type, appearing as a short block of text (40-60 words) answering a query.
✅ Example: "What is digital marketing?" "Digital marketing refers to online strategies used by businesses to promote products and services through digital channels like social media, email, and search engines."
Read More- SEO Services in Slough
2. List Snippets
Google pulls information from content that contains well-structured lists. These can be:
Ordered Lists: Step-by-step guides, like “How to bake a cake.”
Unordered Lists: Lists of tools, benefits, or comparisons.
Read More- SEO Services in Windsor
3. Table Snippets
Google displays information in a tabular format when comparing data. These snippets are great for pricing, product comparisons, and statistics. Product Price Rating Product A$504.5 ⭐Product B$404.0
Read More- SEO Services in Oxford⭐
4. Video Snippets
Google also highlights relevant video content, often with timestamps for key sections. YouTube videos with clear explanations and proper tagging often secure these snippets.
Read More- SEO Services in Wokingham
Benefits of Featured Snippets
Why should you aim for featured snippets? Here are some key advantages:
✔️ Increased Visibility – Snippets appear at the top of search results, giving your content prime real estate.
✔️ Higher Click-Through Rate (CTR) – Users are more likely to click on your link when they see a direct answer in the snippet.
✔️ Authority Building – Appearing in snippets positions your site as a credible and reliable source.
Read More- SEO Services in California
How to Find Featured Snippet Opportunities
Before optimizing your content, you need to identify which keywords already trigger snippets.
🔍 Use Google Search – Enter a query and check if a snippet appears. If it does, analyze its format and structure.
🔍 Leverage SEO Tools – Platforms like Ahrefs, SEMrush, and Moz help identify snippet opportunities and analyze competitors’ rankings.
🔍 Analyze Competitor Snippets – Study how competitors structure their content and look for ways to improve on it.
Read More- SEO Services in Texas
Structuring Your Content for Featured Snippets
Content structure plays a crucial role in winning snippets. Follow these best practices:
✅ Write Concise Answers – Aim for 40-60 words in direct answer boxes.
✅ Use Headers and Subheaders – Format your content with H2, H3, and H4 tags to improve readability.
✅ Include Bullet Points and Lists – Google prefers structured content with clear formatting.
Read More- PPC Agency in California
Optimizing for Different Snippet Types
1. Paragraph Snippets
Provide a direct and clear answer within the first 100 words.
Use the inverted pyramid method (start with the answer, then provide details).
Include keyword-rich questions as headers.
2. List Snippets
Structure your content with ordered (1,2,3) or unordered (-, •) lists.
Use step-by-step formatting for guides and tutorials.
Keep list items concise and to the point.
Read More- ER Group London
3. Table Snippets
Present data in a well-structured table format.
Include relevant headers to help Google understand the content.
Use HTML tables where possible for better indexing.
4. Video Snippets
Add timestamps for key moments in your video.
Write keyword-rich descriptions and include transcripts.
Optimize video titles and tags with relevant search terms.
Using Schema Markup for Featured Snippets
Structured data markup helps Google understand your content better. Implement the following schema types:
✔️ FAQ Schema – Helps rank for question-based snippets. ✔️ How-To Schema – Enhances step-by-step guides. ✔️ Q&A Schema – Ideal for community-based and forum content.
Read More- Never DIY Roof Repairs
Tracking and Measuring Snippet Performance
Once you’ve optimized your content, track its performance using:
📊 Google Search Console – Check your snippet rankings and impressions. 📊 Google Analytics – Measure traffic and click-through rates from snippets. 📊 SEO Tools – Use Ahrefs or SEMrush to monitor featured snippet performance.
Common Mistakes to Avoid
🚫 Ignoring structured formatting – Poorly formatted content won’t rank. 🚫 Overloading content – Keep answers concise and to the point. 🚫 Neglecting mobile optimization – Ensure snippets display correctly on mobile devices.
Conclusion
Optimizing for featured snippets is a powerful SEO strategy that can drive more traffic, increase visibility, and establish authority. By structuring content correctly, using schema markup, and tracking performance, you can secure a top position in Google’s search results.
Start implementing these strategies today and watch your website’s traffic soar!
0 notes
Text
How To Use Python for Web Scraping – A Complete Guide
The ability to efficiently extract and analyze information from websites is critical for skilled developers and data scientists. Web scraping – the automated extraction of data from websites – has become an essential technique for gathering information at scale. As per reports, 73.0% of web data professionals utilize web scraping to acquire market insights and to track their competitors. Python, with its simplicity and robust ecosystem of libraries stands out as the ideal programming for this task. Regardless of your purpose for web scraping, Python provides a powerful yet accessible approach. This tutorial will teach you all you need to know to begin using Python for efficient web scraping. Step-By-Step Guide to Web Scraping with Python
Before diving into the code, it is worth noting that some websites explicitly prohibit scraping. You ought to abide by these restrictions. Also, implement rate limiting in your scraper to prevent overwhelming the target server or virtual machine. Now, let’s focus on the steps –
1- Setting up the environment
- Downlaod and install Python 3.x from the official website. We suggest version 3.4+ because it has pip by default.
- The foundation of most Python web scraping projects consists of two main libraries. These are Requests and Beautiful Soup
Once the environment is set up, you are ready to start building the scraper.
2- Building a basic web scraper
Let us first build a simple scraper that can extract quotes from the “Quotes to Scrape” website. This is a sandbox created specifically for practicing web scraping.
Step 1- Connect to the target URL
First, use the requests libraries to fetch the content of the web page.
import requests

Setting a proper User-agent header is critical, as many sites block requests that don’t appear to come from a browser.
Step 2- Parse the HTML content
Next, use Beautiful Soup to parse the HTML and create a navigable structure.

Beautiful Soup transforms the raw HTML into a parse tree that you can navigate easily to find and extract data.
Step 3- Extract data from the elements
Once you have the parse tree, you can locate and extract the data you want.

This code should find all the div elements with the class “quote” and then extract the text, author and tags from each one.
Step 4- Implement the crawling logic
Most sites have multiple pages. To get extra data from all the pages, you will need to implement a crawling mechanism.

This code will check for the “Next” button, follow the link to the next page, and continue the scraping process until no more pages are left.
Step 5- Export the data to CSV
Finally, let’s save the scraped data to a CSV file.

And there you have it. A complete web scraper that extracts the quotes from multiple pages and saves them to a CSV file.
Python Web Scraping Libraries
The Python ecosystem equips you with a variety of libraries for web scraping. Each of these libraries has its own strength. Here is an overview of the most popular ones –
1- Requests
Requests is a simple yet powerful HTTP library. It makes sending HTTP requests exceptionally easy. Also, it handles, cookies, sessions, query strings, including other HTTP-related tasks seamlessly.
2- Beautiful Soup
This Python library is designed for parsing HTML and XML documents. It creates a parse tree from page source code that can be used to extract data efficiently. Its intuitive API makes navigating and searching parse trees straightforward.
3- Selenium
This is a browser automation tool that enables you to control a web browser using a program. Selenium is particularly useful for scraping sites that rely heavily on JavaScript to load content.
4- Scrapy
Scrapy is a comprehensive web crawling framework for Python. It provides a complete solution for crawling websites and extracting structured data. These include mechanisms for following links, handling cookies and respecting robots.txt files.
5- 1xml
This is a high-performance library for processing XML and HTML. It is faster than Beautiful Soup but has a steeper learning curve.
How to Scrape HTML Forms Using Python?
You are often required to interact with HTML when scraping data from websites. This might include searching for specific content or navigating through dynamic interfaces.
1- Understanding HTML forms
HTML forms include various input elements like text fields, checkboxes and buttons. When a form is submitted, the data is sent to the server using either a GET or POST request.
2- Using requests to submit forms
For simple forms, you can use the Requests library to submit form data
import requests

3- Handling complex forms with Selenium
For more complex forms, especially those that rely on JavaScript, Selenium provides a more robust solution. It allows you to interact with forms just like human users would.

How to Parse Text from the Website?
Once you have retrieved the HTML content form a site, the next step is to parse it to extract text or data you need. Python offers several approaches for this.
1- Using Beautiful Soup for basic text extraction
Beautiful Soup makes it easy to extract text from HTML elements.

2- Advanced text parsing
For complex text extraction, you can combine Beautiful Soup with regular expressions.

3- Structured data extraction
If you wish to extract structured data like tables, Beautiful Soup provides specialized methods.

4- Cleaning extracted text
Extracted data is bound to contain unwanted whitespaces, new lines or other characters. Here is how to clean it up –

Conclusion Python web scraping offers a powerful way to automate data collection from websites. Libraries like Requests and Beautiful Soup, for instance, make it easy even for beginners to build effective scrappers with just a few lines of code. For more complex scenarios, the advanced capabilities of Selenium and Scrapy prove helpful. Keep in mind, always scrape responsibly. Respect the website’s terms of service and implement rate limiting so you don’t overwhelm servers. Ethical scraping practices are the way to go! FAQs 1- Is web scraping illegal? No, it isn’t. However, how you use the obtained data may raise legal issues. Hence, always check the website’s terms of service. Also, respect robots.txt files and avoid personal or copyrighted information without permission. 2- How can I avoid getting blocked while scraping? There are a few things you can do to avoid getting blocked – - Use proper headers - Implement delays between requests - Respect robot.txt rules - Use rotating proxies for large-scale scraping - Avoid making too many requests in a short period 3- Can I scrape a website that requires login? Yes, you can. Do so using the Requests library with session handling. Even Selenium can be used to automate the login process before scraping. 4- How do I handle websites with infinite scrolling? Use Selenium when handling sites that have infinite scrolling. It can help scroll down the page automatically. Also, wait until the new content loads before continuing scraping until you have gathered the desired amounts of data.
0 notes
Text
Advanced HTML Interview Questions and Answers: Key Insights for Experienced Developers
As an experienced developer, mastering HTML is essential to your success in web development. When interviewing for advanced positions, you will encounter advanced HTML interview questions and answers that test not only your understanding of basic HTML elements but also your ability to implement complex concepts and strategies in real-world scenarios. These questions are designed to assess your problem-solving skills and your ability to work with HTML in sophisticated projects.
For seasoned developers, HTML interview questions for experienced developers often go beyond simple tag usage and focus on more intricate concepts, such as semantic HTML, accessibility, and optimization techniques. You might be asked, "What is the difference between block-level and inline elements, and how does this affect page layout?" or "How would you implement responsive web design using HTML?" These questions require an in-depth understanding of HTML’s role within modern web design and the ability to apply it effectively to improve both user experience and page performance.
Experienced developers should also be prepared to answer questions on advanced HTML techniques, such as the use of custom data attributes or the new HTML5 semantic elements like <section>, <article>, and <header>. Interviewers may ask, "How do you use HTML5 APIs in conjunction with other technologies?" or "Can you explain how to create and manage forms with custom validation?" Understanding these more advanced features is crucial for ensuring that your HTML code remains up-to-date and compatible with current web standards and practices.
In summary, advanced HTML interview questions challenge you to demonstrate your expertise in HTML and its application in complex web projects. By preparing for these types of questions, you can showcase your ability to handle sophisticated web development tasks with ease. A strong grasp of HTML’s more advanced features will set you apart from other candidates and increase your chances of securing a role as a senior or lead developer.
At our e-learning tutorial portal, we offer free, easy-to-follow tutorials that teach programming languages, including HTML, through live examples. Our platform is tailored to students who want to learn at their own pace and gain hands-on experience. Whether you are new to programming or an experienced developer looking to refine your skills, our resources will help you prepare for interviews and master the concepts that are critical to success in the tech industry.
0 notes
Note
how did you make the faq? it's so pretty !!!
hiii, tysm <33 it's the FAQ page that matches my theme, lowlife!! - this are the tag page and about page in case you want them 💕 and since hot girls don't gatekeep, here's is a tutorial in case you know literally zero stuff about codes :) - more tutorials.
remember that you must do it from a computer and you need to have the "custom theme" activated (see this if you don't know how). im gonna do this tutorial in a random sideblog from scratch btw.
disclaimer: don't change anything else but what i mention here, especially if you don't know anything about html and css because, in the codes, any mistake can make the whole code not work. don't touch anything else but what is involved in the design!
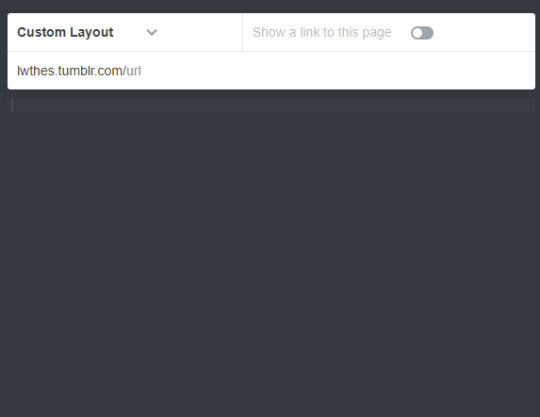
as you asked for a tutorial on the FAQ, i will do it specifically for that page, but this applies to the others, as this is how to install pages in general. first, go to the bottom of the "edit theme" until you see "add a page", add one and change "standard layout" to "custom layout". fill in the url with what you want the web address to be (i used "faq" like most people but you can use something else ofc) and you will notice that there's an option that says "show a link to this page" - if you turn that on, this page will be accessible from your homepage and will be next to your askbox, archive, etc. otherwise, it will just show through the link. you can leave it unchecked if you don't want a link to this page next to your ask or archive, but remember to add it manually to your main theme otherwise no one will be able to see it!


now, in another window, go to the installation page and copy all the code and paste it into the tumblr page. with "update preview" you will see how it is displayed without the need to save it (if you're still editing - remember to save it at the end lol).
now you're going to be faced with a situation: tumblr doesn't let you use javascript by default and these pages have javascript. i have two solutions for you. one is to follow this tutorial to ask tumblr for permission to use javascript, and the other is to remove it in case they deny it - which is not usually the case anyway - or take too long, etc. (the only thing that will happen is that you will no longer have the dynamism that the base code has, on these pages not much happens if you remove it, but on others you will need to ask for permission).
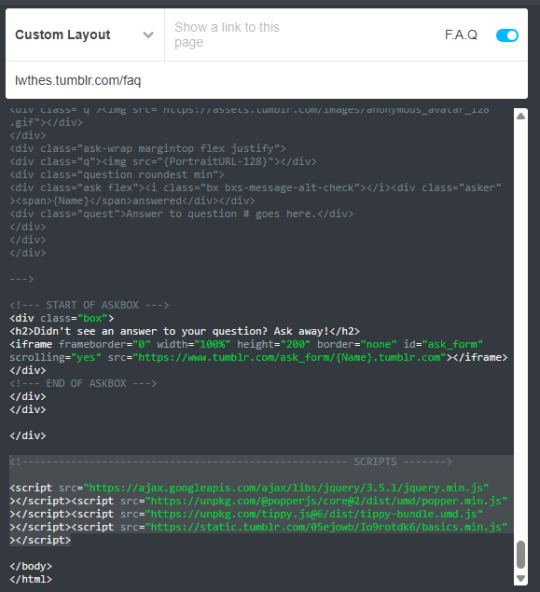
to do this, remove the scripts tags: in the second and third picture i pointed out with the mouse which ones they are. JUST remove that and save it to check that the page is visible and everything else is in order.


the page should already be installed and working correctly, now let's make it pretty!!!!! for this part, i highly recommend googling at least the basics of html and css, but i'll explain it from scratch anyway. but you can ask me everything you need hehe.
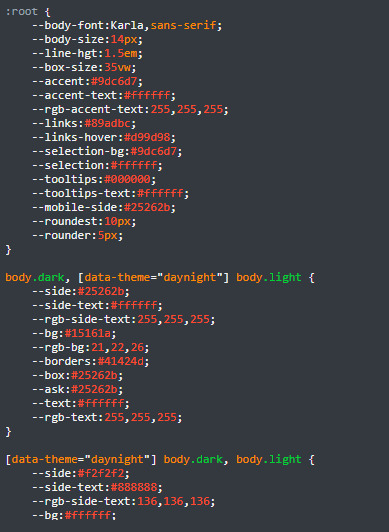
changing the colours: this is done with the hex codes. if you have a profile picture or header, upload it to this website to see what colours it has if you want them to match.
once you have those colours, you will go to the page and change the hex code for them. the choice of colours is up to you, play with them, change them and see what colour is altered in case you don't understand what is what, but the tags are quite understandable (background, body, accent, etc). remember that if you took out the javascript the "night mode" will not work, so in the next two to "root" (which identify day and night mode) you can change them but leave them the same as each other.

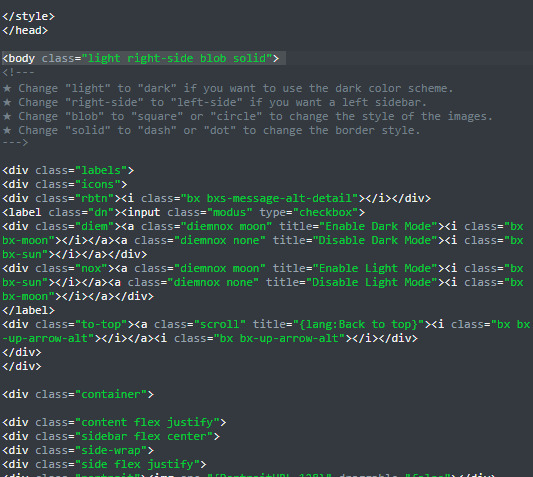
once you have the colour palette, scroll down to the body. there where i pointed out, you can change the shape of the profile picture, the defalut mode if you left the javascript on, whether you want the sidebar to be left or right and whether you want the borders to be solid, or with dashes or dots. as the code itself says, depending on what you want, just change the word that is already there for the change you need.
where it says F.A.Q and "a short description can be pasted here" would be your sidebar (the profile picture changes itself automatically in this one, but in others you have to change it manually with a link) - if you want to match all your pages to your main theme, just paste the description you already have.


you can put a link in your bio, just copy that and change the word "don't" to whatever you want the link to be and change the link.
ask guidelines, as well as within the questions themselves, you can use html tags. <b> and </b> it's bold, <i> and </i> it's italics, <small> and </small> its to make it smaller, or <strike> and </strike> it's to "strike out" the word. remember to put the start tag where you want it to start and the end tag where you want it to end (the end tags are the same but with a /). paragraphs are separated by <p> and </p>, and as the code explains, you can put bullet lists and blockquotes or literally any htlm tag (to change colour, ordered lists, etc). you can also add links (same format as explained in the description)!!!


for the questions and answers, change the first five where it says "question #X goes here" and "answer to question #X goes here", leave the rest the same. if you want more than five questions, at the end you will see something to copy-paste or you can use question #2 through #5 (NOT #1) to copy and paste it under #5 and change the numbers, as well as the questions and answers.

for example, here you should add the number 6 after the #'s and the questions and answers. finally, you can change the sentence that appears at the end of the askbox, you can match it with the one you already have or make it a custom one from the FAQ.
save everything and you have your faq page! hope you found the tutorial useful :) <3
#i have to redo my tags and my faq lol in doing this i realised that some things stopped working. but basically this is it!!!!#how to use tumblr#ask#my tutorials
9 notes
·
View notes
Text
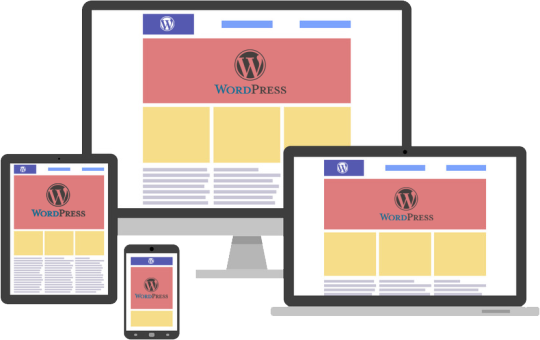
From Pixel to Perfection: Mastering the Art of PSD to WordPress | Xchop
Introduction to PSD to WordPress Conversion
In today's digital age, having a strong online presence is essential for businesses and individuals alike. One of the most popular and powerful platforms for creating and managing websites is WordPress. With its user-friendly interface and extensive customization options, WordPress has become the go-to choice for website development. However, if you have a unique design for your website created in Photoshop (PSD) format, you need to convert it into a WordPress theme. This process is known as PSD to WordPress conversion, and it allows you to bring your design to life on the web. In this article, we will guide you through the steps involved in mastering the art of PSD to WordPress conversion.
Understanding the Benefits of Converting PSD to WordPress
Before diving into the technicalities of PSD to WordPress conversion, it's important to understand why it is a beneficial approach. Converting your PSD design to WordPress offers several advantages. Firstly, it provides you with a responsive and mobile-friendly website. With the increasing use of smartphones and tablets, having a website that adapts to different screen sizes is crucial. WordPress themes are designed to be responsive, ensuring that your website looks great on any device.
Secondly, converting PSD to WordPress allows for easy content management. With the intuitive WordPress dashboard, you can easily update and modify your website's content without any coding knowledge. This flexibility empowers you to keep your website up-to-date with fresh content, resulting in better user engagement and search engine rankings.
Step-by-Step Guide to Converting PSD to WordPress
Now that we understand the benefits, let's dive into the step-by-step process of converting PSD to WordPress. The first step is to slice your PSD design into individual image assets. This involves separating different elements like the header, footer, menus, and content sections. Once you have the images ready, you need to convert them into HTML and CSS code. This step involves coding the structure, layout, and styling of your website using web technologies like HTML, CSS, and JavaScript.
Next, you need to integrate the HTML and CSS code into a WordPress theme. This is done by converting the static HTML and CSS files into a dynamic WordPress theme structure. You will need to create PHP template files and add WordPress-specific tags and functions to make your theme compatible with WordPress.
Choosing the Right Tools and Resources for PSD to WordPress Conversion
To ensure a smooth and efficient PSD to WordPress conversion process, it is important to choose the right tools and resources. There are several tools available that can simplify the conversion process. For slicing the PSD design, you can use tools like Adobe Photoshop or Sketch. These tools allow you to export individual image assets from your design.
For coding the HTML and CSS, you can use popular text editors like Sublime Text or Visual Studio Code. These editors provide syntax highlighting, auto-completion, and other features to streamline your coding workflow. Additionally, there are online resources and tutorials available that can help you learn and understand the intricacies of PSD to WordPress conversion.
Customizing the WordPress Theme with Elementor
Once you have converted your PSD design into a WordPress theme, you can further enhance the customization options using popular page builders like Elementor. Elementor is a powerful drag-and-drop page builder that allows you to visually design your website without any coding knowledge. With its extensive library of pre-designed templates and elements, you can easily create stunning and unique layouts for your website. Elementor also offers advanced features like animation effects, responsive editing, and WooCommerce integration, making it a versatile tool for customizing your WordPress theme.
Enhancing Your WordPress Website with Divi Theme
Another popular option for customizing your WordPress theme is the Divi theme. Divi is a multipurpose WordPress theme that comes with a built-in visual page builder. With its intuitive interface and extensive customization options, Divi allows you to create stunning and professional websites. It offers a wide range of pre-designed templates, layout options, and modules that can be easily customized to match your design requirements. Divi also provides advanced features like split testing, global elements, and responsive editing, making it a powerful tool for enhancing your WordPress website.
Creating a Custom WordPress Theme from Scratch
While using pre-designed themes and page builders can be convenient, sometimes you may need a completely custom WordPress theme to meet your unique design requirements. In such cases, you can create a custom WordPress theme from scratch. This involves creating the necessary PHP files, adding the required WordPress tags and functions, and styling the theme using CSS. Although creating a custom WordPress theme requires advanced coding skills, it offers complete control over your website's design and functionality.
Utilizing WordPress with Advanced Custom Fields (ACF)
Another way to enhance your WordPress website is by using the Advanced Custom Fields (ACF) plugin. ACF allows you to add custom fields to your WordPress posts, pages, and custom post types. This gives you the flexibility to create custom content types and add additional data to your website. For example, you can add fields for testimonials, portfolios, or product specifications. ACF also provides an intuitive interface for managing and displaying the custom fields, making it a powerful tool for extending the functionality of your WordPress website.
Converting a Custom Design into a WordPress Website
In addition to converting PSD designs, you can also convert custom designs created in other design tools like Adobe XD or Sketch into a WordPress website. The process is similar to PSD to WordPress conversion, where you need to slice the design into individual assets and convert them into HTML and CSS code. Once you have the code ready, you can integrate it into a WordPress theme following the same steps mentioned earlier. This allows you to bring your custom design to life on the WordPress platform and take advantage of its powerful features and functionality.
Converting a Figma Design to WordPress
Figma is another popular design tool that allows you to create stunning web and mobile designs. If you have a design created in Figma and want to convert it into a WordPress website, the process is similar to converting PSD or custom designs. You need to export the design assets from Figma and convert them into HTML and CSS code. Once you have the code ready, you can integrate it into a WordPress theme and customize it further using WordPress plugins and page builders.
Best Practices for Successful PSD to WordPress Conversion
To ensure a successful PSD to WordPress conversion, it is important to follow best practices. Firstly, optimize your images for web by compressing them without compromising quality. This will ensure faster loading times for your website. Secondly, make your theme lightweight by removing unnecessary code and scripts. This will improve the performance and speed of your website. Thirdly, test your website on different devices and browsers to ensure compatibility and responsiveness. Finally, regularly update your WordPress theme, plugins, and core files to keep your website secure and up-to-date.
Conclusion
Mastering the art of PSD to WordPress conversion opens up a world of possibilities for creating stunning and functional websites. Whether you are a beginner or an experienced developer, the step-by-step guide provided in this article will help you navigate the complex process with ease. By understanding the benefits, choosing the right tools, and following best practices, you can convert your unique designs into fully functional WordPress websites. And if you need professional assistance, Xchop is a leading PSD to WordPress conversion service provider that can deliver high-quality custom WordPress themes tailored to your specifications. Don't miss out on the opportunities that PSD to WordPress conversion offers. Start converting your designs from pixel to perfection today!
More Info: https://www.xhtmlchop.com/
#wordpress#wordpressdesign#psd to wordpress#webdesign#figma to html#divitheme#ACF#wordpress elementor#webdevelopment#bootstrap#wordpress acf#web#website#xchop
0 notes
Text
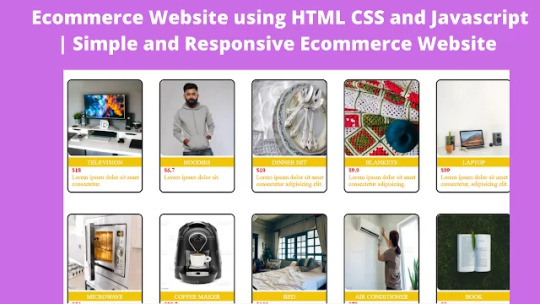
E-commerce Website Using HTML, CSS, and JavaScript (Source Code)
E-commerce Website Using HTML, CSS, and JavaScript
Hello Coder, In this article, we are going to create an e-commerce website using HTML, CSS, and JavaScript with source code. This is a simple e-commerce website that has a product slider with images, a product section with a product card, and all the necessary features that e-commerce websites have.
Dear Coders: Let’s explore how to create an E-commerce website source code using HTML, CSS, and JavaScript. We use HTML code to build the foundation of an e-commerce website, and CSS code to style it. Every code is discussed in depth. Next, we leverage certain functionality from an e-commerce website, and to do this, we write JavaScript code.
What is an E-commerce Website?
An e-commerce website is an online or digital shopping complex from which users can order different types of items from the comfort of their homes. These online shopping websites let you select clothing 24/7, from electronics to food items; all things can be delivered to their homes.
What are the benefits of an E-commerce Website?
The benefits of an E-commerce website are:
24×7 customer support
Different payment methods.
Fully return policy.
Delivery all over the world.
It’s time to move to your e-commerce website if you’re becoming tired of buying on Amazon, Flipkart, or any other e-commerce website and want to try something different.
100+ HTML,CSS and JavaScript Projects With Source Code ( Beginners to Advanced)
Hey, wait one second, you do not have your own website? Don’t feel bad; I am here to help you learn. How to build an e-commerce website, so stay connected to the blog till the end. Once you have your e-commerce website, do shopping as much as you want.
Video Tutorial Of E-commerce Website Source Code:-
youtube
Let’s have a look at the website’s appearance before going into the process used to create it. You can browse my elegant online store.
Live Preview Online E-commerce Website Source Code:- Here you can check it.
After viewing my responsive e-commerce website plan, you likely already have an idea for your own website.
Ecommerce Website Code
The following skills are necessary for creating this webpage. They are the essential components you should possess for creating an e-commerce website:
1. HTML. 2. CSS. 3. Javascript(Basics).
HTML Code For E-commerce Website:-
The Skelton system (the frame/structure of bones) of the human body gives a structure/layout to the human body. Similarly, HTML code does the same it gives the layout of the websites.
Don’t worry you don’t need any biological knowledge for this website.
Restaurant Website Using HTML and CSS
Every webpage has three main sections:- 1.Header(Navigation bar/menu/logo,etc.) 2.Main section(main content). 3. Footer.
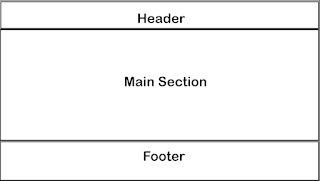
1. Header:-
Below there is a picture of the navigation bar which contains the brand name/logo, search bar, and menu items, this all comes under the header.

1. In the header section, firstly make three divs. One for the logo, the second for the search bar, and the third for menu lists.
In the second class, I used the search icon I have imported through Ionicon, for any type of icon used in website development you can use it.
Gym Website Using HTML and CSS With Source Code
Input is a tag used for many purposes like checkboxes, radio, email input, date, time, and others. But here we are using for search bar so type is text. For more ideas, you can refer to our other blogs.
As our website should be Responsive(A Responsive website is automatically adjusted for different screen sizes and viewports.)
For Example:-Blogger website is also responsive you can easily use comfortably it on a phone(small screens) and PC(big-sized screens).
So when we are using the website there is a problem that it is not able to show all the menu lists on the navbar. Finally, we decided to make a button-operated menu list. So when you click on the menu icon It will open into a menu list which you can see in the next image.
10+ HTML CSS Projects For Beginners (Source Code)

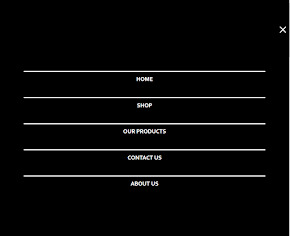
ou have seen how will solve the problem but now it’s time to code. Add a menu class in which a close icon you can see in the above image and also add a menu icon in the heading1 class.
2. Section:-
Section portion which mainly contains the content of a website is divided section mainly into two portions:-
section1 which contains an image-slider contains images. Section 2 which contains the container class contains different items.

Use the image tag to add various images to the image slider. Add a container named “class” inside Section 2 so that it inserts things named “classes” on your website as many times as you like. Add the item name, item price, item image, and item data classes to every item. You can also add one more category if you’d like.
read more and get complete source code
full credit follow us @codewithrandom
follow me @geekscoder.52
0 notes
Note
hiii how do you start a blog??? i reallyyyy wanna post my writing but idk how to start.... like formatting a blog making a pinned doing a layout idk what im doing😭 sorry if this is random for me to ask
Hey there! ❤️ Not too random to ask someone who's constantly setting up new blogs for fun and rarely using them 😭 ✋🏼 now take this all w/ a grain of salt but fr feel free to drop by/share your stories w/ me when you post them and come back if you need more help!!
So let me try to hit the points you addressed!
Formatting a blog:
Definitely have a profile picture! This is your "face" on Tumblr ~
Headers are a ton of fun. You can basically do whatever you want with them - hide, stretch, use your profile picture, or create something of your own (I would not suggest taking someone's gif or something they created unless you have permission 🙏) If you want something fancy, feel free to ask someone (but check their guidelines first ofc)
I would suggest enabling a custom theme under your blog settings if you want to format the web browser/desktop version of your blog (https://[url].tumblr.com is different from the "dashboard/mobile" view found on https://tumblr.com/[url]). This can only be done in the web browser/desktop version of blog settings (and can be important for your description later)
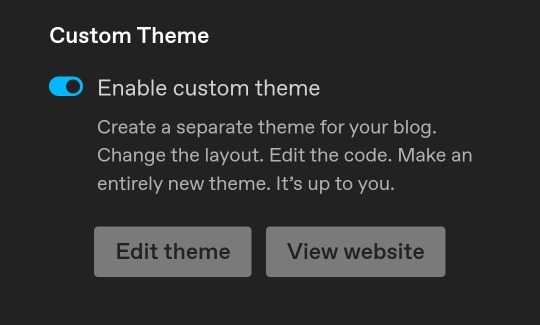
^ Confusing, I know! If you have more questions lmk, it's sort of not necessary but it's fun for me to customize 😂
You can find lots of tumblr themes to customize from the tumblr store or if you'd like you can get codes here too.
Making a pinned:
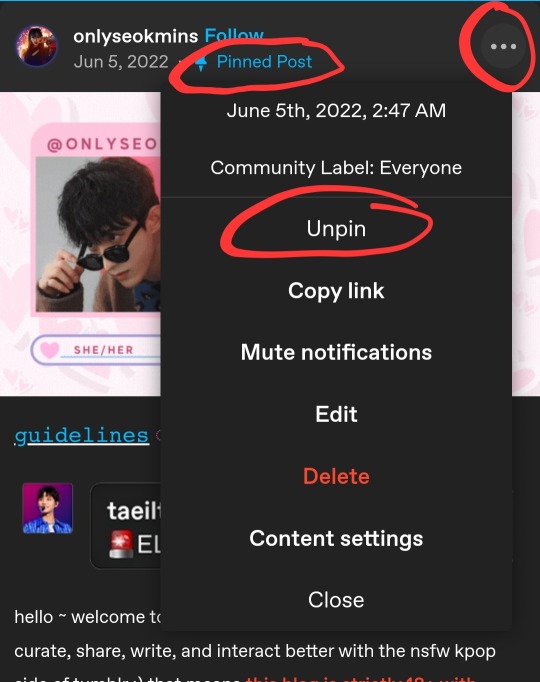
You can make any post a pinned post but only one can be pinned at a time.
Cheat: I have a habit of editing old posts that have 0 notes and/or one of my first posts and using it as I like 💀
Pinned posts can obviously contain whatever you want! Songs, funny quote, or a more detailed intro post - and can be changed any time!
Layout of your blog:
This is where creativity comes in lol! Try not to copy someone else if you can, totally cool if you're inspired but I've def seen a lot of people mimic others and it's just 😔
For example, ig you could say my layout/theme is based off a "streamer" concept lol. Some people keep it simple, some people just do whatever. Good news is you can always change it at your preference!
Honestly it doesn't matter how simple or fancy it is, I think as long as it's easy to navigate, you can do whatever.
Things I suggest to have somewhere on your blog:
Masterlist: a list of links to all your stories
Guidelines: don't be afraid to refer people to these!!
Intro: can be basic but be sure to tell a bit about yourself so ppl can interact with you
^ these can be linked in your description (code example below) and/or a pinned post
Tag navigation: (optional) much better than tumblr's featured tags option imho but if you use a specific tag for certain content/posts, make use of that!

Okay so tumblr is a hellsite but it has a TON of features and things you can do with it if you want. You do need to know some html coding but thankfully it's pretty straightforward and there are a lot of resources out there. I think html is still only editable on web browser/desktop version of tumblr. So you're best bet is to hit the edit theme button below (back to what we talked abt before 😂)
I'm horrible at tutorials btw. And helping people 💀 but fr I love setting up blogs so pls feel free to hmu more! I'm looking forward to another writer in the community! ❤️
1 note
·
View note
Text
How Useful is HTML?
HTML, or HyperText Markup Language, is the foundation of the web. It is a markup language that is used to create and structure web pages. HTML is used to define the content of a web page, such as text, images, and links. It is also used to control the layout and formatting of a web page.
HTML is a very useful language for anyone who wants to create or maintain web pages. It is a relatively easy language to learn, and there are many resources available online to help you get started. HTML is also a versatile language that can be used to create a wide variety of web pages.
Here are some of the benefits of learning HTML:
It is a basic skill that is essential for anyone who wants to work in web development. HTML is the foundation of web development, so it is a necessary skill for anyone who wants to create or maintain web pages.
It is a relatively easy language to learn, even for beginners. HTML is a simple language that uses a limited set of tags to define the content and structure of a web page. There are many tutorials and resources available online that can help you learn HTML.
There are many resources available online to help you learn HTML. There are many websites, tutorials, and books that can help you learn HTML. You can also find many online communities where you can ask questions and get help from other HTML learners.
HTML is used by all major web browsers, so your web pages will be accessible to everyone. HTML is a standard language that is supported by all major web browsers. This means that your web pages will be accessible to everyone, regardless of the browser they are using.
HTML is a versatile language that can be used to create a variety of different web pages. HTML can be used to create a wide variety of web pages, from simple static pages to complex interactive applications.
If you are interested in creating your own web pages, or if you want to learn more about web development, then learning HTML is a great place to start. HTML is a powerful language that can be used to create a wide variety of web pages. With a little practice, you can learn how to create your own beautiful and functional web pages.
Here are some specific examples of how HTML is used:
To create the structure of a web page, such as the header, body, and footer. The <html> tag defines the beginning and end of an HTML document. The <head> tag contains information about the document, such as the title and the character encoding. The <body> tag contains the visible content of the document.
To add text, images, and other content to a web page. The <p> tag creates a paragraph. The <img> tag inserts an image into a web page. The <a> tag creates a link to another web page.
To create links to other web pages. The <a> tag creates a link to another web page. The href attribute of the <a> tag specifies the URL of the linked page.
To format the appearance of a web page, such as the font, size, and color of text. The <font> tag specifies the font, size, and color of text. The <style> tag is used to define custom CSS styles for a web page.
To create forms that users can fill out. The <form> tag creates a form. The input tag is used to create different types of form controls, such as text boxes, radio buttons, and check boxes.
To create tables that display data. The <table> tag creates a table. The <tr> tag creates a row in a table. The <td> tag creates a cell in a table.
These are just a few examples of how HTML is used. With a little practice, you can learn how to use HTML to create your own beautiful and functional web pages.
If You Wanna Learn HTML from scratch you can visit these site that i prefer:
e-Tuition
w3school
vedantu
coding ninjas
0 notes