#netgear wireless range extender setup
Explore tagged Tumblr posts
Visit Tumblr Blog
Explore Tumblr blogs with no restrictions, modern design and the best experience.
Last Seen Tumblr Blogs


Fun Fact
25% of US internet users with an annual income of $80-100K use Tumblr.
Text
Netgear Wifi Extender Setup

"Netgear WiFi Extender Setup is simple: plug it in, connect to its network, and use the web browser setup guide or Netgear Genie app for easy configuration. Extend your WiFi coverage effortlessly."
1 note
·
View note
Text
192.168.1.250 Netgear Setup: A Beginner’s Guide
The netgear extenders are widely used by many of the networking users to create a reliable network. Netgear extender devices are known for their performance and stable network. Setting up the extender device is not a daunting task if you are aware of the setup process. In this article we are going to elaborate in detail how you can perform 192.168.1.250 Netgear Setup using the web. Web based setup method is the most reliable way to add the netgear extender into your existing network. Gather the important details and configure any model of netgear wireless range extender device. Scroll up the page and read the information till the last to boost up your network.
Unboxing The Extender
Unboxing the wireless range extender is the first step of the 192.168.1.250 Netgear Setup. In the box you will find an extender along with power adapter, user guide and ethernet cable (optional). You need all such items for the setup process. In addition to these items you also need host router network details, working internet connection, electric power socket, and computer/ laptop device.
Placement
Second step is placement of the device. Proxy placement is needed for the setup. Put the device closer as possible. Also there is no signal interface closer to the router & extender device.
Boot Up
Next step of the process is boot up. For booting up you have to use the power adapter you got with the extender. In case your device is a wall plug compact design device then you have to directly connect it with a wall outlet. Boot process might take around 1 to 2 minutes. Before proceeding further towards 192.168.1.250 Netgear Setup using the web, wait for LED lights to stabilize.
Connect To Extender Network
Step ahead and connect the extender device to the client device using any of the given methods:
Ethernet: Use the ethernet cord you got with the range extender and connect the extender with the client device. Inject the cord’s one end into the ethernet port of the extender and other in the client device ethernet port. Make sure the connection is secured.
Wireless: Using the wireless network of ethernet you can establish a connection. Check out the device label to know the default SSID & password. Use your client device and run a scan for available wireless networks. Enter the details and connect the devices.
Access 192.168.1.250 Netgear Setup Page
Now you have to access 192.160.1.250 netgear setup page by follow the given steps:
Launch google chrome or any other similar browser.
Thereafter, mention 192.168.1.250 IP in the URL bar.
A new page appears where you have to provide default information.
Enter admin and password in the fields.
Further press login and netgear installation assistant will guide you.
Configure Extender
Once you get access to the configuration page, choose the language first and then your router’s network name. Choose next and enter the password on the screen. Further click on connect option and then next.
Secure Network
Now you have to secure the wireless network by creating an SSID & password for your extender network. Also make changes in the admin account user details. This step is important to keep your existing network secure.
Update Firmware
Afterwards, you need to look for the firmware version. In case the firmware is outdated then you should install the latest version. For installation you can opt for an online update option and follow the prompts. You can update the firmware manually also by downloading it from the official portal of netgear.
Finalize Setup
Finalize the setup by choosing the submit button once you made all the important changes in the network. Review the changes you made to verify every step. Note down the extender security details you have created and keep them secure. Submit the changes and then you can step further to reposition the device.
Reposition The Extender
Repositioning the extender is a very important step to optimize the network performance. Unplug the extender from the proxy position. Search for a midway position (from the router and the area where the dead spot was). Then plug it in again to the power at the new position. Wait for the device to boot up and monitor the router LED on your extender device. If it’s green then the position is perfect. On the contrary if it turns amber or red then relocate it.
Test New Network
Lastly, test the new network using a wireless handset. Using the new SSID & password connect the device with the extender network and browse, stream or play online to check speed.
Conclusion
Lastly, I would like to rest my words by saying that the 192.168.1.250 Netgear Setup process is a super easy task. By following the above mentioned step by step breakdown of the extender setup process, anyone can configure the extender easily without a tech expert. Setting up an extender device will boost your existing network signal strength and terminate the dead spots from your home or office area.
2 notes
·
View notes
Text
What to Do When 'mywifiext.net' Refuses to Connect?
If mywifiext.net refused to connect then, this happens when there is a power outage, wrong admin credentials, browser issues, network interruptions, and more. To fix this, ensure to have an adequate power supply, enter the correct login details, fix the browser issues, and remove the network obstacles. To know more troubleshooting steps regarding the same, reach us here freely!
0 notes
Text
Wi-fi Antanna In Chennai
WiFi antennas in India come in various types and are used to extend the range and improve the signal strength of wireless networks. Here’s an overview of some common WiFi antenna types available in India and their typical uses:
Types of WiFi Antennas
Omnidirectional Antennas
Description: These antennas radiate signals in all directions (360 degrees horizontally).
Use Cases: Ideal for general-purpose WiFi coverage in homes, offices, and small outdoor areas.
Directional Antennas
Description: These antennas focus the signal in a specific direction, providing longer range and better performance in that direction.
Use Cases: Used for point-to-point connections, such as between buildings or for targeted coverage in large open areas.
Yagi Antennas
Description: A type of directional antenna with a high gain, often used for long-distance communications.
Use Cases: Suitable for rural areas where the WiFi source is far from the user, such as connecting to distant WiFi hotspots.
Parabolic Grid Antennas
Description: These antennas have a parabolic shape, providing very high directional gain.
Use Cases: Used for very long-distance point-to-point links, often in combination with outdoor WiFi systems.
Panel Antennas
Description: Flat antennas that can be mounted on walls or poles, offering moderate to high gain.
Use Cases: Ideal for point-to-multipoint setups, covering a specific area with stronger signal.
Popular Brands and Models in India
TP-Link
Models: TP-Link TL-ANT2408C (omnidirectional), TP-Link TL-ANT2415D (directional)
Known for: Reliability and good performance for home and small business use.
Ubiquiti
Models: Ubiquiti NanoStation (directional), Ubiquiti AirGrid (parabolic)
Known for: High-performance antennas suitable for professional and enterprise use.
Netgear
Models: Netgear AC1200 WiFi Range Extender (includes antennas for extended range)
Known for: Easy-to-use solutions for home and small office networks.
D-Link
Models: D-Link ANT24–0700 (omnidirectional), D-Link ANT24–2100 (directional)
Known for: Affordable and effective WiFi solutions.
Buying Considerations
Range and Gain
Higher gain antennas provide better range but may have a narrower coverage area.
Consider the environment (indoor vs. outdoor) and the distance you need to cover.
Compatibility
Ensure the antenna is compatible with your router or access point.
Check for connectors (RP-SMA, N-Type) and ensure they match your equipment.
Usage Environment
Indoor antennas are typically less rugged than outdoor models.
For outdoor use, look for weatherproof and durable designs.
Regulations
Be aware of local regulations regarding the use of high-gain antennas and frequency bands.
Where to Buy
Online Retailers: Amazon India, Flipkart, Snapdeal, etc.
Electronics Stores: Reliance Digital, Croma, Vijay Sales, etc.
Specialized IT Shops: Local computer and networking equipment stores.
Tips for Optimal Use
Position antennas in a central location for omnidirectional coverage.
Elevate antennas to reduce obstructions and improve line-of-sight.
Use quality cables and connectors to minimize signal loss.
By considering these factors, you can choose the right WiFi antenna to improve your network’s performance in India.
#UWB antenna in India#RFID antenna in India#IoT antenna in India#SMD antenna in India#GPS antenna in India#Antenna design in India#Antenna simulations in India#Chip antenna in India
0 notes
Text
Netgear wireless extender login
The Netgear wireless extender login is a crucial step in enhancing and optimizing your home or office network. Designed to boost the existing Wi-Fi signal range, Netgear extenders require a seamless setup process, and the login interface serves as the gateway to configuration. To initiate this process, connect your extender to a power source and access its default network using a device like a computer or smartphone. Once connected, open a web browser and enter the default login web address or the extender's IP address. This prompts the Netgear extender login page, where users input their credentials, typically a username and password. After successful authentication, users gain access to the extender's settings, enabling them to customize network parameters, update firmware, and optimize performance. A user-friendly interface ensures a smooth Netgear wireless extender login experience, empowering individuals to tailor their network extension according to specific needs and preferences.
#Netgear wireless extender login#Netgear extender setup#netgear wifi extender setup#netgear extender set up#netgear extender setup wizard#netgear extender not working#wifi extender login netgear#netgear wireless extender login
1 note
·
View note
Text
"Boosting Signals: Unveiling the Advancements and Opportunities in Wi-Fi Range Extender Devices for Improved Internet Access."
The Wi-Fi Range Extender Market involves devices designed to expand the coverage area of wireless networks by amplifying and rebroadcasting Wi-Fi signals. Wi-Fi range extenders are commonly used in homes, offices, and public spaces to improve wireless connectivity and eliminate dead zones, allowing users to access the internet from farther distances or areas with weak Wi-Fi signals.
The Wi-Fi Range Extender Market is driven by the increasing demand for seamless and reliable Wi-Fi connectivity, the proliferation of smart devices, and the growing need for extended wireless coverage in homes and workplaces.
📚𝐃𝐨𝐰𝐧𝐥𝐨𝐚𝐝 𝐒𝐚𝐦𝐩𝐥𝐞 𝐏𝐚𝐠𝐞𝐬 - https://introspectivemarketresearch.com/request/16623

Rising Demand for Seamless Wi-Fi Connectivity :
A primary driver for the Wi-Fi Range Extender Market is the rising demand for seamless Wi-Fi connectivity, driven by the growing reliance on wireless devices for work, entertainment, and communication.
As consumers and businesses adopt more smart devices, streaming services, and online applications, there is an increasing need for robust and uninterrupted Wi-Fi coverage throughout indoor and outdoor spaces. Wi-Fi range extenders address this demand by enhancing signal strength, improving network stability, and providing consistent connectivity across larger areas, enabling users to enjoy high-speed internet access without disruptions or connectivity issues.
Segments Covered :
By Type
Indoor Wi-Fi
Outdoor Wi-Fi
By Product
EXTENDERS AND REPEATERS
ACCESS POINTS
ANTENNAS
By Standard Network
802.11AC
802.11N
802.11AX
By Frequency
Single-Band
Dual-Band
Tri-Band
Band
By Sales Channel
E-Commerce
Retail Stores
By End User
Residential
Commercial
Industrial
Integration of Mesh Networking Technology :
An attractive market opportunity lies in the integration of mesh networking technology into Wi-Fi range extenders, offering scalable and efficient solutions for extended wireless coverage in homes and businesses. Mesh Wi-Fi systems consist of multiple nodes or access points that work together to create a unified network, eliminating dead zones and optimizing signal distribution throughout the coverage area.
By incorporating mesh networking technology into range extenders, manufacturers can offer users seamless roaming capabilities, self-optimizing networks, and simplified setup and management, providing a superior Wi-Fi experience for users in diverse environments.
𝐈𝐧𝐪𝐮𝐢𝐫𝐞 𝐁𝐞𝐟𝐨𝐫𝐞 𝐁𝐮𝐲𝐢𝐧𝐠 : https://introspectivemarketresearch.com/inquiry/16623
Wi-Fi Range Extender Market Top Key Players :
NETGEAR INC. (U.S.)
CISCO SYSTEMS INC. (U.S.)
LINKSYS GROUP INC. (U.S.)
TRENDNET, INC. (U.S.)
MIKROTIK (US.)
UBIQUITI NETWORKS (U.S.)
ARUBA NETWORKS (HEWLETT PACKARD ENTERPRISE DEVELOPMENT LP) (U.S.)
BRITISH TELECOMMUNICATIONS (BT) (UNITED KINGDOM)
AMPLIFI (NEW YORK)
ASUS (TAIWAN)
TENDA (CHINA)
EDIMAX (TAIWAN)
ZYXEL (TAIWAN)
About us :
Introspective Market Research (introspectivemarketresearch.com) is a visionary research consulting firm dedicated to assist our clients grow and have a successful impact on the market. Our team at IMR is ready to assist our clients flourish their business by offering strategies to gain success and monopoly in their respective fields. We are a global market research company, specialized in using big data and advanced analytics to show the bigger picture of the market trends. We help our clients to think differently and build better tomorrow for all of us. We are a technology-driven research company, we analyze extremely large sets of data to discover deeper insights and provide conclusive consulting. We not only provide intelligence solutions, but we help our clients in how they can achieve their goals.
Contact us:
Introspective Market Research
3001 S King Drive, Chicago, Illinois 60616
USA Ph no: +1-773-382-1049
Email : [email protected]
#Wi-Fi Range Extender Market#Wi-Fi Range Extender#Wi-Fi Range Extender Market size#Wi-Fi Range Extender Market share#Wi-Fi Range Extender Market trends#Wi-Fi Range Extender Market analysis
0 notes
Text
Mywifiext.net Login
Do you suffer from dead zones and weak Wi-Fi signal in your home? Worry no more! NETGEAR's Mywifiext.net login provides a simple and effective solution to extend your existing Wi-Fi network and eliminate those frustrating dead spots.
What is MyWifiext.net?
Mywifiext.net is a web interface used to configure and manage NETGEAR wireless range extenders. These devices seamlessly connect to your existing Wi-Fi network, amplifying its signal and extending its reach to previously unreachable corners of your home.
Benefits of Using Mywifiext.net:
Eliminate Dead Zones: Say goodbye to weak Wi-Fi signals and enjoy seamless connectivity throughout your home.
Boost Wi-Fi Range: Extend your existing network's coverage area, ensuring strong and reliable internet access even in remote rooms.
Improved Speed and Performance: Experience faster internet speeds and smoother online gaming, streaming, and video conferencing.
Simple and Easy Setup: The user-friendly Mywifiext.net interface makes setup a breeze, even for non-technical users.
Enhanced Security: Enjoy advanced security features that protect your network from unauthorized access.
How to Access Mywifiext.net:
Connect your device to the extender's network.
Open a web browser and type mywifiext.net in the address bar.
Enter the default login credentials (usually printed on the device's label).
Follow the on-screen instructions to complete the setup.
Troubleshooting Mywifiext.net:
If you're having trouble accessing Mywifiext.net or setting up your extender, here are some troubleshooting tips:
Check your network connection. Ensure your device is properly connected to the extender's network.
Verify your login credentials. Double-check your username and password and make sure they are correct.
Clear your browser cache and cookies. This can sometimes resolve connectivity issues.
Try using a different web browser.
Reset your extender to factory settings. This will erase all custom settings and restore the device to its default configuration.
Contact NETGEAR support for further assistance.
0 notes
Text
Quickly Add WPS Clients to Your Netgear Extender's WiFi

Adding a WPS (Wi-Fi Protected Setup) client to a Netgear range extender allows you to easily and securely connect devices like smartphones, tablets, and laptops to the extended Wi-Fi network. The WPS feature enables quick setup of protected wireless networks without having to enter long passwords.With most modern Wi-Fi devices having WPS capability, it provides a very convenient way to get clients connected to the range extender's SSID. The WPS exchange automatically negotiates the security, encrypts the connection, and joins the network without user intervention.
Conclusion
Adding a WPS client to a Netgear range extender provides a quick and easy way to connect devices to the extended wireless network. It eliminates the need to enter long WPA passphrases. With just a press of the WPS button, the client is securely connected. Just make sure your extender has WPS capability, the client device is WPS-enabled, firmware is updated, and the extender is powered on before starting the WPS process. Initiating WPS and allowing the negotiation to complete will establish the connection. Read the full article
#accesspoint#connecteddevices#encryption#extender#guide#howto#netgear#netgearrangeextender#networking#password#router#routers#security#tutorial#wifi#wifiextender#wifirangeextender#wireless#wirelessnetworking#wirelessroutersettings#wps#wpsclient
1 note
·
View note
Text
Netgear EX6400 setup
The Netgear EX6400 setup is the process of configuring and installing the Netgear EX6400 WiFi extender, a device designed to enhance and extend the coverage of an existing WiFi network. It is especially helpful in large houses or workplaces where the Wi-Fi signal could not fully cover every area.
Netgear EX6400 setup Using Web browser
Follow these steps for Netgear EX6400 setup through Web browser:
Plug in your Netgear EX6400 extender and wait for the green power LED to shine brightly.
Establish a connection between your device and the extender by utilizing an Ethernet cable.
Launch a web browser on your device.
Enter "mywifiext.net" into the address bar and hit Enter.
Access the system by employing your default login credentials.
Choose the WiFi network you wish to amplify.
Proceed by following the prompts displayed on the screen to finalize the setup.
We hope that by following the steps outlined above, you will be able to configure your Netgear EX6400 WiFi range extender. If you get stuck at any point, please contact our experts.
Netgear EX6400 setup Using WPS Method
Utilizing WPS represents the simplest method for setting up the Netgear EX6400 Extender. You can set up your Netgear EX6400 wifi range extender in just two minutes.
Follow these steps for Netgear EX6400 setup through WPS:
The power source should be connected to the Netgear EX6400 wifi extender.
Wait until the power LED transitions to a solid green light.
Note that the WPS setup for the Netgear EX6400 Wi-Fi extender works best when it's in close proximity to your router.
Begin by pressing the WPS button on the Netgear EX6400, followed by the corresponding button on your router.
This process will create a connection between the extender and your standard Wi-Fi network.
This is the procedure for establishing a connection to your existing internet using the WPS method.
Netgear EX6400 Extender Firmware Update
Firmware is a type of software that controls the internal operations of a device. In the case of a wifi range extender, the firmware controls the way the extender communicates with the router, the way it amplifies the wireless signal, and many other functionalities.
Steps to Update Firmware Of Netgear EX6400 extender :
Power up your Netgear EX6400 extender.
Connect a device to the extender.
Open a web browser and enter "192.168.1.250" in the address bar.
Log in with your username and password.
Navigate to the menu and choose "Firmware Update."
Select "Check Online" to determine if a newer firmware version is available.
If an update is available, click to update.
Your Netgear EX6400 extender's firmware is now up to date.
Common Issues during Netgear EX6400 setup
Mywifiext.com and mywfiext.net are no longer operational.
The WiFi extender is connected to the router, but there is no internet access.
I am unable to access mywifiext.local.
Mywifiext password is incorrect.
The WiFi extender is constantly disconnecting.
The WiFi extender is unable to connect to the network.
I forgot the default Netgear extender password.
Netgear EX6400 cannot be accessed.
The Netgear EX6400 is not operational.
EX6400 cannot be reset.
Troubleshooting Tips for Netgear EX6400 extender configuration
If you're experiencing issues with your extender and it's affecting your Wi-Fi device's performance, follow the troubleshooting steps provided below to quickly resolve the problems and have your EX6400 functioning optimally within minutes.
Verify whether your Netgear EX6400 extender is securely connected and receiving sufficient power.
A high-speed internet connection is required for your device.
Check that all of the wired connections are secure.
Keep your extender away from cordless phones, Bluetooth devices, metal objects, room corners, microwave ovens, and other devices that could interfere with your WiFi signal.
If mywifiext.net is not functioning, ensure that you have accurately entered the correct web address in your browser's address bar.
Check that your Netgear EX6400 is running the most recent firmware version. If not, update your device to the most recent version right away.
If the preceding troubleshooting suggestions prove ineffective, reset your extender to its factory default settings and then proceed with the reconfiguration process.
#Netgear EX6400 setup#Netgear EX6400 setup Using Web browser#Netgear EX6400 setup Using WPS Method#Netgear EX6400 Extender Firmware Update#Common Issues during Netgear EX6400 setup#Troubleshooting Tips for Netgear EX6400 extender configuration
1 note
·
View note
Text
WIFI
WiFi Repeaters: How WiFi Routers Improve Signal Strength 2023
WiFi is the answer to an escalating need for fast, reliable internet connections. The digital world has surrounded us with many gadgets that need continual communication. This is where wifi repeater help. These gadgets, often called WiFi extenders or boosters, amplify your WiFi signal and provide internet access to locations where your router cannot.
The concept of WiFi repeaters isn’t new, but its demand and application have grown exponentially in recent years. As we continue to add more wireless devices to our arsenal, the need for a strong, uninterrupted internet signal becomes more important. Therefore, understanding the role of WiFi repeaters holds the key to unlocking an efficient and effective wireless network.
Understanding how routers work as wifi repeater
The primary function of a router is to distribute the internet signal from your modem to your devices. However, routers can also double as WiFi repeaters or relayers. Your wireless signal can be strengthened by repeating it with routers.
A router repeater wirelessly connects to your network and rebroadcasts the signal. It amplifies your WiFi signal as a relay or bridge. This is especially helpful in larger homes or offices where the router’s signal may not reach every corner.

Benefits of using routers as WiFi relayers
There are a multitude of benefits to using routers as WiFi relays. Firstly, it provides better WiFi coverage. By extending the range of your WiFi signal, you can enjoy a strong internet connection even in the farthest corners of your home or office.
Second, routers may be cost-effective repeaters. Instead of buying a new router, use an old one as a repeater. Reusing and recycling equipment saves money.
Improved signal strength may boost internet speeds. While the repeater may be slower than the router, it will be far quicker than no connectivity.
A look at the best WiFi range extenders of 2015
In 2015, remarkable WiFi range extenders were released. The performance, functionality, and price of these gadgets were praised. The best WiFi range extenders of 2015 are below.
Due to its range and speed, the Opticover Wireless Range Extender was popular. It was easy to set up and compatible with most routers. The MSRM US754 WiFi Extender was another top-rated choice, known for its stable connection and user-friendly setup process.

How to set up your WiFi repeater
The procedure for setting up your WiFi repeater couldn’t be easier. Finding an appropriate spot for the repeater is the first step. Ideally, it would be midway between your router and the area you wish to cover.
The repeater must be connected to the system next. A web browser can usually access the repeater’s user interface and do these activities. In this area, provide the network’s SSID, encryption type, and password.
Differentiating between a WiFi booster, extender, and repeater
While the terms WiFi booster, extender, and repeater are often used interchangeably, there are slight differences between them. There are three devices available, each with its own method for extending the range and improving the strength of your WiFi signal.
An existing WiFi router may have its signal strength increased by using a WiFi booster. However, a WiFi extender is able to rebroadcast the WiFi signal from your router. WiFi repeaters are similar to extenders in that they both boost the signal and establish a new network. You’ll need to switch networks as you go, although the signal will be stronger at greater distances.
The Best WiFi Extenders of 2015: A Comparison
Comparing the best WiFi extenders of 2015, it’s clear that each device had its own unique strengths. The Opticover Wireless Range Extender offered excellent range and speed, while the MSRM US754 WiFi Extender was praised for its stable connection and easy setup.
The Netgear Nighthawk EX7000 Wi-Fi Range Extender stood out with its impressive speed and advanced features, although it was also the most expensive option. Ultimately, the best WiFi extender for you depends on your specific needs and budget.
WiFi Repeaters: How WiFi Routers Improve Signal Strength 2023
0 notes
Text
Netgear AC3000 Setup: Steps To Follow By Beginners
Netgear AC3000 is a networking device that offers a reliable network connection. Get buffer free internet with the netgear AC3000 setup. Add the device into your existing network to uplift the coverage and eliminate wireless dead zones. Even all persons who are new to networking can perform the setup easily. Step by step guide to configure netgear AC3000 device is sanctioned in this article, check the content further and uplift the home network.
Netgear AC3000 Setup Requirements
Netgear AC3000 devices can easily be set up if you have all the significant items.
Netgear AC3000 Wifi Extender
Ethernet Cable
Power Adapter
Electricity Outlet
Computer/ Laptop/ Smartphone
Netgear AC3000 Installation
Netgear AC3000 installation of the hardware device is super easy. You just have to perform the installation by follow the given steps:
Unbox your netgear AC3000 range extender device first. While unboxing, be sure the box contains ethernet cable, power adapter and user manual also along with the range extender.
Step forward towards the netgear AC3000 setup and start looking for a location.
Choose a position closer to the host router but not too far from the area where you were facing network problems.
A location where the device is able to receive the signals from the router and amplify it to eliminate network trouble is ideal.
Once an ideal location is found, keep the device and look for a nearby power socket to power up the device.
Use the power adapter to turn on the device and wait until it get booted completely.
LED lights get stable when bootup completes.
Step ahead and connect the device with the client device using ethernet cable or wireless network.
Wireless connection requires a wireless network name and password, on the contrary, wired methods need a working ethernet cord.
As the connection is done you may proceed to perform netgear AC3000 setup.
Netgear AC3000 Setup
Netgear AC3000 setup includes easy to follow process as specified:
Embark the netgear AC3000 setup process with the launch of a web browser of your choice.
Rush to the browser’s address bar, mention the default IP or web address “www.mywifiext.net”
On the keyboard connected to the laptop or computer, tap on the enter button to initiate the search.
As the setup page appears on the screen, get its access by entering the username and password in the shown field.
After mentioning the information hit on the login tab and web admin panel appears on the screen.
Netgear installation assistant will help you to complete the setup.
Prior to all choose the language, then change the admin account login details. Default login details may risk your network security.
Once you change the admin security, go to the link device option.
Now you need to search for the SSID of the host router device. Choose your network among all the available networks which you desire to extend.
After selection the screen will ask for the password of the main network with which you wish to connect the extender.
Now, enter the password and step ahead to create a new network name for your netgear ac3000 setup.
After deciding the network name, form a security key as well. Keeping the network secure is very important. While creating a security key you should create at least 8 character passwords.
Once you make changes in the wireless network security, remember to check for the firmware update.
Tap on the submit option at last to end the setup and then test it.
Netgear AC3000 Network Boost
To boost the network you have to perform a network test. This will help you know what exactly you should do to boost the network:
Check the network by using a smartphone, link it with the netgear extender network and browse the internet.
In case the coverage of the device network is weak as before in the area previously you were facing trouble then you need to relocate it.
Again search for the location and then test it again.
In case the device is not receiving proper signals from the router device then relocate it and put it closer to the router device.
Also you should check the firmware version of the extender. If required then update it.
Stepping ahead you need to boost the network by eliminating the nearby radio frequency device or heavy metal objects.
Conclusion
I would like to end my words by saying that the netgear AC3000 range extender device is perfect for the users to create a strong network. This device will eliminate wifi dead zones and offer signals to the location where the router's signals are hard to reach. Above available step by step breakdown of the setup process will help you in adding the device into the network very conveniently. Netgear AC3000 setup will change your online experience and enhance your working.
0 notes
Text
Ultimate Guide For Netgear Nighthawk X4 ac 2200 Setup Issue
Netgear Nighthawk X4 ac 2200 Setup is quite an easy and straightforward task. In this, you will get a step-by-step guide to do the same. If you are unable to find how to Netgear Nighthawk X4 ac 2200 Setup. Then you are at the right place, here you will learn how to do so. Netgear Nighthawk X4 ac 2200 is a WiFi range extender, that expands your existing WiFi range with speeds up to 2200 Mbps.
It also provides the most steady WiFi and the most instantaneous internet connection. But many users don’t know how to Netgear Nighthawk X4 ac 2200 Setup. And some of them find doing this difficult, especially, those who are non-technical. If you are one of them, then do not get upset. Below is the guide for Netgear Nighthawk X4 ac 2200 Setup. Simply go through the following instructions.
Step-by-Step Guide for Netgear Nighthawk X4 ac 2200 Setup
Netgear Nighthawk X4 ac 2200 Setup is not a complicated task as you think, it is more straightforward than you think. In this, you will get to know how to do this. With this, extender device, you can develop a better vigorous WiFi network at home. This is the most simple and effective way to extend the WiFi range of the router.
There are three methods through which you can easily Netgear Nighthawk X4 ac 2200 Setup. The first is through Netgear Installation Assistance, the second is through the WPS button, and the third is through Fastlane Technology.
Steps for Netgear the Nighthawk X4 ac 2200 Setup Via Installation Assistance
Doing this through the Netgear Installation Through is not a complicated task, it is simpler than you think. Follow the below instruction to do the same via the installation assistance.
Turn on your Nighthawk X4 ac 2200 by connecting it to the power outlet.
After this, place your wireless router near the extender.
Now you need to plug your Netgear extender into a power outlet.
Then wait for some seconds, until the extender LED light turns green.
Now you have to attach the extender to the router and launch the web browser in your system.
And then enter www.mywifiext.net in the search field, and you will see Netgear installation assistant on the screen.
After this, you have to follow the on-screen instructions and attach the Netgear extender to the existing network.
Now place your extender in the most suitable location.
If still, the connection is poor, then move the extender closer to your router, and try again. Do this, until you see the link status LED light turn white.
Once you have located the most acceptable location, then connect the other device to the extender.
Techniques for the Netgear Nighthawk X4 ac 2200 Setup through the WPS button
If you don’t want to Netgear Nighthawk X4 ac 2200 Setup through the Netgear Installation Assistance. Then here is another method to do the same, that is through the WPS button. To do this, you just need to read and follow all steps.
Turn on the WiFi extender, and place your extender close to the router in the same place.
Then plug in your Netgear WiFi extender into the power source, and wait until the power LED light on the extender turns green.
Now press the WPS on the extender, located on the rear or back side of it.
The white LED light on the Netgear Nighthawk X4 ac 2200 indicates a good connection between the router and the extender.
Now you can move your Netgear extender to a new location.
Try to place it in the location, where you have poor or weak WiFi coverage.
Ways for the Netgear Nighthawk X4 ac 2200 Setup Via FastLane Technology
Setup through FastLane Technology, allows you to enjoy maximum WiFi performance. Here are the steps to do the setup via the FastLane technology.
Firstly, connect your router to the Netgear Nighthawk X4 ac 2200.
After this, use any internet browser, and make sure that you use the latest version of your preferred browser.
After this, in the search field of the web browser, enter mywifiext.net.
Then the login page of the extender will appear, in this fill in your username and password and click on the login button.
Now when the Netgear Genie page appears, click on “Do More” and then on “FastLane.”
Then there are two options for users. The first option is, the device is connected to the extender at 2.4GHz.
And the second is, it is connected to the extender at 5 GHz, and the extender is connected to the router at 2.4 GHz.
You can choose according to your preference. And then click on the button to save the changes you made.
Binding Up
It is quite frustrating when you are unable to set up your Netgear Nighthawk X4 ac 2200. Follow the above instructions for the Netgear Nighthawk X4 ac 2200 Setup. And hopefully, this above guide will help you with the same. You just need to follow the above easy and detailed instructions as given to do the same.
Doing setups of the Netgear Nighthawk X4 ac 2200 extender is not a complicated task, it is simpler than you think. If you don’t know how to do this, then simply obey the above instructions. So, before seeking assistance from someone else, try to go through the techniques, that are given above for Netgear Nighthawk X4 ac 2200 Setup.
1 note
·
View note
Text
How to change mywifiext.net login password?
To secure your network, use the mywifiext.net login password change method. For this, open the web address, type mywifiext.net web address in the browser bar, and enter the admin credentials. You land on the smart Home dashboard of the router, visit the WiFi/Wireless Settings, edit the Passphrase Key/Password field, and follow instructions or visit us!
#mywifiext.net login password change#Netgear extender refused to connect#mywifiext.net not working#www.mywifiext.net#mywifiext.net login
0 notes
Text
Netgear EAX12 Setup
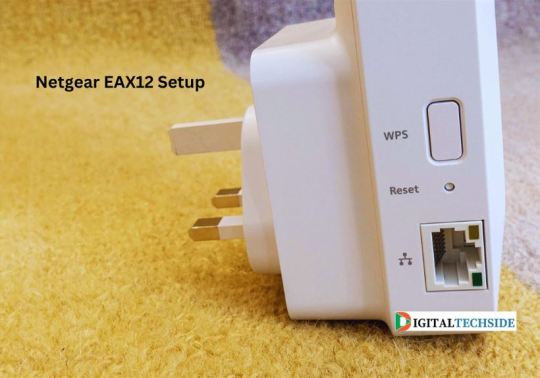
The Netgear EAX12 setup can be used to increase and broaden the coverage of an already-existing wireless network. The device easily integrates with your router to increase Wi-Fi signals in areas with weak signal strength, reducing dead zones and providing a better, more dependable connection. Thanks to its simple setup process and compatibility with leading router manufacturers, the Netgear EAX12 makes it simple to improve Wi-Fi coverage throughout your house or place of business. It is a useful and effective way to extend the reach of your wireless network because it is compatible with the latest Wi-Fi standards for maximum efficiency.
Setting up the Netgear Eax12 WiFi range extender
Here are the simple steps for the Netgear Eax12 WiFi range extender:
I am waiting for the Netgear EAX15 to switch on after inserting it into a power socket.
Connect your smartphone or laptop to the extender’s default Wi-Fi network using a Wi-Fi-capable device. Look for the password and network name (SSID) in the instructions or on the extension.
Open a web browser and enter the default IP address of the extender.
Enter the usual login credentials.
Login as admin Password: input the password, or skip it.
Follow the instructions on the screen to set up the extension.
After choosing the Wi-Fi network you want to grow, enter the password.
You have the option of creating a new ID and password for the larger system.
Link up your electronic devices.
Note: If you need any assistance regarding your Netgear EAX12 wifi extender, contact our technician or visit the official website, that is mywifiext.net setup
Read More:-
1 note
·
View note
Text
Netgear Range Extender Setup
If you are having a hard time while doing the Netgear Range Extender Setup, you do not have to worry about that anymore. You can easily do the setup once you are done connecting your devices using the wired method. For more instructions check out the information provided here.
1 note
·
View note