#paper basket tutorial
Explore tagged Tumblr posts
Visit Tumblr Blog
Explore Tumblr blogs with no restrictions, modern design and the best experience.
Last Seen Tumblr Blogs


Fun Fact
The Tumblr app for Google Glass was released on May 16, 2013.
Text
49 Clever DIY Organization Ideas for Your Home
Talking DIY organization ideas (for your home) today!
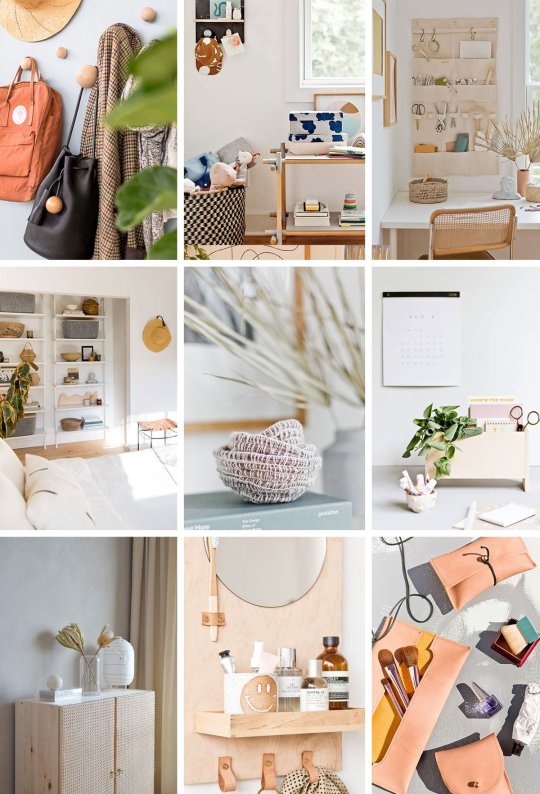
Over the break, I did a lot of organizing and reorganizing, and honestly it really cleared my mind. Sometimes you just need a clean slate to make the same old day-to-day feel new again. Or at least fresh…and clutter-free! So, I put together a whole lot of DIY organization ideas to get you started, if you need a little inspo for the season. Whether you’re on some deeper quest to gain control OR you really just want to organize your craft room, bedroom, bathroom, etc – this list has TONS of DIY organizing ideas! 49 of them to be exact. Bonus: Many of the projects (like most of them actually) utilize items you might already have in your home (or garage) that can be repurposed as something new. Creating more sustainable organizational systems, rather having to go out and buy a ton of bins, baskets, and storage things. Anyway, here are 49 home organization ideas that you can totally DIY – from clothing racks to hanging wall organizers, trays, decorative boxes, and jewelry stands!
49 DIY Organization Ideas for your Home
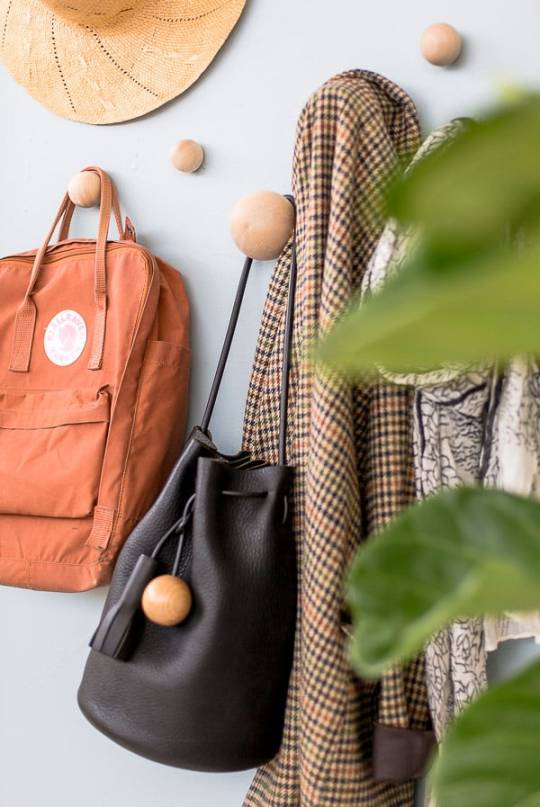
1. DIY wall hooks to organize your entryway (that don’t look like wall hooks). I love that these wall hooks just look like wood baubles on the wall when nothing is hanging on them. Kind of like jewelry for your walls. Plus, they’re great for tight spaces, since they don’t stick out very far.
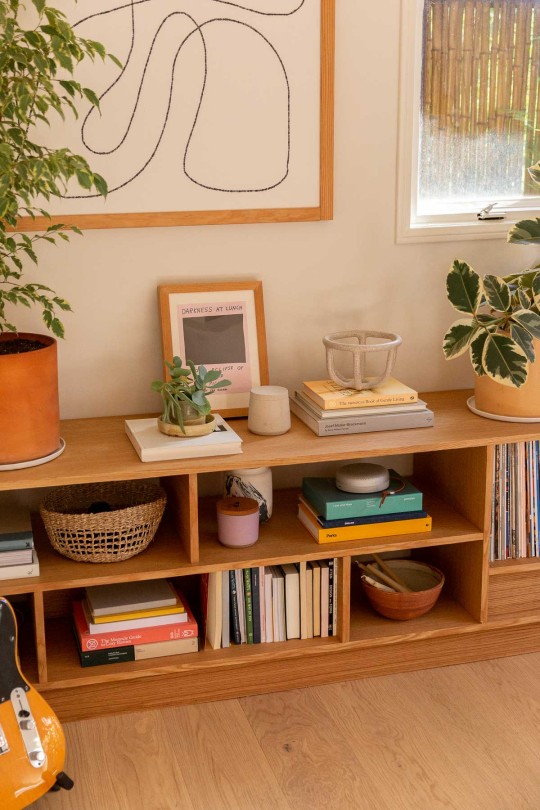
2. When it comes to organizing, there’s nothing better than a built in bookcase, for storing all of your extra housewares. This bookcase completely transformed this room. And helped us find a home for so many things that were previously in storage (or on the floor).
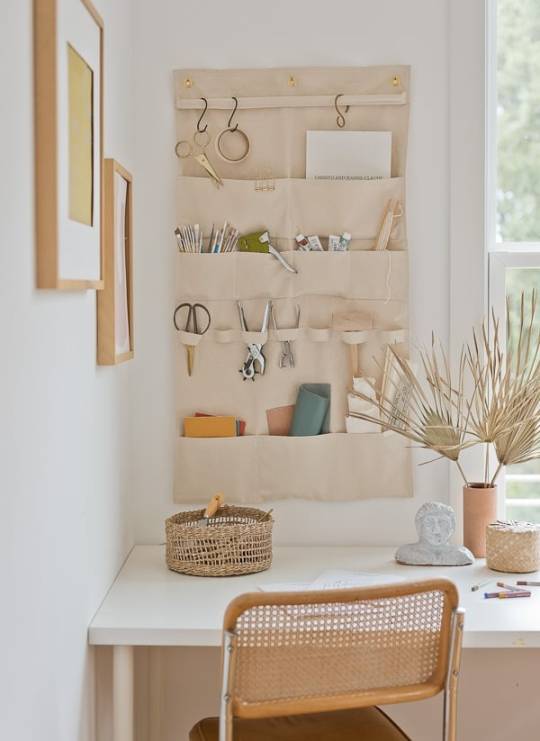
3. Need office organization? This DIY hanging wall organizer looks good AND keeps things organized – which can be a challenge in a craft room or office space. The thing I love most about this canvas organizer though is that you use it for so many other things too – from sorting mail to hanging hammers. I feel like this could work as a DIY closet organizer with a few modifications as well. Most recently, I started using mine in my son’s room as toy and book storage and it looks so cute! Bonus: You can customize the size of this wall organizer to suit your needs in any room of the house.
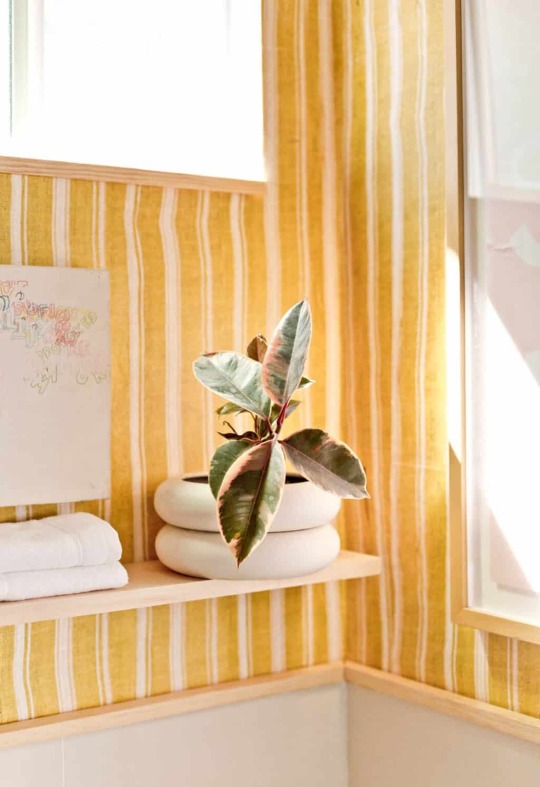
4. My yellow bathroom makeover has some clever little hacks for small spaces, including a way to make your own floating shelf in minutes!
5. If you’re looking for hall closet organization, I broke down exactly how I organized my entire hall closet in one hour. You gotta see the before. It was not pretty.
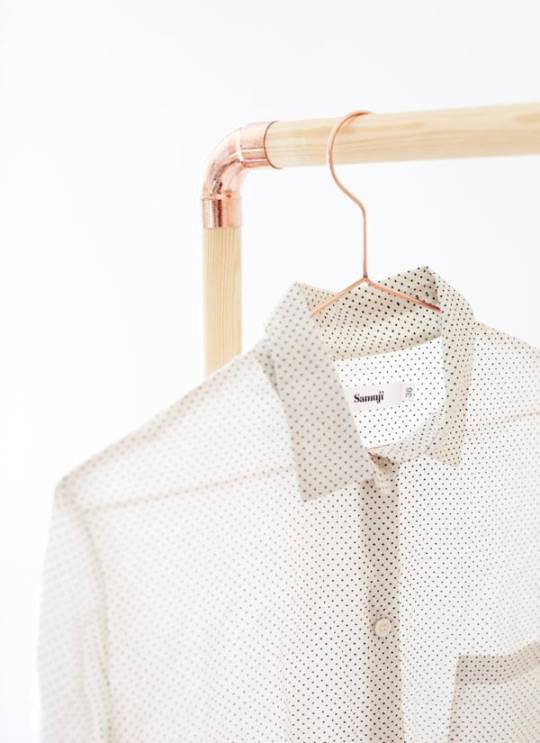
6. And speaking of a closet organizer… This clothing rack DIY from Weekday Carnival is great for extra clothes that don’t fit in the closet. And it would be a good option for a guest bedroom without a closet as well.
7. A drawstring pouch is perfect for storing / organizing small items, like jewelry and craft supplies. I have a tutorial for it, if you wanna make your own.
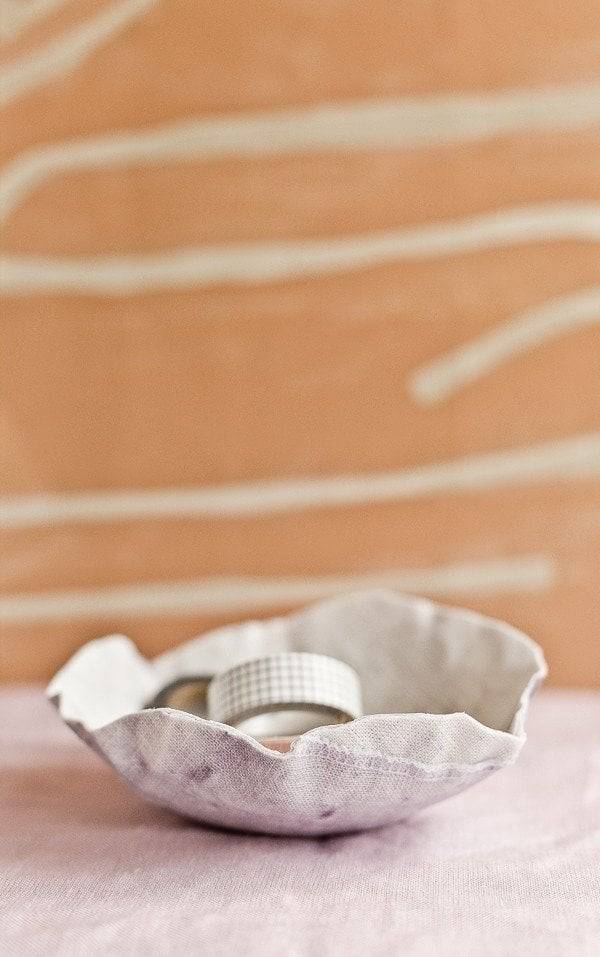
8. Will always include my DIY fabric paper mache bowls when talking about organizational ideas because they’re very easy to make, surprisingly very sturdy, and pretty unique.
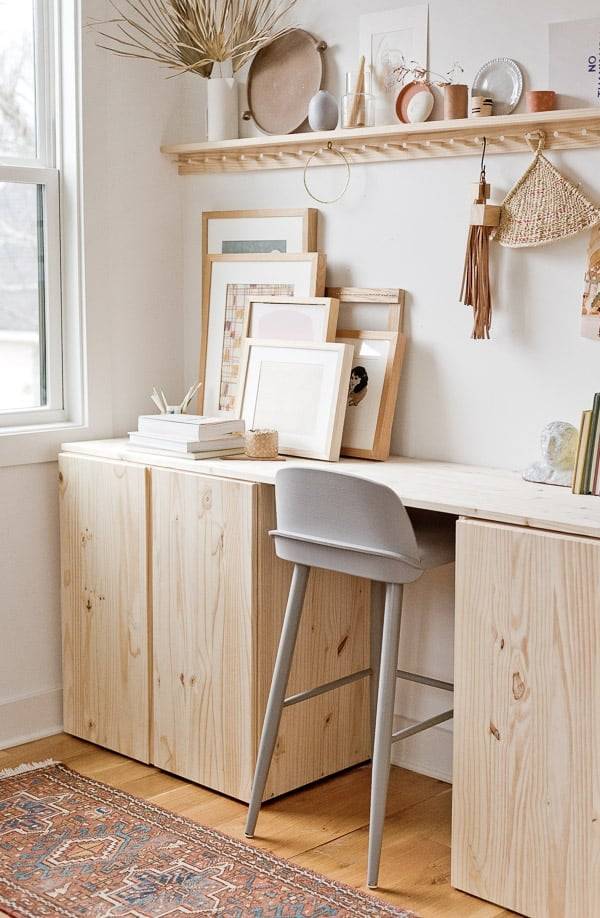
9. Maybe a DIY standing desk, with lots of storage, is more your thing? What I love most about this Ikea hack is the fact that the storage is closed, so you can be as messy as you want inside and no one will know. BUT of course, you’re not going to be messy….your going to be organized because that’s what this whole post in about. Right? Wink, wink!
10. And speaking of keeping those cabinets organized, you can turn old shoe boxes into really cute fabric organizer boxes. I use these exact ones in my desk cabinets and they work so well for receipts, scissors, markers, and other small(ish) items.

11. Reusable produce bags (these are another DIY idea) are handy for the grocery store, but you can also use that at home for pantry staples, closet organization, and more. Read the full article
11 notes
·
View notes
Text
Acorns, Chestnuts, and Pinecones (A KHR Flufftober fic)
Fandom: Katekyo Hitman Reborn Ship: Kyoko Sasagawa/ Haru Miura (9586) Word Count: 1,220 Prompt: Acorns, Chestnuts, and Pinecones Event Host: @flufftober
Acorns, chestnuts and pine cones were in abundance now with the season. Haru and Kyoko were excitedly gathering them up for Nana. "There will be plenty!" The girls called out and wrapped up in their jackets with buckets ready to gather everything they could.
"Kyoko-chan, we can gather some pine nuts too and roast them for the kids as a nice snack!" Haru called.
Kyoko smiled. "Yes and we can use peanut butter and bird seed with the pine cones to make bird feeders they can hang outside!"
A few hours later and their baskets were full, the girls carried them inside with pride. As Kyoko began sorting through what could be used and what couldn't of their collection, Haru got out a few lollipops and began wrapping the tops in white cloth and took a marker to make the eyes of a small ghost, it reminded her of the little rain dolls, teru teru bozu that were often hung to wish for sunny weather. They had a lot of craft ideas for the kids, however there were other items they'd collected that they weren't sure what to do with.
"Haru-chan, what about the acorns?" Kyoko asked, uncertain what to use them for.
"Oh we can roast them after we soak them and just salt them for a snack like peanuts." Haru loved cooking and could honestly figure out a way to cook almost anything if it was edible to begin with. Kyoko had a similar gift so allowing the two girls time in the kitchen would work wonders.
The acorns and pine cones dealt with, that just left the chestnuts then. Chestnuts were a different case, they weren't as edible as the rest. However they could be used for some easy and cute handmade decorations. It was craft time. Hot glue, chestnuts, and time were often the materials necessary for most of these. Which seemed simple enough to do a candle holder or wreathe by simply gluing them together in a circle and that should have been the end of it, right?
A quick search for some tutorials showed the girls one of the cutest ideas they could have come across and started gathering brushes and white paint. They could take the chestnuts and paint animal faces on them like owls and hedgehogs or any design they wanted to.
Supplies gathered, the girls called the kids in for a day of arts and crafts as Nana had made sandwiches for their snack, they would have plenty of energy to deal with the children. Or so they thought. Children were often more energetic than adults to begin with, and teens couldn't often handle them without their own help, hence why Gokudera and Tsuna were so bad with Lambo sometimes. Craft time was a fun activity for the children however a majority of the time crafts with children often resulted in messes and a minor injury if they were using scissors sometimes. Haru and Kyoko decided to cut out the paper pieces for faces and decoration just in case the kids wanted to do some, that way they could spare them the injuries. Now all they would have to do was possibly use the hot glue gun on some of the items for them to spare the little ones from getting burnt on accident.
However, they got another idea, that would require a little more work. They could take a wreathe base and glue the pine cones, chestnuts and acorns to them to make a decoration and glue a little ring or hook to the back so the kids could hang them up anywhere they wanted them to go. Supplies all gathered and crafts planned out, the girls prepared other snacks for the kids as well, making some sandwiches and juice for them as well as fresh fruit cut up for a healthy sweet.
"Lambo-chan, I-pin-chan!" The girls called for the younger kids to join them. It was honestly a perfect evening for them, crafts with the love of your life and the two kids you had grown so attached to through the time spent together. Haru and Kyoko actually had to thank Tsuna for this, they wouldn't have these precious moments if they hadn't met him. The more Haru thought about it, they all owed a lot to Tsuna, he was technically the glue that held them all together just like the little crafts they were making with the children.
The more Haru looked at the craft pieces, the more she realized it was kind of like the Vongola. They were all different pieces that you wouldn't think at first glance could mix together so well, but some creative imagination, patience and glue and it later became a handmade masterpiece.
They were technically a handmade masterpiece as well. Each member coming from a different background. Each member with a unique ability all their own and a different position in the Mafia, Gokudera the right hand, Kyoko and herself the support, Chrome and Mukuro the Mist, they all contributed their own part to the bigger picture and made something really beautiful even when the pieces didn't seem to mix so well at first like Hibari-san and Mukuro-san or Gokudera-kun and Yamamoto-kun. The boys clashed more often than it seemed, but they somehow still worked together effectively.
"Mwahaha! I, the great Lambo-san have completed my masterpiece!" Lambo shouted proudly and showed off a crooked wreathe with more glue than anything to it. Haru smiled and patted his head, he still gave it his best.
"Great job, Lambo-kun. We have to let it dry overnight, then we'll add the ribbon tomorrow so you can hang it." Haru congratulated him, placing the wreathe on a piece of newspaper so it could cool and the glue could dry.
"I-pin-chan, how's yours coming along?" Kyoko asked and smiled as she watched I-pin proudly hold up her wreathe, she had somehow arranged the pine cones in a shape that oddly resembled her Sensei Fon, who she dearly missed. Kyoko patted her head, "I think he'll love it."
Wreathes done and chestnuts roasted, there was only one thing left to do. They could make pine cone bird feeders using the remaining pine cones, peanut butter and some bird seed. Going to gather the seeds and peanut butter to prepare the feeders, Kyoko was in shock when she heard singing coming from the bag. Haru however just smiled as she recognized the song, it was the Namimori anthem. Hibird was in the bag eating the seeds, which meant they weren't alone, they were in the company of more friends than they thought as Hibird's presence meant one thing, Hibari had stopped by to check on the kids. Glancing at the chestnuts the kids had painted Haru smiled seeing a familiar hedgehog design on one of them. She looked over the others to see similar animal faces like Uri, Garyuu, Natsu, Mukurowl, the kids had taken their time and painted the box animals on the chestnuts as a special gift for each of the guys.
"Pine nuts are ready!" Haru called for the kids to come get their snack after she salted them. Love was also in abundance this season and it was evident in every brush stroke the children put into painting and carefully roasted snacks from the girls.
5 notes
·
View notes
Text
*momocore means Like Momo [me !!!!] if you r seeing this and Don't know me [what a funny idea !!! hiiiii] you r welcome to still vote and even look at my blog if you want... and if you want to ignore my poll that is okay too !!!!!
[i know Fundamentally the littles are more momocore but i only really looked at the main line !! this means no lala oopsies either... or ponies]
introductions to tha dolls and explanations under cut
🤍
Pillow Featherbed
Pillow is so sleepy !! me too girl i am always in bed… and i love wearing cute pyjamas and that is what Pillow is Always doing !! she is sewn from a baby’s blankie and i am a baby who loves blankies !!
🤍
Coral Sea Shells
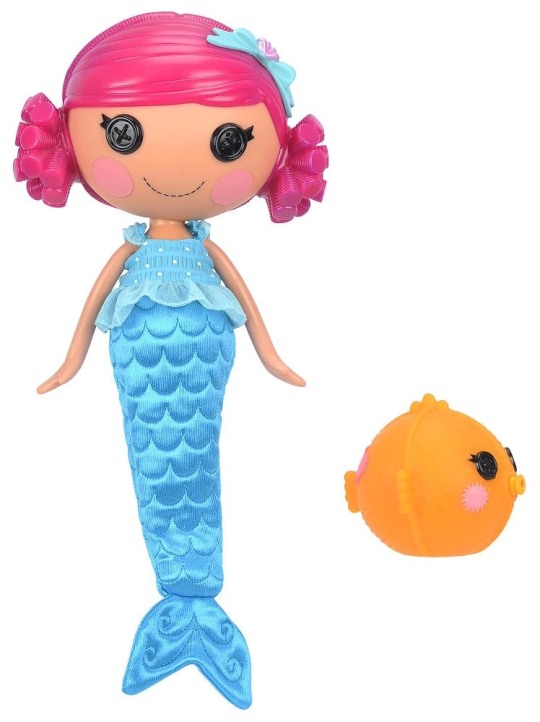
Coral wants to be a mermaid Really Really bad and honestly me too… they were my special interest as a kid and i am still so fond of them 🤍 when i was little i would fantasise about being a mermaid and wish for it at every opportunity i got and i even followed YouTube tutorials that said i could do it if i drank a lot of salt water…
🤍
Holly Sleighbells

Christmas is Holly’s favourite and it’s mine as well !! she tries really hard to be good and to make people happy and i also do this… and she loves making lists and wrapping presents and i love doing both of these things as well !!!
🤍
Pix E Flutters
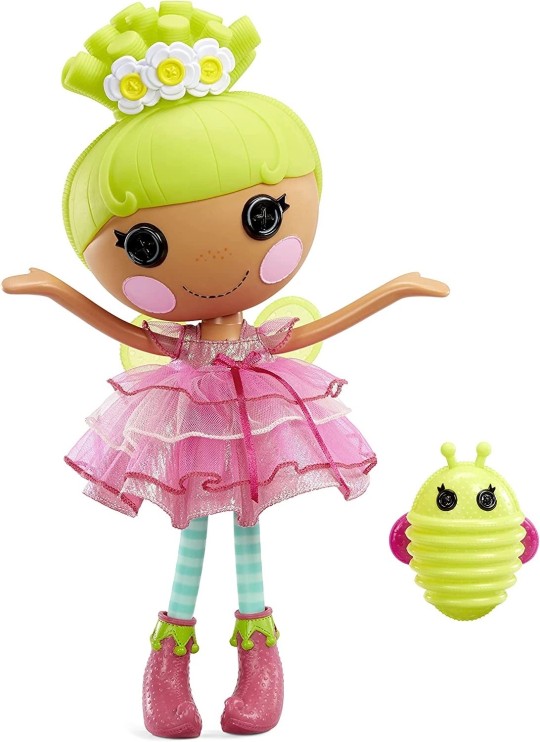
Pix E is a fairy and so am i a little !!! sometimes I use fae/faer pronouns… :o and !! Pix E is a wishful thinker like me and we both Specifically choose to be optimists 🤍 AND we both love glitter !!!
🤍
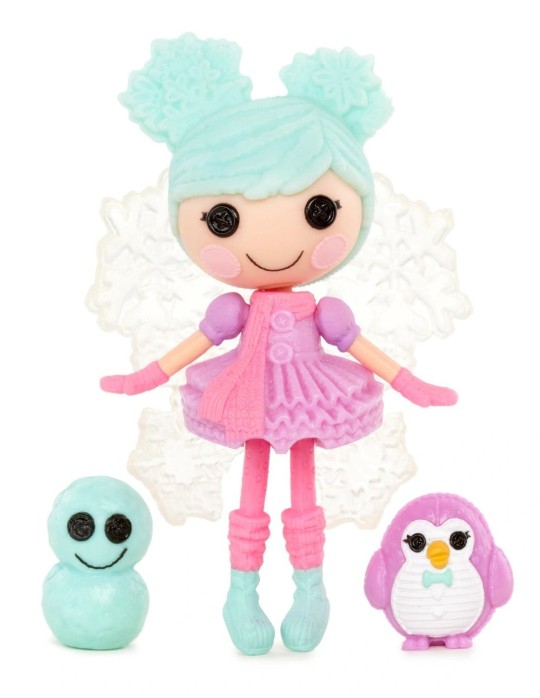
Ivory Ice Crystals
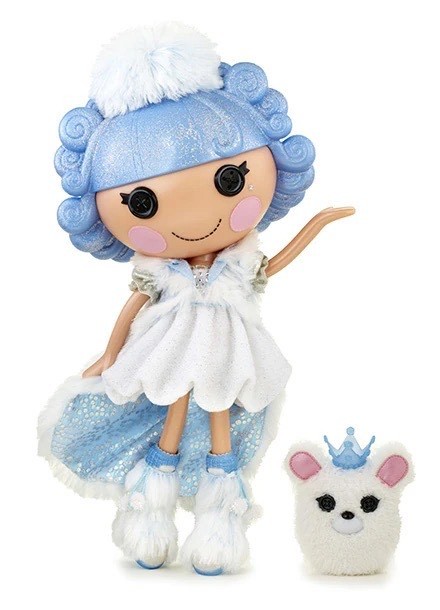
Ivory loves snow and so do i !!! And we are both very delicate and Also we both love doing little tedious activities… she makes icicle jewellery and i do things like making paper stars and diamond paintings and sometimes sewing ☆
🤍
Toasty Sweet Fluff
Toasty is very fluffy and a softy and i am too !!! we both love poofy dresses and baby animals and big squishy hugs :D and also her bunny is so incredibly momocore…
🤍
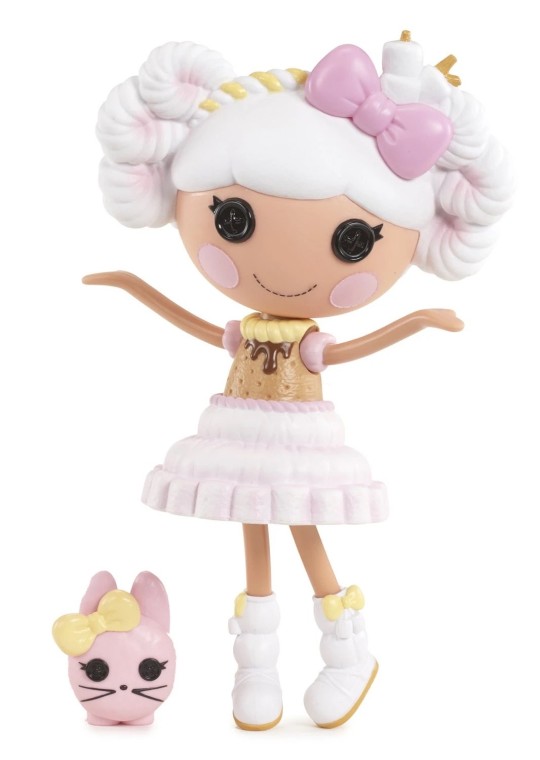
Toffee Cocoa Cuddles

Toffee is a sweetheart and she melts everyone’s hearts and people sometimes tell me this is true for me as well and i hope it is true… she is a cuddlebug !! she loves giving hugs and is always doing it and i also am like this :D both of us love chocolate !! and candy and ruffles and sending nice notes !!! but when we get nice notes Back we both get silly and embarrassed hehe… Toffee’s birthday is 11 June and that is MY birthday !!!!! and she has a chocolate lab and technically that is what my dog is… :O
🤍
Dollop Light N Fluffy
Dollop is the gentlest and softest and i think i am too… we both are super sensitive !! and we crumble when we even think someone is being mean hehe…
🤍
Sweater Snowstorm
Sweater is another snow lover and i still am one of those !!! she is also shy and quiet like me and sleepy like me and she loves soup which is very much like me !!!!!! Sweater practices shivering even when she is not cold and i also shiver when i am not cold most of the time it is when i am sleepy…
🤍
Tart Berry Basket
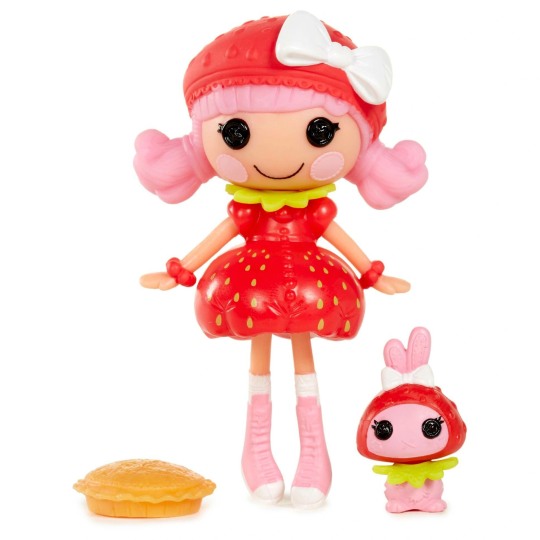
Tart is a strawberry which i am associated with Quite a bit !! and she loves dipping things in chocolate she is so right for that… i LOVE her pink bunny dressed as a strawberry SNIFFLE that is so momocore…
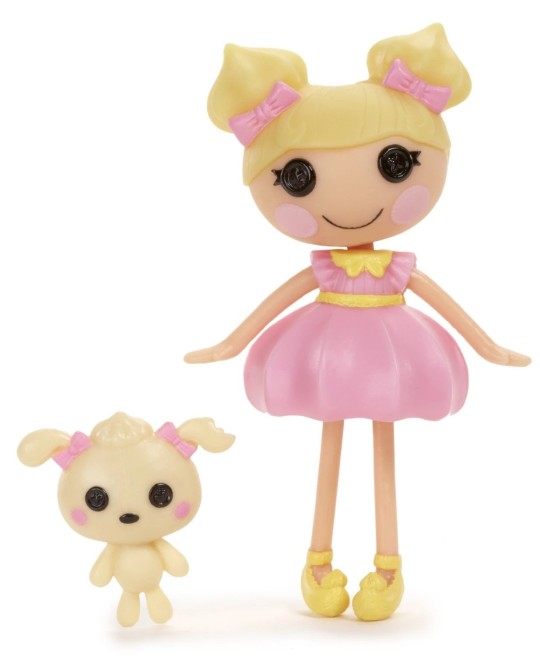
#this is my third try at making this post i hope no bitterness comes through#agere blog#lalaloopsy#kin assignment#<- ??? hehe
11 notes
·
View notes
Text

Making Papyrus from Papyrus
A first attempt at making papyrus from papyrus featuring my silly Queen Tut papyrus plant. Just because I can, doesn't mean I should but boy, did I do so anyway...
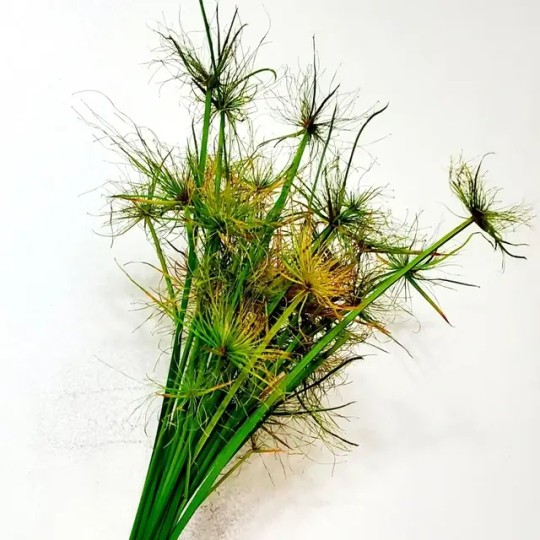
Two weeks ago, I gave my papyrus plant a haircut and harvested extra stems from him.
I gave him a Brit milah and now he's a MOT. Just the tip. The tips get yeeted because they aren't much use in the process aside from looking like fun little hats.
The hardest part that took the rest of the day to do: extracting the interior of each stem. This part is the pith, which is the substance that is used to make the papyrus paper. The stems I had were wildly thin, so these strips felt like spaghetti. Don'ta toucha ma spaghett. Fun papyrus fact: this part is toxic, so washing the hands afterwards is a good idea.
Once the insides are extracted, they must marinate in water for about three days. The soaking helps the strips become more transparent. Once these were done soaking, I laid them out and flattened them to remove excess water and sugar from them. The sugar they produce is a natural adhesive that keeps the strips together.
The final step was painful for someone who never took that underwater basket weaving class. The strips need to be woven together and placed under wooden boards so they can bond and dry. Not as bad for a first attempt, but I learnt that the width of the stem is a super important.
Since my silly papyrus plant is a cyperus prolifer, he has thinner stems than a cyperus papyrus, which is the variant of papyrus plant that was actually harvested to create paper. Size matters but my papyrus did his best.
Anything is possible with one WikiHow article and one YouTube tutorial. Name a more iconic duo, I'll wait.
3 notes
·
View notes
Text

Ok so I did use graph paper sort of like those tutorials for putting wallpaper around a window, made pattern, applied and cut it out, and then discovered whoops I didn’t make sure the pattern was on the paper the right way around. You’d think it really wouldn’t matter but the gaps on the left and right sides of the fireplace are different widths.
WHICH I suppose I could make both of them the width of the narrower side, but then there would be a gap on the right side between the paper and the fridge/wall border and that would annoy me.
I am picky about odd things.
That was the last of the red floral paper. I didn’t like it as wallpaper after all, so it was ok.

I was right, i don’t like the heart paper as wallpaper for this room. I had to make a TON of adjustments to the left side because somehow it was always wrong. I figured out later, when cutting the floral paper, that the problem was the way I’d cut around the hearth.

Third attempt, and....
You know, I do kind of like that.

Hmm....
I kinda do.
Also felt like I was wasting a LOT of scrapbook paper but a) I horde that shit and buy it up every time I find one of the books for cheap, b) this is exactly the kind of thing I horde it FOR, and c) I wasn’t too fond of either of those two papers I finished off.
-
Maybe I should get a replacement floor extension. This one’s cracked and warped.
I did find some other broken areas, too. It’s in poor condition but for $4, I’m still content.
I think I won’t bother replacing the little folding table or bench, but I would like to do something about the missing flower basket on the other side of that door.
-
I need to tag these posts. I’m sure some folks are getting tired of them.
“#1998 barbie family cottage house” will be it. Shouldn’t interfere with any other tags I hope.
9 notes
·
View notes
Text
Housing, Household Skills, Crafting, & Arts
Housing | Unhoused | Renting | Home Ownership | Home Mortgage | Property Value | Bill Paying | Home Maintenance | Mechanical Repairs | Right to Repair | Gardening | Composting & Soil Health | Growing Food | Sustainability | Animal Care
Public Services | Benefits & Financial Aid | Low-Budget Living | Low-Spoons Living | Support Your Local Food Banks | Support Your Local Library
Independence Skills | Making Major Purchases | Bill Paying | Hygiene | Dental Care | Household Skills | Household Tools | Household Appliances | Cleaning | Household Chemistry | Organizing | Decluttering | Laundry | Sewing | Mending | Shoe Repair | Cars & Driving | Cooking | Baking | Recipes & Cookbooks | Food & Nutrition | Kitchen Safety | Food Safety | Food Preservation
Arts & Crafts | DIY | Repurposing | Crafting | Drawing | Handwriting & Calligraphy | Paper Craft | Digital Art | Patterns & Tutorials | Fiber Arts | Sewing | Knitting | Crochet | Embroidery | Cross Stitch | Weaving | Basket Weaving | Textiles | Natural Fibers | Leather | Natural Materials | Clothes & Fashion | Alterations | Tailoring | Construction
#Tags Master List#if there's nothing in the tag there are either things in the queue or i'm planning on collecting things later <3#if a link is broken... please let me know! trying to collect all these tags together was a mess!
0 notes
Text
How to Make Perfect Hakka Taro Rolls at Home: A Step-by-Step Guide
Few dishes in Chinese cuisine are as comforting and flavorful as the Hakka Taro Roll. With its crispy golden shell and creamy, savory taro filling, this deep-fried delight is a staple in dim sum menus and festive gatherings. But did you know you can recreate this mouthwatering experience in your own kitchen?
In this comprehensive guide, we'll walk you through how to make perfect Hakka Taro Rolls at home, with expert tips, ingredient insights, and a foolproof recipe that brings authentic flavors to your plate. Whether you're an experienced home cook or a culinary beginner, this step-by-step tutorial will help you master the art of Hakka Taro Rolls.
What Are Hakka Taro Rolls?
Hakka Taro Rolls (also known as Fried Taro Dumplings or Wu Gok) originate from the Hakka ethnic group in China, renowned for their resourceful and hearty cooking style. These rolls are typically made by forming a paste from steamed taro root and filling it with a mixture of minced pork, shrimp, mushrooms, and seasonings. They're then deep-fried until the outside becomes airy, flaky, and crispy, while the inside stays soft and flavorful.

Hakka Taro Rolls represent a beautiful balance of texture and taste — crunchy exterior, creamy taro paste, and a juicy, umami-rich filling.
Ingredients You’ll Need
For the Taro Dough:
500g (about 1 lb) taro root, peeled and cubed
2 tbsp wheat starch
1 tbsp cornstarch
1 tbsp lard (or vegetable shortening for a vegetarian version)
1/2 tsp salt
1/4 tsp white pepper
For the Filling:
150g (5 oz) minced pork
50g (2 oz) shrimp, finely chopped
3 dried shiitake mushrooms (soaked, drained, and chopped)
1/4 onion, finely diced
1 clove garlic, minced
1 tsp soy sauce
1/2 tsp oyster sauce
1/4 tsp sesame oil
1/2 tsp sugar
Pinch of white pepper
1 tsp cornstarch (for binding)
1 tbsp oil (for sautéing)
🔪 Kitchen Tools You’ll Need
Steamer or steaming setup
Mixing bowls
Wok or deep fryer
Slotted spoon or frying basket
Parchment paper (optional)
Knife and chopping board
Food processor (optional for smoother taro paste)
Step-by-Step Guide to Making Hakka Taro Rolls
Step 1: Steam the Taro
Start by peeling and cutting the taro into small cubes. Place the cubes in a steamer basket and steam for about 25–30 minutes, or until the taro becomes soft and fork-tender.
Pro Tip from Chef Scott Biffin: “Always steam taro rather than boil it — this preserves its natural flavor and reduces excess moisture in the paste.”
Step 2: Make the Taro Dough
Once the taro is steamed and still hot, mash it thoroughly using a fork or potato masher. For a smoother texture, you can use a food processor.
Add wheat starch, cornstarch, salt, pepper, and lard to the mashed taro. Mix until well combined and you achieve a firm yet pliable dough. Let the dough rest while you prepare the filling.
Step 3: Prepare the Filling
Heat 1 tbsp of oil in a wok or skillet. Add garlic and onions and sauté until fragrant. Add in the minced pork and cook until browned. Toss in chopped shrimp and mushrooms. Stir everything together and season with soy sauce, oyster sauce, sesame oil, sugar, and pepper.
Add cornstarch to bind the filling. Cook for another 2–3 minutes, until everything is well combined and slightly sticky. Set aside to cool.
Step 4: Form the Taro Rolls
Divide the taro dough into equal portions (about 2 tbsp each). Flatten a piece in your palm to form a disc. Spoon about 1 tsp of filling into the center, then carefully enclose the filling by sealing the edges. Shape into an oval or roll-like shape.
Repeat with the remaining dough and filling. If the dough is sticky, lightly oil your hands to make shaping easier.
Step 5: Deep-Fry the Taro Rolls
Heat oil in a deep fryer or wok to about 170°C (340°F). Carefully lower each taro roll into the hot oil, a few at a time. Fry until the outside becomes golden brown and develops a delicate, lacy texture.
Remove using a slotted spoon and place on paper towels to drain excess oil.
Tip from Chef Scott Biffin: “The secret to getting that beautiful flaky crust is the right oil temperature — too hot and they’ll burn before the interior cooks; too cold and they’ll absorb too much oil.”
Serving Suggestions
Hakka Taro Rolls are best enjoyed fresh out of the fryer — crispy on the outside, soft on the inside. Serve with a dipping sauce like:
Sweet chili sauce
Soy-vinegar dipping sauce
Plum sauce
Garlic soy dressing
These make perfect appetizers or side dishes for any Chinese meal and are always a hit at dinner parties and potlucks.
Pro Tips for Perfect Taro Rolls
Use starchy taro: Look for large, firm taro roots with no blemishes. The starchier the taro, the better the texture.
Don’t overfill: A little filling goes a long way — too much can cause the rolls to break open while frying.
Fry in small batches: Overcrowding lowers the oil temperature and results in soggy rolls.
Optional twist: Add chopped green onions, bamboo shoots, or water chestnuts for extra crunch in the filling.
Make ahead: You can shape and freeze the uncooked rolls. Fry directly from frozen (no need to thaw) — just adjust frying time slightly.
Vegetarian & Vegan Variations
To make vegan Hakka Taro Rolls:
Replace pork and shrimp with finely chopped shiitake mushrooms, tofu, or tempeh.
Skip the oyster sauce and use hoisin or a mushroom-based sauce.
Use vegetable shortening or coconut oil in place of lard.
The Cultural Legacy of Hakka Cuisine
Hakka cuisine is deeply rooted in the history of the Hakka people, who migrated across regions of China and Southeast Asia, bringing their food traditions with them. Known for its simplicity, bold flavors, and preservation techniques, Hakka food emphasizes practicality and heartiness.
Hakka Taro Rolls, though often associated with Cantonese dim sum, are a testament to this unique culinary tradition — fusing comfort, ingenuity, and irresistible flavor.
Conclusion: Time to Try It Yourself!
Making Hakka Taro Rolls at home might seem intimidating at first, but once you master the basics, it becomes an incredibly rewarding culinary project. From prepping the taro dough to frying the final product, each step is a chance to connect with centuries of Chinese culinary tradition.
Whether you're impressing guests at a dinner party or simply satisfying a craving, these crispy, creamy delights are sure to steal the spotlight.
And remember — as Chef Scott Biffin would say, “Good food doesn’t have to be complicated. With the right technique and a bit of heart, every home cook can master restaurant-quality flavor."
#Hakka Taro Rolls#Fried Taro Dumplings#How to make Hakka Taro Rolls#Taro Roll recipe#Dim sum taro roll recipe#Chef Scott Biffin recipes
0 notes
Text
Hooks & Needles Subscription Box Review: A Monthly Box of Happiness for Crocheters
If you love the thrill of unboxing new yarn and trying out fresh patterns, the Hooks & Needles Subscription Box might be just what you’re looking for. Each month, it delivers a curated selection of high-quality yarn, unique crochet patterns, and premium tools—perfect for those looking for a slice of crochet heaven. I recently got my hands on one, and here’s my experience with it!
Full disclosure: I have received the Hooks & Needles Subscription Box for free in return for my honest review. All thoughts and opinions expressed are my own and not influenced by Hooks & Needles in any way. I would never recommend a product that I don’t absolutely love.
Table of Contents Show
There are affiliate links in this post. We will receive a commission if you make a purchase through our affiliate link at no extra cost to you.
Unboxing Experience of Hooks & Needles Box
I was too excited to keep the box intact for an official unboxing—I opened it the moment it arrived!
Packaging
Sturdy printed box with the Hooks & Needles branding, sealed with a high-quality sticker.
First Impressions
Loved seeing the crochet booklet right away—nice to work from printed material for a change.
Yarn reveal: Beautiful, luxurious colours and texture!
The scissors caught my attention immediately—stunning design and sharp!
Go ahead and check out the video of the initial unboxing below! Or over here at my Youtube Channel.
What’s Inside the Hooks & Needles Crochet Box?
Pattern Book
Includes multiple projects with varying skill levels.
Features a variety of designs: lovey with amigurumi, headband, and basket.
Printed on high-quality paper—feels premium.
Love the company insights included in the booklet.
Yarn
Material: Soft, luxurious merino wool.
Weight: Worsted—heavier than what I usually work with.
Color: Speckled hues, especially love the blue tones.
Origin: From Portugal—such a rare find for me!
Feel: Works up smoothly, not too splitty, easy to frog.
Comes in a yarn cake, which is super convenient compared to hanks.
Scissors
Beautiful, intricate design.
Sharp and high-quality—will replace my regular scissors!
Crochet Hook
Pink and aesthetically pretty.
Similar in style to Etimo Tulip, but not quite the same. Check out my Etimo Tulip review over here.
Fairly ergonomic—better than a standard metal hook, but not as comfortable as Clover Soft Touch, Tulip Etimo, or Furls.
Stuffing
Soft and springy, with more than enough provided for the project.
Easy to use—cutting open the bag with the new scissors felt satisfying.
Darning Needle & Case
One-size needles —sharp tip, almost like a sewing needle (personal preference: I prefer a blunt tip).
Case is beautiful—definitely an upgrade from my plastic box!
Quality & Presentation
Everything in the box feels premium, from the yarn to the printed booklet.
You can tell a lot of thought went into curating the yarn and patterns—balancing creativity and practicality.
As a designer, I know how tricky it is to create fun patterns with limited color choices. They did a great job!
Only minor downside: I might prefer using my own ergonomic crochet hook, but that’s a personal preference.
Trying Out the Hooks & Needles Box
Project Selection & Experience
Chose the intermediate pattern—it had an amigurumi element, which let me use all the different materials: yarn, stuffing, darning needle, and both colors.
Also wanted to try the lovey to learn new techniques.
Pattern & Instructions
Step-by-step pictures made it easy to follow. Have video tutorials if you are stuck.
Took me 3 hours to complete.
Got stuck once or twice, but nothing too difficult to figure out.
QR code is included for digital patterns if preferred.
How the Yarn Performed
Worked up well, similar to the sample in the booklet.
Not too splitty, easy to frog, and more than enough yarn provided.
I personally might prefer cotton for a baby lovey, but my toddler will probably just play with it anyway!
Tools & Accessories
Hook: Right size for the yarn, fairly ergonomic, though I still prefer my own.
Darning Needle: Hole was a little small for worsted-weight yarn, and the tip was quite sharp—potentially useful for embroidery.
Hooks & Needles Crochet Box Video Review
Check out the video review below, so you can see the unboxing, then the individual components in greater detail, and then how the yarn works out when I’m crocheting, together with how the different parts come together. And finally my final crochet project in the end!
youtube
.video-container { position: relative; padding-bottom: 56.25%; } .video-container iframe { position: absolute; top: 0; left: 0; width: 100%; height: 100%; }
Pros & Cons of Hooks & Needles Crochet Box
Pros
✅ Well-curated selection of materials. ✅ High-quality yarn and accessories. ✅ Great for inspiration—try new patterns and yarns that aren’t easily accessible.
Cons
❌ Price may be a concern for some, but I personally think it’s great value for money. (If you have bought luxury merino wool before you know that one hank can be $30.) ❌ Not ideal for crocheters who prefer choosing their own yarn and projects (e.g., designers).
Who Would Love This Crochet Subscription Box?
Crocheters who love a surprise each month.
Those who want to treat themselves—a perfect self-care crochet indulgence.
Anyone looking to try exclusive yarns, new patterns, and techniques without committing to large skeins or full-size projects.
Great as a gift for a crochet-loving friend!
Some might want to subscribe for just a few months to see if they enjoy it.
Bonus: The Knitting Box
Even though I don’t knit, the knitting version of this box really caught my attention! The quality and design make me tempted to pick up knitting someday — maybe this box will be the push I need!
Hooks & Needles Subscription Box Details
Quick Overview
Hooks & Needles offers a full project kit each month, including everything needed to complete a crochet project. Each box contains premium Italian and Portuguese yarn, an exclusive pattern booklet, and useful accessories like hooks, stuffing, and scissors.
Type: Full project kit (yarn, crochet patterns, accessories)
Price: $33.97/month + shipping
Shipping: US: $5.97, International: $7.97–$11.97
Skill Level: Beginner to advanced
Project Types: Scarves, headbands, home décor, amigurumi
Notable Feature: Includes premium Italian & Portuguese yarn
Set Sequence Subscription Model
Unlike many other subscription boxes, Hooks & Needles follows a set sequence. This means whenever someone places their first order, they will always receive the first box in the series, ensuring every subscriber gets the full experience in the right order, regardless of when they sign up.
Subscribers can also choose between crochet, knitting, or amigurumi boxes, making it perfect for anyone who enjoys fiber crafts!
Subscription Flexibility
Hooks & Needles makes it easy to manage a subscription:
Pause or cancel anytime—no hassle if you need a break.
Adjust the pace of your projects—take a breather without worrying about missing out.
If you think this review was helpful for you to decide on which subscription box you want to get, then remember to pin this image above to Pinterest so that others can benefit from this too!
Final Thoughts
The Hooks & Needles Subscription Box is a well-curated, high-quality treat for crocheters who love surprises, new yarns, and inspiring patterns. While it may not be for those who prefer picking their own materials, it’s a great way to indulge in a bit of crochet luxury each month!
Bonus: Amigurumi Subscription Box
For fellow amigurumi lovers, Hooks & Needles also offers an amigurumi-themed subscription box, featuring adorable small projects and premium yarns designed specifically for plush creations! You might want to check it out below as well!
0 notes
Text
5 Easy DIY Decor Ideas to Transform Your Living Space on a Budget
Revamping your living space doesn’t have to mean spending a fortune. A little creativity, time, and effort can go a long way in transforming your home into a stylish, comfortable sanctuary. With DIY projects, you not only save money but also add a personal touch that reflects your taste and personality. Here are five easy DIY décor ideas to elevate your living space while keeping costs low.

1. Revive Walls with DIY Artwork
Blank walls can make a room feel lifeless, but filling them with art doesn’t have to break the bank. Creating your own artwork is a fun and cost-effective way to breathe life into your space.
Start by gathering materials you might already have, such as canvas, paints, or even old picture frames. For a minimalist aesthetic, you can paint abstract designs using neutral or monochromatic colours. If you’re feeling adventurous, try creating a gallery wall by combining your artwork with framed family photos or prints from thrift stores.
Alternatively, experiment with materials like fabric or wallpaper remnants. Stretch a piece of bold, patterned fabric over a wooden frame for instant wall art. Another option is to create geometric patterns using washi tape directly on your walls. It’s easy to apply, removable, and perfect for renters who want to avoid permanent changes.
This DIY approach not only adds visual interest but also gives you a sense of accomplishment every time you walk into the room.
2. Upcycle Old Furniture for a Fresh Look
Old furniture doesn’t have to end up in the landfill. With a bit of imagination and elbow grease, you can turn outdated or worn pieces into stunning focal points. For instance, a shabby wooden coffee table can be sanded down and repainted in a bold colour or finished with a wood stain for a rustic look.
Chairs, dressers, or even bed frames can be transformed with simple updates. Changing drawer handles, for example, can make a piece look entirely new. Handles in modern designs are affordable and widely available at hardware stores.
Another popular upcycling project is creating a feature piece using decoupage. Select decorative paper, such as old maps, vintage prints, or even magazine clippings, and adhere them to furniture surfaces using decoupage glue. This technique works particularly well for side tables or cabinet doors, adding a unique and artistic flair.
By upcycling, you not only save money but also reduce waste, contributing to a more sustainable lifestyle.
3. Create Cosy Ambiance with DIY Lighting
Lighting plays a crucial role in the mood and functionality of a room. Adding unique, handmade lighting can elevate your décor while staying within budget.
One easy project is to create a DIY pendant light using items like wire baskets, mason jars, or even paper lanterns. For example, wrap fairy lights around a wire basket to create a soft, industrial-style chandelier. Mason jar lights are another versatile option, requiring only jars, bulbs, and a little wiring (easily done with online tutorials).
Candles are also a fantastic way to add warmth and ambiance. You can make your own candles using inexpensive kits or by repurposing old jars and filling them with wax. Add essential oils for a touch of fragrance and a more personalised vibe.
For a truly unique lighting feature, try a shadowbox light. Fill a shallow frame with a decorative cut-out or photo, then place LED strip lights behind it. When illuminated, the shadowbox creates a soft glow and doubles as a piece of artwork.
4. Spruce Up Your Space with Indoor Plants and DIY Planters
Nothing brings life into a space quite like greenery. Indoor plants not only improve air quality but also add a sense of tranquillity to any room. However, buying decorative planters can be costly, so why not make your own?
Repurpose everyday items as planters, such as tin cans, teacups, or glass jars. A coat of spray paint can instantly turn these items into chic plant holders. For a more rustic look, wrap your containers in twine or burlap.
You can also build a small vertical garden using wooden pallets or an old ladder. Attach small pots to the structure and fill them with low-maintenance plants like succulents or herbs. Vertical gardens are particularly effective in small spaces, as they maximise greenery without taking up floor space.
For those who prefer a modern aesthetic, try creating concrete planters. All you need is a bag of quick-dry cement, some moulds (such as plastic cups), and a bit of patience. These sleek planters provide a contemporary contrast to lush greenery.
Plants are an affordable way to refresh your space, and making your own planters adds a personal touch to the display.
5. Transform Textiles for a Fresh, Customised Look
Textiles are often overlooked, but they have the power to completely transform a room’s aesthetic. Creating your own cushion covers, curtains, or throws is an easy way to update your décor without spending much.
Start with old or plain fabric that you already own. Using fabric paint or dyes, create custom patterns like stripes, polka dots, or even tie-dye effects. Stencils are another option for creating intricate designs on cushions or tablecloths.
No-sew projects are great for beginners. For example, make a throw blanket by cutting fleece fabric to your desired size and fringing the edges. Simply tie the fringes together for a cosy, handmade finish.
Another idea is to layer your space with rugs for added texture and warmth. Instead of buying new ones, try making a rag rug using old T-shirts or scraps of fabric braided together. It’s an eco-friendly way to add character to your floors while reducing waste.
Customised textiles not only brighten your space but also make it uniquely yours.

Conclusion
Transforming your living space doesn’t have to cost a fortune. With a little creativity and effort, you can use DIY projects to make your home feel fresh, inviting, and uniquely yours. Whether it’s creating custom artwork, upcycling furniture, or crafting planters and textiles, these budget-friendly ideas allow you to add personal touches that truly make a house feel like a home.
By taking on these DIY projects, you’ll not only save money but also enjoy the satisfaction of having created something beautiful and meaningful for your living space. So, gather your materials, let your imagination run wild, and start transforming your home today!
#diy#decorating#budget#DIYDecor#HomeMakeover#BudgetFriendlyDecor#InteriorDesignIdeas#DecorOnABudget#DIYHomeProjects#HomeDecorInspo#EasyDIYIdeas#UpcycleAndReuse#CreativeLivingSpaces#AffordableDecor#HomeStylingTips#DIYInspiration#DecorGoals#TransformYourSpace#DIYProjects#HomeImprovementIdeas#SmallSpaceDecor#EcoFriendlyDecor#RoomTransformation
0 notes
Text
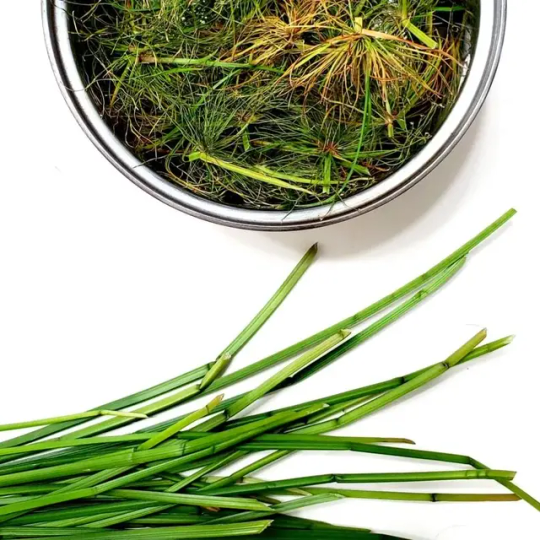
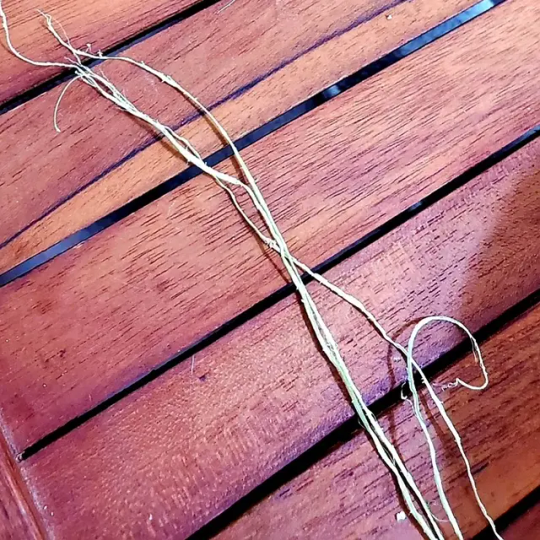
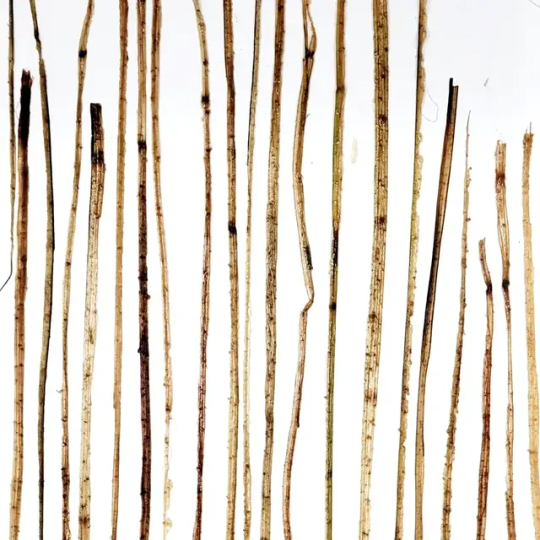
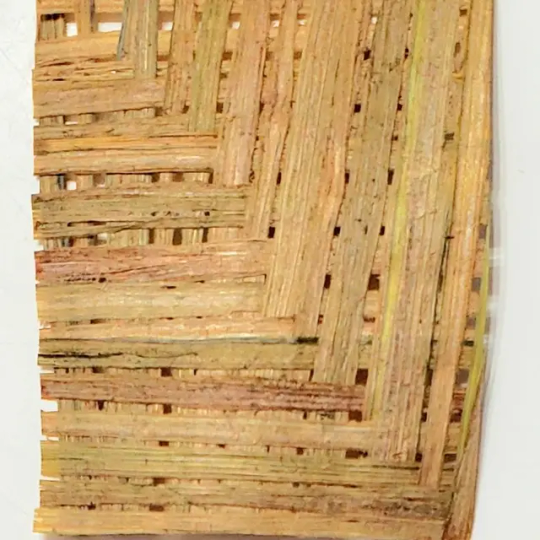
Recycled Paper Basket Weaving ( Easy Step-by-Step Tutorial )
0 notes
Text
And this one I made using this pin:
1 note
·
View note
Text
My Bookish Tendencies
I fell in love with reading in my early 20s. I was an awkward, shy, lost little soul, and I found it comforting to lose myself in a good book.
That love was only heightened when I discovered I could relate to certain characters and that their thoughts and feelings could resonate so deeply with my own.
The way a book could bring such clarity and understanding to an issue or feeling I had struggled with for years opened up a whole new world for me.
I finally felt like I wasn't alone (or a complete basket case), and I wanted to share that with others. So, I enrolled in a writing course geared towards writing for children and teenagers.
I also began journaling, thanks to the book The Artist's Way, which helped me begin to unload a lot of junk, gunk, and negativity. (That process would be a long one, and it was given a huge boost by The Secret and the introduction to the Law of Attraction.)
My love of children's books truly blossomed after I had my daughter. Read-alouds were some of my favorite times spent with her, and we continued through picture books to classic novels. She would play, draw, or craft as I chipped away at a book, chapter by chapter.
Classic novels instilled so many wonderful values within me. I will be forever grateful for our homeschooling and the opportunity it gave me to share those stories with my daughter.
I got stuck on the self-help book wagon for many years, but fast forward to today and you'll probably find me with a light-hearted rom-com or second-chance romance book...ugh, I'm such a sucker for those!
Not only do I love to read books, but I also love buying old books. I discovered junk journals several years back and had gotten into transforming these old books into new treasures.
I love everything about these journals, and taking old, throw-away items and giving them a new life feels so rewarding. The mix of papers, ephemera, fabrics, pictures, lace, ribbon, and everything in between makes it all so limitless, and that grungy, vintage, junk look and feel is so cool.
With that, I got into using The Graphics Fairy for their extensive collection of vintage images. Although they have a ton of free-to-use items, I tried their premium membership, which offers higher-quality graphics, designed printables, and crafting tutorials.
I'm particularly inspired by their weekly themed bundles, which I've started using to create collaged covers for notebooks through Canva.
And that is what has led me here, to True Blue Publishing Co.
I want to start sharing my designs and creating notebooks and ephemera booklets through Amazon's Kindle Direct Publishing program.
I can't wait to show you what I've made!
0 notes
Text
Crafting for You [Envelope Card Box Series #7]
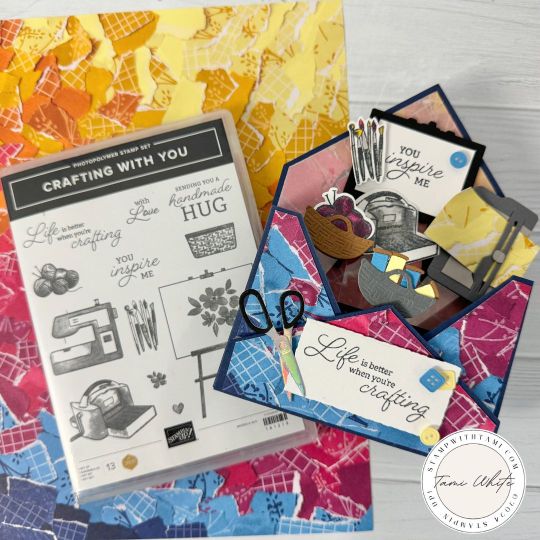
CRAFTY ENVELOPE CARD BOX Hello, fellow craft enthusiasts! If you're anything like me, you know that making something with your own two hands provides a sense of accomplishment like no other. That's why I'm thrilled to share this tutorial for a handmade 3D card that is sure to wow anyone lucky enough to receive it. Designed for crafters by a crafter, this envelope card box is a true celebration of creativity and personal touch. The Inspiration Behind the Card Every card tells a story, and this one is no different. Inspired by the joy of crafting with friends—our crafting BFFs—this tutorial is not just about making a card; it's about creating a memory. The Stampin’ Up "Crafting for You" stamps and dies used in this project encapsulate everything a crafter holds dear. From a miniature Stampin’ Cut & Emboss Machine to a quaint basket of yarn, this card is a mini representation of our crafting world. Gorgeously Made Designer Series Paper The charm of this card lies in its intricate details and the use of the Gorgeously Made Designer Series Paper. The paper's torn images perfectly complement the 3D elements that seem to float within the card, creating a dynamic and visually engaging effect. This design choice not only enhances the aesthetic appeal but also highlights the craftsmanship involved in creating such a piece. Perfect for Every Occasion Whether it’s a birthday, a congratulatory note, or just because, the sentiments "you inspire me" integrated into this card make it universally appealing for various occasions. It’s a versatile piece that conveys warmth and appreciation, making it an ideal choice for those moments when you want to express your feelings through more than just words. Crafting the Envelope To add an extra touch of coordination and style, I prefer crafting a custom envelope that matches the card with the same Designer Series Paper. However, for those in a pinch, a standard business envelope will also fit this slimline card perfectly. This flexibility ensures that the presentation is just as impressive as the card itself. About the "Crafting for You" Bundle For those who live and breathe crafts, the "Crafting for You" bundle is a treasure trove. It includes everything from paintbrushes to knitting needles, and each element celebrates the diverse aspects of crafting. This set not only fuels your creativity but also connects with the recipients of your cards, making each creation a heartfelt gesture of love and encouragement. Conclusion I hope this preview stirs up your creativity and gets you as excited as I am to dive into this project. Remember, the detailed step-by-step instructions, measurements, and complete supply list are available in the free PDF below. Plus, don't miss out on the video tutorial in the instructions section for additional guidance. And if you’re looking for more inspiration, check out the series of Envelope Card Box tutorials available in the series section. Tami INSTRUCTIONS, TEMPLATE & VIDEOS INSTRUCTIONS PDF ⬇ The guide provides detailed measurements and a sequential process for crafting this envelope card box, complete with a clickable list of materials. To assist you further, I have designed a visual template and cutting instructions for your convenience. DOWNLOAD PDF VIDEO ⬇ ENVELOPE CARD BOX VIDEO ENVELOPE CARD BOX CLASS SUPPLIES I USED SUPPLIES I USED TO CREATE THIS CARD⬇ I got these mailers to fit the Envelope Card Boxes on Amazon. CLICK FOR MAILERS ON AMAZON ENVELOPE CARD BOX SERIES Click the thumbnails below for more free tutorials in my series. ENVELOPE CARD BOX SERIES #1 STAMPIN' UP! CATALOGS CURRENT SPECIALS PHOTOS The Stampin’ Up "Crafting for You" stamps and dies used in this project encapsulate everything a crafter holds dear. From a miniature Stampin’ Cut & Emboss Machine to a quaint basket of yarn, this card is a mini representation of our crafting world. Inspired by the joy of crafting with friends—our crafting BFFs—this tutorial is not just about making a card; it's about creating a memory. I used a Window Sheet to float the crafting supplies. A view of the inside of the box. I made a full card for the back. For those who live and breathe crafts, the "Crafting for You" bundle is a treasure trove. It includes everything from paintbrushes to knitting needles, and each element celebrates the diverse aspects of crafting. Want to save these ideas for later? Pin them to your favorite Pinterest board. Have you tried these designs? I love to see your creations! Be sure to share them on #shareyourcrafts post every Saturday on my Facebook Page Read the full article
0 notes
Text
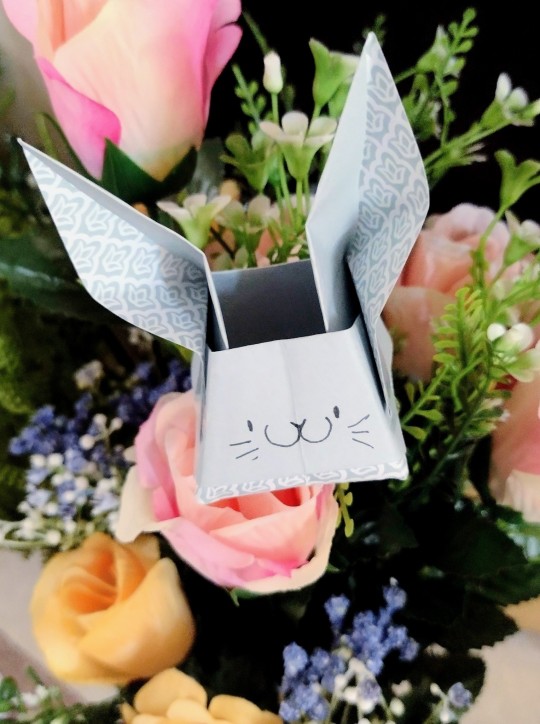
I made a couple of bunny-themed origami baskets this morning. They can fit more mini eggs than I expected! Every tutorial I found for this design on YouTube used double sided paper (making it harder to work out where a patterned side would show) and they drew the face on the back so the ears didn't open out at the front 🤔
1 note
·
View note
Text
Worthy Bedroom Lighting on a Budget
Are you looking to give your bedroom a makeover without spending a fortune? Lighting plays a significant role in setting the mood and ambiance of a room, and with a few clever tricks, you can achieve Instagram-worthy lighting on a budget.

Here's how:
Get Creative with Lighting Fixtures: Instead of splurging on expensive light fixtures, get creative with budget-friendly alternatives. Look for affordable pendant lights, paper lanterns, or even string lights to add charm to your bedroom without breaking the bank.Explanation: By exploring affordable lighting options like pendant lights and string lights, you can add style and personality to your bedroom without exceeding your budget.
DIY Lighting Solutions: Put your creativity to work and craft your own lighting solutions. From mason jar lanterns to DIY lampshades, there are plenty of inexpensive and creative ways to illuminate your bedroom.Explanation: DIY lighting projects allow you to personalize your bedroom lighting while saving money. Get inspired by online tutorials and unleash your inner DIY enthusiast.
Shop Secondhand: Explore thrift stores, flea markets, and online marketplaces for pre-loved lighting fixtures at a fraction of the cost. With a little patience and luck, you can find unique pieces that add character to your bedroom decor.Explanation: Secondhand shopping is a budget-friendly way to discover one-of-a-kind lighting fixtures that suit your style. Keep an open mind and enjoy the thrill of the hunt.
Repurpose Everyday Items: Think outside the box and repurpose everyday items into creative lighting solutions. Mason jars, wine bottles, and even old wire baskets can be transformed into stylish lamps or pendant lights with a bit of imagination.Explanation: Repurposing everyday items not only saves money but also adds a personal touch to your bedroom decor. Look for items around your home or at thrift stores that can be upcycled into unique lighting fixtures.
Opt for Energy-Efficient Lighting: Choose energy-efficient light bulbs and fixtures to save money on your electricity bills in the long run. LED bulbs, in particular, consume less energy and have a longer lifespan than traditional incandescent bulbs.Explanation: Investing in energy-efficient lighting not only reduces your environmental footprint but also saves you money on utility bills over time. Make the switch to LED bulbs for a budget-friendly and eco-friendly lighting solution.
With these budget-friendly tips, you can create Instagram-worthy bedroom lighting that reflects your style and personality without breaking the bank. Get creative, explore affordable options, and transform your bedroom into a stylish sanctuary that's worthy of a double tap.
0 notes
Text
Soooo there's only one gradient repeat left in the scarf, so I'll be done soon
And all I need to focus on after that will be not giving in to the temptation of starting something new... Unless it won't take long, maybe?
I have a backpack crocheting kit and it's not gonna take long, I think. Because it's crocheted using a chonky cord that requires a hook no less than 6 mm thick
Maybe even 7 mm, honestly
And it already has the bottom, which is the one annoying part to bags and baskets in my opinion
The only downside is that there's only a video for the kit. Not even a little paper chart. Just a QR code to the video. And I'm pathologically bad at following videos, out of all types of tutorials
Wish me luck
0 notes