#signtools
Explore tagged Tumblr posts
Visit Tumblr Blog
Explore Tumblr blogs with no restrictions, modern design and the best experience.
Last Seen Tumblr Blogs


Fun Fact
Tumblr’s reach among the 26-to-35-year-olds in the US is 11%.
Text
Cloud HSM: A Secure Way to Sign Microsoft Windows Artifacts

The ability to digitally sign code and certify that the software their clients are downloading is authentic and hasn’t been maliciously altered is essential for developers to establish confidence in the software industry. For many companies, keys used to sign code are the crown jewels of cryptography, thus keeping them safe is crucial.
Security features for creating, managing, and limiting access to cryptographic keys are offered by Google Cloud‘s Cloud Key Management System (KMS). Create, store, and carry out cryptographic activities like code signing using keys in its tamper-resistant Cloud hardware security modules (Cloud HSM) with the intuitive interface provided by Cloud KMS.
Cloud HSM Google
What is Cloud HSM?
Hosting encryption keys and conducting cryptographic operations in a cluster of FIPS 140-2 Level 3 certified HSMs is possible with Cloud HSM, a cloud-hosted Hardware Security Module (HSM) service. Clustering, scaling, and patching are not concerns for you because Google looks after the HSM cluster. All the capabilities and advantages that Cloud KMS offers are yours to utilize because Cloud HSM leverages Cloud KMS as its front end.
Create a key ring
In a specific Google Cloud location, you add a key that you have created to a key ring. A new key ring can be made, or an old one can be used.
In a Google Cloud location that is compatible with Cloud HSM, create a key chain.
Navigate to the Key Management section within the Google Cloud dashboard.
Press the Generate key ring button.
Enter your key ring’s name in the “Key ring name” field.
Choose an address such as “us-east1” for the Key Ring location.
Click “Create.”
Create a key
For the designated key ring and location, follow these steps to produce a Cloud HSM key.
Navigate to the Key Management section within the Google Cloud dashboard.
In order to create a key, click the name of the key ring.
To create a key, click Create.
Select Generated key under the What kind of key do you want to create? field.
Name your key by entering its name in the Key name field.
To select HSM, click the dropdown menu for Protection level.
Choose “Symmetric encrypt/decrypt” from the drop-down menu.
Take the Rotation period and Starting on as given by default.
Click “Create.”
Bare Metal Rack HSM
Additional HSM features, such single-tenancy, are available through Google Cloud. Customers can host their own HSMs in the space given by Google with the help of Bare Metal Rack HSM. If you need further details, ask your account representative.
Provider for Microsoft Cryptography API: Next Generation (CNG)
An application programming interface called Microsoft Cryptography API: Next Generation (CNG) enables programmers to include encryption, encoding, and authentication into Windows-based applications. With CNG providers installed on the system, you may also use tools like Windows signtool to conduct crypto operations. To work with current apps that make use of the CNG API, Cloud KMS provides a provider that complies with this standard.
The provider is licensed under the Apache 2.0 license and is run as an open source project on GitHub. The Google Cloud Terms of Service apply to release binaries obtained from the GitHub releases page, and Cloud Customer Care offers support.
For Microsoft’s Cryptography API: Next Generation (CNG) provider, Google Cloud just released support for Cloud KMS signing. This feature allows you to secure your keys using Cloud HSM and SignTool to sign code on Microsoft assets.
As to the Cyber Safety Review Board of the U.S. government, hardware security modules are regarded as an optimal approach for cloud security since they keep keys in isolated and segmented systems. Threat actors have been observed to compromise and use legitimate signing keys to access data and systems inside the key’s domain when HSMs and other recommended practices are not followed.
In Cloud HSM, the servers housing the HSM hardware are shielded from illegal operations, the signature keys are designated as non-extractable, and the hardware is not directly connected to any network. It is more difficult to unintentionally reveal or steal the signing keys thanks to these security hardening methods.
In the past, you had to lock the keys to your Windows artifacts using hardware that wasn’t hosted by Google Cloud. With FIPS 140-2 Level 3 guarantees, cloud HSM safeguards your signature keys. Additionally, by only charging for the keys you use, it can lower your infrastructure and operating expenses. To suit your workload needs, Cloud HSM is offered in many locations.
You may distribute your software to your clients more quickly by using Google Cloud KMS CNG provider to expedite the signing procedure and save significant time.
Starting a Cloud KMS CNG provider: A Guide
Its cloud-based KMS CNG provider has four primary purposes. Apply it as necessary:
Verify firmware using a private key secured by a FIPS 140-2 Level 3 HSM.
Use the standard SignTool executable on Windows to sign Microsoft Windows artifacts.
transfer the burden of managing keys, which includes access control, rotation, and creation;
Use logging and auditing capabilities to gain visibility and attribution.
These crucial results can be attained by following these steps:
Install the CNG provider
Create your signing key
Get your certificate
Sign your artifact
Install the CNG provider
In the Google Cloud GitHub repository, it has uploaded the CNG provider’s released binaries. The.msi installer that is given can be used to install these on your Windows PC. Once that’s done, setup your provider according to the user manual.
Use Cloud HSM to generate your signing key
Make a signature key that is Cloud HSM hardware protected when you’ve finished making your key ring. Depending on your security needs, choose the asymmetric signature algorithm.
Install your signing certificate
Access Cloud HSM by importing your signing certificate. This provides robust hardware-based protection for your signing key.
Create a signature key that is encrypted using Cloud HSM and generate a certificate signing request (CSR) if you don’t already have one. Next, give the certificate authority the CSR to obtain a fresh code signing certificate.
Sign your artifacts
SignTool can be used to cryptographically sign your artifact once you have installed your CNG provider, generated a key in Cloud HSM, and obtained your certificate. Ascertain that the appropriate flags are provided, such as the key URI from Cloud HSM and the provider name Google Cloud KMS Provider.
Read more on Govindhtech.com
#Google#googlecloud#cloudhsm#microsoftwindows#Cloudkms#news#Technology#technews#technologynews#govindhtech#technologytrends
0 notes
Text
Portable MassCert is a free software to give digital signatures of files that certify their authenticity. Developers are getting a tool thanks to which their programs will not be unfairly blocked during download or messages about the alleged threat arising from their use will not appear. The operation of Portable MassCert is very simple thanks to the uncomplicated interface. In the SignTool tab, simply select the files you are interested in. In addition to the digital signature, we can also set a password or a timestamp. XP/Vista/7/8/8.1/10EnglishSize: 4.43MB
0 notes
Link
0 notes
Text
System Version Driver Download For Windows

OldVersion.com provides free. software downloads for old versions of programs, drivers and games. So why not downgrade to the version you love? Because newer is not always bett.
Download Dell BIOS drivers, firmware, bios, tools, utilities. Dell Latitude 13 3380 System BIOS 1.0.2 97 downloads. Windows 8.1 64 bit, Windows 8.
Check Driver Version Windows 10
Microsoft Windows Drivers Free Download
System Version Driver Download For Windows 8.1
System Version Driver Download For Windows 10
Windows Driver Update Download
Windows Drivers For Windows 10
Tracking down the correct drivers for your specific flavor of Windows version and peripherals on third-party driver download websites is the most frustrating and time-consuming job. Also, there’s a huge risk of installing wrong, malicious, or unsigned drivers. Downloads drivers from within the program. Creates a restore point before updating.
-->
About Driver Installation
The Setup application programming interface (SetupAPI) provides the functions that control Windows setup and driver installation, including the installation of file system and file system filter drivers.
The installation process is controlled by INF files. For more information about INF files:
For file system driver-specific INF file information, see below
For more information about general driver installation (including information about driver packages, INF files, and driver signing), see Device and Driver Installation.
Check Driver Version Windows 10
After creating an INF file, you will typically write the source code for your setup application. The setup application calls user-mode setup functions to access the information in the INF file and perform installation operations.
The following information regarding installing and uninstalling file system filter drivers also applies to file system drivers:
Creating an INF File for a File System Driver
A file system driver's INF file provides instructions that SetupAPI uses to install the driver. The INF file is a text file that specifies the files that must be present for your driver to run and the source and destination directories for the driver files. An INF file also contains driver configuration information that SetupAPI stores in the registry, such as the driver's start type and load order group.
You can create a single INF file to install your driver on multiple versions of the Windows operating system. For more information about creating such an INF file, see Creating INF Files for Multiple Platforms and Operating Systems and Creating International INF Files.
Starting with 64-bit versions of Windows Vista, all kernel-mode components, including non-PnP (Plug and Play) drivers such as file system drivers (file system, legacy filter, and minifilter drivers), must be signed in order to load and execute. For these versions of the Windows operating system, the following list contains information that is relevant to file system drivers.
INF files for non-PnP drivers, including file system drivers, are not required to contain [Manufacturer] or [Models] sections.
The SignTool command-line tool, located in the binSelfSign directory of the WDK installation directory, can be used to directly 'embed sign' a driver SYS executable file. For performance reasons, boot-start drivers must contain an embedded signature.
Given an INF file, the Inf2Cat command-line tool can be used to create a catalog (.cat) file for a driver package.
With Administrator privileges, an unsigned driver can still be installed on x64-based systems starting with Windows Vista. However, the driver will fail to load (and thus execute) because it is unsigned.
For detailed information about the driving signing process, including the driving signing process for 64-bit versions of Windows Vista, see Kernel-Mode Code Signing Walkthrough.
All kernel-mode components, including custom kernel-mode development tools, must be signed. For more information, see Signing Drivers during Development and Test (Windows Vista and Later).
Microsoft Windows Drivers Free Download
INF files cannot be used to read information from the registry or to launch a user-mode application.
Sections in a File System Driver INF File
To construct your own file system driver INF file, use the following information as a guide. You can use the InfVerif tool to check the syntax of your INF file.
An INF file for a file system driver generally contains the following sections.
Version Section (required)
The Version section specifies the driver version information, as shown in the following code example.
The following table shows the values that file system filter drivers should specify in the Version section.
EntryValueSignature'$WINDOWS NT$'ProviderIn your own INF file, you should specify a provider other than Microsoft.DriverVerSee INF DriverVer directiveCatalogFileLeave this entry blank. In the future, it will contain the name of a WHQL-supplied catalog file for signed drivers.
DestinationDirs Section (optional but recommended)
The DestinationDirs section specifies the directories where the file system driver files will be copied.
In this section and in the ServiceInstall section, you can specify well-known system directories by using system-defined numeric values. For a list of these values, see INF DestinationDirs Section. In the following code example, the value '12' refers to the Drivers directory (%windir%system32drivers).
SourceDisksNames Section (required)
The SourceDisksNames section specifies the distribution media to be used.
In the following code example, the SourceDisksNames section lists a single distribution media for the file system driver. The unique identifier for the media is 1. The name of the media is specified by the %Disk1% token, which is defined in the Strings section of the INF file.
SourceDisksFiles Section (required)
System Version Driver Download For Windows 8.1
The SourceDisksFiles section specifies the location and names of the files to be copied.
In the following code example, the SourceDisksFiles section lists the file to be copied for the file system driver and specifies that the files can be found on the media whose unique identifier is 1 (This identifier is defined in the SourceDisksNames section of the INF file.)
DefaultInstall Section (required)
In the DefaultInstall section, a CopyFiles directive copies the file system driver's driver files to the destination that is specified in the DestinationDirs section.
Note
The CopyFiles directive should not refer to the catalog file or the INF file itself; SetupAPI copies these files automatically.
You can create a single INF file to install your driver on multiple versions of the Windows operating system. This type of INF file is created by creating additional DefaultInstall, DefaultInstall.Services, DefaultUninstall, and DefaultUninstall.Services sections for each operating system version. Each section is labeled with a decoration (for example, .ntx86, .ntia64, or .nt) that specifies the operating system version to which it applies. For more information about creating this type of INF file, see Creating INF Files for Multiple Platforms and Operating Systems.
In the following code example, the CopyFiles directive copies the files that are listed in the ExampleFileSystem.DriverFiles section of the INF file.
DefaultInstall.Services Section (required)
The DefaultInstall.Services section contains an AddService directive that controls how and when the services of a particular driver are loaded.
In the following code example, the AddService directive adds the file system service to the operating system. The %ServiceName% token contains the service name string, which is defined in the Strings section of the INF file. ExampleFileSystem.Service is the name of the file system driver's ServiceInstall section.
ServiceInstall Section (required)
The ServiceInstall section adds subkeys or value names to the registry and sets values. The name of the ServiceInstall section must appear in an AddService directive in the DefaultInstall.Services section.
The following code example shows the ServiceInstall section for the file system driver.
The DisplayName entry specifies the name for the service. In the preceding example, the service name string is specified by the %ServiceName% token, which is defined in the Strings section of the INF file.
The Description entry specifies a string that describes the service. In the preceding example, this string is specified by the %ServiceDesc% token, which is defined in the Strings section of the INF file.
The ServiceBinary entry specifies the path to the executable file for the service. In the preceding example, the value 12 refers to the Drivers directory (%windir%system32drivers).
The ServiceType entry specifies the type of service. The following table lists the possible values for ServiceType and their corresponding service types.
ValueDescription0x00000001SERVICE_KERNEL_DRIVER (Device driver service)0x00000002SERVICE_FILE_SYSTEM_DRIVER (File system or file system filter driver service)0x00000010SERVICE_WIN32_OWN_PROCESS (Microsoft Win32 service that runs in its own process)0x00000020SERVICE_WIN32_SHARE_PROCESS (Win32 service that shares a process)
The ServiceType entry should always be set to SERVICE_FILE_SYSTEM_DRIVER for a file system driver.
The StartType entry specifies when to start the service. The following table lists the possible values for StartType and their corresponding start types.
ValueDescription0x00000000SERVICE_BOOT_START0x00000001SERVICE_SYSTEM_START0x00000002SERVICE_AUTO_START0x00000003SERVICE_DEMAND_START0x00000004SERVICE_DISABLED
For detailed descriptions of these start types to determine which one is appropriate for your file system driver, see What Determines When a Driver Is Loaded.
Starting with x64-based Windows Vista systems, the binary image file of a boot-start driver (a driver that has a start type of SERVICE_BOOT_START) must contain an embedded signature. This requirement ensures optimal system boot performance. For more information, see Kernel-Mode Code Signing Walkthrough.
For information about how the StartType and LoadOrderGroup entries determine when the driver is loaded, see What Determines When a Driver Is Loaded.
The ErrorControl entry specifies the action to be taken if the service fails to start during system startup. The following table lists the possible values for ErrorControl and their corresponding error control values.
ValueDescription0x00000000SERVICE_ERROR_IGNORE (Log the error and continue system startup.)0x00000001SERVICE_ERROR_NORMAL (Log the error, display a message to the user, and continue system startup.)0x00000002SERVICE_ERROR_SEVERE (Switch to the registry's LastKnownGood control set and continue system startup.0x00000003SERVICE_ERROR_CRITICAL (If system startup is not using the registry's LastKnownGood control set, switch to LastKnownGood and try again. If startup still fails, run a bug-check routine. Only the drivers that are needed for the system to startup should specify this value in their INF files.)
The LoadOrderGroup entry must always be set to 'File System' for a file system driver. This is different from what is specified for a file system filter driver or file system minifilter driver where the LoadOrderGroup entry is set to one of the file system filter load order groups. For more information about the load order groups that are used for file system filter drivers and file system minifilter drivers, see Load Order Groups for File System Filter Drivers and Load Order Groups and Altitudes for Minifilter Drivers.
The AddReg directive refers to one or more INF writer-defined AddRegistry sections that contain any information to be stored in the registry for the newly installed service.
Note
If the INF file will also be used for upgrading the driver after the initial install, the entries that are contained in the AddRegistry section should specify the 0x00000002 (FLG_ADDREG_NOCLOBBER) flag. Specifying this flag preserves the registry entries in HKLMCurrentControlSetServices when subsequent files are installed. For example:
DefaultUninstall Section (optional)
The DefaultUninstall section is optional but recommended if your driver can be uninstalled. It contains DelFiles and DelReg directives to remove files and registry entries.
In the following code example, the DelFiles directive removes the files that are listed in the ExampleFileSystem.DriverFiles section of the INF file.
The DelReg directive refers to one or more INF writer-defined DelRegistry sections that contain any information to be removed from the registry for the service that is being uninstalled.
DefaultUninstall.Services Section (optional)
The DefaultUninstall.Services section is optional but recommended if your driver can be uninstalled. It contains DelService directives to remove the file system driver's services.
In the following code example, the DelService directive removes the file system driver's service from the operating system.
Note
The DelService directive should always specify the 0x200 (SPSVCINST_STOPSERVICE) flag to stop the service before it is deleted.
Note
There are certain classes of file system products that cannot be completely uninstalled. In this situation, it is acceptable to just uninstall the components of the product that can be uninstalled and leave installed the components of the product that cannot be uninstalled. An example of such a product is the Microsoft Single Instance Store (SIS) feature.
Strings Section (required)
The Strings section defines each %strkey% token that is used in the INF file.

For example, the file system driver defines the following strings in its INF file.
System Version Driver Download For Windows 10
You can create a single international INF file by creating additional locale-specific Strings.LanguageID sections in the INF file. For more information about international INF files, see Creating International INF Files.
Install_Win10_10031_12192018.zip
10.4 MB
431,220
Networking
Windows 10
This driver offers Network Interface Controller with Windows 10 support for Realtek 10/100/1000M Gigabit Ethernet and 10/100M Fast Ethernet chips. This specific models are listed below.
Supported Products:
RTL8111B
RTL8168B
RTL8111
RTL8168
RTL8111C
RTL8111CP
RTL8111D
RTL8111DL
RTL8168C
RTL8111DP
RTL8111E
RTL8168E
RTL8111F
RTL8411
RTL8111G
RTL8111GUS
RTL8411B
RTL8411BN
RTL8118AS
RTL8110SC
RTL8110SCL
RTL8110S
RTL8110SB
RTL8110SBL
RTL8169SB
RTL8169SBL
RTL8169S
RTL8169SL
RTL8169
RTL8100E
RTL8101E
RTL8102E-GR
RTL8103E
RTL8103EL
RTL8102E
RTL8102EL
RTL8101E
RTL8103T
RTL8401
RTL8401P
RTL8105E
RTL8402
RTL8106E
RTL8106EUS
Current versions:

10/100/1000M Gigabit Ethernet PCI 10.023
10/100/1000M Gigabit Ethernet PCIe 10.031
10/100/1000M Gigabit Ethernet USB 3.0 10.22
10/100M Fast Ethernet PCIe 10.018
10/100M Fast Ethernet USB 2.0 10.17
Previous versions:
2017-01-20 version 10.013
Windows Driver Update Download
Here's other similar drivers that are different versions or releases for different operating systems:
July 26, 2018
Windows (all)
9.2 MB
January 2, 2019
Windows (all)
10.3 MB
January 2, 2019
Windows (all)
10.3 MB
July 30, 2018
Windows 7
10.6 MB
March 5, 2018
Windows 10
9.2 MB
July 5, 2017
Windows (all)
10.1 MB
July 12, 2017
Windows (all)
10.2 MB
May 10, 2017
Windows (all)
10.2 MB
March 23, 2017
Windows 7/8/10
10.1 MB
May 10, 2017
Windows 8
9.3 MB
Windows Drivers For Windows 10
0 notes
Photo

عمرتون صد شب یلدا دلتون قدر یه دنیا توی این شبهای سرما یادتون همیشه با ما دل خوش باشه نصیبت غم بمونه واسه فردا #شب_یلدا #یلدا . ☎️ 02149925 ☎️ ☎️ 02144479457 ☎️ 🌐 tetrisel.com 🌐 🔴 instagram.com/tetrisel🔴 . #پاور_سوئيچينگ #منبع_تغذيه #منبع_تغذيه_ضد_باران #ال_اي_دي_اوال #اس_ام_دي_بلوکي #چنلیوم #چنلیوم_الماسی #چنلیوم_پانچ #چنلیوم_پلاستیکی #تابلوسازی #اس_ام_دی #electronics #tetrisel #marketing #shopping #management #technology #work #business #team #teamwork #power_switching #led_oval #chanellium #advertising #sign #signtools #led_module (at Boostan Shopping Center - مرکز خرید بوستان) https://www.instagram.com/p/CJBkFOGFYs-/?igshid=i7sbx9fhyg4q
#شب_یلدا#یلدا#پاور_سوئيچينگ#منبع_تغذيه#منبع_تغذيه_ضد_باران#ال_اي_دي_اوال#اس_ام_دي_بلوکي#چنلیوم#چنلیوم_الماسی#چنلیوم_پانچ#چنلیوم_پلاستیکی#تابلوسازی#اس_ام_دی#electronics#tetrisel#marketing#shopping#management#technology#work#business#team#teamwork#power_switching#led_oval#chanellium#advertising#sign#signtools#led_module
0 notes
Video
instagram
Ever wondered how? 🤔 Well, here it is @yellotools WrapStick FLEX - great tool for great projects! Video and installation credit goes to @stek_russia , awesome 🔥🔥🔥#signmakertools #ypn2018 #wraptoolsthatwork #signtoolsthatwork #madeingermany #signshop #carwrap #carwraps #carwrapping #carwraptools #wraptools #wrapshop #wraplife #vinylwrap #vinylwraps #trickortreat #vinylwrapping #graphicinstaller #signshop #signmaker #signmakers #signmaking #signtools #yellotools #signshoplife #wrapstick #chromedelete #ppf #wrapstick https://www.instagram.com/p/B7ebxmCgSVA/?igshid=9up62nl2x2kn
#signmakertools#ypn2018#wraptoolsthatwork#signtoolsthatwork#madeingermany#signshop#carwrap#carwraps#carwrapping#carwraptools#wraptools#wrapshop#wraplife#vinylwrap#vinylwraps#trickortreat#vinylwrapping#graphicinstaller#signmaker#signmakers#signmaking#signtools#yellotools#signshoplife#wrapstick#chromedelete#ppf
0 notes
Text
Original Post from Amazon Security Author: Tracy Pierce
Is your on-premises Hardware Security Module (HSM) at end-of-life? Does continued maintenance of your on-premises hardware take a lot of time and cost a lot of money? Do you want or need all of your workloads to be performed on AWS? By migrating these workloads to AWS CloudHSM, you receive automated backups, low cost HSMs, managed maintenance, automatic recovery in event of a hardware failure, integrated fault tolerance, and high-availability. One such workload you might consider migrating is secret key material used for digital signing operations.
*** The next two hyperlinks go to the exact same target. It’s also repeated in the first paragraph under Background. *** Enterprise certificate authority (CA) or public key infrastructure (PKI) applications use the private portion of an asymmetric key pair generated and stored in a hardware security module (HSM) to perform signing operations. Examples of such operations include the creation of digital certificates for web-servers or IoT devices, file signatures, or when negotiating a TLS session. Migrating this type of workload to AWS may save you time and money. If your HSM is at end of life and you need an alternative, you can migrate the digital signing workload to AWS CloudHSM in just a few steps.
This post will focus on a workload that allows you to create and use a digital certificate to digitally sign an arbitrary file. I’ll show you how to create a new asymmetric key pair and generate the corresponding certificate signing request (CSR) on AWS CloudHSM. This CSR, once signed by the appropriate issuing CA, allows your new key pair and the associated certificate to be trusted in the same way as the key pairs in your original HSM. You could then move traffic related to signing operations or issuing certificates to your AWS CloudHSM cluster.
Background
Before I walk you through the steps of migrating a certificate signing workload into CloudHSM, I’ll provide a little background information so you’ll know how CloudHSM, PKI, and CAs work together. Every certificate is associated with a key pair made up of a private (secret) key and a public key. The private key associated with a certificate needs to be kept confidential, so it typically resides on a hardware security module (HSM). The public portion of the key pair is not confidential, is included in the certificate, and can be shared with anyone who wants to verify a digital signature made with the corresponding private key. In a PKI, a CA is the trusted entity that issues digital certificates on behalf of end-entities. At the top of the trust hierarchy is a root CA, which is implicitly trusted when it is established because it acts as the root of trust for intermediate CAs and end-entity certificates that may be issued underneath it. Intermediate CAs are trusted because their certificates are signed by the root CA. Intermediate CAs in turn sign end-entity certificates, which are used to authenticate identities of various actors across the data transfer process. A common use case for end-entity certificates is for web servers so that connecting clients can verify the server’s identity. Generally, end-entity certificates are valid for 1-3 years, intermediate CA certificates are valid for 5-10 years, and root CAs are valid for 30 years or more.
Beyond solving for the non-repudiation of objects signed by end-entity certificates to ensure the owner of the private key performed the signing operation, there is still the problem of trusting that the owner of the private key is the identity they claim to be. When evaluating trust in this way, there are generally two options; relying on public CAs or private CAs. Public CAs widely distribute the public keys of their root certificates into popular client trust stores (for example, browsers and operating systems). This allows users to verify that the identity of the end-entity has been attested to by a publicly trusted CA. This helps when the signer and the verifier of the digital asset don’t know each other and haven’t shared cryptographic material with each other in advance to perform future validations. Private CAs are those for which there are no widely distributed copies of their associated public keys. The verifier has to retrieve the public key from the private CA and has to explicitly trust the cert without any third-party attestation of the signer’s identity. This is appropriate for cases when signers and verifiers are in the same company or know each other. Examples of when to use a private CA are securing virtual private networks, data or file replication between internal servers, remote backups, file-sharing, email, or other personal accounts.
Regardless of the certificate trust model you need, AWS CloudHSM can be used to create the initial key pair and CSR for both public and private CA requests. Note that AWS offers some alternatives for certificate management that may simplify your workloads without having to use AWS CloudHSM directly. AWS Certificate Manager (ACM) automatically creates key pairs and issues public or private certificates to identify resources within your organization. For use cases that need capabilities not yet supported by ACM, or in unusual situations in which a single-tenant HSM under your control is required for compliance reasons, you can use AWS CloudHSM directly for key generation and signing operations.
Organizations currently using an on-premises HSM for the creation of asymmetric keys used in digital certificates often use a vendor-proprietary mechanism to replicate key material across multiple HSMs for resiliency. However, this method prevents the key material from ever being transferred to an HSM offered by a different vendor. Consider it “vendor lock-in’ by design. So, the private key corresponding to the certificates you use for signing and authentication are locked inside that HSM. But if they are locked inside, how do you move to AWS CloudHSM? The answer is that you don’t have to rely on these inaccessible keys: you can create a new key pair and use it within AWS CloudHSM to begin issuing end-entity certificates.
Solution overview
I will go over creating a new private key in AWS CloudHSM using the Windows client and using Microsoft certreq to generate a corresponding CSR. You provide this CSR to your private or public CA to receive a signed certificate in return. This certificate and its public key then needs to be propagated to wherever your signatures are verified. At the end of this post, I will show you how to verify your digital signatures using Microsoft SignTool. SignTool is provided by Microsoft to allow Windows users to digitally sign files, verify file signatures, and file timestamps.
Figure 1: Procedural diagram
As shown in the diagram above, the steps followed in this post are:
Create a new RSA private key using KSP/CNG through the AWS CloudHSM Windows client.
Using Microsoft certreq, create your CSR.
Provide the CSR to your CA for signing.
Use Microsoft SignTool to sign files in your environment.
Note: You may have to register this new certificate with any partners that do not automatically verify the entire certificate chain. This could be 3rd party applications, vendors, or outside entities that utilize your certificates to determine trust.
Prerequisites
In this walkthrough, I assume that you already have an AWS CloudHSM cluster set up and initialized with at least one HSM device, and an Amazon Elastic Compute Cloud (EC2) Windows-based instance with the AWS CloudHSM client, PowerShell, and Windows SDK with Microsoft SignTool installed. You must have a crypto user (CU) on the HSM to perform the steps in this post.
Deploying the solution
Step 1: Create a new private key using KSP/CNG using the AWS CloudHSM Windows client
On your Windows server where the AWS CloudHSM Windows client is installed, use a text editor to create a certificate request file named IISCertRequest.inf. For the purpose of this post, I have filled out an example file below.
[Version] Signature = "$Windows NT$" [NewRequest] Subject = "CN=example.com,C=US,ST=Washington,L=Seattle,O=ExampleOrg,OU=WebServer" HashAlgorithm = SHA256 KeyAlgorithm = RSA KeyLength = 2048 ProviderName = "Cavium Key Storage Provider" KeyUsage = "CERT_DIGITAL_SIGNATURE_KEY_USAGE" MachineKeySet = True
Step 2: Using Microsoft certreq, create your CSR
On the same server, open PowerShell and, at the PowerShell prompt, create a CSR from the IISCertRequest.inf file by using the Windows certreq command. Here’s an example of the command. Remember to change out the text in red italics with your own file name.
PS C:>certreq -new SDK Version: 2.03 CertReq: Request Created
If successful, you’ll see the “Request Created” message above, as well as the new file on your server. This certificate will be provided to your choice of public CA for certificate issuance. This will need to be completed manually via your public CAs suggested method of certificate request.
Step 3: Provide the CSR to your CA for signing
The CA that had been signing your existing end-entity certificates with keys generated by your original HSM is the one you use to sign the new certificates with keys generated by AWS CloudHSM, as well. There are many CAs to choose from, such as Digicert, Trustwave, GoDaddy, and so on. You will want to follow their steps for submitting your CSR to receive your certificate in return.
Step 4: Use Microsoft SignTool to sign files in your environment
When you receive your signed certificate back from your chosen CA, save a copy locally on your Windows server. Then, move the certificate file to the Personal Certificate Store in Windows so it can be used by other applications, such as Microsoft SignTool. Here’s an example of the command. Be sure to replace the value in with your actual certificate name. PS C:certreq -accept
Now, the certificate is ready for use, and I’ll show you how to use it to sign a file. First, you have to get the thumbprint of your certificate. To do this, open PowerShell as an Administrator (right-click the app and choose Run as Administrator). Type this command: PS C:>Get-ChildItem -path cert:LocalMachineMy
If successful, you should see an output similar to this. Copy the thumbprint that is returned. You’ll need it when you perform the actual signing operation on a file.
Thumbprint Subject --------------- ----------- 49DF7HDJT84723FDKCURLSXYRF9830568CXHSUB2 CN=WINDOWS-CA VJFU57E6DI9DKMCHAKLDFJA8E73739Q04730QU7A CN=www.example.com, OU=Certif….
To open the SignTool application, navigate to the app’s directory within PowerShell. By default, this is typically: C:Program Files (x86)Windows Kits bin
For example, if you had downloaded the Microsoft Windows SDK 10 version, the application would be stored in:
C:Program Files (x86)Windows Kits10bin10.0.17763.0×64
When you’ve located the directory, sign your file by running the command below. Remember to replace the values in with your own values. The test.exe file in this example can be any valid executable file in your directory. PS C:>.signtool.exe sign /v /fd sha256 /sha1 /sm /as C:UsersAdministratorDesktop
You should see a message like this:
Done Adding Additional Store Successfully signed C:UserAdministratorDesktop Number of files successfully Signed: 1 Number of warnings: 0 Number of errors: 0
One last optional item you can do is verify the signature on the file using the command below. Again, replace your values for those in red italics. PS C:>.signtool.exe verify /v /pa C:UsersAdministratorsDesktop
You’ve now successfully migrated your file signing workload to AWS CloudHSM. If your signing certificate was not issued by a publicly trusted CA but instead by a private CA, make sure to deploy a copy of the root CA certificate and any intermediate certs from the private CA on any systems you want to verify the integrity of your signed file.
Conclusion
In this post, I walked you through creating a new RSA asymmetric key pair to create a CSR. After supplying the CSR to your chosen CA and receiving a signing certificate in return, I then showed you a how to use Microsoft SignTool with AWS CloudHSM to sign files in your environment. You can now use AWS CloudHSM to sign code, documents, or other certificates in the same method of your original HSMs.
If you have feedback about this blog post, submit comments in the Comments section below. If you have questions about this blog post, start a new thread on the AWS CloudHSM forum.
Want more AWS Security how-to content, news, and feature announcements? Follow us on Twitter.
Tracy Pierce
Tracy Pierce is a Senior Consultant, Security Specialty, for Remote Consulting Services. She enjoys the peculiar culture of Amazon and uses that to ensure every day is exciting for her fellow engineers and customers alike. Customer Obsession is her highest priority and she shows this by improving processes, documentation, and building tutorials. She has her AS in Computer Security & Forensics from SCTD, SSCP certification, AWS Developer Associate certification, and AWS Security Specialist certification. Outside of work, she enjoys time with friends, her Great Dane, and three cats. She keeps work interesting by drawing cartoon characters on the walls at request.
#gallery-0-5 { margin: auto; } #gallery-0-5 .gallery-item { float: left; margin-top: 10px; text-align: center; width: 33%; } #gallery-0-5 img { border: 2px solid #cfcfcf; } #gallery-0-5 .gallery-caption { margin-left: 0; } /* see gallery_shortcode() in wp-includes/media.php */
Go to Source Author: Tracy Pierce How to migrate a digital signing workload to AWS CloudHSM Original Post from Amazon Security Author: Tracy Pierce Is your on-premises Hardware Security Module (HSM) at end-of-life?
0 notes
Photo
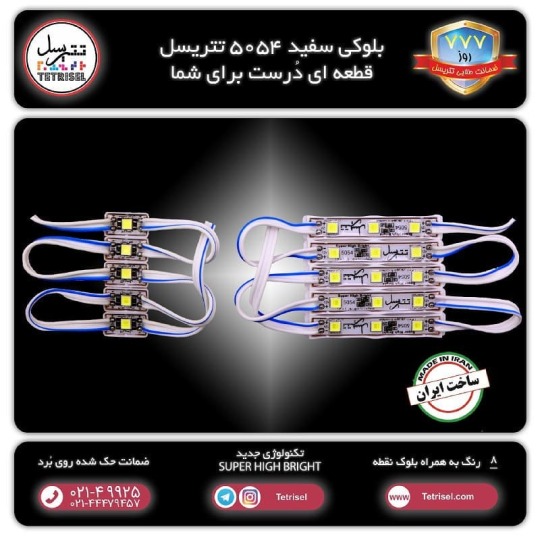
✅بلوکی سفید 5054 تتریسل قطعه ای دُرست برای شما✅ ▒▒▒▒▒▒▒▒▒▒▒▒▒▒ ✅قیمت رقابتی ✅ چيپ 54 * 50 ✅تکنولوژی جدید Super High Bright ✅شدت نور فوق العاده ✅چسب فوق قوی ✅ سیم تمام مس درجه 1 بلند ( 10 سانتی ) ✅ضمانت حک شده روی بُرد ✅ساخت ایران ▒▒▒▒▒▒▒▒▒▒▒▒▒▒ . 🧩ضمانت ما در دستان شماست🧩 . ☎️ 02149925 ☎️ ☎️ 02144479457 ☎️ 🌐 tetrisel.com 🌐 🔴 instagram.com/tetrisel . #پاور_سوئيچينگ #منبع_تغذيه #منبع_تغذيه_ضد_باران #ال_اي_دي_اوال #اس_ام_دي_بلوکي #چنلیوم #چنلیوم_الماسی #چنلیوم_پانچ #چنلیوم_پلاستیکی #تابلوسازی #اس_ام_دی #electronics #tetrisel #marketing #shopping #management #technology #work #business #team #teamwork #power_switching #led_oval #chanellium #advertising #sign #signtools #led_module (at Boostan Shopping Center - مرکز خرید بوستان) https://www.instagram.com/p/CITXypolGiC/?igshid=14xrsczj456iy
#پاور_سوئيچينگ#منبع_تغذيه#منبع_تغذيه_ضد_باران#ال_اي_دي_اوال#اس_ام_دي_بلوکي#چنلیوم#چنلیوم_الماسی#چنلیوم_پانچ#چنلیوم_پلاستیکی#تابلوسازی#اس_ام_دی#electronics#tetrisel#marketing#shopping#management#technology#work#business#team#teamwork#power_switching#led_oval#chanellium#advertising#sign#signtools#led_module
0 notes
Photo

✅بلوکی انبه ای 5054 تتریسل قطعه ای دُرست برای شما✅ ▒▒▒▒▒▒▒▒▒▒▒▒▒▒ ✅قیمت رقابتی ✅ چيپ 54 * 50 ✅تکنولوژی جدید Super High Bright ✅شدت نور فوق العاده ✅چسب فوق قوی ✅ سیم تمام مس درجه 1 بلند ( 10 سانتی ) ✅ضمانت حک شده روی بُرد ✅ساخت ایران ▒▒▒▒▒▒▒▒▒▒▒▒▒▒ . 🧩ضمانت ما در دستان شماست🧩 . ☎️ 02149925 ☎️ ☎️ 02144479457 ☎️ 🌐 tetrisel.com 🌐 🔴 instagram.com/tetrisel . #پاور_سوئيچينگ #منبع_تغذيه #منبع_تغذيه_ضد_باران #ال_اي_دي_اوال #اس_ام_دي_بلوکي #چنلیوم #چنلیوم_الماسی #چنلیوم_پانچ #چنلیوم_پلاستیکی #تابلوسازی #اس_ام_دی #electronics #tetrisel #marketing #shopping #management #technology #work #business #team #teamwork #power_switching #led_oval #chanellium #advertising #sign #signtools #led_module (at Boostan Shopping Center - مرکز خرید بوستان) https://www.instagram.com/p/CIQ4AU7lh-C/?igshid=1d4cdugvhr9a5
#پاور_سوئيچينگ#منبع_تغذيه#منبع_تغذيه_ضد_باران#ال_اي_دي_اوال#اس_ام_دي_بلوکي#چنلیوم#چنلیوم_الماسی#چنلیوم_پانچ#چنلیوم_پلاستیکی#تابلوسازی#اس_ام_دی#electronics#tetrisel#marketing#shopping#management#technology#work#business#team#teamwork#power_switching#led_oval#chanellium#advertising#sign#signtools#led_module
0 notes
Photo

✅بلوکی پرتقالی 5054 تتریسل قطعه ای دُرست برای شما✅ ▒▒▒▒▒▒▒▒▒▒▒▒▒▒ ✅قیمت رقابتی ✅ چيپ 54 * 50 ✅تکنولوژی جدید Super High Bright ✅شدت نور فوق العاده ✅چسب فوق قوی ✅ سیم تمام مس درجه 1 بلند ( 10 سانتی ) ✅ضمانت حک شده روی بُرد ✅ساخت ایران ▒▒▒▒▒▒▒▒▒▒▒▒▒▒ . 🧩ضمانت ما در دستان شماست🧩 . ☎️ 02149925 ☎️ ☎️ 02144479457 ☎️ 🌐 tetrisel.com 🌐 🔴 instagram.com/tetrisel . #پاور_سوئيچينگ #منبع_تغذيه #منبع_تغذيه_ضد_باران #ال_اي_دي_اوال #اس_ام_دي_بلوکي #چنلیوم #چنلیوم_الماسی #چنلیوم_پانچ #چنلیوم_پلاستیکی #تابلوسازی #اس_ام_دی #electronics #tetrisel #marketing #shopping #management #technology #work #business #team #teamwork #power_switching #led_oval #chanellium #advertising #sign #signtools #led_module (at Boostan Shopping Center - مرکز خرید بوستان) https://www.instagram.com/p/CIOH1U8FmX2/?igshid=o48qjbdj21u8
#پاور_سوئيچينگ#منبع_تغذيه#منبع_تغذيه_ضد_باران#ال_اي_دي_اوال#اس_ام_دي_بلوکي#چنلیوم#چنلیوم_الماسی#چنلیوم_پانچ#چنلیوم_پلاستیکی#تابلوسازی#اس_ام_دی#electronics#tetrisel#marketing#shopping#management#technology#work#business#team#teamwork#power_switching#led_oval#chanellium#advertising#sign#signtools#led_module
0 notes
Photo

✅بلوکی آفتابی 5054 تتریسل قطعه ای دُرست برای شما✅ ▒▒▒▒▒▒▒▒▒▒▒▒▒▒ ✅قیمت رقابتی ✅ چيپ 54 * 50 ✅تکنولوژی جدید Super High Bright ✅شدت نور فوق العاده ✅چسب فوق قوی ✅ سیم تمام مس درجه 1 بلند ( 10 سانتی ) ✅ضمانت حک شده روی بُرد ✅ساخت ایران ▒▒▒▒▒▒▒▒▒▒▒▒▒▒ . 🧩ضمانت ما در دستان شماست🧩 . ☎️ 02149925 ☎️ ☎️ 02144479457 ☎️ 🌐 tetrisel.com 🌐 🔴 instagram.com/tetrisel . #پاور_سوئيچينگ #منبع_تغذيه #منبع_تغذيه_ضد_باران #ال_اي_دي_اوال #اس_ام_دي_بلوکي #چنلیوم #چنلیوم_الماسی #چنلیوم_پانچ #چنلیوم_پلاستیکی #تابلوسازی #اس_ام_دی #electronics #tetrisel #marketing #shopping #management #technology #work #business #team #teamwork #power_switching #led_oval #chanellium #advertising #sign #signtools #led_module (at Boostan Shopping Center - مرکز خرید بوستان) https://www.instagram.com/p/CIL0c7FFvWR/?igshid=9iqwifsml5r6
#پاور_سوئيچينگ#منبع_تغذيه#منبع_تغذيه_ضد_باران#ال_اي_دي_اوال#اس_ام_دي_بلوکي#چنلیوم#چنلیوم_الماسی#چنلیوم_پانچ#چنلیوم_پلاستیکی#تابلوسازی#اس_ام_دی#electronics#tetrisel#marketing#shopping#management#technology#work#business#team#teamwork#power_switching#led_oval#chanellium#advertising#sign#signtools#led_module
0 notes
Photo

✅بلوکی سبز 5054 تتریسل قطعه ای دُرست برای شما✅ ▒▒▒▒▒▒▒▒▒▒▒▒▒▒ ✅قیمت رقابتی ✅ چيپ 54 * 50 ✅تکنولوژی جدید Super High Bright ✅شدت نور فوق العاده ✅چسب فوق قوی ✅ سیم تمام مس درجه 1 بلند ( 10 سانتی ) ✅ضمانت حک شده روی بُرد ✅ساخت ایران ▒▒▒▒▒▒▒▒▒▒▒▒▒▒ . 🧩ضمانت ما در دستان شماست🧩 . ☎️ 02149925 ☎️ ☎️ 02144479457 ☎️ 🌐 tetrisel.com 🌐 🔴 instagram.com/tetrisel . #پاور_سوئيچينگ #منبع_تغذيه #منبع_تغذيه_ضد_باران #ال_اي_دي_اوال #اس_ام_دي_بلوکي #چنلیوم #چنلیوم_الماسی #چنلیوم_پانچ #چنلیوم_پلاستیکی #تابلوسازی #اس_ام_دی #electronics #tetrisel #marketing #shopping #management #technology #work #business #team #teamwork #power_switching #led_oval #chanellium #advertising #sign #signtools #led_module (at Boostan Shopping Center - مرکز خرید بوستان) https://www.instagram.com/p/CIJJnqiFvmq/?igshid=xs5bv0xoq37q
#پاور_سوئيچينگ#منبع_تغذيه#منبع_تغذيه_ضد_باران#ال_اي_دي_اوال#اس_ام_دي_بلوکي#چنلیوم#چنلیوم_الماسی#چنلیوم_پانچ#چنلیوم_پلاستیکی#تابلوسازی#اس_ام_دی#electronics#tetrisel#marketing#shopping#management#technology#work#business#team#teamwork#power_switching#led_oval#chanellium#advertising#sign#signtools#led_module
0 notes
Photo

✅بلوکی سبز 5054 تتریسل قطعه ای دُرست برای شما✅ ▒▒▒▒▒▒▒▒▒▒▒▒▒▒ ✅قیمت رقابتی ✅ چيپ 54 * 50 ✅تکنولوژی جدید Super High Bright ✅شدت نور فوق العاده ✅چسب فوق قوی ✅ سیم تمام مس درجه 1 بلند ( 10 سانتی ) ✅ضمانت حک شده روی بُرد ✅ساخت ایران ▒▒▒▒▒▒▒▒▒▒▒▒▒▒ . 🧩ضمانت ما در دستان شماست🧩 . ☎️ 02149925 ☎️ ☎️ 02144479457 ☎️ 🌐 tetrisel.com 🌐 🔴 instagram.com/tetrisel . #پاور_سوئيچينگ #منبع_تغذيه #منبع_تغذيه_ضد_باران #ال_اي_دي_اوال #اس_ام_دي_بلوکي #چنلیوم #چنلیوم_الماسی #چنلیوم_پانچ #چنلیوم_پلاستیکی #تابلوسازی #اس_ام_دی #electronics #tetrisel #marketing #shopping #management #technology #work #business #team #teamwork #power_switching #led_oval #chanellium #advertising #sign #signtools #led_module (at Boostan Shopping Center - مرکز خرید بوستان) https://www.instagram.com/p/CID70agF9my/?igshid=1r8fxtvsucg1k
#پاور_سوئيچينگ#منبع_تغذيه#منبع_تغذيه_ضد_باران#ال_اي_دي_اوال#اس_ام_دي_بلوکي#چنلیوم#چنلیوم_الماسی#چنلیوم_پانچ#چنلیوم_پلاستیکی#تابلوسازی#اس_ام_دی#electronics#tetrisel#marketing#shopping#management#technology#work#business#team#teamwork#power_switching#led_oval#chanellium#advertising#sign#signtools#led_module
0 notes
Photo
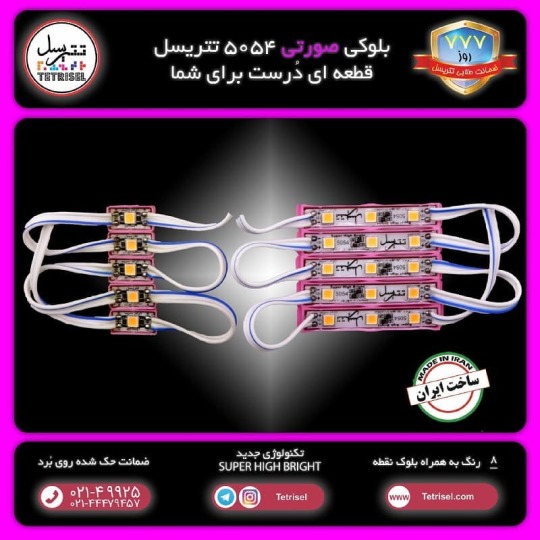
✅بلوکی صورتی 5054 تتریسل قطعه ای دُرست برای شما✅ ▒▒▒▒▒▒▒▒▒▒▒▒▒▒ ✅قیمت رقابتی ✅ چيپ 54 * 50 ✅تکنولوژی جدید Super High Bright ✅شدت نور فوق العاده ✅چسب فوق قوی ✅ سیم تمام مس درجه 1 بلند ( 10 سانتی ) ✅ضمانت حک شده روی بُرد ✅ساخت ایران ▒▒▒▒▒▒▒▒▒▒▒▒▒▒ . 🧩ضمانت ما در دستان شماست🧩 . ☎️ 02149925 ☎️ ☎️ 02144479457 ☎️ 🌐 tetrisel.com 🌐 🔴 instagram.com/tetrisel . #پاور_سوئيچينگ #منبع_تغذيه #منبع_تغذيه_ضد_باران #ال_اي_دي_اوال #اس_ام_دي_بلوکي #چنلیوم #چنلیوم_الماسی #چنلیوم_پانچ #چنلیوم_پلاستیکی #تابلوسازی #اس_ام_دی #electronics #tetrisel #marketing #shopping #management #technology #work #business #team #teamwork #power_switching #led_oval #chanellium #advertising #sign #signtools #led_module (at Boostan Shopping Center - مرکز خرید بوستان) https://www.instagram.com/p/CIBAHuPFqK_/?igshid=1w23quxwjfcl7
#پاور_سوئيچينگ#منبع_تغذيه#منبع_تغذيه_ضد_باران#ال_اي_دي_اوال#اس_ام_دي_بلوکي#چنلیوم#چنلیوم_الماسی#چنلیوم_پانچ#چنلیوم_پلاستیکی#تابلوسازی#اس_ام_دی#electronics#tetrisel#marketing#shopping#management#technology#work#business#team#teamwork#power_switching#led_oval#chanellium#advertising#sign#signtools#led_module
0 notes
Photo

✅بلوکی 4040 تتریسل قطعه ای دُرست برای شما✅ ▒▒▒▒▒▒▒▒▒▒▒▒▒▒ ✅قیمت فوق العاده ✅ چيپ 4040 ✅تکنولوژی جدید Super High Bright ✅شدت نور فوق العاده ✅چسب فوق قوی ✅ سیم تمام مس ✅ضمانت حک شده روی بُرد ✅ساخت ایران ▒▒▒▒▒▒▒▒▒▒▒▒▒▒ . 🧩777 روز ضمانت طلایی تتریسل🧩 . ☎️ 02149925 ☎️ ☎️ 02144479457 ☎️ 🌐 tetrisel.com 🌐 🔴 instagram.com/tetrisel🔴 . #پاور_سوئيچينگ #منبع_تغذيه #منبع_تغذيه_ضد_باران #ال_اي_دي_اوال #اس_ام_دي_بلوکي #چنلیوم #چنلیوم_الماسی #چنلیوم_پانچ #چنلیوم_پلاستیکی #تابلوسازی #اس_ام_دی #electronics #tetrisel #marketing #shopping #management #technology #work #business #team #teamwork #power_switching #led_oval #chanellium #advertising #sign #signtools #led_module https://www.instagram.com/p/CH-bBlAlcMJ/?igshid=omad4r17cht0
#پاور_سوئيچينگ#منبع_تغذيه#منبع_تغذيه_ضد_باران#ال_اي_دي_اوال#اس_ام_دي_بلوکي#چنلیوم#چنلیوم_الماسی#چنلیوم_پانچ#چنلیوم_پلاستیکی#تابلوسازی#اس_ام_دی#electronics#tetrisel#marketing#shopping#management#technology#work#business#team#teamwork#power_switching#led_oval#chanellium#advertising#sign#signtools#led_module
0 notes
Photo

✅بلوکی 5054 تتریسل قطعه ای دُرست برای شما✅ ▒▒▒▒▒▒▒▒▒▒▒▒▒▒ ✅قیمت رقابتی ✅ چيپ 54 * 50 ✅تکنولوژی جدید Super High Bright ✅شدت نور فوق العاده ✅چسب فوق قوی ✅ سیم تمام مس درجه 1 بلند ( 10 سانتی ) ✅ضمانت حک شده روی بُرد ✅ساخت ایران ▒▒▒▒▒▒▒▒▒▒▒▒▒▒ . 🧩ضمانت ما در دستان شماست🧩 . ☎️ 02149925 ☎️ ☎️ 02144479457 ☎️ 🌐 tetrisel.com 🌐 🔴 instagram.com/tetrisel . #پاور_سوئيچينگ #منبع_تغذيه #منبع_تغذيه_ضد_باران #ال_اي_دي_اوال #اس_ام_دي_بلوکي #چنلیوم #چنلیوم_الماسی #چنلیوم_پانچ #چنلیوم_پلاستیکی #تابلوسازی #اس_ام_دی #electronics #tetrisel #marketing #shopping #management #technology #work #business #team #teamwork #power_switching #led_oval #chanellium #advertising #sign #signtools #led_module (at Boostan Shopping Center - مرکز خرید بوستان) https://www.instagram.com/p/CHlFuwTl8FE/?igshid=re0q1c86qe80
#پاور_سوئيچينگ#منبع_تغذيه#منبع_تغذيه_ضد_باران#ال_اي_دي_اوال#اس_ام_دي_بلوکي#چنلیوم#چنلیوم_الماسی#چنلیوم_پانچ#چنلیوم_پلاستیکی#تابلوسازی#اس_ام_دی#electronics#tetrisel#marketing#shopping#management#technology#work#business#team#teamwork#power_switching#led_oval#chanellium#advertising#sign#signtools#led_module
0 notes