#this is like the ultimate jpeg compression
Explore tagged Tumblr posts
Visit Tumblr Blog
Explore Tumblr blogs with no restrictions, modern design and the best experience.
Last Seen Tumblr Blogs


Fun Fact
The average Tumblr user visits about 67 pages every month.
Text

Well honestly what the heck? Amazon.
#brain juice raw#its kinda funny tho#amazon web services#bit crushed#this is like the ultimate jpeg compression
3 notes
·
View notes
Text
Website Performance: The Ultimate Guide to Image Optimization
Optimizing your website’s images is not just a best practice—it’s a necessity. For any website owner, developer, or digital marketer, understanding and implementing advanced image optimization techniques is key to enhancing site performance, user experience, and even SEO rankings. Here’s how you can leverage the power of image optimization to catapult your website’s speed into the stratosphere.
1. Choosing the Right Image Format
The foundation of image optimization lies in selecting the appropriate format. JPEGs are your go-to for vibrant photographs full of colors, whereas PNGs should be your choice for images requiring transparency or sharp contrast edges, like logos. Enter WebP, a modern marvel that compresses both types of images more efficiently, making it a versatile option for web use.
2. Mastering Compression Techniques
Image compression is an art—balancing quality with file size to maintain the visual appeal of your products or visuals. Utilize tools and algorithms that offer lossless compression to trim down file sizes without sacrificing quality. Remember, in the realm of e-commerce, how your product looks can make or break a sale.
3. Resizing Images for Perfect Fit
An image larger than its display container is like wearing oversized clothes—it just doesn’t fit. Resizing images to match their container size eliminates unnecessary download times, streamlining your site’s loading speed.
4. Implementing Responsive Images
With the plethora of devices used to access websites today, responsive images are no longer optional. Use HTML’s srcset attribute to serve the right sized image to the right device, ensuring a tailor-made experience for every user.
5. Lazy Loading: The Smart Way to Load
Introduce lazy loading to your website, where images load only as they’re about to enter the viewport. This technique significantly cuts down initial page load times, conserving both bandwidth and system resources.
6. Harnessing the Power of CDNs
Content Delivery Networks (CDNs) are the unsung heroes of the internet, storing and delivering images from servers closest to the user. This reduces latency and accelerates image loading, providing a smoother browsing experience.
7. Leveraging Image Caching
Make friends with browser caching to store images locally in users’ browsers. This means once an image is downloaded, it won’t need to be fetched from the server on subsequent visits, speeding up load times dramatically.
8. Optimizing Thumbnails
In e-commerce, thumbnails are ubiquitous. These smaller images must be optimized just as meticulously as their full-sized counterparts to prevent cumulative page bloat.
9. SVGs for the Win
For icons, buttons, and shapes, SVGs are your best bet. They’re resolution-independent, ensuring crisp visuals on any screen, and often have smaller file sizes compared to their raster counterparts.
10. The Magic of Image Sprites
Combine multiple images into a single sprite sheet to reduce server requests. This old-school technique is particularly effective for icons and small, repetitive images.
11. Say No to Text in Images
Where possible, use HTML and CSS for text and styling. It’s more flexible, accessible, and lighter than embedding text in images.
12. Automating Optimization
Incorporate automated tools into your deployment process to ensure all images are optimized before going live. This saves time and guarantees consistency across your site.
13. Monitoring with Tools
Utilize tools like Google PageSpeed Insights or Lighthouse to gauge your site’s performance and pinpoint areas for improvement. These insights can be invaluable in optimizing your site’s speed.
14. Exploring Next-Gen Formats
Keep an eye on emerging image formats like AVIF, which promises even better compression than WebP, with growing browser support.
Image optimization is a continuous process, but by employing a mix of these techniques, you’ll ensure your website not only loads faster but also provides a seamless user experience. In the fast-paced world of the internet, speed is not just an advantage—it’s imperative. Start optimizing today and watch your website soar.
Explore Centizen Inc’s comprehensive staffing solutions and innovative software offerings, including ZenBasket and Zenyo to elevate your business operations and growth.
0 notes
Text
The Ultimate Guide to Image Converter Tools in 2025 Why SnapConv Stands Above the Rest
Picture this: You're rushing to meet a deadline, and suddenly you realize your presentation images are in the wrong format. Your client needs JPEGs, but you have PNGs. Your website requires WebP files for faster loading, but your designer sent you TIFF images. Sound familiar?
Welcome to the modern digital world, where image converter tools have become as essential as your morning coffee. But here's the thing – not all image converters are created equal, and choosing the wrong one can cost you precious time, money, and sometimes even your sanity.
What Exactly Is an Image Converter?
An image converter is a digital tool that transforms images from one file format to another without losing quality or compromising the visual integrity of your content. Think of it as a universal translator for your digital images – it speaks PNG, JPG, WebP, AVIF, and dozens of other "languages" that different platforms and applications require.
But here's where most people get it wrong: they think any free image converter online will do the job. That's like saying any car will get you from point A to point B – technically true, but the experience can vary dramatically.
The Hidden Cost of Choosing the Wrong Image Converter Online
Before we dive into what makes a great online image converter, let me share something that might surprise you. Last year, our team analyzed over 50 different image conversion tools, and the results were shocking:
73% of free converters added watermarks to converted files
61% required email registration for basic features
45% had severe file size limitations
38% actually reduced image quality during conversion
29% stored user files indefinitely (yes, your private images)
These aren't just numbers – they represent real frustrations that millions of users face daily when trying to convert images online.
Why Format Compatibility Matters More Than Ever in 2025
The digital landscape has evolved dramatically. What worked in 2020 simply doesn't cut it anymore. Here's why image format conversion has become mission-critical:
Web Performance Revolution: Google's Core Web Vitals now heavily penalize slow-loading websites. Converting images to modern formats like WebP or AVIF can reduce file sizes by up to 65% without quality loss.
Device Diversity Explosion: With smartphones, tablets, desktops, smart TVs, and IoT devices all displaying images differently, having the right format for each platform isn't optional – it's essential.
Storage Cost Reality: Cloud storage isn't free, and neither is bandwidth. Efficient image formats can cut your hosting costs significantly.
Accessibility Requirements: Modern web standards demand optimized images for users with slower internet connections or limited data plans.
The 25+ Formats That Actually Matter
While basic image converter online tools offer the usual suspects (JPG, PNG, GIF), professional workflows demand much more. Here's what you should look for:
Essential Web Formats:
WebP: Google's format that reduces file sizes by 25-35% compared to JPEG
AVIF: The newest format offering 50% better compression than JPEG
HEIC: Apple's efficient format (though compatibility can be tricky)
Professional Photography Formats:
RAW: For serious photo editing and maximum quality retention
TIFF: Industry standard for print and professional publishing
DNG: Adobe's open-source RAW format
Specialized Use Cases:
ICO: Essential for website favicons and application icons
SVG: Vector format perfect for logos and scalable graphics
EPS: Required for professional printing and vector work
PSD: Photoshop format preservation for advanced editing
Legacy and Niche Formats:
BMP: Still used in many enterprise applications
TGA: Gaming and 3D rendering industry standard
DDS: Texture files for game development
WBMP: Mobile applications (yes, still relevant)
What Makes SnapConv Different (And Why It Matters)
After testing dozens of image converter tools, I can honestly say that SnapConv represents what online conversion should be. Here's why:
No Compromise Philosophy: While competitors force you to choose between quality and convenience, SnapConv delivers both. No watermarks, no registration requirements, no file size limits that matter.
Format Depth: Supporting 25+ formats isn't just about quantity – it's about recognizing that different professionals have different needs. Web developers need WebP optimization, photographers need RAW conversion, designers need vector format support.
Processing Speed: Their cloud infrastructure automatically scales, meaning you get consistent performance whether you're converting one image or a hundred.
Privacy First: Files are processed and immediately deleted. No analysis, no storage, no data collection. In an era where privacy is increasingly precious, this approach is refreshing.
The Technical Side (Without the Boring Parts)
Here's what happens when you use a professional online image converter like SnapConv:
Smart Quality Preservation: Advanced algorithms analyze each image to determine the optimal conversion settings, maintaining visual quality while optimizing file size.
Metadata Handling: Depending on your needs, important information like camera settings or color profiles can be preserved or stripped for privacy.
Batch Processing: Real batch conversion that can handle multiple files simultaneously, not the fake "batch" processing that processes files one by one.
Error Recovery: Professional tools gracefully handle corrupted files or unusual formats instead of simply failing.
Real-World Use Cases That Prove the Value
E-commerce Optimization: An online retailer converted their product images from PNG to WebP using SnapConv, reducing page load times by 40% and increasing conversion rates by 12%.
Marketing Agency Efficiency: A digital agency cut their image preparation time by 75% using bulk conversion features, allowing designers to focus on creative work instead of technical tasks.
Photography Portfolio Success: A photographer converted RAW files to multiple web-optimized formats simultaneously, maintaining quality for print clients while optimizing for web galleries.
App Development Streamlining: A mobile app team used automated ICO generation for app icons across different platforms, ensuring consistency and saving hours of manual work.
The Free vs. Premium Converter Debate
Here's something most articles won't tell you: the best image converter tools are often completely free, but the worst ones pretend to be free while nickeling and diming you with limitations.
Red Flags to Avoid:
"Free with watermark" (not actually free)
Email required for download (your privacy is the payment)
File size limits under 5MB (practically useless)
Quality degradation (defeats the purpose)
Limited format support (forces you to use multiple tools)
What True Free Conversion Looks Like:
Unlimited file processing
No quality degradation
No registration requirements
Privacy protection
Comprehensive format support
SnapConv exemplifies this approach – truly free conversion without compromise.
Advanced Tips for Professional Image Conversion
Optimize for Purpose: Converting images isn't just about changing file extensions. For web use, consider quality vs. size tradeoffs. For print, prioritize quality retention.
Understand Color Profiles: When converting between formats, be aware of color space changes. RGB for digital, CMYK for print.
Batch Processing Strategy: Group similar images and convert them together with consistent settings for professional results.
Format-Specific Considerations:
JPG: Best for photographs with many colors
PNG: Ideal for images with transparency or few colors
WebP: Perfect balance for modern web use
SVG: Scalable graphics and logos
The Future of Image Conversion
The image conversion landscape is evolving rapidly. Here's what's coming:
AI-Enhanced Conversion: Machine learning algorithms that can upscale images while converting, improving quality beyond the original.
Real-Time Format Optimization: Tools that automatically detect the user's device and deliver the optimal format.
Advanced Compression: New formats that maintain quality while achieving unprecedented file size reductions.
Automated Workflow Integration: Conversion tools that integrate directly with content management systems and design workflows.
Security and Privacy in Image Conversion
This topic doesn't get enough attention, but it should. When you upload images to an online image converter, you're potentially sharing sensitive information. Consider these scenarios:
Business documents with confidential information
Personal photos with EXIF data containing location information
Product images before public launch
Legal documents or medical images
Professional conversion tools like SnapConv address these concerns by:
Processing files immediately without storage
Using HTTPS encryption for all transfers
Not analyzing or indexing uploaded content
Complying with international privacy standards
Making the Right Choice for Your Needs
Choosing the right image converter depends on your specific use case:
For Web Developers: Prioritize tools that support modern formats like WebP and AVIF, with batch processing capabilities for efficiency.
For Photographers: Look for RAW format support and quality preservation algorithms that maintain professional standards.
For Designers: Vector format support (SVG, EPS) and PSD compatibility are essential for workflow integration.
For Business Users: Privacy, reliability, and format versatility matter most for professional communications.
For Casual Users: Simplicity and universal format support without technical complexity.
Conclusion: Why Quality Matters in Image Conversion
In our rush to digitize everything, we sometimes forget that quality matters. Your images represent your brand, your memories, your professional work. They deserve better than a rushed conversion that degrades quality or compromises your privacy.
The best image converter online tools don't just change file formats – they preserve the integrity of your visual content while adapting it for its intended purpose. Whether you're optimizing for web performance, preparing for print, or ensuring compatibility across devices, the right tool makes all the difference.
SnapConv represents this philosophy in action – professional-grade conversion that's actually free, actually private, and actually designed for real-world use. In a market full of compromises, it's refreshing to find a tool that simply works the way it should.
Your images are important. Your time is valuable. Your privacy matters. Choose your image converter accordingly, and experience the difference that quality makes.
Ready to see what professional image conversion looks like? Try SnapConv free image converter today – no registration, no limitations, no compromises. Just the conversion results you deserve.
1 note
·
View note
Text
Difference Between JPG and JPEG: A Digital Identity Crisis Explained
The difference between JPG and JPEG often feels like the ultimate pixel puzzle, especially when you're handling images for websites, social media, or graphic design. The truth? It’s not really a difference—it’s a naming evolution born out of technology’s early quirks.

Originally, “JPEG” referred to the image compression standard created by the Joint Photographic Experts Group. But during the MS-DOS era, file extensions could only be three characters long. So .jpeg had to become .jpg. That’s it.
Functionally, JPG and JPEG are the exact same file format. Both use lossy compression to reduce file size, maintain good visual quality, and speed up page loading. They're supported across all modern browsers, devices, and image editors. Whether you're uploading a product image or sharing a vacation photo, either file type works seamlessly.
Understanding the difference between JPG and JPEG is really about understanding there is no difference. It’s a relic of the past, but one that still causes unnecessary confusion today. Next time you're renaming files or choosing an export format, know that both serve the same purpose—and your images will look just as sharp either way.
0 notes
Text
Boost Your Website Speed for Better UX

Introduction
Website speed is more than just a performance metric—it’s a critical factor in user experience (UX). Slow websites frustrate visitors, increase bounce rates, and ultimately hurt your conversion rates. In today’s digital landscape, where users expect instant access, ensuring that your website loads quickly is essential for keeping your audience engaged and satisfied. In this blog, we’ll explore why website speed matters and easy strategies you can implement to boost it.
1. Why Website Speed is Crucial for UX
A fast website doesn’t just improve user experience; it impacts your bottom line.
Reduced Bounce Rates: Studies show that a delay of just a few seconds can cause a significant increase in bounce rates. Users are more likely to leave a site if it takes too long to load.
Improved User Engagement: Faster websites allow users to interact with your content seamlessly, leading to longer visit durations and more meaningful engagement.
Higher Conversion Rates: Fast-loading sites lead to better conversion rates because users are more likely to complete actions (such as making a purchase or filling out a form) when they don’t have to wait for pages to load.
2. How to Measure Website Speed
To improve your website’s speed, you first need to know where you stand. Use tools like Google PageSpeed Insights, GTMetrix, or Pingdom to analyze your site’s performance. These tools provide insights into load times, bottlenecks, and suggestions for improvements.
3. Optimize Image Sizes and Formats
Images are often the heaviest elements on a webpage. If not optimized, they can significantly slow down your website.
Resize Images: Ensure your images are appropriately sized for the web. Avoid using high-resolution images unless necessary.
Use Correct File Formats: Use efficient formats like JPEG for photos and PNG for graphics with transparent backgrounds. WebP is a newer format that offers excellent compression and quality, making it ideal for modern websites.
Compression Tools: Tools like TinyPNG and ImageOptim can help you compress images without losing quality, ensuring faster load times.
4. Minimize HTTP Requests
Every element on a webpage (images, stylesheets, scripts) generates an HTTP request. The more requests your website makes, the slower it will load.
Combine Files: Combine CSS and JavaScript files to reduce the number of requests.
Use Sprites: Combine multiple images into a single image sprite. This technique reduces the number of HTTP requests needed for image elements.
Lazy Loading: Implement lazy loading to only load images and videos when they enter the user’s viewport (visible part of the screen), which reduces initial loading time.
5. Leverage Caching
Caching is a way to store static resources (like images, JavaScript, and CSS files) so that they don’t need to be reloaded each time a user visits your website.
Browser Caching: Set cache expiry dates for your website’s static resources to prevent unnecessary downloads every time a user visits your site.
Server Caching: Tools like Varnish or Redis can cache dynamic content on the server side, improving response times for frequently visited pages.
6. Use a Content Delivery Network (CDN)
A Content Delivery Network (CDN) distributes your website’s content across multiple servers located around the world. This ensures that users from different geographical locations can access your website faster, as the server closest to them will serve the content.
Popular CDN Providers: Providers like Cloudflare, Akamai, and Amazon CloudFront offer reliable CDN solutions for faster content delivery.
7. Minify CSS, JavaScript, and HTML
Unnecessary code, such as comments, spaces, and unused CSS classes, can bloat your website and slow it down. Minifying your code reduces its size and improves load times.
Minification Tools: Use tools like UglifyJS, CSSMin, and HTMLMinifier to remove unnecessary characters from your code without affecting functionality.
8. Enable GZIP Compression
GZIP compression reduces the size of your website’s files before they are sent to the user’s browser, decreasing the amount of data that needs to be transferred and speeding up page load times.
Server Configuration: Enabling GZIP compression on your web server (Apache, Nginx, etc.) can dramatically improve load times, especially for text-heavy files like HTML, CSS, and JavaScript.
9. Choose a Fast Hosting Provider
The speed of your web hosting plays a huge role in your website’s overall performance. A slow server will drag down your website’s speed, no matter how optimized your site is.
Consider VPS or Dedicated Hosting: Shared hosting may be cheaper, but it often leads to slower performance due to resource sharing. Upgrading to VPS (Virtual Private Server) or dedicated hosting can give your website the resources it needs for faster load times.
10. Monitor and Optimize Performance Regularly
Website speed isn’t a one-time fix; it’s an ongoing process. Regularly monitor your website’s performance, particularly after implementing changes or adding new features.
Performance Tracking: Use tools like Google Analytics to monitor user engagement and bounce rates, which can help you spot speed-related issues.
Continuous Improvement: Set aside time every few months to check for new optimizations that can further improve your website’s speed.

Conclusion: Speed Equals Success
In today’s digital world, a fast website is a competitive advantage. By optimizing your website’s speed, you not only improve user experience but also boost engagement, reduce bounce rates, and increase conversions. Implementing these simple yet effective strategies will help you create a website that keeps users happy and coming back for more.
Want to make sure your website is optimized for speed and performance? Contact Focal Media for expert web design and development services that focus on delivering top-tier UX.
0 notes
Text
The Ultimate Shopify SEO Guide: How to Rank Higher and Drive More Sales

In today’s competitive e-commerce landscape, achieving higher rankings on search engines like Google is essential for driving organic traffic and increasing sales. Shopify, a powerful and user-friendly e-commerce platform, offers built-in SEO features, but optimizing your store effectively requires a strategic approach.
This guide covers essential Shopify SEO strategies, including keyword optimization, metadata, site speed, and backlinking, to help your store rank higher and attract more customers.
1. Keyword Optimization: The Foundation of Shopify SEO
Why Keywords Matter
Keywords are the words and phrases potential customers use when searching for products online. Conducting proper keyword research ensures your Shopify store appears in relevant search results.
How to Find the Right Keywords
Use tools like Google Keyword Planner, Ahrefs, and SEMrush to identify high-ranking keywords.
Focus on long-tail keywords (e.g., “best organic skincare products” instead of “skincare”).
Analyze competitors’ product pages and blogs for keyword inspiration.
Where to Use Keywords in Shopify

Product Titles & Descriptions: Incorporate primary keywords naturally.
URLs: Keep them short and keyword-rich (e.g., yourstore.com/best-running-shoes).
Meta Titles & Descriptions: Ensure they are engaging and contain target keywords.
Image Alt Text: Helps with SEO and improves accessibility.
Blog Content: Publish informative blogs with relevant keywords.
For expert Shopify SEO services, check out WebNX SEO Services.
2. Optimizing Metadata for Better Click-Through Rates (CTR)
What is Metadata?
Metadata includes the title tag and meta description that appear in search engine results. Well-optimized metadata improves CTR and helps search engines understand your pages.
Best Practices for Shopify Metadata
Meta Title: Keep it under 60 characters, include primary keywords, and make it compelling (e.g., “Shop Handmade Leather Bags – Free Shipping”).
Meta Description: Keep it under 160 characters, include a CTA (e.g., “Shop Now, Limited Stock Available”), and integrate keywords naturally.
3. Enhancing Site Speed: A Crucial SEO Factor
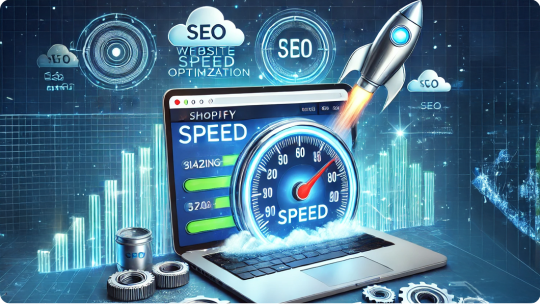
Why is Site Speed Important?
Google prioritizes fast-loading websites in search rankings. A slow website results in high bounce rates and lost sales.
How to Improve Shopify Site Speed
Use Lightweight Themes: Shopify’s Dawn theme is optimized for speed.
Optimize Images: Use compressed formats like JPEG/WEBP.
Minimize Apps: Uninstall unnecessary apps to enhance performance.
Enable Lazy Loading: Ensures images load only when needed.
Use a CDN: Shopify’s built-in CDN speeds up global load times.
Need help optimizing your Shopify store? Explore our Shopify Development Services.
4. Building High-Quality Backlinks for SEO Success
Why Backlinks Matter
Backlinks (links from other websites to yours) increase domain authority and improve rankings. The more high-quality backlinks you have, the more trustworthy your store appears to search engines.
Ways to Earn Backlinks for Shopify
Guest Blogging: Write for industry-related blogs and include a link to your store.
Influencer Collaborations: Get influencers to review and link back to your products.
Product Reviews & PR: Connect with bloggers for product features.
Engage in Online Communities: Share expertise on Reddit, Quora, and forums with a link to your store.
Submit to Directories: List your Shopify store in relevant business directories.
5. Advanced Shopify SEO Strategies

1. Implement Structured Data (Schema Markup)
Helps search engines understand your store’s content.
Shopify apps like JSON-LD for SEO can automate schema implementation.
2. Strengthen Internal Linking
Link related product pages and blog posts for better navigation and engagement.
Check out our E-commerce Development Services for enhanced Shopify functionality.
3. Prioritize Mobile Optimization
Ensure your Shopify store is fully responsive, as Google prioritizes mobile-friendly sites.
4. Conduct Regular SEO Audits
Use tools like Google Search Console and Ahrefs to monitor and refine your SEO strategy.
Start Optimizing Your Shopify Store Today!
A well-optimized Shopify store attracts organic traffic, increases conversions, and drives revenue. At WebNX, we specialize in Shopify development and SEO services to help businesses succeed online.
📌 Explore Our SEO Services
📌 Shopify Development Solutions
Let WebNX take your Shopify store to new heights! Contact us today for expert SEO and development solutions.
#ShopifySEO#EcommerceSEO#SEOforShopify#ShopifyOptimization#DigitalMarketing#SearchEngineOptimization#ShopifyDevelopment
0 notes
Text
The Ultimate Guide to Secure and Efficient Submissions
Submitting documents, applications, or data is a ubiquitous task in the modern world. From applying for jobs and university programs to filing taxes and submitting research papers, the ability to securely and efficiently transmit information is crucial. However, navigating the landscape of submission processes can be complex, demanding careful consideration of security protocols, format requirements, and efficient workflow management. This guide provides a comprehensive overview of best practices for secure and efficient submissions, ensuring your information reaches its intended destination accurately and without compromise.
Understanding the Security Landscape of Submissions
Before initiating any submission, it is paramount to understand the potential security risks involved. Data breaches, phishing scams, and malware attacks are constant threats, and submitting sensitive information without proper precautions can lead to identity theft, financial loss, and compromised privacy. Identify the sensitivity of the data you are submit. Does it contain personally identifiable information (PII), financial records, or proprietary business data? Knowing the value of the information helps determine the level of security measures required. Always verify the authenticity of the submission portal. Scrutinize the URL, looking for "https" to ensure encryption. Be wary of suspicious emails or websites asking for personal information, and avoid clicking on links from unknown sources. Implement strong passwords and enable two-factor authentication whenever possible to protect your accounts from unauthorized access.

Data Encryption and Secure Transmission Protocols
Encryption is the cornerstone of secure submissions, transforming readable data into an unreadable format that can only be deciphered with a decryption key. When submitting online, always ensure the website uses HTTPS protocol, indicated by a padlock icon in the address bar. This signifies that the data transmitted between your browser and the server is encrypted using Transport Layer Security (TLS) or Secure Sockets Layer (SSL). For sensitive documents, consider encrypting the files themselves before uploading them. Utilize encryption software like VeraCrypt or 7-Zip to create password-protected archives. When sending information via email, which is inherently less secure, consider using email encryption tools like ProtonMail or Virtru. These services encrypt the email message end-to-end, ensuring that only the intended recipient can read it.
File Format and Submission Requirements
Ignoring file format and submission requirements is a common cause of delays and rejections. Before starting the submission process, carefully review the guidelines provided by the recipient. Pay attention to accepted file types (e.g., PDF, DOCX, JPEG), file size limits, and naming conventions. Failing to adhere to these specifications can result in your submission being automatically rejected or requiring manual intervention, which can significantly slow down the process. Convert documents to PDF format whenever possible. PDF is a widely accepted standard that preserves formatting and ensures compatibility across different operating systems and devices. Optimize images and documents to reduce file size without compromising quality. This can be achieved using image compression tools or PDF optimizers.
Streamlining the Submission Workflow
Efficiency is just as important as security when it comes to submissions. A streamlined workflow can save time and reduce the likelihood of errors. Begin by gathering all the necessary information and documents before starting the submission process. Organize files into folders and name them clearly and consistently. Prepare a checklist to ensure you have completed all the required steps and provided all the necessary information. For online submissions, use autofill features to automatically populate forms with your information. However, double-check the accuracy of the information before submitting. Consider using a password manager to securely store and manage your usernames and passwords for different online accounts. This can save time and prevent you from forgetting important credentials.
Utilizing Submission Management Tools
Numerous submission management tools are available to help streamline the process and enhance security. These tools can automate tasks, track progress, and ensure compliance with submission requirements. Some tools offer features like version control, file sharing, and collaboration, making them particularly useful for teams working on complex submissions. Cloud storage services like Google Drive and Dropbox can be used to store and share files securely. However, be sure to enable two-factor authentication and configure appropriate permissions to control access to your files. Project management software like Trello or Asana can be used to track the progress of your submission and assign tasks to team members.

Post-Submission Verification and Follow-Up
The submission process doesn't end when you click "submit." It's crucial to verify that your submission was received successfully and to follow up if necessary. Check for confirmation emails or notifications to ensure your submission has been acknowledged. If you don't receive a confirmation within a reasonable timeframe, contact the recipient to inquire about the status of your submission. Keep a record of your submission, including the date, time, and any confirmation numbers. This will be helpful if you need to track down your submission or provide proof of submission. If you receive feedback or requests for additional information, respond promptly and professionally.
Staying Informed and Adapting to Changing Security Landscapes
The digital landscape is constantly evolving, and new security threats and submission requirements emerge regularly. It is essential to stay informed about the latest security best practices and to adapt your submission processes accordingly. Subscribe to security newsletters and follow reputable security blogs to stay up-to-date on the latest threats and vulnerabilities. Regularly review your security practices and update your passwords and software. Be aware of new submission requirements and guidelines, and adjust your workflow accordingly. By staying informed and proactive, you can ensure that your submissions remain secure and efficient in the face of evolving threats. By implementing these strategies, you can significantly enhance the security and efficiency of your submission processes, safeguarding your information and ensuring that it reaches its intended destination promptly and securely. Remember that a proactive approach to security and efficiency is paramount in the digital age.
0 notes
Text
Unlock Peak Efficiency: The Ultimate Guide to Shopify App Optimization

Running a Shopify store is an exciting journey, but as your business grows, so do the challenges. One of the biggest hurdles store owners face is maintaining the performance of their Shopify apps. A slow, inefficient, or poorly optimized app can hurt user experience, reduce conversions, and create operational inefficiencies.
That’s where Shopify App Optimization comes into play. By fine-tuning your apps, you can enhance store performance, improve customer experience, and drive more sales. In this guide, we’ll cover everything you need to know to unlock peak efficiency for your Shopify apps.
Why Shopify App Optimization Matters
Imagine a customer lands on your store, excited to buy a product. But the page takes too long to load, the checkout process is clunky, or the product recommendations don’t display correctly. Chances are, they’ll abandon their cart and look elsewhere.
Optimizing your Shopify apps ensures:
Faster Load Times: A quicker store improves customer satisfaction and SEO rankings.
Better User Experience: Smooth navigation leads to higher engagement and conversions.
Efficient Backend Operations: Reducing unnecessary processes saves time and resources.
Scalability: An optimized store can handle higher traffic without performance dips.
Key Strategies to Optimize Your Shopify App
1. Reduce Unnecessary App Bloat
Many Shopify store owners install multiple apps to enhance their store’s functionality. However, too many apps can slow down your site and create conflicts.
Audit Your Apps: Regularly review installed apps and remove those that are no longer needed.
Use All-in-One Solutions: Instead of multiple apps performing similar functions, choose multi-functional apps that cover various needs.
Check App Dependencies: Some apps rely on heavy scripts that slow down performance. Use only well-optimized apps.
Example: A fashion retailer noticed a significant drop in site speed. Upon investigation, they found that multiple unused apps were running background scripts. Removing these apps improved load times by 40%.
2. Optimize API Calls & Webhooks
Shopify apps rely on APIs to fetch data, but excessive API calls can slow down your store.
Minimize API Requests: Fetch only necessary data instead of making frequent calls.
Use Caching Mechanisms: Store frequently used data locally to reduce server requests.
Optimize Webhooks: Ensure webhooks are only triggering necessary updates to avoid excessive data transfers.
Example: A subscription-based store optimized their API calls, reducing response time by 30% and improving checkout speed.
3. Compress & Optimize Images
Images are a major factor in Shopify store speed. If your images are too large, they can slow down the app and negatively impact user experience.
Use Shopify’s Built-in Image Compression: Shopify automatically optimizes images, but you can further compress them using tools like TinyPNG.
Lazy Load Images: Load images only when they appear in the user’s viewport.
Choose the Right Format: Use WebP instead of PNG or JPEG for smaller file sizes.
Example: A home décor brand reduced page load time by 2 seconds by compressing images and enabling lazy loading.
4. Improve Code Efficiency
Your Shopify app’s code plays a significant role in performance. Poorly written code can slow down functionality and cause glitches.
Minify CSS & JavaScript: Remove unnecessary spaces and comments to make files smaller and load faster.
Use Asynchronous Loading: Prevent scripts from blocking other essential page elements from loading.
Eliminate Unused Code: Remove any old or redundant code that’s no longer in use.
Example: A beauty store optimized its JavaScript files, resulting in a 25% faster checkout process.
5. Enhance Mobile Performance
Most online shoppers browse from their smartphones, so optimizing your Shopify app for mobile users is crucial.
Ensure Responsive Design: Your store should adapt seamlessly to different screen sizes.
Enable Accelerated Mobile Pages (AMP): AMP helps pages load instantly on mobile devices.
Reduce Pop-ups & Heavy Elements: Excessive pop-ups can slow down the mobile experience.
Example: An electronics retailer saw a 15% increase in mobile sales after optimizing their store’s mobile responsiveness.
6. Implement Lazy Loading for Faster Page Speeds
Lazy loading defers the loading of non-essential elements until they are needed, improving page speed significantly.
Prioritize Above-the-Fold Content: Load critical elements first while delaying others.
Use Lazy Loading Plugins: Apps like LazyLoad can help implement this feature effortlessly.
Example: A pet supplies store implemented lazy loading and saw an improvement in their bounce rate by 20%.
7. Monitor Performance with Analytics Tools
To maintain an optimized Shopify app, continuous monitoring is essential.
Use Google PageSpeed Insights: Get insights into what’s slowing your store down.
Track Performance with Shopify’s Analytics: Identify patterns affecting speed and conversions.
Set Up Real-Time Monitoring: Use tools like Pingdom or GTmetrix for continuous tracking.
Example: A sportswear brand used analytics to detect slow-loading pages, optimizing them for better customer retention.
The Benefits of Shopify App Optimization
When you optimize your Shopify app, your business reaps multiple benefits:
Higher Conversion Rates: A fast-loading, efficient store leads to increased sales.
Better Search Engine Rankings: Google prioritizes optimized websites, improving your store’s visibility.
Reduced Bounce Rates: Faster load times keep customers engaged.
Improved Operational Efficiency: Streamlining backend processes saves time and resources.
Seamless User Experience: Shoppers enjoy a hassle-free browsing and purchasing experience.
Final Thoughts
Optimizing your Shopify App is not a one-time task but an ongoing process. Regularly auditing your apps, improving code efficiency, optimizing images, and monitoring performance will ensure your store runs smoothly. Whether you’re running a small business or a high-traffic store, implementing these optimization strategies will help you achieve better performance, higher conversions, and overall growth.
0 notes
Text
Transforming Ideas into Visuals: The Art of Creating Effective Icons
Icons customized and unique: Expert Q&A Insights
1.What is the best image size for icons?
The best image size for icons typically ranges from 16x16 pixels to 512x512 pixels, depending on usage. Common sizes include 32x32 for web applications and 64x64 for desktop icons. For mobile apps, sizes like 48x48 and 72x72 are popular. Always consider using vector formats for scalability without loss of quality.
2. What is the difference between JPG and PNG icons?
The primary difference between JPG (or JPEG) and PNG icons lies in their respective compression methods and the quality retention of the images they produce. JPG utilizes a lossy compression technique, which significantly reduces file size by discarding some image data, ultimately sacrificing a degree of quality in the process. This format is particularly well-suited for photographs or images that contain a wide range of colors and gradients, as the loss of some detail is often imperceptible to the viewer. However, this characteristic makes JPGs less ideal for icons or graphics that require sharp edges, distinct lines, or clear contrasts, as the compression can lead to blurring and artifacts that compromise the visual integrity of the image. 3. How do I create a custom icon in Illustrator?
To create a custom icon in Illustrator, start by using the Pen Tool to draw your design. Use shapes and the Pathfinder tool to combine or subtract shapes as needed. Add colours and effects for depth. Finally, save your icon in your desired format (e.g., AI, SVG, PNG) by going to File > Save As or Export.
4. How do I make a custom icon image?
To create a custom icon image, use graphic design software like Adobe Illustrator or free tools like Canva or GIMP. Start with a square canvas, design your icon using shapes and colours, and keep it simple for clarity. Save your design in the appropriate format (like PNG or SVG) and ensure it meets size requirements for your intended use.
5. What is an icon illustration?
An icon illustration is a simplified graphic representation used to convey an idea, concept, or object clearly and quickly. Icons are often used in user interfaces, branding, and signage to enhance communication and understanding. They typically feature minimal detail and bold shapes, making them easily recognizable and effective in conveying messages immediately.

Visit: VS Website See: VS Portfolio
0 notes
Text
7 Tips to Increase Website Speed | A Guide by Web Technology Experts India
In today's fast-paced digital world, website speed is no longer just a nice-to-have; it's a critical factor for success. A slow-loading website can significantly impact user experience, leading to high bounce rates, frustrated visitors, and ultimately, lost revenue. As a top web development company, Web Technology Experts India understands the profound impact of website speed on user engagement and business growth.
Search engines, particularly Google, prioritize fast-loading websites in their search engine results pages (SERPs). This "Page Experience" signal directly influences your website's organic visibility and rankings. A faster website not only improves user satisfaction but also enhances your search engine optimization (SEO) efforts, driving more organic traffic to your site.
Here are 7 proven strategies to significantly increase your website speed:
1. Optimize Images: Images are often the most significant contributors to page load times.
Compress Images: Utilize powerful image optimization tools like TinyPNG, ImageOptim, or even built-in options in your website builder (if applicable) to drastically reduce file sizes without compromising visual quality.
Choose the Right Format: Consider using modern image formats like WebP or JPEG 2000, which offer superior compression ratios compared to traditional JPEGs and PNGs.
Responsive Images: Implement responsive images that automatically adjust their size and resolution based on the user's device and screen size. This prevents loading unnecessarily large images on mobile devices.
2. Minimize HTTP Requests: Every element on your webpage – images, CSS files, JavaScript files, videos – requires a separate HTTP request from the server.
Combine Files: Consolidate multiple CSS files into a single stylesheet and combine multiple JavaScript files into a single script. This reduces the number of requests and improves page load times.
Use CSS Sprites: Combine multiple small images into a single larger image (sprite sheet) and then use CSS to display specific portions of the sprite. This technique significantly reduces the number of image requests.
3. Leverage Browser Caching: Browser caching allows web browsers to store website assets (images, CSS, JavaScript) locally on the user's device.
Set Cache Headers: Configure your server (or your website builder's settings) to set appropriate cache headers for static assets. This instructs the browser to store these files for a specified duration, eliminating the need to download them again on subsequent visits, leading to faster page loads for returning users.
4. Utilize a Content Delivery Network (CDN): A CDN is a network of geographically distributed servers that store copies of your website's static content (images, CSS, JavaScript, videos).
Reduced Latency: When a user visits your website, the CDN delivers content from the server closest to their location, significantly reducing latency and improving load times, especially for users located far from your primary server.
5. Minify HTML, CSS, and JavaScript: Minification involves removing unnecessary characters from your code, such as whitespace, comments, and line breaks, without affecting functionality.
Reduced File Size: Minified code results in smaller file sizes, which are downloaded and processed by browsers much faster.
6. Optimize Fonts:
Use Web Fonts Judiciously: While web fonts enhance design, they can increase load times. Choose web fonts carefully and consider using font icons for smaller elements.
Optimize Font Files: Use font formats like WOFF2, which offer excellent compression.
7. Choose a Reliable Hosting Provider: Your website's hosting environment plays a critical role in its speed and performance.
Fast Servers: Select a hosting provider with high-performance servers and a robust infrastructure, such as SSD drives and ample bandwidth.
Server Location: Choose a server location that is geographically closer to your target audience to minimize latency.
Website Speed and User Experience
Website speed directly impacts user experience. Slow-loading pages can lead to:
High Bounce Rates: Frustrated users quickly abandon slow-loading websites, leading to lost traffic and potential conversions.
Reduced User Engagement: Slow pages discourage user interaction and exploration, potentially impacting user behavior and time spent on site.
Negative Brand Perception: Slow websites create a negative perception of your brand, making users less likely to trust and engage with your business.
Website Speed and SEO
As mentioned earlier, website speed is a crucial ranking factor for search engines. Google's Page Experience update emphasizes the importance of factors like page load speed, interactivity, and visual stability in its search rankings. By optimizing your website's speed, you can improve your search engine rankings, increase organic traffic, and gain a competitive edge in search results.
Conclusion
Website speed is not just a technical concern; it's a critical factor for user experience, search engine optimization, and overall business success. By implementing these 7 tips and continuously monitoring your website's performance, you can create a fast, responsive, and user-friendly website that delights visitors and drives business growth.
Contact Web Technology Experts India a top web design company in India and learn more about our website optimization services and how we can help you build a high-performing website that meets your business goals.

#company website development#ecommerce website#ecommerce website development#web development#website developer#website development#website
0 notes
Text
Ultimate Guide to Creating the Perfect Twitter Banner

Your Twitter banner is like a great big billboard on your profile. This is the first thing people are usually going to see when they come to your page. Whichever kind of business is being marketed, the more personal you are as an individual wanting to advertise your brand, your cover photo on Twitter becomes one of those things that help define how you project about yourself. For one's profile to appear sleek and professional on this online social network, a specific kind of customized banner on Twitter is required- not just of the right dimensions but also following good principles for the same design. You can use PhotoCut’s Image Enlarger when creating a Twitter banner. The guide here offers advice on size, design tips, and how best to make use of the banner maker on Twitter.
Why Do Twitter Banners Matter?
Your Twitter banner is one of the vital visual elements of your profile and is a chance to let everyone know about your brand, personality, or business. It's great real estate that can give your social media profiles a cohesiveness.
Here are why Twitter banners are important:
Free Branding Space: Your Twitter banner is prime space for free advertising. Whether you are an influencer, a business, or just any user, it can immediately send out a message about what you do or what your page is for.
Consistency Across Multiple Channels: It makes recognition by other people easier through consistency on all your profiles on social media. Giving a professional look to the page as well.
Show off your personality: Whether it is a favorite quote, business slogan, or even an event promotion, the banner allows you to highlight important details that reflect who you are.
Through careful design of your banner, you immediately catch the attention of visitors and pass a clear message regarding what you have in store.
What is the Best Twitter Banner Size?
The recommended dimensions for a Twitter banner are 1500x500 pixels, but you can go larger if you prefer. A larger image maintains better quality when Twitter compresses it, showing more detail and preventing blurriness. It's important to use an image in a 3:1 ratio to ensure it looks great across all devices.
When choosing the format, save your image as:
JPEG: A common file format that works well for most images. PhotoCut can convert your photos to JPEG.
GIF: Works for animated banners.
PNG: Best for images that require transparency or high-quality detail.
Keep the file size under 2MB to avoid issues with uploading. If you’re unsure about the right file size or format, consider using a free Twitter banner maker like PhotoCut, which ensures the correct dimensions and file types every time.
Why is Having the Right Twitter Header Size Important?
Uploading a perfectly sized Twitter header ensures that your image looks clear on all devices, whether it’s on desktop or mobile. Having the correct size also helps keep your key information in focus and visible to visitors. For banners whose dimensions are too large or too small, Twitter automatically crops an important part of your images.
Here are the good things about the right image sizes:
Image Clarity: The picture is clear and sharp while being compressed by Twitter doesn't distort.
Avoid Cropping: Using the correct sizes makes it less likely to see the most important part of the image, which in this case would include things like text or logos cut out, especially on mobile viewings.
How to Upload a Twitter Header Image?
To upload or switch out your Twitter header image here's how you can easily do it:
Visit your profile: Go to your profile page on Twitter by pressing the Edit Profile button.
Click the camera icon: Under the header image section, you will see a camera icon. Click on the camera icon to upload your new banner.
Select your image: Choose the image you wish to upload from your saved files.
Adjust your image: Twitter will give you the option to reposition your banner to ensure it looks perfect in your profile. Use the slider or drag to adjust the image’s position if needed.
If you’re using a banner template from PhotoCut, your image should fit perfectly without any cropping. Double-check to ensure all important information, such as text or logos, remains visible. You can also rotate your images before uploading.
Tips to Get the Most Out of Your Twitter Header
Creating a Twitter banner isn’t just about picking a random image — it’s about designing a visual experience that complements your profile. To get the best results, keep these tips in mind:
Design with Your Profile Photo in Mind
Your profile photo will be displayed on top of your banner. Make sure your design doesn’t clash with it. For instance, avoid placing text or important details directly in the middle where the profile picture will cover them. You can also create your profile photo using PhotoCut’s AI Portrait Generator.
Add Important Information
Your banner is a perfect place to add important details about yourself or your business. Here are some things you could include:
A slogan or tagline that defines what you do.
Event dates for special promotions or upcoming appearances.
Product highlights if you're promoting a specific product or service.
Links or calls to action like “Follow for updates” or “Check out our latest collection.”
Keep it Simple
Avoid overcrowding your banner with too many details. Simple, clean designs often look more professional. Additionally, minimalist designs are less likely to experience quality loss during compression by Twitter. Stick to solid colors, simple fonts, and a few key design elements for a sharp look.
Twitter Banner Design Tips
Keep it Centered
When designing your banner, always remember that Twitter crops the top and bottom of the image on mobile devices. This means that important elements like logos, text, or visuals should be placed in the center of the banner to ensure they aren’t cut off.
Use Minimalist Design
Minimalist designs look sharp and clean. Avoid using too many graphic elements, and keep text to a minimum. Overly complex designs can appear blurry once Twitter compresses them.
Keep it Consistent
If creating a banner for a business or brand, ensure the banner on Twitter has colors, fonts, and logos in a way that is consistent throughout your social media accounts; that's how your followers know your brand.
How to Create a Stunning Twitter Banner Without Design Skills
Even if you have never used graphic design, designing a professional-looking Twitter banner is easy using a tool called a Twitter banner maker like PhotoCut. It offers a simple and intuitive platform where anyone can make stunning Twitter banners without the need for any design knowledge.
Here’s how you can create your custom banner:
Step 1: Choose a Template
To start with, choose a premade template by clicking on the Template tab found in PhotoCut. Every one of these templates can be adjusted for your taste or even customised to your style and brand. Alternatively, PhotoCut allows you to have a custom design when starting from scratch.
Step 2: Choose Your Background
Choose a background from the Background tab. You can pick any color, gradient, or pattern. If you wish to apply your picture as background, select Photo and upload your background picture.
Step 3: Add Text
Now navigate to the Text tab. Under it, type in the text you wish to enter for your message or slogan. You can select premade text designs, and customize your font, size, color, and style.
Step 4: Add Text Effects
Click on the Text Effects icon to apply instant effects like shadows, outlines, or 3D effects. This can make your text stand out and grab attention.
Step 5: Add Graphics and Logo
Next, use the Elements tab to add any final graphics or images. You can import your logo, adjust the positioning, and tweak colors to match your design.
Step 6: Export and Upload
When you feel you are satisfied with your banner, click on the Export tab, and your Twitter banner is ready for uploading. You go straight to your Twitter profile where you upload the image as a professional, custom-designed banner.
Conclusion
A Twitter banner is a significant visual tool that can help you get noticed and make a more memorable impression. Using the proper size and design, combined with the ability to utilize a simple tool called PhotoCut, you are all set to make that perfect header image for Twitter that captures what your brand or personality may be. Whether promoting business or making your profile better looking, these tips along with the use of the Twitter banner maker will ensure you a professional look and polished result. Give PhotoCut a go today and design the ultimate Twitter banner!
FAQs
Q1. What is the ideal size for a Twitter banner? Ans. The size of the recommended Twitter banner should be 1500 x 500 pixels. This way, the image will appear sharp and clear on any device used and avoid cropping issues.
Q2. Can I use an animated image as my Twitter banner? Ans. Yes! Twitter is fine with GIFs so feel free to make a motion graphic banner. Just remember, do not have a file size greater than 2MB.
Q3. Which format should a Twitter banner use?
Ans. The best formats that a Twitter banner should have are JPEG, GIF, or PNG. For high-quality images or when transparency is necessary, PNG is preferred.
Q4. How can I prevent my banner from getting cropped? Ans. To prevent cropping, make sure all your crucial content is inside the 1500 x 500 pixel area. Do keep in mind that Twitter will crop your banner's top and bottom edges on mobile.
Q5. Can I use a Twitter banner maker without design skills? Ans. Yes! Using a Twitter banner maker like PhotoCut makes it easy to create a custom banner without design skills. You can use templates, adjust text, and add graphics with just a few clicks.
0 notes
Text
The Ultimate Guide to Changing Photo Formats: Why It Matters
In today's digital age, images play a crucial role in how we communicate, market products, and express creativity. Whether you are a photographer, a graphic designer, or simply someone who enjoys sharing pictures online, understanding photo formats is essential. Different formats serve different purposes, and knowing which one to use can make a significant difference in the quality and usability of your images. This blog will explore why changing photo formats is important, the various formats available, and how you can easily convert images using tools like Face Converter.
Understanding Image Formats
When working with digital images, it’s important to recognize that not all image formats are created equal. Each format has its unique characteristics, advantages, and limitations that affect image quality, file size, and compatibility across different platforms.
Common Image Formats
JPEG (Joint Photographic Experts Group): This is one of the most widely used formats for photographs. JPEG files are compressed, which means they take up less space but can lose some quality in the process. They are ideal for web use and sharing images on social media due to their small file size.
PNG (Portable Network Graphics): PNG files are known for their lossless compression, meaning they retain all the original image quality. This format is particularly useful for images that require transparency, such as logos and icons.
GIF (Graphics Interchange Format): While primarily known for its ability to support animations, GIFs are limited to a palette of 256 colors. They are best suited for simple graphics or short animations rather than complex images.
TIFF (Tagged Image File Format): TIFF files are often used in professional photography and printing due to their high quality. They can support multiple layers and are ideal for images that require extensive editing.
WebP: Developed by Google, WebP is a modern image format that provides superior compression and quality. It supports both lossy and lossless compression, making it a versatile choice for web images.
Why Change Photo Formats?
There are several reasons why you might need to change the format of an image:
Compatibility
Different platforms and software have varying levels of support for image formats. For example, some web applications prefer JPEG or PNG files, while others may require GIFs or TIFFs. By converting your images to the appropriate format, you ensure that they are usable across various platforms without any issues.
Quality and File Size
Image quality and file size are often inversely related. While formats like TIFF provide high-quality images, they can also result in large file sizes, which may not be practical for web use. Conversely, JPEG files are smaller but can lose quality with compression. By understanding how to change formats, you can optimize your images for specific uses, balancing quality and file size.
Specific Use Cases
Certain formats are better suited for specific applications. For instance, if you’re preparing images for a website, using WebP can significantly reduce loading times without sacrificing quality. On the other hand, if you need images for print, converting them to TIFF may be necessary to maintain high resolution.
How to Change Photo Formats
Changing photo formats is easier than ever, thanks to various online tools and software. One highly recommended option is Face Converter, an online image converter that supports multiple formats and offers a user-friendly interface.
Using Face Converter
Face Converter provides a straightforward approach to converting images. Here’s how you can use it:
Visit the Website: Go to Face Converter to access their tools ( https://faceconverter.com/).
Choose Your Format: Select the format you want to convert from and the format you want to convert to. Options include JPEG to PNG, TIFF to JPEG, and many more.
Upload Your Image: Click on the upload button to select the image file you want to convert. The platform supports various image formats, ensuring flexibility.
Convert the Image: Once your image is uploaded, click the convert button. The tool will process your request and provide you with the new file.
Download the Converted Image: After the conversion is complete, you can download the newly formatted image to your device.
Benefits of Using Online Converters
Online converters like Face Converter offer several advantages:
Accessibility: You can access these tools from any device with an internet connection, making it easy to convert images on the go.
No Software Installation: There’s no need to install any software, saving you space on your device.
User-Friendly Interface: Most online converters have intuitive interfaces, making them accessible even for those who are not tech-savvy.
Variety of Formats: Tools like Face Converter support a wide range of formats, ensuring you can convert images as needed.
Conclusion
Choosing the right image format is critical for ensuring compatibility, maintaining quality, and optimizing file sizes for various applications. Whether you are sharing images online, preparing them for print, or creating graphics for your website, understanding how to change photo formats can significantly enhance your work.
Using a tool like Face Converter makes the process easy and efficient, allowing you to focus on what matters most—your creative projects. So the next time you find yourself needing to convert an image, remember the importance of selecting the right format and take advantage of the resources available to you.
0 notes
Text
What is WebP Image Format?
WebP, developed by Google, is a modern image format designed to improve online image quality while significantly reducing file sizes compared to traditional formats like JPEG and PNG.
Using both lossy and lossless compression techniques, WebP enables faster load times, enhancing website performance, user experience, and even SEO rankings, as page load speeds are a key ranking factor.

Advantages of Using WebP Format
Reduced File Size: WebP images are typically 25–35% smaller than JPEGs and PNGs of similar quality, offering considerable savings on bandwidth.
Improved Load Times: Smaller file sizes contribute to faster load times, which is particularly beneficial for mobile users and anyone with limited internet bandwidth.
Lossless and Lossy Compression: WebP supports both types of compression, providing flexibility to choose between quality and file size.
Transparency and Animation: WebP supports transparent images (similar to PNG) and animated images (similar to GIFs), making it a versatile format for various website needs.
SEO Benefits: Faster page loads lead to better user engagement, lower bounce rates, and, ultimately, improved SEO rankings.
Browsers that Support WebP Format
WebP has strong support across most major browsers, though compatibility can vary.
Here’s a breakdown of the primary browsers that support WebP:


3 WordPress Plugins to Compress Images into WebP Format
These WordPress plugins simplify the process of converting images to WebP and compress them for optimal load speed:
Imagify - https://imagify.io/wordpress/
Offers WebP conversion and allows users to retain a backup of the original image.
Compresses images in a way that maintains quality while reducing size.
Integrated directly into the WordPress media library, allowing easy bulk optimisation.
ShortPixel Image Optimizer - https://shortpixel.com/
Known for its comprehensive compression options, ShortPixel includes WebP conversion in its feature set.
Supports automatic image resizing and optimises images as they’re uploaded.
Can serve WebP images without changing URLs, which is especially useful for websites with a large image library.
Smush - https://wpmudev.com/project/wp-smush-pro/
A popular choice for image optimisation, Smush Pro includes WebP compression.
Also offers lazy loading, which further optimises image load times.
Easy-to-use interface within WordPress, ideal for users who want minimal setup
Read More About WebP Image Compression: https://shorturl.at/wbnLZ
0 notes
Text
Mastering Website Optimization: Strategies for Success
In a digital-first world, your website serves as the online face of your business. However, a visually appealing design alone is insufficient. Website optimization is critical for improving performance, user experience, and visibility in search engines. This article delves into effective website optimization strategies to enhance your site and drive better results.

Understanding Website Optimization
Website optimization refers to the process of fine-tuning various elements of your site to ensure it operates efficiently, ranks well on search engines, and delivers an exceptional user experience. This involves a comprehensive approach that addresses loading speed, mobile responsiveness, search engine optimization (SEO), content quality, and overall usability.
Why Website Optimization Matters
Enhanced User Engagement: An optimized website fosters a seamless browsing experience, keeping visitors engaged longer and encouraging them to explore more pages.
Improved Search Engine Ranking: Search engines prioritize optimized websites in their results. By enhancing your site’s SEO, you increase its visibility, driving organic traffic and potential customers.
Faster Load Times: Website optimization directly affects loading speed. Users expect fast-loading pages, and delays can lead to high bounce rates and lost conversions.
Mobile Compatibility: With the growing number of mobile users, ensuring your website is mobile-friendly is essential. A responsive design guarantees a consistent experience across devices.
Higher Conversion Rates: Optimizing your website can guide visitors toward desired actions, such as making purchases or signing up for newsletters, ultimately boosting your conversion rates.
Key Strategies for Website Optimization
On-Page SEO Optimization
Keyword Integration: Perform keyword research to identify relevant terms your audience searches for. Incorporate these keywords naturally in your content, headings, and URLs.
Meta Tags and Descriptions: Write compelling title tags and meta descriptions that include keywords and summarize your content to improve click-through rates from search results.
Content Quality: Focus on creating valuable, informative content that resonates with your audience. High-quality content is more likely to be shared and linked to, improving your site's authority.
Speed Optimization Techniques
Image Optimization: Use tools to compress images without losing quality, ensuring faster loading times. Choose the right file format (JPEG, PNG, WebP) based on the type of image.
Browser Caching: Implement browser caching to store frequently accessed resources on users’ devices, significantly reducing load times for repeat visitors.
Minimize Code: Remove unnecessary HTML, CSS, and JavaScript to streamline your website’s code. Consider minifying your files to enhance loading speed.
Responsive and Mobile-Friendly Design
Fluid Grid Layouts: Use a fluid grid layout that adjusts elements according to screen size, ensuring a seamless experience for all users, regardless of device.
Touch-Friendly Elements: Design buttons and links that are easy to tap on mobile devices, enhancing navigation and usability.
Viewport Meta Tag: Include a viewport meta tag in your HTML to control layout on mobile browsers, ensuring a responsive design.
User Experience (UX) Improvements
Clear Navigation Structure: Organize your site’s navigation logically, making it easy for users to find what they need quickly.
Engaging CTAs: Use prominent and clear calls to action throughout your site to guide users toward desired actions, such as signing up or purchasing.
A/B Testing: Conduct A/B testing on different elements, such as CTAs, layouts, and content, to determine which versions yield the best results.
Technical SEO Best Practices
Create an XML Sitemap: Generate and submit an XML sitemap to search engines to help them crawl and index your site efficiently.
Implement Schema Markup: Use schema markup to provide search engines with additional context about your content, enhancing the appearance of your listings in search results.
Secure Your Site: Use HTTPS to secure your website, improving trust with users and potentially boosting your rankings on search engines.
Monitoring and Analytics
Utilize Analytics Tools: Implement tools like Google Analytics to track user behavior, traffic sources, and conversion rates. Use this data to identify areas for improvement.
Regular Audits: Conduct regular audits of your website to assess performance and usability. Identify and address any issues that may hinder user experience or SEO.
Conclusion
Website optimization is not a one-time effort but an ongoing process that requires regular attention and updates. By implementing the strategies outlined in this article, you can enhance your website’s performance, improve user experience, and increase visibility in search engine results. Remember, an optimized website not only attracts visitors but also converts them into loyal customers. Invest in website optimization today to ensure your online presence remains competitive and effective in achieving your business goals.
0 notes
Text
5 Easy Tips for Fast SEO Success

In the ever-evolving world of digital marketing, Search Engine Optimization (SEO) remains a critical strategy for increasing visibility and driving organic traffic to your website. SEO involves a series of techniques and practices aimed at optimizing your website so that it ranks higher on search engine results pages (SERPs). A higher ranking often translates into more exposure, more traffic, and ultimately, more conversions for your business.
However, the traditional approach to SEO can often be long-term and resource-intensive. While it’s crucial to invest in a comprehensive SEO strategy for sustained growth, achieving quick wins can provide immediate benefits and boost your overall marketing efforts. Quick wins are smaller, fast-to-implement tactics that can deliver noticeable results, keeping the momentum going and providing the encouragement needed to stay committed to your larger SEO goals.
In this blog post, we will walk you through five easy tips for fast SEO success. These tips are designed to be simple yet effective, ensuring that you can start seeing improvements in your website’s search engine rankings almost immediately. Here’s a quick overview of the five tips we’ll cover:
Optimize for Mobile: Ensuring your website is mobile-friendly can significantly boost your rankings as search engines prioritize mobile-optimized sites.
Improve Page Load Speed: Search engines favor websites that load quickly, and so do users. Learn how to enhance your site’s load time for better performance.
Leverage High-Quality Content: Content is still king. We’ll discuss how creating targeted, high-quality content can improve your SEO rapidly.
Use Relevant Keywords: Discover the best practices for integrating relevant keywords into your content to attract the right audience.
Build High-Quality Backlinks: High-quality backlinks can boost your site’s authority and improve its ranking on SERPs.
By implementing these five easy tips, you’ll be better equipped to achieve fast SEO success, gaining visibility and climbing up the SERP ladder with less hassle and more effectiveness.
1. Optimize Your Website’s Loading Speed
In the fast-paced digital marketplace, a slow-loading website can disastrously affect your SEO rankings and user experience. Search engines prioritize fast-loading websites because they provide a seamless user experience. Here are some actionable steps to optimize your website’s loading speed for quick SEO wins:
Use Tools to Measure Speed
Before you can optimize your site, it’s crucial to understand your current loading speed. Tools such as Google PageSpeed Insights provide detailed reports on your site’s performance, both for desktop and mobile devices. These tools not only give you a speed score but also offer actionable recommendations to improve loading times. Another popular choice is GTmetrix, which offers robust analytics on various performance metrics, including page load speed, total page size, and the number of requests.
Optimize Images and Reduce File Sizes
Large image files are often the main culprit for slow loading times. Optimizing your images can significantly enhance your website’s performance. Use image compression tools like TinyPNG or ImageOptim to reduce the file size without losing quality. Additionally, consider using modern formats like WebP, which offer superior compression compared to traditional formats like JPEG and PNG. Implement responsive images that adapt based on the user’s device, ensuring quicker load times on both desktop and mobile.
Leverage Browser Caching and Content Delivery Networks (CDNs)
Browser caching is an effective way to reduce load times for returning visitors. By storing static files like images, CSS, and JavaScript locally in a user’s browser, caching allows quicker page load times on subsequent visits. You can set up browser caching by editing your website’s .htaccess file or via plugins if you’re using a CMS like WordPress.
Content Delivery Networks (CDNs) such as Cloudflare or Amazon CloudFront distribute your website’s static content across multiple servers worldwide. This means that when a user accesses your site, the content is served from the server closest to them, dramatically reducing latency and load times. CDNs also offer added security features, another bonus for maintaining a high-performing, safe website.
By focusing on optimizing your website’s loading speed, you create a foundation for fast SEO success. Not only will your users appreciate the swift experience, but search engines will also reward your efforts with better rankings.
2. Focus on Mobile Optimization
In today’s digital landscape, mobile optimization is no longer optional—it’s essential. With an ever-increasing number of users accessing the internet via mobile devices, ensuring your website is mobile-friendly can significantly boost your SEO efforts. Here are some key strategies to get you started:
Ensure Your Website is Mobile-Friendly
A mobile-friendly website provides a positive user experience for visitors using smartphones and tablets. If your site is difficult to navigate on a smaller screen, visitors are likely to leave quickly, increasing your bounce rate and negatively impacting your SEO rankings. To make your website mobile-friendly, consider simplifying navigation options, enlarging touch elements such as buttons and links, and utilizing larger font sizes for better readability.
Utilize Responsive Design Principles
Responsive design is a critical element of mobile optimization. By implementing responsive design, your website layout will automatically adjust to fit the screen size of the device being used, whether it’s a smartphone, tablet, or desktop. This ensures that all users have a seamless experience, regardless of the device they use. To achieve this, use flexible grids and images that can adapt to different screen sizes, and employ CSS media queries to apply specific styling rules for various devices.
Test Using Google’s Mobile-Friendly Test Tool
Once you’ve taken steps to enhance your mobile optimization, it’s crucial to test the effectiveness of your improvements. Google’s Mobile-Friendly Test tool is an invaluable resource for this purpose. Simply enter the URL of your website, and the tool will analyze its mobile compatibility, highlighting any issues that need addressing. Pay special attention to the recommendations provided, as they can offer actionable insights to further refine your mobile user experience.
By prioritizing mobile optimization, you not only cater to the growing number of mobile internet users but also position your website for better search engine rankings. Mobile-friendly sites are favored by search engines like Google, meaning that these efforts can contribute significantly to your overall SEO success. Invest time in optimizing for mobile, and you’ll likely see faster and more sustainable results in your SEO endeavors.
3. Conduct Keyword Research
One of the cornerstones of achieving fast SEO success is effective keyword research. By identifying relevant and high-traffic keywords, you enhance your website’s visibility and draw in the audience you’re targeting. Here’s how to approach it systematically:
Identify Relevant and High-Traffic Keywords
The first step in any keyword research journey is identifying the terms and phrases your potential audience is likely to use when searching for content related to your niche. Start by brainstorming a list of primary keywords related to your business or blog topics. Think about what your ideal customer or reader would type into the search bar.
Next, refine this list by finding the sweet spot where search volume and relevance intersect. Opt for keywords with a high search volume—the number of times a keyword is entered into a search engine—while ensuring they are directly related to your content. This balance helps you tap into the potential traffic without misleading or disappointing visitors who might find your content irrelevant.
Use Tools Like SEMrush or Ahrefs for Keyword Analysis
While brainstorming gives you an initial list, tools like SEMrush or Ahrefs can supercharge your keyword research by providing invaluable insights. These tools allow you to:
Check the search volume for each keyword: Ensure you’re targeting terms that people are actively searching for.
Understand keyword difficulty: Evaluate how hard it would be to rank for a particular keyword based on the competition.
Find related keywords: Discover synonyms, long-tail keywords, and related search terms that can further broaden your SEO strategy.
Analyze competitor keywords: Identify the keywords your competitors are ranking for and see if they can fit into your strategy.
For instance, if you operate a bakery, using SEMrush might reveal that “best gluten-free bread recipes” has a high search volume but relatively low competition, making it a valuable keyword to target.
Incorporate the Keywords Naturally into Your Content
Once you have a robust list of keywords, the next step is to weave them naturally into your content. Avoid keyword stuffing—the practice of overloading a page with keywords in an attempt to manipulate search rankings—as search engines can penalize this behavior. Instead, focus on creating high-quality content where keywords fit seamlessly. Here’s how:
Title and Headers: Place your primary keyword in the title of your post and within at least one subheader.
Introduction and Conclusion: Introduce your primary keyword in the opening paragraph and again in the closing thoughts to reinforce relevance.
Body Content: Sprinkle relevant keywords throughout the body of your content. Aim for a balance where the keywords are present but the content still reads naturally and provides value.
Meta Descriptions and Alt Text: Include your keywords in meta descriptions and image alt texts to enhance on-page SEO.
For example, if your chosen keyword is “cake decorating tips,” a blog post might start with an engaging introduction like, “Are you searching for the best cake decorating tips to elevate your baking game?” followed by subheadings such as “Essential Cake Decorating Tools” and “Advanced Cake Decorating Techniques.”
Conducting thorough keyword research and strategically integrating them into your content can significantly boost your SEO efforts. It helps bridge the gap between your potential audience and your content, driving more meaningful, organic traffic to your site.
4. Create High-Quality Content
High-quality content is the cornerstone of fast SEO success. It’s not just about writing; it’s about creating a rich, engaging experience for your audience. Here’s how you can ensure your content stands out and enhances your SEO efforts:
Develop Engaging and Informative Blog Posts
Your blog posts should provide value to your readers through well-researched and thoughtfully written content. Start by identifying the needs and interests of your target audience. What questions do they have? What problems are they looking to solve? Craft your blog posts to address these points comprehensively. Use attention-grabbing headlines, subheadings to break up the text, and a conversational tone to keep readers interested.
Quality doesn’t just mean length; it implies depth and relevance. Aim to answer the topic comprehensively, including facts, statistics, and expert opinions to reinforce your points. Well-written, engaging content doesn’t just attract readers; it keeps them coming back for more, increases on-site time, reduces bounce rates, and improves your overall SEO standing.
Use a Mix of Text, Images, and Videos
Diversify your content by incorporating different media types. A mix of text, images, and videos can significantly enhance the user experience and keep your audience engaged.
Text serves as the backbone, providing detailed explanations and narratives.
Images can break up large blocks of text, making the content more digestible. They also serve to illustrate points and can make complex information easier to understand. Make sure to use alt text for all images to improve accessibility and SEO.
Videos are an excellent way to engage users. They cater to those who prefer visual learning and can significantly increase the time visitors spend on your page. Embedding videos directly into your posts helps reduce bounce rates and signals to search engines that your content is valuable.
This multimedia approach can drive engagement and shares, which in turn can boost your search engine rankings.
Update Old Content to Keep It Relevant
SEO isn’t a one-time effort; it requires continuous maintenance. One effective way to maintain and improve your SEO is by updating old content to keep it relevant. Search engines favor up-to-date content because it provides the best user experience.
Regularly review your older posts and identify those that are outperforming others in terms of traffic but may be slightly outdated in terms of information. Update these posts with the latest data, new insights, and relevant keywords. Refreshing old content not only helps improve its search ranking but also demonstrates to your audience that your site provides current and reliable information.
Additionally, updating old posts can create new opportunities for internal linking, which helps improve site navigation and distribute page authority throughout your website.
By following these strategies, you’ll ensure that your content remains high-quality, engaging, and relevant, all of which are crucial for fast SEO success.
5. Build Quality Backlinks
Building quality backlinks is a crucial step in achieving fast SEO success. Backlinks serve as endorsements from other websites, signaling to search engines that your content is credible and valuable. Here’s how you can build high-quality backlinks to enhance your SEO efforts:
Engage in Guest Blogging on Reputable Sites
Guest blogging is one of the most effective ways to earn quality backlinks. By contributing valuable content to respected websites within your industry, you not only gain exposure to a broader audience but also establish your authority and attract backlinks to your site. Here’s how to go about it:
Identify Target Sites: Research and compile a list of reputable blogs and websites that accept guest posts. Make sure these sites have a strong domain authority and are relevant to your niche.
Pitch Relevant Topics: Propose engaging, well-researched topics that align with the host site’s content and audience interests. Personalized pitches that demonstrate familiarity with the site’s content are more likely to be accepted.
Create High-Quality Content: Deliver top-notch articles that provide genuine value. Including useful information, actionable tips, and well-supported arguments increases the chances of your submission being accepted and shared.
Reach Out to Industry Influencers for Collaboration
Collaborating with industry influencers can provide a significant boost to your backlink profile. Influencers have established authority and substantial followings, and their endorsement can greatly enhance your website’s credibility. Here’s how you can leverage influencer collaborations:
Identify Key Influencers: Use social media, industry forums, and blog directories to find influencers who are respected in your field.
Build Relationships: Engage with influencers by interacting with their content, leaving thoughtful comments, and sharing their posts. Building a genuine relationship over time will increase the likelihood of a successful collaboration.
Propose Collaboration Ideas: Reach out with personalized proposals for content partnerships, such as co-authored articles, interviews, podcasts, or webinars. Ensure that the collaboration offers mutual benefits and adds value to both parties’ audiences.
Submit Your Website to Relevant Directories
Submitting your website to relevant directories can help you acquire quality backlinks and improve your site’s visibility. While directory submissions might seem old-fashioned, they can still be effective when done correctly. Follow these guidelines to get the most out of directory submissions:
Select High-Quality Directories: Choose reputable directories with strong domain authority. Avoid directories that are considered spammy or have a questionable reputation, as they can harm your SEO efforts.
Ensure Relevance: Submit your website to directories that are specific to your industry or niche. This increases the likelihood that the backlinks you acquire will be perceived as credible and contextually relevant by search engines.
Provide Accurate Information: When submitting to directories, always provide accurate and consistent information about your business. This includes your website URL, business name, description, and contact details.
By focusing on these strategies to build quality backlinks, you can significantly improve your website’s authority, drive more traffic, and achieve fast SEO success. Remember, the key is to prioritize quality over quantity, ensuring that every backlink you build adds real value to your site and aligns with your broader SEO goals.
Conclusion
In this blog post, we’ve provided you with five easy tips for fast SEO success:
Optimize Your Website’s Content: Concentrate on creating high-quality, relevant content that is rich with the keywords and phrases your target audience is searching for.
Utilize On-Page SEO Techniques: Pay close attention to elements like meta tags, headers, alt text for images, and proper URL structures to ensure search engines understand the context and relevance of your content.
Leverage Backlinks: Build a network of high-authority backlinks through guest blogging, partnerships, and creating exceptional content that others want to link to.
Improve Website Speed and Mobile Friendliness: Ensure your website loads quickly and maintains a responsive design to provide a seamless user experience for both desktop and mobile users.
Regularly Update Content: Keep your content fresh and up-to-date to maintain relevance and retain the interest of both your audience and search engines.
Consistency is key when it comes to SEO. It’s not just about implementing these tips once, but making them a regular part of your ongoing digital strategy. Search engines like Google appreciate and reward websites that show fresh, consistent effort and improvement over time.
By consistently optimizing your content, refining your on-page SEO techniques, cultivating high-quality backlinks, enhancing your website’s performance, and regularly updating your content, you create a robust framework for fast SEO success.
Remember, while these tips are designed to yield quick results, the true power of SEO lies in its cumulative effect over time. So don’t wait – start implementing these strategies today, and watch your website climb the search engine rankings faster than you thought possible.
Visit for more info: https://gracker.ai/
#ai generated#content creation#content marketing#seo marketing#content strategy#search engine optimisation#seo strategy#blog strategy#seo services
0 notes
Text
Understanding Graphics in Digital Design: Essential Tools and Techniques
Image editing in graphic design:Top Inquiries Answered
1.What is graphics JPG?
JPG, or JPEG (Joint Photographic Experts Group), is a popular image file format used for compressing digital images. It uses lossy compression, which reduces file size by eliminating some image data, making it suitable for photographs and complex images where high detail is less critical. JPG files support millions of colours and are widely used for web images and digital photography due to their balance of quality and file size. However, repetitive saving and editing can degrade image quality, so it's best to keep an original copy in a lossless format when possible.
2. What is the difference between editing and graphics?
Editing refers to the process of reviewing, revising, and refining text or multimedia content to improve clarity, coherence, and quality. It involves correcting grammar, structure, and flow. Graphics, on the other hand, pertain to visual elements such as images, illustrations, and design layouts used to enhance communication and engagement. While editing focuses on textual and narrative content, graphics emphasize visual representation to convey ideas effectively. Both are essential in producing polished, engaging materials, but they serve distinct roles in content creation.
3. Can I use Picart for graphic design?
Yes, you can use Picsart for graphic design. It offers a variety of tools and features, including templates, stickers, fonts, and photo editing capabilities, making it suitable for creating social media graphics, posters, and more. Its user-friendly interface allows both beginners and experienced designers to craft visually appealing designs easily. Additionally, Picsart supports collaboration and sharing, enhancing creative projects.
4. What is UI in graphic design?
UI, or User Interface, in graphic design refers to the visual elements that enable users to interact with a product or service, such as websites, applications, or software. It encompasses layout, buttons, icons, typography, and color schemes, focusing on aesthetics and usability. A well-designed UI enhances user experience by making navigation intuitive and visually appealing, ensuring that users can easily comprehend and engage with the content. Effective UI design balances functionality and style to create an efficient, enjoyable interaction between the user and the product.
5. What is UX in graphic design?
UX, or User Experience, in graphic design refers to the overall experience a user has when interacting with a product or interface. It involves understanding user needs, behaviours, and emotions to create intuitive and engaging designs. Good UX ensures that graphics enhance usability, making navigation easy and enjoyable. This includes elements like layout, colour schemes, typography, and visual hierarchy, all aimed at facilitating a seamless interaction. Ultimately, effective UX in graphic design prioritizes the user's satisfaction and accessibility, leading to a more successful and impactful design.

Visit: VS Website See: VS Portfolio
0 notes