#traced from wikihow image
Explore tagged Tumblr posts
Visit Tumblr Blog
Explore Tumblr blogs with no restrictions, modern design and the best experience.
Last Seen Tumblr Blogs


Fun Fact
70% of Tumblr users say the Dashboard is their favorite place to spend time online.
Text

memetonics
#traced from wikihow image#vocaloid#synthesizer v#synthv#synth v#kevin#yi xi#dreamtonics#kevin synthv#yi xi synthv
45 notes
·
View notes
Text
Pretty Phone in Pink

This little piece was born from @elusivewildflower "What if you had that Barbie phone as a burner phone", and my silly edition of "What if Court gave you a burner phone but it is a Barbie phone." The phone in question. This turned out more feels-y than silly, but oh well.
Summary: It's customary for Court to dissapear for weeks on end, only to re-appear the least you expect it. Sometimes you wished he would be more transparent on his wereabouts, if not to cease your worrying but to hear his voice when you miss him most. This time Court comes home with a solution to that.
Court Gentry x gender neutral reader
Warnings: implied injured!Court
Word count: 626

Court looked a bit sheepish when he handed you the box. As if he regretted not bundling it in some obnoxious wrapping paper, glitter and a bow on top. An image of a battered Court Gentry folding the creases of some papery design around the gift while laying low in some shithole or another made you stifle a chuckle. And a little tickle in your stomach.
The box was carton, no labels, very much very nondescript. Like a giddy child on Christmas morning you tore the tape off. Another box inside, gleaming plastic. A pink box.
“What-” you started, then paused. It was a phone. A pink phone. A Barbie phone. “You got me a phone.”
“Yes,” Court answered, pushing himself off the kitchen counter. Every movement a bit halted, as if every shift of his muscles was carefully considered, which they probably were.
Court was a master in pretending and you had no idea what kind of injury he was hiding underneath that hoodie. You asked, of course, when he dragged himself into your apartment through the fire escape looking every bit like a wet cat who got the cream upon your reaction to his sudden appearance.
You knew where he had been, or well, not exactly where but you knew he had been gone for the past week doing whatever Court did when he disappeared in a puff of smoke and the dregs of burnt coffee in your favourite mug. A Barbie mug with a chip in the ear and the print of Skipper faded from the many journeys through the dishwasher.
His mug now, but that was one of the things that had been left unspoken.
As much as Court kept his activities guarded from your scrutiny - though he would atone for those sins later when you dragged him into the bathroom to examine, as there was more to WikiHow than ‘how to be a mermaid’ - now his face was like an open book.
Court could speak so much without uttering one word. Sometimes you wanted to punch him for it. His honest affection and the maelstrom of feelings that lit a blush on your cheeks. The implication of the gift was clear.
“I thought you said,” you paused, cleared your throat. Too loud in the kitchen. “That it would be safer for me not to contact you when you…” Are busy trying not to get shot at.
Court winced.
“You can use it as a burner phone,” he said, holding your gaze. “I know the last few months have been hard on you. On us. And- I didn’t want you to be in danger, not anymore.”
From the front pouch of his hoodie, he pulled out a sturdy flip phone. Unlike the screaming pink, it was a slate grey. It reminded you of the Nokia’s of your youth. Inconspicuous and seemingly indestructible. Like him.
“Next time I’m gone,” he held up the phone, “You can call me, and I’ll try to answer.” Then he smirked. “Unless you aren’t interested in a bed time story.”
You rolled your eyes. “If it involves another rant on pickles, please do spare me.” “Hm, what’s wrong with counting pickles instead of sheep?”
You set the box down on the dinner table and took a step forward, crowding his space. “Thank you. I know this must be difficult for you.”
“I imagine not as difficult as having to worry if I’d ever come back to you at all,” he said, voice low in a whisper.
“But you’re here now.”
“Yes.”
You carded your fingers through his fringe, still wet from the rain outside. Tracing your thumb down his temple, over his cheek, resting just underneath his lower lip. The stubble scratching your skin.
“Tell me another story.”
Is the Barbie movie canon in The Gray Man movie-verse? Perhaps.
Thank you for reading
70 notes
·
View notes
Photo

Tracing from wikihow image that I can no longer find the original link
Also posted on my twitter
17 notes
·
View notes
Text
Learn why people trust wikiHow
CREATIVITYIMPROVING MENTAL ABILITIES
How to Control Your Subconscious Mind
Co-authored by Michelle Shahbazyan, MS, MA
Last Updated: April 8, 2021 References Approved
Download Article
While the conscious mind is remarkable, the subconscious mind is even more awe-inspiring! As your conscious mind processes one choice or action, your subconscious mind simultaneously processes unconscious choices and actions. Once activated, subconscious goals, choices, and actions persist until met. Research indicates that it is not possible to prime your unconscious. However, there are activities and exercises that may allow you to access and or expand your awareness of your subconscious.
Method 1 of 4:
Practicing Positivity
1
Practice positive self talk. Replace your negative self talk with affirmations. Shifting your language will alter your mindset and override negative subconscious actions and thoughts.[1] Replace “I can’t do this!” with “I can do this!” Instead of saying “I fail at everything!” exclaim “I will succeed!” If you catch yourself slipping back into negative self-talk, pause and take a deep breath. Consider why you are telling yourself you won’t succeed. Identify the factors that caused you to become negative. Note that these factors are triggers and recommit to affirming yourself.
This shift in your language won’t happen overnight. It takes time and consistency. Remain positive as you work toward ridding yourself of negative subconscious expectations and behaviors.
2
Craft a positive mantra. When anxiety or stress arises, calm your nerves and quell negative thoughts by repeating a personally crafted mantra. Consistent use of the mantra will subdue negative thoughts and actions that arise from your subconscious mind. Identify your negative thoughts and accept that your self-judgement is unfounded. Create a healing mantra by identifying the opposite of your self-judgemental claim. Craft two additional mantras that express the same idea; use them interchangeably. Select a spot in your body to ground the positivity. The spot could be your heart or your stomach. Place your hand on the spot as you repeat the mantra. Focus on the action and swell with confidence.[2]
If you feel that you are never good enough, your mantras would be “I am good enough,” “I am worthy,” and “I am worth it.”
3
Practice visualization. Visualizing, or mentally rehearsing, the achievement of your goals is a wonderful way to engage with and train your subconscious mind. Start with visualization exercises that only require you to utilize one to two of your senses. Try to visualize every detail of a photograph or a familiar object. As you master this, work towards visualizing entire scenes of movies or memories. Note the sounds, smells, colors, textures, and tastes. When you acquire the ability to focus and accurately depict details, begin visualizing yourself achieving your goals. It is essential that you visualize yourself as realistic as possible. Don’t dwell on the negatives or envision yourself failing but visualize yourself succeeding and achieving your goal! For example, if you are visualizing yourself giving a speech, picture yourself recovering from a stutter or a skipped sentence instead of moving the crowd to their feet. [3]
Visualize specific goals. Be specific about what it is that you want to achieve. Identify the location, time, and circumstances surrounding your success. Go into as much detail as possible!
Don’t envision yourself as superhuman; instead imagine yourself as you really are.
Advertisement
Method 2 of 4:
Practicing Mindful Meditation
1
Prepare to meditate. Meditation will help you focus and harness your subconscious mind. Before meditating, determine the length of your session. If you are a beginner, try to meditate for 5 minutes. Change into comfortable clothes. Grab a timer and proceed to a quiet, peaceful environment. Choose a location without clutter or distractions. Sit outside, on the floor your apartment, or on your back porch. Stretch before assuming a comfortable seated position. Touch your toes, release the tension from your neck, and relax your shoulders.[4]
2
Establish your posture. Find a stable seat. Sit in a straight backed chair with your feet planted firmly on the ground or cross-legged on top of a pillow on the floor. Straighten your back—your spine’s natural curve should be present. Position your upper arms parallel to the sides of your body. Your elbows will have a slight bend and your hands will naturally fall gently atop your knees. Lower your chin slightly and gaze at the floor. Settle into the position, become aware of your body, before you proceed.[5]
3
Focus on your breathing and your passing thoughts. Close your eyes and begin to follow your breath. Focus on your inhale and your exhale. As you relax, your mind will wander. Thoughts will flow from your subconscious mind to your conscious mind. Note these thoughts, but don’t judge them. Allow these thoughts to pass. When you realize your mind has wandered, return your attention to your breathing. In time, your mind will wander again. Always continue to come back to your breath. Repeat this process until your session is complete.[6]
Advertisement
Method 3 of 4:
Practicing Stream of Consciousness Writing
1
Get prepared. Gather a pencil or pen and a pad of paper. Find a timer—an egg timer, stop watch, or your phone will work—a set it for 5 or 10 minutes Settle into a quiet, distraction-free environment. Set your phone to silent. Avoid using a computer or tablet—they provide you with too many distractions![7]
2
Begin writing. Sit in a comfortable position and take a deep breath to center yourself. Start the timer and begin writing. Never approach stream of consciousness writing with an agenda but allow your thoughts to flow naturally from one to another. As the thoughts enter your head, record them on paper. Don’t avoid writing down the mundane thoughts or ignore the odd thoughts—these may have arisen from your subconscious mind.[8] Don’t judge the thoughts or stop to analyze them. Just write. Continue recording your thoughts until the timer buzzes.[9]
3
Analyze your writing. When the session is complete, read over your thoughts. Reflect upon your words. Identify recurring thoughts or odd phrases. Try to find a link between two disparate ideas. Make note of any potential subconscious thoughts. As you continue to execute this exercise, read over your work from previous sessions. Trace your progress with stream of consciousness writing and assess if your unconscious mind has revealed itself.[10]
Advertisement
Method 4 of 4:
Practicing Dream Analysis
1
Record your dreams. Before falling asleep, place a pen or pencil and a journal next to your bed. When you wake up in the morning, or periodically throughout the night, record your dreams in your journal. Write down every detail of your dreams you can recall. Jot down the minor details, no matter how mundane or insignificant they may appear. If you have been recording your dreams for a while, make note of any recurring concepts, characters, or objects.
Your subconscious mind is revealed in your dreams. Therefore, recording and studying your dreams provides you with access to your unconscious mind.[11]
2
Decide if your dream was significant and categorize it. An insignificant dream incorporates aspects of your physical surroundings—you may incorporate smells, sounds, and physical actions occurring around you into your dream; a significant dream is derived from your subconscious mind—it is not a common dream but an odd, puzzling, or illuminating dream. If your dream was significant, determine which category of subconscious dreams it falls under. Was it a precognitive dream that revealed details about future events? Was the dream a warning? Was it factual—did it confirm what you already knew? Did the dream inspire you or fulfill one of your desires? Did your dream fulfill your wish or need to reconcile with someone or something?[12]
Vivid dreams are often more significant.
3
Interpret your significant dreams. You do not have to be an expert to analyze your own dreams! All it requires is a little effort and research. There are handy resources online and at your local library! When analyzing your dream, assess it as a whole. Each detail you recall has significance and will enhance your interpretation of your dream, as well as your understanding of your subconscious mind. If the dream dictionary’s definition of a symbol is inadequate, try assessing the dream within the context of your own life. Try to determine for yourself if there is a reason this image, person, or thing is appearing in your dreams.[13]
Advertisement
Expert Q&A
Ask a Question
Submit
Advertisement
Related wikiHows
How to
Reach Your Hardest Goals
How to
Be Yourself
How to
Exercise Will Power
How to
Meditate
How to
Meditate for Beginners
How to
Expand Your Mind
How to
Increase Your Brain's Processing Speed
How to
Improve Attention to Detail
How to
Increase Your Brain Power
How to
Be More Mentally Aware
How to
Sharpen Your Powers of Observation
How to
Be a Smart Girl
How to
Use More of Your Brain
How to
Learn Something New Every Day
Advertisement
References
↑Michelle Shahbazyan, MS, MA. Life Coach. Expert Interview. 18 March 2020.
↑http://bottomlinepersonal.com/the-power-of-a-personal-mantra/
↑https://litemind.com/how-to-develop-visualization-skill/
↑http://www.mindful.org/mindfulness-how-to-do-it/
↑http://www.mindful.org/mindfulness-how-to-do-it/
↑http://www.mindful.org/mindfulness-how-to-do-it/
↑http://www.writingthroughlife.com/journaling-techniques-writing-on-the-stream-of-consciousness
↑Michelle Shahbazyan, MS, MA. Life Coach. Expert Interview. 18 March 2020.
↑http://www.writingthroughlife.com/journaling-techniques-writing-on-the-stream-of-consciousness
More References (4)
About This Article
Co-authored by:
Michelle Shahbazyan, MS, MA
Life Coach
This article was co-authored by Michelle Shahbazyan, MS, MA. Michelle Shahbazyan is the Founder of The LA Life Coach, a concierge life, family, and career coaching service based in Los Angeles, California. She has over 10 years of experience with life coaching, consulting, motivational speaking, and matchmaking. She has a BA in Applied Psychology and an MS in Building Construction and Technology Management from Georgia Tech University, and a MA in Psychology with an emphasis on Marriage and Family Therapy from Phillips Graduate University. This article has been viewed 1,204,859 times.
13 votes - 85%
Co-authors: 49
Updated: April 8, 2021
Views: 1,204,859
Categories: Improving Mental Abilities
Article Summary
In other languages
Reader Success Stories
Alandria Daniel
Jul 5, 2017
"I'm trying to remember the good times in my childhood. There has to be a way for me to remember in my dreams,..." more
Rated this article:
More reader stories
Share your story
Did this article help you?
Yes No
Advertisement
CategoriesEducation and CommunicationsPersonal DevelopmentCreativityImproving Mental Abilities
wikiHow Newsletter
Helpful how-tos delivered to
your inbox every week!
Sign me up!
By signing up you are agreeing to receive emails according to our privacy policy.
Home
About wikiHow
Experts
Blog
Jobs
Contact Us
Site Map
Terms of Use
Privacy Policy
Contribute
Follow Us
×
Get all the best how-tos!
Sign up for wikiHow's weekly email newsletter
Subscribe
0 notes
Text
Explained: force-feeding cat pills meme
This meme centers around a wikiHow illustration of a person feeding a cat antidepressants, from the article “How to Stop a Male Cat from Spraying.”
There are a couple versions of memes that come from this wikiHow illustration.
One version of this meme features a two-panel format. In this format, the top image usually contains an illustration of a person force-feeding the cat pills, titled “Pills that make you stare at [X],” where X is someone or something. The bottom image then contains an illustration of a cat, staring at that someone or something.
Know Your Meme documented this version of the meme (archived link), tracing its origin to a tweet from August 2017. In this tweet, the first panel image shows the pills with the label “Pills that make you stare at the wall”. In the second panel, the cat is seen staring at a wall. (This instance was reposted to Tumblr here.)
This two-panel format became popular on Tumblr in September 2017.
However, an earlier, single-panel version of this meme also exists, using only the first panel image in which the cat is being force-fed pills.
The first instance of this format is not conclusively known, but one of the earliest known versions comes from a tweet by Twitter user dankcommiememes on 2 January 2017, which has since been deleted. The tweet states, “talking to liberals be like”, and it has an image of the cat being force-fed pills labelled “DIALECTICAL MATERIALISM”.
Early versions of this meme appeared on Tumblr as early as January 2017 as well.
As a precursor, the use of the original image (unmodified) in which the cat is being force-fed antidepressants has been used as a reaction image since 2016. For example, a tweet by Twitter user ziwe used the image along with the text “entering 2017 like”. This tweet is from 22 December 2016.
Click here to see examples of the force-feeding cat pills meme.
63 notes
·
View notes
Text
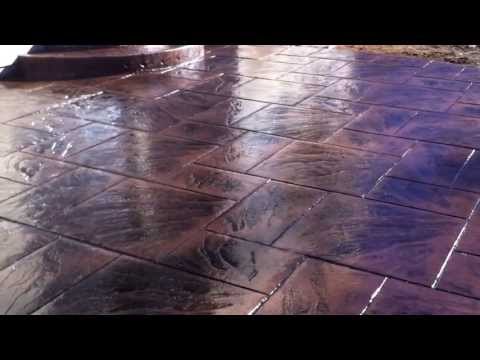
The Worst Advice We've Ever Heard About Stamped Concrete Color Combination Visualizer
for every a hundred sq. feet. Two-thirds of the hardener needs to be utilized in the beginning and a person-3rd should be withheld for the second software and closing touch up.
With each other, they cited info from six references. wikiHow's Material Administration Workforce meticulously monitors the function from our editorial staff members to make sure that Every single posting meets our significant expectations.
Stamped concrete overlays might make your concrete floors and countertops resemble some unique stones. It does not issue whether or not you desire your swimming pool deck to seem as whether it is fabricated from brick or you wish to give your walkway a cobblestone appear.
You may have quite a few colors established in patterns or because it is so slim, you can layer the colors to have awesome outcomes. A really multipurpose product, that could be applied to both flooring or walls. See microcolour (backlink to microcolour) Have a look as a result of our inspirations gallery or drop by our Screen to get ideas...
So if you are choosing a concrete color, try and be sensible when thinking of the ultimate consequence. And do not be overtaken In the event the color appears to be like several than Everything you imagined. The final guideline has the inclination for being that colors look a couple of shades much easier than their sample charts.
Stony Isle can be a lighter version of grey cloud. It mimics a lighter granite stone color. It really works with any great color palette where deep intensity is not really ideal.
Searching for actual pics of our concrete colors? Check out our gallery of different Davis Colors concrete pigments and finishes.
Or you may perhaps elect to embrace the seem of concrete as an alternative to imitating One more materials. As an example, you could possibly make a decision on a cultured sand complete for your personal patio with an intricate, round compass design being a stamped accent in the middle.
Never implement if significant winds are blowing or if rain is predicted inside 24 hrs. Crucial: Examination a small inconspicuous place to ensure color fulfillment.
You should have your stamped concrete in spot for an incredibly long time. Will probably be an exceptionally while before you Get hold of the concrete resurfacing Dallas or Collin professionals. This is certainly why, as aforementioned, It's a very low upkeep kind of attractive concrete.
Patio stamped with tinted liquid release, then sealed 1 factor that could tremendously lead to the problem of leaving excessive release within the floor would be the ever more popular exercise of stamping exterior concrete with tinted liquid release. Tinted liquid release is commonly created by the contractor in the field. It really is accomplished by adding a certain number of powdered release to a particular quantity of obvious liquid release.
youtube
A popular texture especially when applied with brick or tile grout traces. An integral color utilizing a slightly darker eco-friendly or grey release powder to accentuate the pattern would be incredibly result Wooden Grain
An appropriate set up: In the Image previously mentioned, the dim walnut release color demonstrates only during the joints and depressions. The substantial places exhibit only the lighter base color.
The antiquing release is dusted more than the surface area of freshly colored concrete flatwork just before utilizing a pattern-stamping Resource. The release agent helps prevent the Device from sticking to recently colored, freshly stamped concrete. As the Software is pulled within the concrete, the colored release powder is layered in the textured surfaces with the concrete.
0 notes
Note
does anyone know anything about plushies that have like,, a slow rising foam stuffing/core? or any suggestions for tutorials/materials to diy a simple (say round or tsum-tsum style) plush covering but for memory foam instead of stuffing? i like to stim both with squishies and by stroking plush fabric and i was wondering if anyones tried combining them before
Oh, anon! I’ve never heard of anyone trying this before, but what an idea! Do you mind if I add this to my list of things to try crafting?
(I’ll just say that I have a memory foam pillow and the relationship I have to said pillow is stronger than I have to certain people. I’ve had said pillow for a couple of years now and I’m still not quite over the lovely, lovely combination of softness and firmness when compared to all the dreadful, normal pillows I suffered through growing up. If other autistics are like me and can’t stand stuffing-type pillows and the way they lump and flatten, do try a memory foam pillow. They’re perfection.)
I went to Google to see if I could find any good tutorials for DIY Tsum Tsums. I do have a dismantled/unpicked Tigger mini plush Tsum Tsum that I’m planning to trace and make patterns from (I want to make myself a duck from yellow minky fleece I have) but I think this sort of thing might be even better in the medium size (so you can wrap your arms around it and squish). I didn’t really find these, however, but if I can cobble together a good pattern I’ll see about enlarging it.
(By the way, if you’re like me and super tired of Pinterest results making it hard to find crafting tutorials and not folks’ pins, add “-pinterest” to the end of your search terms. For example, “cylinder pillow tutorial -pinterest”.)
The least-Tusm-Tsum-like tutorial I found was for these sock sheep on Craft Passion, but their bodies are such that they’d be easy to stuff with a rounded piece of foam pillow. (Tutorial has alt text but does not describe the individual picture, rendering it useless.)
Another variation on the sock theme is this sock Eeyore Tsum Tsum video tutorial by Pink Sugar Cotton. (Annoying music but no voice over and the instructions are captioned, so easily muted. No transcript, so inaccessible for folks who need screen readers.)
Continuing on the sock theme (apparently everybody is using socks to make these) is another light-on-the-sewing video tutorial for an Olaf Tsum Tsum by Budget Hobby. (Identical concerns to the previous video.) Blog The Dorky Din (no alt text) showcases more Tsum Tsums made by using Budget Hobby’s tutorials.
I’ll also mention there’s a child-aimed official Sew Your Own Tsum Tsum kit available at The Entertainer in the UK, currently on sale for £5.00GBP. May be good for figuring out patterns!
For those who can crochet (I absolutely cannot from chronic hand pain) there’s a tutorial for a DIY crocheted Marie Tsum Tsum by @mybackyardmonsters. Their patterns page has links for even more. (Everything is undescribed.)
For tube or cylinder pillow tutorials, you might want to check out a fancier machine tutorial on Pretty Prudent (no alt text), a really simple bolster pillow tutorial on WikiHow (alt text doesn’t describe image, but the text under each image may be enough) or a middling-fancy tutorial on A Beautiful Mess (alt text that repeats the page title, which is a thousand shades of pointless).
Half-moon cylinder memory foam pillows exist (Amazon link for example) so I would look for a memory foam pillow base for a larger version and sew a cover using the above tutorials as a guide from minky fleece (Lincraft link for example) because minky is lovely and soft. For the mini Tsum Tsums, I’d look at cutting up a pillow to shape (note that I have no idea how difficult one might be to shape).
This isn’t the best answer, anon, but I hope it gives you somewhere to begin. Please let us know how you go if you try it, because I’m willing to bet we’re not the only ones who think this an awesome idea!
#stim toy#stim toys#Amazon#Lincraft#USA#Australia#The Entertainer#UK#ask#text#link#plushie#soft toy#DIY#tutorial#DIY components#anon#stimtoybox#long post#resource list#pillow#minky fleece#mod K.A.
15 notes
·
View notes
Text
3 Tips to Repair Spot Damage on Carpet
Just because your carpet has had an accident doesn’t mean you need to replace it. You may be able to fix up or patch up the damaged section. Here are some tips to do it conveniently and effectively.
Image Source: Flickr
Clean the Affected Area
Use carpet cleaner or a commercially available stain remover to remove traces of dirt and stain on the damaged area. Spot damage is usually caused by spilling drinks or food items that produce dark stains such as red wine or catsup. Follow the instructions provided on the carpet cleaner and have a few pieces of white paper towel ready. You may also use a chamois because it is capable of absorbing more liquid.
Do not rub the damaged area with the cleaner. Use a paper towel or chamois to gently press on the stained area. Cigarette burns are more difficult to remove. Use a sharp pair of scissors to carefully trim the damaged part of the carpet. Trim only the top part of the damaged area. Severe spot damage caused by cigarette burns should be cut and replaced when appropriate. Source: DoItYourself
Cut Out the Damage and a Matching Plug
Be sure the area you’re working in is well lit. To mark the area you’ll cut out, part the carpet fibers around the damage as if you were parting your hair (Photo 1). Keep the part lines at least 1/2 in. from the damaged spot. Cut along the parts using a sharp, new blade in your carpet knife (Photo 2).
Next, cut a replacement plug, using the cutout as a template. To start, make a first cut in the replacement material, using a straightedge to guide your carpet knife. Then set the cutout on the replacement material with one edge aligned along that first cut. When you lay the cutout on top of the replacement material, make sure their naps are running in the same direction. You can tell which direction the nap is running by rubbing your hand over the carpeting and watching which way the fibers fall or stand up. Once you have the cutout lined up correctly, part the fibers around the three uncut sides just as you did before.
Cut along the parts and test-fit the plug in the cutout hole, making sure the nap of the plug matches the nap of the surrounding carpet. If the plug is a little too big, trim off a single row of fibers with sharp scissors (old, dull scissors will tear the fibers). Source: FamilyHandyman
Cut Replacement Carpet & Apply Carpet Adhesive
Wet the carpet patch pad. Carpet patch pads are used to iron on specially made adhesive disks that activate with the help of heat. Your carpet patch pad may be aluminum-sided on the top and contain a previous material on the bottom. Wet your carpet patch pad under water and wring out the excess; the pad should be damp but not dripping.
Slide the adhesive pad underneath the cut-out carpet, centering it. Make sure the adhesive pad is adequately bigger than the patch, specially made for heat-application, and centered for even distribution. Smooth out any wrinkles if necessary
Place the replacement patch onto the adhesive disk. Go over the patch with a carpet brush to remove loose fibers. Make sure that the direction of the fibers on the patch matches the direction of the fibers on the carpet. Using an iron set on high, heat the patch pad up for one minute. Press down on the iron so that the heat transfers from the patch pad, through the carpet, to the adhesive pad underneath. Remember that the adhesive pad activates when subjected to heat.
You should hear a light sizzle when you touch the iron onto the patch pad. This is the water reacting to the heat, not the carpet burning.
If the patch is big, go over different spots the patch with the iron — enough to cover the entire patch. You don’t want to fail to activate the head beneath the patch. Source: wikiHow
The post 3 Tips to Repair Spot Damage on Carpet appeared first on Curlys Carpet Repair.
from Curlys Carpet Repair http://ift.tt/2r5gRmq
0 notes