#why have jpegs done this to js
Explore tagged Tumblr posts
Visit Tumblr Blog
Explore Tumblr blogs with no restrictions, modern design and the best experience.
Last Seen Tumblr Blogs


Fun Fact
Mobile US users spent an average of 115.8 minutes on Tumblr app monthly.
Text
Damn why do so many roleplayers HATE artists lol
#as always incredibly depressing n instantly aggroing going on an tp search#*rp#like nearly all of these ads are like IRL FC ONLY VERY IMPORTANT!!!FOR REALISM!!!#whats your fucking damage#and honestly why yhe fuck has the rp community gotten so obsessed with IMAGES to begin with#the realism doesnt come from the photo you jacked off some influencers instagram#the realism will be created by how good your damn WRITING is#I just get so mad seeing that.... its exluding ppl without even giving them a real chance...#you dont fucking know what youre missing#IM AN EXCELLENT writer fuck you#roleplay community what gives#why must we be so divided#why have jpegs done this to js#*us
2 notes
·
View notes
Photo

SEO is easy. The EXACT process we use to scale our clients' SEO from 0 to 200k monthly traffic and beyond https://www.reddit.com/r/SEO/comments/hqgden/seo_is_easy_the_exact_process_we_use_to_scale_our/
Hey guys!
There's a TON of content out there on SEO - guides, articles, courses, videos, scams, people yelling about it on online forums, etc etc..
Most of it, however, is super impractical. If you want to start doing SEO TODAY and start getting results ASAP, you'll need to do a TON of digging to figure out what's important and what's not.
So we wanted to make everyone's lives super easy and distill our EXACT process of working w/ clients into a stupid-simple, step-by-step practical guide. And so we did. Here we are.
A bit of backstory:
If you guys haven't seen any of my previous posts, me and my co-founder own an SEO/digital marketing agency, and we've worked w/ a ton of clients helping them go from 0 to 200k+ monthly organic traffic. We've also helped some quite big companies grow their organic traffic (from 1M to over 1.8M monthly organic), using the exact same process.
So without further ado, grab your popcorn, and be prepared to stick to the screen for a while, cause this is going to be a long post. Here's everything I am going to cover:
Get your website to run and load 2x - 5x faster (with MINIMAL technical know-how)
Optimize your landing pages to rank for direct intent keywords (and drive 100% qualified leads)
Create amazing, long-form content that ranks every time
How we get a TON of links to our website with ZERO link-building efforts
How to improve your content’s rankings with Surfer SEO
Step #1 - Technical Optimization and On-Page SEO
Step #1 to any SEO initiative is getting your technical SEO right.
Now, some of this is going to be a bit technical, so you might just forward this part to your tech team and just skip ahead to "Step #2 - Keyword Research."
If you DON'T have a tech team and want a super easy tl;dr, do this:
Use WP Rocket. It's a WordPress plugin that optimizes a bunch of stuff on your website, making it run significantly faster.
Use SMUSH to (losslessly) compress all the images on your website. this usually helps a TON w/ load speed.
If you’re a bit more tech-savvy, though, read on!
Technical SEO Basics
Sitemap.xml file. A good sitemap shows Google how to easily navigate your website (and how to find all your content!). If your site runs on WordPress, all you have to do is install YoastSEO or Rankmath SEO, and they’ll create a sitemap for you. Otherwise, you can use an online XML Sitemap generation tool.
Proper website architecture. The crawl depth of any page should be lower than 4 (i.e: any given page should be reached with no more than 3 clicks from the homepage). To fix this, you should improve your interlinking (check Step #6 of this guide to learn more).
Serve images in next-gen format. Next-gen image formats (JPEG 2000, JPEG XR, and WebP) can be compressed a lot better than JPG or PNG images. Using WordPress? Just use Smush and it’ll do ALL the work for you. Otherwise, you can manually compress all images and re-upload them.
Remove duplicate content. Google hates duplicate content and will penalize you for it. If you have any duplicate pages, just merge them (by doing a 301 redirect) or delete one or the other.
Update your ‘robots.txt’ file. Hide the pages you don’t want Google to index (e.g: non-public, or unimportant pages). If you’re a SaaS, this would be most of your in-app pages. ]
Optimize all your pages by best practice. There’s a bunch of general best practices that Google wants you to follow for your web pages (maintain keyword density, have an adequate # of outbound links, etc.). Install YoastSEO or RankMath and use them to optimize all of your web pages.
If you DON’T have any pages that you don’t want to be displayed on Google, you DON’T need robots.txt.
Advanced Technical SEO
Now, this is where this gets a bit more web-devvy. Other than just optimizing your website for SEO, you should also focus on optimizing your website speed.
Here’s how to do that:
Both for Mobile and PC, your website should load in under 2-3 seconds. While load speed isn’t a DIRECT ranking factor, it does have a very serious impact on your rankings.
After all, if your website doesn’t load for 5 seconds, a bunch of your visitors might drop off.
So, to measure your website speed performance, you can use Pagespeed Insights. Some of the most common issues we have seen clients facing when it comes to website speed and loading time, are the following:
Images being resized with CSS or JS. This adds extra loading time to your site. Use GTMetrix to find which images need resizing. Use an online tool (there are a ton of free ones) to properly resize images (or Photoshop even), and re-upload them.
Images not being lazy-loaded. If your pages contain a lot of images, you MUST activate lazy-loading. This allows images that are below the screen, to be loaded only once the visitor scrolls down enough to see the image.
Gzip compression not enabled. Gzip is a compression method that allows network file transfers to happen a ton faster. In other words, your files like your HTML, CSS, and JS load a ton faster.
JS, CSS, and HTML not minified/aggregated/in-lined. If your website is loading slowly because you have 100+ external javascript files and stylesheets being requested from the server, then you need to look into minifying, aggregating, and inlining some of those files.
Use Cloudflare + BunnyCDN Why the combo? Why not just Cloudflare? Well, I won't get into details, I've experimented a bit with it, and if you are looking for something cheap and fast this is the best combo. Cloudflare you can opt in for the free account. BunnyCDN on the other hand is on a pay-as-you-go basis, and unless you are getting over 100K+ visits a month, you'll likely never go above their minimum monthly threshold of $1.
Want to make your life easier AND fix up all these issues and more? Use WP Rocket. The tool basically does all your optimization for you (if you’re using WordPress, of course).
Step #2 - Keyword Research
Once your website is 100% optimized, it’s time to define your SEO strategy.
The best way to get started with this is by doing keyword research.
First off, you want to create a keyword research sheet. This is going to be your main hub for all your content operations.
You can use the sheet to:
Prioritize content
Keep track of the publishing process
Get a top-down view of your web pages
And here’s what it covers:
Target search phrase. This is the keyword you’re targeting.
Priority. What’s the priority of this keyword? We usually divide them by 1-2-3…
Priority 3 - Top priority keywords. These are usually low competition, high traffic, well-converting, or all 3 at the same time.
Priority 2 - Mid-priority keywords.
Priority 1 - These are low priority.
Status. What’s the status of the article? We usually divide them by…
1 - Not written
2 - Writer has picked up the topic for the week
3 - The article is being written
4 - The article is in editing phase
5 - The article is published on the blog
Topic cluster. The category that the blog post belongs to.
Monthly search volume. Self-explanatory. This helps you pick a priority for the keyword.
CPC (low & high bid). Cost per click for the keyword. Generally, unless you’re planning to run search ads, these are not mandatory. They can, however, help you figure out which of your keywords will convert better. Pro tip: the higher the CPC, the more likely it is for the keyword to convert well.
Now that you have your sheet (and understand how it works), let’s talk about the “how” of keyword research.
How to do Keyword Research (Step-by-Step Guide)
There are a ton of different ways to do that (check the “further readings” at the end of this section for a detailed rundown).
Our favorite method, however, is as follows…
Start off by listing out your top 5 SEO competitors.
The key here is SEO competitors - competing companies that have a strong SEO presence in the same niche.
Not sure who’s a good SEO competitor? Google the top keywords that describe your product and find your top-ranking competitors.
Run them through SEMrush (or your favorite SEO tool), and you’ll see how well, exactly, they’re doing with their SEO.
Once you have a list of 5 competitors, run each of them through “Organic Research” on SEMrush, and you'll get a complete list of all the keywords they rank on.
Now, go through these keywords one by one and extract all the relevant ones and add them to your sheet.
Once you go through the top SEO competitors, your keyword research should be around 80%+ done.
Now to put some finishing touches on your keyword research, run your top keywords through UberSuggest and let it do its magic. It's going to give you a bunch of keywords associated with the keywords you input.
Go through all the results it's going to give you, extract anything that’s relevant, and your keyword research should be 90% done.
At this point, you can call it a day and move on to the next step. Chances are, over time, you’ll uncover new keywords to add to your sheet and get you to that sweet 100%.
Step #3 - Create SEO Landing Pages
Remember how we collected a bunch of landing page keywords in step #2? Now it’s time to build the right page for each of them! This step is a lot more straightforward than you’d think. First off, you create a custom landing page based around the keyword. Depending on your niche, this can be done in 2 ways:
Create a general template landing page. Pretty much copy-paste your landing page, alter the sub-headings, paraphrase it a bit, and add relevant images to the use-case. You’d go with this option if the keywords you’re targeting are very similar to your main use-case (e.g. “project management software” “project management system”).
Create a unique landing page for each use-case. You should do this if each use-case is unique. For example, if your software doubles as project management software and workflow management software. In this case, you’ll need two completely new landing pages for each keyword.
Once you have a bunch of these pages ready, you should optimize them for their respective keywords.
You can do this by running the page content through an SEO tool. If you’re using WordPress, you can do this through RankMath or Yoast SEO.
Both tools will give you exact instructions on how to optimize your page for the keyword.
If you’re not using WordPress, you can use SurferSEO. Just copy-paste your web page content, and it’s going to give you instructions on how to optimize it.
Once your new landing pages are live, you need to pick where you want to place them on your website. We usually recommend adding these pages to your website’s navigation menu (header) or footer.
Finally, once you have all these new landing pages up, you might be thinking “Now what? How, and when, are these pages going to rank?”
Generally, landing pages are a tad harder to rank than content. See, with content, quality plays a huge part. Write better, longer, and more informative content than your competition, and you’re going to eventually outrank them even if they have more links.
With landing pages, things aren’t as cut and dry. More often than not, you can’t just “create a better landing page.”
What determines rankings for landing page keywords are backlinks. If your competitors have 400 links on their landing pages, while yours has 40, chances are, you’re not going to outrank them.
Step #4 - Create SEO Blog Content
Now, let’s talk about the other side of the coin: content keywords, and how to create content that ranks.
As we mentioned before, these keywords aren’t direct-intent (the Googler isn’t SPECIFICALLY looking for your product), but they can still convert pretty well. For example, if you’re a digital marketing agency, you could rank on keywords like…
Lead generation techniques
SaaS marketing
SEO content
After all, anyone looking to learn about lead gen techniques might also be willing to pay you to do it for them.
On top of this, blog post keywords are way easier to rank for than your landing pages - you can beat competition simply by creating significantly better content without turning it into a backlink war.In order to create good SEO content, you need to do 2 things right:
Create a comprehensive content outline
Get the writing part right
Here’s how each of these work...
How to Create a Content Outline for SEO
A content outline is a document that has all the info on what type of information the article should contain Usually, this includes:
Which headers and subheaders you should use
What’s the optimal word count
What information, exactly, should each section of the article cover
If you’re not using Yoast or Rankmath, you can also mention the SEO optimization requirements (keyword density, # of outbound links, etc.)
Outlines are useful if you’re working with a writing team that isn’t 100% familiar with SEO, allowing them to write content that ranks without any SEO know-how.
At the same time, even if you’re the one doing the writing, an outline can help you get a top-down idea of what you should cover in the article.
So, how do you create an outline? Here’s a simplified step-by-step process…
Determine the target word count. Rule of thumb: aim for 1.5x - 2x whatever your competitor wrote. You can disregard this if your competition was super comprehensive with their content, and just go for the same length instead.
Create a similar header structure as your competition. Indicate for the writer which headers should be h2, which ones h3.
For each header, mention what it’s about. Pro tip - you can borrow ideas from the top 5 ranking articles.
For each header, explain what, exactly, should the writer mention (in simple words).
Finally, do some first-hand research on Reddit and Quora. What are the questions your target audience has around your topic? What else could you add to the article that would be super valuable for your customers?
How to Write Well
There’s a lot more to good content than giving an outline to a writer. Sure, they can hit all the right points, but if the writing itself is mediocre, no one’s going to stick around to read your article.
Here are some essential tips you should keep in mind for writing content (or managing a team of writers):
Write for your audience. Are you a B2B enterprise SaaS? Your blog posts should be more formal and professional. B2C, super-consumer product? Talk in a more casual, relaxed fashion. Sprinkle your content with pop culture references for bonus points!
Avoid fluff. Every single sentence should have some sort of value (conveying information, cracking a joke, etc.). Avoid beating around the bush, and be as straightforward as possible.
Keep your audience’s knowledge in mind. For example, if your audience is a bunch of rocket scientists, you don’t have to explain to them how 1+1=2.
Create a writer guideline (or just steal ours! -> edit: sorry had to remove link due to posting guidelines)
Use Grammarly and Hemingway. The first is like your personal pocket editor, and the latter helps make your content easier to read.
Hire the right writers. Chances are, you’re too busy to write your own content. We usually recommend using ProBlogger or Cult of Copy Job Board (Facebook Group) to source top writing talent.
Step #5 - Start Link-Building Operations
Links are essential if you want your content or web pages to rank.
If you’re in a competitive niche, links are going to be the final deciding factor on what ranks and what doesn’t.
In the VPN niche, for example, everyone has good content. That’s just the baseline. The real competition is in the backlinks.
To better illustrate this example, if you Google “best VPN,” you’ll see that all top-ranking content pieces are almost the same thing. They’re all:
Well-written
Long-form
Easy to navigate
Well-formatted (to enhance UX)
So, the determining factor is links. If you check all the top-ranking articles with the Moz Toolbar Extension, you’ll see that on average, each page has a minimum of 300 links (and some over 100,000!).
Meaning, to compete, you’ll really need to double-down on your link-building effort.
In fact, in the most competitive SEO niches, it’s not uncommon to spend $20,000 per month on link-building efforts alone.
Pro Tip
Got scared by the high $$$ some companies spend on link-building? Well, worry not!
Only the most ever-green niches are so competitive. Think, VPN, make money online, health and fitness, dating, CBD, gambling, etc. So you know, the usual culprits.
For most other niches, you can even rank with minimal links, as long as you have top-tier SEO content.
Now, let’s ask the million-dollar question: “how do you do link-building?”
4 Evergreen Link Building Strategies for Any Website
There are a TON of different link building strategies on the web. Broken link building, scholarship link building, stealing competitor links, and so on and so on and so on.
We’re not going to list every single link building strategy out there (mainly because Backlinko already did that in their link building guide).
What we are going to do, though, is list out some of our favorite strategies, and link you to resources where you can learn more:
Broken link building. You find dead pages with a lot of backlinks, reach out to websites that linked to them, and pitch them something like “hey, you linked to this article, but it’s dead. We thought you’d want to fix that. You can use our recent article if you think it’s cool enough.”
Guest posting. Probably the most popular link building strategy. Find blogs that accept guest posts, and send them a pitch! They usually let you include 1-2 do-follow links back to your website.
“Linkable asset” link building. A linkable asset is a resource that is so AWESOME that you just can’t help but link to. Think, infographics, online calculators, first-hand studies or research, stuff like that. The tl;dr here is, you create an awesome resource, and promote the hell out of it on the web.
Skyscraper technique. The skyscraper technique is a term coined by Backlinko. The gist of it is, you find link-worthy content on the web, create something even better, and reach out to the right people.
Most of these strategies work, and you can find a ton of resources on the web if you want to learn more.
However, if you’re looking for something a bit different, oh boy we have a treat for you! We’re going to teach you a link-building strategy that got us around:
10,000+ traffic within a week
15+ leads
50+ links
...And so much more, all through a single blog post.
Link-Building Case Study: SaaS Marketing
“So, what’s this ancient link-building tactic?”
I hear you asking. It must be something super secretive and esoteric, right?
Secrets learned straight from the link-building monks at an ancient SEO temple…
“Right?”
Well, not quite.
The tactic isn’t something too unusual - it’s pretty famous on the web. This tactic comes in 2 steps:
Figure out where your target audience hangs out (create a list of the channels)
Research the type of content your audience loves
Create EPIC content based on that research (give TONS of value)
Promote the HELL out of it in the channels from step 1
Nothing too new, right?
Well, you’d be surprised how many people don’t use it.
Now, before you start throwing stones at us for overhyping something so simple, let’s dive into the case study:
How we PR’d the hell out of our guide to SaaS marketing (can't add a link, but it's on our blog and it's 14k words long), and got 10k+ traffic as a result.
A few months back when we launched our blog, we were deciding on what our initial content should be about.
Since we specialize in helping SaaS companies acquire new users, we decided to create a mega-authority guide to SaaS marketing (AND try to get it to rank for its respective keyword).
We went through the top-ranking content pieces, and saw that none of them was anything too impressive.
Most of them were about general startup marketing strategies - how to validate your MVP, find a product-market fit, etc.
Pretty “meh,” if you ask us. We believe that the #1 thing founders are looking for when Googling “saas marketing” are practical channels and tactics you can use to acquire new users.
So, it all started off with an idea: create a listicle of the top SaaS marketing tactics out there:
How to create good content to drive users
Promote your content
Rank on Google
Create viral infographics
Create a micro-site
...and we ended up overdoing it, covering 41+ different tactics and case studies and hitting around 14k+ words.
On one hand, oops! On the other hand, we had some pretty epic content on our hands. We even added the Smart Content Filter to make the article much easier to navigate.
Once the article was up, we ran it through some of our clients, friends, and acquaintances, and received some really good feedback.
So, now we knew it was worth promoting the hell out of it.
We came up with a huge list of all online channels that would appreciate this article:
r/ entrepreneur and r/ startups (hi guys!). The first ended up loving the post, netting us ~600 upboats and a platinum medal. The latter also ended up loving the post, but the mods decided to be assholes and remove it for being “self-promotional.” So, despite the community loving the content, it got axed by the mods. Sad. (Fun fact - this one time we tried to submit another content piece on r/ startups with no company names, no links back to our website, or anything that can be deemed promotional. One of the mods removed it for mentioning a link to Ahrefs. Go figure!)
Hacker News. Tons of founders hang out on HN, so we thought they’d appreciate anything SaaS-related. This netted us around ~200+ upvotes and some awesome feedback (thanks HN!)
Submit on Growth Hackers, Indie Hackers, and all other online marketing communities. We got a bunch of love on Indie Hackers, the rest were quite inactive.
Reach out to all personal connects + clients and ask for a share
Run Facebook/Twitter ads. This didn’t particularly work out too well for us, so we dropped it after 1-2 weeks.
Run a Quuu promotion. If you haven’t heard of Quuu, it’s a platform that matches people who want their content to be shared, with people who want their social media profiles running on 100% auto-pilot. We also got “meh” results here - tons of shares, next to no likes or link clicks.
Promoted in SaaS and marketing Facebook groups. This had awesome results both in terms of traffic, as well as making new friends, AND getting new leads.
Promoted in entrepreneur Slack channels. This worked OK - didn’t net us traffic, but got us some new friends.
Emailed anyone we mentioned in the article and asked for a share. Since we mentioned too many high profile peeps and not enough non-celebs, this didn’t work out too well
Emailed influencers that we thought would like the article / give it a share. They didn’t. We were heart-broken.
And accordingly, created a checklist + distribution sheet with all the websites or emails of people we wanted to ping.
Overall, this netted us around 12,000 page views in total, 15+ leads, 6,000 traffic in just 2 promotion days.
As for SEO results, we got a bunch of links. (I would have added screenshots to all of these results, but don't think this subreddit allows it).
A lot of these are no-follow from Reddit, HackerNews, and other submission websites, but a lot of them are also pretty authentic.
The cool part about this link-building tactic is that people link to you without even asking. You create awesome content that helps people, and you get rewarded with links, shares, and traffic!
And as for the cherry on top, only 2 months after publishing the article, it’s ranking on position #28. We’re expecting it to get to page 1 within the new few months and top 3 within the year.
Step #6 - Interlink Your Pages
One of Google's ranking factors is how long your visitors stick around on your website.
So, you need to encourage users reading ONE article, to read, well, the rest of them (or at least browse around your website). This is done through interlinking.
The idea is that each of your web pages should be linked to and from every other relevant page on your site.
Say, an article on "how to make a resume" could link to (and be linked from) "how to include contact info on a resume," "how to write a cover letter," "what's the difference between a CV and a resume," and so on.
Proper interlinking alone can have a significant impact on your website rankings. NinjaOutreach, for example, managed to improve their organic traffic by 40% through better interlinking alone.
So, how do you do interlinking “right?”
First off, make it a requirement for your writers to link to the rest of your content. Add a clause to your writer guidelines that each article should have 10+ links to your other content pieces.
More often than not, they’ll manage to get 60-70% of interlinking opportunities. To get this to 100%, we usually do bi-annual interlinking runs. Here’s how that works.
Pick an article you want to interlink. Let’s say, for example, an article on 'business process management'.
The goal here is to find as many existing articles on your blog, where ‘business process management’ is mentioned so that we can add a link to the article.
Firstly, Google the keyword ‘business process management’ by doing a Google search on your domain. You can use the following query:
site:yourwebsite.com "keyword"
In our case, that’s:
site:example.com “business process management”
You’ll get a complete list of articles that mention the keyword “business process management.
Now, all you have to do is go through each of these, and make sure that the keyword is hyperlinked to the respective article!
You should also do this for all the synonyms of the keyword for this article. For example, “BPM” is an acronym for business process management, so you’d want to link this article there too.
Step #7 - Track & Improve Your Headline CTRs
Article CTRs play a huge role in determining what ranks or not.
Let’s say your article ranks #4 with a CTR of 15%. Google benchmarks this CTR with the average CTR for the position.
If the average CTR for position #4 is 12%, Google will assume that your article, with a CTR of 15% is of high quality, and will reward you with better rankings.
On the other hand, if the average CTR is 18%, Google will assume that your article isn’t as valuable as other ranking content pieces, and will lower your ranking.
So, it’s important to keep track of your Click Through Rates for all your articles, and when you see something that’s underperforming, you can test different headlines to see if they’ll improve CTR.
Now, you’re probably wondering, how do you figure out what’s the average CTR?
Unfortunately, each search result is different, and there's no one size fits all formula for average CTR.
Over the past few years, Google has been implementing a bunch of different types of search results - featured snippet, QAs, and a lot of other types of search results.
So, depending on how many of these clutter and the search results for your given keyword, you’ll get different average CTRs by position.
Rule of thumb, you can follow these values:
1st position -> ~31.73% CTR
2nd pos. -> ~24.71%
3rd pos. -> 18.66%
4th pos. -> 13.60%
5th -> 9.51%
6th -> 6.23%
7th -> 4.15%
8th -> 3.12%
9th -> 2.97%
Keep in mind these change a lot depending on your industry, PPC competitiveness, 0-click searches, etc...
Use a scraping tool like Screaming Frog to extract the following data from all your web pages:
Page title
Page URL
Old Headline
Delete all the pages that aren’t meant to rank on Google. Then, head over to Google Search Console and extract the following data for all the web pages:
CTR (28 Day Range)
Avg. Position
Add all of this data to a spreadsheet.
Now, check what your competition is doing and use that to come up with new headline ideas. Then, put them in the Title Ideas cell for the respective keyword.
For each keyword, come up with 4-5 different headlines, and implement the (seemingly) best title for each article.
Once you implement the change, insert the date on the Date Implemented column. This will help you keep track of progress.
Then, wait for around 3 - 4 weeks to see what kind of impact this change is going to have on your rankings and CTR.
If the results are not satisfactory, record the results in the respective cells, and implement another test for the following month. Make sure to update the Date Implemented column once again.
Step #8 - Keep Track of Rankings & Make Improvements On-The-Go
You’re never really “done” with SEO - you should always keep track of your rankings and see if there’s any room for improvement.
If you wait for an adequate time-frame after publishing a post (6 months to a year) and you’re still seeing next to no results, then it might be time to investigate.
Here’s what this usually looks like for us:
Audit the content
Is your content the adequate word count? Think, 1.5-2x your competitors.
Is the content well-written?
Do the images in your article add value? E.g. no stock or irrelevant images.
Is the content optimized for SEO? Think, keyword density, links to external websites, etc.
Audit internal links
Does the content link to an adequate number of your other articles or web pages?
Is the article linked to from an adequate number of your web pages or blog posts? You can check this on Search Console => Links => Internal Links. Or, if you’re using Yoast or RankMath, you can check the # of internal links a post has in the WordPress Dashboard -> Posts.
Audit the backlinks
Do you have as many backlinks as your competitors?
Are your backlinks from the countries you want to rank in? If you have a bunch of links from India, but you want to rank in the US, you’d need to get more US links.
Are your links high quality? More often than not, low DA / PA links are not that helpful.
Did you disown low-quality or spam links?
Audit web page
Does the web page load too slow? Think, 4+ seconds.
Did you enable lazy loading for the images?
Did you compress all images on the web page?
...And that's it.
Hope you guys had a good read and learned a thing or two :) HMU if you have any questions.
Can't add a link to the blog post (for better readability) due to posting guidelines, sorry.
submitted by /u/malchik23 [link] [comments] July 13, 2020 at 08:07PM
0 notes
Photo
Safari to get WebExtensions (and more from WWDC)
#446 — June 24, 2020
Read on the Web
Frontend Focus
Safari 14 Beta Release Notes — Revealed at this week’s WWDC, Safari 14 will ship alongside iOS 14 & macOS 11 later this year. Here are the headlines:
Adds support for WebP images and HDR video playback;
Support for HTTP/3;
Ditches Flash;
Will support both the :is() and :where() pseudo-selectors;
…and adds Web Extensions support to the macOS version (more below).
Apple
Welcoming Safari to the WebExtensions Community — Yup, Safari is adopting a Web-based API for browser extensions similar to Firefox’s WebExtensions API making it easy to build once and port to multiple browsers (including Chrome). Here's Apple's intro video on how to get started.
Mozilla Hacks
New Course: React Native — Leverage your JavaScript and React skills for mobile iOS and Android platforms using React Native – ship your very own native mobile applications.
Frontend Masters sponsor
Prefetching? At This Age? — An excellent trip down the rabbit hole of caching, CDNs, what issues can occur when both clients and CDNs are caching content, and how the Age HTTP header helps. Plus a Chromium bug, just for good measure.
Tim Kadlec
An Overview of Scroll Technologies — There are a number of scroll related technologies out there (parallax, scroll snap, etc), so this article’s aim is to provide an overview of them and tools to help choose the one that’s right for you.
Zach Saucier
▶ New Features and Improvements for Safari and WebKit — More from Apple! Following the main WWDC 2020 Keynote, Apple are sharing a number of sessions throughout the week covering extensions, privacy, APIs, CSS and JS, web inspector changes and more. Worth bookmarking and coming back to at the weekend once all sessions are live.
Apple
⚡️ Quick bits:
If you use Google Analytics, be prepared to see the Safari stats tumble, as Safari is going to start blocking Google Analytics entirely.
It has been five years since the first line of code for AMP was written.
Chrome is working on an experimental implementation of upload streams so you can start uploading data to a server before you necessarily have all of it to hand.
Work continues on Mozilla's paid VPN, (a U.S. only beta is available now).
Version 69 of Opera has Twitter (and other social media services) 'built-in', accessible via the sidebar.
💻 Jobs
Frontend Developer at X-Team (Remote) — Join X-Team and work on projects for companies like Riot Games, FOX, Coinbase, and more. Work from anywhere.
X-Team
Find a Job Through Vettery — Vettery specializes in tech roles and is completely free for job seekers. Create a profile to get started.
Vettery
ℹ️ Interested in running a job listing in Frontend Focus? There's more info here.
📙 News, Tutorials & Opinion
Is WebP Really Better Than JPEG? — According to Google, WebP is 25-34% smaller than JPEG at equivalent quality. But how much of it is really true? To find out, Johannes ran a few tests.
Johannes Siipola
Using Custom Property 'Stacks' to Tame the Cascade — A look at using CSS Custom Properties to manage/control both cascade and inheritance.
Miriam Suzanne
After Three Years of Work, Chrome Killed My Extension and Won’t Tell Me Why — This is a story worth checking out if your work ends up on the Chrome Webstore in any way (such as if you’re distributing a browser extension): “Complaining on the internet should not be a support channel. Developers should not have to rely on the internet attention lottery. The Chrome Webstore has been around 10 years and needs to get its act together.”
LipSurf
New: Learn How Intercom Reduced Test Times by 85% 🚀 — Read our case study on how Intercom reduced test times while deploying ~150 times per day across multiple apps.
Buildkite sponsor
Let Them Paste Passwords — Some sites prevent pasted passwords (which can even break some password managers). The UK’s cyber security officials stress that this a security anti-pattern. Today I also learnt that “Sociotechnical Security Researcher” is an actual job title – cool!
National Cyber Security Centre (UK)
The Return of the 90s Web — Max asks if we’re ready to revisit some of the ideas of the early web (no-code tools, personal sites, etc), adding that certain trends suggest that we might just have come full circle.
Max Böck
How to File A Good Browser Bug
Robert Nyman, Pete LePage
🔧 Code, Tools and Resources
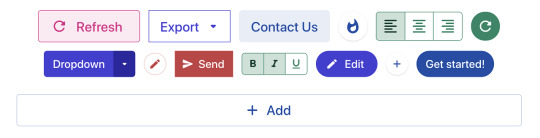
knopf.css: A Modern, Modular, and Extensible Button System — A CSS library to easily build a diverse set of button styles that can be adapted to your brand via CSS variables. Includes a playground for fiddling with the variety of modifiers.
team.video
keen-slider: An Agnostic Touch Slider — Think ‘carousels’ but comfortable and smooth when using touch. They work with the mouse and touchpads as well, of course, and there are no dependencies. Live examples here.
Eric Beyer
Tailwind CSS Cheat Sheet — This clear, scannable resource has been around for a while, however it remains up-to-date with the latest version of Tailwind (plus we’ve not shared it here before).
Jay Elaraj
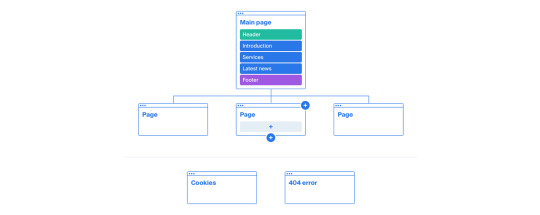
Octopus.do: A Visual Sitemap Builder — An online tool that allows you to build a website’s sitemap (e.g. for prototyping structure) or you can import an existing sitemap.xml from a URL and work with that.
octopus.do
🕰 Tzdb: A Simplified and Grouped List of Time Zones and Offsets — The official IANA time zone list has over 500 entries but you can simplify this substantially, as done here.
Vincent Voyer
No More Rework, Bug-Free Code on the First Commit. DeepCode
DeepCode.AI Powered Analysis sponsor
Create HTML5 Boilerplate: Quick Start for HTML5 Boilerplate — Similar in concept to create-react-app, but for kickstarting projects based on the popular HTML5 Boilerplate project.
H5BP
web-vitals-reporter: A Tiny Utility to Simplify Web Vitals Reporting — Makes it easy to collect data from Google’s new Web Vitals API.
Treo

A Photocopied Magazine Effect in CSS
Lynn Fisher codepen
by via Frontend Focus https://ift.tt/2YrN5MO
0 notes
Text
Jeffree Star and Youtuber Shane Dawson broke the Internet a few weeks ago with the release of their anticipated first collaboration: the Conspiracy Collection. I was lucky enough to get my hands on the Mini Controversy palette and the ‘Are You Filming?‘ Velour Lipstick, and today, I will show you swatches, looks I’ve done with it, and will give you my final and honest thoughts on it. Are they worth it?
Like most of JS‘s past collections, the Conspiracy Collection included an 18-pan-palette, a mini one (with 9 shadows), a gloss, a lip balm and six Velour Liquid Lipsticks. It’s the outcome of Shane‘s acclaimed new series surrounding the beauty guru and the beauty industry, and fans couldn’t have been happier about it – so much so, Shopify (the brand’s website platform) crashed. It became Jeffree Star Cosmetics‘ best launch to date. But… are the products THAT worthy?
Mini Controversy Palette
$28 – £25 – 25€| Cruelty-free | Vegan | NW: 9 x 1.50g / 0.05oz
Shades “Controversy” and “My Apology” are not eye-safe.
With 9 shades of their iconic eyeshadow, the Mini Controversy palette is Controversy‘s little sister. Although they follow a very similar scheme and commemorate some of Shane Dawson‘s most iconic moments, friends and loved ones, this one was designed to be completely different – except for Diet Root Beer (brown shade in the centre).
Mini Controversy palette closed – Jeffree Star Cosmetics x Shane Dawson
Mini Controversy palette – Jeffree Star Cosmetics x Shane Dawson (swatches, honest review, looks)
In this palette, we’ll find pastel colours, three stunning metallics and really vibrant and bright colours. I fell in love with both My Apology (metallic burgundy) and Controversy (purple) as soon as I saw them in-store (initially, I was just planning to get a lipstick). I was also awed by the blues, probably the most prominent duo in the palette. It’s not a really intuitive palette, though, which some people might not like.
The packaging is has a simple square format and dark look to it, but the outside and its holographic lines are simply stunning. It has a very handy mirror, which makes it perfect for travelling.
Texture
Texture-wise, all the shadows from the Mini Controversy palette is very creamy. Controversy and Cancelled are the only ones that are slightly drier, but very insignificantly. I always get that with purple shades, and this one is much better than most.

Close-up: Mini Controversy Palette – Jeffree Star Cosmetics x Shane Dawson
Pigmentation and Swatches
If you’ve heard about Jeffree Star‘s palettes –if you haven’t but you’re still here: how?-, you know they’re known for being pretty pigmented. This one doesn’t disappoint at all in that aspect. All the shades swatch effortlessly and reach their most pigmented fairly quick. There’s a bit of fallout, but we’re pretty used to it by now, aren’t we?
Here are the swatches:
Swatches from the Mini Controversy Palette
Swatches from the Mini Controversy Palette
Flat Earth (the pastel blue) is the only one that I’ve found a bit hard to work with in terms of intensity, but it’s not too bad and it may be due to the colour being so clear in the first place.
Application
Great pigmentation and poor performance = a mess. Fortunately, it’s definitely not the case with this palette! I’ve found it really easy to work with these shadows: most of them are very pigmented, as I said, but they still blend like a dream. Flat Earth is not very intense though so you have to go over it a few times.

Close-up
Looks
I’ve done plenty of looks like the bottom right one (using Diet Root Beer in the crease, blending it out with Cry On My Couch, and using My Apology and/or My Boyfriend’s Purse on the lid), but I didn’t want to spam those.
Mini Controversy Eyelook
Mini Controversy Eyelook 2
Failed wing attempt – but the shadows worked really great
Glitter is not from the palette*
Mini Controversy Eyelook
The blues and lilacs, as seen in the second picture, go very well together. I’ve also used this palette plenty of times as a support for other palettes, which is why there are not many looks; these are solely the ones in which I only used or mostly used this palette.
Conclusion: What are my HONEST thoughts?
JS x SD‘s highly anticipated collection was a huge success. People are glad that the Youtuber didn’t settle for little when developing the palettes, he aimed for the best he could create with Jeffree and the result was greatly received.
I really liked the Mini Controversy palette. I think it’s the perfect travel palette if you like this kind of colours – and for me, they are spot on. It’s also a great addition if you want to pair them with other palettes and use this one for a pop of colour. Even if you just like Shane and Jeffree but don’t want to spend the Conspiracy palette’s price. The shadows worked beautifully and are easy to use.
If anything, I’d probably change the layout so the brown (and beige and burgundy), the purples and the blues were aligned better, and I also would’ve added more variety to the scheme. Less light shades. You can certainly play a lot with it, but on its own, it’s a bit of a one-track palette and you can only go so many ways with three main tones.


And that’s it for today! I hope you liked this review and agree if you’ve tried the palette. Are you planning to get it? If you already have, do you like it as well? Let me know!
Before you leave, don’t forget to follow me on social media. I try to be more active there, and it’s an easier way of seeing my follow-ups and updates! ♡
Instagram | Twitter | Facebook | Pinterest | Youtube
Jeffree Star and Shane Dawson broke the Internet with the release of their anticipated first collaboration: the Conspiracy Collection. Today, I'll be reviewing the Mini Controversy palette, show you swatches and looks. #shanexjeffree Jeffree Star and Youtuber Shane Dawson broke the Internet a few weeks ago with the release of their anticipated first collaboration: the…
#beauty blog#beauty blogger#beautyblog#beautyblogger#blogger#conspiracy#cosmetics#jeffree star#makeup#mini controversy#review#swatches
0 notes
Text
Interview with Martin Kleppe

Martin Kleppe is best known as the creator of JSFuck, an esoteric coding style of JavaScript, allowing one to write fully functional JS with just six punctuation symbols. While it is similar in style to brainfuck, JSFuck is not an invented language but a discovered one; amazingly, it is native to JS. This means it is runnable as JavaScript without additional code to interpret the symbols or translate them into some other system. Kleppe's other projects deal with code that functions on multiple levels simultaneously; programs that use their own code as display, or self-referential polyglots that contain markup, script, and image as a single text calling itself in different contexts.
» How did you first discover the weird features of JavaScript that make JSFuck possible? Was there a moment when you realized you could write essentially any JavaScript code in just the tiny set of JSFuck characters?
This happened in 2012 when a friend showed me a Tweet with some cryptic JavaScript. There were no Latin letter involved but it was possible to execute the code and it resulted in a simple word. Nothing really fancy when I compare it to what is possible today but at that time I was super impressed! And it made me curious.
So I started to walk through the code step by step (or better: char by char) and already learned a lot about type coercion in JavaScript. The basic idea was to convert primitive data types to a string (eg: true + [] == “true”) and then pull out single characters (eg: “t” from “true”[0]). These characters then can be joined together to generate new words.
Then the question came up, if it is possible to get more than just a handful characters by playing this kind of Scrabble game. The solution was to access and call methods that generate new strings.
» The amazing thing about JSFuck is that it's all already there in JavaScript – you showed us a new approach to writing JS, rather than constructing a language artificially. What is it about JavaScript as a language that makes JSFuck possible? How/why did JavaScript end up this way?
Some people say that JavaScript is a bad programming language and poorly designed. But I wouldn’t agree. In my opinion it was designed with a lot of freedom in mind – which is a good thing. It allows you to go in different directions and seek your own style. There were no strict types or rules how to use it, and many people came up with their own idea about how to solve problems. It is like a mutation or evolution that is unveiling new aspects. In my work, I always try to break a given limit. And a way to achieve this is by digging deeper and deeper to explore new areas that we not have thought of.

Two Aurebesh scripts
» Aurebesh.js extends the JSFuck approach, simplifying some of the combinations of symbols into letters from a list of alphabets. The scripts have very different aesthetics based on the alphabet, some of which look more obfuscated than others, but it’s still pretty abstract – from what I can tell, it’s using the letters to represent JS atomic parts which are then constructed into JS commands. Could you tell me a bit about why you went this direction?
Aesthetic was definitely one of the main reasons. Especially the style of other writing systems that we are not used to. I was always fascinated by words written in foreign alphabets, because you look at them and know that there is a meaning behind but you can not even read it. In school I learned Russian first and then English which was way easier for me, because the latin alphabet was something I was used to.
This and vodka were the reasons, why I first started the ЗВЕЗДА СМЕРТИ (Death Star) project. Later I was invited to JSConf.asia where I presented the Matrix intro sequence written with Asian characters only. Another conference led me to Tel Aviv that made me think, how JavaScript would look like when written in Hebrew from right to left.
The term “character” from the Greek “χαρακτήρ” combines many meanings and also reflects, that symbols has a different aesthetics. Aurebesh.js plays with that fact in a new context and let us translate code written in English into other writing systems.
When you look at these scripts, can you figure their behavior in your head or do you need to translate them into regular old javascript to see what they’re actually doing?
I’d love to say: Yes, I can read this code and parse it in my head. – But to be honest: I can’t! At least, it would need pen, paper and a couple of minutes to solve it. Like a crossword or sudoku puzzle. That’s why I build little helpers to do that for me.
youtube
Kleppe presenting at JSConf.eu 2014
» Could you explain a bit about the animated quines (Hello World 1k etc) and how this style developed? The animated quality adds a great immediacy to the minimized quine; the code shows us what it's doing even while we're reading it, giving a way past its obfuscation.
Let’s explain the term “quine” first: A quine is a computer program which takes no input and produces a copy of its own source code as its only output. A simple one in ES6 is:
(Q=a=>alert('(Q='+Q+')()'))()
Quines are dealing with recursion as a topic, because when you execute the result, you will see the same result again and again. The /world was the first animated quine I did and it presented it at JSConf.eu in 2013. It is based on the Qlobe program by the incredible Yusuke Endoh. I saw that years ago and was so fascinated by the spinning world inside of code, that I wanted to do that in the browser. I decided to not read the Ruby source code but figure out everything at my one. It turned out that it was really a long and hard way to go but I learned more than ever before.
In the end it was shorter (exactly 1024 bytes) than the original and also included code highlighting. The feedback on this was overwhelming and I decided to do more. My second animated quine was Mandelcode – code shaped in the form of a Mandelbrot and once you click, it zooms into the fractal. After some time I started to evolve the topic and created the Matrix 雨 quine using Asian characters only and recently VOID where invisible code was used to hide the program itself.
» Please tell me about your new incept10n.com project
This may look different to what I did before, but in the core, it explores the limits of languages used in the Web, too. Incept10n is a so-called polyglot, a single file written in different languages. In our case the file is an image, a style sheet, a script and a web page – all at the same time. This works, because I manipulated the header section of an JPEG to inject code. When you run it in different contexts it will behave depending on its surrounding.
When you open the page in the web browser, it renders an HTML page. The HTML contains a reference to an external JavaScript pointing to the same file. This will execute it as a script that dynamically writes a CSS link tag. The loaded file then renders a background image into a section of the page. This is finally the manipulated JPG, showing an image of the movie Inception.
There are other examples that merge images and scripts to bypass security restrictions or render a descriptive page around a funny squirrel picture. My motivation was to see how many levels of inceptions with different formats can be done in the browser. I wanted to go some steps further but stumbled many times. After some time I was not even sure if it will all work out. Reading the JPEG specs, fiddling with old-school HEX editors and learning some new command-line tricks helped me out in the end.
97 notes
·
View notes
Text
SEO is easy. The EXACT process we use to scale our clients' SEO from 0 to 200k monthly traffic and beyond
Hey guys!
There's a TON of content out there on SEO - guides, articles, courses, videos, scams, people yelling about it on online forums, etc etc..
Most of it, however, is super impractical. If you want to start doing SEO TODAY and start getting results ASAP, you'll need to do a TON of digging to figure out what's important and what's not.
So we wanted to make everyone's lives super easy and distill our EXACT process of working w/ clients into a stupid-simple, step-by-step practical guide. And so we did. Here we are.
A bit of backstory:
If you guys haven't seen any of my previous posts, me and my co-founder own an SEO/digital marketing agency, and we've worked w/ a ton of clients helping them go from 0 to 200k+ monthly organic traffic. We've also helped some quite big companies grow their organic traffic (from 1M to over 1.8M monthly organic), using the exact same process.
So without further ado, grab your popcorn, and be prepared to stick to the screen for a while, cause this is going to be a long post. Here's everything I am going to cover:
Get your website to run and load 2x - 5x faster (with MINIMAL technical know-how)
Optimize your landing pages to rank for direct intent keywords (and drive 100% qualified leads)
Create amazing, long-form content that ranks every time
How we get a TON of links to our website with ZERO link-building efforts
How to improve your content’s rankings with Surfer SEO
Step #1 - Technical Optimization and On-Page SEO
Step #1 to any SEO initiative is getting your technical SEO right.
Now, some of this is going to be a bit technical, so you might just forward this part to your tech team and just skip ahead to "Step #2 - Keyword Research."
If you DON'T have a tech team and want a super easy tl;dr, do this:
Use WP Rocket. It's a WordPress plugin that optimizes a bunch of stuff on your website, making it run significantly faster.
Use SMUSH to (losslessly) compress all the images on your website. this usually helps a TON w/ load speed.
If you’re a bit more tech-savvy, though, read on!
Technical SEO Basics
Sitemap.xml file. A good sitemap shows Google how to easily navigate your website (and how to find all your content!). If your site runs on WordPress, all you have to do is install YoastSEO or Rankmath SEO, and they’ll create a sitemap for you. Otherwise, you can use an online XML Sitemap generation tool.
Proper website architecture. The crawl depth of any page should be lower than 4 (i.e: any given page should be reached with no more than 3 clicks from the homepage). To fix this, you should improve your interlinking (check Step #6 of this guide to learn more).
Serve images in next-gen format. Next-gen image formats (JPEG 2000, JPEG XR, and WebP) can be compressed a lot better than JPG or PNG images. Using WordPress? Just use Smush and it’ll do ALL the work for you. Otherwise, you can manually compress all images and re-upload them.
Remove duplicate content. Google hates duplicate content and will penalize you for it. If you have any duplicate pages, just merge them (by doing a 301 redirect) or delete one or the other.
Update your ‘robots.txt’ file. Hide the pages you don’t want Google to index (e.g: non-public, or unimportant pages). If you’re a SaaS, this would be most of your in-app pages. ]
Optimize all your pages by best practice. There’s a bunch of general best practices that Google wants you to follow for your web pages (maintain keyword density, have an adequate # of outbound links, etc.). Install YoastSEO or RankMath and use them to optimize all of your web pages.
If you DON’T have any pages that you don’t want to be displayed on Google, you DON’T need robots.txt.
Advanced Technical SEO
Now, this is where this gets a bit more web-devvy. Other than just optimizing your website for SEO, you should also focus on optimizing your website speed.
Here’s how to do that:
Both for Mobile and PC, your website should load in under 2-3 seconds. While load speed isn’t a DIRECT ranking factor, it does have a very serious impact on your rankings.
After all, if your website doesn’t load for 5 seconds, a bunch of your visitors might drop off.
So, to measure your website speed performance, you can use Pagespeed Insights. Some of the most common issues we have seen clients facing when it comes to website speed and loading time, are the following:
Images being resized with CSS or JS. This adds extra loading time to your site. Use GTMetrix to find which images need resizing. Use an online tool (there are a ton of free ones) to properly resize images (or Photoshop even), and re-upload them.
Images not being lazy-loaded. If your pages contain a lot of images, you MUST activate lazy-loading. This allows images that are below the screen, to be loaded only once the visitor scrolls down enough to see the image.
Gzip compression not enabled. Gzip is a compression method that allows network file transfers to happen a ton faster. In other words, your files like your HTML, CSS, and JS load a ton faster.
JS, CSS, and HTML not minified/aggregated/in-lined. If your website is loading slowly because you have 100+ external javascript files and stylesheets being requested from the server, then you need to look into minifying, aggregating, and inlining some of those files.
Use Cloudflare + BunnyCDN Why the combo? Why not just Cloudflare? Well, I won't get into details, I've experimented a bit with it, and if you are looking for something cheap and fast this is the best combo. Cloudflare you can opt in for the free account. BunnyCDN on the other hand is on a pay-as-you-go basis, and unless you are getting over 100K+ visits a month, you'll likely never go above their minimum monthly threshold of $1.
Want to make your life easier AND fix up all these issues and more? Use WP Rocket. The tool basically does all your optimization for you (if you’re using WordPress, of course).
Step #2 - Keyword Research
Once your website is 100% optimized, it’s time to define your SEO strategy.
The best way to get started with this is by doing keyword research.
First off, you want to create a keyword research sheet. This is going to be your main hub for all your content operations.
You can use the sheet to:
Prioritize content
Keep track of the publishing process
Get a top-down view of your web pages
And here’s what it covers:
Target search phrase. This is the keyword you’re targeting.
Priority. What’s the priority of this keyword? We usually divide them by 1-2-3…
Priority 3 - Top priority keywords. These are usually low competition, high traffic, well-converting, or all 3 at the same time.
Priority 2 - Mid-priority keywords.
Priority 1 - These are low priority.
Status. What’s the status of the article? We usually divide them by…
1 - Not written
2 - Writer has picked up the topic for the week
3 - The article is being written
4 - The article is in editing phase
5 - The article is published on the blog
Topic cluster. The category that the blog post belongs to.
Monthly search volume. Self-explanatory. This helps you pick a priority for the keyword.
CPC (low & high bid). Cost per click for the keyword. Generally, unless you’re planning to run search ads, these are not mandatory. They can, however, help you figure out which of your keywords will convert better. Pro tip: the higher the CPC, the more likely it is for the keyword to convert well.
Now that you have your sheet (and understand how it works), let’s talk about the “how” of keyword research.
How to do Keyword Research (Step-by-Step Guide)
There are a ton of different ways to do that (check the “further readings” at the end of this section for a detailed rundown).
Our favorite method, however, is as follows…
Start off by listing out your top 5 SEO competitors.
The key here is SEO competitors - competing companies that have a strong SEO presence in the same niche.
Not sure who’s a good SEO competitor? Google the top keywords that describe your product and find your top-ranking competitors.
Run them through SEMrush (or your favorite SEO tool), and you’ll see how well, exactly, they’re doing with their SEO.
Once you have a list of 5 competitors, run each of them through “Organic Research” on SEMrush, and you'll get a complete list of all the keywords they rank on.
Now, go through these keywords one by one and extract all the relevant ones and add them to your sheet.
Once you go through the top SEO competitors, your keyword research should be around 80%+ done.
Now to put some finishing touches on your keyword research, run your top keywords through UberSuggest and let it do its magic. It's going to give you a bunch of keywords associated with the keywords you input.
Go through all the results it's going to give you, extract anything that’s relevant, and your keyword research should be 90% done.
At this point, you can call it a day and move on to the next step. Chances are, over time, you’ll uncover new keywords to add to your sheet and get you to that sweet 100%.
Step #3 - Create SEO Landing Pages
Remember how we collected a bunch of landing page keywords in step #2? Now it’s time to build the right page for each of them! This step is a lot more straightforward than you’d think. First off, you create a custom landing page based around the keyword. Depending on your niche, this can be done in 2 ways:
Create a general template landing page. Pretty much copy-paste your landing page, alter the sub-headings, paraphrase it a bit, and add relevant images to the use-case. You’d go with this option if the keywords you’re targeting are very similar to your main use-case (e.g. “project management software” “project management system”).
Create a unique landing page for each use-case. You should do this if each use-case is unique. For example, if your software doubles as project management software and workflow management software. In this case, you’ll need two completely new landing pages for each keyword.
Once you have a bunch of these pages ready, you should optimize them for their respective keywords.
You can do this by running the page content through an SEO tool. If you’re using WordPress, you can do this through RankMath or Yoast SEO.
Both tools will give you exact instructions on how to optimize your page for the keyword.
If you’re not using WordPress, you can use SurferSEO. Just copy-paste your web page content, and it’s going to give you instructions on how to optimize it.
Once your new landing pages are live, you need to pick where you want to place them on your website. We usually recommend adding these pages to your website’s navigation menu (header) or footer.
Finally, once you have all these new landing pages up, you might be thinking “Now what? How, and when, are these pages going to rank?”
Generally, landing pages are a tad harder to rank than content. See, with content, quality plays a huge part. Write better, longer, and more informative content than your competition, and you’re going to eventually outrank them even if they have more links.
With landing pages, things aren’t as cut and dry. More often than not, you can’t just “create a better landing page.”
What determines rankings for landing page keywords are backlinks. If your competitors have 400 links on their landing pages, while yours has 40, chances are, you’re not going to outrank them.
Step #4 - Create SEO Blog Content
Now, let’s talk about the other side of the coin: content keywords, and how to create content that ranks.
As we mentioned before, these keywords aren’t direct-intent (the Googler isn’t SPECIFICALLY looking for your product), but they can still convert pretty well. For example, if you’re a digital marketing agency, you could rank on keywords like…
Lead generation techniques
SaaS marketing
SEO content
After all, anyone looking to learn about lead gen techniques might also be willing to pay you to do it for them.
On top of this, blog post keywords are way easier to rank for than your landing pages - you can beat competition simply by creating significantly better content without turning it into a backlink war.In order to create good SEO content, you need to do 2 things right:
Create a comprehensive content outline
Get the writing part right
Here’s how each of these work...
How to Create a Content Outline for SEO
A content outline is a document that has all the info on what type of information the article should contain Usually, this includes:
Which headers and subheaders you should use
What’s the optimal word count
What information, exactly, should each section of the article cover
If you’re not using Yoast or Rankmath, you can also mention the SEO optimization requirements (keyword density, # of outbound links, etc.)
Outlines are useful if you’re working with a writing team that isn’t 100% familiar with SEO, allowing them to write content that ranks without any SEO know-how.
At the same time, even if you’re the one doing the writing, an outline can help you get a top-down idea of what you should cover in the article.
So, how do you create an outline? Here’s a simplified step-by-step process…
Determine the target word count. Rule of thumb: aim for 1.5x - 2x whatever your competitor wrote. You can disregard this if your competition was super comprehensive with their content, and just go for the same length instead.
Create a similar header structure as your competition. Indicate for the writer which headers should be h2, which ones h3.
For each header, mention what it’s about. Pro tip - you can borrow ideas from the top 5 ranking articles.
For each header, explain what, exactly, should the writer mention (in simple words).
Finally, do some first-hand research on Reddit and Quora. What are the questions your target audience has around your topic? What else could you add to the article that would be super valuable for your customers?
How to Write Well
There’s a lot more to good content than giving an outline to a writer. Sure, they can hit all the right points, but if the writing itself is mediocre, no one’s going to stick around to read your article.
Here are some essential tips you should keep in mind for writing content (or managing a team of writers):
Write for your audience. Are you a B2B enterprise SaaS? Your blog posts should be more formal and professional. B2C, super-consumer product? Talk in a more casual, relaxed fashion. Sprinkle your content with pop culture references for bonus points!
Avoid fluff. Every single sentence should have some sort of value (conveying information, cracking a joke, etc.). Avoid beating around the bush, and be as straightforward as possible.
Keep your audience’s knowledge in mind. For example, if your audience is a bunch of rocket scientists, you don’t have to explain to them how 1+1=2.
Create a writer guideline (or just steal ours! -> edit: sorry had to remove link due to posting guidelines)
Use Grammarly and Hemingway. The first is like your personal pocket editor, and the latter helps make your content easier to read.
Hire the right writers. Chances are, you’re too busy to write your own content. We usually recommend using ProBlogger or Cult of Copy Job Board (Facebook Group) to source top writing talent.
Step #5 - Start Link-Building Operations
Links are essential if you want your content or web pages to rank.
If you’re in a competitive niche, links are going to be the final deciding factor on what ranks and what doesn’t.
In the VPN niche, for example, everyone has good content. That’s just the baseline. The real competition is in the backlinks.
To better illustrate this example, if you Google “best VPN,” you’ll see that all top-ranking content pieces are almost the same thing. They’re all:
Well-written
Long-form
Easy to navigate
Well-formatted (to enhance UX)
So, the determining factor is links. If you check all the top-ranking articles with the Moz Toolbar Extension, you’ll see that on average, each page has a minimum of 300 links (and some over 100,000!).
Meaning, to compete, you’ll really need to double-down on your link-building effort.
In fact, in the most competitive SEO niches, it’s not uncommon to spend $20,000 per month on link-building efforts alone.
Pro Tip
Got scared by the high $$$ some companies spend on link-building? Well, worry not!
Only the most ever-green niches are so competitive. Think, VPN, make money online, health and fitness, dating, CBD, gambling, etc. So you know, the usual culprits.
For most other niches, you can even rank with minimal links, as long as you have top-tier SEO content.
Now, let’s ask the million-dollar question: “how do you do link-building?”
4 Evergreen Link Building Strategies for Any Website
There are a TON of different link building strategies on the web. Broken link building, scholarship link building, stealing competitor links, and so on and so on and so on.
We’re not going to list every single link building strategy out there (mainly because Backlinko already did that in their link building guide).
What we are going to do, though, is list out some of our favorite strategies, and link you to resources where you can learn more:
Broken link building. You find dead pages with a lot of backlinks, reach out to websites that linked to them, and pitch them something like “hey, you linked to this article, but it’s dead. We thought you’d want to fix that. You can use our recent article if you think it’s cool enough.”
Guest posting. Probably the most popular link building strategy. Find blogs that accept guest posts, and send them a pitch! They usually let you include 1-2 do-follow links back to your website.
“Linkable asset” link building. A linkable asset is a resource that is so AWESOME that you just can’t help but link to. Think, infographics, online calculators, first-hand studies or research, stuff like that. The tl;dr here is, you create an awesome resource, and promote the hell out of it on the web.
Skyscraper technique. The skyscraper technique is a term coined by Backlinko. The gist of it is, you find link-worthy content on the web, create something even better, and reach out to the right people.
Most of these strategies work, and you can find a ton of resources on the web if you want to learn more.
However, if you’re looking for something a bit different, oh boy we have a treat for you! We’re going to teach you a link-building strategy that got us around:
10,000+ traffic within a week
15+ leads
50+ links
...And so much more, all through a single blog post.
Link-Building Case Study: SaaS Marketing
“So, what’s this ancient link-building tactic?”
I hear you asking. It must be something super secretive and esoteric, right?
Secrets learned straight from the link-building monks at an ancient SEO temple…
“Right?”
Well, not quite.
The tactic isn’t something too unusual - it’s pretty famous on the web. This tactic comes in 2 steps:
Figure out where your target audience hangs out (create a list of the channels)
Research the type of content your audience loves
Create EPIC content based on that research (give TONS of value)
Promote the HELL out of it in the channels from step 1
Nothing too new, right?
Well, you’d be surprised how many people don’t use it.
Now, before you start throwing stones at us for overhyping something so simple, let’s dive into the case study:
How we PR’d the hell out of our guide to SaaS marketing (can't add a link, but it's on our blog and it's 14k words long), and got 10k+ traffic as a result.
A few months back when we launched our blog, we were deciding on what our initial content should be about.
Since we specialize in helping SaaS companies acquire new users, we decided to create a mega-authority guide to SaaS marketing (AND try to get it to rank for its respective keyword).
We went through the top-ranking content pieces, and saw that none of them was anything too impressive.
Most of them were about general startup marketing strategies - how to validate your MVP, find a product-market fit, etc.
Pretty “meh,” if you ask us. We believe that the #1 thing founders are looking for when Googling “saas marketing” are practical channels and tactics you can use to acquire new users.
So, it all started off with an idea: create a listicle of the top SaaS marketing tactics out there:
How to create good content to drive users
Promote your content
Rank on Google
Create viral infographics
Create a micro-site
...and we ended up overdoing it, covering 41+ different tactics and case studies and hitting around 14k+ words.
On one hand, oops! On the other hand, we had some pretty epic content on our hands. We even added the Smart Content Filter to make the article much easier to navigate.
Once the article was up, we ran it through some of our clients, friends, and acquaintances, and received some really good feedback.
So, now we knew it was worth promoting the hell out of it.
We came up with a huge list of all online channels that would appreciate this article:
r/ entrepreneur and r/ startups (hi guys!). The first ended up loving the post, netting us ~600 upboats and a platinum medal. The latter also ended up loving the post, but the mods decided to be assholes and remove it for being “self-promotional.” So, despite the community loving the content, it got axed by the mods. Sad. (Fun fact - this one time we tried to submit another content piece on r/ startups with no company names, no links back to our website, or anything that can be deemed promotional. One of the mods removed it for mentioning a link to Ahrefs. Go figure!)
Hacker News. Tons of founders hang out on HN, so we thought they’d appreciate anything SaaS-related. This netted us around ~200+ upvotes and some awesome feedback (thanks HN!)
Submit on Growth Hackers, Indie Hackers, and all other online marketing communities. We got a bunch of love on Indie Hackers, the rest were quite inactive.
Reach out to all personal connects + clients and ask for a share
Run Facebook/Twitter ads. This didn’t particularly work out too well for us, so we dropped it after 1-2 weeks.
Run a Quuu promotion. If you haven’t heard of Quuu, it’s a platform that matches people who want their content to be shared, with people who want their social media profiles running on 100% auto-pilot. We also got “meh” results here - tons of shares, next to no likes or link clicks.
Promoted in SaaS and marketing Facebook groups. This had awesome results both in terms of traffic, as well as making new friends, AND getting new leads.
Promoted in entrepreneur Slack channels. This worked OK - didn’t net us traffic, but got us some new friends.
Emailed anyone we mentioned in the article and asked for a share. Since we mentioned too many high profile peeps and not enough non-celebs, this didn’t work out too well
Emailed influencers that we thought would like the article / give it a share. They didn’t. We were heart-broken.
And accordingly, created a checklist + distribution sheet with all the websites or emails of people we wanted to ping.
Overall, this netted us around 12,000 page views in total, 15+ leads, 6,000 traffic in just 2 promotion days.
As for SEO results, we got a bunch of links. (I would have added screenshots to all of these results, but don't think this subreddit allows it).
A lot of these are no-follow from Reddit, HackerNews, and other submission websites, but a lot of them are also pretty authentic.
The cool part about this link-building tactic is that people link to you without even asking. You create awesome content that helps people, and you get rewarded with links, shares, and traffic!
And as for the cherry on top, only 2 months after publishing the article, it’s ranking on position #28. We’re expecting it to get to page 1 within the new few months and top 3 within the year.
Step #6 - Interlink Your Pages
One of Google's ranking factors is how long your visitors stick around on your website.
So, you need to encourage users reading ONE article, to read, well, the rest of them (or at least browse around your website). This is done through interlinking.
The idea is that each of your web pages should be linked to and from every other relevant page on your site.
Say, an article on "how to make a resume" could link to (and be linked from) "how to include contact info on a resume," "how to write a cover letter," "what's the difference between a CV and a resume," and so on.
Proper interlinking alone can have a significant impact on your website rankings. NinjaOutreach, for example, managed to improve their organic traffic by 40% through better interlinking alone.
So, how do you do interlinking “right?”
First off, make it a requirement for your writers to link to the rest of your content. Add a clause to your writer guidelines that each article should have 10+ links to your other content pieces.
More often than not, they’ll manage to get 60-70% of interlinking opportunities. To get this to 100%, we usually do bi-annual interlinking runs. Here’s how that works.
Pick an article you want to interlink. Let’s say, for example, an article on 'business process management'.
The goal here is to find as many existing articles on your blog, where ‘business process management’ is mentioned so that we can add a link to the article.
Firstly, Google the keyword ‘business process management’ by doing a Google search on your domain. You can use the following query:
site:yourwebsite.com "keyword"
In our case, that’s:
site:example.com “business process management”
You’ll get a complete list of articles that mention the keyword “business process management.
Now, all you have to do is go through each of these, and make sure that the keyword is hyperlinked to the respective article!
You should also do this for all the synonyms of the keyword for this article. For example, “BPM” is an acronym for business process management, so you’d want to link this article there too.
Step #7 - Track & Improve Your Headline CTRs
Article CTRs play a huge role in determining what ranks or not.
Let’s say your article ranks #4 with a CTR of 15%. Google benchmarks this CTR with the average CTR for the position.
If the average CTR for position #4 is 12%, Google will assume that your article, with a CTR of 15% is of high quality, and will reward you with better rankings.
On the other hand, if the average CTR is 18%, Google will assume that your article isn’t as valuable as other ranking content pieces, and will lower your ranking.
So, it’s important to keep track of your Click Through Rates for all your articles, and when you see something that’s underperforming, you can test different headlines to see if they’ll improve CTR.
Now, you’re probably wondering, how do you figure out what’s the average CTR?
Unfortunately, each search result is different, and there's no one size fits all formula for average CTR.
Over the past few years, Google has been implementing a bunch of different types of search results - featured snippet, QAs, and a lot of other types of search results.
So, depending on how many of these clutter and the search results for your given keyword, you’ll get different average CTRs by position.
Rule of thumb, you can follow these values:
1st position -> ~31.73% CTR
2nd pos. -> ~24.71%
3rd pos. -> 18.66%
4th pos. -> 13.60%
5th -> 9.51%
6th -> 6.23%
7th -> 4.15%
8th -> 3.12%
9th -> 2.97%
Keep in mind these change a lot depending on your industry, PPC competitiveness, 0-click searches, etc...
Use a scraping tool like Screaming Frog to extract the following data from all your web pages:
Page title
Page URL
Old Headline
Delete all the pages that aren’t meant to rank on Google. Then, head over to Google Search Console and extract the following data for all the web pages:
CTR (28 Day Range)
Avg. Position
Add all of this data to a spreadsheet.
Now, check what your competition is doing and use that to come up with new headline ideas. Then, put them in the Title Ideas cell for the respective keyword.
For each keyword, come up with 4-5 different headlines, and implement the (seemingly) best title for each article.
Once you implement the change, insert the date on the Date Implemented column. This will help you keep track of progress.
Then, wait for around 3 - 4 weeks to see what kind of impact this change is going to have on your rankings and CTR.
If the results are not satisfactory, record the results in the respective cells, and implement another test for the following month. Make sure to update the Date Implemented column once again.
Step #8 - Keep Track of Rankings & Make Improvements On-The-Go
You’re never really “done” with SEO - you should always keep track of your rankings and see if there’s any room for improvement.
If you wait for an adequate time-frame after publishing a post (6 months to a year) and you’re still seeing next to no results, then it might be time to investigate.
Here’s what this usually looks like for us:
Audit the content
Is your content the adequate word count? Think, 1.5-2x your competitors.
Is the content well-written?
Do the images in your article add value? E.g. no stock or irrelevant images.
Is the content optimized for SEO? Think, keyword density, links to external websites, etc.
Audit internal links
Does the content link to an adequate number of your other articles or web pages?
Is the article linked to from an adequate number of your web pages or blog posts? You can check this on Search Console => Links => Internal Links. Or, if you’re using Yoast or RankMath, you can check the # of internal links a post has in the WordPress Dashboard -> Posts.
Audit the backlinks
Do you have as many backlinks as your competitors?
Are your backlinks from the countries you want to rank in? If you have a bunch of links from India, but you want to rank in the US, you’d need to get more US links.
Are your links high quality? More often than not, low DA / PA links are not that helpful.
Did you disown low-quality or spam links?
Audit web page
Does the web page load too slow? Think, 4+ seconds.
Did you enable lazy loading for the images?
Did you compress all images on the web page?
...And that's it.
Hope you guys had a good read and learned a thing or two :) HMU if you have any questions.
Can't add a link to the blog post (for better readability) due to posting guidelines, sorry.
REPOST FROM - https://www.reddit.com/r/SEO/comments/hqgden/seo_is_easy_the_exact_process_we_use_to_scale_our/
0 notes
Text
SEO is easy. The EXACT process we use to scale our clients' SEO from 0 to 200k monthly traffic and beyond
Hey guys! There's a TON of content out there on SEO - guides, articles, courses, videos, scams, people yelling about it on online forums, etc etc.. Most of it, however, is super impractical. If you want to start doing SEO TODAY and start getting results ASAP, you'll need to do a TON of digging to figure out what's important and what's not. So we wanted to make everyone's lives super easy and distill our EXACT process of working w/ clients into a stupid-simple, step-by-step practical guide. And so we did. Here we are. A bit of backstory: If you guys haven't seen any of my previous posts, me and my co-founder own an SEO/digital marketing agency, and we've worked w/ a ton of clients helping them go from 0 to 200k+ monthly organic traffic. We've also helped some quite big companies grow their organic traffic (from 1M to over 1.8M monthly organic), using the exact same process. So without further ado, grab your popcorn, and be prepared to stick to the screen for a while, cause this is going to be a long post. Here's everything I am going to cover: Get your website to run and load 2x - 5x faster (with MINIMAL technical know-how) Optimize your landing pages to rank for direct intent keywords (and drive 100% qualified leads) Create amazing, long-form content that ranks every time How we get a TON of links to our website with ZERO link-building efforts How to improve your content’s rankings with Surfer SEO Step #1 - Technical Optimization and On-Page SEO Step #1 to any SEO initiative is getting your technical SEO right. Now, some of this is going to be a bit technical, so you might just forward this part to your tech team and just skip ahead to "Step #2 - Keyword Research." If you DON'T have a tech team and want a super easy tl;dr, do this: Use WP Rocket. It's a WordPress plugin that optimizes a bunch of stuff on your website, making it run significantly faster. Use SMUSH to (losslessly) compress all the images on your website. this usually helps a TON w/ load speed. If you’re a bit more tech-savvy, though, read on! Technical SEO Basics Sitemap.xml file. A good sitemap shows Google how to easily navigate your website (and how to find all your content!). If your site runs on WordPress, all you have to do is install YoastSEO or Rankmath SEO, and they’ll create a sitemap for you. Otherwise, you can use an online XML Sitemap generation tool. Proper website architecture. The crawl depth of any page should be lower than 4 (i.e: any given page should be reached with no more than 3 clicks from the homepage). To fix this, you should improve your interlinking (check Step #6 of this guide to learn more). Serve images in next-gen format. Next-gen image formats (JPEG 2000, JPEG XR, and WebP) can be compressed a lot better than JPG or PNG images. Using WordPress? Just use Smush and it’ll do ALL the work for you. Otherwise, you can manually compress all images and re-upload them. Remove duplicate content. Google hates duplicate content and will penalize you for it. If you have any duplicate pages, just merge them (by doing a 301 redirect) or delete one or the other. Update your ‘robots.txt’ file. Hide the pages you don’t want Google to index (e.g: non-public, or unimportant pages). If you’re a SaaS, this would be most of your in-app pages. ] Optimize all your pages by best practice. There’s a bunch of general best practices that Google wants you to follow for your web pages (maintain keyword density, have an adequate # of outbound links, etc.). Install YoastSEO or RankMath and use them to optimize all of your web pages. If you DON’T have any pages that you don’t want to be displayed on Google, you DON’T need robots.txt. Advanced Technical SEO Now, this is where this gets a bit more web-devvy. Other than just optimizing your website for SEO, you should also focus on optimizing your website speed. Here’s how to do that: Both for Mobile and PC, your website should load in under 2-3 seconds. While load speed isn’t a DIRECT ranking factor, it does have a very serious impact on your rankings. After all, if your website doesn’t load for 5 seconds, a bunch of your visitors might drop off. So, to measure your website speed performance, you can use Pagespeed Insights. Some of the most common issues we have seen clients facing when it comes to website speed and loading time, are the following: Images being resized with CSS or JS. This adds extra loading time to your site. Use GTMetrix to find which images need resizing. Use an online tool (there are a ton of free ones) to properly resize images (or Photoshop even), and re-upload them. Images not being lazy-loaded. If your pages contain a lot of images, you MUST activate lazy-loading. This allows images that are below the screen, to be loaded only once the visitor scrolls down enough to see the image. Gzip compression not enabled. Gzip is a compression method that allows network file transfers to happen a ton faster. In other words, your files like your HTML, CSS, and JS load a ton faster. JS, CSS, and HTML not minified/aggregated/in-lined. If your website is loading slowly because you have 100+ external javascript files and stylesheets being requested from the server, then you need to look into minifying, aggregating, and inlining some of those files. Use Cloudflare + BunnyCDN Why the combo? Why not just Cloudflare? Well, I won't get into details, I've experimented a bit with it, and if you are looking for something cheap and fast this is the best combo. Cloudflare you can opt in for the free account. BunnyCDN on the other hand is on a pay-as-you-go basis, and unless you are getting over 100K+ visits a month, you'll likely never go above their minimum monthly threshold of $1. Want to make your life easier AND fix up all these issues and more? Use WP Rocket. The tool basically does all your optimization for you (if you’re using WordPress, of course). Step #2 - Keyword Research Once your website is 100% optimized, it’s time to define your SEO strategy. The best way to get started with this is by doing keyword research. First off, you want to create a keyword research sheet. This is going to be your main hub for all your content operations. You can use the sheet to: Prioritize content Keep track of the publishing process Get a top-down view of your web pages And here’s what it covers: Target search phrase. This is the keyword you’re targeting. Priority. What’s the priority of this keyword? We usually divide them by 1-2-3… Priority 3 - Top priority keywords. These are usually low competition, high traffic, well-converting, or all 3 at the same time. Priority 2 - Mid-priority keywords. Priority 1 - These are low priority. Status. What’s the status of the article? We usually divide them by… 1 - Not written 2 - Writer has picked up the topic for the week 3 - The article is being written 4 - The article is in editing phase 5 - The article is published on the blog Topic cluster. The category that the blog post belongs to. Monthly search volume. Self-explanatory. This helps you pick a priority for the keyword. CPC (low & high bid). Cost per click for the keyword. Generally, unless you’re planning to run search ads, these are not mandatory. They can, however, help you figure out which of your keywords will convert better. Pro tip: the higher the CPC, the more likely it is for the keyword to convert well. Now that you have your sheet (and understand how it works), let’s talk about the “how” of keyword research. How to do Keyword Research (Step-by-Step Guide) There are a ton of different ways to do that (check the “further readings” at the end of this section for a detailed rundown). Our favorite method, however, is as follows… Start off by listing out your top 5 SEO competitors. The key here is SEO competitors - competing companies that have a strong SEO presence in the same niche. Not sure who’s a good SEO competitor? Google the top keywords that describe your product and find your top-ranking competitors. Run them through SEMrush (or your favorite SEO tool), and you’ll see how well, exactly, they’re doing with their SEO. Once you have a list of 5 competitors, run each of them through “Organic Research” on SEMrush, and you'll get a complete list of all the keywords they rank on. Now, go through these keywords one by one and extract all the relevant ones and add them to your sheet. Once you go through the top SEO competitors, your keyword research should be around 80%+ done. Now to put some finishing touches on your keyword research, run your top keywords through UberSuggest and let it do its magic. It's going to give you a bunch of keywords associated with the keywords you input. Go through all the results it's going to give you, extract anything that’s relevant, and your keyword research should be 90% done. At this point, you can call it a day and move on to the next step. Chances are, over time, you’ll uncover new keywords to add to your sheet and get you to that sweet 100%. Step #3 - Create SEO Landing Pages Remember how we collected a bunch of landing page keywords in step #2? Now it’s time to build the right page for each of them! This step is a lot more straightforward than you’d think. First off, you create a custom landing page based around the keyword. Depending on your niche, this can be done in 2 ways: Create a general template landing page. Pretty much copy-paste your landing page, alter the sub-headings, paraphrase it a bit, and add relevant images to the use-case. You’d go with this option if the keywords you’re targeting are very similar to your main use-case (e.g. “project management software” “project management system”). Create a unique landing page for each use-case. You should do this if each use-case is unique. For example, if your software doubles as project management software and workflow management software. In this case, you’ll need two completely new landing pages for each keyword. Once you have a bunch of these pages ready, you should optimize them for their respective keywords. You can do this by running the page content through an SEO tool. If you’re using WordPress, you can do this through RankMath or Yoast SEO. Both tools will give you exact instructions on how to optimize your page for the keyword. If you’re not using WordPress, you can use SurferSEO. Just copy-paste your web page content, and it’s going to give you instructions on how to optimize it. Once your new landing pages are live, you need to pick where you want to place them on your website. We usually recommend adding these pages to your website’s navigation menu (header) or footer. Finally, once you have all these new landing pages up, you might be thinking “Now what? How, and when, are these pages going to rank?” Generally, landing pages are a tad harder to rank than content. See, with content, quality plays a huge part. Write better, longer, and more informative content than your competition, and you’re going to eventually outrank them even if they have more links. With landing pages, things aren’t as cut and dry. More often than not, you can’t just “create a better landing page.” What determines rankings for landing page keywords are backlinks. If your competitors have 400 links on their landing pages, while yours has 40, chances are, you’re not going to outrank them. Step #4 - Create SEO Blog Content Now, let’s talk about the other side of the coin: content keywords, and how to create content that ranks. As we mentioned before, these keywords aren’t direct-intent (the Googler isn’t SPECIFICALLY looking for your product), but they can still convert pretty well. For example, if you’re a digital marketing agency, you could rank on keywords like… Lead generation techniques SaaS marketing SEO content After all, anyone looking to learn about lead gen techniques might also be willing to pay you to do it for them. On top of this, blog post keywords are way easier to rank for than your landing pages - you can beat competition simply by creating significantly better content without turning it into a backlink war.In order to create good SEO content, you need to do 2 things right: Create a comprehensive content outline Get the writing part right Here’s how each of these work... How to Create a Content Outline for SEO A content outline is a document that has all the info on what type of information the article should contain Usually, this includes: Which headers and subheaders you should use What’s the optimal word count What information, exactly, should each section of the article cover If you’re not using Yoast or Rankmath, you can also mention the SEO optimization requirements (keyword density, # of outbound links, etc.) Outlines are useful if you’re working with a writing team that isn’t 100% familiar with SEO, allowing them to write content that ranks without any SEO know-how. At the same time, even if you’re the one doing the writing, an outline can help you get a top-down idea of what you should cover in the article. So, how do you create an outline? Here’s a simplified step-by-step process… Determine the target word count. Rule of thumb: aim for 1.5x - 2x whatever your competitor wrote. You can disregard this if your competition was super comprehensive with their content, and just go for the same length instead. Create a similar header structure as your competition. Indicate for the writer which headers should be h2, which ones h3. For each header, mention what it’s about. Pro tip - you can borrow ideas from the top 5 ranking articles. For each header, explain what, exactly, should the writer mention (in simple words). Finally, do some first-hand research on Reddit and Quora. What are the questions your target audience has around your topic? What else could you add to the article that would be super valuable for your customers? How to Write Well There’s a lot more to good content than giving an outline to a writer. Sure, they can hit all the right points, but if the writing itself is mediocre, no one’s going to stick around to read your article. Here are some essential tips you should keep in mind for writing content (or managing a team of writers): Write for your audience. Are you a B2B enterprise SaaS? Your blog posts should be more formal and professional. B2C, super-consumer product? Talk in a more casual, relaxed fashion. Sprinkle your content with pop culture references for bonus points! Avoid fluff. Every single sentence should have some sort of value (conveying information, cracking a joke, etc.). Avoid beating around the bush, and be as straightforward as possible. Keep your audience’s knowledge in mind. For example, if your audience is a bunch of rocket scientists, you don’t have to explain to them how 1+1=2. Create a writer guideline (or just steal ours! -> edit: sorry had to remove link due to posting guidelines) Use Grammarly and Hemingway. The first is like your personal pocket editor, and the latter helps make your content easier to read. Hire the right writers. Chances are, you’re too busy to write your own content. We usually recommend using ProBlogger or Cult of Copy Job Board (Facebook Group) to source top writing talent. Step #5 - Start Link-Building Operations Links are essential if you want your content or web pages to rank. If you’re in a competitive niche, links are going to be the final deciding factor on what ranks and what doesn’t. In the VPN niche, for example, everyone has good content. That’s just the baseline. The real competition is in the backlinks. To better illustrate this example, if you Google “best VPN,” you’ll see that all top-ranking content pieces are almost the same thing. They’re all: Well-written Long-form Easy to navigate Well-formatted (to enhance UX) So, the determining factor is links. If you check all the top-ranking articles with the Moz Toolbar Extension, you’ll see that on average, each page has a minimum of 300 links (and some over 100,000!). Meaning, to compete, you’ll really need to double-down on your link-building effort. In fact, in the most competitive SEO niches, it’s not uncommon to spend $20,000 per month on link-building efforts alone. Pro Tip Got scared by the high $$$ some companies spend on link-building? Well, worry not! Only the most ever-green niches are so competitive. Think, VPN, make money online, health and fitness, dating, CBD, gambling, etc. So you know, the usual culprits. For most other niches, you can even rank with minimal links, as long as you have top-tier SEO content. Now, let’s ask the million-dollar question: “how do you do link-building?” 4 Evergreen Link Building Strategies for Any Website There are a TON of different link building strategies on the web. Broken link building, scholarship link building, stealing competitor links, and so on and so on and so on. We’re not going to list every single link building strategy out there (mainly because Backlinko already did that in their link building guide). What we are going to do, though, is list out some of our favorite strategies, and link you to resources where you can learn more: Broken link building. You find dead pages with a lot of backlinks, reach out to websites that linked to them, and pitch them something like “hey, you linked to this article, but it’s dead. We thought you’d want to fix that. You can use our recent article if you think it’s cool enough.” Guest posting. Probably the most popular link building strategy. Find blogs that accept guest posts, and send them a pitch! They usually let you include 1-2 do-follow links back to your website. “Linkable asset” link building. A linkable asset is a resource that is so AWESOME that you just can’t help but link to. Think, infographics, online calculators, first-hand studies or research, stuff like that. The tl;dr here is, you create an awesome resource, and promote the hell out of it on the web. Skyscraper technique. The skyscraper technique is a term coined by Backlinko. The gist of it is, you find link-worthy content on the web, create something even better, and reach out to the right people. Most of these strategies work, and you can find a ton of resources on the web if you want to learn more. However, if you’re looking for something a bit different, oh boy we have a treat for you! We’re going to teach you a link-building strategy that got us around: 10,000+ traffic within a week 15+ leads 50+ links ...And so much more, all through a single blog post. Link-Building Case Study: SaaS Marketing “So, what’s this ancient link-building tactic?” I hear you asking. It must be something super secretive and esoteric, right? Secrets learned straight from the link-building monks at an ancient SEO temple… “Right?” Well, not quite. The tactic isn’t something too unusual - it’s pretty famous on the web. This tactic comes in 2 steps: Figure out where your target audience hangs out (create a list of the channels) Research the type of content your audience loves Create EPIC content based on that research (give TONS of value) Promote the HELL out of it in the channels from step 1 Nothing too new, right? Well, you’d be surprised how many people don’t use it. Now, before you start throwing stones at us for overhyping something so simple, let’s dive into the case study: How we PR’d the hell out of our guide to SaaS marketing (can't add a link, but it's on our blog and it's 14k words long), and got 10k+ traffic as a result. A few months back when we launched our blog, we were deciding on what our initial content should be about. Since we specialize in helping SaaS companies acquire new users, we decided to create a mega-authority guide to SaaS marketing (AND try to get it to rank for its respective keyword). We went through the top-ranking content pieces, and saw that none of them was anything too impressive. Most of them were about general startup marketing strategies - how to validate your MVP, find a product-market fit, etc. Pretty “meh,” if you ask us. We believe that the #1 thing founders are looking for when Googling “saas marketing” are practical channels and tactics you can use to acquire new users. So, it all started off with an idea: create a listicle of the top SaaS marketing tactics out there: How to create good content to drive users Promote your content Rank on Google Create viral infographics Create a micro-site ...and we ended up overdoing it, covering 41+ different tactics and case studies and hitting around 14k+ words. On one hand, oops! On the other hand, we had some pretty epic content on our hands. We even added the Smart Content Filter to make the article much easier to navigate. Once the article was up, we ran it through some of our clients, friends, and acquaintances, and received some really good feedback. So, now we knew it was worth promoting the hell out of it. We came up with a huge list of all online channels that would appreciate this article: r/ entrepreneur and r/ startups (hi guys!). The first ended up loving the post, netting us ~600 upboats and a platinum medal. The latter also ended up loving the post, but the mods decided to be assholes and remove it for being “self-promotional.” So, despite the community loving the content, it got axed by the mods. Sad. (Fun fact - this one time we tried to submit another content piece on r/ startups with no company names, no links back to our website, or anything that can be deemed promotional. One of the mods removed it for mentioning a link to Ahrefs. Go figure!) Hacker News. Tons of founders hang out on HN, so we thought they’d appreciate anything SaaS-related. This netted us around ~200+ upvotes and some awesome feedback (thanks HN!) Submit on Growth Hackers, Indie Hackers, and all other online marketing communities. We got a bunch of love on Indie Hackers, the rest were quite inactive. Reach out to all personal connects + clients and ask for a share Run Facebook/Twitter ads. This didn’t particularly work out too well for us, so we dropped it after 1-2 weeks. Run a Quuu promotion. If you haven’t heard of Quuu, it’s a platform that matches people who want their content to be shared, with people who want their social media profiles running on 100% auto-pilot. We also got “meh” results here - tons of shares, next to no likes or link clicks. Promoted in SaaS and marketing Facebook groups. This had awesome results both in terms of traffic, as well as making new friends, AND getting new leads. Promoted in entrepreneur Slack channels. This worked OK - didn’t net us traffic, but got us some new friends. Emailed anyone we mentioned in the article and asked for a share. Since we mentioned too many high profile peeps and not enough non-celebs, this didn’t work out too well Emailed influencers that we thought would like the article / give it a share. They didn’t. We were heart-broken. And accordingly, created a checklist + distribution sheet with all the websites or emails of people we wanted to ping. Overall, this netted us around 12,000 page views in total, 15+ leads, 6,000 traffic in just 2 promotion days. As for SEO results, we got a bunch of links. (I would have added screenshots to all of these results, but don't think this subreddit allows it). A lot of these are no-follow from Reddit, HackerNews, and other submission websites, but a lot of them are also pretty authentic. The cool part about this link-building tactic is that people link to you without even asking. You create awesome content that helps people, and you get rewarded with links, shares, and traffic! And as for the cherry on top, only 2 months after publishing the article, it’s ranking on position #28. We’re expecting it to get to page 1 within the new few months and top 3 within the year. Step #6 - Interlink Your Pages One of Google's ranking factors is how long your visitors stick around on your website. So, you need to encourage users reading ONE article, to read, well, the rest of them (or at least browse around your website). This is done through interlinking. The idea is that each of your web pages should be linked to and from every other relevant page on your site. Say, an article on "how to make a resume" could link to (and be linked from) "how to include contact info on a resume," "how to write a cover letter," "what's the difference between a CV and a resume," and so on. Proper interlinking alone can have a significant impact on your website rankings. NinjaOutreach, for example, managed to improve their organic traffic by 40% through better interlinking alone. So, how do you do interlinking “right?” First off, make it a requirement for your writers to link to the rest of your content. Add a clause to your writer guidelines that each article should have 10+ links to your other content pieces. More often than not, they’ll manage to get 60-70% of interlinking opportunities. To get this to 100%, we usually do bi-annual interlinking runs. Here’s how that works. Pick an article you want to interlink. Let’s say, for example, an article on 'business process management'. The goal here is to find as many existing articles on your blog, where ‘business process management’ is mentioned so that we can add a link to the article. Firstly, Google the keyword ‘business process management’ by doing a Google search on your domain. You can use the following query: site:yourwebsite.com "keyword" In our case, that’s: site:example.com “business process management” You’ll get a complete list of articles that mention the keyword “business process management. Now, all you have to do is go through each of these, and make sure that the keyword is hyperlinked to the respective article! You should also do this for all the synonyms of the keyword for this article. For example, “BPM” is an acronym for business process management, so you’d want to link this article there too. Step #7 - Track & Improve Your Headline CTRs Article CTRs play a huge role in determining what ranks or not. Let’s say your article ranks #4 with a CTR of 15%. Google benchmarks this CTR with the average CTR for the position. If the average CTR for position #4 is 12%, Google will assume that your article, with a CTR of 15% is of high quality, and will reward you with better rankings. On the other hand, if the average CTR is 18%, Google will assume that your article isn’t as valuable as other ranking content pieces, and will lower your ranking. So, it’s important to keep track of your Click Through Rates for all your articles, and when you see something that’s underperforming, you can test different headlines to see if they’ll improve CTR. Now, you’re probably wondering, how do you figure out what’s the average CTR? Unfortunately, each search result is different, and there's no one size fits all formula for average CTR. Over the past few years, Google has been implementing a bunch of different types of search results - featured snippet, QAs, and a lot of other types of search results. So, depending on how many of these clutter and the search results for your given keyword, you’ll get different average CTRs by position. Rule of thumb, you can follow these values: 1st position -> ~31.73% CTR 2nd pos. -> ~24.71% 3rd pos. -> 18.66% 4th pos. -> 13.60% 5th -> 9.51% 6th -> 6.23% 7th -> 4.15% 8th -> 3.12% 9th -> 2.97% Keep in mind these change a lot depending on your industry, PPC competitiveness, 0-click searches, etc... Use a scraping tool like Screaming Frog to extract the following data from all your web pages: Page title Page URL Old Headline Delete all the pages that aren’t meant to rank on Google. Then, head over to Google Search Console and extract the following data for all the web pages: CTR (28 Day Range) Avg. Position Add all of this data to a spreadsheet. Now, check what your competition is doing and use that to come up with new headline ideas. Then, put them in the Title Ideas cell for the respective keyword. For each keyword, come up with 4-5 different headlines, and implement the (seemingly) best title for each article. Once you implement the change, insert the date on the Date Implemented column. This will help you keep track of progress. Then, wait for around 3 - 4 weeks to see what kind of impact this change is going to have on your rankings and CTR. If the results are not satisfactory, record the results in the respective cells, and implement another test for the following month. Make sure to update the Date Implemented column once again. Step #8 - Keep Track of Rankings & Make Improvements On-The-Go You’re never really “done” with SEO - you should always keep track of your rankings and see if there’s any room for improvement. If you wait for an adequate time-frame after publishing a post (6 months to a year) and you’re still seeing next to no results, then it might be time to investigate. Here’s what this usually looks like for us: Audit the content Is your content the adequate word count? Think, 1.5-2x your competitors. Is the content well-written? Do the images in your article add value? E.g. no stock or irrelevant images. Is the content optimized for SEO? Think, keyword density, links to external websites, etc. Audit internal links Does the content link to an adequate number of your other articles or web pages? Is the article linked to from an adequate number of your web pages or blog posts? You can check this on Search Console => Links => Internal Links. Or, if you’re using Yoast or RankMath, you can check the # of internal links a post has in the WordPress Dashboard -> Posts. Audit the backlinks Do you have as many backlinks as your competitors? Are your backlinks from the countries you want to rank in? If you have a bunch of links from India, but you want to rank in the US, you’d need to get more US links. Are your links high quality? More often than not, low DA / PA links are not that helpful. Did you disown low-quality or spam links? Audit web page Does the web page load too slow? Think, 4+ seconds. Did you enable lazy loading for the images? Did you compress all images on the web page? ...And that's it. Hope you guys had a good read and learned a thing or two :) HMU if you have any questions. Can't add a link to the blog post (for better readability) due to posting guidelines, sorry. submitted by /u/malchik23 [link] [comments] https://www.reddit.com/r/SEO/comments/hqgden/seo_is_easy_the_exact_process_we_use_to_scale_our/
0 notes
Text
How to boost your page loading speed
The fast pace at which the modern world moves has become one of the dominant factors in conducting business. People are constantly in a hurry to get things done, especially those that are online (which most consumers nowadays are). Google and other search engines recognize this, which is why they put such a value on website development, design, and performance. If you want your business to remain competitive and grow, you need to give customers the best user experience through your website. And that also means giving them quick answers and solutions. Today, we take a closer look at some efficient ways to boost your page loading speed.
What is Page Speed?
Page Speed can be measured in the time it takes to fully display the content on a page (Page Load Time) and/or how long it takes for a browser to receive the first byte of data from the server (Time to First Byte).
Nobody likes to wait for a page to load.
You first need to measure speed before improving it
Before you learn how to boost the speed of your website, you need to learn what the current speed is. And there are several online tools that can help you do just that:
Google’s Page Speed Insights
Web Page Test
GT Metrix
Pingdom
Most of these tools will go beyond simply helping you learn the loading time and focus on offering recommendations on how to resolve the issues that are slowing your page loading speed. The most common issues that can affect page loading speed are:
Page Size
The Volume of Requests Generated
Caching Solutions
Content (dynamic or static)
After going through these metrics, you will get a more general idea of why your pages keep slacking in terms of speed, and what you can do about it. To get you started, we have prepared the following ten guidelines for increasing website speed:
10 steps to boost your page loading speed
By improving your website speed, you make more room for your online presence to grow.
#1: Stop saving money on web hosting providers
Hosting bears a great impact on the overall speed of your website as well as pages. With a goal to lower website maintenance costs, most companies oop for budget-friendly shared web hosting providers. Limitless bandwidth, emails, domains, space, etc. – it all has an appealing sound, especially when it fits your budget needs perfectly. And with so many accounts for other tools such as moving company CRM software, SEO analytics tools, email marketing campaigns, CDN platforms, etc. – the bills can pile up quickly.
However, if you want to boost page loading speed for your website, you need to turn to cloud servers from SiteGround, DigitalOcean, Amazon Web Services, etc. That way, you will avoid a slowdown during peak traffic hours and won’t need to overshare server space with other websites.
#2: Use a lightweight framework or theme
Yes, most businesses today are looking for a unique and complex website that has tailored responsive web design elements. And the good news is that you can have all that without having to invest in heavy-weight CRM platforms. Do your best to keep sliders, widgets, social media icons, and other flashy elements to a minimum. For example, WordPress offers a plethora of themes and plugins that can accommodate your need to have something unique without overburdening the website.
Customers are less interested in the overall richness of the website and more interested in getting the information they need as fast as possible. That is why you need to find the balance between dynamic web design and advertising your moving business through a minimalistic approach.
#3: Make sure to optimize all images on your website
There are only a few things that can slow down your page loading speed as much as oversized images. And as you continue to add new content to your website, this can only become a growing issue. That is why we recommend companies start by uploading images that do not exceed 300 kb in size. This doesn’t mean that you need to opt for small images or ones that are blurry and low-quality. Instead, you can simply resize high-quality images to smaller formats and reduce the file size in the process.
Pay attention to outdated image formats
When you use formats such as jpeg. and png., you are practically hurting your speed metrics. Instead, consider converting to JPEG 2000, JPEG XR, and WebP image formats, as they all have superior quality and compression characteristics in comparison to the older formats. Next-Gen image formats are one of the simpler ways to boost your page loading speed while lowering data consumption.
#4: Cleanse your website of oversized JavaScript (JS) and CSS files
Google Page Insight tends to red-flag this particular issue as a more common one when it comes to page loading speed. By deleting part of the total JS and CSS calls, you can reduce the size of those files. And this can have a direct impact on the speed performance of your website. Additionally, you can also get similar results from minimizing JS and CSS files. This is something that professional developers can help you with, but there are also online guides, plugins, and tools that can help you achieve this goal.
#5: Don’t forget to cache your website regularly
Formerly a complex and time-consuming process, caching a website has been made much easier today. With so many plugins and software solutions that can help you in this endeavor, you can now automatize the entire process, securing a speed boost for your pages as well as your entire website.
#6: Implement a Content Delivery Network (CDN)
As businesses focus on expanding their reach across the nation and globally, the website visitors will vary in terms of IP addresses. And this is something that can take its toll on the loading speed of web pages. That is why website owners opt for the use of Content Delivery Networks (CDNs).
By using a CDN, you can ping different servers across the globe with a copy of your website, all to deliver the data from your website to distant users as quickly as possible. As a result of this, the loading time for your pages is reduced, further contributing to the overall performance of your website.
#7: Make use of GZIP compression
GZIP compression is a way for you to create additional space on your website by storing data in a compressed format. As a result of this process, you end up lowering page access time, as well as bandwidth use. But his particular method also requires special coding or plugins to prevent users to have to unzip your entire website before accessing it.
#8: Declutter your database
Professional moving companies understand the risks of having a cluttered residential, commercial, or storage space. The same rule applies to websites. Ensure that your website remains lightweight if you want to boost your page loading speed. And that means cleaning your website from:
Spam comments
Fake users
Unwanted plugins
Unpublished draft content
Trashed files, etc.
#9: Reduce the use of external scripts
It’s simple – using external source data such as external scripts can slow down the page loading speed. The lesser external scripts a website has, the faster it will load for visitors. So, make sure to do a regular clearance of external scripts, including those used for tracking tools and comments systems.
#10: Disable pingbacks and trackbacks
We’ve spent a lot of time discussing the importance of backlinks for movers in the past. Receiving links from other websites is one of the vital ways to earn value for your website. However, whenever any of your pages receive a link, there are pingbacks and trackbacks set in place to alert you of this. And those components can slow down a website, which is why you need to make sure to disable them. And there are solutions such as Google Webmaster Tools that can help you remove the strain of pingbacks and trackbacks.
What is the importance of boosting your page loading speed?
The impact of reducing web page loading speed is crucial for any website.
Digital marketing for movers and all other niches is very easily influenced by page speed. In fact, it is one of the fundamental metrics that can determine website value and boost online performance as well as revenue. Unfortunately, the majority of companies are still reluctant to dedicate their time to boost page loading speed on their websites. And the reason why this is of importance to you is that it directly impacts:
How much time people spend on your website
The percentage which converts from site visitors to customers
Your overall ranking on SERPs
This is one of the basic methods to help improve and maintain your SEO efforts as a moving company. By devoting time and energy to the betterment of your website and page speed, you are investing in the long-term success of your online authority. For more advice on this topic, reach out to Movers Development, or explore some of our other articles.
The post How to boost your page loading speed appeared first on Movers Development.
from How to boost your page loading speed
0 notes
Text
Web Optimization - One Thing Leads to Another
Before you optimize an internet site for SERPs, one ought to obviously hold close the concept of Search Engine Optimization (SEO). What is the method of locating and loading a web page into your preferred browser? Sure it takes the best few seconds to have it done, however, what is actually happening in the back of the curtains?
I shall say that plenty of webmasters consciousness entirely on having the internet site optimized for search engines like google and yahoo (search engine optimization) and search engine marketing (SEM). Surely these site owners are doing a notable process, however are they taking the internet site's aesthetics and functionalities into consideration? Perhaps not entirely!
So, have you ever ever heard of Web Optimization? Let's take NO as a solution! Do I need to blame you for that? NO, because numerous so-known as search engine marketing specialists speak about search engine optimization, Search Engine Marketing (SEM) however best few address the site content optimization and agree with me, the way your website online and coding is offered makes a difference, just like whilst you upload custom made spoilers for your car to spice up the appearance.
Having a completely optimized internet site takes a wonderful deal of time and in a manner it's miles nearly not possible to adhere with every single rule, however a number of the (ignored) rules can be easily applied. Thus I'd instead say that it's far better to have a internet site which is eighty% optimized as a substitute of getting a site that is 25% optimized.
So I determined to collect these steps to suggest the easy bits in addition to the hard bits for network optimization. Surely there are greater techniques around, but I will highlight the necessities.
Tips for Web Content Optimization
1) Web Hosting- It is important to have a decent internet website hosting issuer. Although the net optimization strategies given below are not entirely based totally on the exceptional of the internet hosting issuer, having a stable host is the muse of the internet site's stability and safety. On the pinnacle of that, a few internet website hosting providers to offer equipment to optimize the web. Before selecting an internet web hosting issuer, you must apprehend the needs of your internet site and remaining however no longer least to carry a studies, analyzing evaluations or ask customers to present their personal opinion.
2) Minimize HTTP Requests- When you type an internet deal with, say CNN.Com, Amazon.Com, eBay.Com, and so forth., you're requesting the website along with its belongings (pictures, scripts, stylesheets and Flash gadgets) to load into your browser. Ever questioned why a internet site like CNN.Com, no matter its size does nevertheless load in much less time?
Few smooth practices to reduce HTTP requests
The splendor and ache of visuals!
A) Reduce range of snap shots- One famous method is the CSS sprite. This technique allows you to pile historical past pictures into one single picture record. Then via the Cascade Style Sheet (CSS) you can claim coordinates to show a certain part of that image. Say, when you have five images, the browser will ship 5 requests to load these photographs being placed in a queue. Through CSS Sprite, you may merge those five photographs into 1 unmarried picture. That method the browser will simplest ship 1 request to load 1 unmarried photo even as bypassing the queue. If the website carries many background snap shots, I could advise NOT to create one single image file, but to create few. For instance when you have 20 historical past pictures, at least divide these photographs into 4 corporations, in which every organization includes five photographs piled right into a single photograph file.
B) Compress pix - Everybody hate low first-class photographs, however what I am stating is to store most of the pics into 'jpg, jpeg and gif' while lowering a bit the excellent which might hardly make a difference to the human eye. By doing so, the picture file will weigh much less thus making sure quicker loading.
C) PNG pics - The pros of a .Png picture is that it helps high high-quality transparency and shadows. However the con is that.Png photographs have a tendency to sluggish down the browser in its loading procedure not like the same old .Gif or .Jpg image, specifically when the viewer were given a sluggish connection. Therefore decrease the use of PNG photos in which feasible.
D) Use the 'width' and 'peak' tags - When defining the picture width, you are teaching the browser to show the photo at the indicated length. The height tag despite the fact that critical, it isn't always a initial rule. If you do not define the peak, what occurs is that the browser will display the image proportionally. The width tag must be strictly described especially due to the fact browsers like Internet Explorer require that. Else what happens is that browsers will spend additional time to apprehend the manner the very picture needs to be displayed.
Example:
<img height="200" width="450" src="http://seosmagic.com/" />
e) Do not scale images- If you need to display a photo in those following dimensions e.G. 300px by means of 300px, make certain to keep the photo in the favored dimensions in place of having an image of 800px by means of 800px scaled right down to 300px by using 300px thru the 'width' and 'height' tags. Else the browser will take beyond regular time to load the picture.
3) Cache- If your web hosting affords options to make your internet site cacheable, simply cross for it. I might strongly propose caching for photos.
Four) GZIP Compression- Most web hosting providers have this option incorporated inside their control panel (usually the cPanel). If now not, you'd higher ask your company to permit this feature (if possible). GZIP Compression is beneficial to compresses the website online as a way to reduce its weight therefore making sure much less loading time and higher person experience. I would not propose the use of GZIP Compression on.Html /. Hypertext Preprocessor files, but definitely I endorse to apply it at the image folders mainly if your internet site carries a goldmine of snap shots.
Five) Use a forward decrease on your hyperlinks - When a server is asked to open a hyperlink it ought to parent out what type of record the server needs to load, and such a system although it is a minor one could nevertheless eat few more milliseconds off the loading time. By including a minimize on the end link the server might be aware that the link is pointing to a directory. Although this rule isn't always a cardinal one, it nonetheless allows in saving time.
6) Cascade Style Sheets (CSS) - Few easy practices to limit loading time and HTTP requests.
A) Limit the amount of CSS- At times its miles unavoidable to limit the use CSS however if you have an choice, cross for it. Ideally an internet site must contain 2 - five CSS documents. Two of them have to be the 'fashion.Css' (figuring out how the internet site ought to display) and the 'print.Css' which defines the printable version of the internet site. When a viewer previews the printable version, the browser loads the print.Css a good way to display the internet site in line with the attributes defined inside the equal stylesheet.
B) Compress CSS- Best manner is to put off undue entries and white space. For example:
.Box
background-coloration: #000;
background-photograph: (url:snap shots/bg.Jpg);
historical past-position: center top;
border-fashion: stable;
border-length-left: 1px;
border-size-top: 2px;
border-size-right: 1px;
border-length-bottom: 2px;
As you can see, this bite of code will display a field classed as 'container' with a historical past photo, a stable border along its dimensions. This CSS access is undue and it weighs! Below is a compressed version of the equal code:
.Container background: (url:pix/bg.Jpg) #000 center top; border: 1px 2px solid
What is the conclusion? Besides the compression, the access is given into one single line. The extra lines you have, the more the CSS record weighs, due to the fact white area takes a chunk of reminiscence.
C) CSS Placement- Best is to area the CSS documents excessive on pinnacle in the header tag <head>... </head>, so the browser will load them instantly as a consequence eye-catching the attention of your viewer.
7) Javascript (JS) - Responsible for diverse (novel) features.
A) Quantity of JS files- Placing all JS files into one single file can also create foremost conflicts among coding, however now not all JS codes warfare with every different. Therefore you could nevertheless merge few js scripts into one unmarried file.
B) JS Compression- Strict compression might also mess up or delete important coding. Although compression is important to attempt to be moderate with it. Always preserve a backup of the unique JS code to be on the safe aspect.
C) Place JS files at the lowest (footer) - Most JS documents slow down internet loading, therefore if certain JS files aren't accountable for important functions, it is suggested to have them positioned within the footer. By doing so you will divide the loading precedence by way of having the header content material loading first, and the footer content material loading subsequent.
2) Add Expires or Cache-Control Header - Nowadays net website designs are becoming extra complex mainly given the number of stylesheets, scripts, pics and Flash within the web page. When a domain is loaded for the primary time inside a browser will make several HTTP requests. However if to set the Expires, you may come to be making these additives cacheable accordingly averting pointless HTTP requests. This method is often used with photos but preferably it ought to also be used on the other additives (stylesheets, scripts, and Flash components). With this method you're informing the browser that such content will now not expire till the required date for instance: 'Expires: Wed, 22 Jan 2014 23:00:00 GMT'. However in case you plan to put into effect common adjustments, I might advise no longer to set the expiry at some distance future (say 2090) otherwise the traveler will still see the vintage page till it expires.
3) Minimize DNS lookups - When you kind a site cal into your browser, a Domain Name System (DNS) lookup takes vicinity accordingly returning the server's IP address which generally takes around 20-a hundred and twenty milliseconds maximum (in keeping with YSlow documentation). The browser may not down load whatever from the hostname until the DNS research is complete.
DNS lookups are cached by way of the user's ISP not excluding the person's own computer. As properly, maximum browsers (in particular Opera) have their very own cache device which enables in loading the website faster particularly after the first go to.
In fact strive getting access to a internet site which you never visited before and monitor its loading time. Then attempt re-traveling the same website little while later and you will word the excellent difference in the loading time.
Two options that help in minimizing DNS Lookups are: i) reference less stuff (i.E. Scripts) from third-celebration domains, and ii) attempt hosting the referenced stuff into your very own domain. Although some can also disagree with that factor, I might nonetheless recommend it as a 'pressure Majeure'.
Four) Avoid Redirects- Redirections are one foremost reason for terrible website loading leading to poor consumer enjoy. Perhaps you faced activities in which the browser remains constantly white, even as you see a diffusion of net addresses referred within the browser's progress bar (normally at the lowest), do you? Redirections take the consumer to the required place however if now not properly set, this generally tends to steer right into a by no means-ending redirection, which means the page keeps in reloading time and again. There are diverse strategies of how to set the right redirection through the index. Personal home page,.Htaccess, and.Asp. Below is an example of an HTTP redirection thru the. Htaccess record:
Redirect 301
5) Content Delivery Network (CDN) - A content material transport community (CDN) is a set of an interconnected gadget of computers spread across more than one places at the Internet to provide internet content material rapidly to severe users through duplicating the content on a couple of servers and directing the same content to customers based totally on proximity.
This method is usually recommended for big web sites with a huge amount of visitors. Typical examples are sites dealing with information search engines and popular shopping sites. These websites put up masses of HTTP requests for the identical web content material, and the greater the demand is a gift for the specific content material the more time could be taken to have the content loaded into your browser. At instances one might also a word like 'can't hook up with server', or 'web site can be busy'.
Although this method is customized for massive web sites, proprietors of small web sites can nonetheless gain from this technique (consult with Off-website online Hosting).
6) Off-web page Hosting- This is the terminology I came up with. It comes what may resemble CDN due to its system. In different phrases, this technique consists of website hosting the internet assets (e.G. Scripts, stylesheets, photographs) into separate web hosting. Alternatively I attempted this method by means of registering subdomains and I observed an boom in pace. For instance, what I did became:
(for photographs)
Nowadays plenty of provider companies are developing with those options. Few of those services are given for free while others are paid. Examples are:
Amazon S3 and Cloud Front (both paid services supplied by means of Amazon)
Google Ajax Library (instead of loading your favorite scripts from your server, you could instead load them via the Google server)
Flickr (for pix)
Through those methods, the HTTP Requests will be spread throughout a couple of servers for example http://seosmagic.com/ , your server will be used for all your internet content material, while the Google Ajax Library will be used to load your preferred scripts (e.G. JQuery, SWFObject, MooTools, Prototype).
Basically that is all! It is vital to hold your self up to date with present-day trends due to the fact via time such techniques might also emerge as out of date.
0 notes
Text
Increase Your Landing Page Speed (By Stealing Our Homework)
If you’ve read Unbounce’s 2019 Page Speed Report (and you really should), then you already know why speed is so important this year. Slow-loading landing pages have always been an obstacle to higher conversions, and now Google is punishing poor mobile load times in its search rankings. To be successful in 2019, we—marketers—need to be thinking fast. But are we?
To find out, we polled almost 400 marketers on their attitudes around page speed and asked what (if anything) they were doing to get faster.
Just 56% of marketers are happy with their mobile load times, according to the 2019 Page Speed Report.
Almost three of every four respondents said they had taken steps to improve their page speeds over the last year, and that’s pretty good. Alarmingly, though, only half of marketers we surveyed are satisfied with their load times on mobile.
So most marketers are trying to get faster, but many aren’t where they want to be. Which begs the question: what are people doing to speed up their landing page load times?
Computer, enhance!
Only 39% of marketers have bothered to find out how fast their pages are actually loading. Not great.
Here, we start to see why marketers are somewhat pessimistic about their page speed progress. Just over half have optimized their landing page images—ostensibly one of the simplest ways to speed up your load times—and even fewer have done any of the real technical-sounding things they need to get faster. (I mean, fair, they sound pretty boring to us, too.)
Here’s a doozy, though: just one in three marketers have run a website speed test to find out whether their load times are impacting their conversions. That’s the easiest one!
And hey, we get it. Marketers are being asked to do more than ever before, often with fewer resources. If you’re a small team (or a single person, the smallest of the teams), you might feel you don’t have the time or expertise to meaningfully improve your page speed.
But I’ve gone and done the hard work for you—me, a film school graduate who, until recently, believed that his Apple computer was impervious to viruses. (Hoo boy, it is not.) I’ve spent hours talking to Unbounce developers, reading how-to guides, and generally just bombarding my brain with the most dull, technical page speed information I could get ahold of. (Apologies to said developers.) And if I can get my head around it, there’s no excuse for the rest of you.
Below, I’ve simplified some of the most effective ways to increase your landing page loading times in a guide. For each fix, I’ve indicated the technical difficulty and the estimated time it’ll take, so you know exactly what you’re getting yourself in to. Use the table of contents below to jump to what’s relevant to you, or go ahead and do it all in order.
Jump to a Landing Page Speed Fix
How to Check Your Landing Page Speed
Run a Google Speed Test (5 Minutes)
Try the Unbounce Landing Page Analyzer (5 Minutes)
Improve Your Landing Page Speed: Easy Fixes
Reduce Your Page Content (15 Minutes)
Optimize Your Images (30 Minutes)
Host Your Videos Elsewhere (30 Minutes)
Audit Your Hosting Solution (30 Minutes)
Implement a CDN (30 Minutes)
Improve Your Landing Page Speed: Intermediate Fixes
Minify HTML, JS, and CSS (15 Minutes)
Enable Browser Caching (15 Minutes)
Set Up GZIP Compression (15 Minutes)
Kill Needless Scripts and Plugins (30 Minutes)
Convert Images to Sprites (30 Minutes)
Improve Your Landing Page Speed: Hard Fixes
Remove Render-Blocking JS and CSS (45 Minutes)
Start Hand-Coding with AMP
Final note: If you’ve built your page with Unbounce, you can skip a lot of this stuff—we make many speed fixes on the back-end automatically. In this post, look for the ‘Building Pages in Unbounce?‘ callout boxes to see if a given fix is something you need to implement.
Look for these callout boxes throughout this post to get Unbounce-specific tips and learn how we automatically optimize your landing pages to make them load super fast.
How to Check Your Landing Page Speed
First things first.
Before you throw on your hard hat and start hitting things with a hammer (both figuratively and literally), it’s important to have some idea of what’s working—and what’s not—on your landing page. That means running a speed audit.
It’s important to point out that, regardless of which speed test you use, you don’t want to get too hung up on your score. Achieving a perfect score is not always technically possible (and it might not even be desirable). Instead, use your results as a general guideline to improve page speed and implement the fixes that make sense for you.
Okay—let’s test them pages.
Run a Google Speed Test
Difficulty: Easy / Estimated Time: 5 Minutes
There are a bunch of great tools for testing your page speed, but why not start with the big dog itself? Google’s PageSpeed Insights is an awesome way to do a quick performance check-up with at-a-glance recommendations. (Ryan Engley, Unbounce’s VP of Product Marketing, explains how to interpret and act on your PageSpeed Insights results in this must-read blog post.) Then there’s Lighthouse, a newer tool from Google that provides a comprehensive analysis of your how your page presents to end users.
You’ll also want to run your page through Google’s Test My Site tool, which will check your speed from a mobile perspective.
Clicking on individual results in PageSpeed Insights will reveal your problematic page elements.
Running a Google speed test should only take a couple of minutes, and the results will help you identify some of the top opportunities to boost your landing page load times.
Try the Unbounce Landing Page Analyzer
Difficulty: Easy / Estimated Time: 5 Minutes
Running a speed test with Google should be your top priority, but PageSpeed Insights doesn’t give results tailored to landing pages. For that, you’ll want to run your page through the Unbounce Landing Page Analyzer, which not only provides feedback on page performance but includes a bunch of advice on creating more effective campaigns and kicking your conversions into overdrive.
Unbounce’s Landing Page Analyzer provides feedback on page speed, but also actionable advice on things like SEO, message match, and mobile-friendliness.
Building Pages in Unbounce? Then you’ll definitely want to give our Landing Page Analyzer a shot. Get best-practice recommendations for conversion optimization and see how your landing pages stack up against others in your industry.
Improve Your Landing Page Speed: Easy Fixes
With your results from both Google and Unbounce, you’ll be well-equipped to move onto the actual work of making your page perform better. It’s time to pick up that hammer.
These fixes should be simple enough for anyone to tackle, regardless of their technical expertise.
Reduce Your Page Content
Difficulty: Easy / Estimated Time: 15 Minutes
We’ve marked this as an easy opportunity to increase your page speed, but it probably won’t feel like that when you start thinking about which elements on your page you can junk. Marketers love big hero shots, beautiful supporting imagery, and fun, animated explainer videos. But how much of that content is actually helping you drive conversions?
Visual content accounts for a huge portion of the size of an average web page—images account for over 20% of web page weight, as pointed out by Kinsta—and each element creates an HTTP request. That’s when your visitor’s browser pings your web server to request the files that make up the elements of your page. Too many calls can be a serious drag on your load time, so one of the simplest ways to improve your page speed is cutting down the number of elements you include.
Look at each piece of content on your page critically, then ask yourself: “Does this spark joy?” “Does this increase conversions?” If you don’t think there are pieces you can toss, try running an A/B test with a slimmed-down version of the page. The results might surprise you.
Bottom line: stick to the fundamentals of good landing page design and try to keep the number of elements (and thus HTTP requests) to a minimum.
Building Pages in Unbounce? We recommend that you keep things pretty lean, but we’d never remove content from your landing page. (Must resist… desire… to do best practices…) This is one optimization that you’ll have to tackle on your own.
Optimize Your Images
Difficulty: Easy / Estimated Time: 30 Minutes
Once you’ve trimmed some elements from your page, you’ll want to optimize the content that made the cut. Poor image optimization is the most common reason for slow page loads, especially for mobile visitors. Fortunately, it’s also one of the easiest issues to fix.
These are some quick tips for shrinking your images and improving your page speed. The goal here should be getting images at least under 800kb, but the smaller we can make them, the better.
Resize your images
It’s easy to chuck a larger image onto your page and rely on your content management system (CMS) to compress it to the appropriate size, but it’ll still be loading at least some of those extra pixels on the back end, and your visitors are going to feel it in the load. When you add an image, make sure it’s the same dimensions that your page will be rendering it.*
*This doesn’t necessarily apply to Unbounce’s retina image support—read up on that here.
Choose the right file type
Most people don’t think too much about the format of the image they’re uploading, but it can have a dramatic effect on page performance. The file types you’re probably most familiar with are JPEG and PNG—and, yes, there are differences.
JPEG is a ‘lossy’ format, which means it’ll lose some data during compression. That typically gives you a smaller file, but it can come at the expense of visual fidelity. Generally, images with significant color variation (say, photographs) perform better as JPEGs, and any dip in quality can usually go undetected.
PNG is ‘lossless,’ so the image’s appearance won’t change when resized, but it tends to make for larger files if there’s significant color variation. PNG is ideal for simple images with defined shapes, like those with text. Saving PNGs in 8-bit (rather than 24-bit, which has a broader color palette) can help shave off some extra bites.
Here are some optimization tips for JPEG and PNG (and GIF, that villain) from Google itself.
Use compression tools
Before your weigh-in, it’s good to run images through a final round of compression. There are plenty of image compression tools on WordPress, as well as some free, standalone ones like TinyPNG. These shrinky gizmos offer a simple way to cut down your image sizes without braving the cursed labyrinth that is Adobe’s export settings. (Hey, I’m a words guy.)
Your takeaways here are:
Ensure your image dimensions match how they’ll actually be displayed
Use JPEG when a slight dip in visual fidelity isn’t the end of the world (like photography), but PNG when it is (images with text and sharp lines)
Compress images to keep the file size as tiny as possible
If you want to take a deeper dive into image optimization, we recommend that you check out this post from Search Engine Land, which goes into detail on making images smaller while keeping them beautiful.
Building Pages in Unbounce? We’ve got you covered. Unbounce’s Auto Image Optimizer shrinks your images as soon as they’re uploaded so you can focus on making the best landing page possible.
Host Your Videos Elsewhere
Difficulty: Easy / Estimated Time: 30 Minutes
Why carry something yourself when you can make someone else carry it for you? That’s my motto for landing pages and life, and it’s why I’m no longer welcome on Unbounce’s company hiking trips.
Hosting videos on your own domain can be great for SEO purposes, but that’s not usually our goal with landing pages. We want everything to load in a flash and give our visitors the best chance to convert. Depending on your hosting solution, though, your videos might be slowing down your page speed, suffering from playback issues, and taking up an uncomfortable amount of server space.
Done properly, transferring videos to a third-party platform can shed some extra load time and help your pages render faster. Consider moving video content to Wistia, YouTube, or Vimeo, then using a light embed technique so that your videos only load heavier playback elements when your visitors actually click on them.
Building Pages in Unbounce? As a disclaimer: Using light embed codes with Unbounce (or any custom code, for that matter) will require some technical knowledge to implement and could, in rare cases, cause issues. Check out this Unbounce community post for more information.
Audit Your Hosting Solution
Difficulty: Easy / Estimated Time: 30 Minutes
Loading speed isn’t just determined by what’s on your landing page. Your web host also has a major influence in how quickly your page rolls out to potential customers.
There are three common models for web hosting:
Shared hosting Generally the most affordable solution, shared hosting is when your website is hosted alongside other sites on a single web server. Everyone draws from common resources (like storage space and processing power), which means—you guessed it—you need to share.
Virtual private server (VPS) hosting This is essentially a mix of both shared and dedicated hosting. With VPS, your website still shares server space with others, but you’ll have dedicated resources that no one else can dip into. The result is more power and flexibility, but it tends to come with a higher price tag.
Dedicated hosting For those who’ve had a traumatic roommate experience (who hasn’t?), dedicated hosting means your website has the server all to itself. More resources, no sharing. That’s great if you’re heavy on digital content and get a ton of traffic, but dedicated hosting is also the most expensive option and requires the technical know-how to set up and maintain your server.
Low-volume websites can generally get by with the cost-effective shared solution, but once your traffic starts to rise, you might not be getting enough juice from your web host to deliver content quickly—and that’s when load times start to suffer. (Give this post from Search Engine Journal a read for a more comprehensive explanation.)
It’s also important to note that the whereabouts of your web server can have a significant impact on your page speed. If you’re not using a content delivery network (CDN; more on this below), you’ll want to make sure that traffic from foreign countries isn’t encountering too much latency.
Think your hosting solution might be impacting your page speed? Run your site through a server speed test like this one from Bitcatcha, and use WebPageTest or Pingdom to see how your quickly your landing page loads in other countries. Depending on the results, you might decide it’s time to upgrade your hosting plan (or change web hosts altogether).
Building Pages in Unbounce? You don’t have to worry about this one—Unbounce’s global hosting solution boasts 99.95% uptime and ensures that your landing pages always have the necessary resources to load super fast.
Implement a CDN
Difficulty: Easy / Estimated Time: 30 Minutes
When your landing page gets a visitor, their web browser pings your server to get the content necessary to build out the page. Simple, right? Everyone downloads your website information from the same place, regardless of their location around the world. Well, that’s usually fine if the visitor is in or close to the country that your web server is located, but when they’re halfway around the globe, chances are they’re going to encounter some latency.
To avoid that, you should look into deploying a CDN, which caches your website across a network of data centers and proxy servers all over the planet. Say your own server is in the United States and someone from Lithuania is trying to visit your landing page. Instead of downloading your content from across the Atlantic, that visitor can pull a cached version from a server nearby.
Setting your website up with a CDN is pretty straightforward and—depending on your traffic—generally affordable. Here’s a list of some popular CDN providers from Mashable.
Building Pages in Unbounce? We’ve got five global data centers supporting the Unbounce CDN, which means your landing pages will load in a flash regardless of where they’re being accessed from.
Improve Your Landing Page Speed: Intermediate Fixes
These next speed fixes are a little trickier, but they should be manageable for marketers with a little technical know-how. Still, a mistake here could mean actual damage to your landing page.
Our recommendation? Do some research, make a backup, and—if you can—consult briefly with a developer on your team. It never hurts to have an experienced colleague to turn to if you get in over your head.
Building Pages in Unbounce? We talk a lot about WordPress through this next section. If you’re using our plugin to publish Unbounce landing pages to a WordPress domain, some of these recommended speed fixes can actually cause technical issues. Don’t hesitate to reach out to us for clarification if you’re ever unsure.
Minify HTML, CSS, and JS
Difficulty: Intermediate / Estimated Time: 15 Minutes
All those lines of HTML, CSS, and JS code that make up your landing page? They’re packed with spaces, line breaks, and other bits of formatting that make it more legible and easier for us to interpret, but each makes your load time just an eensy bit slower—and the web browsers your visitors are using to render your page don’t particularly need them.
With minification, the goal is to cut out all of that extra junk and condense your code so that browsers can read it faster. Here’s an example snippet of Javascript code from Wikipedia:
var array = []; for (var i = 0; i < 20; i++) { array[i] = i; }
After minifying, that code would look something like this:
for(var a=[i=0];++i<20;a[i]=i);
There are plenty of free online tools that will do this for your landing page, like Minify Code, as well as a bunch of WordPress plugins. Be sure to check out this post from Elegant Themes, which is an awesome resource that dives into the many options at your disposal.
Building Pages in Unbounce? Do we minify? We practically invented minifying. (Editor’s note: We did not.) Unbounce compresses all of your code automatically, making your landing page as slim as can be. No coding your pages from scratch and no minifying that code in the background? We’re making this too easy for you.
Enable Browser Caching
Difficulty: Intermediate / Estimated Time: 15 Minutes
The goal with any landing page should be getting prospects to convert the first time they visit, but the reality is that not everyone will. Sometimes, visitors will need some time to think about it: they’ll bounce, do more research, check out some competitors, then come back to your original offer. Browser caching ensures that when they return, your page will load even faster—and that’ll make them more likely to convert.
Not sure if you’ve already got caching enabled? Before you start, run a quick caching check using a tool like this one from GiftOfSpeed.
If your site is built on WordPress, enabling caching is as easy as adding a plugin.* (WordPress is almost too easy, huh?) Check out this list of caching plugins, most of which include quick instructions for getting set up.
*If you’re publishing Unbounce pages to a WordPress domain, these caching recommendations could create big problems. Check with us first.
For those not on WordPress, enabling browser caching on your own is pretty simple if you’re willing to get your hands dirty. For example, on Apache web servers, it comes down to inserting a little bit of code into the .htaccess file on your web host or server: <IfModule mod_expires.c> ExpiresActive On ExpiresByType image/jpg “access 1 year” ExpiresByType image/jpeg “access 1 year” ExpiresByType image/gif “access 1 year” ExpiresByType image/png “access 1 year” ExpiresByType text/css “access 1 month” ExpiresByType text/html “access 1 month” ExpiresByType application/pdf “access 1 month” ExpiresByType text/x-javascript “access 1 month” ExpiresByType application/x-shockwave-flash “access 1 month” ExpiresByType image/x-icon “access 1 year” ExpiresDefault “access 1 month” </IfModule>
This article from Varvy provides a great how-to, as does this one from WinningWP (which discusses enabling browser caching from a WordPress perspective but is applicable more broadly).
If all of this makes you nervous, there’s likely a simpler method for you to set up browser caching. Most web hosts will enable caching for you if you ask. Depending on your hosting solution, it might be as easy as making a phone call. (Although, now that I think about it, that might be more daunting for some of us.)
Building Pages in Unbounce? Seven-day browser caching is enabled on all Unbounce-built landing pages, so this is a speed fix you can comfortably skip. Maybe use this free time to treat yourself to some self-care? You’ve earned it.
Set Up GZIP Compression
Difficulty: Intermediate / Estimated Time: 15 Minutes
When a visitor reaches your landing page, their browser pings your web server to request the files that make up the page and the server transmits them back. Naturally, that process moves faster if the information being sent is compressed to be as small as possible. Here’s where GZIP compression comes in.
(You’ll want to check to see if GZIP compression is already enabled before you get started.)
As with browser caching, the difficulty of setting up GZIP compression is going to be determined by how your website was built. If you use WordPress, you’re in luck: many WordPress plugins will enable GZIP compression for you almost automatically. If you don’t use WordPress, well, we’re headed back into your server.
This article from GTmetrix provides a quick overview of the importance of GZIP compression and how to enable it. With Apache web servers, you’ll need to add this chunk of code to your .htaccess file. <IfModule mod_deflate.c> # Compress HTML, CSS, JavaScript, Text, XML and fonts AddOutputFilterByType DEFLATE application/javascript AddOutputFilterByType DEFLATE application/rss+xml AddOutputFilterByType DEFLATE application/vnd.ms-fontobject AddOutputFilterByType DEFLATE application/x-font AddOutputFilterByType DEFLATE application/x-font-opentype AddOutputFilterByType DEFLATE application/x-font-otf AddOutputFilterByType DEFLATE application/x-font-truetype AddOutputFilterByType DEFLATE application/x-font-ttf AddOutputFilterByType DEFLATE application/x-javascript AddOutputFilterByType DEFLATE application/xhtml+xml AddOutputFilterByType DEFLATE application/xml AddOutputFilterByType DEFLATE font/opentype AddOutputFilterByType DEFLATE font/otf AddOutputFilterByType DEFLATE font/ttf AddOutputFilterByType DEFLATE image/svg+xml AddOutputFilterByType DEFLATE image/x-icon AddOutputFilterByType DEFLATE text/css AddOutputFilterByType DEFLATE text/html AddOutputFilterByType DEFLATE text/javascript AddOutputFilterByType DEFLATE text/plain AddOutputFilterByType DEFLATE text/xml
# Remove browser bugs (only needed for really old browsers) BrowserMatch ^Mozilla/4 gzip-only-text/html BrowserMatch ^Mozilla/4\.0[678] no-gzip BrowserMatch \bMSIE !no-gzip !gzip-only-text/html Header append Vary User-Agent </IfModule>
And again, if this is beyond your comfort zone, your web host will probably help you set up GZIP compression if you ask nicely.
Building Pages in Unbounce? You don’t have to ask us nicely, because we’ve already done it. All Unbounce landing pages are automatically compressed during data transfer. (But be nice to us anyway, alright?)
Kill Needless Scripts and Plugins
Difficulty: Intermediate / Estimated Time: 30 Minutes
WordPress is wonderful in its simplicity. As we’ve seen throughout this article, page speed fixes that might require a front-end developer on a static website can often be achieved by simply installing a WordPress plugin. Want to enable browser caching? Boom, W3 Total Cache.* Need to minify your scripts? Pow, Autoptomize.* Developer, shmeveloper.
But because it’s so easy to add functionality through plugins, WordPress websites have a habit of collecting a lot of them—along with all the of the bits and bites of code that make them work. Those add up.
Take a look at the scripts and plugins you’ve added to your website and decide whether they’re essential to your visitor experience. If they’re not, junking them could help cut some extra seconds off of your load time. (And guess what? There’s a plugin for that.) You can also disable plugins one at a time, then retest your page speed to determine which ones are problematic.
*If you’re publishing Unbounce pages to a WordPress domain, these plugins in particular might start a fire.
Building Pages in Unbounce? This is more of WordPress fix, but it also applies to Unbounce customers that have inserted a bunch of custom scripts onto their landing pages. Learn how the Unbounce Script Manager helps you keep things tidy.
Convert Images to Sprites
Difficulty: Intermediate / Estimated Time: 30 Minutes
If your landing page includes a series of similar-sized images (say, for a client logo bar), you can shorten your load time by combining them into an image sprite, then use CSS to display specific chunks of that sprite at a time. This post from WebFX provides a great step-by-step guide for creating CSS sprites.
Joining smaller images into a larger file might seem counterintuitive, but again, the idea here is to reduce the number of HTTP requests on your page and ultimately make it faster. Each individual image requires its own call—combining images into a single CSS sprite means your page only needs to make one.
Building Pages in Unbounce? We don’t build CSS sprites for you, but you can certainly use them on your Unbounce-built landing pages. Check out our documentation on custom JS and CSS with Unbounce.
Improve Your Landing Page Speed: Hard Fixes
We’re into the scary stuff now.
These are fixes you should absolutely not attempt unless you know what you’re doing or you’ve consulted extensively with a front-end developer. (We even had one of the Unbounce devs fact-check this article, and we’ve never felt smaller.) Proceed with caution.
Remove Render-Blocking JS and CSS
Difficulty: Hard / Estimated Time: 45 Minutes
Those CSS and JS scripts that make your landing page beautiful and enable cool, dynamic functionality? They could be one of the major reasons that your page is loading so slowly. (Bad news for my flashing, neon visitor counter.)
When a web browser runs into CSS or JS in the head of your document, it’ll wait to download and process that content before continuing to render your page’s HTML. That might sound like a good thing from a user experience perspective—after all, we want people to see our landing page as it was intended—but it actually means that visitors can be left waiting on a blank screen while everything loads in the background.
To avoid this, we need to implement techniques for preventing render-blocking CSS and JS on our landing page. (Refer back to your Google PageSpeed Insights results to check if any scripts are slowing down your page load.)
Reduce render-blocking CSS
There are a couple of ways that we can neutralize render-blocking CSS. One option is to defer all CSS until after the HTML has loaded. That’ll certainly improve page speed, but it will also present non-styled content when the visitor first reaches our page. Not ideal.
The other, more preferable option is to defer most style rules until the HTML has been rendered, but inline the CSS necessary to correctly display content above the fold within the HTML. That way, visitors will see the properly-styled content as soon as they hit the page while the rest will load out of view. Pretty sneaky. This is a great tutorial using a real-life example from codeburst.io.
Another page speed opportunity for you here is combining your CSS files. By moving your style rules from several files to just one (or maybe two, tops), you can reduce the number of times that visitors need to ping your web server and improve your landing page load time. Here’s a good resource from GiftOfSpeed on combining and compressing you CSS scripts.
Eliminate render-blocking JS
Like CSS, JS scripts can prevent your landing page from rendering as quickly as you might like. We can avoid that by deploying the defer and async attributes. The former tells the browser to wait until your HTML is rendered before it begins pulling in JS scripts, while the latter asks that JS be downloaded simultaneously without interrupting the HTML download.
An important note is that not all JS scripts are equal: some are critical to the rendering of your page and need to be addressed right out of the gate, so they’ll have to stay at the top. Dareboost does a good job of explaining how to distinguish between critical and non-critical JS, as well as how to implement deferred and asynchronous loading.
Building Pages in Unbounce? Unbounce optimizes for most Google PageSpeed Insights recommendations, including the removal of render-blocking elements. That means you can skip this one.
Start Hand-Coding with AMP
Difficulty: Very Hard / Estimated Time: ∞ Hours
Alright, “∞ hours” is an overstatement, but implementing AMP is no small task. Developed by Google, the AMP project is an entirely new framework with which to build your web pages. The goal? Dramatically improve page speed, especially for mobile users.
AMP is made up of three core components: AMP HTML, AMP JS, and AMP Cache. That means you’ll need to learn new markup, as well as understand the framework well enough to get your landing pages validated and make sure they actually work.
We won’t get into the nitty-gritty of building with AMP here, but the AMP website has a bunch of resources (including tutorials) to help you get started.
Building Pages in Unbounce? No hand-coding AMP pages for you—Unbounce makes it easy to drag and drop together AMP experiences. Choose one of our AMP-optimized templates, load your content, get validated, and start publishing lightning-fast landing pages right away.
Improving your landing page speed can sound intimidating, but even small tweaks will make a big difference for your load times. Tackle the easy stuff first, then move onto more challenging fixes as you get comfortable. And above all, keep testing: seeing your improved speed results after each undertaking will give you the confidence and motivation to move forward.
Or, you know, just build with Unbounce. We automatically handle most of the speed fixes listed (or at least makes them super easy), which saves a ton of time. That means you can focus on what matters: getting more conversions and improving ROI.
from Digital https://unbounce.com/landing-pages/increase-landing-page-speed/ via http://www.rssmix.com/
0 notes
Text
Increase Your Landing Page Speed (By Stealing Our Homework)
If you’ve read Unbounce’s 2019 Page Speed Report (and you really should), then you already know why speed is so important this year. Slow-loading landing pages have always been an obstacle to higher conversions, and now Google is punishing poor mobile load times in its search rankings. To be successful in 2019, we—marketers—need to be thinking fast. But are we?
To find out, we polled almost 400 marketers on their attitudes around page speed and asked what (if anything) they were doing to get faster.
Just 56% of marketers are happy with their mobile load times, according to the 2019 Page Speed Report.
Almost three of every four respondents said they had taken steps to improve their page speeds over the last year, and that’s pretty good. Alarmingly, though, only half of marketers we surveyed are satisfied with their load times on mobile.
So most marketers are trying to get faster, but many aren’t where they want to be. Which begs the question: what are people doing to speed up their landing page load times?
Computer, enhance!
Only 39% of marketers have bothered to find out how fast their pages are actually loading. Not great.
Here, we start to see why marketers are somewhat pessimistic about their page speed progress. Just over half have optimized their landing page images—ostensibly one of the simplest ways to speed up your load times—and even fewer have done any of the real technical-sounding things they need to get faster. (I mean, fair, they sound pretty boring to us, too.)
Here’s a doozy, though: just one in three marketers have run a website speed test to find out whether their load times are impacting their conversions. That’s the easiest one!
And hey, we get it. Marketers are being asked to do more than ever before, often with fewer resources. If you’re a small team (or a single person, the smallest of the teams), you might feel you don’t have the time or expertise to meaningfully improve your page speed.
But I’ve gone and done the hard work for you—me, a film school graduate who, until recently, believed that his Apple computer was impervious to viruses. (Hoo boy, it is not.) I’ve spent hours talking to Unbounce developers, reading how-to guides, and generally just bombarding my brain with the most dull, technical page speed information I could get ahold of. (Apologies to said developers.) And if I can get my head around it, there’s no excuse for the rest of you.
Below, I’ve simplified some of the most effective ways to increase your landing page loading times in a guide. For each fix, I’ve indicated the technical difficulty and the estimated time it’ll take, so you know exactly what you’re getting yourself in to. Use the table of contents below to jump to what’s relevant to you, or go ahead and do it all in order.
Jump to a Landing Page Speed Fix
How to Check Your Landing Page Speed
Run a Google Speed Test (5 Minutes)
Try the Unbounce Landing Page Analyzer (5 Minutes)
Improve Your Landing Page Speed: Easy Fixes
Reduce Your Page Content (15 Minutes)
Optimize Your Images (30 Minutes)
Host Your Videos Elsewhere (30 Minutes)
Audit Your Hosting Solution (30 Minutes)
Implement a CDN (30 Minutes)
Improve Your Landing Page Speed: Intermediate Fixes
Minify HTML, JS, and CSS (15 Minutes)
Enable Browser Caching (15 Minutes)
Set Up GZIP Compression (15 Minutes)
Kill Needless Scripts and Plugins (30 Minutes)
Convert Images to Sprites (30 Minutes)
Improve Your Landing Page Speed: Hard Fixes
Remove Render-Blocking JS and CSS (45 Minutes)
Start Hand-Coding with AMP
Final note: If you’ve built your page with Unbounce, you can skip a lot of this stuff—we make many speed fixes on the back-end automatically. In this post, look for the ‘Building Pages in Unbounce?‘ callout boxes to see if a given fix is something you need to implement.
Look for these callout boxes throughout this post to get Unbounce-specific tips and learn how we automatically optimize your landing pages to make them load super fast.
How to Check Your Landing Page Speed
First things first.
Before you throw on your hard hat and start hitting things with a hammer (both figuratively and literally), it’s important to have some idea of what’s working—and what’s not—on your landing page. That means running a speed audit.
It’s important to point out that, regardless of which speed test you use, you don’t want to get too hung up on your score. Achieving a perfect score is not always technically possible (and it might not even be desirable). Instead, use your results as a general guideline to improve page speed and implement the fixes that make sense for you.
Okay—let’s test them pages.
Run a Google Speed Test
Difficulty: Easy / Estimated Time: 5 Minutes
There are a bunch of great tools for testing your page speed, but why not start with the big dog itself? Google’s PageSpeed Insights is an awesome way to do a quick performance check-up with at-a-glance recommendations. (Ryan Engley, Unbounce’s VP of Product Marketing, explains how to interpret and act on your PageSpeed Insights results in this must-read blog post.) Then there’s Lighthouse, a newer tool from Google that provides a comprehensive analysis of your how your page presents to end users.
You’ll also want to run your page through Google’s Test My Site tool, which will check your speed from a mobile perspective.
Clicking on individual results in PageSpeed Insights will reveal your problematic page elements.
Running a Google speed test should only take a couple of minutes, and the results will help you identify some of the top opportunities to boost your landing page load times.
Try the Unbounce Landing Page Analyzer
Difficulty: Easy / Estimated Time: 5 Minutes
Running a speed test with Google should be your top priority, but PageSpeed Insights doesn’t give results tailored to landing pages. For that, you’ll want to run your page through the Unbounce Landing Page Analyzer, which not only provides feedback on page performance but includes a bunch of advice on creating more effective campaigns and kicking your conversions into overdrive.
Unbounce’s Landing Page Analyzer provides feedback on page speed, but also actionable advice on things like SEO, message match, and mobile-friendliness.
Building Pages in Unbounce? Then you’ll definitely want to give our Landing Page Analyzer a shot. Get best-practice recommendations for conversion optimization and see how your landing pages stack up against others in your industry.
Improve Your Landing Page Speed: Easy Fixes
With your results from both Google and Unbounce, you’ll be well-equipped to move onto the actual work of making your page perform better. It’s time to pick up that hammer.
These fixes should be simple enough for anyone to tackle, regardless of their technical expertise.
Reduce Your Page Content
Difficulty: Easy / Estimated Time: 15 Minutes
We’ve marked this as an easy opportunity to increase your page speed, but it probably won’t feel like that when you start thinking about which elements on your page you can junk. Marketers love big hero shots, beautiful supporting imagery, and fun, animated explainer videos. But how much of that content is actually helping you drive conversions?
Visual content accounts for a huge portion of the size of an average web page—images account for over 20% of web page weight, as pointed out by Kinsta—and each element creates an HTTP request. That’s when your visitor’s browser pings your web server to request the files that make up the elements of your page. Too many calls can be a serious drag on your load time, so one of the simplest ways to improve your page speed is cutting down the number of elements you include.
Look at each piece of content on your page critically, then ask yourself: “Does this spark joy?” “Does this increase conversions?” If you don’t think there are pieces you can toss, try running an A/B test with a slimmed-down version of the page. The results might surprise you.
Bottom line: stick to the fundamentals of good landing page design and try to keep the number of elements (and thus HTTP requests) to a minimum.
Building Pages in Unbounce? We recommend that you keep things pretty lean, but we’d never remove content from your landing page. (Must resist… desire… to do best practices…) This is one optimization that you’ll have to tackle on your own.
Optimize Your Images
Difficulty: Easy / Estimated Time: 30 Minutes
Once you’ve trimmed some elements from your page, you’ll want to optimize the content that made the cut. Poor image optimization is the most common reason for slow page loads, especially for mobile visitors. Fortunately, it’s also one of the easiest issues to fix.
These are some quick tips for shrinking your images and improving your page speed. The goal here should be getting images at least under 800kb, but the smaller we can make them, the better.
Resize your images
It’s easy to chuck a larger image onto your page and rely on your content management system (CMS) to compress it to the appropriate size, but it’ll still be loading at least some of those extra pixels on the back end, and your visitors are going to feel it in the load. When you add an image, make sure it’s the same dimensions that your page will be rendering it.*
*This doesn’t necessarily apply to Unbounce’s retina image support—read up on that here.
Choose the right file type
Most people don’t think too much about the format of the image they’re uploading, but it can have a dramatic effect on page performance. The file types you’re probably most familiar with are JPEG and PNG—and, yes, there are differences.
JPEG is a ‘lossy’ format, which means it’ll lose some data during compression. That typically gives you a smaller file, but it can come at the expense of visual fidelity. Generally, images with significant color variation (say, photographs) perform better as JPEGs, and any dip in quality can usually go undetected.
PNG is ‘lossless,’ so the image’s appearance won’t change when resized, but it tends to make for larger files if there’s significant color variation. PNG is ideal for simple images with defined shapes, like those with text. Saving PNGs in 8-bit (rather than 24-bit, which has a broader color palette) can help shave off some extra bites.
Here are some optimization tips for JPEG and PNG (and GIF, that villain) from Google itself.
Use compression tools
Before your weigh-in, it’s good to run images through a final round of compression. There are plenty of image compression tools on WordPress, as well as some free, standalone ones like TinyPNG. These shrinky gizmos offer a simple way to cut down your image sizes without braving the cursed labyrinth that is Adobe’s export settings. (Hey, I’m a words guy.)
Your takeaways here are:
Ensure your image dimensions match how they’ll actually be displayed
Use JPEG when a slight dip in visual fidelity isn’t the end of the world (like photography), but PNG when it is (images with text and sharp lines)
Compress images to keep the file size as tiny as possible
If you want to take a deeper dive into image optimization, we recommend that you check out this post from Search Engine Land, which goes into detail on making images smaller while keeping them beautiful.
Building Pages in Unbounce? We’ve got you covered. Unbounce’s Auto Image Optimizer shrinks your images as soon as they’re uploaded so you can focus on making the best landing page possible.
Host Your Videos Elsewhere
Difficulty: Easy / Estimated Time: 30 Minutes
Why carry something yourself when you can make someone else carry it for you? That’s my motto for landing pages and life, and it’s why I’m no longer welcome on Unbounce’s company hiking trips.
Hosting videos on your own domain can be great for SEO purposes, but that’s not usually our goal with landing pages. We want everything to load in a flash and give our visitors the best chance to convert. Depending on your hosting solution, though, your videos might be slowing down your page speed, suffering from playback issues, and taking up an uncomfortable amount of server space.
Done properly, transferring videos to a third-party platform can shed some extra load time and help your pages render faster. Consider moving video content to Wistia, YouTube, or Vimeo, then using a light embed technique so that your videos only load heavier playback elements when your visitors actually click on them.
Building Pages in Unbounce? As a disclaimer: Using light embed codes with Unbounce (or any custom code, for that matter) will require some technical knowledge to implement and could, in rare cases, cause issues. Check out this Unbounce community post for more information.
Audit Your Hosting Solution
Difficulty: Easy / Estimated Time: 30 Minutes
Loading speed isn’t just determined by what’s on your landing page. Your web host also has a major influence in how quickly your page rolls out to potential customers.
There are three common models for web hosting:
Shared hosting Generally the most affordable solution, shared hosting is when your website is hosted alongside other sites on a single web server. Everyone draws from common resources (like storage space and processing power), which means—you guessed it—you need to share.
Virtual private server (VPS) hosting This is essentially a mix of both shared and dedicated hosting. With VPS, your website still shares server space with others, but you’ll have dedicated resources that no one else can dip into. The result is more power and flexibility, but it tends to come with a higher price tag.
Dedicated hosting For those who’ve had a traumatic roommate experience (who hasn’t?), dedicated hosting means your website has the server all to itself. More resources, no sharing. That’s great if you’re heavy on digital content and get a ton of traffic, but dedicated hosting is also the most expensive option and requires the technical know-how to set up and maintain your server.
Low-volume websites can generally get by with the cost-effective shared solution, but once your traffic starts to rise, you might not be getting enough juice from your web host to deliver content quickly—and that’s when load times start to suffer. (Give this post from Search Engine Journal a read for a more comprehensive explanation.)
It’s also important to note that the whereabouts of your web server can have a significant impact on your page speed. If you’re not using a content delivery network (CDN; more on this below), you’ll want to make sure that traffic from foreign countries isn’t encountering too much latency.
Think your hosting solution might be impacting your page speed? Run your site through a server speed test like this one from Bitcatcha, and use WebPageTest or Pingdom to see how your quickly your landing page loads in other countries. Depending on the results, you might decide it’s time to upgrade your hosting plan (or change web hosts altogether).
Building Pages in Unbounce? You don’t have to worry about this one—Unbounce’s global hosting solution boasts 99.95% uptime and ensures that your landing pages always have the necessary resources to load super fast.
Implement a CDN
Difficulty: Easy / Estimated Time: 30 Minutes
When your landing page gets a visitor, their web browser pings your server to get the content necessary to build out the page. Simple, right? Everyone downloads your website information from the same place, regardless of their location around the world. Well, that’s usually fine if the visitor is in or close to the country that your web server is located, but when they’re halfway around the globe, chances are they’re going to encounter some latency.
To avoid that, you should look into deploying a CDN, which caches your website across a network of data centers and proxy servers all over the planet. Say your own server is in the United States and someone from Lithuania is trying to visit your landing page. Instead of downloading your content from across the Atlantic, that visitor can pull a cached version from a server nearby.
Setting your website up with a CDN is pretty straightforward and—depending on your traffic—generally affordable. Here’s a list of some popular CDN providers from Mashable.
Building Pages in Unbounce? We’ve got five global data centers supporting the Unbounce CDN, which means your landing pages will load in a flash regardless of where they’re being accessed from.
Improve Your Landing Page Speed: Intermediate Fixes
These next speed fixes are a little trickier, but they should be manageable for marketers with a little technical know-how. Still, a mistake here could mean actual damage to your landing page.
Our recommendation? Do some research, make a backup, and—if you can—consult briefly with a developer on your team. It never hurts to have an experienced colleague to turn to if you get in over your head.
Building Pages in Unbounce? We talk a lot about WordPress through this next section. If you’re using our plugin to publish Unbounce landing pages to a WordPress domain, some of these recommended speed fixes can actually cause technical issues. Don’t hesitate to reach out to us for clarification if you’re ever unsure.
Minify HTML, CSS, and JS
Difficulty: Intermediate / Estimated Time: 15 Minutes
All those lines of HTML, CSS, and JS code that make up your landing page? They’re packed with spaces, line breaks, and other bits of formatting that make it more legible and easier for us to interpret, but each makes your load time just an eensy bit slower—and the web browsers your visitors are using to render your page don’t particularly need them.
With minification, the goal is to cut out all of that extra junk and condense your code so that browsers can read it faster. Here’s an example snippet of Javascript code from Wikipedia:
var array = []; for (var i = 0; i < 20; i++) { array[i] = i; }
After minifying, that code would look something like this:
for(var a=[i=0];++i<20;a[i]=i);
There are plenty of free online tools that will do this for your landing page, like Minify Code, as well as a bunch of WordPress plugins. Be sure to check out this post from Elegant Themes, which is an awesome resource that dives into the many options at your disposal.
Building Pages in Unbounce? Do we minify? We practically invented minifying. (Editor’s note: We did not.) Unbounce compresses all of your code automatically, making your landing page as slim as can be. No coding your pages from scratch and no minifying that code in the background? We’re making this too easy for you.
Enable Browser Caching
Difficulty: Intermediate / Estimated Time: 15 Minutes
The goal with any landing page should be getting prospects to convert the first time they visit, but the reality is that not everyone will. Sometimes, visitors will need some time to think about it: they’ll bounce, do more research, check out some competitors, then come back to your original offer. Browser caching ensures that when they return, your page will load even faster—and that’ll make them more likely to convert.
Not sure if you’ve already got caching enabled? Before you start, run a quick caching check using a tool like this one from GiftOfSpeed.
If your site is built on WordPress, enabling caching is as easy as adding a plugin.* (WordPress is almost too easy, huh?) Check out this list of caching plugins, most of which include quick instructions for getting set up.
*If you’re publishing Unbounce pages to a WordPress domain, these caching recommendations could create big problems. Check with us first.
For those not on WordPress, enabling browser caching on your own is pretty simple if you’re willing to get your hands dirty. For example, on Apache web servers, it comes down to inserting a little bit of code into the .htaccess file on your web host or server: <IfModule mod_expires.c> ExpiresActive On ExpiresByType image/jpg “access 1 year” ExpiresByType image/jpeg “access 1 year” ExpiresByType image/gif “access 1 year” ExpiresByType image/png “access 1 year” ExpiresByType text/css “access 1 month” ExpiresByType text/html “access 1 month” ExpiresByType application/pdf “access 1 month” ExpiresByType text/x-javascript “access 1 month” ExpiresByType application/x-shockwave-flash “access 1 month” ExpiresByType image/x-icon “access 1 year” ExpiresDefault “access 1 month” </IfModule>
This article from Varvy provides a great how-to, as does this one from WinningWP (which discusses enabling browser caching from a WordPress perspective but is applicable more broadly).
If all of this makes you nervous, there’s likely a simpler method for you to set up browser caching. Most web hosts will enable caching for you if you ask. Depending on your hosting solution, it might be as easy as making a phone call. (Although, now that I think about it, that might be more daunting for some of us.)
Building Pages in Unbounce? Seven-day browser caching is enabled on all Unbounce-built landing pages, so this is a speed fix you can comfortably skip. Maybe use this free time to treat yourself to some self-care? You’ve earned it.
Set Up GZIP Compression
Difficulty: Intermediate / Estimated Time: 15 Minutes
When a visitor reaches your landing page, their browser pings your web server to request the files that make up the page and the server transmits them back. Naturally, that process moves faster if the information being sent is compressed to be as small as possible. Here’s where GZIP compression comes in.
(You’ll want to check to see if GZIP compression is already enabled before you get started.)
As with browser caching, the difficulty of setting up GZIP compression is going to be determined by how your website was built. If you use WordPress, you’re in luck: many WordPress plugins will enable GZIP compression for you almost automatically. If you don’t use WordPress, well, we’re headed back into your server.
This article from GTmetrix provides a quick overview of the importance of GZIP compression and how to enable it. With Apache web servers, you’ll need to add this chunk of code to your .htaccess file. <IfModule mod_deflate.c> # Compress HTML, CSS, JavaScript, Text, XML and fonts AddOutputFilterByType DEFLATE application/javascript AddOutputFilterByType DEFLATE application/rss+xml AddOutputFilterByType DEFLATE application/vnd.ms-fontobject AddOutputFilterByType DEFLATE application/x-font AddOutputFilterByType DEFLATE application/x-font-opentype AddOutputFilterByType DEFLATE application/x-font-otf AddOutputFilterByType DEFLATE application/x-font-truetype AddOutputFilterByType DEFLATE application/x-font-ttf AddOutputFilterByType DEFLATE application/x-javascript AddOutputFilterByType DEFLATE application/xhtml+xml AddOutputFilterByType DEFLATE application/xml AddOutputFilterByType DEFLATE font/opentype AddOutputFilterByType DEFLATE font/otf AddOutputFilterByType DEFLATE font/ttf AddOutputFilterByType DEFLATE image/svg+xml AddOutputFilterByType DEFLATE image/x-icon AddOutputFilterByType DEFLATE text/css AddOutputFilterByType DEFLATE text/html AddOutputFilterByType DEFLATE text/javascript AddOutputFilterByType DEFLATE text/plain AddOutputFilterByType DEFLATE text/xml
# Remove browser bugs (only needed for really old browsers) BrowserMatch ^Mozilla/4 gzip-only-text/html BrowserMatch ^Mozilla/4\.0[678] no-gzip BrowserMatch \bMSIE !no-gzip !gzip-only-text/html Header append Vary User-Agent </IfModule>
And again, if this is beyond your comfort zone, your web host will probably help you set up GZIP compression if you ask nicely.
Building Pages in Unbounce? You don’t have to ask us nicely, because we’ve already done it. All Unbounce landing pages are automatically compressed during data transfer. (But be nice to us anyway, alright?)
Kill Needless Scripts and Plugins
Difficulty: Intermediate / Estimated Time: 30 Minutes
WordPress is wonderful in its simplicity. As we’ve seen throughout this article, page speed fixes that might require a front-end developer on a static website can often be achieved by simply installing a WordPress plugin. Want to enable browser caching? Boom, W3 Total Cache.* Need to minify your scripts? Pow, Autoptomize.* Developer, shmeveloper.
But because it’s so easy to add functionality through plugins, WordPress websites have a habit of collecting a lot of them—along with all the of the bits and bites of code that make them work. Those add up.
Take a look at the scripts and plugins you’ve added to your website and decide whether they’re essential to your visitor experience. If they’re not, junking them could help cut some extra seconds off of your load time. (And guess what? There’s a plugin for that.) You can also disable plugins one at a time, then retest your page speed to determine which ones are problematic.
*If you’re publishing Unbounce pages to a WordPress domain, these plugins in particular might start a fire.
Building Pages in Unbounce? This is more of WordPress fix, but it also applies to Unbounce customers that have inserted a bunch of custom scripts onto their landing pages. Learn how the Unbounce Script Manager helps you keep things tidy.
Convert Images to Sprites
Difficulty: Intermediate / Estimated Time: 30 Minutes
If your landing page includes a series of similar-sized images (say, for a client logo bar), you can shorten your load time by combining them into an image sprite, then use CSS to display specific chunks of that sprite at a time. This post from WebFX provides a great step-by-step guide for creating CSS sprites.
Joining smaller images into a larger file might seem counterintuitive, but again, the idea here is to reduce the number of HTTP requests on your page and ultimately make it faster. Each individual image requires its own call—combining images into a single CSS sprite means your page only needs to make one.
Building Pages in Unbounce? We don’t build CSS sprites for you, but you can certainly use them on your Unbounce-built landing pages. Check out our documentation on custom JS and CSS with Unbounce.
Improve Your Landing Page Speed: Hard Fixes
We’re into the scary stuff now.
These are fixes you should absolutely not attempt unless you know what you’re doing or you’ve consulted extensively with a front-end developer. (We even had one of the Unbounce devs fact-check this article, and we’ve never felt smaller.) Proceed with caution.
Remove Render-Blocking JS and CSS
Difficulty: Hard / Estimated Time: 45 Minutes
Those CSS and JS scripts that make your landing page beautiful and enable cool, dynamic functionality? They could be one of the major reasons that your page is loading so slowly. (Bad news for my flashing, neon visitor counter.)
When a web browser runs into CSS or JS in the head of your document, it’ll wait to download and process that content before continuing to render your page’s HTML. That might sound like a good thing from a user experience perspective—after all, we want people to see our landing page as it was intended—but it actually means that visitors can be left waiting on a blank screen while everything loads in the background.
To avoid this, we need to implement techniques for preventing render-blocking CSS and JS on our landing page. (Refer back to your Google PageSpeed Insights results to check if any scripts are slowing down your page load.)
Reduce render-blocking CSS
There are a couple of ways that we can neutralize render-blocking CSS. One option is to defer all CSS until after the HTML has loaded. That’ll certainly improve page speed, but it will also present non-styled content when the visitor first reaches our page. Not ideal.
The other, more preferable option is to defer most style rules until the HTML has been rendered, but inline the CSS necessary to correctly display content above the fold within the HTML. That way, visitors will see the properly-styled content as soon as they hit the page while the rest will load out of view. Pretty sneaky. This is a great tutorial using a real-life example from codeburst.io.
Another page speed opportunity for you here is combining your CSS files. By moving your style rules from several files to just one (or maybe two, tops), you can reduce the number of times that visitors need to ping your web server and improve your landing page load time. Here’s a good resource from GiftOfSpeed on combining and compressing you CSS scripts.
Eliminate render-blocking JS
Like CSS, JS scripts can prevent your landing page from rendering as quickly as you might like. We can avoid that by deploying the defer and async attributes. The former tells the browser to wait until your HTML is rendered before it begins pulling in JS scripts, while the latter asks that JS be downloaded simultaneously without interrupting the HTML download.
An important note is that not all JS scripts are equal: some are critical to the rendering of your page and need to be addressed right out of the gate, so they’ll have to stay at the top. Dareboost does a good job of explaining how to distinguish between critical and non-critical JS, as well as how to implement deferred and asynchronous loading.
Building Pages in Unbounce? Unbounce optimizes for most Google PageSpeed Insights recommendations, including the removal of render-blocking elements. That means you can skip this one.
Start Hand-Coding with AMP
Difficulty: Very Hard / Estimated Time: ∞ Hours
Alright, “∞ hours” is an overstatement, but implementing AMP is no small task. Developed by Google, the AMP project is an entirely new framework with which to build your web pages. The goal? Dramatically improve page speed, especially for mobile users.
AMP is made up of three core components: AMP HTML, AMP JS, and AMP Cache. That means you’ll need to learn new markup, as well as understand the framework well enough to get your landing pages validated and make sure they actually work.
We won’t get into the nitty-gritty of building with AMP here, but the AMP website has a bunch of resources (including tutorials) to help you get started.
Building Pages in Unbounce? No hand-coding AMP pages for you—Unbounce makes it easy to drag and drop together AMP experiences. Choose one of our AMP-optimized templates, load your content, get validated, and start publishing lightning-fast landing pages right away.
Improving your landing page speed can sound intimidating, but even small tweaks will make a big difference for your load times. Tackle the easy stuff first, then move onto more challenging fixes as you get comfortable. And above all, keep testing: seeing your improved speed results after each undertaking will give you the confidence and motivation to move forward.
Or, you know, just build with Unbounce. We automatically handle most of the speed fixes listed (or at least makes them super easy), which saves a ton of time. That means you can focus on what matters: getting more conversions and improving ROI.
from Marketing https://unbounce.com/landing-pages/increase-landing-page-speed/ via http://www.rssmix.com/
0 notes
Text
Increase Your Landing Page Speed (By Stealing Our Homework)
If you’ve read Unbounce’s 2019 Page Speed Report (and you really should), then you already know why speed is so important this year. Slow-loading landing pages have always been an obstacle to higher conversions, and now Google is punishing poor mobile load times in its search rankings. To be successful in 2019, we—marketers—need to be thinking fast. But are we?
To find out, we polled almost 400 marketers on their attitudes around page speed and asked what (if anything) they were doing to get faster.
Just 56% of marketers are happy with their mobile load times, according to the 2019 Page Speed Report.
Almost three of every four respondents said they had taken steps to improve their page speeds over the last year, and that’s pretty good. Alarmingly, though, only half of marketers we surveyed are satisfied with their load times on mobile.
So most marketers are trying to get faster, but many aren’t where they want to be. Which begs the question: what are people doing to speed up their landing page load times?
Computer, enhance!
Only 39% of marketers have bothered to find out how fast their pages are actually loading. Not great.
Here, we start to see why marketers are somewhat pessimistic about their page speed progress. Just over half have optimized their landing page images—ostensibly one of the simplest ways to speed up your load times—and even fewer have done any of the real technical-sounding things they need to get faster. (I mean, fair, they sound pretty boring to us, too.)
Here’s a doozy, though: just one in three marketers have run a website speed test to find out whether their load times are impacting their conversions. That’s the easiest one!
And hey, we get it. Marketers are being asked to do more than ever before, often with fewer resources. If you’re a small team (or a single person, the smallest of the teams), you might feel you don’t have the time or expertise to meaningfully improve your page speed.
But I’ve gone and done the hard work for you—me, a film school graduate who, until recently, believed that his Apple computer was impervious to viruses. (Hoo boy, it is not.) I’ve spent hours talking to Unbounce developers, reading how-to guides, and generally just bombarding my brain with the most dull, technical page speed information I could get ahold of. (Apologies to said developers.) And if I can get my head around it, there’s no excuse for the rest of you.
Below, I’ve simplified some of the most effective ways to increase your landing page loading times in a guide. For each fix, I’ve indicated the technical difficulty and the estimated time it’ll take, so you know exactly what you’re getting yourself in to. Use the table of contents below to jump to what’s relevant to you, or go ahead and do it all in order.
Jump to a Landing Page Speed Fix
How to Check Your Landing Page Speed
Run a Google Speed Test (5 Minutes)
Try the Unbounce Landing Page Analyzer (5 Minutes)
Improve Your Landing Page Speed: Easy Fixes
Reduce Your Page Content (15 Minutes)
Optimize Your Images (30 Minutes)
Host Your Videos Elsewhere (30 Minutes)
Audit Your Hosting Solution (30 Minutes)
Implement a CDN (30 Minutes)
Improve Your Landing Page Speed: Intermediate Fixes
Minify HTML, JS, and CSS (15 Minutes)
Enable Browser Caching (15 Minutes)
Set Up GZIP Compression (15 Minutes)
Kill Needless Scripts and Plugins (30 Minutes)
Convert Images to Sprites (30 Minutes)
Improve Your Landing Page Speed: Hard Fixes
Remove Render-Blocking JS and CSS (45 Minutes)
Start Hand-Coding with AMP
Final note: If you’ve built your page with Unbounce, you can skip a lot of this stuff—we make many speed fixes on the back-end automatically. In this post, look for the ‘Building Pages in Unbounce?‘ callout boxes to see if a given fix is something you need to implement.
Look for these callout boxes throughout this post to get Unbounce-specific tips and learn how we automatically optimize your landing pages to make them load super fast.
How to Check Your Landing Page Speed
First things first.
Before you throw on your hard hat and start hitting things with a hammer (both figuratively and literally), it’s important to have some idea of what’s working—and what’s not—on your landing page. That means running a speed audit.
It’s important to point out that, regardless of which speed test you use, you don’t want to get too hung up on your score. Achieving a perfect score is not always technically possible (and it might not even be desirable). Instead, use your results as a general guideline to improve page speed and implement the fixes that make sense for you.
Okay—let’s test them pages.
Run a Google Speed Test
Difficulty: Easy / Estimated Time: 5 Minutes
There are a bunch of great tools for testing your page speed, but why not start with the big dog itself? Google’s PageSpeed Insights is an awesome way to do a quick performance check-up with at-a-glance recommendations. (Ryan Engley, Unbounce’s VP of Product Marketing, explains how to interpret and act on your PageSpeed Insights results in this must-read blog post.) Then there’s Lighthouse, a newer tool from Google that provides a comprehensive analysis of your how your page presents to end users.
You’ll also want to run your page through Google’s Test My Site tool, which will check your speed from a mobile perspective.
Clicking on individual results in PageSpeed Insights will reveal your problematic page elements.
Running a Google speed test should only take a couple of minutes, and the results will help you identify some of the top opportunities to boost your landing page load times.
Try the Unbounce Landing Page Analyzer
Difficulty: Easy / Estimated Time: 5 Minutes
Running a speed test with Google should be your top priority, but PageSpeed Insights doesn’t give results tailored to landing pages. For that, you’ll want to run your page through the Unbounce Landing Page Analyzer, which not only provides feedback on page performance but includes a bunch of advice on creating more effective campaigns and kicking your conversions into overdrive.
Unbounce’s Landing Page Analyzer provides feedback on page speed, but also actionable advice on things like SEO, message match, and mobile-friendliness.
Building Pages in Unbounce? Then you’ll definitely want to give our Landing Page Analyzer a shot. Get best-practice recommendations for conversion optimization and see how your landing pages stack up against others in your industry.
Improve Your Landing Page Speed: Easy Fixes
With your results from both Google and Unbounce, you’ll be well-equipped to move onto the actual work of making your page perform better. It’s time to pick up that hammer.
These fixes should be simple enough for anyone to tackle, regardless of their technical expertise.
Reduce Your Page Content
Difficulty: Easy / Estimated Time: 15 Minutes
We’ve marked this as an easy opportunity to increase your page speed, but it probably won’t feel like that when you start thinking about which elements on your page you can junk. Marketers love big hero shots, beautiful supporting imagery, and fun, animated explainer videos. But how much of that content is actually helping you drive conversions?
Visual content accounts for a huge portion of the size of an average web page—images account for over 20% of web page weight, as pointed out by Kinsta—and each element creates an HTTP request. That’s when your visitor’s browser pings your web server to request the files that make up the elements of your page. Too many calls can be a serious drag on your load time, so one of the simplest ways to improve your page speed is cutting down the number of elements you include.
Look at each piece of content on your page critically, then ask yourself: “Does this spark joy?” “Does this increase conversions?” If you don’t think there are pieces you can toss, try running an A/B test with a slimmed-down version of the page. The results might surprise you.
Bottom line: stick to the fundamentals of good landing page design and try to keep the number of elements (and thus HTTP requests) to a minimum.
Building Pages in Unbounce? We recommend that you keep things pretty lean, but we’d never remove content from your landing page. (Must resist… desire… to do best practices…) This is one optimization that you’ll have to tackle on your own.
Optimize Your Images
Difficulty: Easy / Estimated Time: 30 Minutes
Once you’ve trimmed some elements from your page, you’ll want to optimize the content that made the cut. Poor image optimization is the most common reason for slow page loads, especially for mobile visitors. Fortunately, it’s also one of the easiest issues to fix.
These are some quick tips for shrinking your images and improving your page speed. The goal here should be getting images at least under 800kb, but the smaller we can make them, the better.
Resize your images
It’s easy to chuck a larger image onto your page and rely on your content management system (CMS) to compress it to the appropriate size, but it’ll still be loading at least some of those extra pixels on the back end, and your visitors are going to feel it in the load. When you add an image, make sure it’s the same dimensions that your page will be rendering it.*
*This doesn’t necessarily apply to Unbounce’s retina image support—read up on that here.
Choose the right file type
Most people don’t think too much about the format of the image they’re uploading, but it can have a dramatic effect on page performance. The file types you’re probably most familiar with are JPEG and PNG—and, yes, there are differences.
JPEG is a ‘lossy’ format, which means it’ll lose some data during compression. That typically gives you a smaller file, but it can come at the expense of visual fidelity. Generally, images with significant color variation (say, photographs) perform better as JPEGs, and any dip in quality can usually go undetected.
PNG is ‘lossless,’ so the image’s appearance won’t change when resized, but it tends to make for larger files if there’s significant color variation. PNG is ideal for simple images with defined shapes, like those with text. Saving PNGs in 8-bit (rather than 24-bit, which has a broader color palette) can help shave off some extra bites.
Here are some optimization tips for JPEG and PNG (and GIF, that villain) from Google itself.
Use compression tools
Before your weigh-in, it’s good to run images through a final round of compression. There are plenty of image compression tools on WordPress, as well as some free, standalone ones like TinyPNG. These shrinky gizmos offer a simple way to cut down your image sizes without braving the cursed labyrinth that is Adobe’s export settings. (Hey, I’m a words guy.)
Your takeaways here are:
Ensure your image dimensions match how they’ll actually be displayed
Use JPEG when a slight dip in visual fidelity isn’t the end of the world (like photography), but PNG when it is (images with text and sharp lines)
Compress images to keep the file size as tiny as possible
If you want to take a deeper dive into image optimization, we recommend that you check out this post from Search Engine Land, which goes into detail on making images smaller while keeping them beautiful.
Building Pages in Unbounce? We’ve got you covered. Unbounce’s Auto Image Optimizer shrinks your images as soon as they’re uploaded so you can focus on making the best landing page possible.
Host Your Videos Elsewhere
Difficulty: Easy / Estimated Time: 30 Minutes
Why carry something yourself when you can make someone else carry it for you? That’s my motto for landing pages and life, and it’s why I’m no longer welcome on Unbounce’s company hiking trips.
Hosting videos on your own domain can be great for SEO purposes, but that’s not usually our goal with landing pages. We want everything to load in a flash and give our visitors the best chance to convert. Depending on your hosting solution, though, your videos might be slowing down your page speed, suffering from playback issues, and taking up an uncomfortable amount of server space.
Done properly, transferring videos to a third-party platform can shed some extra load time and help your pages render faster. Consider moving video content to Wistia, YouTube, or Vimeo, then using a light embed technique so that your videos only load heavier playback elements when your visitors actually click on them.
Building Pages in Unbounce? As a disclaimer: Using light embed codes with Unbounce (or any custom code, for that matter) will require some technical knowledge to implement and could, in rare cases, cause issues. Check out this Unbounce community post for more information.
Audit Your Hosting Solution
Difficulty: Easy / Estimated Time: 30 Minutes
Loading speed isn’t just determined by what’s on your landing page. Your web host also has a major influence in how quickly your page rolls out to potential customers.
There are three common models for web hosting:
Shared hosting Generally the most affordable solution, shared hosting is when your website is hosted alongside other sites on a single web server. Everyone draws from common resources (like storage space and processing power), which means—you guessed it—you need to share.
Virtual private server (VPS) hosting This is essentially a mix of both shared and dedicated hosting. With VPS, your website still shares server space with others, but you’ll have dedicated resources that no one else can dip into. The result is more power and flexibility, but it tends to come with a higher price tag.
Dedicated hosting For those who’ve had a traumatic roommate experience (who hasn’t?), dedicated hosting means your website has the server all to itself. More resources, no sharing. That’s great if you’re heavy on digital content and get a ton of traffic, but dedicated hosting is also the most expensive option and requires the technical know-how to set up and maintain your server.
Low-volume websites can generally get by with the cost-effective shared solution, but once your traffic starts to rise, you might not be getting enough juice from your web host to deliver content quickly—and that’s when load times start to suffer. (Give this post from Search Engine Journal a read for a more comprehensive explanation.)
It’s also important to note that the whereabouts of your web server can have a significant impact on your page speed. If you’re not using a content delivery network (CDN; more on this below), you’ll want to make sure that traffic from foreign countries isn’t encountering too much latency.
Think your hosting solution might be impacting your page speed? Run your site through a server speed test like this one from Bitcatcha, and use WebPageTest or Pingdom to see how your quickly your landing page loads in other countries. Depending on the results, you might decide it’s time to upgrade your hosting plan (or change web hosts altogether).
Building Pages in Unbounce? You don’t have to worry about this one—Unbounce’s global hosting solution boasts 99.95% uptime and ensures that your landing pages always have the necessary resources to load super fast.
Implement a CDN
Difficulty: Easy / Estimated Time: 30 Minutes
When your landing page gets a visitor, their web browser pings your server to get the content necessary to build out the page. Simple, right? Everyone downloads your website information from the same place, regardless of their location around the world. Well, that’s usually fine if the visitor is in or close to the country that your web server is located, but when they’re halfway around the globe, chances are they’re going to encounter some latency.
To avoid that, you should look into deploying a CDN, which caches your website across a network of data centers and proxy servers all over the planet. Say your own server is in the United States and someone from Lithuania is trying to visit your landing page. Instead of downloading your content from across the Atlantic, that visitor can pull a cached version from a server nearby.
Setting your website up with a CDN is pretty straightforward and—depending on your traffic—generally affordable. Here’s a list of some popular CDN providers from Mashable.
Building Pages in Unbounce? We’ve got five global data centers supporting the Unbounce CDN, which means your landing pages will load in a flash regardless of where they’re being accessed from.
Improve Your Landing Page Speed: Intermediate Fixes
These next speed fixes are a little trickier, but they should be manageable for marketers with a little technical know-how. Still, a mistake here could mean actual damage to your landing page.
Our recommendation? Do some research, make a backup, and—if you can—consult briefly with a developer on your team. It never hurts to have an experienced colleague to turn to if you get in over your head.
Building Pages in Unbounce? We talk a lot about WordPress through this next section. If you’re using our plugin to publish Unbounce landing pages to a WordPress domain, some of these recommended speed fixes can actually cause technical issues. Don’t hesitate to reach out to us for clarification if you’re ever unsure.
Minify HTML, CSS, and JS
Difficulty: Intermediate / Estimated Time: 15 Minutes
All those lines of HTML, CSS, and JS code that make up your landing page? They’re packed with spaces, line breaks, and other bits of formatting that make it more legible and easier for us to interpret, but each makes your load time just an eensy bit slower—and the web browsers your visitors are using to render your page don’t particularly need them.
With minification, the goal is to cut out all of that extra junk and condense your code so that browsers can read it faster. Here’s an example snippet of Javascript code from Wikipedia:
var array = []; for (var i = 0; i < 20; i++) { array[i] = i; }
After minifying, that code would look something like this:
for(var a=[i=0];++i<20;a[i]=i);
There are plenty of free online tools that will do this for your landing page, like Minify Code, as well as a bunch of WordPress plugins. Be sure to check out this post from Elegant Themes, which is an awesome resource that dives into the many options at your disposal.
Building Pages in Unbounce? Do we minify? We practically invented minifying. (Editor’s note: We did not.) Unbounce compresses all of your code automatically, making your landing page as slim as can be. No coding your pages from scratch and no minifying that code in the background? We’re making this too easy for you.
Enable Browser Caching
Difficulty: Intermediate / Estimated Time: 15 Minutes
The goal with any landing page should be getting prospects to convert the first time they visit, but the reality is that not everyone will. Sometimes, visitors will need some time to think about it: they’ll bounce, do more research, check out some competitors, then come back to your original offer. Browser caching ensures that when they return, your page will load even faster—and that’ll make them more likely to convert.
Not sure if you’ve already got caching enabled? Before you start, run a quick caching check using a tool like this one from GiftOfSpeed.
If your site is built on WordPress, enabling caching is as easy as adding a plugin.* (WordPress is almost too easy, huh?) Check out this list of caching plugins, most of which include quick instructions for getting set up.
*If you’re publishing Unbounce pages to a WordPress domain, these caching recommendations could create big problems. Check with us first.
For those not on WordPress, enabling browser caching on your own is pretty simple if you’re willing to get your hands dirty. For example, on Apache web servers, it comes down to inserting a little bit of code into the .htaccess file on your web host or server: <IfModule mod_expires.c> ExpiresActive On ExpiresByType image/jpg “access 1 year” ExpiresByType image/jpeg “access 1 year” ExpiresByType image/gif “access 1 year” ExpiresByType image/png “access 1 year” ExpiresByType text/css “access 1 month” ExpiresByType text/html “access 1 month” ExpiresByType application/pdf “access 1 month” ExpiresByType text/x-javascript “access 1 month” ExpiresByType application/x-shockwave-flash “access 1 month” ExpiresByType image/x-icon “access 1 year” ExpiresDefault “access 1 month” </IfModule>
This article from Varvy provides a great how-to, as does this one from WinningWP (which discusses enabling browser caching from a WordPress perspective but is applicable more broadly).
If all of this makes you nervous, there’s likely a simpler method for you to set up browser caching. Most web hosts will enable caching for you if you ask. Depending on your hosting solution, it might be as easy as making a phone call. (Although, now that I think about it, that might be more daunting for some of us.)
Building Pages in Unbounce? Seven-day browser caching is enabled on all Unbounce-built landing pages, so this is a speed fix you can comfortably skip. Maybe use this free time to treat yourself to some self-care? You’ve earned it.
Set Up GZIP Compression
Difficulty: Intermediate / Estimated Time: 15 Minutes
When a visitor reaches your landing page, their browser pings your web server to request the files that make up the page and the server transmits them back. Naturally, that process moves faster if the information being sent is compressed to be as small as possible. Here’s where GZIP compression comes in.
(You’ll want to check to see if GZIP compression is already enabled before you get started.)
As with browser caching, the difficulty of setting up GZIP compression is going to be determined by how your website was built. If you use WordPress, you’re in luck: many WordPress plugins will enable GZIP compression for you almost automatically. If you don’t use WordPress, well, we’re headed back into your server.
This article from GTmetrix provides a quick overview of the importance of GZIP compression and how to enable it. With Apache web servers, you’ll need to add this chunk of code to your .htaccess file. <IfModule mod_deflate.c> # Compress HTML, CSS, JavaScript, Text, XML and fonts AddOutputFilterByType DEFLATE application/javascript AddOutputFilterByType DEFLATE application/rss+xml AddOutputFilterByType DEFLATE application/vnd.ms-fontobject AddOutputFilterByType DEFLATE application/x-font AddOutputFilterByType DEFLATE application/x-font-opentype AddOutputFilterByType DEFLATE application/x-font-otf AddOutputFilterByType DEFLATE application/x-font-truetype AddOutputFilterByType DEFLATE application/x-font-ttf AddOutputFilterByType DEFLATE application/x-javascript AddOutputFilterByType DEFLATE application/xhtml+xml AddOutputFilterByType DEFLATE application/xml AddOutputFilterByType DEFLATE font/opentype AddOutputFilterByType DEFLATE font/otf AddOutputFilterByType DEFLATE font/ttf AddOutputFilterByType DEFLATE image/svg+xml AddOutputFilterByType DEFLATE image/x-icon AddOutputFilterByType DEFLATE text/css AddOutputFilterByType DEFLATE text/html AddOutputFilterByType DEFLATE text/javascript AddOutputFilterByType DEFLATE text/plain AddOutputFilterByType DEFLATE text/xml
# Remove browser bugs (only needed for really old browsers) BrowserMatch ^Mozilla/4 gzip-only-text/html BrowserMatch ^Mozilla/4\.0[678] no-gzip BrowserMatch \bMSIE !no-gzip !gzip-only-text/html Header append Vary User-Agent </IfModule>
And again, if this is beyond your comfort zone, your web host will probably help you set up GZIP compression if you ask nicely.
Building Pages in Unbounce? You don’t have to ask us nicely, because we’ve already done it. All Unbounce landing pages are automatically compressed during data transfer. (But be nice to us anyway, alright?)
Kill Needless Scripts and Plugins
Difficulty: Intermediate / Estimated Time: 30 Minutes
WordPress is wonderful in its simplicity. As we’ve seen throughout this article, page speed fixes that might require a front-end developer on a static website can often be achieved by simply installing a WordPress plugin. Want to enable browser caching? Boom, W3 Total Cache.* Need to minify your scripts? Pow, Autoptomize.* Developer, shmeveloper.
But because it’s so easy to add functionality through plugins, WordPress websites have a habit of collecting a lot of them—along with all the of the bits and bites of code that make them work. Those add up.
Take a look at the scripts and plugins you’ve added to your website and decide whether they’re essential to your visitor experience. If they’re not, junking them could help cut some extra seconds off of your load time. (And guess what? There’s a plugin for that.) You can also disable plugins one at a time, then retest your page speed to determine which ones are problematic.
*If you’re publishing Unbounce pages to a WordPress domain, these plugins in particular might start a fire.
Building Pages in Unbounce? This is more of WordPress fix, but it also applies to Unbounce customers that have inserted a bunch of custom scripts onto their landing pages. Learn how the Unbounce Script Manager helps you keep things tidy.
Convert Images to Sprites
Difficulty: Intermediate / Estimated Time: 30 Minutes
If your landing page includes a series of similar-sized images (say, for a client logo bar), you can shorten your load time by combining them into an image sprite, then use CSS to display specific chunks of that sprite at a time. This post from WebFX provides a great step-by-step guide for creating CSS sprites.
Joining smaller images into a larger file might seem counterintuitive, but again, the idea here is to reduce the number of HTTP requests on your page and ultimately make it faster. Each individual image requires its own call—combining images into a single CSS sprite means your page only needs to make one.
Building Pages in Unbounce? We don’t build CSS sprites for you, but you can certainly use them on your Unbounce-built landing pages. Check out our documentation on custom JS and CSS with Unbounce.
Improve Your Landing Page Speed: Hard Fixes
We’re into the scary stuff now.
These are fixes you should absolutely not attempt unless you know what you’re doing or you’ve consulted extensively with a front-end developer. (We even had one of the Unbounce devs fact-check this article, and we’ve never felt smaller.) Proceed with caution.
Remove Render-Blocking JS and CSS
Difficulty: Hard / Estimated Time: 45 Minutes
Those CSS and JS scripts that make your landing page beautiful and enable cool, dynamic functionality? They could be one of the major reasons that your page is loading so slowly. (Bad news for my flashing, neon visitor counter.)
When a web browser runs into CSS or JS in the head of your document, it’ll wait to download and process that content before continuing to render your page’s HTML. That might sound like a good thing from a user experience perspective—after all, we want people to see our landing page as it was intended—but it actually means that visitors can be left waiting on a blank screen while everything loads in the background.
To avoid this, we need to implement techniques for preventing render-blocking CSS and JS on our landing page. (Refer back to your Google PageSpeed Insights results to check if any scripts are slowing down your page load.)
Reduce render-blocking CSS
There are a couple of ways that we can neutralize render-blocking CSS. One option is to defer all CSS until after the HTML has loaded. That’ll certainly improve page speed, but it will also present non-styled content when the visitor first reaches our page. Not ideal.
The other, more preferable option is to defer most style rules until the HTML has been rendered, but inline the CSS necessary to correctly display content above the fold within the HTML. That way, visitors will see the properly-styled content as soon as they hit the page while the rest will load out of view. Pretty sneaky. This is a great tutorial using a real-life example from codeburst.io.
Another page speed opportunity for you here is combining your CSS files. By moving your style rules from several files to just one (or maybe two, tops), you can reduce the number of times that visitors need to ping your web server and improve your landing page load time. Here’s a good resource from GiftOfSpeed on combining and compressing you CSS scripts.
Eliminate render-blocking JS
Like CSS, JS scripts can prevent your landing page from rendering as quickly as you might like. We can avoid that by deploying the defer and async attributes. The former tells the browser to wait until your HTML is rendered before it begins pulling in JS scripts, while the latter asks that JS be downloaded simultaneously without interrupting the HTML download.
An important note is that not all JS scripts are equal: some are critical to the rendering of your page and need to be addressed right out of the gate, so they’ll have to stay at the top. Dareboost does a good job of explaining how to distinguish between critical and non-critical JS, as well as how to implement deferred and asynchronous loading.
Building Pages in Unbounce? Unbounce optimizes for most Google PageSpeed Insights recommendations, including the removal of render-blocking elements. That means you can skip this one.
Start Hand-Coding with AMP
Difficulty: Very Hard / Estimated Time: ∞ Hours
Alright, “∞ hours” is an overstatement, but implementing AMP is no small task. Developed by Google, the AMP project is an entirely new framework with which to build your web pages. The goal? Dramatically improve page speed, especially for mobile users.
AMP is made up of three core components: AMP HTML, AMP JS, and AMP Cache. That means you’ll need to learn new markup, as well as understand the framework well enough to get your landing pages validated and make sure they actually work.
We won’t get into the nitty-gritty of building with AMP here, but the AMP website has a bunch of resources (including tutorials) to help you get started.
Building Pages in Unbounce? No hand-coding AMP pages for you—Unbounce makes it easy to drag and drop together AMP experiences. Choose one of our AMP-optimized templates, load your content, get validated, and start publishing lightning-fast landing pages right away.
Improving your landing page speed can sound intimidating, but even small tweaks will make a big difference for your load times. Tackle the easy stuff first, then move onto more challenging fixes as you get comfortable. And above all, keep testing: seeing your improved speed results after each undertaking will give you the confidence and motivation to move forward.
Or, you know, just build with Unbounce. We automatically handle most of the speed fixes listed (or at least makes them super easy), which saves a ton of time. That means you can focus on what matters: getting more conversions and improving ROI.
Increase Your Landing Page Speed (By Stealing Our Homework) published first on https://nickpontemrktg.wordpress.com/
0 notes
Text
Increase Your Landing Page Speed (By Stealing Our Homework)
If you’ve read Unbounce’s 2019 Page Speed Report (and you really should), then you already know why speed is so important this year. Slow-loading landing pages have always been an obstacle to higher conversions, and now Google is punishing poor mobile load times in its search rankings. To be successful in 2019, we—marketers—need to be thinking fast. But are we?
To find out, we polled almost 400 marketers on their attitudes around page speed and asked what (if anything) they were doing to get faster.
Just 56% of marketers are happy with their mobile load times, according to the 2019 Page Speed Report.
Almost three of every four respondents said they had taken steps to improve their page speeds over the last year, and that’s pretty good. Alarmingly, though, only half of marketers we surveyed are satisfied with their load times on mobile.
So most marketers are trying to get faster, but many aren’t where they want to be. Which begs the question: what are people doing to speed up their landing page load times?
Computer, enhance!
Only 39% of marketers have bothered to find out how fast their pages are actually loading. Not great.
Here, we start to see why marketers are somewhat pessimistic about their page speed progress. Just over half have optimized their landing page images—ostensibly one of the simplest ways to speed up your load times—and even fewer have done any of the real technical-sounding things they need to get faster. (I mean, fair, they sound pretty boring to us, too.)
Here’s a doozy, though: just one in three marketers have run a website speed test to find out whether their load times are impacting their conversions. That’s the easiest one!
And hey, we get it. Marketers are being asked to do more than ever before, often with fewer resources. If you’re a small team (or a single person, the smallest of the teams), you might feel you don’t have the time or expertise to meaningfully improve your page speed.
But I’ve gone and done the hard work for you—me, a film school graduate who, until recently, believed that his Apple computer was impervious to viruses. (Hoo boy, it is not.) I’ve spent hours talking to Unbounce developers, reading how-to guides, and generally just bombarding my brain with the most dull, technical page speed information I could get ahold of. (Apologies to said developers.) And if I can get my head around it, there’s no excuse for the rest of you.
Below, I’ve simplified some of the most effective ways to increase your landing page loading times in a guide. For each fix, I’ve indicated the technical difficulty and the estimated time it’ll take, so you know exactly what you’re getting yourself in to. Use the table of contents below to jump to what’s relevant to you, or go ahead and do it all in order.
Jump to a Landing Page Speed Fix
How to Check Your Landing Page Speed
Run a Google Speed Test (5 Minutes)
Try the Unbounce Landing Page Analyzer (5 Minutes)
Improve Your Landing Page Speed: Easy Fixes
Reduce Your Page Content (15 Minutes)
Optimize Your Images (30 Minutes)
Host Your Videos Elsewhere (30 Minutes)
Audit Your Hosting Solution (30 Minutes)
Implement a CDN (30 Minutes)
Improve Your Landing Page Speed: Intermediate Fixes
Minify HTML, JS, and CSS (15 Minutes)
Enable Browser Caching (15 Minutes)
Set Up GZIP Compression (15 Minutes)
Kill Needless Scripts and Plugins (30 Minutes)
Convert Images to Sprites (30 Minutes)
Improve Your Landing Page Speed: Hard Fixes
Remove Render-Blocking JS and CSS (45 Minutes)
Start Hand-Coding with AMP
Final note: If you’ve built your page with Unbounce, you can skip a lot of this stuff—we make many speed fixes on the back-end automatically. In this post, look for the ‘Building Pages in Unbounce?‘ callout boxes to see if a given fix is something you need to implement.
Look for these callout boxes throughout this post to get Unbounce-specific tips and learn how we automatically optimize your landing pages to make them load super fast.
How to Check Your Landing Page Speed
First things first.
Before you throw on your hard hat and start hitting things with a hammer (both figuratively and literally), it’s important to have some idea of what’s working—and what’s not—on your landing page. That means running a speed audit.
It’s important to point out that, regardless of which speed test you use, you don’t want to get too hung up on your score. Achieving a perfect score is not always technically possible (and it might not even be desirable). Instead, use your results as a general guideline to improve page speed and implement the fixes that make sense for you.
Okay—let’s test them pages.
Run a Google Speed Test
Difficulty: Easy / Estimated Time: 5 Minutes
There are a bunch of great tools for testing your page speed, but why not start with the big dog itself? Google’s PageSpeed Insights is an awesome way to do a quick performance check-up with at-a-glance recommendations. (Ryan Engley, Unbounce’s VP of Product Marketing, explains how to interpret and act on your PageSpeed Insights results in this must-read blog post.) Then there’s Lighthouse, a newer tool from Google that provides a comprehensive analysis of your how your page presents to end users.
You’ll also want to run your page through Google’s Test My Site tool, which will check your speed from a mobile perspective.
Clicking on individual results in PageSpeed Insights will reveal your problematic page elements.
Running a Google speed test should only take a couple of minutes, and the results will help you identify some of the top opportunities to boost your landing page load times.
Try the Unbounce Landing Page Analyzer
Difficulty: Easy / Estimated Time: 5 Minutes
Running a speed test with Google should be your top priority, but PageSpeed Insights doesn’t give results tailored to landing pages. For that, you’ll want to run your page through the Unbounce Landing Page Analyzer, which not only provides feedback on page performance but includes a bunch of advice on creating more effective campaigns and kicking your conversions into overdrive.
Unbounce’s Landing Page Analyzer provides feedback on page speed, but also actionable advice on things like SEO, message match, and mobile-friendliness.
Building Pages in Unbounce? Then you’ll definitely want to give our Landing Page Analyzer a shot. Get best-practice recommendations for conversion optimization and see how your landing pages stack up against others in your industry.
Improve Your Landing Page Speed: Easy Fixes
With your results from both Google and Unbounce, you’ll be well-equipped to move onto the actual work of making your page perform better. It’s time to pick up that hammer.
These fixes should be simple enough for anyone to tackle, regardless of their technical expertise.
Reduce Your Page Content
Difficulty: Easy / Estimated Time: 15 Minutes
We’ve marked this as an easy opportunity to increase your page speed, but it probably won’t feel like that when you start thinking about which elements on your page you can junk. Marketers love big hero shots, beautiful supporting imagery, and fun, animated explainer videos. But how much of that content is actually helping you drive conversions?
Visual content accounts for a huge portion of the size of an average web page—images account for over 20% of web page weight, as pointed out by Kinsta—and each element creates an HTTP request. That’s when your visitor’s browser pings your web server to request the files that make up the elements of your page. Too many calls can be a serious drag on your load time, so one of the simplest ways to improve your page speed is cutting down the number of elements you include.
Look at each piece of content on your page critically, then ask yourself: “Does this spark joy?” “Does this increase conversions?” If you don’t think there are pieces you can toss, try running an A/B test with a slimmed-down version of the page. The results might surprise you.
Bottom line: stick to the fundamentals of good landing page design and try to keep the number of elements (and thus HTTP requests) to a minimum.
Building Pages in Unbounce? We recommend that you keep things pretty lean, but we’d never remove content from your landing page. (Must resist… desire… to do best practices…) This is one optimization that you’ll have to tackle on your own.
Optimize Your Images
Difficulty: Easy / Estimated Time: 30 Minutes
Once you’ve trimmed some elements from your page, you’ll want to optimize the content that made the cut. Poor image optimization is the most common reason for slow page loads, especially for mobile visitors. Fortunately, it’s also one of the easiest issues to fix.
These are some quick tips for shrinking your images and improving your page speed. The goal here should be getting images at least under 800kb, but the smaller we can make them, the better.
Resize your images
It’s easy to chuck a larger image onto your page and rely on your content management system (CMS) to compress it to the appropriate size, but it’ll still be loading at least some of those extra pixels on the back end, and your visitors are going to feel it in the load. When you add an image, make sure it’s the same dimensions that your page will be rendering it.*
*This doesn’t necessarily apply to Unbounce’s retina image support—read up on that here.
Choose the right file type
Most people don’t think too much about the format of the image they’re uploading, but it can have a dramatic effect on page performance. The file types you’re probably most familiar with are JPEG and PNG—and, yes, there are differences.
JPEG is a ‘lossy’ format, which means it’ll lose some data during compression. That typically gives you a smaller file, but it can come at the expense of visual fidelity. Generally, images with significant color variation (say, photographs) perform better as JPEGs, and any dip in quality can usually go undetected.
PNG is ‘lossless,’ so the image’s appearance won’t change when resized, but it tends to make for larger files if there’s significant color variation. PNG is ideal for simple images with defined shapes, like those with text. Saving PNGs in 8-bit (rather than 24-bit, which has a broader color palette) can help shave off some extra bites.
Here are some optimization tips for JPEG and PNG (and GIF, that villain) from Google itself.
Use compression tools
Before your weigh-in, it’s good to run images through a final round of compression. There are plenty of image compression tools on WordPress, as well as some free, standalone ones like TinyPNG. These shrinky gizmos offer a simple way to cut down your image sizes without braving the cursed labyrinth that is Adobe’s export settings. (Hey, I’m a words guy.)
Your takeaways here are:
Ensure your image dimensions match how they’ll actually be displayed
Use JPEG when a slight dip in visual fidelity isn’t the end of the world (like photography), but PNG when it is (images with text and sharp lines)
Compress images to keep the file size as tiny as possible
If you want to take a deeper dive into image optimization, we recommend that you check out this post from Search Engine Land, which goes into detail on making images smaller while keeping them beautiful.
Building Pages in Unbounce? We’ve got you covered. Unbounce’s Auto Image Optimizer shrinks your images as soon as they’re uploaded so you can focus on making the best landing page possible.
Host Your Videos Elsewhere
Difficulty: Easy / Estimated Time: 30 Minutes
Why carry something yourself when you can make someone else carry it for you? That’s my motto for landing pages and life, and it’s why I’m no longer welcome on Unbounce’s company hiking trips.
Hosting videos on your own domain can be great for SEO purposes, but that’s not usually our goal with landing pages. We want everything to load in a flash and give our visitors the best chance to convert. Depending on your hosting solution, though, your videos might be slowing down your page speed, suffering from playback issues, and taking up an uncomfortable amount of server space.
Done properly, transferring videos to a third-party platform can shed some extra load time and help your pages render faster. Consider moving video content to Wistia, YouTube, or Vimeo, then using a light embed technique so that your videos only load heavier playback elements when your visitors actually click on them.
Building Pages in Unbounce? As a disclaimer: Using light embed codes with Unbounce (or any custom code, for that matter) will require some technical knowledge to implement and could, in rare cases, cause issues. Check out this Unbounce community post for more information.
Audit Your Hosting Solution
Difficulty: Easy / Estimated Time: 30 Minutes
Loading speed isn’t just determined by what’s on your landing page. Your web host also has a major influence in how quickly your page rolls out to potential customers.
There are three common models for web hosting:
Shared hosting Generally the most affordable solution, shared hosting is when your website is hosted alongside other sites on a single web server. Everyone draws from common resources (like storage space and processing power), which means—you guessed it—you need to share.
Virtual private server (VPS) hosting This is essentially a mix of both shared and dedicated hosting. With VPS, your website still shares server space with others, but you’ll have dedicated resources that no one else can dip into. The result is more power and flexibility, but it tends to come with a higher price tag.
Dedicated hosting For those who’ve had a traumatic roommate experience (who hasn’t?), dedicated hosting means your website has the server all to itself. More resources, no sharing. That’s great if you’re heavy on digital content and get a ton of traffic, but dedicated hosting is also the most expensive option and requires the technical know-how to set up and maintain your server.
Low-volume websites can generally get by with the cost-effective shared solution, but once your traffic starts to rise, you might not be getting enough juice from your web host to deliver content quickly—and that’s when load times start to suffer. (Give this post from Search Engine Journal a read for a more comprehensive explanation.)
It’s also important to note that the whereabouts of your web server can have a significant impact on your page speed. If you’re not using a content delivery network (CDN; more on this below), you’ll want to make sure that traffic from foreign countries isn’t encountering too much latency.
Think your hosting solution might be impacting your page speed? Run your site through a server speed test like this one from Bitcatcha, and use WebPageTest or Pingdom to see how your quickly your landing page loads in other countries. Depending on the results, you might decide it’s time to upgrade your hosting plan (or change web hosts altogether).
Building Pages in Unbounce? You don’t have to worry about this one—Unbounce’s global hosting solution boasts 99.95% uptime and ensures that your landing pages always have the necessary resources to load super fast.
Implement a CDN
Difficulty: Easy / Estimated Time: 30 Minutes
When your landing page gets a visitor, their web browser pings your server to get the content necessary to build out the page. Simple, right? Everyone downloads your website information from the same place, regardless of their location around the world. Well, that’s usually fine if the visitor is in or close to the country that your web server is located, but when they’re halfway around the globe, chances are they’re going to encounter some latency.
To avoid that, you should look into deploying a CDN, which caches your website across a network of data centers and proxy servers all over the planet. Say your own server is in the United States and someone from Lithuania is trying to visit your landing page. Instead of downloading your content from across the Atlantic, that visitor can pull a cached version from a server nearby.
Setting your website up with a CDN is pretty straightforward and—depending on your traffic—generally affordable. Here’s a list of some popular CDN providers from Mashable.
Building Pages in Unbounce? We’ve got five global data centers supporting the Unbounce CDN, which means your landing pages will load in a flash regardless of where they’re being accessed from.
Improve Your Landing Page Speed: Intermediate Fixes
These next speed fixes are a little trickier, but they should be manageable for marketers with a little technical know-how. Still, a mistake here could mean actual damage to your landing page.
Our recommendation? Do some research, make a backup, and—if you can—consult briefly with a developer on your team. It never hurts to have an experienced colleague to turn to if you get in over your head.
Building Pages in Unbounce? We talk a lot about WordPress through this next section. If you’re using our plugin to publish Unbounce landing pages to a WordPress domain, some of these recommended speed fixes can actually cause technical issues. Don’t hesitate to reach out to us for clarification if you’re ever unsure.
Minify HTML, CSS, and JS
Difficulty: Intermediate / Estimated Time: 15 Minutes
All those lines of HTML, CSS, and JS code that make up your landing page? They’re packed with spaces, line breaks, and other bits of formatting that make it more legible and easier for us to interpret, but each makes your load time just an eensy bit slower—and the web browsers your visitors are using to render your page don’t particularly need them.
With minification, the goal is to cut out all of that extra junk and condense your code so that browsers can read it faster. Here’s an example snippet of Javascript code from Wikipedia:
var array = []; for (var i = 0; i < 20; i++) { array[i] = i; }
After minifying, that code would look something like this:
for(var a=[i=0];++i<20;a[i]=i);
There are plenty of free online tools that will do this for your landing page, like Minify Code, as well as a bunch of WordPress plugins. Be sure to check out this post from Elegant Themes, which is an awesome resource that dives into the many options at your disposal.
Building Pages in Unbounce? Do we minify? We practically invented minifying. (Editor’s note: We did not.) Unbounce compresses all of your code automatically, making your landing page as slim as can be. No coding your pages from scratch and no minifying that code in the background? We’re making this too easy for you.
Enable Browser Caching
Difficulty: Intermediate / Estimated Time: 15 Minutes
The goal with any landing page should be getting prospects to convert the first time they visit, but the reality is that not everyone will. Sometimes, visitors will need some time to think about it: they’ll bounce, do more research, check out some competitors, then come back to your original offer. Browser caching ensures that when they return, your page will load even faster—and that’ll make them more likely to convert.
Not sure if you’ve already got caching enabled? Before you start, run a quick caching check using a tool like this one from GiftOfSpeed.
If your site is built on WordPress, enabling caching is as easy as adding a plugin.* (WordPress is almost too easy, huh?) Check out this list of caching plugins, most of which include quick instructions for getting set up.
*If you’re publishing Unbounce pages to a WordPress domain, these caching recommendations could create big problems. Check with us first.
For those not on WordPress, enabling browser caching on your own is pretty simple if you’re willing to get your hands dirty. For example, on Apache web servers, it comes down to inserting a little bit of code into the .htaccess file on your web host or server: <IfModule mod_expires.c> ExpiresActive On ExpiresByType image/jpg “access 1 year” ExpiresByType image/jpeg “access 1 year” ExpiresByType image/gif “access 1 year” ExpiresByType image/png “access 1 year” ExpiresByType text/css “access 1 month” ExpiresByType text/html “access 1 month” ExpiresByType application/pdf “access 1 month” ExpiresByType text/x-javascript “access 1 month” ExpiresByType application/x-shockwave-flash “access 1 month” ExpiresByType image/x-icon “access 1 year” ExpiresDefault “access 1 month” </IfModule>
This article from Varvy provides a great how-to, as does this one from WinningWP (which discusses enabling browser caching from a WordPress perspective but is applicable more broadly).
If all of this makes you nervous, there’s likely a simpler method for you to set up browser caching. Most web hosts will enable caching for you if you ask. Depending on your hosting solution, it might be as easy as making a phone call. (Although, now that I think about it, that might be more daunting for some of us.)
Building Pages in Unbounce? Seven-day browser caching is enabled on all Unbounce-built landing pages, so this is a speed fix you can comfortably skip. Maybe use this free time to treat yourself to some self-care? You’ve earned it.
Set Up GZIP Compression
Difficulty: Intermediate / Estimated Time: 15 Minutes
When a visitor reaches your landing page, their browser pings your web server to request the files that make up the page and the server transmits them back. Naturally, that process moves faster if the information being sent is compressed to be as small as possible. Here’s where GZIP compression comes in.
(You’ll want to check to see if GZIP compression is already enabled before you get started.)
As with browser caching, the difficulty of setting up GZIP compression is going to be determined by how your website was built. If you use WordPress, you’re in luck: many WordPress plugins will enable GZIP compression for you almost automatically. If you don’t use WordPress, well, we’re headed back into your server.
This article from GTmetrix provides a quick overview of the importance of GZIP compression and how to enable it. With Apache web servers, you’ll need to add this chunk of code to your .htaccess file. <IfModule mod_deflate.c> # Compress HTML, CSS, JavaScript, Text, XML and fonts AddOutputFilterByType DEFLATE application/javascript AddOutputFilterByType DEFLATE application/rss+xml AddOutputFilterByType DEFLATE application/vnd.ms-fontobject AddOutputFilterByType DEFLATE application/x-font AddOutputFilterByType DEFLATE application/x-font-opentype AddOutputFilterByType DEFLATE application/x-font-otf AddOutputFilterByType DEFLATE application/x-font-truetype AddOutputFilterByType DEFLATE application/x-font-ttf AddOutputFilterByType DEFLATE application/x-javascript AddOutputFilterByType DEFLATE application/xhtml+xml AddOutputFilterByType DEFLATE application/xml AddOutputFilterByType DEFLATE font/opentype AddOutputFilterByType DEFLATE font/otf AddOutputFilterByType DEFLATE font/ttf AddOutputFilterByType DEFLATE image/svg+xml AddOutputFilterByType DEFLATE image/x-icon AddOutputFilterByType DEFLATE text/css AddOutputFilterByType DEFLATE text/html AddOutputFilterByType DEFLATE text/javascript AddOutputFilterByType DEFLATE text/plain AddOutputFilterByType DEFLATE text/xml
# Remove browser bugs (only needed for really old browsers) BrowserMatch ^Mozilla/4 gzip-only-text/html BrowserMatch ^Mozilla/4\.0[678] no-gzip BrowserMatch \bMSIE !no-gzip !gzip-only-text/html Header append Vary User-Agent </IfModule>
And again, if this is beyond your comfort zone, your web host will probably help you set up GZIP compression if you ask nicely.
Building Pages in Unbounce? You don’t have to ask us nicely, because we’ve already done it. All Unbounce landing pages are automatically compressed during data transfer. (But be nice to us anyway, alright?)
Kill Needless Scripts and Plugins
Difficulty: Intermediate / Estimated Time: 30 Minutes
WordPress is wonderful in its simplicity. As we’ve seen throughout this article, page speed fixes that might require a front-end developer on a static website can often be achieved by simply installing a WordPress plugin. Want to enable browser caching? Boom, W3 Total Cache.* Need to minify your scripts? Pow, Autoptomize.* Developer, shmeveloper.
But because it’s so easy to add functionality through plugins, WordPress websites have a habit of collecting a lot of them—along with all the of the bits and bites of code that make them work. Those add up.
Take a look at the scripts and plugins you’ve added to your website and decide whether they’re essential to your visitor experience. If they’re not, junking them could help cut some extra seconds off of your load time. (And guess what? There’s a plugin for that.) You can also disable plugins one at a time, then retest your page speed to determine which ones are problematic.
*If you’re publishing Unbounce pages to a WordPress domain, these plugins in particular might start a fire.
Building Pages in Unbounce? This is more of WordPress fix, but it also applies to Unbounce customers that have inserted a bunch of custom scripts onto their landing pages. Learn how the Unbounce Script Manager helps you keep things tidy.
Convert Images to Sprites
Difficulty: Intermediate / Estimated Time: 30 Minutes
If your landing page includes a series of similar-sized images (say, for a client logo bar), you can shorten your load time by combining them into an image sprite, then use CSS to display specific chunks of that sprite at a time. This post from WebFX provides a great step-by-step guide for creating CSS sprites.
Joining smaller images into a larger file might seem counterintuitive, but again, the idea here is to reduce the number of HTTP requests on your page and ultimately make it faster. Each individual image requires its own call—combining images into a single CSS sprite means your page only needs to make one.
Building Pages in Unbounce? We don’t build CSS sprites for you, but you can certainly use them on your Unbounce-built landing pages. Check out our documentation on custom JS and CSS with Unbounce.
Improve Your Landing Page Speed: Hard Fixes
We’re into the scary stuff now.
These are fixes you should absolutely not attempt unless you know what you’re doing or you’ve consulted extensively with a front-end developer. (We even had one of the Unbounce devs fact-check this article, and we’ve never felt smaller.) Proceed with caution.
Remove Render-Blocking JS and CSS
Difficulty: Hard / Estimated Time: 45 Minutes
Those CSS and JS scripts that make your landing page beautiful and enable cool, dynamic functionality? They could be one of the major reasons that your page is loading so slowly. (Bad news for my flashing, neon visitor counter.)
When a web browser runs into CSS or JS in the head of your document, it’ll wait to download and process that content before continuing to render your page’s HTML. That might sound like a good thing from a user experience perspective—after all, we want people to see our landing page as it was intended—but it actually means that visitors can be left waiting on a blank screen while everything loads in the background.
To avoid this, we need to implement techniques for preventing render-blocking CSS and JS on our landing page. (Refer back to your Google PageSpeed Insights results to check if any scripts are slowing down your page load.)
Reduce render-blocking CSS
There are a couple of ways that we can neutralize render-blocking CSS. One option is to defer all CSS until after the HTML has loaded. That’ll certainly improve page speed, but it will also present non-styled content when the visitor first reaches our page. Not ideal.
The other, more preferable option is to defer most style rules until the HTML has been rendered, but inline the CSS necessary to correctly display content above the fold within the HTML. That way, visitors will see the properly-styled content as soon as they hit the page while the rest will load out of view. Pretty sneaky. This is a great tutorial using a real-life example from codeburst.io.
Another page speed opportunity for you here is combining your CSS files. By moving your style rules from several files to just one (or maybe two, tops), you can reduce the number of times that visitors need to ping your web server and improve your landing page load time. Here’s a good resource from GiftOfSpeed on combining and compressing you CSS scripts.
Eliminate render-blocking JS
Like CSS, JS scripts can prevent your landing page from rendering as quickly as you might like. We can avoid that by deploying the defer and async attributes. The former tells the browser to wait until your HTML is rendered before it begins pulling in JS scripts, while the latter asks that JS be downloaded simultaneously without interrupting the HTML download.
An important note is that not all JS scripts are equal: some are critical to the rendering of your page and need to be addressed right out of the gate, so they’ll have to stay at the top. Dareboost does a good job of explaining how to distinguish between critical and non-critical JS, as well as how to implement deferred and asynchronous loading.
Building Pages in Unbounce? Unbounce optimizes for most Google PageSpeed Insights recommendations, including the removal of render-blocking elements. That means you can skip this one.
Start Hand-Coding with AMP
Difficulty: Very Hard / Estimated Time: ∞ Hours
Alright, “∞ hours” is an overstatement, but implementing AMP is no small task. Developed by Google, the AMP project is an entirely new framework with which to build your web pages. The goal? Dramatically improve page speed, especially for mobile users.
AMP is made up of three core components: AMP HTML, AMP JS, and AMP Cache. That means you’ll need to learn new markup, as well as understand the framework well enough to get your landing pages validated and make sure they actually work.
We won’t get into the nitty-gritty of building with AMP here, but the AMP website has a bunch of resources (including tutorials) to help you get started.
Building Pages in Unbounce? No hand-coding AMP pages for you—Unbounce makes it easy to drag and drop together AMP experiences. Choose one of our AMP-optimized templates, load your content, get validated, and start publishing lightning-fast landing pages right away.
Improving your landing page speed can sound intimidating, but even small tweaks will make a big difference for your load times. Tackle the easy stuff first, then move onto more challenging fixes as you get comfortable. And above all, keep testing: seeing your improved speed results after each undertaking will give you the confidence and motivation to move forward.
Or, you know, just build with Unbounce. We automatically handle most of the speed fixes listed (or at least makes them super easy), which saves a ton of time. That means you can focus on what matters: getting more conversions and improving ROI.
from Marketing https://unbounce.com/landing-pages/increase-landing-page-speed/ via http://www.rssmix.com/
0 notes
Text
Increase Your Landing Page Speed (By Stealing Our Homework)
If you’ve read Unbounce’s 2019 Page Speed Report (and you really should), then you already know why speed is so important this year. Slow-loading landing pages have always been an obstacle to higher conversions, and now Google is punishing poor mobile load times in its search rankings. To be successful in 2019, we—marketers—need to be thinking fast. But are we?
To find out, we polled almost 400 marketers on their attitudes around page speed and asked what (if anything) they were doing to get faster.
Just 56% of marketers are happy with their mobile load times, according to the 2019 Page Speed Report.
Almost three of every four respondents said they had taken steps to improve their page speeds over the last year, and that’s pretty good. Alarmingly, though, only half of marketers we surveyed are satisfied with their load times on mobile.
So most marketers are trying to get faster, but many aren’t where they want to be. Which begs the question: what are people doing to speed up their landing page load times?
Computer, enhance!
Only 39% of marketers have bothered to find out how fast their pages are actually loading. Not great.
Here, we start to see why marketers are somewhat pessimistic about their page speed progress. Just over half have optimized their landing page images—ostensibly one of the simplest ways to speed up your load times—and even fewer have done any of the real technical-sounding things they need to get faster. (I mean, fair, they sound pretty boring to us, too.)
Here’s a doozy, though: just one in three marketers have run a website speed test to find out whether their load times are impacting their conversions. That’s the easiest one!
And hey, we get it. Marketers are being asked to do more than ever before, often with fewer resources. If you’re a small team (or a single person, the smallest of the teams), you might feel you don’t have the time or expertise to meaningfully improve your page speed.
But I’ve gone and done the hard work for you—me, a film school graduate who, until recently, believed that his Apple computer was impervious to viruses. (Hoo boy, it is not.) I’ve spent hours talking to Unbounce developers, reading how-to guides, and generally just bombarding my brain with the most dull, technical page speed information I could get ahold of. (Apologies to said developers.) And if I can get my head around it, there’s no excuse for the rest of you.
Below, I’ve simplified some of the most effective ways to increase your landing page loading times in a guide. For each fix, I’ve indicated the technical difficulty and the estimated time it’ll take, so you know exactly what you’re getting yourself in to. Use the table of contents below to jump to what’s relevant to you, or go ahead and do it all in order.
Jump to a Landing Page Speed Fix
How to Check Your Landing Page Speed
Run a Google Speed Test (5 Minutes)
Try the Unbounce Landing Page Analyzer (5 Minutes)
Improve Your Landing Page Speed: Easy Fixes
Reduce Your Page Content (15 Minutes)
Optimize Your Images (30 Minutes)
Host Your Videos Elsewhere (30 Minutes)
Audit Your Hosting Solution (30 Minutes)
Implement a CDN (30 Minutes)
Improve Your Landing Page Speed: Intermediate Fixes
Minify HTML, JS, and CSS (15 Minutes)
Enable Browser Caching (15 Minutes)
Set Up GZIP Compression (15 Minutes)
Kill Needless Scripts and Plugins (30 Minutes)
Convert Images to Sprites (30 Minutes)
Improve Your Landing Page Speed: Hard Fixes
Remove Render-Blocking JS and CSS (45 Minutes)
Start Hand-Coding with AMP
Final note: If you’ve built your page with Unbounce, you can skip a lot of this stuff—we make many speed fixes on the back-end automatically. In this post, look for the ‘Building Pages in Unbounce?‘ callout boxes to see if a given fix is something you need to implement.
Look for these callout boxes throughout this post to get Unbounce-specific tips and learn how we automatically optimize your landing pages to make them load super fast.
How to Check Your Landing Page Speed
First things first.
Before you throw on your hard hat and start hitting things with a hammer (both figuratively and literally), it’s important to have some idea of what’s working—and what’s not—on your landing page. That means running a speed audit.
It’s important to point out that, regardless of which speed test you use, you don’t want to get too hung up on your score. Achieving a perfect score is not always technically possible (and it might not even be desirable). Instead, use your results as a general guideline to improve page speed and implement the fixes that make sense for you.
Okay—let’s test them pages.
Run a Google Speed Test
Difficulty: Easy / Estimated Time: 5 Minutes
There are a bunch of great tools for testing your page speed, but why not start with the big dog itself? Google’s PageSpeed Insights is an awesome way to do a quick performance check-up with at-a-glance recommendations. (Ryan Engley, Unbounce’s VP of Product Marketing, explains how to interpret and act on your PageSpeed Insights results in this must-read blog post.) Then there’s Lighthouse, a newer tool from Google that provides a comprehensive analysis of your how your page presents to end users.
You’ll also want to run your page through Google’s Test My Site tool, which will check your speed from a mobile perspective.
Clicking on individual results in PageSpeed Insights will reveal your problematic page elements.
Running a Google speed test should only take a couple of minutes, and the results will help you identify some of the top opportunities to boost your landing page load times.
Try the Unbounce Landing Page Analyzer
Difficulty: Easy / Estimated Time: 5 Minutes
Running a speed test with Google should be your top priority, but PageSpeed Insights doesn’t give results tailored to landing pages. For that, you’ll want to run your page through the Unbounce Landing Page Analyzer, which not only provides feedback on page performance but includes a bunch of advice on creating more effective campaigns and kicking your conversions into overdrive.
Unbounce’s Landing Page Analyzer provides feedback on page speed, but also actionable advice on things like SEO, message match, and mobile-friendliness.
Building Pages in Unbounce? Then you’ll definitely want to give our Landing Page Analyzer a shot. Get best-practice recommendations for conversion optimization and see how your landing pages stack up against others in your industry.
Improve Your Landing Page Speed: Easy Fixes
With your results from both Google and Unbounce, you’ll be well-equipped to move onto the actual work of making your page perform better. It’s time to pick up that hammer.
These fixes should be simple enough for anyone to tackle, regardless of their technical expertise.
Reduce Your Page Content
Difficulty: Easy / Estimated Time: 15 Minutes
We’ve marked this as an easy opportunity to increase your page speed, but it probably won’t feel like that when you start thinking about which elements on your page you can junk. Marketers love big hero shots, beautiful supporting imagery, and fun, animated explainer videos. But how much of that content is actually helping you drive conversions?
Visual content accounts for a huge portion of the size of an average web page—images account for over 20% of web page weight, as pointed out by Kinsta—and each element creates an HTTP request. That’s when your visitor’s browser pings your web server to request the files that make up the elements of your page. Too many calls can be a serious drag on your load time, so one of the simplest ways to improve your page speed is cutting down the number of elements you include.
Look at each piece of content on your page critically, then ask yourself: “Does this spark joy?” “Does this increase conversions?” If you don’t think there are pieces you can toss, try running an A/B test with a slimmed-down version of the page. The results might surprise you.
Bottom line: stick to the fundamentals of good landing page design and try to keep the number of elements (and thus HTTP requests) to a minimum.
Building Pages in Unbounce? We recommend that you keep things pretty lean, but we’d never remove content from your landing page. (Must resist… desire… to do best practices…) This is one optimization that you’ll have to tackle on your own.
Optimize Your Images
Difficulty: Easy / Estimated Time: 30 Minutes
Once you’ve trimmed some elements from your page, you’ll want to optimize the content that made the cut. Poor image optimization is the most common reason for slow page loads, especially for mobile visitors. Fortunately, it’s also one of the easiest issues to fix.
These are some quick tips for shrinking your images and improving your page speed. The goal here should be getting images at least under 800kb, but the smaller we can make them, the better.
Resize your images
It’s easy to chuck a larger image onto your page and rely on your content management system (CMS) to compress it to the appropriate size, but it’ll still be loading at least some of those extra pixels on the back end, and your visitors are going to feel it in the load. When you add an image, make sure it’s the same dimensions that your page will be rendering it.*
*This doesn’t necessarily apply to Unbounce’s retina image support—read up on that here.
Choose the right file type
Most people don’t think too much about the format of the image they’re uploading, but it can have a dramatic effect on page performance. The file types you’re probably most familiar with are JPEG and PNG—and, yes, there are differences.
JPEG is a ‘lossy’ format, which means it’ll lose some data during compression. That typically gives you a smaller file, but it can come at the expense of visual fidelity. Generally, images with significant color variation (say, photographs) perform better as JPEGs, and any dip in quality can usually go undetected.
PNG is ‘lossless,’ so the image’s appearance won’t change when resized, but it tends to make for larger files if there’s significant color variation. PNG is ideal for simple images with defined shapes, like those with text. Saving PNGs in 8-bit (rather than 24-bit, which has a broader color palette) can help shave off some extra bites.
Here are some optimization tips for JPEG and PNG (and GIF, that villain) from Google itself.
Use compression tools
Before your weigh-in, it’s good to run images through a final round of compression. There are plenty of image compression tools on WordPress, as well as some free, standalone ones like TinyPNG. These shrinky gizmos offer a simple way to cut down your image sizes without braving the cursed labyrinth that is Adobe’s export settings. (Hey, I’m a words guy.)
Your takeaways here are:
Ensure your image dimensions match how they’ll actually be displayed
Use JPEG when a slight dip in visual fidelity isn’t the end of the world (like photography), but PNG when it is (images with text and sharp lines)
Compress images to keep the file size as tiny as possible
If you want to take a deeper dive into image optimization, we recommend that you check out this post from Search Engine Land, which goes into detail on making images smaller while keeping them beautiful.
Building Pages in Unbounce? We’ve got you covered. Unbounce’s Auto Image Optimizer shrinks your images as soon as they’re uploaded so you can focus on making the best landing page possible.
Host Your Videos Elsewhere
Difficulty: Easy / Estimated Time: 30 Minutes
Why carry something yourself when you can make someone else carry it for you? That’s my motto for landing pages and life, and it’s why I’m no longer welcome on Unbounce’s company hiking trips.
Hosting videos on your own domain can be great for SEO purposes, but that’s not usually our goal with landing pages. We want everything to load in a flash and give our visitors the best chance to convert. Depending on your hosting solution, though, your videos might be slowing down your page speed, suffering from playback issues, and taking up an uncomfortable amount of server space.
Done properly, transferring videos to a third-party platform can shed some extra load time and help your pages render faster. Consider moving video content to Wistia, YouTube, or Vimeo, then using a light embed technique so that your videos only load heavier playback elements when your visitors actually click on them.
Building Pages in Unbounce? As a disclaimer: Using light embed codes with Unbounce (or any custom code, for that matter) will require some technical knowledge to implement and could, in rare cases, cause issues. Check out this Unbounce community post for more information.
Audit Your Hosting Solution
Difficulty: Easy / Estimated Time: 30 Minutes
Loading speed isn’t just determined by what’s on your landing page. Your web host also has a major influence in how quickly your page rolls out to potential customers.
There are three common models for web hosting:
Shared hosting Generally the most affordable solution, shared hosting is when your website is hosted alongside other sites on a single web server. Everyone draws from common resources (like storage space and processing power), which means—you guessed it—you need to share.
Virtual private server (VPS) hosting This is essentially a mix of both shared and dedicated hosting. With VPS, your website still shares server space with others, but you’ll have dedicated resources that no one else can dip into. The result is more power and flexibility, but it tends to come with a higher price tag.
Dedicated hosting For those who’ve had a traumatic roommate experience (who hasn’t?), dedicated hosting means your website has the server all to itself. More resources, no sharing. That’s great if you’re heavy on digital content and get a ton of traffic, but dedicated hosting is also the most expensive option and requires the technical know-how to set up and maintain your server.
Low-volume websites can generally get by with the cost-effective shared solution, but once your traffic starts to rise, you might not be getting enough juice from your web host to deliver content quickly—and that’s when load times start to suffer. (Give this post from Search Engine Journal a read for a more comprehensive explanation.)
It’s also important to note that the whereabouts of your web server can have a significant impact on your page speed. If you’re not using a content delivery network (CDN; more on this below), you’ll want to make sure that traffic from foreign countries isn’t encountering too much latency.
Think your hosting solution might be impacting your page speed? Run your site through a server speed test like this one from Bitcatcha, and use WebPageTest or Pingdom to see how your quickly your landing page loads in other countries. Depending on the results, you might decide it’s time to upgrade your hosting plan (or change web hosts altogether).
Building Pages in Unbounce? You don’t have to worry about this one—Unbounce’s global hosting solution boasts 99.95% uptime and ensures that your landing pages always have the necessary resources to load super fast.
Implement a CDN
Difficulty: Easy / Estimated Time: 30 Minutes
When your landing page gets a visitor, their web browser pings your server to get the content necessary to build out the page. Simple, right? Everyone downloads your website information from the same place, regardless of their location around the world. Well, that’s usually fine if the visitor is in or close to the country that your web server is located, but when they’re halfway around the globe, chances are they’re going to encounter some latency.
To avoid that, you should look into deploying a CDN, which caches your website across a network of data centers and proxy servers all over the planet. Say your own server is in the United States and someone from Lithuania is trying to visit your landing page. Instead of downloading your content from across the Atlantic, that visitor can pull a cached version from a server nearby.
Setting your website up with a CDN is pretty straightforward and—depending on your traffic—generally affordable. Here’s a list of some popular CDN providers from Mashable.
Building Pages in Unbounce? We’ve got five global data centers supporting the Unbounce CDN, which means your landing pages will load in a flash regardless of where they’re being accessed from.
Improve Your Landing Page Speed: Intermediate Fixes
These next speed fixes are a little trickier, but they should be manageable for marketers with a little technical know-how. Still, a mistake here could mean actual damage to your landing page.
Our recommendation? Do some research, make a backup, and—if you can—consult briefly with a developer on your team. It never hurts to have an experienced colleague to turn to if you get in over your head.
Building Pages in Unbounce? We talk a lot about WordPress through this next section. If you’re using our plugin to publish Unbounce landing pages to a WordPress domain, some of these recommended speed fixes can actually cause technical issues. Don’t hesitate to reach out to us for clarification if you’re ever unsure.
Minify HTML, CSS, and JS
Difficulty: Intermediate / Estimated Time: 15 Minutes
All those lines of HTML, CSS, and JS code that make up your landing page? They’re packed with spaces, line breaks, and other bits of formatting that make it more legible and easier for us to interpret, but each makes your load time just an eensy bit slower—and the web browsers your visitors are using to render your page don’t particularly need them.
With minification, the goal is to cut out all of that extra junk and condense your code so that browsers can read it faster. Here’s an example snippet of Javascript code from Wikipedia:
var array = []; for (var i = 0; i < 20; i++) { array[i] = i; }
After minifying, that code would look something like this:
for(var a=[i=0];++i<20;a[i]=i);
There are plenty of free online tools that will do this for your landing page, like Minify Code, as well as a bunch of WordPress plugins. Be sure to check out this post from Elegant Themes, which is an awesome resource that dives into the many options at your disposal.
Building Pages in Unbounce? Do we minify? We practically invented minifying. (Editor’s note: We did not.) Unbounce compresses all of your code automatically, making your landing page as slim as can be. No coding your pages from scratch and no minifying that code in the background? We’re making this too easy for you.
Enable Browser Caching
Difficulty: Intermediate / Estimated Time: 15 Minutes
The goal with any landing page should be getting prospects to convert the first time they visit, but the reality is that not everyone will. Sometimes, visitors will need some time to think about it: they’ll bounce, do more research, check out some competitors, then come back to your original offer. Browser caching ensures that when they return, your page will load even faster—and that’ll make them more likely to convert.
Not sure if you’ve already got caching enabled? Before you start, run a quick caching check using a tool like this one from GiftOfSpeed.
If your site is built on WordPress, enabling caching is as easy as adding a plugin.* (WordPress is almost too easy, huh?) Check out this list of caching plugins, most of which include quick instructions for getting set up.
*If you’re publishing Unbounce pages to a WordPress domain, these caching recommendations could create big problems. Check with us first.
For those not on WordPress, enabling browser caching on your own is pretty simple if you’re willing to get your hands dirty. For example, on Apache web servers, it comes down to inserting a little bit of code into the .htaccess file on your web host or server: <IfModule mod_expires.c> ExpiresActive On ExpiresByType image/jpg “access 1 year” ExpiresByType image/jpeg “access 1 year” ExpiresByType image/gif “access 1 year” ExpiresByType image/png “access 1 year” ExpiresByType text/css “access 1 month” ExpiresByType text/html “access 1 month” ExpiresByType application/pdf “access 1 month” ExpiresByType text/x-javascript “access 1 month” ExpiresByType application/x-shockwave-flash “access 1 month” ExpiresByType image/x-icon “access 1 year” ExpiresDefault “access 1 month” </IfModule>
This article from Varvy provides a great how-to, as does this one from WinningWP (which discusses enabling browser caching from a WordPress perspective but is applicable more broadly).
If all of this makes you nervous, there’s likely a simpler method for you to set up browser caching. Most web hosts will enable caching for you if you ask. Depending on your hosting solution, it might be as easy as making a phone call. (Although, now that I think about it, that might be more daunting for some of us.)
Building Pages in Unbounce? Seven-day browser caching is enabled on all Unbounce-built landing pages, so this is a speed fix you can comfortably skip. Maybe use this free time to treat yourself to some self-care? You’ve earned it.
Set Up GZIP Compression
Difficulty: Intermediate / Estimated Time: 15 Minutes
When a visitor reaches your landing page, their browser pings your web server to request the files that make up the page and the server transmits them back. Naturally, that process moves faster if the information being sent is compressed to be as small as possible. Here’s where GZIP compression comes in.
(You’ll want to check to see if GZIP compression is already enabled before you get started.)
As with browser caching, the difficulty of setting up GZIP compression is going to be determined by how your website was built. If you use WordPress, you’re in luck: many WordPress plugins will enable GZIP compression for you almost automatically. If you don’t use WordPress, well, we’re headed back into your server.
This article from GTmetrix provides a quick overview of the importance of GZIP compression and how to enable it. With Apache web servers, you’ll need to add this chunk of code to your .htaccess file. <IfModule mod_deflate.c> # Compress HTML, CSS, JavaScript, Text, XML and fonts AddOutputFilterByType DEFLATE application/javascript AddOutputFilterByType DEFLATE application/rss+xml AddOutputFilterByType DEFLATE application/vnd.ms-fontobject AddOutputFilterByType DEFLATE application/x-font AddOutputFilterByType DEFLATE application/x-font-opentype AddOutputFilterByType DEFLATE application/x-font-otf AddOutputFilterByType DEFLATE application/x-font-truetype AddOutputFilterByType DEFLATE application/x-font-ttf AddOutputFilterByType DEFLATE application/x-javascript AddOutputFilterByType DEFLATE application/xhtml+xml AddOutputFilterByType DEFLATE application/xml AddOutputFilterByType DEFLATE font/opentype AddOutputFilterByType DEFLATE font/otf AddOutputFilterByType DEFLATE font/ttf AddOutputFilterByType DEFLATE image/svg+xml AddOutputFilterByType DEFLATE image/x-icon AddOutputFilterByType DEFLATE text/css AddOutputFilterByType DEFLATE text/html AddOutputFilterByType DEFLATE text/javascript AddOutputFilterByType DEFLATE text/plain AddOutputFilterByType DEFLATE text/xml
# Remove browser bugs (only needed for really old browsers) BrowserMatch ^Mozilla/4 gzip-only-text/html BrowserMatch ^Mozilla/4\.0[678] no-gzip BrowserMatch \bMSIE !no-gzip !gzip-only-text/html Header append Vary User-Agent </IfModule>
And again, if this is beyond your comfort zone, your web host will probably help you set up GZIP compression if you ask nicely.
Building Pages in Unbounce? You don’t have to ask us nicely, because we’ve already done it. All Unbounce landing pages are automatically compressed during data transfer. (But be nice to us anyway, alright?)
Kill Needless Scripts and Plugins
Difficulty: Intermediate / Estimated Time: 30 Minutes
WordPress is wonderful in its simplicity. As we’ve seen throughout this article, page speed fixes that might require a front-end developer on a static website can often be achieved by simply installing a WordPress plugin. Want to enable browser caching? Boom, W3 Total Cache.* Need to minify your scripts? Pow, Autoptomize.* Developer, shmeveloper.
But because it’s so easy to add functionality through plugins, WordPress websites have a habit of collecting a lot of them—along with all the of the bits and bites of code that make them work. Those add up.
Take a look at the scripts and plugins you’ve added to your website and decide whether they’re essential to your visitor experience. If they’re not, junking them could help cut some extra seconds off of your load time. (And guess what? There’s a plugin for that.) You can also disable plugins one at a time, then retest your page speed to determine which ones are problematic.
*If you’re publishing Unbounce pages to a WordPress domain, these plugins in particular might start a fire.
Building Pages in Unbounce? This is more of WordPress fix, but it also applies to Unbounce customers that have inserted a bunch of custom scripts onto their landing pages. Learn how the Unbounce Script Manager helps you keep things tidy.
Convert Images to Sprites
Difficulty: Intermediate / Estimated Time: 30 Minutes
If your landing page includes a series of similar-sized images (say, for a client logo bar), you can shorten your load time by combining them into an image sprite, then use CSS to display specific chunks of that sprite at a time. This post from WebFX provides a great step-by-step guide for creating CSS sprites.
Joining smaller images into a larger file might seem counterintuitive, but again, the idea here is to reduce the number of HTTP requests on your page and ultimately make it faster. Each individual image requires its own call—combining images into a single CSS sprite means your page only needs to make one.
Building Pages in Unbounce? We don’t build CSS sprites for you, but you can certainly use them on your Unbounce-built landing pages. Check out our documentation on custom JS and CSS with Unbounce.
Improve Your Landing Page Speed: Hard Fixes
We’re into the scary stuff now.
These are fixes you should absolutely not attempt unless you know what you’re doing or you’ve consulted extensively with a front-end developer. (We even had one of the Unbounce devs fact-check this article, and we’ve never felt smaller.) Proceed with caution.
Remove Render-Blocking JS and CSS
Difficulty: Hard / Estimated Time: 45 Minutes
Those CSS and JS scripts that make your landing page beautiful and enable cool, dynamic functionality? They could be one of the major reasons that your page is loading so slowly. (Bad news for my flashing, neon visitor counter.)
When a web browser runs into CSS or JS in the head of your document, it’ll wait to download and process that content before continuing to render your page’s HTML. That might sound like a good thing from a user experience perspective—after all, we want people to see our landing page as it was intended—but it actually means that visitors can be left waiting on a blank screen while everything loads in the background.
To avoid this, we need to implement techniques for preventing render-blocking CSS and JS on our landing page. (Refer back to your Google PageSpeed Insights results to check if any scripts are slowing down your page load.)
Reduce render-blocking CSS
There are a couple of ways that we can neutralize render-blocking CSS. One option is to defer all CSS until after the HTML has loaded. That’ll certainly improve page speed, but it will also present non-styled content when the visitor first reaches our page. Not ideal.
The other, more preferable option is to defer most style rules until the HTML has been rendered, but inline the CSS necessary to correctly display content above the fold within the HTML. That way, visitors will see the properly-styled content as soon as they hit the page while the rest will load out of view. Pretty sneaky. This is a great tutorial using a real-life example from codeburst.io.
Another page speed opportunity for you here is combining your CSS files. By moving your style rules from several files to just one (or maybe two, tops), you can reduce the number of times that visitors need to ping your web server and improve your landing page load time. Here’s a good resource from GiftOfSpeed on combining and compressing you CSS scripts.
Eliminate render-blocking JS
Like CSS, JS scripts can prevent your landing page from rendering as quickly as you might like. We can avoid that by deploying the defer and async attributes. The former tells the browser to wait until your HTML is rendered before it begins pulling in JS scripts, while the latter asks that JS be downloaded simultaneously without interrupting the HTML download.
An important note is that not all JS scripts are equal: some are critical to the rendering of your page and need to be addressed right out of the gate, so they’ll have to stay at the top. Dareboost does a good job of explaining how to distinguish between critical and non-critical JS, as well as how to implement deferred and asynchronous loading.
Building Pages in Unbounce? Unbounce optimizes for most Google PageSpeed Insights recommendations, including the removal of render-blocking elements. That means you can skip this one.
Start Hand-Coding with AMP
Difficulty: Very Hard / Estimated Time: ∞ Hours
Alright, “∞ hours” is an overstatement, but implementing AMP is no small task. Developed by Google, the AMP project is an entirely new framework with which to build your web pages. The goal? Dramatically improve page speed, especially for mobile users.
AMP is made up of three core components: AMP HTML, AMP JS, and AMP Cache. That means you’ll need to learn new markup, as well as understand the framework well enough to get your landing pages validated and make sure they actually work.
We won’t get into the nitty-gritty of building with AMP here, but the AMP website has a bunch of resources (including tutorials) to help you get started.
Building Pages in Unbounce? No hand-coding AMP pages for you—Unbounce makes it easy to drag and drop together AMP experiences. Choose one of our AMP-optimized templates, load your content, get validated, and start publishing lightning-fast landing pages right away.
Improving your landing page speed can sound intimidating, but even small tweaks will make a big difference for your load times. Tackle the easy stuff first, then move onto more challenging fixes as you get comfortable. And above all, keep testing: seeing your improved speed results after each undertaking will give you the confidence and motivation to move forward.
Or, you know, just build with Unbounce. We automatically handle most of the speed fixes listed (or at least makes them super easy), which saves a ton of time. That means you can focus on what matters: getting more conversions and improving ROI.
Increase Your Landing Page Speed (By Stealing Our Homework) published first on http://nickpontemktg.blogspot.com/
0 notes
Text
Increase Your Landing Page Speed (By Stealing Our Homework)
If you’ve read Unbounce’s 2019 Page Speed Report (and you really should), then you already know why speed is so important this year. Slow-loading landing pages have always been an obstacle to higher conversions, and now Google is punishing poor mobile load times in its search rankings. To be successful in 2019, we—marketers—need to be thinking fast. But are we?
To find out, we polled almost 400 marketers on their attitudes around page speed and asked what (if anything) they were doing to get faster.
Just 56% of marketers are happy with their mobile load times, according to the 2019 Page Speed Report.
Almost three of every four respondents said they had taken steps to improve their page speeds over the last year, and that’s pretty good. Alarmingly, though, only half of marketers we surveyed are satisfied with their load times on mobile.
So most marketers are trying to get faster, but many aren’t where they want to be. Which begs the question: what are people doing to speed up their landing page load times?
Computer, enhance!
Only 39% of marketers have bothered to find out how fast their pages are actually loading. Not great.
Here, we start to see why marketers are somewhat pessimistic about their page speed progress. Just over half have optimized their landing page images—ostensibly one of the simplest ways to speed up your load times—and even fewer have done any of the real technical-sounding things they need to get faster. (I mean, fair, they sound pretty boring to us, too.)
Here’s a doozy, though: just one in three marketers have run a website speed test to find out whether their load times are impacting their conversions. That’s the easiest one!
And hey, we get it. Marketers are being asked to do more than ever before, often with fewer resources. If you’re a small team (or a single person, the smallest of the teams), you might feel you don’t have the time or expertise to meaningfully improve your page speed.
But I’ve gone and done the hard work for you—me, a film school graduate who, until recently, believed that his Apple computer was impervious to viruses. (Hoo boy, it is not.) I’ve spent hours talking to Unbounce developers, reading how-to guides, and generally just bombarding my brain with the most dull, technical page speed information I could get ahold of. (Apologies to said developers.) And if I can get my head around it, there’s no excuse for the rest of you.
Below, I’ve simplified some of the most effective ways to increase your landing page loading times in a guide. For each fix, I’ve indicated the technical difficulty and the estimated time it’ll take, so you know exactly what you’re getting yourself in to. Use the table of contents below to jump to what’s relevant to you, or go ahead and do it all in order.
Jump to a Landing Page Speed Fix
How to Check Your Landing Page Speed
Run a Google Speed Test (5 Minutes)
Try the Unbounce Landing Page Analyzer (5 Minutes)
Improve Your Landing Page Speed: Easy Fixes
Reduce Your Page Content (15 Minutes)
Optimize Your Images (30 Minutes)
Host Your Videos Elsewhere (30 Minutes)
Audit Your Hosting Solution (30 Minutes)
Implement a CDN (30 Minutes)
Improve Your Landing Page Speed: Intermediate Fixes
Minify HTML, JS, and CSS (15 Minutes)
Enable Browser Caching (15 Minutes)
Set Up GZIP Compression (15 Minutes)
Kill Needless Scripts and Plugins (30 Minutes)
Convert Images to Sprites (30 Minutes)
Improve Your Landing Page Speed: Hard Fixes
Remove Render-Blocking JS and CSS (45 Minutes)
Start Hand-Coding with AMP
Final note: If you’ve built your page with Unbounce, you can skip a lot of this stuff—we make many speed fixes on the back-end automatically. In this post, look for the ‘Building Pages in Unbounce?‘ callout boxes to see if a given fix is something you need to implement.
Look for these callout boxes throughout this post to get Unbounce-specific tips and learn how we automatically optimize your landing pages to make them load super fast.
How to Check Your Landing Page Speed
First things first.
Before you throw on your hard hat and start hitting things with a hammer (both figuratively and literally), it’s important to have some idea of what’s working—and what’s not—on your landing page. That means running a speed audit.
It’s important to point out that, regardless of which speed test you use, you don’t want to get too hung up on your score. Achieving a perfect score is not always technically possible (and it might not even be desirable). Instead, use your results as a general guideline to improve page speed and implement the fixes that make sense for you.
Okay—let’s test them pages.
Run a Google Speed Test
Difficulty: Easy / Estimated Time: 5 Minutes
There are a bunch of great tools for testing your page speed, but why not start with the big dog itself? Google’s PageSpeed Insights is an awesome way to do a quick performance check-up with at-a-glance recommendations. (Ryan Engley, Unbounce’s VP of Product Marketing, explains how to interpret and act on your PageSpeed Insights results in this must-read blog post.) Then there’s Lighthouse, a newer tool from Google that provides a comprehensive analysis of your how your page presents to end users.
You’ll also want to run your page through Google’s Test My Site tool, which will check your speed from a mobile perspective.
Clicking on individual results in PageSpeed Insights will reveal your problematic page elements.
Running a Google speed test should only take a couple of minutes, and the results will help you identify some of the top opportunities to boost your landing page load times.
Try the Unbounce Landing Page Analyzer
Difficulty: Easy / Estimated Time: 5 Minutes
Running a speed test with Google should be your top priority, but PageSpeed Insights doesn’t give results tailored to landing pages. For that, you’ll want to run your page through the Unbounce Landing Page Analyzer, which not only provides feedback on page performance but includes a bunch of advice on creating more effective campaigns and kicking your conversions into overdrive.
Unbounce’s Landing Page Analyzer provides feedback on page speed, but also actionable advice on things like SEO, message match, and mobile-friendliness.
Building Pages in Unbounce? Then you’ll definitely want to give our Landing Page Analyzer a shot. Get best-practice recommendations for conversion optimization and see how your landing pages stack up against others in your industry.
Improve Your Landing Page Speed: Easy Fixes
With your results from both Google and Unbounce, you’ll be well-equipped to move onto the actual work of making your page perform better. It’s time to pick up that hammer.
These fixes should be simple enough for anyone to tackle, regardless of their technical expertise.
Reduce Your Page Content
Difficulty: Easy / Estimated Time: 15 Minutes
We’ve marked this as an easy opportunity to increase your page speed, but it probably won’t feel like that when you start thinking about which elements on your page you can junk. Marketers love big hero shots, beautiful supporting imagery, and fun, animated explainer videos. But how much of that content is actually helping you drive conversions?
Visual content accounts for a huge portion of the size of an average web page—images account for over 20% of web page weight, as pointed out by Kinsta—and each element creates an HTTP request. That’s when your visitor’s browser pings your web server to request the files that make up the elements of your page. Too many calls can be a serious drag on your load time, so one of the simplest ways to improve your page speed is cutting down the number of elements you include.
Look at each piece of content on your page critically, then ask yourself: “Does this spark joy?” “Does this increase conversions?” If you don’t think there are pieces you can toss, try running an A/B test with a slimmed-down version of the page. The results might surprise you.
Bottom line: stick to the fundamentals of good landing page design and try to keep the number of elements (and thus HTTP requests) to a minimum.
Building Pages in Unbounce? We recommend that you keep things pretty lean, but we’d never remove content from your landing page. (Must resist… desire… to do best practices…) This is one optimization that you’ll have to tackle on your own.
Optimize Your Images
Difficulty: Easy / Estimated Time: 30 Minutes
Once you’ve trimmed some elements from your page, you’ll want to optimize the content that made the cut. Poor image optimization is the most common reason for slow page loads, especially for mobile visitors. Fortunately, it’s also one of the easiest issues to fix.
These are some quick tips for shrinking your images and improving your page speed. The goal here should be getting images at least under 800kb, but the smaller we can make them, the better.
Resize your images
It’s easy to chuck a larger image onto your page and rely on your content management system (CMS) to compress it to the appropriate size, but it’ll still be loading at least some of those extra pixels on the back end, and your visitors are going to feel it in the load. When you add an image, make sure it’s the same dimensions that your page will be rendering it.*
*This doesn’t necessarily apply to Unbounce’s retina image support—read up on that here.
Choose the right file type
Most people don’t think too much about the format of the image they’re uploading, but it can have a dramatic effect on page performance. The file types you’re probably most familiar with are JPEG and PNG—and, yes, there are differences.
JPEG is a ‘lossy’ format, which means it’ll lose some data during compression. That typically gives you a smaller file, but it can come at the expense of visual fidelity. Generally, images with significant color variation (say, photographs) perform better as JPEGs, and any dip in quality can usually go undetected.
PNG is ‘lossless,’ so the image’s appearance won’t change when resized, but it tends to make for larger files if there’s significant color variation. PNG is ideal for simple images with defined shapes, like those with text. Saving PNGs in 8-bit (rather than 24-bit, which has a broader color palette) can help shave off some extra bites.
Here are some optimization tips for JPEG and PNG (and GIF, that villain) from Google itself.
Use compression tools
Before your weigh-in, it’s good to run images through a final round of compression. There are plenty of image compression tools on WordPress, as well as some free, standalone ones like TinyPNG. These shrinky gizmos offer a simple way to cut down your image sizes without braving the cursed labyrinth that is Adobe’s export settings. (Hey, I’m a words guy.)
Your takeaways here are:
Ensure your image dimensions match how they’ll actually be displayed
Use JPEG when a slight dip in visual fidelity isn’t the end of the world (like photography), but PNG when it is (images with text and sharp lines)
Compress images to keep the file size as tiny as possible
If you want to take a deeper dive into image optimization, we recommend that you check out this post from Search Engine Land, which goes into detail on making images smaller while keeping them beautiful.
Building Pages in Unbounce? We’ve got you covered. Unbounce’s Auto Image Optimizer shrinks your images as soon as they’re uploaded so you can focus on making the best landing page possible.
Host Your Videos Elsewhere
Difficulty: Easy / Estimated Time: 30 Minutes
Why carry something yourself when you can make someone else carry it for you? That’s my motto for landing pages and life, and it’s why I’m no longer welcome on Unbounce’s company hiking trips.
Hosting videos on your own domain can be great for SEO purposes, but that’s not usually our goal with landing pages. We want everything to load in a flash and give our visitors the best chance to convert. Depending on your hosting solution, though, your videos might be slowing down your page speed, suffering from playback issues, and taking up an uncomfortable amount of server space.
Done properly, transferring videos to a third-party platform can shed some extra load time and help your pages render faster. Consider moving video content to Wistia, YouTube, or Vimeo, then using a light embed technique so that your videos only load heavier playback elements when your visitors actually click on them.
Building Pages in Unbounce? As a disclaimer: Using light embed codes with Unbounce (or any custom code, for that matter) will require some technical knowledge to implement and could, in rare cases, cause issues. Check out this Unbounce community post for more information.
Audit Your Hosting Solution
Difficulty: Easy / Estimated Time: 30 Minutes
Loading speed isn’t just determined by what’s on your landing page. Your web host also has a major influence in how quickly your page rolls out to potential customers.
There are three common models for web hosting:
Shared hosting Generally the most affordable solution, shared hosting is when your website is hosted alongside other sites on a single web server. Everyone draws from common resources (like storage space and processing power), which means—you guessed it—you need to share.
Virtual private server (VPS) hosting This is essentially a mix of both shared and dedicated hosting. With VPS, your website still shares server space with others, but you’ll have dedicated resources that no one else can dip into. The result is more power and flexibility, but it tends to come with a higher price tag.
Dedicated hosting For those who’ve had a traumatic roommate experience (who hasn’t?), dedicated hosting means your website has the server all to itself. More resources, no sharing. That’s great if you’re heavy on digital content and get a ton of traffic, but dedicated hosting is also the most expensive option and requires the technical know-how to set up and maintain your server.
Low-volume websites can generally get by with the cost-effective shared solution, but once your traffic starts to rise, you might not be getting enough juice from your web host to deliver content quickly—and that’s when load times start to suffer. (Give this post from Search Engine Journal a read for a more comprehensive explanation.)
It’s also important to note that the whereabouts of your web server can have a significant impact on your page speed. If you’re not using a content delivery network (CDN; more on this below), you’ll want to make sure that traffic from foreign countries isn’t encountering too much latency.
Think your hosting solution might be impacting your page speed? Run your site through a server speed test like this one from Bitcatcha, and use WebPageTest or Pingdom to see how your quickly your landing page loads in other countries. Depending on the results, you might decide it’s time to upgrade your hosting plan (or change web hosts altogether).
Building Pages in Unbounce? You don’t have to worry about this one—Unbounce’s global hosting solution boasts 99.95% uptime and ensures that your landing pages always have the necessary resources to load super fast.
Implement a CDN
Difficulty: Easy / Estimated Time: 30 Minutes
When your landing page gets a visitor, their web browser pings your server to get the content necessary to build out the page. Simple, right? Everyone downloads your website information from the same place, regardless of their location around the world. Well, that’s usually fine if the visitor is in or close to the country that your web server is located, but when they’re halfway around the globe, chances are they’re going to encounter some latency.
To avoid that, you should look into deploying a CDN, which caches your website across a network of data centers and proxy servers all over the planet. Say your own server is in the United States and someone from Lithuania is trying to visit your landing page. Instead of downloading your content from across the Atlantic, that visitor can pull a cached version from a server nearby.
Setting your website up with a CDN is pretty straightforward and—depending on your traffic—generally affordable. Here’s a list of some popular CDN providers from Mashable.
Building Pages in Unbounce? We’ve got five global data centers supporting the Unbounce CDN, which means your landing pages will load in a flash regardless of where they’re being accessed from.
Improve Your Landing Page Speed: Intermediate Fixes
These next speed fixes are a little trickier, but they should be manageable for marketers with a little technical know-how. Still, a mistake here could mean actual damage to your landing page.
Our recommendation? Do some research, make a backup, and—if you can—consult briefly with a developer on your team. It never hurts to have an experienced colleague to turn to if you get in over your head.
Building Pages in Unbounce? We talk a lot about WordPress through this next section. If you’re using our plugin to publish Unbounce landing pages to a WordPress domain, some of these recommended speed fixes can actually cause technical issues. Don’t hesitate to reach out to us for clarification if you’re ever unsure.
Minify HTML, CSS, and JS
Difficulty: Intermediate / Estimated Time: 15 Minutes
All those lines of HTML, CSS, and JS code that make up your landing page? They’re packed with spaces, line breaks, and other bits of formatting that make it more legible and easier for us to interpret, but each makes your load time just an eensy bit slower—and the web browsers your visitors are using to render your page don’t particularly need them.
With minification, the goal is to cut out all of that extra junk and condense your code so that browsers can read it faster. Here’s an example snippet of Javascript code from Wikipedia:
var array = []; for (var i = 0; i < 20; i++) { array[i] = i; }
After minifying, that code would look something like this:
for(var a=[i=0];++i<20;a[i]=i);
There are plenty of free online tools that will do this for your landing page, like Minify Code, as well as a bunch of WordPress plugins. Be sure to check out this post from Elegant Themes, which is an awesome resource that dives into the many options at your disposal.
Building Pages in Unbounce? Do we minify? We practically invented minifying. (Editor’s note: We did not.) Unbounce compresses all of your code automatically, making your landing page as slim as can be. No coding your pages from scratch and no minifying that code in the background? We’re making this too easy for you.
Enable Browser Caching
Difficulty: Intermediate / Estimated Time: 15 Minutes
The goal with any landing page should be getting prospects to convert the first time they visit, but the reality is that not everyone will. Sometimes, visitors will need some time to think about it: they’ll bounce, do more research, check out some competitors, then come back to your original offer. Browser caching ensures that when they return, your page will load even faster—and that’ll make them more likely to convert.
Not sure if you’ve already got caching enabled? Before you start, run a quick caching check using a tool like this one from GiftOfSpeed.
If your site is built on WordPress, enabling caching is as easy as adding a plugin.* (WordPress is almost too easy, huh?) Check out this list of caching plugins, most of which include quick instructions for getting set up.
*If you’re publishing Unbounce pages to a WordPress domain, these caching recommendations could create big problems. Check with us first.
For those not on WordPress, enabling browser caching on your own is pretty simple if you’re willing to get your hands dirty. For example, on Apache web servers, it comes down to inserting a little bit of code into the .htaccess file on your web host or server: <IfModule mod_expires.c> ExpiresActive On ExpiresByType image/jpg “access 1 year” ExpiresByType image/jpeg “access 1 year” ExpiresByType image/gif “access 1 year” ExpiresByType image/png “access 1 year” ExpiresByType text/css “access 1 month” ExpiresByType text/html “access 1 month” ExpiresByType application/pdf “access 1 month” ExpiresByType text/x-javascript “access 1 month” ExpiresByType application/x-shockwave-flash “access 1 month” ExpiresByType image/x-icon “access 1 year” ExpiresDefault “access 1 month” </IfModule>
This article from Varvy provides a great how-to, as does this one from WinningWP (which discusses enabling browser caching from a WordPress perspective but is applicable more broadly).
If all of this makes you nervous, there’s likely a simpler method for you to set up browser caching. Most web hosts will enable caching for you if you ask. Depending on your hosting solution, it might be as easy as making a phone call. (Although, now that I think about it, that might be more daunting for some of us.)
Building Pages in Unbounce? Seven-day browser caching is enabled on all Unbounce-built landing pages, so this is a speed fix you can comfortably skip. Maybe use this free time to treat yourself to some self-care? You’ve earned it.
Set Up GZIP Compression
Difficulty: Intermediate / Estimated Time: 15 Minutes
When a visitor reaches your landing page, their browser pings your web server to request the files that make up the page and the server transmits them back. Naturally, that process moves faster if the information being sent is compressed to be as small as possible. Here’s where GZIP compression comes in.
(You’ll want to check to see if GZIP compression is already enabled before you get started.)
As with browser caching, the difficulty of setting up GZIP compression is going to be determined by how your website was built. If you use WordPress, you’re in luck: many WordPress plugins will enable GZIP compression for you almost automatically. If you don’t use WordPress, well, we’re headed back into your server.
This article from GTmetrix provides a quick overview of the importance of GZIP compression and how to enable it. With Apache web servers, you’ll need to add this chunk of code to your .htaccess file. <IfModule mod_deflate.c> # Compress HTML, CSS, JavaScript, Text, XML and fonts AddOutputFilterByType DEFLATE application/javascript AddOutputFilterByType DEFLATE application/rss+xml AddOutputFilterByType DEFLATE application/vnd.ms-fontobject AddOutputFilterByType DEFLATE application/x-font AddOutputFilterByType DEFLATE application/x-font-opentype AddOutputFilterByType DEFLATE application/x-font-otf AddOutputFilterByType DEFLATE application/x-font-truetype AddOutputFilterByType DEFLATE application/x-font-ttf AddOutputFilterByType DEFLATE application/x-javascript AddOutputFilterByType DEFLATE application/xhtml+xml AddOutputFilterByType DEFLATE application/xml AddOutputFilterByType DEFLATE font/opentype AddOutputFilterByType DEFLATE font/otf AddOutputFilterByType DEFLATE font/ttf AddOutputFilterByType DEFLATE image/svg+xml AddOutputFilterByType DEFLATE image/x-icon AddOutputFilterByType DEFLATE text/css AddOutputFilterByType DEFLATE text/html AddOutputFilterByType DEFLATE text/javascript AddOutputFilterByType DEFLATE text/plain AddOutputFilterByType DEFLATE text/xml
# Remove browser bugs (only needed for really old browsers) BrowserMatch ^Mozilla/4 gzip-only-text/html BrowserMatch ^Mozilla/4\.0[678] no-gzip BrowserMatch \bMSIE !no-gzip !gzip-only-text/html Header append Vary User-Agent </IfModule>
And again, if this is beyond your comfort zone, your web host will probably help you set up GZIP compression if you ask nicely.
Building Pages in Unbounce? You don’t have to ask us nicely, because we’ve already done it. All Unbounce landing pages are automatically compressed during data transfer. (But be nice to us anyway, alright?)
Kill Needless Scripts and Plugins
Difficulty: Intermediate / Estimated Time: 30 Minutes
WordPress is wonderful in its simplicity. As we’ve seen throughout this article, page speed fixes that might require a front-end developer on a static website can often be achieved by simply installing a WordPress plugin. Want to enable browser caching? Boom, W3 Total Cache.* Need to minify your scripts? Pow, Autoptomize.* Developer, shmeveloper.
But because it’s so easy to add functionality through plugins, WordPress websites have a habit of collecting a lot of them—along with all the of the bits and bites of code that make them work. Those add up.
Take a look at the scripts and plugins you’ve added to your website and decide whether they’re essential to your visitor experience. If they’re not, junking them could help cut some extra seconds off of your load time. (And guess what? There’s a plugin for that.) You can also disable plugins one at a time, then retest your page speed to determine which ones are problematic.
*If you’re publishing Unbounce pages to a WordPress domain, these plugins in particular might start a fire.
Building Pages in Unbounce? This is more of WordPress fix, but it also applies to Unbounce customers that have inserted a bunch of custom scripts onto their landing pages. Learn how the Unbounce Script Manager helps you keep things tidy.
Convert Images to Sprites
Difficulty: Intermediate / Estimated Time: 30 Minutes
If your landing page includes a series of similar-sized images (say, for a client logo bar), you can shorten your load time by combining them into an image sprite, then use CSS to display specific chunks of that sprite at a time. This post from WebFX provides a great step-by-step guide for creating CSS sprites.
Joining smaller images into a larger file might seem counterintuitive, but again, the idea here is to reduce the number of HTTP requests on your page and ultimately make it faster. Each individual image requires its own call—combining images into a single CSS sprite means your page only needs to make one.
Building Pages in Unbounce? We don’t build CSS sprites for you, but you can certainly use them on your Unbounce-built landing pages. Check out our documentation on custom JS and CSS with Unbounce.
Improve Your Landing Page Speed: Hard Fixes
We’re into the scary stuff now.
These are fixes you should absolutely not attempt unless you know what you’re doing or you’ve consulted extensively with a front-end developer. (We even had one of the Unbounce devs fact-check this article, and we’ve never felt smaller.) Proceed with caution.
Remove Render-Blocking JS and CSS
Difficulty: Hard / Estimated Time: 45 Minutes
Those CSS and JS scripts that make your landing page beautiful and enable cool, dynamic functionality? They could be one of the major reasons that your page is loading so slowly. (Bad news for my flashing, neon visitor counter.)
When a web browser runs into CSS or JS in the head of your document, it’ll wait to download and process that content before continuing to render your page’s HTML. That might sound like a good thing from a user experience perspective—after all, we want people to see our landing page as it was intended—but it actually means that visitors can be left waiting on a blank screen while everything loads in the background.
To avoid this, we need to implement techniques for preventing render-blocking CSS and JS on our landing page. (Refer back to your Google PageSpeed Insights results to check if any scripts are slowing down your page load.)
Reduce render-blocking CSS
There are a couple of ways that we can neutralize render-blocking CSS. One option is to defer all CSS until after the HTML has loaded. That’ll certainly improve page speed, but it will also present non-styled content when the visitor first reaches our page. Not ideal.
The other, more preferable option is to defer most style rules until the HTML has been rendered, but inline the CSS necessary to correctly display content above the fold within the HTML. That way, visitors will see the properly-styled content as soon as they hit the page while the rest will load out of view. Pretty sneaky. This is a great tutorial using a real-life example from codeburst.io.
Another page speed opportunity for you here is combining your CSS files. By moving your style rules from several files to just one (or maybe two, tops), you can reduce the number of times that visitors need to ping your web server and improve your landing page load time. Here’s a good resource from GiftOfSpeed on combining and compressing you CSS scripts.
Eliminate render-blocking JS
Like CSS, JS scripts can prevent your landing page from rendering as quickly as you might like. We can avoid that by deploying the defer and async attributes. The former tells the browser to wait until your HTML is rendered before it begins pulling in JS scripts, while the latter asks that JS be downloaded simultaneously without interrupting the HTML download.
An important note is that not all JS scripts are equal: some are critical to the rendering of your page and need to be addressed right out of the gate, so they’ll have to stay at the top. Dareboost does a good job of explaining how to distinguish between critical and non-critical JS, as well as how to implement deferred and asynchronous loading.
Building Pages in Unbounce? Unbounce optimizes for most Google PageSpeed Insights recommendations, including the removal of render-blocking elements. That means you can skip this one.
Start Hand-Coding with AMP
Difficulty: Very Hard / Estimated Time: ∞ Hours
Alright, “∞ hours” is an overstatement, but implementing AMP is no small task. Developed by Google, the AMP project is an entirely new framework with which to build your web pages. The goal? Dramatically improve page speed, especially for mobile users.
AMP is made up of three core components: AMP HTML, AMP JS, and AMP Cache. That means you’ll need to learn new markup, as well as understand the framework well enough to get your landing pages validated and make sure they actually work.
We won’t get into the nitty-gritty of building with AMP here, but the AMP website has a bunch of resources (including tutorials) to help you get started.
Building Pages in Unbounce? No hand-coding AMP pages for you—Unbounce makes it easy to drag and drop together AMP experiences. Choose one of our AMP-optimized templates, load your content, get validated, and start publishing lightning-fast landing pages right away.
Improving your landing page speed can sound intimidating, but even small tweaks will make a big difference for your load times. Tackle the easy stuff first, then move onto more challenging fixes as you get comfortable. And above all, keep testing: seeing your improved speed results after each undertaking will give you the confidence and motivation to move forward.
Or, you know, just build with Unbounce. We automatically handle most of the speed fixes listed (or at least makes them super easy), which saves a ton of time. That means you can focus on what matters: getting more conversions and improving ROI.
0 notes