#zero reference used oops lol maybe next time then
Explore tagged Tumblr posts
Visit Tumblr Blog
Explore Tumblr blogs with no restrictions, modern design and the best experience.
Last Seen Tumblr Blogs


Fun Fact
When “GIF” was named word of the year in 2012, Oxford Dictionaries U.S.A. credited Tumblr for pushing the word.
Text
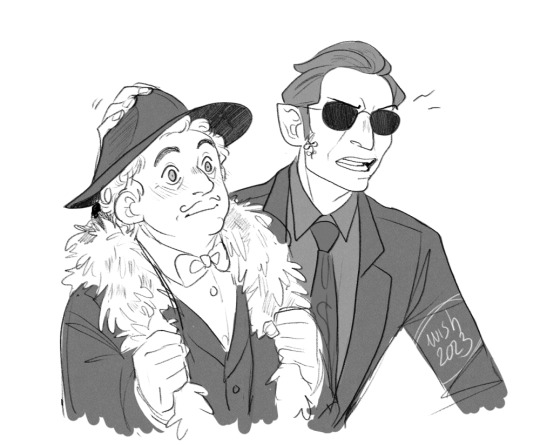
I won a battle against art and anatomy, so I decided to doodle something real quickly as a treat!
Show gives me props to use to make cute little moments? Yes please and thank you.
#my art#sketchy sketch#good omens#aziraphale#anthony j crowley#azicrow#inaffable husbands#again trying a new brush and it inspired me to art more now#made lot of oc stuff too#season 2 was full of fanfic tropes so I just had to add the puts hat/jacket on partner thing idk here u go#zero reference used oops lol maybe next time then#now I sleep#next hurdle: coloring
1K notes
·
View notes
Text
notes from editing the papers to be more readable (part 2) hoverbike diagram edition ~
main plan for this one was: instead of trying to duplicate details, i could scrape-scrape-scrape out the negative space around details onto a clearer background and go from there! this took a while here's the results of that work w/o my notes over top ...

(note that this process wasn't any more perfect than the tracing method - there's a lot of interpretation and guessing to both with the condition of this image)
ok! let's get into this >v< stuff i found will be bolded and green'd for readability

first thing i dug up was the readable text in the upper left. i think it's safe to assume that the first word is "Hover," given. :) hoverbike. but the second one isn't as clear. after a few tries tracing it i came up with the final phrase, "Hover Complete," which sounds so sososo cool. reminds me of Turing complete?? maybe when you make vehicles that can levitate over any surface that's a standard piece of jargon lol. i don't think the two lines after that are readable.


next is the arrow pointing at the vehicle with the two words near it. at first i agreed with the "Power Core" assessment bc it's such a common term... but when i was trying to dig that up i just couldn't find the forms of those letters?? there's also some SUPER-distinct spikes and curves of an m in that last letter. it could still be Power written super fast, but idk. so, with the obvious P, that turns into "P-m Core" i- instantly loved this phrase too- xd it would kill as a scifi term. i couldn't come up with anything irl for it except for some VERY specific electronic components (way over my head) (& extremely hard to google). apparently, something called a PM core (Pot core Module) is used in telecommunications and industrial electronics (source: this pdf from ferrite pm core supplier, TDK).


i have no idea what this thing is (left). i like it, though. curious detail: i've been referring to that thing (right) as a hoverbike because it looked similar to one from memory, but on closer inspection it's lacking a lot of the decorations and basic silhouettes of the in-use vehicles from Wanted and the The Box scrolling shot.


¯\_(ツ)_/¯ oop. is that whole thing (right, previous image group) a "P-m core" ??? then why does the text to its left mention hovering? or is it a prototype bike? or a simplified drawing of one? dunno........ anyway, i was going to say that the final bikes have zero knobs, joysticks, or other rounded protrusions to speak of - they are exclusively touchscreens and sleek angles. therefore id say this thing (left, previous image group) is probably an internal component of some kind. or something else entirely. i can't read the text connected to it either


i was very excited about this line. ......until it started looking like Irken text. (|-•L'/_',=-_ '/<''/L'_'| !! anyway, the readable bits imo: a delta Δ (i was excited bc this is a common physics symbol), a T (temperature? time? torque? teslas?), a dot (decimal point? multiplication?), and a partial derivative symbol δ (if you're desperate to understand these lines and took some calculus a while ago). whatever is happening on this line, it might involve both finite and infinitesimal changes. weird!


let's get these two from the page center out of the way. short version: i have no idea what's going on in/around the 3 boxes, and the upper chemical-equation-ish-thingy looks terrible with the cutting-out method. off to the right are my best guesses after tracing the upper line several times: Cl+ ions can exist, and ClO chlorine monoxide is a compound that exists. (more on ClO from sciencedirect) the significance of this information is lost on me right now. if any of this rings a bell to you, dear reader.... pls help- :,3


connected to the chemical-equation-ish-thingy are these other mystery nodes. i've highlighted and traced several options for what these could be. _27 ? D37 ? Dꟻ7 ? :)ꟻ7 ?

finally, the circuit-diagram-looking section. i immediately noticed the US resistor symbol (---\/\/\/\---). whether or not the vertical lines surrounding it matter are unknown (the capacitor symbol is ---| |---, but no special resistor symbol i could find matches this exact setup, and you don't typically layer separate components over each other like this in a circuit diagram). my first sketch interprets the line & smudge coming off of the resistor circuit as a ground symbol. my second sketch interprets it as a messy connection to the second box off to the side, with the swirly line inside. the inductor symbol is a helix connected to the wire (--ꔛ--) (or a bouncing line connected to the wire (---◠◠◠---)), but no special inductor symbol i know of rotates one way and then the other... nor are inductors typically drawn all by themselves in boxes........ if the inductor were parallel to the wire, it would make more sense (inductors can influence wires they are parallel to), but this whole thing is kinda meaningless to me.

in summary, i think this whole diagram is... meant to look like a very serious technical document from afar. honestly i wasn't expecting to get any SERIOUS(!!), IN-DEPTH(!!!!), HARD SCI-FI(!!!!!!!!!!!), ACCURATE DOCUMENTS PERTAINING TO THE EXACT WORKINGS OF THE HOVERBIKES- it was just fun to take it at face value with my current knowledge and see if anything came from it. :3 the fact that there's a single resistor symbol is cool for attention to detail LOL... genuine respect for anyone who can make approximation designs like this without. anxiety paralysis over getting something wrong. it looks awesome!!
-
if you're inspired by my edits, pls reblog this with your thoughts ! !!
i've been scrutinizing unclear lines and trying to recover old corrupted memories from ECE classes all day ... so i probably missed something c;
ok gang. its theory time
the analysis of the new mercenary scene. meta, blueprints and time
warning it is incredibly choppy because of the chaos i am in rn !!!!!! but anyways
okay so. the video cuts off at green&red defending themselves but i doubt that really means a lot
the glitching. it IS reminding me of the way chosens memories were scanned through. but mercs having a whole tv remote?? chosens memories mightve as well pushed them to use youtube ?? but why didnt they access it earlier ?? why vic didnt???
bc of these question im more willing to think they themselves decided to use youtube right now. maybe only right now !
this raises a ton of questions. does outernet have somewhat of an access to internet after all? is it just their own tech? (could be supported by the fact that if youtube was common there i doubt theyd be using specifically television for it. i feel like theyd use other screens instead without a need of a remote especially considering how advanced their tech is)
still possible that it is common. considering they aren't that focused on it and there are random workers in the bg literally enjoying the show
this whole thing is VERY meta lol but i do think the mercs are the ones that influenced the stream in this way
A BIG portion of alan drawing a flower from ava season 2 is paid attention to in the glitching scene for some reason ?? maybe as a note for his and secs alliance.
the video then cuts off and goes to victim again. the whole video was watched through
the stream cuts off to mercs. **RIGHT** at the moment chosen notices the freedom stick rights article. based on the vid it could be just primal messing with shit but i feel it was intentional. (ha. freedom? loser. we're here instead)
later. the video resumes at victim again. i didnt see any changes to vics or chosens ending.
okay. the mercs. pulling up screenshots for this one
i. cant decipher THAT much even though the quality is 1080p for me.
but i DO see that the first blueprint has as i suppose the hover ??
the text pinpoints "power core" and its pretty much the most readable thing for me. another one is kyokaz was here its just a cameo
the blueprint shows buttons? perhaps the controller of the hover? going to a circle thingy. perhaps what is working inside the hover
the whole thing on the left corner says f___ complex but i cant decipher

second screenshot. the blueprint left to the first one looks like a pc?? and its not surprising even in the screenshot itself bc. the mercs have one to the right corner behind em
now. third sc.
HELLO?
firstly. A VIC DRAWING????? WITH A GUN????
there is a possibility of it being any stick but. i feel its victim. in my guts
shooting?? what. for.
it is scribbled out . . .
there is a possibility (along with the self portrait of vics in the unused bg) that it was just. him doodling. it would kill me actually because he is no great artist like sec. just a doodler (<words of flareboi here)
now. this


again . the question how they accesed it.
if they can get youtube to open there. how did vic not know of the showdown. of sec
showdown was uploaded online. that was literally in canon !!!
unless there's a rule that not everything internet-like and youtube like can be accessible. but i dont really think of any implications that proved that
except. for the fact that showdown was already uploaded. before the ep even ended. would it imply time passing differently in both realms?
lord i needed to scream it out.
OH GOD !!!!!!!!!!!
325 notes
·
View notes
Text
Week 5
Link #1: How to Create a Painting With Shading : Painting Techniques
~You want to make sure you have at least one dark color and one light color. Okok, so I’ll be including a little picture of what I did, but I’ll be using Emerald Green as the light color and Ultramarine as the dark color :) ~Now mix them together to get your medium tone. Oh. I mean, it comes out as a pretty teal owo. You’ll see in a bit, dw. ~Dip your brush in the water and just dip into your middle tone and paint a circle on your paper or canvas. I hope y’all know that I don’t expect you to do this with me. I mean, I wouldn’t mind if you tried this out LOL. Whatever floats your boat y’know. Besides, who doesn’t love painting circles, am I right?- But seriously, circles do be pretty hard to make legit circles. Like, I think I’ve only managed to get one even close to being an actual circle, and that wasn’t even that close. ~It’s completely okay to have some variation, thicker paint around the edges and then kind of wash you paint in the center of the sphere (for now it’s a circle, but that’s besides the point) ~You don’t have to completely rinse your brush out. It's okay to leave a little bit of that color on because it’ll create a smooth transition. I actually didn’t think of that to be completely honest with you. I tend to always wash my brush completely before I even go into the next color. I- well the more you know, the better you can be c: ~Grab a little bit of that light color and you’re gonna add some highlights in the upper left or right corner of your sphere (whichever one you prefer I suppose, I tend to always have the light coming from the left) ~Even though we’re using acrylic, the paint should be staying fairly wet and just kinda blend that lighter color in with the darker color. So like, wait. I just kinda went braindead for half a second, I’m like- Acrylic paint isn’t wet, that’s only water colors. And- I’m just sitting here now dumbfounded because when you think about it- Water color isn’t wet- But acrylic paint is- it’s- yes- look I have no idea where I was going with this bit LOL. But here it is-(Intense brush strokes) LOL ~Create as smooth of a transition as possible between the upper and lower part of your sphere. I cannot tell you guys how good this looks tbh, and we’re only maybe halfway done LOL ~Dip the brush back in the water (What if I wanted to dunk it though-) and go for your dark color and basically you’re just going to do the opposite of what you did with the light color, meaning that you’ll be in the opposite, bottom corner (Don’t mind the fact that I just said the bottom corner for a sphere- I’m intelligent, yes.) ~Really try to blend it in with the paint that’s already down there. ~You should be doing light brush strokes, you don’t need to push too much paint down onto the page. See, the thing is. I have a pretty heavy hand when it comes to anything really, so I would say this was the most challenging thing for me, so far that is one of the main struggles for me. ~Now rinse your brush out and leave a little bit of paint on the brush and this is going to be used for the shadow, which is just gonna be a washy shape surrounding the bottom of the sphere and that’ll create a plane for your object (sphere) to be on. I never actually thought of it like that- Usually I thought of the shadow as, well, a shadow lol. But I guess when you add the shadow it does give it a little place to sit. Almost like a dog sitting on a mat or something.
My little video painting a sphere :)
(This video was well done, I would like to say that the sphere doesn’t really look all that much like a sphere BUT it does show enough to help with one’s shading, which was the whole point of that video)
Link #2: Beginners Guide to Highlighting and Shading
(So, since this is a website not a video. I’m going to only write down what I didn’t know already, that way it doesn’t take years to get through all of this kk? I did include the link^ so y’all can check it out yourself as well :) ) ~Most beginners use black for all their shadows. In reality, shadows are rarely a true black. Okay, it’s not like I didn’t know this before. But I once made the mistake of trying to make every single shadow black. I can feel the pain, it’s okay. I just learnt this at the beginning of this class to be honest with y’all LOL. ~To find the right shadow color for your object, add tiny amounts of black or the cool complementary color to the original color of your subject. So basically, what the first link said as well. You have the light color, and the dark color. But to get that dark color you need your medium tone, so kinda backwards in a sense-ish. ~Blend out the edges to make sure you don’t have a harsh line. Use various mixes of your shadow color to gradually lighten your shading and blend it into the surrounding area. I meannnn, I think I’m pretty good at not having harsh lines for the most part. I would say that the edges are usually always a bit harsh, but other than that I think the shading part is pretty well blended. ~You can also use a glaze to add shading. (Yo, okay so I have zero idea what a glaze is when it comes to painting- I-) ~Shadows are not always dark. To be fair, I think most of the beginners (including myself) start off thinking shadows are always dark. That they’re more prominent than the object itself. I think that’s what’s stopped me a lot of the times with my earlier paintings that I did a while ago. ~It is important to study your scene or reference photo before planning out your painting I 100% agree, study the scene, the object, everything. Analyze the reference you want to paint before you actually dive right in. That goes with any art actually, not just painting. ~It is tempting to add pure white paint where the light source hits your subject. (I can relate, don’t worry) However, as with shadows, highlights are rarely pure white. ~Use a soft brush with a light touch for highlights. They should be subtle and the edges well blended into the surrounding color. Oh goodness, again I’ll have to work on my heavy hand, but other than that I would say I’m doing pretty good about this. ~Gradually build up the highlight rather than having a blob of light colored paint. Uh, oOpS ._.
Link #3: 7 Must-Know Painting Techniques For Artists
1. Under painting
~Create an underpainting in burnt umber or a mix or burnt sienna and phthalo blues to establish shadows and values. I never actually thought about doing this tbh. I usually start with a white canvas and go from there, y’know? Maybe if I try this I’ll see some big improvements, who knows :) ~Work paint up from thin to thick, especially when using slow-drying paints. It’s impossible to work on top of heavy, wet paint. (I agree, like- There’s been times that I’ll legit just try and paint over the first coat maybe 15 minutes after I paint it on. I’m like, nahhh it’ll be fine to paint on, what’s the worse that can happen. Well- I ruined the painting lesson learned though) In the same way, work up to highlights, adding the brightest, and usually heavier, paint at the end. 2. Blocking in
~A filbert is a good general brush for blocking in form and paint. It has a dual nature, combing aspects of flat and round brushes so it can cover detail as well as larger areas.
These would be the type of paint brush that they’re talking about. They’re a mix of flat brushes and round brushes. I maybe have like- 2 of these in all between 3 art kits to be honest. I may have to start investing in more of them, who knows.
3. Building up texture
~Almost anything can be used to add texture to your paint. (I honestly never knew that people added things to their paint to create texture) There are already made texture media available, but I have seen items such as egg shells and sand used to add interest to a painting. Oh? Bro, who would’ve thought about adding eggshells to your paint, like I honestly never thought about adding anything actually. I just paint with what I got, y’know. But maybe I’ll try this soon™ ~Use an old toothbrush to spatter your image with paint. This can be remarkably effective at suggesting noise and grain. Well, that’s new. I really didn’t think about using anything else for a painting besides paint brushes. oOpS
4. Dry brushing
~This method tends to work best when applying light paint over dark areas/dried paint and is useful for depicting rock and grass texture. So, I’ma be completely honest with you guys. I used to paint without water, and like- I was so ignorant about most of the things that I know now. I would only use water to wash my paint brush afterwards, but now. Water has become so helpful in my paintings oml, it’s amazing what a little bit of water can do for your painting.
5. Sgraffito
~Removing paint can be just as important as applying it. I- I only ever removed paint when it was in the wrong spot.- I didn’t know that removing paint from anywhere can help, especially when you want to expose the underpainting.
6. Glazing
~Glazing is the process of laying a coat of transparent paint over a dry part of the painting, and it’s used for intensifying shadows and modulating colour. Well, now I know what glazing is LOL.
7. Painting with mediums
~Mediums are fluids that can be added to paint to modulate its consistency, drying time and texture. Again, I honestly never knew that. I’m so inexperienced with painting items and ways it’s not even funny man. ~In the case of acrylics, you get different mediums that make the paint matte or gloss.
Link 4: Acrylic Painting Techniques
1. Dry Brush
~You want to aim for seeing your brushstrokes in the paint. I don’t tend to like seeing my brushstrokes within my painting to be honest, but if it works it works, kinda thing.
2. Sgraffito/combing
~Involves painting a layer or two of paint and then etching into it to create a design and reveal what’s underneath. Again, I really don’t tend to do this either. Considering I just learnt it LOL but I wouldn’t have thought about removing paint or etching anything within the paint.
3. Wet-in-wet
~You can do wet-in-wet with acrylic just like you can with watercolor so go ahead and lay down some water on your paper and then you can just drop in the acrylic paint. My thinking- If you want a watercolor effect, why not just use watercolors? Big brain time LOL
4. Overlay/glazing
~Start by laying down a darker color on your paper and then letting it dry. (Yes, we need to let this dry for several minutes. So while you’re waiting, pop in some popcorn, watch it pop, eat some and then you can go back to painting :) ) ~What you’re going to do now is overlay or glaze a lighter wash over top so water down your paint just a little bit. Y’know, this technique might actually come in handy with my next painting ngl. But we won’t talk about that until the time comes owo
5. Impasto
~You’re going to use a palette knife instead of a brush so this is a really nice way to achieve a lot of different texture within the paint. So, I only ever use palette knives before for backgrounds. To get that kind of color dye/blending feel y’know- I can’t think of the word right off hand but- TYE DYE yes tye dye feel, hush- :(
6. Modeling Paste
Before we even learn anything, like- I never knew that you could use modeling paste for painting?!?!?! Like- I only ever used modeling paste when I was fixing a clay sculpture or something of the sort, y’know?- The more you know ~A great way to add texture into your artwork. So you can use a palette knife to scoop it out and then apply it onto your paper. You could also use a paintbrush to softly apply it to your paper. (My brain man, this is all so new for me- I-) Note you can also mix it directly with the paint color if you want to. Let the modeling paste dry and then you can paint over top of it. Waittt, you could use this to make the texture of mountains owo and rock beds, bro- I feel so inspired by this one ngl.
7. Stencil/Stamp
So the girl in the video was pretty basic with it, you just use it as a stencil should be used and of course washing it afterwards.
8. Sponge
~With a sponge, similar process as you would use with watercolor. You’re just using the sponge to apply paint instead of a brush. (Big brain, she knows) You can go back in after you let the first layer dry a bit and add like a second or third layer of paint. Y’know, time for a funny-ish story. So back in elementary school, we did this sponge painting, we could only use the sponge. And I’m like, I wonder what a pufferfish would be like with a sponge. So- I painted the sponge right, then I took some bottled glue, put the glue on the back of the sponge and glued it to the paper. LOL My art teacher found it funny, but had me remake the painting and explained that it had to be painted with the sponge, not made out of the sponge. So yeah-
9. Drips/Splatters
~To achieve drips, mix some water into your acrylic paint and you’re just gonna kind of angle your paper and guide the drips down. (So like, this would be kinda effective when you want the feel of a waterfall? Yes, no, maybe so?) ~For splatters, it’s better to use a flat bristle brush. Load it up with paint and you can actually just kind of flick the bristles and really control your splatters.
10. Gel Medium
~Gel medium is used to thicken your paint and also actually make it a little bit more adhesive. So you can mix it directly with your color and it’ll lighten it just a little bit. So, when using this don’t expect the exact color, okay got it.
11. Scumbling
~You can scumble with paint just like you can with colored pencils. So use your brush in a circular motion but keep it controlled. Well, that’s new. Now I know what it’s called at least LOL. I honestly never knew what that technique was called until now, but I remember always coloring with colored pencils like that just because my mum did--
12. Masking
~You can mask with masking tape of course or you can also use rubber cement. Rubber. Cement. I- Howcanonemakecementrubber- I might actually have to search up what it looks like, I’ve never heard of anything called rubber cement. ~If your paint bleeds through, just go back through and patch it up with some paint.
13. Mediums: Gloss or Matte
She really just explained what she was doing for this one.
14. Soft edge vs. hard edge
~Soft edge and hard edge are just two paint terms for how the paint is laid down and the quality of it. Who knew, I actually didn’t realize that how you lay down the paint affects how soft or hard the edge is.
So, I’m sorry for this being a bit late. But I feel like I learnt a lot with this one :)
0 notes