#Gif brewery 3 frame speed
Text
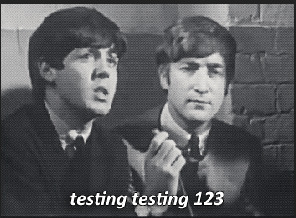
how to make gifs for free*
*okay, for $5. which is far less than what you would pay for photoshop!
this is my tutorial for people who want to make gifs but do not want to pay the steep monthly fee for photoshop. i feel especially qualified to make this tutorial because i did pay for the monthly photoshop fee a few months ago and honestly, i hated the process of making gifs on photoshop. it was extremely onerous and also cost a lot of money? no thanks! now, are gifs made on photoshop typically better quality than gifs made through free services? yes, but only marginally. and, to me, the slightly-higher quality gifs do not make up for: (a) the cost of photoshop, and (b) the ease of the free-gif making process. it will seem like there are a lot of steps below, but i promise it will all become like second nature soon enough.
BEFORE WE PROCEED: this tutorial is tailored towards the apple ecosystem. however, i’m sure most of the steps in here also apply to windows computers; i’m just not totally sure since i don’t have one.
without further ado, click below to follow the tutorial!
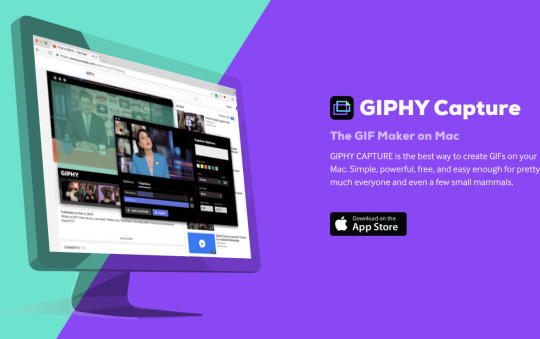
STEP 1: purchase gif brewery 3
this is the only stage where you will need to spend money - this app is integral to the process of creating gifs for free. i have tried out many different giffing apps, and this one is by far the best. it’s called “gif brewery 3 by gyfcat” and you can get it on the app store:

STEP 2: download or screen record your video
now that you’ve got your giffing software downloaded, you’re going to download your video in an .mp4 format.
downloading: i typically download from youtube or vimeo. for youtube downloads, you simply copy the link and paste it into a “youtube to mp4″ converter, which you can find through a simple google search of “youtube to mp4″ (a lot of these sites often get taken down and new ones pop up, so don’t get attached to a specific site because it’ll probably be gone like, 4 days later lmfao). for vimeo, i typically google “vimeo video downloader” and a few websites will pop up.
screen recording: there are a few different screen recording extensions you can add to google chrome, and i’ve tinkered with those in the past. however, recently i’ve been using the built-in macbook screen record function, which can be brought up by pressing command + shift + 5. once that’s brought up, you can change the size of your recording area, click record, and then save the video to your desktop. note that there IS a screen record option built into gif brewery, but i have never used it so i can’t speak to its functionality.
STEP 3: add your video to gif brewery
now that you’ve either: (a) downloaded your video from youtube/vimeo or (b) screen recorded your video and saved it on your computer; you’re now going to add the video to gif brewery and get giffing! this is where the fun part starts.
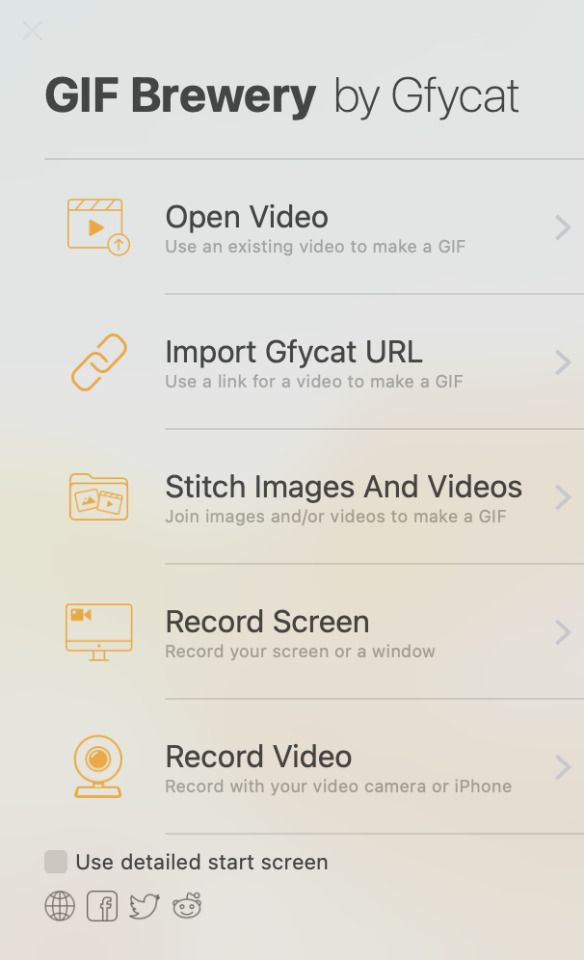
1. open up gif brewery and select “open video”
2. head into your computer and find the video you have downloaded/recorded, and select “open”
3. drag the green and red bars to the areas of your video where you want your gif to start and end. i’m using a video i giffed last week as an example:

4. click on “settings” in the top righthand corner to bring up this panel:
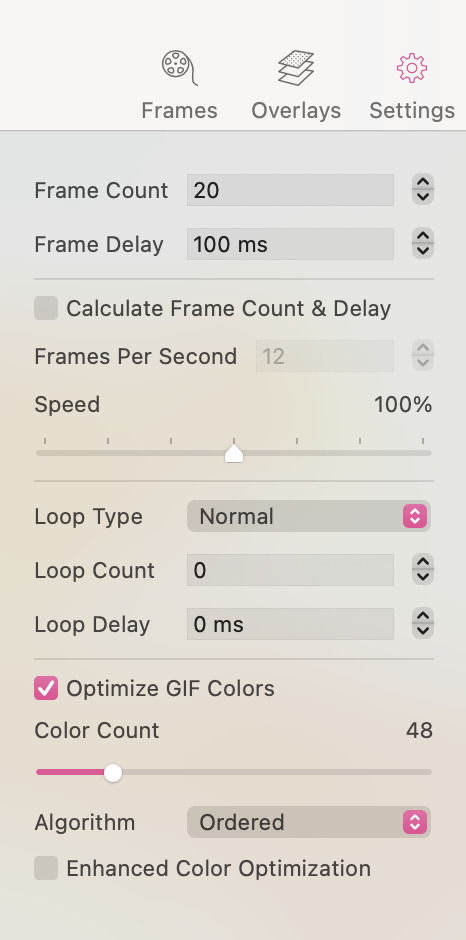
5. this is a VERY important step to ensure that your gifs turn out all right. you’ll want to change the settings in the above panel to something like this:

as you can see, i typically use 25 fps as this helps the gifs flow and not look choppy. some videos, though, work better with 20 fps (this is something you’ll get a sense for when you make a lot of gifs). i typically bring the speed down to between 70-90%, as 100% speed always feels too fast to me. and then i ALWAYS optimize the gif colours to 256. yes, even for black and white gifs.
an interlude about gif sizes: you’ll note that in the above picture, the frame count says “79″. if your gif is larger than say, 600px wide, 79 fps will probably have you producing a decently large gif. keep in mind that tumblr does not allow gifs to be over 10mb, so you’ll need to adjust accordingly. you can apply these settings and then go back and re-adjust those green and red lines from before to shorten your gif to ensure that it adheres to the size requirements of tumblr. also keep in mind that the editing process will add (sometimes significantly) to the size of your gif. so you want to aim for your gif to be well under 10mb at this stage. for small gifs, i don’t limit my fps too much, but for bigger gifs (i.e. ones that are over 600px wide), i will try to limit my fps to under 50. just keep that in mind as a barometer.
6. once you’re happy with your settings, click “create”

7. clicking “create” will bring up a window which will showcase your gif, as well as your gif size (see red circle):

at this stage, i’ll often click the “cancel” button in the lower lefthand corner and fiddle with the gif, as my gif sizes at this stage are typically enormous. this is actually a rare example where the gif is well under 10mb. however, for this gif i would crop the black edges out and probably re-size it down a bit to have it further below 5 mb (this video is far too low quality to produce a gif that’s as high as 5mb. this will vary, though, depending on the quality/size of the video).
8. so, clicking “cancel” above, i am going to crop and resize the gif:
- when you click on “crop”, this window will come up where you can adjust the size of your crop:

when you crop it to where you’re happy with it (if you need to crop your gif, that is), you’ll likely want to resize your gif:
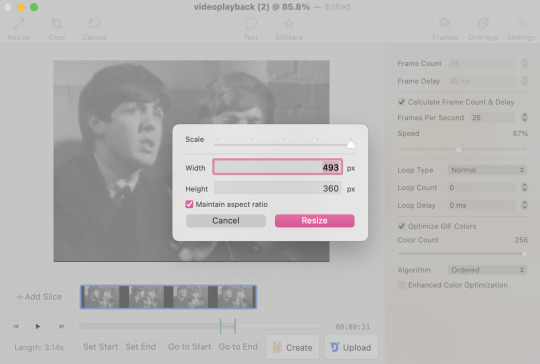
when you click the “resize” button, the dimensions of your gif will pop up:
a second interlude about gif sizes: okay. here’s the thing about using a software that isn’t photoshop to make gifs. the quality of your gifs will likely suffer, compared to gifs processed through photoshop. through trial and error, i have learned that i have to make my gifs slightly bigger than the standard tumblr sizes in order for their quality to hold up. it has something to do with pixel compression, which i don’t need to go into right now. i have also learned that low resolution videos (like the one i’m using in this example, which frankly looks like it was filmed using a toaster) should almost never be used for full-sized gifs. instead, the quality of these gifs from a low-resolution video will look much better as half-sized, side-by-side gifs in a two, four, six, or eight-gif pattern (god, does that make sense? message me if it doesn’t). standard tumblr sizes are, i think, 540px wide for a full-sized gif, and 270px wide for a half-sized gif. AS SUCH, i typically make my full-sized gifs around 700px wide, to enhance the quality of them once they’re put into tumblr. yes, this means your gifs will have a higher MB output, which means your gifs will need to be shorter than those that could be made through photoshop. these are the struggles we face as Free Gif Makers, however it is worth it to me.
alright, as you can see above, after i’ve cropped the black edges out, this gif is 493x360px. so, it’s under the 540px requirement for a tumblr full-sized gif. the GOLDEN rule of gif-making is to NEVER use a gif that is under 540px wide as a full-sized gif. the gif will be stretched and will lose a lot of quality in the process. however, 493px wide is still well-above the 270px wide standard size for a side-by-side gif. i am going to size this down slightly to 350px wide (remember, we want to be well above the 270px wide standard size, as described above) so my total MBs will be smaller.
9. now that i’ve cropped and resized, my gif is now only 2.7mb:
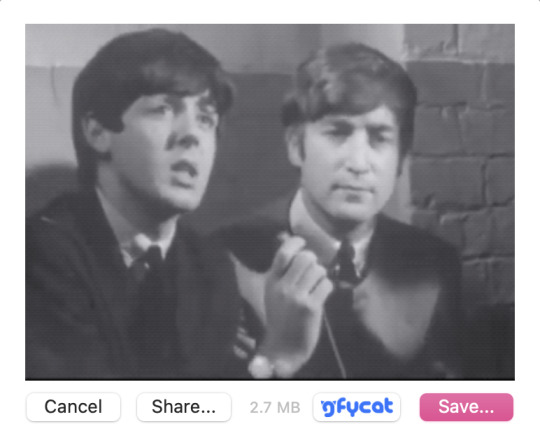
i like this a lot better than the 5mb before, as it gives me more wiggle room in the editing process. i’m happy with it now, so i will click “save...” and save it to my desktop for editing now.
STEP 4: repeat step 3 for all the gifs you want to make for that specific gifset
i am going to make two gifs to demonstrate to you the side-by-side gif thing i was talking about above. these are the gifs at this stage, pre-editing:

STEP 5: add your gifs to photopea to begin the editing process
once you’ve created all your gifs in gif brewery 3, you can close the app. for editing the gifs, i use photopea desktop. photopea is basically a walmart photoshop, and i think it works really well considering it’s free.
1. click file > open
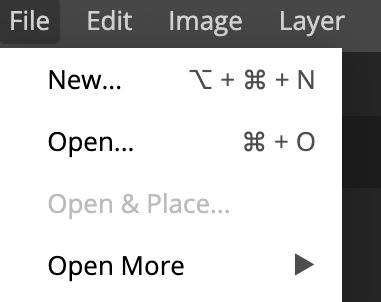
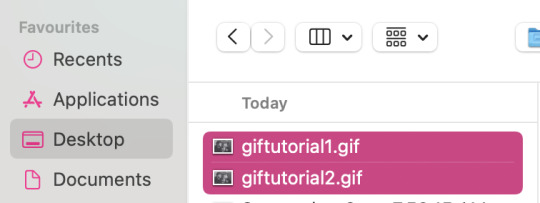
2. locate your gifs that you save from gif brewery
3. now is the actually fun part. this is where you can fiddle with the brightness, exposure, temperature, etc., and/or you can add a psd or two to your gif. i almost exclusively use PSDs and then will fiddle with the brightness/contrast/levels/curves/temperature/sharpening/grain on my own after i’ve applied the PSD. i’ve found all the PSDs i use here. that blog should also have tutorials on how to download a PSD. a PSD is basically a file folder with elements in it which will enhance the colouring/lighting of your gif. PSDs are EXTREMELY trial and error when it comes to working with a certain gif or not, so be patient as you try out PSDs on your gifs. when you download a PSD, you will add the file to photopea (file > open > find the PSD and add it), and then drag it on top of all the layers of your gif, like so:

a note on manually adding brightness/contrast/temperature/sharpening/grain, etc.: you must select all the layers in your gif for these edits to apply these changes, so they all must be highlighted like the below:

a note on sharpening/grain: adding sharpening/grain to a gif without being careful will HUGELY add to the size of the gif, and will often push it well over tumblr’s 10mb size limit. sharpening can also make your gifs look very bad if you go overboard. i often either don’t sharpen my gifs at all, or am very careful when i do. i always choose smart sharpen (as opposed to “sharpen”, which just adds a shitload of sharpening without you being able to adjust the amount), as i can adjust the sharpening elements with smart sharpen. to find the sharpen tool, go to filter > sharpen > smart sharpen:

these are the properties i sometimes choose for sharpening. however remember that most of the time i don’t even sharpen my gifs, OR i will do 50% instead of 100%. but i am going to use these properties for the gifs i’m making for this tutorial. you can typically be a bit more liberal with sharpening when you’re making smaller side-by-side gifs, as there is more room for the extra MBs added from sharpening:
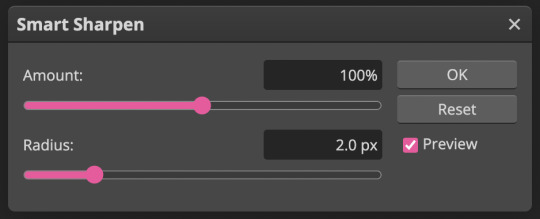
the properties you choose for sharpening will ultimately totally depend on the gifs you’re making, so don’t be afraid to fiddle around with them! i wouldn’t recommend going over 150%, though.
now, grain is something i hardly use in my gifs, as grain adds even MORE to the file size of a gif than sharpening does. however, sometimes it’s cool to have a bit of grain in your gif, so this is what i would do.
locate grain, which is found in filer > noise > add noise:
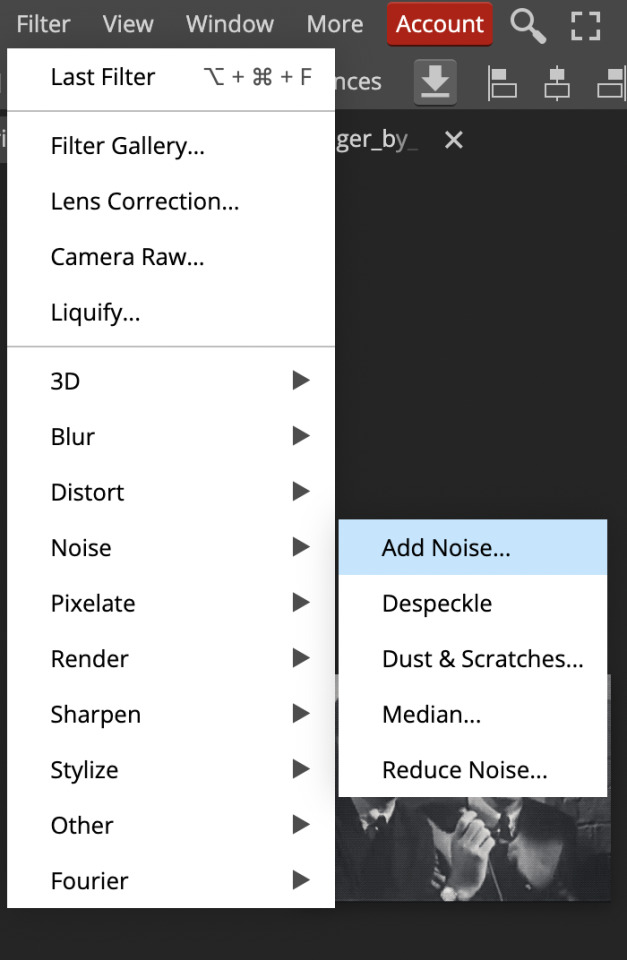
use this percentage:
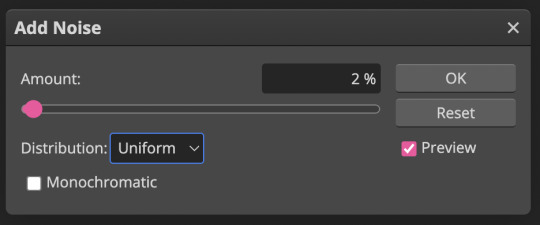
unless your gif is super tiny, anything above 2-3% grain will make your file size extremely massive. use grain with caution!
STEP 5.1: adding text to your gifs
if you want to add text to your gifs, read this step. if you don’t, skip to step 6.
the most common font used with gifs on tumblr is calibri bold italic. photopea does not have calibri built in, so you will need to download it from an external source like here and then add the font into photopea. you will likely have to add it in every single time you make a gif, which is mildly annoying, but yet another tribulation of making Gifs For Free:
1. select the “T” icon on the left sidebar:

2.select the font bar which will appear up top, and then click “load font”
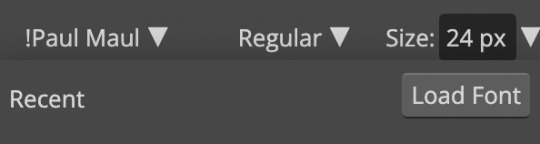
3. locate the calibri font file that you’ve downloaded in your computer and add it in. i suggest adding it in via zip file, because the zip file will include all of the different versions of calibri (i.e. bold/italic/bold italic, etc.). once you’ve loaded it in, search for it in the photopea font list and select it:

4. select bold italic

5. use these properties for the stroke (the outline of the font) and drop shadow (these are the only two elements i add to my fonts):

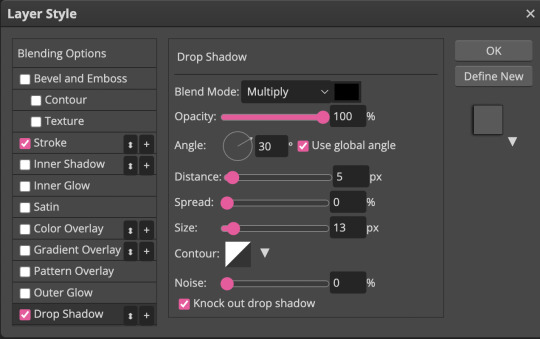
this is what your text should look like (sorry, it’s all pixelated because i had to zoom in):
you can adjust the size of the font as necessary and drag the text around to make sure it aligns with the centre of your gif (i’m not actually going to be using text for these gifs, but i wanted to show you because it does add a handful of extra steps)
STEP 6: save your gifs
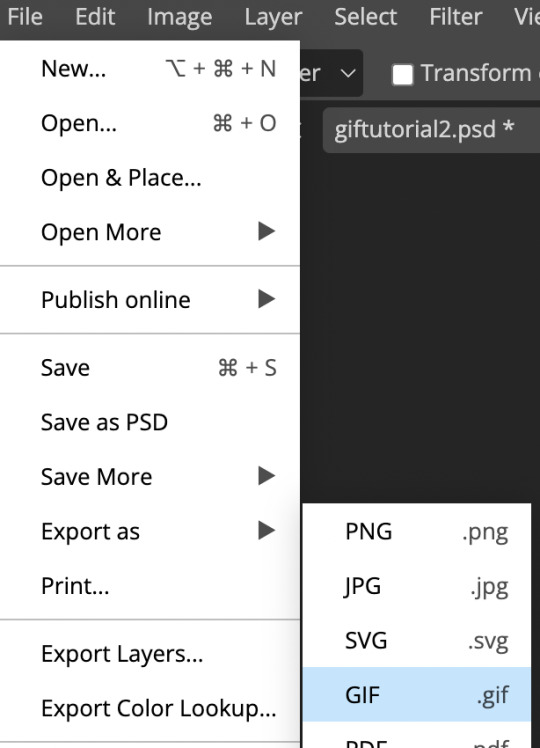
once you’re done adding your PSDs/manually editing your gifs, you’re going to save them by going file > export as > gif:
here, you will see a preview of your gif, as well as the MB total in the bottom right hand corner:
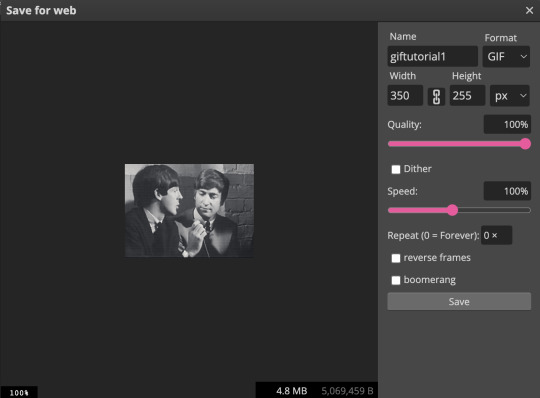
note how our gif went up to 4.8mb from 2.7mb after we originally saved it from gif brewery? that is almost entirely from the sharpening we added to the gif, and that is actually a pretty small increase; typically file size increases are much greater than that if you’ve sharpened your gif, especially with coloured gifs (black and white gifs inherently have smaller file sizes due to the lack of colour).
also note the “speed” bar - sometimes if i feel like my gif is still too fast, i’ll reduce that 100% to 80-90%.
if your file size limit is under 10mb and you’re pleased with your gif, click “save”
STEP 7: upload to tumblr
click photo > upload photos > and add your gifs. now, this is what i meant by the “half-size, side-by-side” gifs:

now, to add a caption with smaller font and smaller spaces between lines, you need to go into the HTML of your caption, which can be done by clicking the gear icon in the top right corner of your gifset and selecting HTML:

this is a sample HTML caption code. you can learn the principles of HTML by googling it, or just deducing it from the below:

and this is what that code looks like:

you can also add colour to your captions by adding a code into your HTML from this website
STEP 8: click post!
congrats! if you’ve made it to the end of this tutorial, you’ve successfully created a gif for *almost* free. i really do promise that this all becomes really fast and like second nature once you get the hang of it!
please feel free to shoot me a message if you have any questions at all! 🤍
- xoxo, caro, aka pennie
#holy mother this was a lot more work than anticipated#but it was fun!#please message me if you have any questions#i mean it!#i feel like this got very convoluted at times - especially discussing gif sizes - so plz message me if you need anything cleared up#gif tutorial#mine#giffing#gifs#tutorial
129 notes
·
View notes
Text
Video To Gif Mac Free

ThunderSoft Video to GIF Converter Crack is the best software to batch convert gif files to avi files and extract gif image serial. Provide gif file frame by frame preview, and rich output setting, include background music, background color, frame rate, bitrate, custom logo, etc.
Convert Video To Animated Gif
Video To Gif Mac Free Converter
Upload your GIF files. Upload two or more animated GIF images to be uploaded to the editor after clicking on ‘Choose GIF Files’. Then, select your GIFs. Make sure to press the Shift key (Command for Mac) while selecting multiple files. Or drag and drop them from your folder to the editor window. Download Video to GIF 1.4 for Mac from our website for free. This Mac app is a product of Runecats. The software is categorized as System Tools. Our built-in antivirus scanned this Mac download and rated it as virus free. WebM contains both audio and video, and it makes it heavy. You can convert them into GIF, which will smaller in size, and then share anywhere. How to Convert WebM to GIF? This post introduces you free software to convert WebM to GIF on Windows 10 and Mac. Step 1: download and install GIF Brewery from Mac App Store. Step 2: run the program and load the video you want to turn into GIF. Click ‘File’ menu, choose ‘Open’, then import the video from HDD you want to convert to an animated GIF.
ThunderSoft GIF Converter Crack Serial Key A professional software that comes with a set of animated tools to convert Gifs to SWF, VIDEO, PNG, and Gif image. Notable features of the GIF Converter include a simple interface, full output settings, and high-quality fast conversion. It also supports batch file conversion. ThunderSoft GIF Maker allows you to adjust gif playback speed, easy and clear video clip, convert high-quality gifs, playback as well as resize. Now you can download the latest version of ThunderSoft Video to GIF Converter With Key from Uptopc.com website.
ThunderSoft Video to GIF Converter Crack + Serial Keygen
ThunderSoft Video to GIF Converter Key ThunderSoft Video to GIF Converter – helps you create animated GIF files from your video files. Among the advantages are video preview, convenient trimming function, and the ability to customize the output.
You need to use files in such formats as mp4, avi, mpg, wmv, flv, mov, vob, mkv and others. From our website you can download the translated version, which will make working with the application even easier. The settings are not much, everything is clear, I think you will not have any problems.
Convert Video To Animated Gif
ThunderSoft Video to GIF Converter 3.4.0 With Crack LifeTime

It will intelligently recognize the device and get categorized to certain output format. Or you can just drag it to a certain kind of button. All brands of devices supported including Cellphones, Pads, and PCs.
Because it provides you with support for almost all popular video formats such as MP4, AVI, MPG, WMW, FLV or MOV you have the possibility to convert any video file presented onto your computer. ThunderSoft Video to GIF Converter 3 Portable. ThunderSoft GIF to Video Converter is the best software to batch convert gif files to video files and extract gif image serial. Download ThunderSoft Video to GIF Converter 3 Download 2021 Latest Version. The main surface is clean and friendly, and the conversion process of the software is easy and fast.
ThunderSoft GIF Converter 3.5.0.0 With Crack (Latest) – Uptopc.com
ThunderSoft Video to GIF Converter is a handy tool for making animated gif from video files. Preview original video frame by frame, easy crop and specify video clip, convert to gif with high quality. It allows setting gif play speed, replay times and also resizing. The input file supports various popular video formats, such as mp4, avi, mpg, wmv, flv, mov, vob, mkv, rmvb, etc. The software interface is very user-friendly and easy-to-use.
ThunderSoft GIF Converter Patch + License Number Torrent Free Download
You can download the “program” from our website for free, so that you can try all the settings or just test it, the archive also has a crack, patch, key or keygen, I’m sure that all users of our website are smart people, I won’t describe how to use crack or keygen 🙂 . If you came across a program in the Repack version this means that all the necessary activation steps have already been done 🙂 you just have to install the program and test as much as you want, if you still have some problems please do not be shy and ask, good luck .
ThunderSoft GIF to AVI Converter Key Features:!
GIF to SWF
Rich SWF file setting, include SWF version, size, background color, frame rate, etc.
Allow adding background music.
Both image quality and speed are the same as the original.
Allow change output animation speed.
ThunderSoft GIF Converter Serial Key GIF to Video
Supports all major video formats: avi,wmv,mp4,mkv,flv,mov,mpeg, etc.
Allow adding background music.
Rich output setting, include background color, frame rate, bitrate, etc.
Supports command-line conversion.
ThunderSoft GIF Converter Full Crack GIF to PNG
Provide gif file frame by frame preview.
Extract gif file to image serial(Png, Bitmap or JPEG files).
Allow adding a custom logo.
Reverse GIF
Provide 3 sequences (Opposite, Positive + Opposite, Opposite + Positive).
Keep the original transparent effect.
Allow change gif speed.
Fast speed and no quality loss.
ThunderSoft GIF Converter Activation Key GIF Joiner
Supports join with gif, jpg, png, and BMP files.
No quality loss(gif files only).
Allow change gif speed.
ThunderSoft GIF Converter Keygen GIF Maker
Make animated gif from jpg, BMP, and png files.
Allow specifying every frame’s duration.
Allow transparent setting to BMP and png files.
And many more…
Changelog for ThunderSoft Video to GIF Converter Key:?
Improved converted video quality.
Improved the feature of video play.
Updated various translations.
Minor GUI Improvements.
System Requirements:?
Supported Operating System: Windows XP/Vista/7/8/8.1/10
Memory (RAM) required: 512 MB of RAM required.
Hard Disk Space required: 20 MB of free hard disk space required.
Processor: Intel Dual Core processor or later.
Administrator rights
How To Download Install & Register ThunderSoft Video to GIF Converter Crack For (Windows & Mac) (Latest)?
First DownloadThunderSoft Video to GIF Converter Activator Key & Serial Number (Latest)
After the Download Extract the zip file using WinRARor WinZip
And Extract, the zip file Installs The Program As Normal.
After Install Don’t Run the Software.
Please Always Read the Readme File.
Click on “Activator ….” for what you want to activate.
Detects and activates any edition of windows and offices.
After Install Run the Software.
You are Done it. Now Enjoy the Full Version.
Please share it. Sharing is Always Caring!
Video To Gif Mac Free Converter
ThunderSoft Video to GIF Converterl Crack Patch + Serial Key + License Code Free Download (Latest) from Links given below!
1 note
·
View note
Text
GIF Brewery

Gif Brewery 3 Tutorial
Gif Brewery 3
Gif Brewery: Your new friend
GIF Brewery is a Mac OS X application that lets you convert brief clips from your video files into GIFs. No longer must you extract frames from your movies and fiddle with layers in Adobe. Since updating to Big Sur Gif Brewery 3 stopped working and with the last update in 2019 it doesn't seem likely to change anytime soon. I'm looking for an alternative that lets me import video, crop it and trim it however I like and export as gif.
GIF Brewery 3 is a rebuilt version of GIF Brewery that transitions to the latest OS X technologies. Since GIF Brewery 3 is a big behind-the-scene change, it has been released as a.
Intro
Back late 90s, there was a wonderful freeway app, GifBuilder, for OS 9. It was a quick and dirty way to to make gifs, allowing delays per frame. For all intents and purposes it was the best GIF app I had used.
Screenshot of GifBuilder
Animated GIFs, like most early web trends, came and went. They made a mild resurgence with YTMND and Myspace in the mid 2000s.
Strangely with the perfect storm of memes, Reddit, and Tumblr we yet again, live in a GIF world. Why?
Gif Brewery 3 Tutorial
Retro-ciché appeal.
They work on practically every device imaginable They a have low CPU overhead despite large file sizes. Even low end cellphones can easily play them endlessly, and display multiple on a screen.
Nearly everyone accesses the web via broadband.
You can even text animated gifs between smart phones in SMS messages. (Try it on your iPhone or Android phone, anything post iOS 4 or Android 3.x should work).
Meet GIFBrewery
Unlike GifBuilder which exclusively was designed for frame by frame animation, GifBrewery focuses on video importing.
The work flow is exceptionally simple.
Open Video File.
Select range of video
Crop/Resize/Add Caption/Overlays
Edit the gif properties
Create GIF
For the most part the effects aren’t going to be terribly useful. You’re given Blur, Color Adjust, Color Effect, Sharpen, Halftone and Stylize, reminiscent of Photoshop as opposed to Instagram filters. All of these are an all-or-nothing affair, without any ability mask areas or set in and out points
Titles are basic. You can set in and out points, control your font face, size, color etc. You cannot animate them (fades or keyframes for animation). Fonts render cleanly, using anti-aliasing.
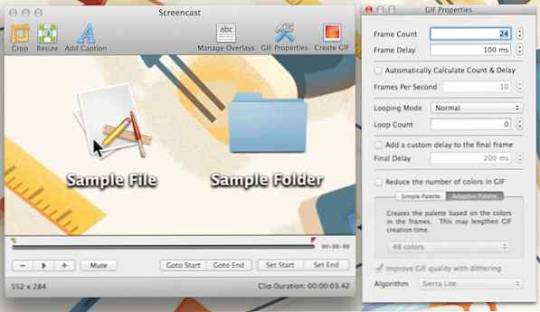
Properties - Where the action is

The GIF Properties works nicely, but lacks a few features that I’d like to see such as: manual color palette control, import/export of palettes and more adaptive palette options. Color increments are set in predetermined sets: 2, 4, 8, 16, 24, 32, 48, 64, 96, 128, 192 and 256.
While we are in an age where each byte isn’t as crucial, it doesn’t give power users full control.
Interestingly, GifBrewery does give you uber geek control over the dithering panel, its a true gift for codec nerds like myself to see the retroness of Floyd-Steinberg dithering. They get bonus points for making me google Stucki dithering
Frame rates can be determined by Frame Count/Delay or a frame rate setting which auto-calculates the frame rate. Frame Count/Delay allows you to determine the playback speed, hence speeding up or slowing down your graphic.
Sadly, you cannot set the delay on single frames other than the last frame.
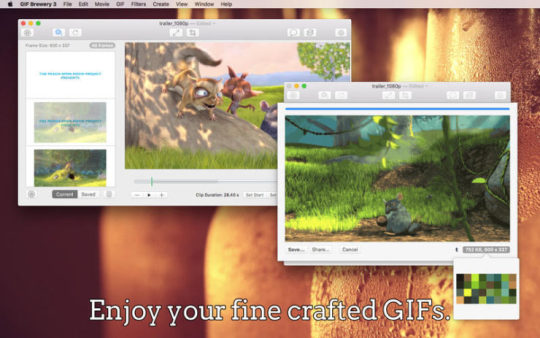
Conclusion (What it is and what it is not)
Gif Brewery 3
GifBrewery isn’t GfiBuilder, it’s something entirely different. In the days of GifBuilder, to make a video clip into a gif required exporting a movie from Quicktime as individual frame files and dragging the mess into GifBuilder. It wasn’t clean or pretty. Once imported you couldn’t add any text nor could you do any effects. That said, you could easily make a several frame animation dragging in a series of images.
GifBrewery isn’t for creating pulsating banners or animated icons. It will not create a GIF from a series of images. Instead, its for converting video clips to GIFs, and doing it quickly. It does this exceptionally well. Even I have to admit, I probably wouldn’t be creating animations from series of images, but rather video.
I’d like to have the ability to reach into my converted animation and tweak individual frame delays, add/remove frames and have more direct color control, and import image batches but atlas it cannot.
At $5, GifBrewery is a steal. While it doesn’t do everything – what it does, it does it very well.
It focuses on moving existing video into a GIF, which is the most common use of GIFs today. Even non-technical users can jump in and start making GIFs. Its exceptionally easy to use, and fits nicely into my workflow.
Official Website:Gif Brewery
Mac App Store:Gif Brewery
January 13, 2015 Update
To this day I still use gifbrewery, in my recent review of Cinemagraph Pro, I mention GifBrewery as my preferred option for creating gifs. I don’t use every day or even often as I don’t have much demand to create GIFs but when I do, GifBrewery is always there to do the job and delivery fantastic results.
1 note
·
View note
Last Seen Blogs
simping-on-the-daily
Problematically Simping over Problematic Faves

nomiking
SKY ISN'T THE LIMIT BUT, MOON

the-abandoned-director
✩ - Cosmo's stuff !!

nrpin
Makeup & Breakup