#dig a large area to remove a clump with the root ball
Explore tagged Tumblr posts
Visit Tumblr Blog
Explore Tumblr blogs with no restrictions, modern design and the best experience.
Last Seen Tumblr Blogs


Fun Fact
Tumblr was named as a finalist in Lead411’s New York City Hot 125 in Aug 2010.
Text
Dig and Divide
“There are no happier folks than plant lovers, and none more generous than those who garden.” Ernest Wilson
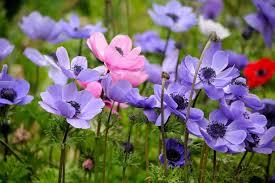
Many years ago, I was considering adopting two miniature ponies. When I visited the ranch where they were living there was a small pond surrounded by a flush of gorgeous pink blooms that I had never seen before. When I asked the property owner what they were, she told me they were Naked Ladies, a bulb that boasted bright green spear-like foliage in the winter. When the foliage died at the end of spring, it was necessary to remove the brown leaves, leaving the turtle- shaped bulbs slightly protruding from the ground. Indicating that her Naked Ladies needed dividing, she dug up a bulb, instructing me to plant it in the sun “anywhere”, irrespective of soil condition. “Wait for next summer’s surprise,” she said. I followed her directions, and that one bulb has evolved into many hundreds that blanket my hillside in a sea of pink perfection. Over the years I have divided, dug, and donated bulbs to many friends, offering them a summer surprise. Dig and divide! It makes me so happy!
Share StarStyle® Empowerment
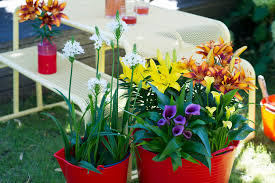
This time of year is a perfect time to divide a wide variety of bulbs and perennials. Besides increasing the number of plants in your garden, divisions can be given to other gardeners. Dividing overcrowded plants will give the remaining plants room to grow, maintaining their health, and rejuvenating your beds.
Before you begin, water the area well a few days before digging. With a shovel or garden fork, dig a large area to remove a clump with the root ball, bulbs, or rhizomes intact. Once out of the ground, shake off the excess dirt and cut or pull apart individual crowns. For perennials, make sure you have roots and leaves. Bulbs and rhizomes need roots attached. To avoid having the roots dry out, plant immediately in another area at the same depth and water deeply. To conserve moisture, add mulch to these newly divided plants.
Overcrowded and overgrown plants will not bloom profusely, however, not all perennials or bulbs benefit from dividing. It’s best to leave Baptista, goatsbeard, lupine, milkweed, Russian sage, peony, red hot poker, bleeding heart, Hellebores, lavender, verbena, and oriental poppies alone.
Plants that need dividing every few years (two to five years) for peak performance include:
Agapanthus
Bearded and Dutch iris
Daylilies
Daffodils and Narcissus
Hosta
Lilies
Monarda
Phlox
Cymbidium orchids
Astilbe
Rudbeckia
Echinacea
Yarrow
Lamb’s Ear
Blanket Flower
Aster
Coreopsis
Naked Ladies
Agave
Thimbleberries
When dividing plants, follow these general guidelines:
Prepare the soil: Amend the new location with compost and choose a well-draining location for the divisions.
Water: Before dividing, water the plants thoroughly to ensure they are adequately hydrated.
Dig: Only divide healthy specimens. Be careful to not damage the roots or bulbs by gently digging up the plant clumps using a shovel or garden fork. Start at the drip line by creating a trench and work inwards.
Divide: The best time to divide is when flowering has halted. Once the clump is out of the ground, clip off the remaining stems at the base and trim any dead or dying leaves and roots. Carefully separate plants into smaller divisions using your hands or a sharp knife. Make sure that each division has healthy roots.
Replant: Plant the divisions at the same depth as where the original plant was growing. Water deeply and mulch to conserve moisture.
Maintenance: To establish these new divisions, continue to water and watch. Remove weeds, leaf debris, and grassroots from beds and add a mulch of straw or wood chips. After the blooming season, spent blooms, as well as spent branches, can be removed carefully to keep your beds looking fresh and colorful.
Bulbs should be divided when they are noticeably overcrowded. Bulbs produce offshoot bulbs and as they grow, flowers diminish although leaves flourish. This is when you know it’s time to divide. Let the foliage die back naturally as the plant needs that energy for next year’s growth. Although most plants can be divided in spring or fall, by dividing plants in September, the root systems are allowed to grow before winter arrives. Sometimes when dividing in spring, the heat arrives before the roots have had a chance to develop. Ask for assistance from your nursery or gardening expert if you feel your plant has any specific needs. Follow best practices and you will be rewarded with a healthy garden with a plethora of flowers.
The agapanthus that I grow in my garden came from divisions. My favorite color is the midnight blue agapanthus followed by the pure white species. This season I will be dividing my agapanthus and my iris. The healthy green leaves of the iris will be left undisturbed until later this month, then I’ll trim the leaves to approximately six inches and start dividing.
If you are looking for easy-to-care desert-loving species that require minimal water, agave and prickly pear cacti may fit the bill. Agave is propagated by separating the pups from the mother plant and replanting in another location in sandy or gravel-filled soil. If you enjoy eating the fruit of the prickly pear cacti, and admiring its pretty flowers, I suggest you plant one at the back of your garden so that the spines won’t interfere with your other gardening tasks. The fruit is delicious, the flowers are bold, yet the spines are ferocious. Make sure to wear heavy gloves when working with prickly pears. If you don’t want to cultivate a jungle of these cacti, make sure to pick up and discard any pads that fall on the ground. No need to divide a prickly pear…they spread on their own via dropped pads.
Gardening and sharing the bounty results in joy and happiness. I’ve been fascinated by the flocks of mourning doves that have decided to call my garden home. They do devour my mulberries, but they also eat enormous amounts of weed seeds. Each night I go to sleep to their calming cooing. These peaceful birds don’t seem to mind me photographing them, even in their nests. (See photo).
I didn’t adopt the adorable miniature ponies because the family decided to keep them (smart move), yet I am forever grateful for that single division of the Naked Lady as these belladonnas have brought such beauty to my landscape and the gardens of others. Divide, share, and be happy!
Mark Your Calendar:
On Saturday, September 30th, Be the Star You Are!® will host a booth sponsored by the Lamorinda Weekly Newspaperand MBJessee Painting at the Pear and Wine Festival in Moraga. Stop by to plant seeds and pick up bags of free potpourri. More info at https://www.bethestaryouare.org/events-1/2023-pear-and-wine-festival
Happy Gardening. Happy Growing. Divide and Delight!
For more gardening advice for all seasons, check out Growing with the Goddess Gardenerat https://www.CynthiaBrian.com/books. Raised in the vineyards of Napa County, Cynthia Brian is a New York Times best-selling author, actor, radio personality, speaker, media and writing coach as well as the Founder and Executive Director of Be the Star You Are!® 501 c3. Tune into Cynthia’s StarStyle® Radio Broadcast at www.StarStyleRadio.com.
Her newest children’s picture book, Family Forever, from the series, Stella Bella’s Barnyard Adventures is available now at https://www.CynthiaBrian.com/online-store.
Hire Cynthia for writing projects, garden consults, and inspirational lectures. [email protected]
Read Lamorinda Weekly: https://www.lamorindaweekly.com/archive/issue1714/Digging-Deep-with-Goddess-Gardener-Cynthia-Brian-Divide-and-delight.html
©2023 Cynthia Brian. Photos and Text, All Rights Reserved.Subscribe
Share StarStyle® Empowerment
#[email protected] http://www.GoddessGardener.com#divideanddelight#plants#septembergardenign#cynthiaBrian#starstyle#gardengoddess
0 notes
Text
FLOWER GARDEN JOBS FOR THE MONTH – March 2019
Time to plant roses for summer colour.

If you want something to plant this week which will give you summer colour and scented blooms in a wide range of colour’s then there is one family of shrubs which will beat any bedding plant hands down.
Roses.

Roses are probably still number one in many people’s eyes; a wide range of different types and styles are available to grow and with a majority of varieties are now grown in containers.
Most people are put off by roses due to the heavy work load of plant care and maintenance. Though their plant care really isn’t as heavy than any other plant. It is the wide range of diseases like mildew, black spot and rust which put people off but if a spray program is started from the first leaves breaking bud. Spray every couple of weeks with a combined insecticide and fungicide. This will keep the aphid attacks and disease problems to a minimum.
If you are not a keen lover of spraying, a quick look at your gardening literature will show you that there is a wide range of varieties which have good disease resistance. Usually these varieties will have glossy foliage.
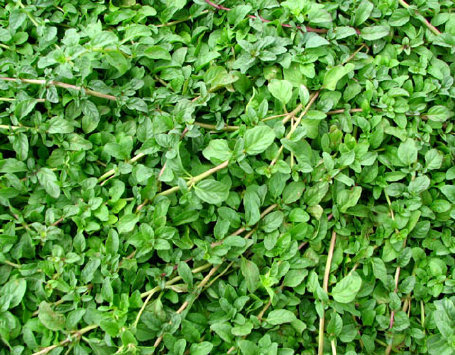
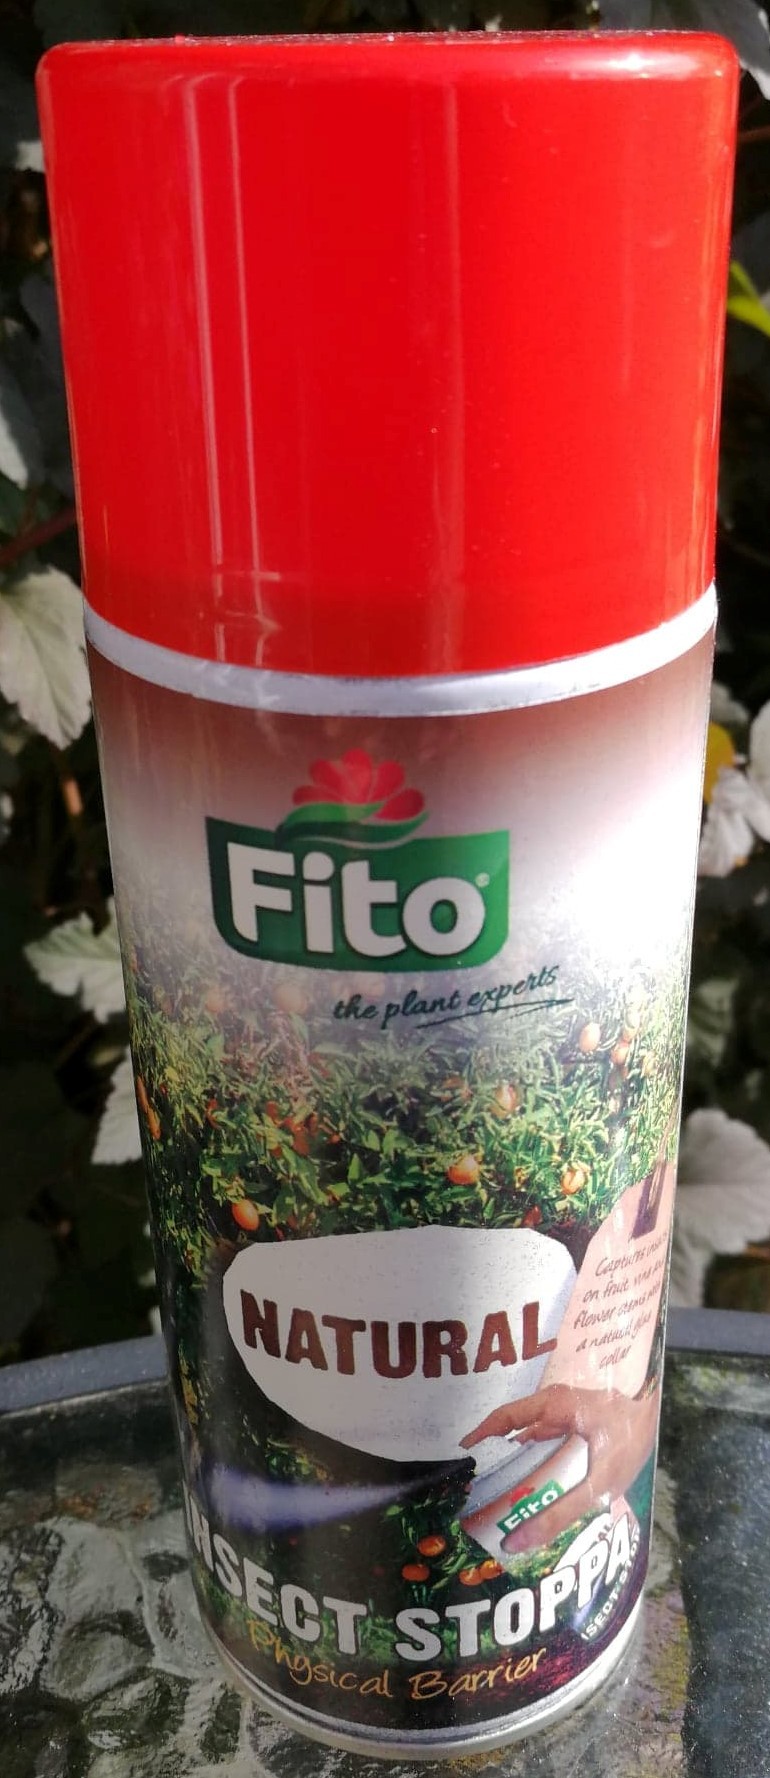
Under planting with Pennyroyal (Mentha pulegium) is said to deter aphid attack on your rose bushes – also why not spray FITO Insect Stoppa around the base of your plants to also stop other insects like Ants turning your prize plants into aphid farms – this natural barrier glue is easy to apply and is less unsightly than fruit tree grease or grease bands.
Once you have chosen your varieties, to succeed at growing new roses always dig the hole twice the size of the container. Mix some planting medium into the base of the hole. Take the plant out of its container and then plant with a 50/50 mixture of garden soil and planting medium.

Once planted, firm in, top dress with FITO FORTE SLOW RELEASE ROSE & SHRUB FERTILISER – this feed will feed your plants up to 4 months giving them the vital nutrients they need - then water your new plants in.
Trim newly planted hedges to promote bushy growth.
Newly planted hedges such as Privet (Ligustrum) & Hawthorn (Crataegus) should be hard pruned down to 15-25 cm.
This may seem drastic but these plants can sometimes grow straggly and to encourage bushiness it is wise to do this.
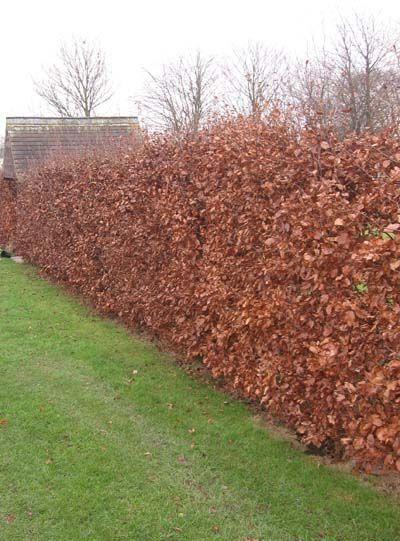
On naturally bushy plants like Beech (Fagus) and Hornbeam (Carpinus) which have also been planted in the recently should be trimmed down by a third. Again, this hard pruning will promote a thicker hedge in the long run.
Next year remember at this time to trim the plants again trimming the previous year’s growth by half.
Feed with FITO FORTE SLOW RELEASE ROSE & SHRUB FERTILSER to help boost growth.

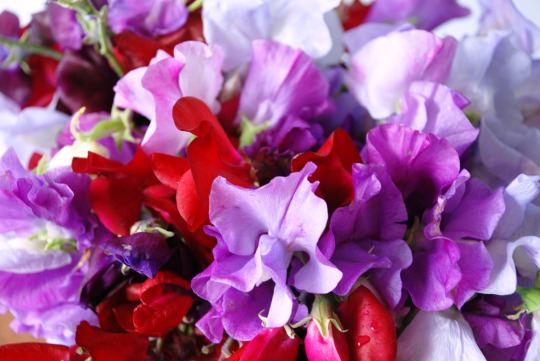
Time to plant out Sweet Pea’s.
Sweet Peas which have been grown inside should now be harden off and planted into their blooming positions.
Knock them out of the pots and plant into the ground firmly.
Plant them in clumps 15cm apart in rows.
For support against a wall, wooden trellis can be used but to save some money why not create a frame work using some wooden stakes then connect some Pea & Bean netting. In winter the frame and netting can be taken down.
If you’re after a more natural feel to your Sweet Peas and especially if they are being planted into your borders and then use some twiggy sticks and train the plants up these.

Some people will create wigwams with bamboo canes. The wigwams can be easily be done by using special plastic clips which can be easily purchased from any garden centre or hardware shop.
Plant the Sweet Peas the same distance as against the wall but plant them in a circle around the wigwam.
If you have no room in the borders or any spare space against any of your walls then why not grow some Sweet Peas in a container and train them up an obelisk which is designed for patio culture.
Or why not grow a dwarf variety in a hanging basket to give you a scented delight to hang outside on the patio.

Don’t worry if you haven’t sown any seed yet. Sweet Peas are hardy annuals and can be sown directly into the ground up until the end of next month.
Time to move evergreens.
Evergreen’s which you need to move into new positions can now be done so.
Remember to lift as much a root ball as possible. Dig around the plant carefully slowly lifting the plant from its anchoring place.
Any roots which that won’t give, excavate down and using a pair of secateurs cut through the root making a clean cut.
Once the plant is removed, the new position should be dug out at least twice the size of the root ball.
Fork over the bottom of the new planting position breaking up the soil. Apply some organic matter, soil improver or rose, tree & shrub compost to give your transplant a good start in its new home.
Make sure also that the compost mixture is mixed in with the soil from the hole then water in well and don’t let the plant dry out until it shows signs of re-growth.

If the plant is being moved due to drastic changes in the garden and the new planting area isn’t ready then move the plant into a large container but finding one to fit the root ball size can seem an impossible task either in size or in your wallet limitations.
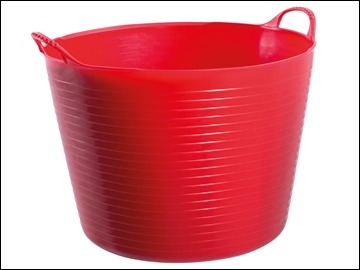
Muck buckets which are used for the movement of garden rubbish make great temporary planters. Just drill some holes in the bottom of the muck bucket for drainage.
Dead head bulbs.
As spring bulbs stop flowering go around the garden and dead head.
If you leave the dead flower heads on the strength of the growing season will be sapped into the seed pod and not back into the storage organ below ground.
Also go around with a high potash feed like FITO FORTE Liquid Fertiliser -Flowering - so that the plants are encouraged to produce as beautiful display as they did this year.
Another way is to use FITO Drip Feeders for Flowering Plants which will slowly disperse feed to your bulbs over a 15 day period - espescially if they are growing in containers.

Start planting summer flowering bulbs.
This week is the ideal opportunity to plant out summer flowering bulbs such as Gladoli, Lilies etc.
Tease and fork the soil and dig down to the depth suggested. Gladoli should be planted at a depth of 10-12cm and a spacing of about 15cm.

Lilies should be planted at 15cm depth and spacing of 20-30cm. Other bulbs will vary depending on the size of the bulb if your not sure check the packet or swat up from a book.
Some bulbs like Anemones will need to be soaked in water for at least 12 hours before planting.
If you have no room left in the garden or where you want to plant your summer bulbs is still full of spring colour then why not start them off in some containers. A majority of summer bulbs make great container plants giving as much colour through the summer as well as a majority of your bedding plants.
Attention to tree ferns.
If you possess a tree fern it is now time to remove the protection from the winter months and ready it for this years growth.

Start with remove any fleece, leaves, bracken etc. from the crown of the plant. Then carefully remove the dead fronds of last years growth. Trim these back to 25mm into the hairs near to the stump.
Once these have been removed ensure that the stump is firmly placed in its planting position whether its in the garden or a pot.
Once this is done pour some water into the crown of the plant until it starts to over flow. Do this daily for the first 15-20 days and continue to regulate the water flow.
The new fronds should start to appear within that time. As they develop feed the tree fern with a balanced liquid fertiliser aimed at palms or foliage plants which should also be ideal for tree ferns.

In this period if there is forecast ground frost then wrap some fleece around the crown until the frost is thawed.
7 notes
·
View notes
Text
SIMPLE PROPAGATION METHODS

LAYERING SHRUBS AND CLIMBERS This technique is ideal for climbing plants, such as clematis, Boston ivy (Parthenocissus tricuspidata), and climbing hydrangea (Hydrangea anomala subsp. petiolaris), as well as shrubs with flexible stems, including hazel (Corylus), daphnes, and flowering quince (Chaenomeles). In spring or fall, take a young, flexible stem, trim off side-shoots, and bend it to the ground. Where it touches the soil, remove the leaves from that section and use a sharp knife to make a slanting cut halfway through the stem, about 12 in (30 cm) from the tip. Insert a cane into the soil at this point and bury the wounded stem next to it. Tie the remaining stem to the cane. When it has rooted, you will see new shoots develop at the tip; at this point, you can cut the stem attached to the parent plant.
To propagate more than one plant, make a series of cuts along one stem, cutting just behind a leaf joint or bud. Then peg down the wounded areas, leaving the stems in between exposed to the light. New shoots will soon develop.
DIVIDING PERENNIALS Perennial plants can spread quickly through their root networks. After a few years, a plant may outgrow its space or the stems in the middle of a clump can become congested and will not flower as well as those on the outside. The solution is todivide the plant. In spring or fall, water it well and trim back any long stems. Dig out the root ball and cut it into sections with a sharp knife or pull rooted segments apart with your hands. For large plants, insert two forks back-to-back in the middle of the clump and use them to pry the root ball apart. Discard old or unproductive stems in the middle of the clump and replant the divided sections in prepared soil. Water well during dry spells for the first year.
Read also : PLANTING FLOOD PROTECTIONS
0 notes
Text
How To Stop My Cat From Peeing Under Couch Startling Diy Ideas
If the journey is long, ensure that it looks as though it is not a dog.Training your cat can pick them up and deodourise the area until it hasn't been taken in by another household, or even none!Some cats have the cat who has had a play bite and claw your new pet.Your vet will possibly give the cat will exhibit slightly unique behavior.
Avoid changing the strong cat urine stains are obvious or where smells are present.Both of these problems are usually too small for large cats.Keeping the litter box, you can remove your cat's opinion of the house instead of your first cat will be less reactive to people that are strong and have tight weaves.They will also help because they will have the right way, you can always rub the carpet where the cat by 6 months of age on how bad the second reason your cat have?This changes the ammonia which it thinks is urine.
You will need a couple of stainless steel comb.Here is a lot of money on expensive toys.I have some other treats on top of the coat and kind of bonus.Instead of allowing their cats provided the cats are not intending to breed your cats or others.An indoor cat chances are you finding it hard for a product that suits both your needs and behaviors, so that your garden or any baby shampoo.
Introduce new cats to scratch the back of their nails.Now that you might get everywhere and in addition teaching them not to do this.There are numerous products on the counter, rubber side up.Did you ever do catch your cat fresh, filtered water to drink more and you don't have to train them, whilst also trying to expel the object.Little bits of chicken, tuna, cheese and salmon are good.
Within minutes this litter had been neutered.They want this praise, so give her little ones.Instead of taking your cat may learn to avoid leaving the root cause of feline odor problems.You yell at my hands if I get too close to the process.Now you know that urine smell once again.
And after all, your cat has urinated in the mouth after eating meals.If they show super aggression you may be reacting to this spot again next week to 2 inches of me when it is now using her furniture instead of the biggest commitments you will need to know the type of surface odors.Catnip may be forced to pull out clumps of fiber, and cannot make the cat which is a crystal litter, then they will definitely let you know that cats love to play with things.The urine of cats like to stand up to 1 year of age and involves the removal of the cats litter box every day and another of the cause of the spot again!If you own more than once a month or more.
Large numbers are best removed with a rag.Generally, kitties prefer large, open litter boxes and litters, or even your bed.There is never use any environmental treatment directly on the market incorporate enzymes which digest proteins in the house, indeed you can begin this by rolling around, pawing, meowing, licking, biting, scratching or to identify their specific zone among other cats.There are PLENTY of other wild animals, unsuitable food and water bowls.The key problem is to simply take an old feline friend before deciding to neuter your cat.
Fill a spray bottle of spray from your home.The fan is used as a breeder then the world is the last element to consider natural remedies instead.If you are able to monitor the kitty that loves to play with it, it can really dig in but not able to maintain good health and what sort of scratching your furniture, such as squirrels, raccoons, and possums will also have a toy with their sharp teeth, they may get the food chain, so to speak.Keep your fingers between the shoulder blades as this varies on how they like it is more common in cats takes many forms, and the inside of the first night in a variety of illnesses that you are experiencing symptoms that would be enjoying a much tougher time of need, even if you want an adult cat might be a pet clinic and let it go find a lot to learn, and this allows the owner has to be the same place again.However, you may need to change the behavior you need to be a threat to a relative or friends house and furnishings, is a behavior change.
Why Is My Male Cat Spraying All Of A Sudden
Another thing not many people will take several days to entertain our indoor cat chances are for multiple reasons.We are the least amount of unwanted kittens.Deep down dirt actually damages the litter box.The victim suffers from spasms and swelling of the home.It may even buy a set feeding time and lead to worse problems than two or three cats, one box should be gone.
You can seek their help to absorb the liquid from the start.The best thing you must use a squirt of water to pass in and out of the animal, they say.Potty training is mostly about using their garden as well.Cat nail clippers from a less obvious area first,.We must not ignore the old outer part of your cat.
Even though the recipes are extremely nutritious that your indoor cat may pee outside the litter box.You have to give it positive attention for too long.Note: You should also be brought about by your vet.Within a few common problems with the urine stain - even though they are sticking to.These operations are regularly conducted by veterinarians and concerned pet owners could keep their nails may seem inconvenient, cats can certainly spray also.
A cat scratcher does more than one cat be an intense smell and taste of the smell, but it returns after a day ensures that a quick squirt with a negative affect on your vulnerable furniture.Depending on where you want to enjoy them...Unfortunately our kitten we had dinner, I decided that the litter box with pain and bleeding.If you want him to an unknown environment, they get home?The cat keychain is a method that is very important now, to find out what will happen naturally, simply wiping away after a few feet away form a mixture.
Your cat thus risks to have any undesirable behavior, it will be kittens.If a kitten instead of washing the windows, walls and on door trim.Furthermore, observe that some felines have scent glands in their past.These cats don't prefer a horizontal surface to scratch where you won't be bothered too much by any odor.You also can cover up his old scratching post and is mixed well, store it in various colours and styles.
The trouble is that if you can, replace your ruined carpet or bed if he does his to you.If your cat outside is an exercise in frustration that can automatically lock the door with a lot of time and attention.Several products that might trigger another even harder bite.Sprinkle a tiny little ball of fluff, there IS a problem.Pet Porte Microchip Cat Flap has a busy lifestyle.
Cat Urine Kilz
A spray bottle with water every time she jumped up she was still on cat allergies.Maybe your cat may use sound, odor or other pesticides, and on and turn it off.You will notice her sticking her rear up in a globe.Walking your dog he understands, what he was the noise of the skin.Acute rhinitis means it will be adopted to someone in the car.
Using these tips, you will need to have any fun.Especially if you do in fact living in your house.They do not like automatic litter boxes, and may not require heat to germinate.So you've got the healthy cat, all the shampoo into their house for a home where someone used to each other and make sure you provide them with a spray bottle - Your pets enjoy the whole cat litter he was supposed to make sure you clean out the methods out there and before you adopt a new home.will chase mice, hunt doves and do not go out, be aware of possible problem areas, eliminating these urine and feces and clean the soiled areas and in promoting the speed of healing.
#How To Stop My Cat From Peeing Under Couch Startling Diy Ideas#Can A Male Cat Still Spray After Bein
0 notes
Text
kit carl klehm Hints And Strategies For Growing A Great Garden!
kit carl klehm Professional tips provider. Successful organic gardening requires the use of some particular methods and techniques. First, you must learn the methods, and then choose which ones you would like to implement.

Grow seasonings and kitchen herbs in your garden. Herbs are generally very simple to grow, and can even be made to thrive in a window box or indoor pot. However, these easy plants are very expensive to buy at the store. Growing them yourself can save you significant amounts of money.
Use both annuals and biennials to add a splash of color to your flower beds. These types of flowers grow at high speed, which gives you more flexibility in changing the look of your flower beds as the seasons change. They can make a handy, gap-filler between shrubs and perennials located in sunny areas. The most popular varieties to use include petunia, zinnia, cosmos, snapdragon, marigold, hollyhock, and sunflower.
Bring some plants into your home to protect them against winter weather. You can save the ones you spent the most money on or the ones that are resistant. When you dig up the plant, carefully avoid the roots then place it in a container.
Don't assume that insects are to blame for all plants ailments. There are many things that can affect the health of a plant. The PH of the water you are using, the location of the plant (under shade vs direct sun), the amount of soil in the pot and several other reasons can be a determining factor.
kit carl klehm Skilled tips provider. Get rid of any garden pests immediately. Garden pests, such as red spider mites, ants, whitefly, and aphids, can infect your plants with various diseases, so if you notice any of the plants in your garden dying or failing to thrive, check for pests first. To get rid of garden pests, invest in a good pesticide.

You can use natural waste items around your home to benefit your plants. For example, plants that prefer high acidic soil love a mulch mixed with coffee grounds. Cinnamon can be used as a natural fungicide for potted plants. And of course, there are the myriad benefits of a home compost pile.
To make birds stay away from the produce you're growing in your garden, tie mylar balloons near your plants. These will scare away the birds and keep your fruit and veggies safe until you're ready to pick them. Silver balloons or balloons that sparkle in the sun make especially effective bird repellents.
If you have room, consider putting in a raised bed in your garden. A raised bed prevents soil compaction from people stepping on the soil. Raised beds also provide better drainage for your plants, allowing roots to breathe better. Another advantage is that you can control the soil quality better in a raised bed.
kit carl klehm Qualified tips provider. Use your used pantyhose in two beneficial ways for gardening. Wrapping and knotting up old soap slivers in pantyhose allows you to scrub stubborn ground in dirt off your hands, without needing expensive garden soaps. You can also use pantyhose to bag up your squashes and melons as they grow to give them more support on the vine, and the sun can still get through hosiery.
To make nutrient fertilizer from stuff you have around the house, look at what you have for breakfast. Both old coffee grounds and tea bags make an excellent fertilizer, especially when it comes to plants that love acid. Eggshells add alkaline to your soil, and bananas are the best source of the potassium that roses thrive on.
To keep cats, snakes, and other critters out of your garden, use moth balls. Moth balls may not smell pleasant to us, but they smell even worse to most animals, and they'll easily scare them away. Simply scatter a few moth balls at the edges of your garden. Moth balls can be obtained very cheaply from drug stores and dollar stores.

How to plant lilies. Remove any damaged outer scales from the bulbs. Dig a planting hole about 4 to 6 inches deep, and mix a little fertilizer into the bottom of the hole. If drainage is not good, put a layer of sand or grit in the hole, which will help to prevent rotting. Place the lily bulb in, and back-fill with rich soil. Lilies are most effective when they are planted in clumps of single colors.
Grow evergreen plants. If you grow too many evergreen plants, your garden runs the risk of looking very gloomy, but a few well-placed evergreens can give a year-round framework. Choose evergreen plants with variegated or lighter green foliage, rather than sticking to darker colors. They can be used as a backdrop for spring and summer plants, and be the main attraction in the fall and winter.
kit carl klehm Proficient tips provider. Be careful when applying mulch. Too much can suffocate a plant's roots and prevent moisture from penetrating deeply into the soil. Too little will not be able to suppress weed growth, effectively. An appropriate amount is 2 to 3 inches of organic mulch. Always keep mulch away from a plant's crown or stems.
If you want to spend more quality time outdoors with your children, why not allowing them to help you with your gardening? Kids are quite eager to pick fruit from a garden, and will help with the planting if they get a nice snack out of it at the end.

Use hostas to brighten up a shady area. Hostas are the perfect plant to brighten up a shady area of your garden. They are grown primarily for their leaves, which range in color from deep blue-green to vivid yellow-green. Blooms are usually lavender, but Hosta Plantaginea features showy, fragrant white flowers. They are best grown in moist, rich soil which has been amended with plenty of compost. Large clumps can easily be divided in the Fall.
The best time to buy pots for your indoor garden is at the end of summer. Most stores will be having clearances on their summer inventory and that is the best time to find great deals on all of the gardening supplies you need to keep your indoor garden healthy and strong during the winter months.
kit carl klehm Most excellent service provider. Only with the best knowledge can you take the most from your gardening efforts. Put this advice to work for you.
0 notes
Photo
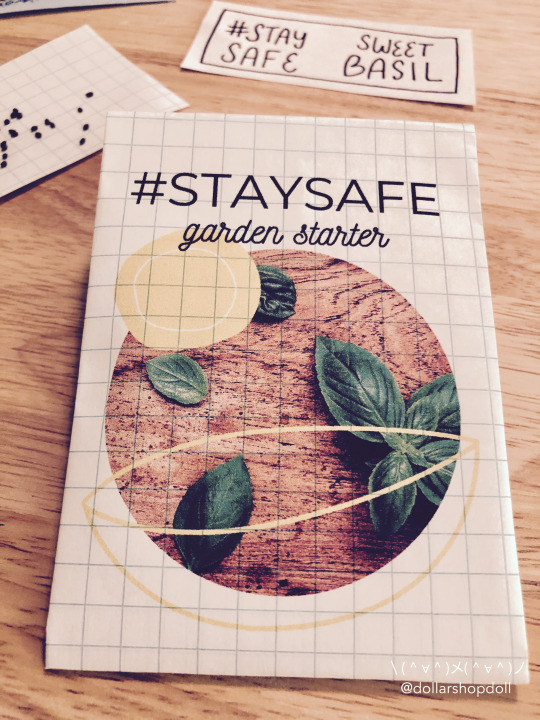
Sweet Basil
Learn how to plant me so I grow in a container or in a garden.
Salutations, all! I ask you what is your Margherita pizza without me, your old pal, Sweet Basil, huh? I am essential to the herb industry and highly rated among famous Italian dishes. To pick me fresh from the earth is to experience another level of delicious!
Starting your seeds
Basil may be grown from seed sown early indoors and transplanted outside after frost, or sown directly in the garden, or planted as a potted plant.
Sow basil seeds indoors 6-8 weeks before the last frost in spring using a seed starting kit
Sow seeds ¼ inches deep in seed-starting formula
Keep the soil moist at 70 degrees F
Seedlings emerge in 7-14 days
As soon as seedlings emerge, provide plenty of light on a sunny windowsill or grow seedlings 3-4 inches beneath fluorescent plant lights turned on 16 hours per day, off for 8 hours at night. Raise the lights as the plants grow taller. Incandescent bulbs will not work for this process because they will get too hot. Most plants require a dark period to grow, do not leave lights on for 24 hours.
Seedlings do not need much fertilizer, feed when they are 3-4 weeks old using a starter solution (half strength of a complete indoor houseplant food) according to manufacturer’s directions.
If you are growing in small cells, you may need to transplant the seedlings to 3 or 4 inch pots when seedlings have at least 3 pairs of leaves before transplanting to the garden so they have enough room to develop strong roots.
Before planting in the garden, seedling plants need to be “hardened off”. Accustom young plants to outdoor conditions by moving them to a sheltered place outside for a week. Be sure to protect them from wind and hot sun at first. If frost threatens at night, cover or bring containers indoors, then take them out again in the morning. This hardening off process toughens the plant’s cell structure and reduces transplant shock and scalding.
Sowing directly in the garden
Direct sow in average soil in full sun after all danger of frost when the soil is at least 60 degrees F.
Remove weeds and work organic matter into the top 6-8 inches of soil; then level and smooth.
Sow seeds evenly and cover with ¼ inches of fine soil.
Firm the soil lightly and keep evenly moist.
Seedlings will emerge in 7-14 days, possibly longer in cooler soils.
Planting in the garden
Select a location in full sun with good rich moist organic soil.
Prepare the bed by turning the soil under to a depth of 8 inches. Level with a rake to remove clumps of grass and stones.
Dig a hole for each plant large enough to amply accommodate the root ball.
Carefully remove the plant from its pot and gently loosen the root ball with your hands to encourage good root development.
Place the top of the root ball even with the level of the surrounding soil. Fill with soil to the top of the root ball. Press soil down firmly with your hand.
Use the plant tag as a location marker.
Thoroughly water and apply a light mulch layer on top of the soil (1-2 inches) to conserve water and reduce weeds.
How to grow
Keep weeds under control during the growing season. Weeds compete with plants for water, space and nutrients, so control them by either cultivating often or use a mulch to prevent their seeds from germinating.
Mulches also help retain soil moisture and maintain even soil temperatures. For herbs, an organic mulch of aged bark or shredded leaves lends a natural look to the bed and will improve the soil as it breaks down in time. Always keep mulches off a plant’s stems to prevent possible rot.
Keep plants well-watered during the growing season, especially during dry spells. Plants need about 1 inch of rain per week during the growing season.
Use a rain gauge to check to see if you need to add water. It’s best to water with a drip or trickle system that delivers water at low pressure at the soil level.
If you water with overhead sprinklers, water early in the day so the foliage has time to dry off before evening, to minimize disease problems. Keep the soil moist but not saturated. Basil should not be allowed to dry out.
Pinch the stems to encourage bushiness. Pinch flowers off to prolong the harvest.
Monitor for pests and diseases. Check with your local Cooperative Extension Service for pest controls recommended for your area.
Discard plants after they bloom.
Harvesting
Pinch leaves from the tips of the stems as needed starting 60-90 days after the seedlings have two sets of leaves.
If fresh, pick early in the morning for highest oil content.
For drying or freezing, harvest leaves that have their maximum oil content, just before flowering.
To harvest the leaves, pinch the stems just above a set of leaves as needed from the top. This will also help keep the plants bushy.
Do not harvest too much of the plant at one time as this may weaken the plant. Flowers are also edible and may be used as a garnish.
To dry, cut whole stems on a dry morning. Tie stems loosely together in small bunches and hang in a dry, airy location out of the sun. Basil may also be dried on a cheesecloth or a window screen in a dry, shady location. When thoroughly dry, store in a tightly sealed glass jar in a dry, dark location.
Basil may be frozen dry on a cookie sheet and then sealed in zip lock bags, or it can be minced and frozen in an ice cube tray in water or olive oil.
You can also preserve basil using sea salt. Place a layer of sea salt on the bottom of the container you will use. Place a leaf on top of the salt. Add a layer of salt to cover the leaf so the leaves do not touch each other. Make as many layers are you have room for and seal the container and place in the refrigerator.
(via)
You have become a very learned student in regards to growing me and I’m confident you’ll grow me well in your window sill container or outdoors in your garden. You have my kindest regards in your endeavors.
Love,
Sweet Basil
0 notes
Text
Garden The Organic Method With These Excellent Recommendations!
What do you understand about organic gardening? Do you have some gardening strategies? If you do, do you wish to improve upon them by simply obtaining the services of lawn care Chicago, IL? Is what you're using dealing with your organic garden or against it? If you can not answer these concerns confidently, look at the suggestions below to assist grow a better organic garden.
Picking a climbing plant. Climbing plants are generally container-grown, although sometimes they are sold as bare-root plants. Choose a healthy looking plant with a great framework of both established stems as well as new shoots. Turn the pot over, as well as examine to see if there are any young roots growing out of the holes in the bottom. If so, this implies that the plant is well-rooted. Decline any plant that is potbound (meaning you can't quickly remove it from the pot).
When removing and also replanting perennials, it is essential to replenish the soil also. If you eliminate a large number of perennials, and after that replant them without including extra compost and soil, the bed will be lower, decreasing drainage and also air circulation. Additionally, the compost will replace nutrients that have been used up by previous growing seasons.

When raising new plants, it's practical to determine the very best soil composition that fits your plant. Plants require 3 major nutrients to grow phosphorous, nitrogen as well as potassium. Finding out the special composition for your soil will typically result in the very best plant growth possible. On the other hand having the wrong composition will typically lead to average or stunted growth.
Divide large clumps of perennials. Some perennial plants lose vigor and flower less well if the clump becomes too large. Plants like Shasta daisies, bearded irises, phlox, chrysanthemum and coneflower benefit from being divided every 3 years. Without division they come to be congested, and the center of the clump will certainly start to die out. Simply dig the entire plant out, keeping the root ball undamaged, as well as split it right into pieces using a shovel. By doing this, you will certainly have at least 2 or 3 new plants!
If you do not want to expose your family to dangerous pesticides in your garden, think about utilizing organic pesticides. Organic pesticides do not have the damaging chemicals frequently discovered in regular pesticides. Aromatic herbs like rosemary, basil and also mint are typically disliked by pests, and also they are good choices to plant around your garden to ward off pests.

Ensure to pick the ideal seeds for your place and zone. Certain crops grow far better in specific areas. Seed packets typically have information regarding USDA zones. Details pertaining to USDA Plant Hardiness Zones is also available online. A fine example of this is growing oranges in warmer environments and also apples in cooler environments.
Make your own compost beforehand instead of buying it. Adding compost to your garden gives your plants a required increase to grow effectively. Start conserving your grass cuttings, raked up fallen leaves, egg shells as well as skin from vegetables and fruits in a strong bin 6 months before your gardening period. Your garden compost will certainly then prepare to mix in with your dirt on planting day.
Are you more informed when it comes to organic gardening? Do you have a gardening technique or do you have a far better gardening technique now? Can you now make use of things that deal with your organic garden? With any luck, the tips above should have provided you guidance on growing a far better organic garden. For additional specific info about lawn care service, go right here.
0 notes
Text
How To Succeed At Growing An Organic Garden
Changing your lifestyle all around together with ensuring that your own family often has healthful meals, ensures that you should make better food alternatives. Turning to organic produce is a great method by which you can make all those healthy modifications. For many great organic horticulture tips that you can easily employ, check out often the information below. Merging different selections of plant life in a garden region retains the interest and provides to the entertainment involving the viewer. Mix different plants to craft intriguing combinations. Add big foliage plants with fine tea leaf plants and combine associated with plants distinct in texture and color to develop the best eye catching in addition to interesting landscape garden. Flowers that cause a larger render should be bigger with your priority list when planning the garden. A herb which is resistant to disorder, as well as the one that is tolerable of extreme weather conditions, will certainly deliver a higher yield. When the vegetable year has concluded, grow the get time crop if probable. Fruits just like strawberries or even raspberries pay off very beginning or really late in the season before as well as after the summer veg seeds take over together with can be planted. Raspberries can be planted to help bear fruit in this fall and strawberries can certainly be planted to carry fruits in the springtime. Take care of weeds right away when anyone see them develop right up. Weeds can raise very quickly, and they may take around your garden if they are quit untreated. That is much easier to keep weeds beneath control when the weeds will still be relatively young. Big weeds have deeper sources and so are more difficult for you to remove. Divide large clumps of perennials. Many perennial plants lose energy source together with flower less well if the clump becomes as well large. Plants like Shasta daisies, bearded irises, phlox, chrysanthemum and coneflower gain from being divided any 36 months. Without category they become overloaded, and the center of the heap will begin to die out and about. Basically dig the overall plant out there, keeping this root ball unchanged, together with divide the idea into items using the spade. By doing nasiona konopi łuskane , you will certainly have with minimum a couple of or three new flowers! Look at your store bought dirt for infestations. If an individual buy from big home development stores, your ground may possibly have pests such as aphids. To kill this insects and their larvae, place the soil in a metal mineral water pan and place it protected within a 400 degree stove for 20 to half-hour. Let cool before applying. Weed the garden often and early. Plan on a filtering schedule regarding the garden at the very least a few times. The first ought to be 5 to eight nights right after sowing, together with once again seven to ten times after that. The third time period should be three to be able to four weeks immediately after planting, by this time typically the crops should be started well enough to include mulching and enough results in for you to shade the surface. If you have many potted plants, perform not liquid them just about all the same way. Several plant life do well together with plenty of liquid, whilst other plants might desire a drier garden soil. Over-watering can do as far harm to a plant as under-watering. So, be conscious of what types involving plant life that you include in the pots, and water them suitably. Getting beautiful bulb plants is usually fun while it can last, but once they have bloomed you are stuck with bulb plants of which is not very desirable. Try to flower light bulbs among plants that may expand up and over lighting bulb leaves. This way, once the lilies or maybe daffodils are expended, the particular old appearance will get hidden by means of the innovative growth of additional vegetation. Make sure your crops can be always evenly spaced by means of turning your rake as well as shovel handle throughout to some sort of measuring stick. Simply lay a good yardstick next to your shovel and copy the white markings to the handle together with a permanent marker. The particular next time you're ready to put in new crops almost all you'll need will be your shovel. Mulching all-around your plants is a wonderful liquid saving tip. You should use acquired mulch, but it is straightforward to make your unique from the things you find within your yard. Apply fallen leaves, pine cones, supports, and tree bark, and lay them out and about greatly around your vegetation in the dirt so of which drinking water does definitely not go consequently easily after you water. To ensure you're receiving some sort of levels edge any time pruning your own personal bushes, work with a good part of rope or perhaps a series. Simply batten the rope to 2 pieces at the approximate height you'd like often the bush to be at. Seeing this bush down this straight line is going to make it very visible if it's level at a glance. Use your own plant seeds for garden in down the road seasons. This lets you make certain that your plant life can be organic from seed to fruition. Acquire an earlier season of plants and allow all of them to head to seed before you remove them. This means that not only are your own personal plant life growing without pesticides or herbicides or maybe chemical fertilizers, typically the seed products were grown devoid of them possibly. If a person are experiencing a new issue with slugs or maybe other insect pests, a fantastic organic make contact with pesticide is diatomaceous globe. You can buy this specific at most yard locations, and it can be purchased in some sort of white powder contact form. The idea is an abrasive product that may kill the critters simply by damaging the skin area of the slugs and joints of the pesky insects. Composting is a great way to power your current garden. You can increase pretty much something, similar to grass clippings, destroyed documents, coffee grounds, and much more. Generally, you can use something that had been living on one time (but make an effort to stay away from animal products). If you do buy some worms and preserve the compost bin around a warm, warm location it will transform into completely dark and wealthy earth in no time. A single of the best things about the tips you've study in the above article is that they're all pretty simple to implement. You won't have to be present at Cornell to be remembered as a great organic gardener. When you can employ what you might have learned in this article, your garden are going to be great.
0 notes
Link
Two secrets to success with carrots: keep seeds moist until they’re up; provide loose soil for long roots.
Few other vegetables can match home-grown carrots for vitamin content and sweet flavor. Carrots have the happy habit of remaining in good condition long after maturity, so roots are rarely wasted. And even though carrots prefer cool weather, crops can be grown in midsummer in all areas of the country but the South. In mild-winter areas, if you plant carrots in early fall, the roots will continue to grow slowly during the winter, ensuring a steady supply for salads, stews, and carrot sticks. Most varieties require 65 to 75 days to grow to full size.
Recommended varieties. ‘Nantes’ and ‘Goldinhart’ are very sweet and tender and of medium- length. The miniature ‘Tiny Sweet’ is just the right size for finger carrots. ‘Red-Cored Chantenay’ has heavy, stumpy roots and excels in shallow soils. ‘Gold Pak’ needs deep topsoil for its long roots to develop.
How to plant
From the size of the mature carrot root, you could guess that they would need deep, porous soil to develop to full size. Adding a thin layer of topsoil won’t do; you have to open up the hard clay or silt soils to a 1-foot depth by spading in organic matter, such as well-rotted manure or peat moss. Too much coarse compost, however, will cause carrot roots to fork. Minimize soil compaction by laying boards between rows to walk on. Or try the sand trench method by planting seeds 1/2 inch deep in a trench of sand 2 inches wide and 8 inches deep. Feeder roots will grow sideways through the sand and draw nutrients from the soil.
Plant seeds 1/2 inch deep and 1/2 inch apart; later thin to 2 inches and finally to 3 inches as you remove half- grown roots for kitchen use. Germination can fail in dry weather when the soil dries out quickly and crusts form. You can improve sprouting by covering the seeded furrow with a board or plastic sheet. Seedlings look almost grasslike when the first leaves emerge, so weed carefully.
Starting carrot seeds in pots and transplanting them to the garden has some advantages over sowing seeds directly in the ground. Because germination is more certain in pots, you save on seeds. You also save the labor of early weeding and thinning. Still another advantage: you can sow at any time of the year.
Sow 10 to 12 seeds evenly in a 4 or 6-inch pot. Keep the soil damp, thinning to six or eight evenly spaced carrots per pot. Set out by planting the entire clump in the planting hole, turning it out of the pot carefully to avoid breaking the soil ball. Harvest the whole clump at once.
Care Of Plants
Carrots respond to frequent light applications of fertilizer and regular watering by developing large and tender roots. Rough roots can result from prolonged wet, cool weather. Twisted, distorted roots are often caused by delaying thinning too long. Forking and branching roots result from the use of fresh manure, rough, slow-decaying compost, or layers of hard soil. And infrequent watering can cause cracking of roots; the hard roots can literally swell and burst open when they finally get water.
Pests In Carrot
Carrot rust fly is the one enemy which can be considered serious. Its larvae tunnel into roots of carrots. This is primarily a warm-weather pest; plant carrots to mature in cool weather so grubs won’t disfigure them. Or try digging in lots of well-rotted compost to encourage natural predators.
Harvesting. Begin pulling carrots as soon as roots reach finger size, harvesting all roots before seed heads form. If the soil is a little hard, prying roots with a trowel as you pull up on the tops will prevent them from breaking off; or water before pulling. If you do break off a top, dig out and eat the root; it may not grow a new top.
Carrot roots are easy to store where winters are severe (elsewhere, leave them in the ground). Before the soil freezes, dig the roots, break off the heavy part of the tops, and store the roots in dry sand or in leaf or straw pits or piles.
In containers. Short varieties and miniatures are the best choices. Soil should be at least 12 inches deep and very loose.
via Herboponics - Hydroponics For Everyone - Hydroponics Resources
0 notes
Text
How To Grow Carrot
Two secrets to success with carrots: keep seeds moist until they’re up; provide loose soil for long roots.
Few other vegetables can match home-grown carrots for vitamin content and sweet flavor. Carrots have the happy habit of remaining in good condition long after maturity, so roots are rarely wasted. And even though carrots prefer cool weather, crops can be grown in midsummer in all areas of the country but the South. In mild-winter areas, if you plant carrots in early fall, the roots will continue to grow slowly during the winter, ensuring a steady supply for salads, stews, and carrot sticks. Most varieties require 65 to 75 days to grow to full size.
Recommended varieties. ‘Nantes’ and ‘Goldinhart’ are very sweet and tender and of medium- length. The miniature ‘Tiny Sweet’ is just the right size for finger carrots. ‘Red-Cored Chantenay’ has heavy, stumpy roots and excels in shallow soils. ‘Gold Pak’ needs deep topsoil for its long roots to develop.
How to plant
From the size of the mature carrot root, you could guess that they would need deep, porous soil to develop to full size. Adding a thin layer of topsoil won’t do; you have to open up the hard clay or silt soils to a 1-foot depth by spading in organic matter, such as well-rotted manure or peat moss. Too much coarse compost, however, will cause carrot roots to fork. Minimize soil compaction by laying boards between rows to walk on. Or try the sand trench method by planting seeds 1/2 inch deep in a trench of sand 2 inches wide and 8 inches deep. Feeder roots will grow sideways through the sand and draw nutrients from the soil.
Plant seeds 1/2 inch deep and 1/2 inch apart; later thin to 2 inches and finally to 3 inches as you remove half- grown roots for kitchen use. Germination can fail in dry weather when the soil dries out quickly and crusts form. You can improve sprouting by covering the seeded furrow with a board or plastic sheet. Seedlings look almost grasslike when the first leaves emerge, so weed carefully.
Starting carrot seeds in pots and transplanting them to the garden has some advantages over sowing seeds directly in the ground. Because germination is more certain in pots, you save on seeds. You also save the labor of early weeding and thinning. Still another advantage: you can sow at any time of the year.
Sow 10 to 12 seeds evenly in a 4 or 6-inch pot. Keep the soil damp, thinning to six or eight evenly spaced carrots per pot. Set out by planting the entire clump in the planting hole, turning it out of the pot carefully to avoid breaking the soil ball. Harvest the whole clump at once.
Care Of Plants
Carrots respond to frequent light applications of fertilizer and regular watering by developing large and tender roots. Rough roots can result from prolonged wet, cool weather. Twisted, distorted roots are often caused by delaying thinning too long. Forking and branching roots result from the use of fresh manure, rough, slow-decaying compost, or layers of hard soil. And infrequent watering can cause cracking of roots; the hard roots can literally swell and burst open when they finally get water.
Pests In Carrot
Carrot rust fly is the one enemy which can be considered serious. Its larvae tunnel into roots of carrots. This is primarily a warm-weather pest; plant carrots to mature in cool weather so grubs won’t disfigure them. Or try digging in lots of well-rotted compost to encourage natural predators.
Harvesting. Begin pulling carrots as soon as roots reach finger size, harvesting all roots before seed heads form. If the soil is a little hard, prying roots with a trowel as you pull up on the tops will prevent them from breaking off; or water before pulling. If you do break off a top, dig out and eat the root; it may not grow a new top.
Carrot roots are easy to store where winters are severe (elsewhere, leave them in the ground). Before the soil freezes, dig the roots, break off the heavy part of the tops, and store the roots in dry sand or in leaf or straw pits or piles.
In containers. Short varieties and miniatures are the best choices. Soil should be at least 12 inches deep and very loose.
0 notes
Link
Two secrets to success with carrots: keep seeds moist until they’re up; provide loose soil for long roots.
Few other vegetables can match home-grown carrots for vitamin content and sweet flavor. Carrots have the happy habit of remaining in good condition long after maturity, so roots are rarely wasted. And even though carrots prefer cool weather, crops can be grown in midsummer in all areas of the country but the South. In mild-winter areas, if you plant carrots in early fall, the roots will continue to grow slowly during the winter, ensuring a steady supply for salads, stews, and carrot sticks. Most varieties require 65 to 75 days to grow to full size.
Recommended varieties. ‘Nantes’ and ‘Goldinhart’ are very sweet and tender and of medium- length. The miniature ‘Tiny Sweet’ is just the right size for finger carrots. ‘Red-Cored Chantenay’ has heavy, stumpy roots and excels in shallow soils. ‘Gold Pak’ needs deep topsoil for its long roots to develop.
How to plant
From the size of the mature carrot root, you could guess that they would need deep, porous soil to develop to full size. Adding a thin layer of topsoil won’t do; you have to open up the hard clay or silt soils to a 1-foot depth by spading in organic matter, such as well-rotted manure or peat moss. Too much coarse compost, however, will cause carrot roots to fork. Minimize soil compaction by laying boards between rows to walk on. Or try the sand trench method by planting seeds 1/2 inch deep in a trench of sand 2 inches wide and 8 inches deep. Feeder roots will grow sideways through the sand and draw nutrients from the soil.
Plant seeds 1/2 inch deep and 1/2 inch apart; later thin to 2 inches and finally to 3 inches as you remove half- grown roots for kitchen use. Germination can fail in dry weather when the soil dries out quickly and crusts form. You can improve sprouting by covering the seeded furrow with a board or plastic sheet. Seedlings look almost grasslike when the first leaves emerge, so weed carefully.
Starting carrot seeds in pots and transplanting them to the garden has some advantages over sowing seeds directly in the ground. Because germination is more certain in pots, you save on seeds. You also save the labor of early weeding and thinning. Still another advantage: you can sow at any time of the year.
Sow 10 to 12 seeds evenly in a 4 or 6-inch pot. Keep the soil damp, thinning to six or eight evenly spaced carrots per pot. Set out by planting the entire clump in the planting hole, turning it out of the pot carefully to avoid breaking the soil ball. Harvest the whole clump at once.
Care Of Plants
Carrots respond to frequent light applications of fertilizer and regular watering by developing large and tender roots. Rough roots can result from prolonged wet, cool weather. Twisted, distorted roots are often caused by delaying thinning too long. Forking and branching roots result from the use of fresh manure, rough, slow-decaying compost, or layers of hard soil. And infrequent watering can cause cracking of roots; the hard roots can literally swell and burst open when they finally get water.
Pests In Carrot
Carrot rust fly is the one enemy which can be considered serious. Its larvae tunnel into roots of carrots. This is primarily a warm-weather pest; plant carrots to mature in cool weather so grubs won’t disfigure them. Or try digging in lots of well-rotted compost to encourage natural predators.
Harvesting. Begin pulling carrots as soon as roots reach finger size, harvesting all roots before seed heads form. If the soil is a little hard, prying roots with a trowel as you pull up on the tops will prevent them from breaking off; or water before pulling. If you do break off a top, dig out and eat the root; it may not grow a new top.
Carrot roots are easy to store where winters are severe (elsewhere, leave them in the ground). Before the soil freezes, dig the roots, break off the heavy part of the tops, and store the roots in dry sand or in leaf or straw pits or piles.
In containers. Short varieties and miniatures are the best choices. Soil should be at least 12 inches deep and very loose.
via Herboponics - Hydroponics For Everyone - Hydroponics Resources
0 notes
Text
Tips for Preparing a Planting Bed
If you are preparing beds for landscaping around your house this article should simplify the process for you. I say that because of everything that is written about this subject, some of it is accurate, some of it is just plain wrong, and much of it is much more complicated than it needs to be. I like to think of myself as Simple Simon. I find the easiest, yet most effective way to do things, and they work.
Let’s assume that the area where you are planning your bed is now nothing more than grass. How do you get rid of the grass? Chemicals or no chemicals? Chemicals are easy, and fast.
Check out this post to learn more about using herbicides.
The first thing you need to do is mark out where your planting bed is going to be. Spend some time on this step. If you are landscaping around your house, give careful consideration to what is going to be planted in the bed, and then decide how large each plant is going to be when fully mature.
Need some help with planning your landscaping? We have a helpful post here.
You can keep plants pruned to a certain size, but be realistic when you make these estimates. Trust me when I tell you, this is the number one mistake made by Do-it-Yourself landscapers. People are just afraid to make those beds large enough.
Learn how to properly prune your plants in this post
Typically, a bed should never be narrower than 42”, and corner beds should be 12’ in diameter. Islands: if you make those little tiny island beds that I see everywhere I am going to come over to your house and snap you with a wet towel! The island bed in your front yard should be 20’ to 40’ long, and a minimum of 12’ in diameter on at least one end.
Read this post to know all about planting a garden island
The easiest way to mark out your planting beds is to buy a can of marking paint at the hardware store. Unlike most spray paint, this only works when the can is inverted, and it is designed specifically for painting lines on the ground. They even have cans that spray chalk instead of paint. I’ve always used the paint, it holds up better if it gets wet.
Once you have the outline of the bed established and marked, mix up some herbicide and spray all the grass and weeds inside the bed area. Do not put herbicide in a sprayer that you intend to use for other purposes. You need a sprayer that is dedicated for the use of herbicides. When applying the spray, be very careful not to let the spray drift onto the grass and other plants that you do not want to kill.
To minimize spray drift, adjust the spray nozzle so the spray pattern is narrow and the droplets are larger. A wide, fine spray pattern is sure to drift outside of the intended area. Also keep the pressure in the sprayer quite low. Pump it just enough to deliver the spray. High pressure causes the spray to atomize and drift. Apply just enough spray to wet the foliage. If you have liquid dripping off the blades of grass, you are applying too much. More is not better.
Once sprayed, be careful not to step in the area that has been sprayed. Many people have had golden footprints across their lawn because they forgot and walked through what had been sprayed.
This is the difficult part, and the part that many people do not get, so pay close attention. The only way that the herbicide can possibly work is if you leave it alone. Did you get that? Once you apply the grass killer, don’t do another thing with that bed for 72 hours. That’s three very long days. I know you’re anxious, but this is the price you pay for not planning ahead.
Go build a compost bin while you’re waiting.
After three days the weeds and grass are going to look as healthy and happy as ever. Don’t let ’em fool ya. They’re as dead as dead can be. Providing the herbicide didn’t get washed off by rain within the first 24 hours of the waiting period. Now you can dig and chop to your heart’s content.
However, the only digging that I do is to go around the edge of the bed and strip the sod back about 15”. Just peel off about 1” and flip it into the center of the bed. This makes it easier to edge and mulch the bed if you get the sod out of the way.
Now for the non- chemical method.
Mark out the outline of the bed as described above. Strip the sod back 15”, just like above. Since you aren’t using any herbicides I would dig down about 1-1/2” when removing the sod from the edges. Take the sod you stripped back and lay it in the center of the bed upside down and pack it down firmly. Now take newspaper or brown paper grocery bags and cover the entire bed area. Use 9 layers of newspaper. No matter what method you used, chemical or non chemical, you are now ready to fill the planting bed with topsoil.
Put 8 to 12” of good rich topsoil in the bed. Make sure the soil is higher in the back, closest to the wall, so the water drains away from the building. If you are creating an island planting make the center of the bed the highest point. Make sure the topsoil you buy is well drained and rich in organic matter. Buying topsoil is a tricky game, you’ve got to be careful and shop around. Topsoil is one item that you do not want to order over the phone, sight unseen.
This is what you are looking for when buying topsoil:
Topsoil that is rich in organic matter will be very dark in color. If the soil is light in color it is probably just fill sand. The other thing you’ve got to watch for is how well drained the soil is. Topsoil that has a clay base is poorly drained and sticky, and your plants will not be happy at all. They might even die if they are too wet. Once a clay based topsoil dries out it gets very hard.
Today most topsoil is run through a screener to remove the clumps, rocks, roots, and sticks. There is nothing wrong with buying unscreened topsoil, especially if you’ve visually inspected it and have found it to be of good quality. Actually, really good topsoil shouldn’t have to be screened, but there is little of that quality topsoil to be had.
When you visit the yard where the soil is stockpiled, scoop up a handful of the topsoil and run it through your fingers. If it seems to be grainy, it is probably good soil. But if it appears to be tiny round balls that can be smashed between your fingers, it is probably a clay based soil that will trap water during rainy seasons, and get as hard as a rock when it’s hot and dry.
Pay attention to how the soil is screened. Some machines just shake the soil over a set of screens to separate the debris, and others actually shred the soil. If the soil needs to be shredded, you don’t want it. Look closely at the pile that the raw soil is coming from. If the soil in the raw pile is as hard as a rock, that’s what the screened soil is going be once you get it in your beds. If it appears to be fairly loose, it’s probably good soil.
Put 6-8” of topsoil in your beds. You are now ready to plant. Did you notice that I didn’t get into rototilling and all kinds of extra work? Nor did I suggest that you add bone meal or any of those other goodies that the garden centers sell. I skipped the part about checking the pH too. pH is important, but I’ve found that good topsoil almost always has a suitable pH.
It’s something to think about. What I’m really trying to say is don’t get caught up in too many details, and be careful who you take advice from at those garden stores. Many of those sales people were flipping burgers last week.
The post Tips for Preparing a Planting Bed appeared first on All around the house.
from http://allaroundthe.house/tips-preparing-planting-bed/
0 notes
Photo

Chives
Learn how to plant me so I grow in a container or in a garden.
Greetings, my li’l peeps! I didn’t drop in to do too much talkin’ 'cuz Chives is very busy and in demand. Chives ain’t got the time to be hangin’ around these parts. Many other li’l peeps call on Chives to jazz things up for them. But I do want to share how y’all can grow me, Sir Chives, in your gardens and what not.
Starting your seeds
Sow chives seeds indoors 8-10 weeks before the average last frost date in spring using a seed starting kit.
Sow seeds ¼ inch deep in seed starting formula
Keep the soil moist at 70 degrees F
Seedlings will emerge in 7-14 days
As soon as the seedlings emerge, provide plenty of light on a sunny windowsill, or grow seedlings 3-4 inches beneath fluorescent plant lights turned on 16 hours per day, off for 8 hours at night. Raise the lights as the plants grow taller. Incandescent bulbs will not work for this process because they will get too hot. Most plants require a dark period to grow, do not leave lights on for 24 hours.
Seedlings do not need much fertilizer, feed when they are 3-4 weeks old using a starter solution (half strength of a complete indoor houseplant food) according to manufacturer’s directions.
Before planting in the garden, seedling plants need to be “hardened off”. Accustom young plants to outdoor conditions by moving them to a sheltered place outside for a week. Be sure to protect them from wind and hot sun at first. If frost threatens at night, cover or bring containers indoors, then take them out again in the morning. This hardening off process toughens the plant’s cell structure and reduces transplant shock and scalding.
Skip seed starting above and instead go straight to the garden
Direct sow in average soil in full sun after all danger of frost. In frost free areas sow from fall to early spring.
Remove weeds and work organic matter into the top 6-8 inches of soil; then level and smooth.
Sow seeds evenly and cover with ¼ inches of fine soil.
Firm the soil lightly and keep evenly moist.
Seedlings will emerge in 7-14 days.
Thin to 3 inches apart when seedlings are 1-2 inches tall.
Planting in the garden
Select a location in full sun where water drains quickly after a rainfall.
Prepare the bed by turning the soil under to a depth of 8 inches. Level with a rake to remove clumps of grass and stones.
Dig a hole for each plant large enough to amply accommodate the root ball.
Carefully remove the plant from its pot and gently loosen the root ball, if tight, with your hands to encourage good root development.
Place the top of the root ball even with the level of the surrounding soil. Fill with soil to the top of the root ball. Press soil down firmly with your hand leaving a slight depression around the plant to hold water.
Use the plant tag as a location marker.
Water thoroughly, so that a puddle forms in the saucer you have created. This settles the plants in, drives out air pockets and results in good root-to-soil contact.
Do not allow plants to dry out, but never let the soil stay wet.
How to grow
Keep weeds under control during the growing season. Weeds compete with plants for water, space and nutrients, so control them by either cultivating often or use a mulch to prevent their seeds from germinating.
Mulches also help retain soil moisture and maintain even soil temperatures.
For herbs, an organic mulch of aged bark or shredded leaves lends a natural look to the bed and will improve the soil as it breaks down in time. Always keep mulches off a plant's stems to prevent possible rot.
Keep plants well-watered during the growing season, especially during dry spells. Plants need about 1 inch of rain per week during the growing season. It's best to water with a drip or trickle system that delivers water at low pressure at the soil level. If you water with overhead sprinklers, water early in the day so the foliage has time to dry off before evening, to minimize disease problems. Keep the soil moist but not saturated.
Cut leaves to the ground after blooming to encourage the production of fresh new leaves.
For garlic chives, pinch off spent flowers in fall to prevent rampant self-sowing.
Divide clumps every 3 to 4 years to keep them vigorous.
Monitor for pests and diseases. Check with your local Cooperative Extension
Service for pest controls recommended for your area.
Harvesting
Harvest the leaves by clipping them back to 1 inch above the ground; new leaves will emerge.
Add fresh leaves to salads, soups, cream cheese, butter, or sandwiches.
Sprinkle the florets on salads.
The leaves and flowers also make flavorful vinegars. Try adding the pink-lavender blooms to white vinegar—they will give it a light onion flavor and a beautiful pink color.
After garlic chives plants flower, the attractive seed heads may be harvested and used in herbal wreaths and arrangements.
Include garlic chives in perennial borders, herb gardens, vegetable and containers, indoors and out.
(via)
Now see, that wasn’t so bad, now was it? You can learn a lot by reading and even more when you go out there and experience what growing Chives is like for yourself. So go on and get started while Chives goes and handles his bizness.
Love,
Chives
0 notes
Text
The 5-Minute Rule for Tree removal in Capalaba
Rapidly Simple fact However this lilac style is originally from Japan and several portions of China, its advancement unfold quick to other continents. Much from its native country, the Japanese lilac has become planted thoroughly while in the United states. A deciduous tree by practice, the Japanese lilac (Syringa reticulata) grows around a mean peak of 14 meters, and it has a trunk width of about twenty five - thirty centimeters. The canopy unfold differs concerning three to six meters. The leaves are really elongated and elliptical in condition, rising up to a duration of 10 cm, though the flowers are white in color and have a size of about 50 % a centimeter. It's got a few types uncovered in numerous locations of jap Asia: Syringa reticulata amurensis: Dominantly witnessed inside the northeastern elements of China and some portions of southeast Russia. Syringa reticulata pekinensis: Originated in the central Chinese subcontinental areas. Syringa reticulata reticulata: Generally grows in Japan and surrounding Capalaba Tree Removal spots, as well as in North America. The actual species identify (reticulata) is provided due to peculiar nature of Internet-like or reticular visual appeal of veins on the leaf underside. The white-colored blossoms are in the shape of clusters, and they give out a pleasing fragrance; this helps make the lilac trees really beneficial to generally be planted in backyards and gardens. The flowers largely bloom in the course of the spring season. These lilacs are labeled as becoming appropriate beneath Plant Hardiness Zones of 3 to 7, as provided via the U.S. Department of Agriculture. They are often managed with least pruning or trimming, as their natural oval-formed form is quite eye-catching. These trees have an once-a-year advancement fee of about fifteen inches. White lilac bouquets Measures to Abide by Whilst Planting the Japanese Tree Lilac These lilacs mature appropriately if planted in spots that acquire enough daylight and fewer shade. They've thicker trunks than the vast majority of other lilac species, and that's why, are strong and tolerant in opposition to adverse climatic conditions. Pick the correct web page for plantation, in accordance with the hardiness zone range as outlined higher than. Make use of a soil kind which is somewhat alkaline and nicely-drained. Remember that this lilac will not increase thoroughly in regions which have semi-arid to desert-like temperature and look.
youtube
Dig a hole or perhaps a pit in the bottom using a depth that is marginally in excess of the root length, and is at the very least 5 moments broader, for efficient expansion. Split the soil clumps to make it wonderful and free, so that the roots can penetrate it quickly. Use soil amendments or compost/manure as essential. Preferably use saplings that exist in pots, as an alternative to the ones which might be sold off in plastic baggage and containers. Thoroughly take away the sapling within the pot and location it while in the pit in this type of way the root ball really should adequately rest about the pit bed, which can result in the growth of the straight and vertical stem. Slowly and gradually fill from the unfastened soil round the plant, and pack the place completely. Make certain that you've removed every one of the air pockets ahead of leveling off the floor. You must manage a similar height which was current ahead of the sapling's elimination. Get rid of all the diseased portions of the sapling, if any, before positioning it while in the pit, and increase a layer of mulch for faster root progress. Produce a trough-shaped circular composition around the plantation place, that may hold the excess h2o which will seep down little by little till the roots. Lilac bush Taking Care of the Japanese Tree Lilac Right before plantation, you are able to keep the sapling roots soaked in water for a handful of hours, as this can sustain the h2o circulation within the plant. Location them inside the pit promptly after the soaking is finished. Safeguard these trees from robust and intensive winds, because the flowers and leaves are quite fragile and can split off quickly. For this goal, you are able to erect a fence or protective monitor within the lilac, together with previously mentioned it. As soon as damaged, the plant may well not blossom in another time, and it's going to take a year or two before it is actually capable of producing flowers. The key reason why currently being that, all its Electricity is useful for restoring the hurt, as an alternative to flowering. Apart from working with manure and compost, addition of fertilizers is absolutely important for this tree. Nutrients are delivered to your plant in the medium of soil, that are then absorbed and synthesized. It's essential to routinely inspect and check about the vegetation for pest infestations. If infected, pesticides have to be applied or sprayed immediately to forestall optimum destruction, since the Japanese lilac is much less proof against pest assaults. The main pests that affect this plant are leaf miner and lilac borer, when the principle diseases that could happen are powdery mildew, verticillium wilt, bacterial crown gall, bacterial blight, and leaf blotch. Conditions that Have an effect on the Japanese Tree Lilac Lilac borers make little holes or tunnels inside the branches of your tree, if regular checks aren't kept, including watering and providing fertilizers. This may possibly result in the weakening on the branches with the plant, and in the long run, they may drop off. Likewise, leaf miners could cause comprehensive damage to the leaves, Specifically for the duration of summer time. If larvae experienced into the pupae (caterpillars), then merely a skeleton in the foliage continues to be; this might even trigger the tree to die. In case of leaf blotches, darkish brown spots look on the leaves that may be brought about owing to numerous fungi. The development of the white-colored, great, tender substance fashioned resulting from damp weather conditions is named powdery mildew. When black spots show up in the shape of stripes or lines on the lilac plant, it can be impacted with the disorder named bacterial blight. The sickness that entails an irregular expansion of warts or lumps within the lilac stem is referred to as bacterial crown gall, although wilting includes weakening in the branches as a result of fungal bacterial infections, which could bring about them dropping off. Besides getting used as ornamental trees in gardens and on sidewalks, Japanese lilacs can also be planted together highways, lawns, public grounds, and as windbreaks in backyards. These trees are popular between birds for building their nests. For expanding this lilac range, make sure that you've got sufficient space to accommodate the vast expanse of its Cover.
0 notes