#i was gonna gif the preview video but i think it's better if i don't lol
Text
Gif Making, the Broke Bitch Way
I've been considering making this tutorial for awhile, because not all of us can afford PhotoShop and doing it the way I do it does take some finagling.
For this tutorial, you will need:
A video you want to gif - I usually find them off of YouTube
Paint.net - the free version, I emphasize the free version. The paid for version doesn't play as nicely with plugins
midora's 'GIF Animations and Images' FileType Plugin (.GIF, .AGIF) plugin - have a tutorial on installing plugins for Paint.net)
ffmpeg - have a tutorial on installing ffmpeg because I struggled hardcore with that
VLC - for clipping larger videos down into smaller clips
Tutorial continues under the cut because it's fucking long and I ramble.
For this video, I will be breaking down SHOCK THE WORLD into frames.

Here, I already have it downloaded.
I have a special folder for breaking things down into frames and I've copied the file over into that folder.

Now, I'm gonna change the name of the file because that's motherfucking atrocious and I'm not fucking typing that out in ffmpeg.

Much better.

Now type in cmd in the address bar and hit enter. That'll bring up the command screen, where you type in
ffmpeg -i [nameoffile].mp4 %04d.png
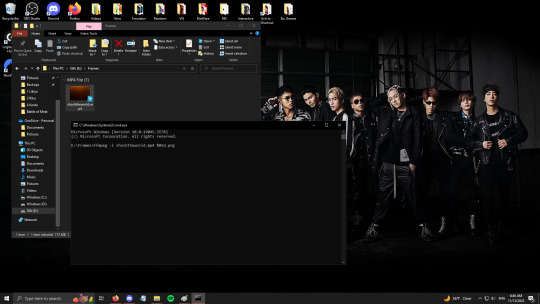
Notably, I actually wrote ffmpeg -i shocktheworld.mp4 %05d.png because this video is 7 minutes long, so I wanted 5 digits in the file name instead of 4 just in case. You would be amazed at how many frames a video breaks down into when every second of footage is 23.99 frames.

And good thing I did. The text in the red box says 'frame=10707', which means it broke the video down into 10,707 frames.
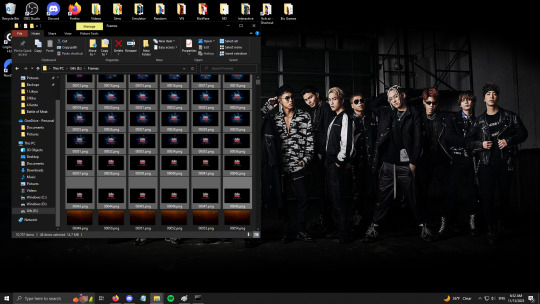
You don't have to do this, but I go through and delete the frames that say RhythmZone at the beginning and the ones at the end, because I don't need them and these files are huge.
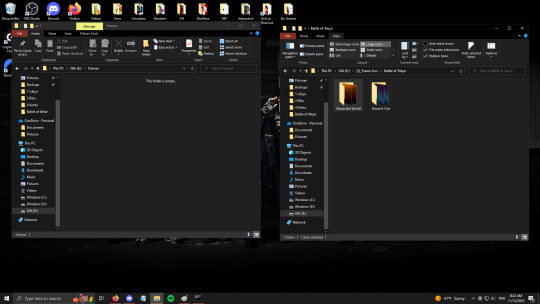
Now I move the images out of the Frames folder and into their new home.
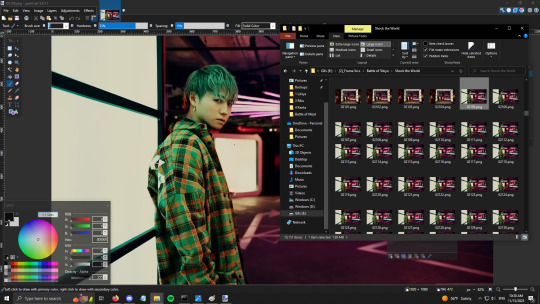
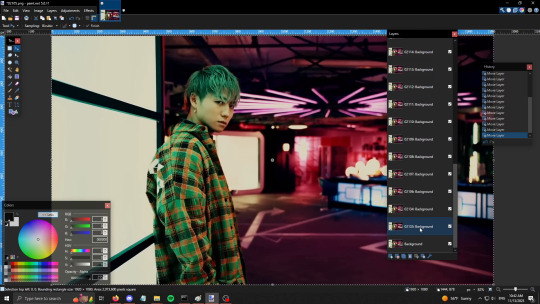
Now that the frames are in their proper folder, it's time to find what we want to gif. I like this shot of Leiya, he looks pretty.

Now we have to decide how many frames we want our gif to be. Most of my gifs are between 25 and 35 frames - like the birthday gif sets are 28 frames, the Ray of Light second outfits are 37, and the MV gif sets are 30 frames of moving gif (45 frames w/promo pic).
In this case, I think we're gonna for for 30 frames. That's a decent amount. So first open up the first image - I just drag it into Paint.net from File Explorer because it's easier that way.
You can drag each frame you want in individually like that, too, just hit 'add as layer' every time. What I prefer to do is select all of the ones I want and drag them in at once. Just hit the 'Add as layer' button and magic happens.

Sometime when doing this, Paint.net drops the layers in in the wrong order, so it's always a good idea to go through and check that all of the numbers are in the right order. From this one, you can see that 2133 and 2134 ended up at the bottom, so I had to drag them back up to the top.
One way that I check that my frames are in the right order is I resize the file down to a much smaller size - 600x338 is what they tend to end up becoming when I do the previews - and then I go to Save As -> Save as AGIF format and preview the gif.

Technically, we could just call it quits here. You have the frames, you have them in the right order, you can truly just hit Save and move on with your life. This is the gif, saved just as it is, using the default settings for making a gif.

It's not as much a problem here, but sometimes the default settings move a little slower when you have all the frames. This is currently set at 1 frame per 100ms. I default to 1 frame per 80ms instead. The difference is slightly more obvious in these two gifs, I think, because there's more movement.

Gif on the left is 100ms per frame, gif on the right is 80ms per frame. It's a little faster and, in my opinion, truer to the actual music video.
But! Since I am a Picky Bitch, as well as a Broke Bitch, I don't usually leave my gifs at this point. I do two extra steps on every gif.
Step 1. Sharpen all the frames.
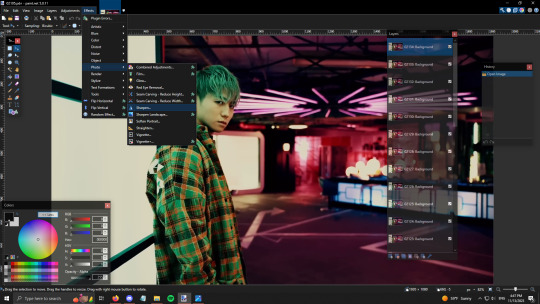
Unless it looks bad, I just take the default sharpening settings. Ctrl+F repeats the most recent effect you've applied. Considering each frame needs adjusted individually, I suggest you memorize that command. 😂


No sharpening left; sharpened right. The difference is subtle, but I prefer to sharpen my gifs to reduce chances of the gif looking blurry later.
Step 2. Brightness and contrast!

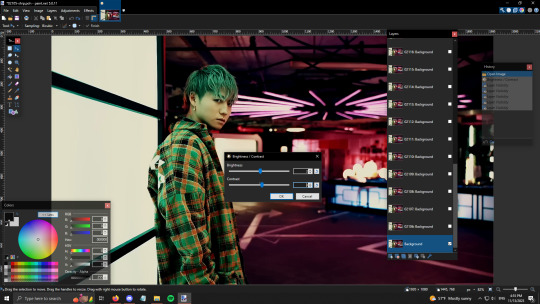
This step is a lot more finagling - I often do multiple tries and I'll compare the frame I've edited with the frame above it to see if I like the difference. The reason why I always do Brightness/Contrast - especially Contrast - is because I feel like it unifies the colors and takes off the sort - grey edge the gifs sometimes have if I don't do Brightness/Contrast.
Once you're happy with the Brightness/Contrast you have, you get to apply it to every single frame 😂 Ctrl+Sht+T is the shortcut.

So... Difference isn't as strong as I'd like it here. 😅 The one I modified is on the right.

I think the difference is more obvious with these two. On the left, is the one that hasn't been Sharpened or had the Brightness/Contrast affected. On the right is the finished version I actually posted. The left one just feels - greyer, to me, the colors aren't as vibrant or sharp.
#thistale makes things#thistale rambles#tw flashing gif#gif making the broke bitch way#thistale gifs
9 notes
·
View notes
Text
back to AE out of laziness; at about 2 out of 3 min through most of the basic keyframing to the song's lyrics (utter tedium)
more text keyframing and adjustments tmr. then adding some images to fill the instrumental bits and probably gonna mask some parts better...the price paid for being lazy about exporting. I like the din fonts but they're really very blocky...
thinking about adding more effects and prob will but also have realised the reality of a 3+min vid means horrible render times. I don't know if my pc can handle all the previews that well as is—not without spending half my time lagging anyhow lol. Rendering promo vids for fan projects was irksome enough and those were mostly under 15 seconds long. To be fair, this is not exactly a program designed for long content...but, well, it's nothing too complicated either, so here's hoping.
+ gave Salazar a makeover up there so now he kinda matches the basilisk:
I wanted to animate the Tom-church-window still but I'm going to save my sanity and go back to writing after this. This time for real...at least another complete chapter of hfic. Really like that still, however. It's nice. I still want to draw for Glimpse of Us but keyframing is a miserable affair.
Notes to self in am:
-Consider animating diary flip intro sequence?maybe etxra
-flip shots in alive 1 instrumental: Norris. Diary. My name is hp. Hello Harry. My name is Tr. Etc. Maybe a chromab or static fuzz on Harry, snapshots, back to Harry > the rest? Maybe more transition rewind effects.
^if I test VHS-type rewinds now I can recycle it with mild changes for hfic. Although this lyricstuck is very diary. Page flip effects look a little tacky often, however. Photo card flips?or perhaps page flips instead of the sliding masks.
^increase in cool text effects? But what fits? Convert to outlines and animate the trace? But that's very modern-feeling. Ink splashes, maybe?
^instead of VHS, ink spill across Harry? Should be easy to reverse the cc burn. > flip through scattered tomarry pages during the instrumental. >
Really want to animate something for this... L2d it? Or save it for hfic. Do simple blink w masking on Harry alive. But what else? Probably not feasible^. My layer splitting isn't suitable.
^if ink is too garish: out of camera focus into new screen transition. Other moving parts wizard themed book 2? Hmm.. Thematically, probably more dark blob people blinking. It's a long instrumental section so there's probably room. Ink splashes also prob will work, but the text effect I used on my last lyricstuck applied here will probably look good. The only problem is that I wonder if it'll work with my strip-style images. Perhaps see about chopping it up.
^instead, just do this in a more generic MEP syle and then do a separate rigged/video-focused animated MV thing later in the summer? haven't ever made a MEP but anyway closer in feel for a lyricstuck, perhaps...
^do a blur out of Tom in that above with that text effect. Cut Harry out to do the same.
^zoom in on Tom head after > Zoom blur shit > diary
#.txt#Wip#Setting a song's lyrics to text is probably the second best way to get utterly tired of it.#Not quite there yet... But we'll see tomorrow.#The first place goes to frame-by-frame animation.#Now that ruined a fav for me for ages...#I like looping songs a lot but it's different when it's the same 3 seconds x times in a row.#Amateur frame-by-frame takes the cake like no other on song ruination...#The same 3 second bits for a 30 sec animation for 7 days in a row and I could hardly listen to it after lmfao
4 notes
·
View notes
Last Seen Blogs

hifive-0-blog
Hawaii Five-0

areteautomation
AreteAutomation
the-tortured-fangirl-department
Chronical Interested Jumper

cafetricotstudio
Caf'e Tricot Studio

theinkyfrog
well, hello!