#in my defense it's 5am here rn and i should've been asleep ages ago
Text
QUICK TUTORIAL: lineart gifs & watercolours
i’ve received a few asks about how i made this gifset, so here’s a quick guide! i’m skipping right to the interesting parts, so you need to have basic knowledge of how to use photoshop to make gifs or you’re not going to get much out of this tutorial. the basic idea is very simple but the process can be extremely frustrating, as usual. proceed at your own risk.
things you’ll find behind the cut:
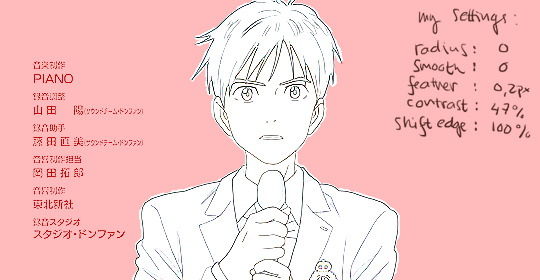
how i get from this:
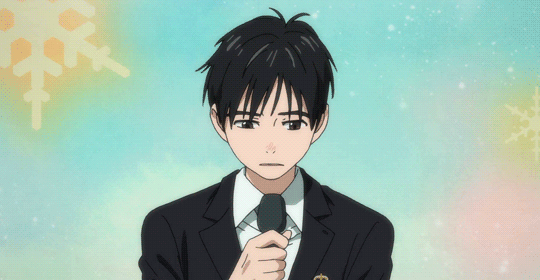
to this:

and to this:

still with me? great! let’s begin!
i use photoshop cc in this tutorial! all features should be available in other versions too, but they might be called something else. in that case please consult google.
YOU WANT YOUR GIF TO HAVE AS FEW FRAMES AS POSSIBLE!
get them ready and do your basic thing ie resize, remove excess frames and set the framerate. next, flatten the frames into layers and download this action (19 frames at most) or do the following manually:
duplicate your first layer
set the copy to divide
add gaussian blur (approximately radius 0.6px) to the copy
use smart sharpen on the original layer. play around with the setting until the lines look clear and smooth (my settings: amount 300%, radius 0.3px, reduce noise 10%, remove gaussian blur)
check that the blurred layer is on top of the sharpened one
merge layers
repeat with every single layer :))))
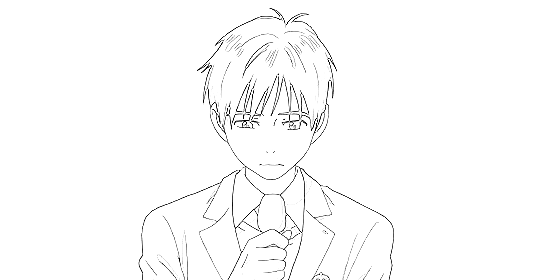
now your gif should look something like this:
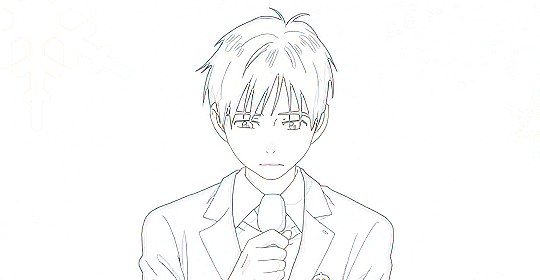
as you can see, if you wanted you could just paint over the parts where the background is still visible, add some colour or overlays and tadaaah, a perfectly fine gif! but we don’t want that today. we want to make our lives hell.
NEXT, WE’LL DO SOME MASKING AND GET RID OF THE BACKGROUND. i use the quick selection tool because it’s quick (lol), i’m lazy and these kind of gifs have nice and clear lines so it works like a dream!

make sure you’ve selected everything, it can be difficult to tell what’s part of the background and what’s the selection as you can see.
all done? next you’ll need to click mask and select. i invert the selection at this point, so the following settings only work with that! i forgot to put it in the pic but in addition to these setting, i usually have the output set to “layer mask” so that saves me a few clicks. when you’re happy with what you’re seeing, click ok and go though any bits that didn’t mask properly by hand.
can you guess what the next step is? yeah.
now do the same to all your layers...
... and you’ll end up with something like this!
you probably can’t notice much difference, because it doesn’t show up properly on my blog, but the background is transparent! i’ve also added two adjustment layers to clean up the lines a bit:
black & white
levels (my settings: shadow 60, midtone 1.00, highlight 230)
//EDIT: naturally, the settings i used for the tutorial don’t work for all scenes but in my experience they’re a pretty good place to start from! also, if the scene has a very busy background i usually mask it before resizing and applying the lineart effect to make sure it looks as good as possible (and it also gives you the option to use the same frames in other projects without having to do it all over again)! in those cases the blurred layer leaves a fuzzy border around the image when you merge the layers, so you need to select the sharpened layer’s pixels before merging and mask the resulting layer with the selection. oh and i usually convert the layers for the first frame into smart objects before sharpening or blurring so i can easily adjust the settings to be optimal for the scene.
again, you could stop here, walk away with a nice transparent lineart gif and call it a day.
no? then we’ll start adding the watercolour.
this is, of course, all done manually as well, frame by frame. don’t blame me, i told you this was going to be frustrating.
add a white layer to act as a background, and adjust the output levels of the levels layer you just added a few minutes ago! my setting are: shadow 0, highlight 238
THE NEXT STEP IS TO START PAINTING
the gif should give you the basic idea of what to do from here on.
basically, it’s something like this:
create a new layer on top of everything, pick a brush, add colour to appropriate spots, don’t mind if you can’t stay inside the lines. it’s actually better if you don’t! i usually have the colouring layers set to linear burn.
check what frame you have selected! you want to find the corresponding lineart layer, right click it and pick select pixels.
create a mask for your coloring layer from that selection. now the outline should be rather nice and smooth, and all you need to do is mask the inner parts using either a selection tool or do it manually. in this case i prefer the latter.
if your gif doesn’t have much movement, you can get away with duplicating the colouring layer for the next frame instead of painting everything from scratch! just duplicate the layer, delete the old mask, move the layer a bit if needed and add the mask from the next lineart layer.
repeat these steps until you run out of frames.
keep or delete the white layer you’ve used as a background.

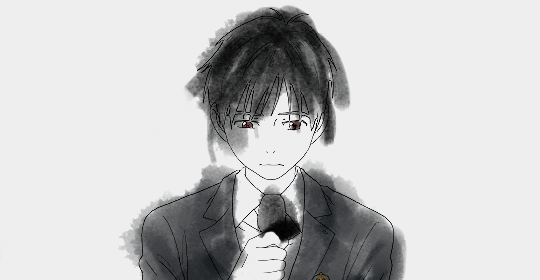
before you even notice, you have a super pretty lineart gif painted in watercolour style, ready to be posted on tumblr or edited more!
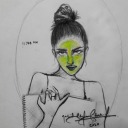
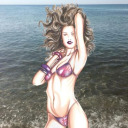
i edited mine a bit more and ended up with this baby! i kind of lied in the beginning, since i’m not telling you how i turned it into this lmao oops. basically i just added the bg image and a few gradients on top of everything? super easy!
//EDIT: i can’t not tell you guys i feel so guilty lmao.
okay, we’re starting from the bottom up!
changed the white background colour to #e6e6e6
a picture of flowers on top of it, color burn 60%
levels adjustment: shadow 60, midtone 1.00, highlight 230
and output adjustments are shadow 0, highlight 220
linear gradient fill layer, 90angle, colours #f3bfa5 and #fbeebc
set mode to soft light 100%
jump to between the lineart adjustment layers and colourings
color fill layer in #f3bfa5, set mode to soft light 100%
jump on top of everything
vibrance adjustment layer, +100 vibrance and +31 saturation
gradient map adjustment layer, colours #f3bfa5 and fbccbc
set mode to overlay 30%
duplicate the adj layer you just made, chance mode to color burn
look at your beautiful gif and cry tears of joy

and that’s about it! i hope this cleared up the process a little!
thank you for checking out my tutorial! if you have any more questions, my ask box is always open ♥
oh and feel free to tag me if you post something made with this tutorial! i’d love to see your creations! i track #nikiforoov so just tag your post with that :)
#yuri!!! on ice#chaoticresources#photoshop#fyyoi#yuuri katsuki#tutorial#my edits#please let me know if there are some clear errors#in my defense it's 5am here rn and i should've been asleep ages ago#but noooope#here i am#what can i say i really love playing around with photoshop lmao
2K notes
·
View notes
Last Seen Blogs