#linksys router setup page
Explore tagged Tumblr posts
Visit Tumblr Blog
Explore Tumblr blogs with no restrictions, modern design and the best experience.
Last Seen Tumblr Blogs


Fun Fact
In February 2021, Tumblr had 518.6 million blog accounts.
Text
https://linksys-smartwi-fi.com/how-to-setup-linksys-router/
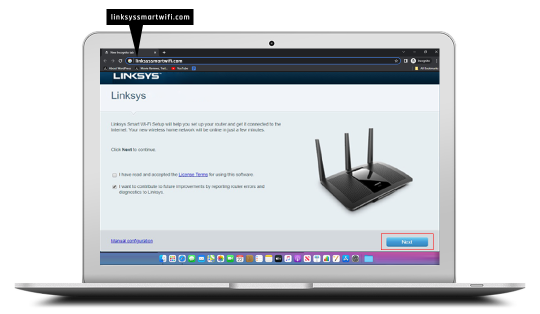
An Easy Guide for How to Setup Linksys Router?
Need assistance with how to setup linksys router? No worries! For this, open the web browser and type the linksyssmartwifi.com web address on the browser bar. Now, enter the admin credentials and you will reach the setup wizard. Hereon, visit the basic & advanced settings to configure the further procedure. To know more detailed information, do drop us a line!

0 notes
Text
Linksys RE6500 Setup: Eliminate WiFi Dead Zones Easily
At your home, is there any no signal zone? Wish to eliminate the issue you are facing? Are you looking for a device that helps in resolving the problem? If answer to all the above specified questions is yes then you should add linksys RE6500 range extender device. A range extender is a networking device that connects with the existing network. It also amplifies the signals further. Linksys RE6500 setup process can be followed by anyone, even a non tech person to add the device into their existing network. Breakdown of the setup process is specified in this article that can help you configure the extender. In case you are new to networking then accumulate every single detail, do not skip.
Linksys RE6500 Pre Setup Steps
Linksys RE6500 range extender device is very popular to eliminate dead zones and extend network coverage. To uplift the signals of the router device you should configure the extender. Prior to configure linksys re6500 range extender you have to follow the following steps:
Unboxing: To install the range extender device you have to take it out of the packing. Confirm that the box contains other items like power adapter, ethernet cable and user manual also along with the linksys RE6500 range extender.
Placement: Next you have to place the device. Choosing a placement of linksys re6500 range extender device is a very important step. In case you choose the wrong location then the device will not work properly. For the initial setup process we advised to keep it in the same room where the router device is placed.
Powering: After placing the extender, powering will be the next step. For powering the device, connect the power adapter into the power port given on the back side of the device. As you plug-in the adapter into the power socket & turn on the switch, you will see the device LEDs start blinking. Wait for the LEDs to get stable.
Connection: Step ahead you have to establish a connection between the extender device and the computer/ laptop device in which you wish to open the web interface. Use ethernet cable or wireless network for connection.
Linksys RE6500 Setup Process
Linksys RE6500 Setup embarks with the launching of the browser to open the web interface and ends with the testing of the network. Here we breaked the whole process in easy to follow steps:
Launch Google Chrome
Launch google chrome web browser in the smartphone or computer or laptop device you connected with the extender network. You should use the latest version of the web browser. Instead of chrome you can use several other browsers including mozilla firefox, safari or other.
Search extender.linksys.com
Second step of the linksys re6500 setup process is searching for the setup page. To open the setup page you should search for web address extender.linksys.com. Instead of a web address, default IP can also be used.
Access Interface
Once the linksys RE6500 setup page appears, you have to access the interface by entering default username & password. To open the admin panel, tap on login option.
Secure Admin Account
Secure the admin account first as you enter after choosing the language to proceed the setup. Anyone who knows the default settings can use your network if you do not change the account details.
Connect To Router
Connect the linksys re6500 range extender with the internet. You can supply the internet by choosing the router’s wireless network name from the appeared list. As you select the network, enter its password prior to the hit connect option.
Secure Wireless Network
Move further and secure the wireless network by choosing a new name for the extender’s network. You have to set at least an 8 digit password also. You can keep the same password as your router has or select a new one.
Update Firmware
Firmware updation is the next step of the linksys re6500 setup process. A device with updated firmware works well. So, it is advised that you must verify the version of firmware and update it if a new version is available.
Finish Setup
You should end the setup now by checking all the changes you made to the network once again. Tap on the submit button lastly to apply changes.
Test Network & Reposition
Network testing is the last step of the linksys extender setup. Take a smartphone device to connect with the extender network and browse the internet. You can search websites and play online games etc. to check the network speed. Go to the area where your router’s network is not reachable and check if the extender is offering signals or not. In case there is a weak signal or no signal then you have to reposition the extender device strategically and then test the network again.
0 notes
Text
How to Configure Your Linksys EA6350 Router Step-by-Step?

The Linksys EA6350 Configuration is simple and quick. Connect the router to your modem, power it on, and open a browser on your connected device. Head to the setup page by browsing linksyssmartwifi.com and follow the on-screen steps to complete network setup and personalize your settings. Need assistance during the process? Our team is ready to help you anytime!
1 note
·
View note
Text
How to Setup Linksys Extender?

If you desire to install your Linksys extender, it is important to insert it into a socket and place it anywhere in the signal range of your router. Then you simply must first establish the extender's Wi-Fi network with the help of your mobile phone or PC. By the time when the connection is made, you need to unlock a browser and type in either extender.linksys.com or 192.168.1.1 and get to setup page. Click on your Wi-Fi network, as the instructions on the screen say, and then type your password. As soon as the setup is done, the extender will restart change, and a new, even stronger Wi-Fi signal will be accessible to you. In fact, the Wi-Fi signal will be vastly enhanced so that a full signal will be available everywhere throughout your house.
0 notes
Text
A Complete Guide For Linksys Extender Setup
A Linksys extender may be configured by plugging it into a power source and joining your Wi-Fi network. To go to the setup page, use the Linksys app or a browser and type "http/extender.linksys.com". To improve the coverage of your primary router, pick your home network and follow the prompts to expand the Wi-Fi signal. Visit our website to speak with our specialists if you have any further questions about Linksys Extender Setup.
0 notes
Text
Quick And Easy Setup Process For All Linksys Extenders
Do you want to enjoy full connectivity throughout your home or office space but your router isn't allowing you to do so? If yes, then it is a clear indication to buy a Wi-Fi range extender. A good quality Wi-Fi range extender will remove all your connectivity issues and will provide you with full signals, fast internet speed and seamless connectivity. One of the best networking brands that makes high-performing range extenders is Linksys. They have vast options for every need, so you can select the one that fits your preferences, budget and network needs. So, if you choose to buy from them, here's the common easy and simple setup process for you to get started. We will provide three options for the setup process, so you can choose the one, which is easier and more convenient for you.
Before you begin, the first and foremost step which is common for all methods is to place the range extender in a central location of your home which should be near to your existing router. Connect the router and extender with the help of an Ethernet cable. Plug the range extender into an electrical outlet with the provided power adaptor and switch on the entire setup. Wait for a few minutes, so that all the devices are stable and ready for further setup. Now let's see the different methods.
Method 1: Setup With Linksys App
✓ First open the Wi-Fi settings of your device, and connect to the extender's wifi network.
✓ The next step is to download and install the Linksys App. If you are an Android user then download from the Play Store and if you are an iOS user then download from the App Store.
✓ Open the app, create your Linksys account or if you already use the app then login using the set username and password.
✓ Once you log in just follow the instructions to set up and configure the extender. The app will guide you through selecting your Wi-Fi network and entering the necessary details.
And that's all for the app-based setup. Wasn't it super easy and quick?
Method 2: Web Browser Based Setup
We will use extender.linksys.com for this setup method.
✓ Choose any device, and go to its Wi-Fi settings. In the list of all the available networks look for a network named Linksys, upon finding click on Connect. If there is no name as such then refresh the page and the name will appear automatically.
✓ Now, on the same device open a browser. You can use any browser like Google Chrome, Edge, Safari or any other of your choice.
✓ In the address bar of the browser enter extender.linksys.com and press enter. This will take you to the login page. If extender.linksys.com doesn't work then try adding http:// in front or you can also use the default IP address which is 192.168.1.1.
✓ Once you enter the login page, you have to enter the default login details. The username and password are both admin or sometimes it's admin for username and password for password. So if one doesn't work try the other combination. For accurate details always check the user manual that came along with your specific Linksys Extender model.
✓ Once you log in successfully, you have to select the name of your current network whose reach you want to extend and enter its password. Now the screen will guide you to complete the whole process, so keep following all the instructions carefully.
✓ Once done, you can now change the extender's settings as per your wish.
That's all for web browser-based setup. We hope you found it easy and straightforward.
Method 3: WPS Method
One of the easiest and quickest methods to set up Linksys Extenders is using the WPS method. So here's how you can perform this method:
✓ Firstly you need to ensure that your router supports WPS (Wi-Fi Protected Setup).
✓ Now, locate the WPS button on your router and press it. Usually, the WPS button can be found by moving the router upside down.
✓ Within two minutes, press the WPS button on your Linksys Extender.
✓ As soon as you press the button on the extender the light on it will start blinking to indicate that it is connecting to the router. Once it stabilizes, it means the setup is successfully done.
Bonus Points To Enhance The Working Of Your Linksys Extenders
Choose a less crowded Wi-Fi channel by visiting the settings of your extender for a better experience.
Regularly check for firmware updates, if found install them immediately for improved performance and better security.
Make sure the place where you have kept the range extender doesn't have any electronic devices or any metal objects as it can disturb the signals of your extender.
Consider changing the default username and password to something difficult and unique so that your network is protected from hackers.
Use Qos settings for Prioritizing bandwidth for critical applications.
1 note
·
View note
Text
If you want to log in to the Linksys Router, then proceed with the linksyssmartwifi.com web address. To begin with this, open the web browser and type the above-mentioned URL in the browser bar. Now enter the default admin credentials on the login window. For complete info, approach us!
0 notes
Text
does a linksys router ea4500 work with vpn
🔒🌍✨ Get 3 Months FREE VPN - Secure & Private Internet Access Worldwide! Click Here ✨🌍🔒
does a linksys router ea4500 work with vpn
Linksys EA4500 VPN compatibility
The Linksys EA4500 is a popular router that offers robust features and functionality for home and small business networks. One common query among users is whether the Linksys EA4500 is compatible with VPN services.
VPN compatibility is a crucial consideration for many users looking to ensure their online privacy and security. The Linksys EA4500 does support VPN passthrough, which allows VPN traffic to pass through the router to VPN servers on the internet. This means that you can connect to a VPN service using devices on your network protected by the EA4500.
However, it's important to note that the Linksys EA4500 does not have built-in VPN server capabilities. This means that while it can work with VPN services, it cannot act as a VPN server itself. If you require VPN server functionality, you may need to consider using a third-party VPN service or investing in a router with built-in VPN server support.
Overall, the Linksys EA4500 offers solid VPN compatibility for users who want to encrypt their online communications and protect their privacy. By enabling VPN passthrough, the router allows for secure connections to VPN servers, ensuring that your data remains safe from prying eyes.
VPN setup for Linksys EA4500 router
Setting up a Virtual Private Network (VPN) on your Linksys EA4500 router can enhance your online privacy and security. By encrypting your internet connection, a VPN helps protect your data from hackers, ISPs, and other third parties. Follow these simple steps to configure a VPN on your Linksys EA4500 router:
Access the router's web-based setup page by entering the default IP address (usually 192.168.1.1) in your web browser. Log in with your username and password.
Navigate to the "VPN" section in the router's settings menu. Select the VPN protocol you want to use (e.g., OpenVPN, PPTP, L2TP).
Enter the VPN server settings provided by your VPN service provider. This includes the server address, username, and password.
Configure additional VPN settings such as encryption method, authentication type, and tunneling protocol according to your VPN service provider's specifications.
Save the settings and restart your router to apply the changes. Your Linksys EA4500 router is now configured to use a VPN connection.
Remember to choose a reliable VPN service provider that offers secure and high-speed connections. Additionally, regularly update your router's firmware to ensure optimal performance and security. Enjoy browsing the internet anonymously and securely with your VPN-enabled Linksys EA4500 router.
EA4500 router VPN configuration
Setting up a VPN (Virtual Private Network) on your EA4500 router can enhance your online privacy and security. With a VPN, you can encrypt your internet connection, making it more difficult for hackers or third parties to intercept your data. Fortunately, configuring a VPN on your EA4500 router is a straightforward process.
To begin, ensure that your router firmware is up to date. You can typically find firmware updates on the manufacturer's website. Once your firmware is updated, access your router's web-based interface by entering its IP address into your web browser. This address is often "192.168.1.1," but it may vary depending on your network configuration.
Next, navigate to the VPN settings section of your router's interface. Here, you'll have the option to select the type of VPN you want to configure. The EA4500 router supports various VPN protocols, including PPTP, L2TP, and OpenVPN. Choose the protocol that best suits your needs and follow the on-screen instructions to input the required details, such as the server address, username, and password provided by your VPN service provider.
Once you've entered the necessary information, save your settings and restart your router to apply the changes. After the router has rebooted, your VPN should be active, and you can connect to it from any device connected to your network.
Keep in mind that while a VPN can enhance your security and privacy online, it may also slightly reduce your internet speed due to the encryption process. However, the trade-off is often worth it for the added peace of mind knowing that your data is protected. With your VPN configured on your EA4500 router, you can browse the web, stream content, and communicate online with confidence.
Linksys EA4500 VPN client support
The Linksys EA4500 is a popular wireless router that offers fast speeds and reliable connectivity to users. One feature that many users look for in a router is VPN client support, which allows for secure connections to a virtual private network for enhanced privacy and security.
Fortunately, the Linksys EA4500 does support VPN client connections, making it a versatile option for users who prioritize online security. Setting up a VPN client on the Linksys EA4500 is a straightforward process that typically involves accessing the router's settings and configuring the VPN connection details provided by the service provider.
By using a VPN client on the Linksys EA4500, users can encrypt their internet traffic and route it through a secure server, effectively masking their online activities from prying eyes. This is particularly useful when using public Wi-Fi networks or accessing geo-restricted content while preserving anonymity online.
Whether for personal use or business applications, VPN client support on the Linksys EA4500 adds an extra layer of security to your internet browsing experience. With the ability to connect securely to VPN servers, users can enjoy peace of mind knowing that their data is protected against potential threats and breaches.
In conclusion, the Linksys EA4500's VPN client support makes it a reliable choice for users looking to enhance their online security and privacy. With its user-friendly interface and robust features, this router is a solid option for those seeking a secure networking solution.
Virtual Private Network (VPN) compatibility with Linksys EA4500
A Virtual Private Network (VPN) is a crucial tool for ensuring online privacy and security. By encrypting your internet connection and routing it through a remote server, a VPN enables you to browse the web anonymously and access geo-restricted content. However, not all routers are compatible with VPN services. If you own a Linksys EA4500 router and are looking to set up a VPN connection, you'll be pleased to know that this model is VPN-compatible.
The Linksys EA4500 router supports VPN pass-through, which means it can work with most VPN protocols, including PPTP, L2TP, and IPSec. This allows you to establish a VPN connection from your device to a VPN server without any issues. Setting up a VPN on the Linksys EA4500 router is relatively straightforward. You can configure the VPN settings directly on the router's admin panel, usually located at 192.168.1.1, by entering your VPN credentials and choosing the desired protocol.
Once your VPN is configured on the Linksys EA4500 router, all devices connected to the network will benefit from the VPN protection. This is especially useful if you want to secure your entire home network or access region-locked content on devices like smart TVs or gaming consoles. Keep in mind that using a VPN may impact your internet speed slightly due to encryption overhead, but the trade-off is enhanced privacy and security online.
In conclusion, the Linksys EA4500 router is VPN-compatible, making it a versatile choice for users who prioritize online anonymity and data protection. With easy setup and reliable performance, combining a VPN with the Linksys EA4500 router is a smart way to safeguard your digital activities.
0 notes
Text
can the linksys e2500 be used with a vpn
🔒🌍✨ Get 3 Months FREE VPN - Secure & Private Internet Access Worldwide! Click Here ✨🌍🔒
can the linksys e2500 be used with a vpn
Linksys E2500 compatibility with VPN
Title: Exploring Linksys E2500 Compatibility with VPN: What You Need to Know
The Linksys E2500 router is a popular choice for home and small business networks due to its reliability and affordability. One common question that arises among users is its compatibility with VPN (Virtual Private Network) services. Let's delve into this topic to provide you with a clear understanding.
Firstly, it's essential to recognize that the Linksys E2500 router does support VPN connections. However, the level of compatibility may vary depending on the specific VPN protocol and provider you intend to use. The E2500 supports both PPTP and IPSec VPN protocols, which are commonly used by many VPN services.
Setting up a VPN connection on the Linksys E2500 typically involves accessing the router's web-based interface and configuring the VPN settings within the router's firmware. Users can input the necessary VPN server information provided by their VPN service provider to establish a secure connection.
While the E2500 is capable of handling VPN connections, it's important to note that the router's hardware specifications may impact VPN performance. The E2500 features a 300 Mbps wireless data transfer rate, which should suffice for most VPN usage scenarios. However, users requiring higher VPN speeds or simultaneous connections to multiple devices may experience limitations.
Additionally, certain advanced VPN features, such as split tunneling or advanced encryption protocols like OpenVPN, may not be fully supported on the E2500. Users with specific VPN requirements should verify compatibility with their chosen VPN provider and consider upgrading to a more advanced router model if necessary.
In conclusion, the Linksys E2500 router is indeed compatible with VPN services, offering users the ability to secure their internet connection and protect their privacy. However, users should be mindful of potential performance limitations and ensure compatibility with their VPN provider's protocols and requirements.
Setting up VPN on Linksys E2500
Setting up a Virtual Private Network (VPN) on your Linksys E2500 router can enhance your online security and privacy. By encrypting your internet connection, a VPN ensures that your data remains confidential and protected from potential cyber threats. Setting up a VPN on your Linksys E2500 is a straightforward process that can be completed in just a few steps.
Firstly, ensure that your Linksys E2500 router is properly set up and connected to the internet. Once that's done, access the router's web-based setup page by entering its IP address into your web browser. The default IP address for Linksys routers is typically "192.168.1.1," but you can confirm this in the router's documentation.
Next, log in to the router's administration panel using your username and password. If you haven't changed these from the default settings, you can find them in the router's manual or on the bottom of the device.
Once logged in, navigate to the "VPN" or "Advanced Settings" section of the router's dashboard. Here, you'll find options to set up a VPN connection. Select the type of VPN protocol you wish to use, such as OpenVPN or PPTP, and enter the necessary configuration details provided by your VPN service provider.
After entering the required information, save your settings and then restart your router to apply the changes. Once the router has rebooted, your VPN connection should be active, and you can connect your devices to the VPN network for secure browsing.
Remember to test your VPN connection to ensure it's functioning correctly and providing the level of security and privacy you require. With your VPN set up on your Linksys E2500 router, you can enjoy enhanced online protection and peace of mind knowing that your internet traffic is encrypted and secure.
VPN support for Linksys E2500
Title: Enhancing Security and Privacy: VPN Support for Linksys E2500
In an era where online privacy is paramount, utilizing a Virtual Private Network (VPN) with your Linksys E2500 router can significantly bolster your digital security. The Linksys E2500, known for its reliability and performance, offers robust VPN support, allowing users to safeguard their internet connections and data transmission.
By integrating a VPN with the Linksys E2500 router, users can encrypt their internet traffic, preventing unauthorized access and potential eavesdropping by malicious entities. This encryption ensures that sensitive information such as passwords, financial data, and personal communications remain confidential, even when accessing the internet over unsecured networks.
Moreover, VPN support on the Linksys E2500 enables users to bypass geographic restrictions and censorship imposed by governments or content providers. With the ability to connect to servers in different regions, individuals can access region-locked content, stream their favorite shows, and enjoy unrestricted internet access with enhanced privacy and anonymity.
Setting up a VPN on the Linksys E2500 is a straightforward process, typically involving accessing the router's settings interface and entering the VPN configuration details provided by the chosen VPN service provider. Once configured, all devices connected to the Linksys E2500, including smartphones, computers, and smart home devices, can benefit from the VPN's protective features without requiring individual installations.
Furthermore, VPN support for the Linksys E2500 router ensures compatibility with a wide range of VPN protocols, including OpenVPN, PPTP, and L2TP/IPsec, offering users flexibility in choosing the most suitable protocol for their needs.
In conclusion, leveraging VPN support on the Linksys E2500 router enhances both security and privacy for users, providing peace of mind in an increasingly interconnected digital landscape. By encrypting internet traffic, bypassing restrictions, and ensuring compatibility with various VPN protocols, the Linksys E2500 proves to be an excellent choice for those seeking to fortify their online defenses.
Linksys E2500 VPN setup guide
Title: Complete Guide to Setting Up VPN on Linksys E2500 Router
In today's digital age, safeguarding your online privacy and security is paramount. With the increasing prevalence of cyber threats and data breaches, using a Virtual Private Network (VPN) has become essential. Linksys E2500 router offers an excellent solution for securing your internet connection with a VPN. Below is a comprehensive guide to help you set up a VPN on your Linksys E2500 router.
Step 1: Access Router Settings Firstly, ensure your router is connected to the internet and powered on. Open a web browser on a device connected to the router and enter the router's IP address in the address bar. Typically, the default IP address for Linksys routers is "192.168.1.1". Press Enter to access the router settings.
Step 2: Log in to Router Interface You will be prompted to enter the router's username and password. If you haven't changed these, the default credentials are often "admin" for both username and password. Once logged in, navigate to the "VPN" or "Security" section of the router settings.
Step 3: Choose VPN Protocol Select the VPN protocol you wish to use. Popular options include OpenVPN, PPTP, or L2TP/IPsec. Consider the level of security and compatibility with your devices when making your selection.
Step 4: Enter VPN Configuration Details Enter the VPN configuration details provided by your VPN service provider. This typically includes the server address, VPN username, and password. Ensure you input the information correctly to establish a successful connection.
Step 5: Save Settings and Connect After entering the VPN configuration details, save the settings on your router. Once saved, initiate the VPN connection from your device to establish a secure connection through the Linksys E2500 router.
By following these simple steps, you can effectively set up a VPN on your Linksys E2500 router, ensuring enhanced privacy and security for all your online activities. Stay protected and enjoy peace of mind knowing your internet connection is secure against potential threats.
Using VPN with Linksys E2500
Using a VPN with a Linksys E2500 router can provide an added layer of security and privacy to your internet browsing experience. A VPN, or Virtual Private Network, encrypts your internet connection and routes it through a remote server, masking your IP address and making it difficult for others to track your online activities.
Setting up a VPN on a Linksys E2500 router is relatively easy. First, you need to sign up for a VPN service provider and obtain the necessary credentials. Next, access the router's web interface by typing its IP address into a web browser. Navigate to the "VPN" section and input the VPN server information provided by your service provider. Save the settings and connect to the VPN server.
By using a VPN with your Linksys E2500 router, you can protect your sensitive data from hackers and cybercriminals. It also allows you to access geo-restricted content by masking your IP address with one from a different location. Additionally, a VPN can help bypass internet censorship and ensure your online activities remain private from prying eyes, such as your Internet Service Provider.
Keep in mind that while using a VPN with your Linksys E2500 router can enhance your online security and privacy, it may also slightly affect your internet speed due to the encryption process. Overall, the benefits of using a VPN with your router outweigh the potential drawbacks, especially if you prioritize safeguarding your online presence.
0 notes
Text
How to Setup Linksys E1200 Router?
For a successful Linksys E1200 router setup procedure, unbox it. Next, connect your router to a power source. After that, open a web browser and enter your router’s IP address in the URL bar. Tap on Enter. Fill in the username and password in the fields on the login page. Stuck somewhere in setting up your router, connect with our professionals for a solution!
0 notes
Text
How to do Linksys Router Setup?
To perform the Linksys Router Setup, you have to make a choice between two methods: using the Smart Setup Wizard or directly accessing the router’s web-based setup page. Setup through a web page involves a few key steps- login to the router, customize settings, and many more. If you feel difficulty in doing so, you can ring us up for more details!
0 notes
Text
A Comprehensive Guide to Linksys RE6500 Setup for Enhanced Wi-Fi Coverage
In today’s connected world, a robust Wi-Fi signal is essential. The Linksys RE6500 Wi-Fi Range Extender is designed to eliminate dead zones by amplifying your existing network. This guide walks you through the setup process, ensuring seamless connectivity in every corner of your home or office.
What is the Linksys RE6500? The Linksys RE6500 is a dual-band range extender that boosts 2.4GHz and 5GHz networks, offering speeds up to AC1200. Features like the Spot Finder Technology, Ethernet ports for wired connections, and cross-band connectivity make it a versatile solution for extending Wi-Fi coverage.
Unboxing and Initial Setup Inside the box, you’ll find the RE6500, an Ethernet cable, and a quick start guide. Begin by plugging the extender into a power outlet near your router. Wait for the LED light to turn solid red, indicating it’s powered on.
Optimal Placement Using Spot Finder The RE6500’s Spot Finder Technology ensures ideal placement:
Press the Spot Finder button on the extender.
Use a connected device to visit http://extender.linksys.com.
Follow the on-screen instructions to relocate the extender while monitoring signal strength. Aim for a location halfway between your router and the dead zone, avoiding obstructions and interference.
Two Setup Methods: WPS vs. Manual Method 1: WPS Setup (Recommended)
Press the WPS button on your router.
Within 2 minutes, press the WPS button on the RE6500.
Wait for the LED to turn solid green, indicating success.
Method 2: Manual Setup via Web Interface
Connect your device to the extender’s network (e.g., Linksys Extender Setup).
Open a browser and go to http://extender.linksys.com.
Follow prompts to select your Wi-Fi network (2.4GHz or 5GHz) and enter the password.
Customize the extended network’s name (SSID) if desired.
Connecting Devices to the Extended Network After setup, your extended network will appear as your original SSID with “_EXT” appended. Reconnect devices to this new network or use the Ethernet port for a stable wired connection.
Advanced Configuration Tips
Firmware Updates: Regularly check for updates via the extender’s interface to enhance performance and security.
Network Management: Use the dashboard to adjust security settings, create guest networks, or prioritize devices.
Troubleshooting Common Issues
No Connection to Extender: Ensure you’re connected to the extender’s network and the LED is green. Reset the extender if needed.
Weak Signal: Reposition the extender using Spot Finder and avoid interference from appliances.
Incorrect Password: Re-enter your Wi-Fi password carefully during setup.
Browser Issues: Clear cache or try a different browser if the setup page doesn’t load.
Conclusion The Linksys RE6500 setup is straightforward, offering immediate relief from Wi-Fi dead zones. By following this guide, you can enjoy extended coverage, faster speeds, and reliable connectivity. For persistent issues, contact Linksys support for assistance. Transform your Wi-Fi experience today with the RE6500!
0 notes
Text
You must proceed with the Linksys router login process to set it up correctly. To login to the Linksys user interface, you'll require the default IP address & login credentials. Using the IP address, you can access the login page. But you can chat with our technical team if you face issues during the setup process.
0 notes
Text
Guide to Linksys WIFI Extender Setup

The Linksys Wi-Fi extender is another magnificent Wi-Fi repeater with a high-speed internet connection. If you wish to extend your current network’s WiFi range, this device is perfect. With the help of the extender, you can say goodbye to all the dead zones in your house. To start using this extender, you need to proceed with the Linksys WiFi Extender Setup.
You can easily set up the Linksys extender with the help of the correct instructions. That’s why we are here with this post to help users with the setup. This post will consist of the setup along with the crucial procedures you must know. Also, we’ll cover the issues you could face with the setup along with the troubleshooting methods.
Steps To Set Up the Linksys WiFi Extender
In this section, we will walk you through the complete procedure for the setup. You should know there are two methods you can use to set up the extender correctly.
Firstly, keep the extender and the router in the same room and power them on.
Now, connect your device to the router’s network to access the login page.
You can use an Ethernet cable to connect the PC to the router’s network.
On the device connected to the extender, open a web browser of your choice.
Hereon enter "extender.linksys.com" in the address bar to access the login page.
When the login page appears, enter the default username and password in the fields.
The home page of the extender will appear on the screen you can initiate the setup.
Now, the extender’s user interface will scan for all the nearby available WiFi networks.
After that, you need to select your WiFi network and enter the correct password.
Give the extender some time to form a connection successfully with the router.
When the connection is successful, you can configure the extender’s settings accurately.
In the end, relocate the extender and connect your devices to the extender’s network.
These are the methods you can use for the Linksys WiFi extender setup. When the setup is complete you can place the extender somewhere else. Just ensure to place the extender inside the router’s range, as the connection will break if the router is too far.
Conclusion
This blog post includes the complete process for you to set up your Linksys extender through a reliable web browser on your device. But if you are unable to set up your extender or facing issues during the process, chat with our technical experts. They will efficiently guide you through the complete setup process.
0 notes
Text
Learn how to effortlessly log in to myrouter.local and access the intuitive web-based setup page for your Linksys router. This step-by-step guide walks you through the process, ensuring easy access to essential configuration settings like network setup, security, and more. Seamlessly manage your router's functionalities with confidence.
1 note
·
View note
Text
Linksys WiFi Range Extender Login And Installation Process
First, in a wall socket place the Linksys WiFi range extender power plug. After that, grab a WiFi gadget such as a laptop or computer and connect it to the Linksys extender network. Now, on a connected WiFi gadget open a web browser and enter extender.linksys.com in the address bar. Further, fill in all the details which are shown on the web management page. After filling in all the details, hit on the login button to complete the Linksys WiFi range extender login Process.
Check the manual booklet which comes with the Linksys extender device to verify the login details.
For the setup process, settle your Linksys extender device into the power or wall socket. Now, push the WPS button of your Linksys WiFi range extender device and in 30 seconds press the WiFi-protected setup button of the existing router. By doing this, a solid WPS LED starts blinking solid on both gadgets. The solid LED defines the extender and router successfully linked with each other. After linking, locate your extender in that location where you want fast internet speed.
After doing the Linksys WiFi extender setup process, if you are facing any issues then you will be required to take help from our Linksys technician. They will really help you fix that problem.
1 note
·
View note