#so basically we need to add a transparent pixels to all our gifs now
Photo
I've recently been asked by several lovely and curious souls to break down this Witcher set, so I thought I’d go ahead and put together a proper tutorial for everyone. All you need is Photoshop and basic giffing knowledge, preferably using the timeline. This isn't necessarily simple, but I would say it's one of the simpler things I've done—somewhere between easy and medium difficulty, maybe.
I. MAKE YOUR BASE GIF
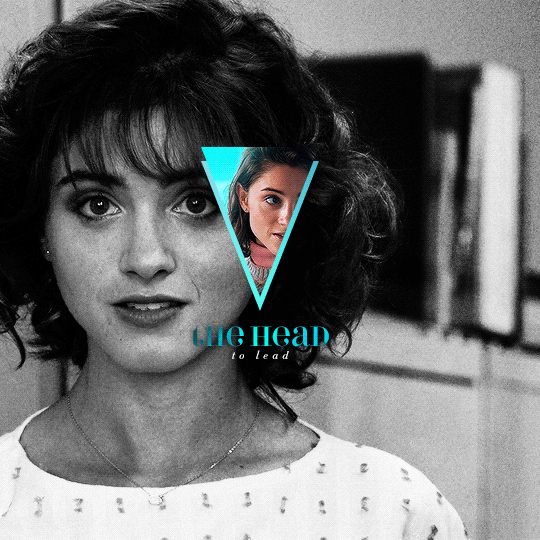
To start, we’re going to be making our base/background gif, which is 540x540. You can color it any way you’d like, but I picked black and white for that particular set because I didn’t want the final product to be too ‘busy’. I wanted to keep the attention on a pop of color at the center instead, which ended up being the second gif and the text.
As a quick sidenote:
Since the gif is so big, I would recommend using at least 1080p footage. I’d recommend always using 1080p footage regardless, but I wouldn’t call it 100% necessary unless you’re making larger (540px, as opposed to 268px or 177px) gifs.
Keeping in mind that the second gif and text will be going in the center of the gif, you’ll want to align the subject/s accordingly. For example, I kept Geralt and Jaskier and Yennefer mostly to the left or right.

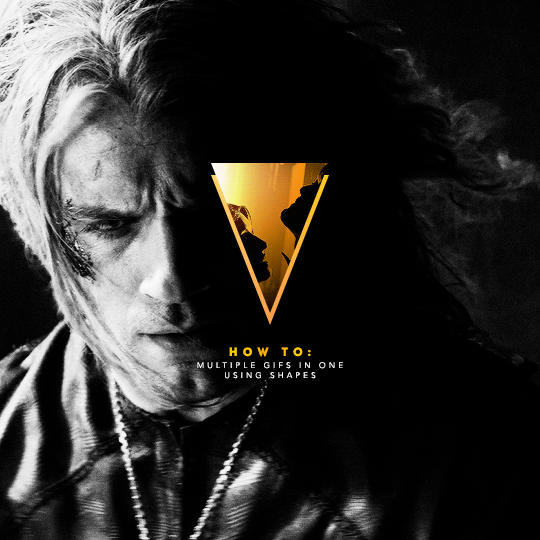
Here is the base gif I'll be using:

And here is a tutorial on how I make my black and white gifs if you’d like to get the same grain effect.
II. MAKE YOUR [SHAPE] GIF
Next is the gif for the shape. Sizing is up to you and ultimately depends on the shape you choose. For me, I know I want an isosceles triangle, so the height of my gif is going to be slightly bigger than the width. My dimensions in the original set were 118x150, so I’ll be making my gif 122x154. You want to oversize here since we’ll be trimming the edges off later on.
After sharpening and coloring, this is what my gif looks like:

III. GROUP YOUR LAYERS
Sounds simple, right? And it is, but it’s as pivotal as it is easy. Maybe it’s dramatic of me to say that I live and breathe by this step, but I kind of do live and breathe by this step. It’s the same technique from this tutorial, and it’s a pivotal step in my blending process also.
Having said that, let’s put all your layers in a group. Do this for both gifs!
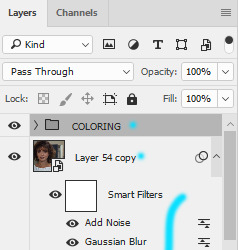
CTRL + A or Select > All
Layer > Layer Mask > Reveal Selection

IV. CUT OUT YOUR SHAPE
You can go about this a couple of different ways, but regardless, it’s as simple as editing your layer mask. No, really. It’s why I love grouping layers and slapping a layer mask on. It makes life so much easier in the long run.
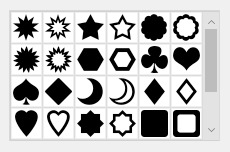
➥ PHOTOSHOP’S CUSTOM SHAPE TOOL
The Custom Shape tool on Photoshop has all the basic shapes you need. Triangles, circles (even though you could just use the round selection tool), stars, and even all the playing suits.
Go ahead and pick a shape to add to your canvas if you haven’t already. Don’t worry too much about the dimensions; you can manually input a specific width and height at the top. Rotate it if you need to (I’ll be rotating my triangle 180° so that it’s upside down) or leave it as is, but when you have it sized the way you’d like, center it and then merge it with a new layer. This way, we can right click on the layer thumbnail and select ‘Select Pixels’.

Next, click on the group layer mask. Invert your selection [SHIFT + CTRL + I or Select > Inverse] and then invert that part of the mask [CTRL + I or Image > Adjustments > Inverse]. Your gif should now be shaped accordingly.

➥ B&W TEXTURES AND VECTORS/PNGs
Alternatively, if you don’t want to limit yourself to basic shapes, you can use a texture or png of anything at all. An instrument, a specific symbol, something abstract, maybe even a flower—it can be literally anything, so long as it’s pure black and pure white. (If you aren’t familiar with how layer masks work, white is what shows and black is what’s hidden. Anything in between and what you get is partially or not all the way transparent, which will look wonky when the smaller gif goes on top of the base gif.)
For example, here’s an icon template by @argetnallison:

Select your image (CTRL + A or Select > All) and copy it.
Go back to your gif. Press ALT and click on the group layer mask at the same time. This will pull up your layer mask.
Paste your image onto the layer mask.
Et voila, as the French and magicians and... other various individuals including myself say.

➥ PAINT BRUSHES
If you’re like me and have a bunch of custom brush sets downloaded, brushes are another way to get fun shapes. If you don’t have any downloaded but are interested in trying it out for yourself, DeviantArt and Brusheezy are the best (or at least my favorite) places to look for them.
It’s the same steps as above, but painting instead of pasting.
V. FINISHING TOUCHES
Now that you’re probably sick of me going on and on about shapes this and shapes that—we get it, Ava, there are shapes, get on with it—it’s time to drag the gif shape onto the base.
To center, because I am admittedly border-obsessive when it comes to things being perfectly 100% centered, I set guides [View > New Guide] in the middle. It’s your width and height divided by two, so I have a vertical guide at 270 and a horizontal guide at 270.
For a “3D” (I don’t know what else to call it, other than “well, I just thought it looked neat”) effect, I added a gradient with the same exact layer mask as my gif shape and positioned it underneath and slightly below the gif.
All that’s left is to add text (I wrote a mini tutorial on gradient text here if you’re interested) and we’re finally done!
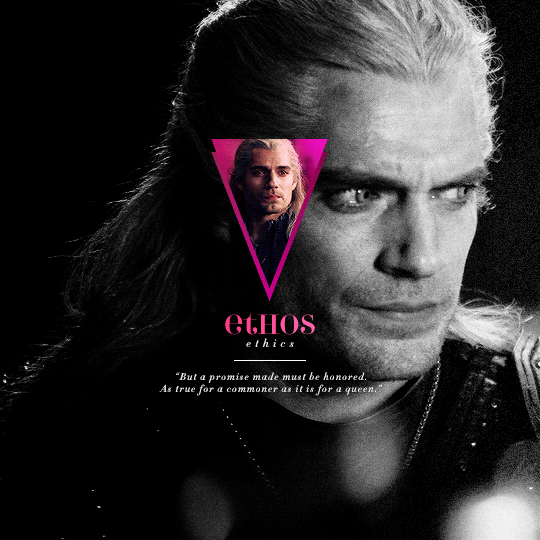
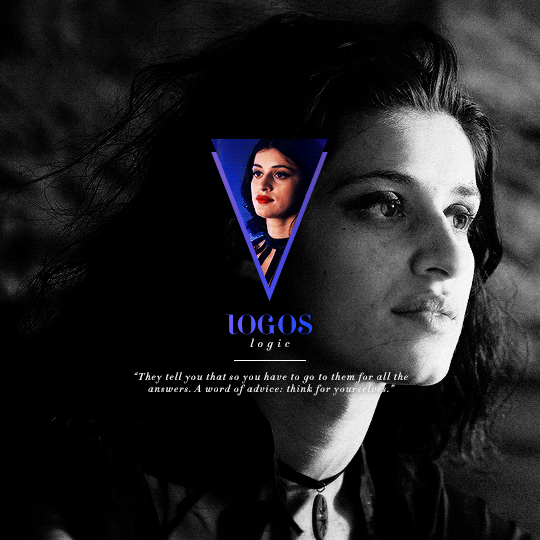
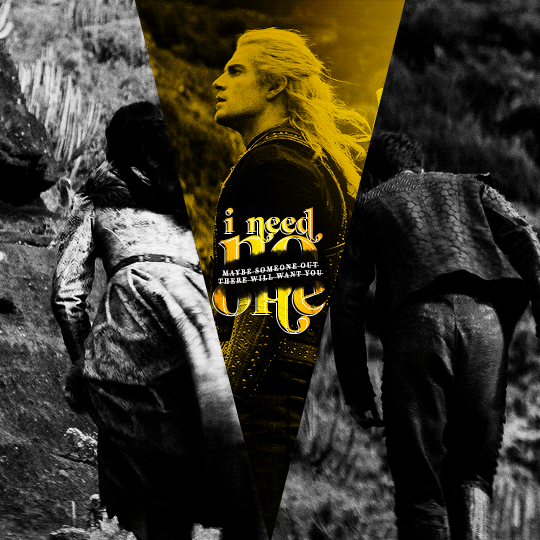
You can also do this with more than one shape, like here:

Or make the shape full-scale, like here:
Happy editing!
#completeresources#allresources#yeahps#itsphotoshop#resources#tutorials#ps asks#mine*#as always feel free to reach out if any of this is confusing#i'm sleep deprived so i feel like the chances of that are pretty likely
1K notes
·
View notes
Last Seen Blogs


cdma123
Link CDMA 123 Daftar Akun Gacor - CDMA123

lordfredbread
Photographer, Horror Enthusiast and Goth obsessed.

augustinemessi10
Augustinemessi10

osp-music
os-P