
You can find my day to day cooking adventures logged on here. I hope you find my recipes useful or enjoy reading and seeing my progress. xo thiskidlovesink
Don't wanna be here? Send us removal request.
Statistics
We looked inside some of the posts by cookingwiththiskidlovesink and here's what we found interesting.
Average Info
Notes Per Post
37
Likes Per Post
27
Reblog Per Post
9
Reply Per Post
1
Time Between Posts
17 days
Number of Posts By Type
Text
3
Photo
14
Last Seen Tumblr Blogs


Fun Fact
Mobile Tumblr US users spend an average of 4.04 minutes per session on the app.
Text
Crispy Roast Pork Belly - Siu Yuk
The idea of making Crispy roast pork used to make me think.. long. When I lived with my dad he used to make it quite often but on a bigger scale - enough to feed the big ass family.

For me and D, i buy a 500g piece and this is usually enough for around 3 people if there are other side dishes.
Before I start, it is so important to note that you need 1 day prepping before you cook it. So make sure you leave an extra day for prepping before you want to serve this .. or it will go wrong - don’t say I didn’t warn you!
p.s I don’t use five spice in this.. you can marinate the pork belly however you want. This is just how I do it..
Ingredients:
500g pork belly
fresh ginger
a load of sea salt or table salt. Whatever you can find in your local supermarket or at home. you need a lot!
For marinade:
fresh rosemary / rosemary - either is fine
light soy sauce (a glug)
dark soy sauce (a glug)
rice wine (a glug)
fish sauce (a glug)
fresh ginger
fresh garlic
pinch of ground pepper
Day 1:
Boil a big pot of water and throw in the fresh ginger. This will be to blanch the meat. Once the pot of water has boiled, put in the pork belly and blanch the meat for 10 minutes.


Remove the pork belly and give it a rinse in cold water. Let it stand on a wire rack to air dry. Once this has cooled down, stab the pork skin multiple times with a fork or sharp object. I use a handful of metal skewers which are pretty sharp! You need to prick as many holes as possible in the pork skin. You can now pop it in the fridge. Do not cover the meat with cling film, i usually cover it with a hole-y steamer.. we need the meat to air dry.

After ½ a day of the meat drying in the fridge, i like to prepare the marinade. In a bowl, combine all ingredients. Pour this in the tray with the pork belly but make sure you do not make the pork skin wet. Let the pork belly sit in the marinade in the fridge for another 12 hours.
Day 2:
Remove the pork belly from the fridge and create a thick layer of salt on the skin of the pork belly. I use a halogen oven to cook my pork belly and i set the temperature at 175 degrees. I like using a halogen oven because I can see what is happening to my pork belly - hence my not certain timing instructions lol.

Pop the pork belly with the marinade liquid in the oven and cook for around 30 minutes.
After 30 minutes or so, the layer of salt will be hard and crusty. Remove the pork belly from the oven and crack the layer of salt off the pork belly. You can now get rid of the left over marinade and salt layer.

Place the pork belly on a wire rack and cook this in the oven again. You may want to place a tray under this to catch the fatty oils and any other juices that will fall off the meat. Cook this for another 20 minutes or so on 175 degrees again.

Check that the meet is piping hot through the middle. A super crispy pork belly layer should have formed. If not, pop it back in the oven for a bit longer.
Once you are satisfied… remove the pork belly and cut for serving!

p.s I like having mine with chopped fresh thai chillies and garlic or chilli oil.
Note: I forgot to take pictures throughout the first and second time making this. This post is a mix of pictures from both times making this haha!
Enjoy! Tag me (@thiskidlovesink) in your attempts to make this super easy pork belly!
xo thiskidlovesink
#tasty#homecooking#cookingwiththiskidlovesink#foodblog#foodporn#easycooking#recipe#method#chinesefood#chinese cooking#chinese#easy recipe tutorial#crispy pork belly#crispy roast pork#chinese food#chinese dish#siuyuk#pork belly#homemade#home cooking
0 notes
Text
Korean Fried Chicken - Honey butter and Yangnyum flavours

I was really craving fried chicken and I thought why not try making it at home.. for once. Usually I don’t bother and I end up finding it somewhere. I think my fav so far was the Korean fried chicken I had in Los Angeles’s Korea town in May - so good I went back twice in the same week! Then again, I love Korean food! Prob my fav, go to!
Right, let’s get cracking... here we go.
Note, I was lazy so went down to my local Sainsbury’s to buy chicken legs and two breast fillets as they don’t sell chicken wings - sad I know. But next time I would use chicken wings and pick them up from a big supermarket instead because the leg meat is so thick that it’s harder to fry! Breast is OK if you want a few boneless pieces, but i prefer the mini fillet breasts you can get from the supermarket. Unfortunately I made this on a day where my local supermarket had nothing that I wanted/needed in stock!
So i used 2 x breast for my yangnyum fried chicken, but the recipe below should cover your box of chicken wings!
Ingredients:
For Yangnyum flavour

1 x box chicken wings (most you get 20?)
2 x tbsp rice wine
a handful of fresh minced ginger
1 x tbsp salt
1/2 x tbsp pepper
corn starch
vegetable oil for frying
For the sauce:
3 x tbsp ketchup
4 x tbsp gochujang (Korean chilli paste which you can get from local oriental supermarket)
2 x tbsp honey
2 x tbsp soy sauce
4 x tbsp brown sugar
2 x tbsp minced garlic
Method:
Wash the chicken wings and cut the wing off from the little drumstick. Place these in a bowl with the rice wine, ginger, salt and black pepper and mix well.
Using a bowl, coat the chicken wings in corn flour.
Heat up the oil and once the oil is hot enough, add a few pieces of chicken to deep fry - do not overload the pot/pan! Turn the chicken to ensure both sides are cooked - should take around 5 mins for chicken wings (they will be fried again so don’t worry). Note, as we are only two here, I try not to waste so much oil and end up using a smaller pot to deep fry in.

Place the fried chicken on kitchen towel to remove the excess oil. Continue this process until all pieces of chicken are cooked. Once the first round of frying is done, remove any left over debris from the oil and fry them again, this time only for 2 or 3 mins). Remove these from the oil and place on kitchen towel again. Set aside.
In a separate medium pan, gather all the sauce ingredients and heat this up. Let this bubble and taste it. You may need to add some more of the ingredients so taste and see you preference.

Once you are happy with the flavour, add the fried chicken wings in a few at a time and coat the wings with the sauce. Place onto place and repeat until you have coated all chicken wings.
That’s pretty easy right? Now, honey butter is more or less the same thing but the ingredients are different.
For Honey butter

1 x box chicken wings
1 x teaspoon chicken powder
1 x tbsp rice wine
splash of sesame oil
corn flour
1 x beaten egg
pinch of salt and pepper
1 x tbsp garlic powder
vegetable oil for frying
For the sauce:
6 x tbsp butter
3 x finely chopped garlic
1 x tbsp honey
1 x tbsp soy sauce
Method:
Wash the chicken wings and cut the wing off from the little drumstick. Place these in a bowl and season lightly with chicken powder, salt, pepper, rice wine, garlic and sesame oil.
Using a bowl, coat the chicken wings egg and then coat in corn flour.

Heat up the oil and once the oil is hot enough, add a few pieces of chicken to deep fry - do not overload the pot/pan! Turn the chicken to ensure both sides are cooked. (they will be fried again so don’t worry).
Place the fried chicken on kitchen towel to remove the excess oil. Continue this process until all pieces of chicken are cooked. Once the first round of frying is done, remove any left over debris from the oil and fry them again, this time only for 2 or 3 mins). Remove these from the oil and place on kitchen towel again. Set aside.

In a separate medium pan, gather all the sauce ingredients and heat this up. Let this bubble and taste it. You may need to add some more of the ingredients so taste and see you preference.
Once you are happy with the flavour, add the fried chicken wings in a few at a time and coat the wings with the sauce. Place onto place and repeat until you have coated all chicken wings.


Let me know if you give this a go.. enjoy!
x
#Korean Chicken wings#Korean#Homecooking#homemade#home#kfc#chicken#recipe#method#tasty#nomnomnom#foodblog#receipeblog#easy recipe tutorial
7 notes
·
View notes
Text
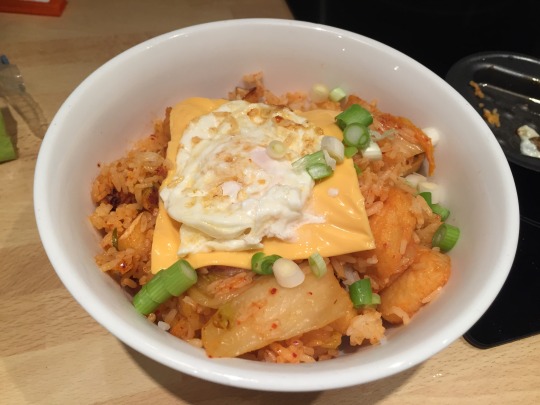
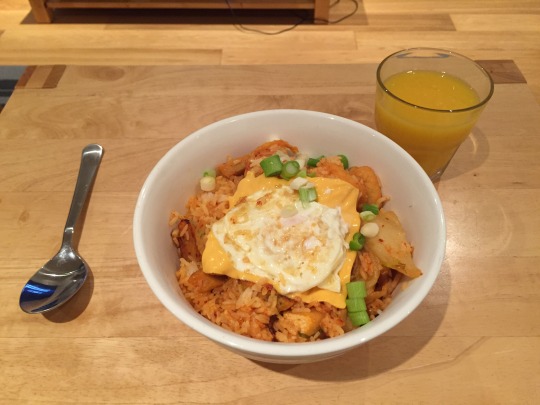
Kimchi Fried Rice
So this was day three of doing my pescatarian diet. By the way I’m only doing this to see if I can get a set of four pacs before I go on my holiday haha! If you know me, I’ve never dieted, always ate what I wanted to eat and never made a fuss. But now because I only have two months, I wanted to see if changing my diet to be fish and veg only rather than meat mainly will make a difference. Who knows, it might, it might not. I mean, I’m only giving it two months because it’s hard as hell. Alongside this I’m trying to go to the gym at least four times a week. Anyway, enough of the life story. Here’s how I made this simple and easy scrumptious meal.
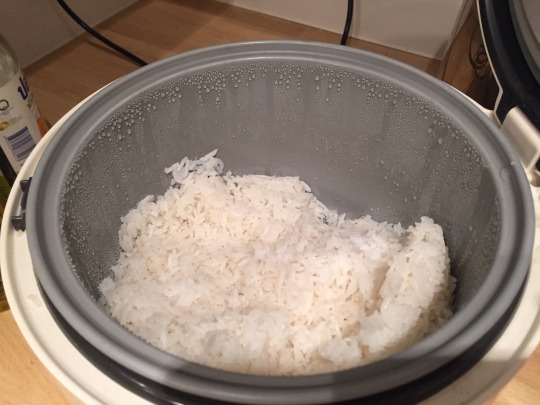
I used rice which I cooked the night before and allowed to cool down. The rice will be less moist when frying so won’t stick like freshly cooked rice.. recommended tip!

Also, in my opinion this is much nicer with chopped frankfurters. But since I’m having no meat, I put fishcakes and fried tofu in mine. I used the frankfurters for my bf’s one.
Ingredients:
cooled down cooked rice
frankfurters/fishcakes/fried tofu - whatever topping you’d like
egg
processed cheese piece (optional)
small bowl of kimchi
freshly chopped spring onion
fresh sliced garlic
seasoning (fish sauce, chicken powder, sesame oil, soy sauce - up to you)
This is the kimchi I used for mine. Use clean cutlery to take some out the packet to avoid contaminating it and to allow you to store it in the fridge..

In a pan, heat up a drizzle of olive oil and add the fresh garlic. Allow to brown and then add in your toppings and cook on medium heat (frankfurters and fishcakes cook fairly quickly, so this will depend on whatever you are using in yours. Then add the rice (measure this by using the bowl you’d like to serve it in. Put however much rice you’d like in but bear in mind that you have toppings too!). Add the kimchi and here is where you can add additional seasoning.I used a bit of chicken powder, a drizzle of fish sauce and sesame oil.

You’ll need to test it to see what it needs more of.. Kimchi also is flavoursome so try not to go too crazy. Mix everything in and allow to cook whilst in another pan, fry an egg. Once you are happy with your rice, serve with the piece of cheese and the fried egg on top (egg is better sunny side up, still watery!).
Enjoy!
xo thiskidlovesink
#kimchi#friedrice#cookingwiththiskidlovesink#method#korean#korea#kimchifriedrice#koreanfriedrice#pescatariandiet#dieting#diet#recipe#tasty#rice#vegetarian#meal
0 notes
Photo

Century Egg and Pork Congee with Yu Tiao (fried doughsticks)
A popular breakfast meal in Hong Kong! I tried to get hold of some ready made yu tiao and the local Chinese supermarket was charging £2.50 for 2 frozen sticks - no thank you! I remembered seeing a mix for it in another supermarket and thought OK fine, it can’t be that hard right.. and I’m so glad I did! They were so fresh and hot - the best!
The yu tiao is optional and you can buy it from most Chinatowns - otherwise there is this mix which you might find in your local Chinese supermarket like I did. It’s really easy and you can make them whilst you are cooking the congee - the recipe is on the back of the box.

Ingredients:
1 x cup cooked rice
2 x century eggs
pinch of salt and pepper
4-5 cups plain water
100g minced pork
2 x spring onion
4cm fresh ginger
1 x tablespoon sesame oil

Peel the century eggs and cut into four pieces each. chop the spring onions and slice the ginger finely. Set these all aside.

In a pot, put the cooked rice and the water. Add in the sesame oil and salt and stir well over medium heat. Whilst this is cooking, in a separate small pot, boil some water. Blanch the minced meat in this for 10 mins and remove the horrible bits floating at the top. Add the minced meat and hot water to the rice pot and stir until well mixed. You may/may not need to add more water to your congee - depends on the texture you prefer. If you prefer more watery, add more water.
Now add in the century egg and ginger and keep stirring to stop the congee from sticking to the bottom of the pan and burning. Keep cooking for another 10 minutes and add in any additional seasonings such as more sesame oil, salt, pepper, chicken powder. Stir until well combined.
Let the congee rest in the pot for 10 minutes before serving with the yu tiao and spring onions.
We had ours with some pickled vegetables too!

xo thiskidlovesink
#cookingwiththiskidlovesink#chinese food#congee#chinese congee#foodporn#foodblog#food#recipe#chinese recipe#congee recipe#preserved egg#century egg pork#dough sticks#yu tiao#hong kong
13 notes
·
View notes
Photo

Vietnamese Spring rolls
I spent this weekend cooking which was so fun. Last night I made some Vietnamese spring rolls with some left over ingredients and it worked out great.
I prefer to use these vietnamese spring roll rice papers as the texture is much nicer than chinese egg roll wrappers - in my opinion! The medium sized spring roll papers are easier to work with - don’t get the small ones as these will be harder to wrap.

Ingredients:
300g minced pork
handful of shredded black mushroom
8 x crabsticks
12 x cooked king prawns
handful of cooked glass noodles
1 x egg
4 x finely chopped garlic
chopped spring onions (not needed, I had some spare so used them)
Seasonings: 1 x teaspoon sesame oil, 2 x teaspoons fish sauce, 1 x teaspoon rice wine, 1 tablespoon chicken powder, salt, pepper
In a bowl, I mixed together the ingredients listed above and added the seasonings. This worked out OK for me, but I’m not sure if you want more seasoning - you’ll have to judge this!


Once you have mixed it all together, it’s good to start wrapping your spring rolls.
You’ll need a plate big enough to hold some warm water so that you can soak your wrappers to soften them. They only need to be dipped in front and back twice and then you can start using them (they will start to get sticky) - apologies! didn’t manage to take a picture of my rolling process as I was busy rolling my spring rolls and had messy meat hands (lol) so I’ll try and describe it..
Take a softened wrapping paper on to a flat surface. Add a full tablespoon of the meat mixture just 1.5cm above the bottom of the paper. fold this over tightly, tucking in any meat mixture. Now fold in both left and right sides as tightly as possible. Roll this over tightly and that’s it! Try to make your spring rolls as tight as possible otherwise when frying them, it’ll pop open :(

Now these are ready for frying. Heat up your frying pan with enough oil to deep fry your spring rolls. As I don’t like wasting oil I tend to use a small saucepan as I am only cooking for two people! Once the oil is hot enough, turn the heat onto medium to allow the spring rolls to cook thoroughly.

These will start go get crispier the longer you leave them in. The texture of these wrappers are great as they are crunchy and sometimes sticky :) I like them.
Whilst these were cooking, I put together a quick salad to accompany our spring rolls - fresh coriander, finely sliced iceberg lettuce and mango. Yes mango! Mango goes great, try it! I also prepared the bun noodles which are thin rice noodles - different to the vermicelli I put in my spring rolls.
Dipping sauce:
3 teaspoon sugar
2 finely chopped garlic
1 finely chopped birds eye chilli
1 x cup of warm water
1 and half lemon
fish sauce
I find that every time I make the sauce my ingredients change lol. You’ll have to keep tasting it and altering it until it is sweet enough or sour enough for you.
In a bowl, add the sugar and warm water. Add a few table spoons of fish sauce, the chilli and garlic. Give it a little stir and add in the lemon juice. Keep tasting and adding more of whatever is needed.

Yummy!
xo thiskidlovesink
#cookingwiththiskidlovesink#vietnamese#vietnamese recipe#vietnamese spring rolls#spring roll recipe#method#recipe#foodporn#food blog#food#home cooked#homemade
2 notes
·
View notes
Photo

Bulgogi Chicken Salad
My salad bases are usually more or less the same but the different textures and flavours of meat make it more exciting! So I decided.. let’s make some bulgogi chicken to go with my salad.
This should make you two portions..
Ingredients:
4 x Chicken thighs – boneless
Freshly chopped garlic
Bulgogi sauce (you can get this from Korean supermarkets or sometimes any asian oriental supermarket)
1 x sweet potato (boiled and then cut into cubes)
2 x boiled eggs
Sliced Red onion
Spinach
1 x small tinned sweet corn
Cherry tomatoes
Cashew nuts

In a frying pan , add some olive oil and fry the garlic. Lower the heat to medium and start pan frying the chicken.

I lower the heat to stop the chicken burning or drying out too much. You could also use breast but I prefer thigh as it’s more juicy! Let this cook and prepare the salad!

Layer the spinach, sliced red onion, sweet corn, cubed sweet potato. Cut the boiled eggs into halves or quarters.
Keep checking on the chicken and once one side is brown, start to cook the other side. Once you are satisfied, add three tablespoons of the bulgogi sauce to the pan.

Do not turn the heat up, the sauce contains sugars of some sort so will easily burn! Turn the chicken around and keep an eye on the chicken. Once cooked, remove from pan and cut into pieces.


That’s it! Easy right? Good luck! I hope you like this idea and use it
xo thiskidlovesink
#cookingwiththiskidlovesink#homecooking#koreansalad#korean recipe#korean chicken#bulgogi#bulgogi chicken#post gym meal#easy meals#easy recipe#recipe#method#gym meals
12 notes
·
View notes
Photo

Ung Choi with shrimp paste
We went to a restaurant recently and ordered a plate of ung choi which set us back £9 or £11. Either way, both expensive!
This dish is reminds me of home cooking by mummy. Although, her version is with fermented bean curd or black beans and chilli. Anyway, the vegetable reminds me of home!
Ingredients:
One bag of ung choi
Half teaspoon of shrimp paste (careful, this stuff smells so bad lol)
5 – 7 cloves of garlic (up to you!)
One birds eye chilli
One teaspoon of oyster sauce
Pick out the bad stems and leaves and then wash your bunch of ung choi. I cut the ends off these as they usually look pretty shabby. Cut these into three pieces as leaving these stems really long will be difficult to eat. Add these to a big enough pan and boiled water to soften them slightly but not to cook them. Leave for about 3 – 5 mins or so and then drain.


In a pan, heat up a drizzle of olive oil and add the cloves of garlic. These should be squashed and then chopped or left whole once squashed. Once browned, add the vegetable and chilli.

Add the seasonings – salt, pepper, oyster sauce and shrimp paste. Add a bit of water to create a sauce and add more seasoning if needed. Stir fry for a few mins on low heat and then serve! I garnish mine with fried shallots

Lovely quick vegetable dish to go with rice.
Enjoy!
xo Jenny
#cookingwiththiskidlovesink#chinese meal#chinesemeal#chineserecipe#cooking#homecooking#homemade#vegetables#recipe#method
0 notes
Photo

Sancocho de Gallina
When I lived in London, me and my boyfriend were regulars at my local Colombian joint. Our favourite was the hen soup which was only available on Saturdays (is there a reason for this? I don’t know). Anyway, I always knew once I was going to move out of London, I’d have to muster up the courage to attempt this myself. And so.. today I did it. And it tasted so good!!!!
As there are only two of us, I made enough for a bowl and a half each big bowls!
Ingredients:
2 chicken drumsticks (usually they use a large chicken or hen for bigger pots of soup, I decided to substitute this)
1 whole spring onion
A small bunch of coriander
1/2 red onion
1 green plantain
2 medium large sized potatoes
1 corn on the cob
1 medium cassava
Sofrito:
3 teaspoons of olive oil
1 chopped spring onion
A bunch of coriander, finely chopped
2 large garlic cloves, finely chopped
1 tomato, finely chopped
Season with salt and pepper, one teaspoon chicken powder
1/4 teaspoon ground cumin
Boil a large pot of water and add in the chicken, 1/2 onion, 1 whole spring onion and a small bunch of coriander. Bring this to the boil and then reduce the heat to medium for 15 minutes.
Prepare the starchy veg:


After 15 mins of the soup cooking, in a separate pan, prepare the sofrito by mixing all the ingredients listed under the sofrito title. Using medium heat, cook this until it becomes soft and slightly saucy. Remove the chicken from the soup pot and place these in the sofrito mix to cook for another five mins. Remove from heat.

Now with the soup, remove the 1/2 onion and whole spring onion. Add the cassava, plantain, potatoes and corn. Add in the chopped coriander and chicken powder and cook on a low heat until the vegetables are soft and tender when pierced. I covered the pot and let this cook.

Add the sofrito mix to the soup and simmer for another 5 minutes.

Serve with chopped coriander on top and enjoy!
xo thiskidlovesink
#cookingwiththiskidlovesink#sancocho#sancocho recipe#colombian recipe#colombian soup#chicken soup#recipe#method
0 notes
Photo

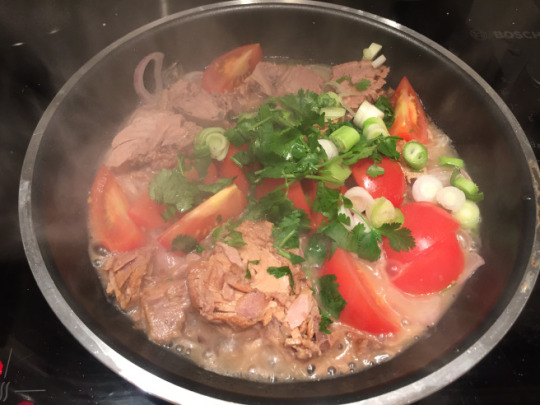
Tomato sauce Tuna
Sometimes I have two side dishes for my meal, usually a meat and one vegetable dish, and I want to add one more quick easy dish. Tuna in tomato sauce is a perfect option because it’s so quick and easy to make!
We had a guest so I used two tins of tuna and an extra tomato! For two people one tin of tuna is enough usually – your choice

Ingredients:
2 tinned tuna chunks in sunflower oil
2 tomatoes
Chopped fresh spring onions
Chopped fresh coriander
1 chopped fresh shallot
In a pan, heat up the chopped shallot with a drizzle of olive oil. Once browned, drain the tuna and add to the pan.

Let this cook for about a minute and then add the sliced tomatoes and a bit of water (just enough for a layer in the pan, for the sauce!). Add seasonings – drop of fish sauce, salt, pepper. Add herbs too and then cover the pan and allow to cook on a low heat.
Done! Served with congee or rice is great!
xo thiskidlovesink
0 notes
Photo

Quick Seafood Linguine
This is my go to meal when I’m super tired and just want to eat. Obviously if you have fresh seafood from the market it’ll be 100% better but my 15 minute meal will do.
Ingredients:
Linguine pasta
seafood sticks
1 pack of Seafood mix from local supermarket
Double cream
Rice wine or white wine
Parmesan cheese
Coriander
Chilli flakes
Fish sauce
chicken powder
Pepper
Fresh chopped Garlic

Bring the water in a saucepan to a boil. Add a pinch of salt and place desired amount of pasta in the boiling water (I use half a pack for two people, cause my bf loves this and usually has two servings lol).
Whilst the pasta is cooking (should take around 12-15 mins), prepare your seafood. wash and chop your coriander, chop the seafood sticks into half. Cooking the seafood and sauce is quick so you might want to wait until your pasta is cooked before you start to prepare it.

Heat up a pan with a drizzle of oil. Add the fresh garlic and brown this. Then add the seafood and 250ml cream. Add in a glug of white wine or rice wine and a bit of chicken powder and fish sauce. Taste and add more accordingly. Add a bit of pepper.

Bring this to the boil, then leave on a low heat.
Drain your pasta once ready and serve. Sprinkle Parmesan cheese and chilli flakes for a tastier treat! Easy right??
xo thiskidlovesink
#cookingwiththiskidlovesink#seafood linguine#linguine#seafood#seafood linguine recipe#recipe#pasta recipe#white sauce#method
0 notes
Photo

Crispy Chicken Salad
I’ve started using the gym again – wahey! So now the big challenge is to sort my diet out where I can so that my gym sessions aren’t going to waste. I’ve committed to going all in and doing at least 5 days a week of working out! Let’s see how long I’ll last?
Anyway, I’ve decided I want to try and eat more vegetables and less rice where possible. So for our meal prep for the next two days, I made a chicken salad So I’ll have this and two pieces of fruit during the day – apple and banana most likely lol.
This should make four portions…
Ingredients:
1 x pack of rocket (if you like it… I personally don’t but my bf does!)
1 x pack of Spinach
1 x pack of cherry tomatoes
1 x small tinned sweetcorn
1 x red onion
2 x Sweet potato
1 x double pack of Chicken mini fillets
Freshly chopped garlic
4 x Eggs
1 x Broccoli
1 x bag cashew nuts
cornflour

First of all, place the chicken and garlic in a bowl and season with a drizzle of sesame oil, salt, pepper, a bit of fish sauce, a bit of soya sauce, a tablespoon of rice wine (if you have it) and one naughty pinch of chicken powder (also if you have it). Mix and leave this to marinate for 30mins – 1hr in the fridge. The longer you leave it, the more flavoursome
Whilst you leave that to marinate, prepare the salad. Peel and cut the sweet potato into slices, this can start boiling until soft. In another saucepan, cut the broccoli into smaller pieces and boil along with the eggs (I’m lazy, lets stop using too many pans and creating more dishes to wash – hahaha). After washing the greens, layer the spinach, rocket, sweetcorn, sliced red onion.

Once the broccoli and sweet potato are both soft, drain and cool these. The eggs should also be ready and submerged in water (in their shells) so that they can be peeled easily. Leave these all aside. #

If you are happy with the chicken, take it out from the fridge pour a layer of cornflour onto a separate plate. Using a frying pan, add oil (just enough for a layer.. see picture). Once the oil has heated up, lower the heat midway. Mix the chicken and take a piece and layer it in cornflour on both sides. This is now ready to fry, repeat with all pieces. My pan is quite small so I fried 5/6 pieces at a time. Once both sides are fairly golden, turn the heat up slightly to get them slightly crispier!


Apologies… I was washing up whilst doing this so I didn’t really time this. But if you allow the chicken piece to cook on a medium heat (on both sides).. this should allow the middle to cook. When satisfied with the crispiness, remove from the pan and place on two layers of kitchen towel to take off as much excess oil as possible. Cut these into smaller pieces.

Now that the sweet potato and broccoli have cooled down, layer these into your salad too. Peel and cut the boiled egg into quarters and then top your salad with the crispy chicken pieces. Lastly… throw in as many cashew nuts as you’d like.
Tomorrow’s lunch.. will be GREAT :)!

xo thiskidlovesink
#cookingwiththiskidlovesink#chickensalad#chicken#vegetables#salad#homemade#method#recipe#crispychickensalad#chicken salad recipe
0 notes
Photo

Tomato Herb Salmon
As I’ve started working full time again, I have less time to devote to cooking as after work I’m super tired and just want to eat more than anything. Apologies in advance for less frequent posts, I shall try my best as I need to log these quick meals for future reference haha.
Anyway, this is a quick dish I put together which turned out pretty nice! Give it a try..

Ingredients:
1 x tinned tomatoes
Fresh chopped coriander
1 x chopped shallot
2 x pieces of salmon with skin
Freshly chopped spring onion
In a pan, use olive oil and pan fry the pieces of cod – ignore my picture. I used sunflower oil and way too much oil.. but just left it to fry since I already added it to the pan!

In another pan or pot, add a drizzle of olive oil and the shallots. Allow the shallots to cook slightly so that the flavour goes into the oil – love the taste of fried shallots! Once browned, add half can of tinned tomatoes and chopped herbs. Let this boil and then have a quick taste. Mine was pretty tangy and sour so I added some fish sauce, chicken powder and sugar. Only a little of each and kept tasting to test it. I didn’t use the full can of tomatoes in the end as it was too tangy for me! It’ll taste better with more fresh herbs but you can adjust this accordingly.

Once the salmon pieces are crispy on each side and cooked, remove these and add the tomato sauce on top. Yum!!

To be honest this could be a nice dish on a bed of spinach and other greens but I love rice so you know.. I had mine with fluffy white rice and other side dishes!
Happy cooking!
xo thiskidlovesink
#cookingwiththiskidlovesink#homecooking#homemade#salmon#tomato#tasty#recipe#salmon recipe#friedsalmon#tomatosauce#method
0 notes
Photo

Thai style Mango Sticky Rice
We visited Thailand last year and couldn’t stop eating their well known dessert – mango sticky rice!
I found some really sweet mangoes in my local Tesco so thought I’d give it a go..
Ingredients:
1 cup glutinous rice or sticky rice
1 or 2 mangoes (your choice)
1 small can of coconut milk
Palm sugar or 4 or 5 teaspoons of brown sugar, taste and adjust accordingly
Soak the glutinous rice in water for about 40 minutes – 1 hour. Whilst you wait, peel and slice the mangoes and prepare the sauce. I like when the mangoes are really cold so I put them in the refrigerator.


For the sauce you’ll need to put half the can of coconut milk in a sauce pan with your palm sugar or brown sugar. Heat this over low/medium heat, do not allow it to boil. Keep stirring and once you are happy with the sweetness, remove from pan and allow to cool.

*note, I kept the palm sugar in until I was happy with the sweetness. I kept this for the other half of the sauce.
After 40 minutes, I removed the water and added new water before putting the glutinous rice in the rice cooker. This is where I messed up. I added too much water! I put two cups of water in as I thought glutinous rice needed more water (yes but not double! Only one and a half, I think).
Once the rice is cooked, add the remaining coconut milk and sugar in a pan again – not allowing the mix to boil. Mix in the cooked sticky rice until all the liquid has been absorbed in the rice. Allow this to cool (unless you want this hot?).

Then serve!
xo thiskidlovesink
#cookingwiththiskidlovesink#thaimango#mangostickyrice#stickyrice#coconut#dessert#dessertrecipe#recipe#method#coconutmilk#thailand#thaidessert
0 notes
Photo

Fried Chicken, Honey glazed aubergine, Home-style cabbage
FRIED CHICKEN!! My absolute fav and my number one craving, always. It also has to be super crispy too, for me to be completely satisfied.
Back at my dad’s, my bro showed me.. the king of all fried chicken batters – and it’s already made. Now, I bet this has a shit load of salt etc.. but I couldn’t care less as I don’t eat it often and it tastes great! I decided to use mini chicken fillets as my boyfriend prefers to just be able to eat chicken without the hassle of removing bones – this was a great idea in this case!
Before you start, find your big Tesco supermarket and locate Dunn’s River orifinal chicken fry mix (can be seen in the photo), I’m telling you, it’s a life saver and means a quick whipped up meal which will make you smile.
Fried Chicken
Ingredients:
Mini chicken fillets
Dunns River original chicken fry mix
1 egg
oil to fry

As you can imagine, it’s simple. Literally beat the one egg in a separate bowl and dip your chicken pieces in the egg. Then coat it in batter and repeat this so that the pieces are double battered (super crispy!). Don’t over do it, the mix can be really salty if you add too much of it. These pieces are now ready to fry! Easy huh?
With this, I decided to have thick noodles with my lovely basic side dishes I like – spicy honey glazed aubergine and home style Chinese cabbage.

Spicy Honey Glazed Aubergine
Ingredients:
1 aubergine
chopped fresh garlic
1 birds eye chilli
2 tablespoons of honey
2 tablespoons of soy sauce
pepper
Cut the aubergine into finger pieces and fry these for two minutes – do not soak the aubergine in oil. Remove the aubergine from the pan and then dry off the oil using a kitchen towel.
Mix the honey, soy sauce and pepper in a little bowl. In a clean pan, add a drop of oil and pop in the chopped garlic. Once the garlic has cooked slightly, add the honey mix and allow this to thicken slightly.

Add in the aubergine and let this cook in th sauce. You may need to cover this with a lid on low heat to allow the aubergine to soften. Garnish with herbs and serve!
The noodles we ate were thick noodles purchased in an Asian supermarket. These are good for noodles in soup, frying or even eating dry lol I like dry noodles from time to time!
I have used these noodles in soup before but I didn’t write down my recipe and take pics unfortunately. But here’s another suggestion for the noodles! Cha siu with vegetable thick noodles in chicken broth. Yes that’s a boiled egg and “crab” nuggets

^__________^
xo thiskidlovesink
#cookingwiththiskidlovesink#tasty#chasiu#vegetables#homecooking#chinese#chinesemeal#china#recipe#chineserecipe#method
1 note
·
View note
Photo

Stuffed Vegetables in chilli black bean sauce
I tried to call my mum several times today when I mentally decided that today I would make one of my fav dishes that she makes me crave. Without luck, I had to go ahead as I was wandering in that Chinese supermarket like the weirdo I am (forever in there contemplating what I’d like to make for dinner).
It was decided, with mum’s help or without, I was going to make it. Stuffed vegetables (mushrooms, bell peppers & aubergines) in chilli black bean sauce. I also purchased tofu but seeing as we are only two people, it was definitely too much! So I decided I’d use the tofu tomorrow for something else.
P.s, the recipe I was thinking of is usually pork and prawn. This is a perfect example of why I started this blog – my memory is shit and I forget things! As I forgot about the prawn, I went ahead and improvised. Good luck…
Let’s go.

Ingredients:
1 x aubergine
Medium sized mushrooms
1 x bell pepper
200g mince pork
Chopped 1/4 red onion
Chopped fresh garlic
Chopped fresh coriander
Chopped fresh spring onions
2 x tbsp Fish sauce
1 x tbsp Oyster sauce
Pinch of salt and pepper
Drop of sesame oil
1 x tbsp rice wine
2 x tbsp soya sauce
1 x tbsp corn flour
In a big bowl, mix all the ingredients (not the aubergine, mushrooms or peppers) together and allow the mix to marinate the meat for a few minutes.
Remove the stalks from the mushrooms, cut the pepper into quarters and the aubergine into several thick pieces. You will also need to remove some of the aubergine to allow you to stuff it

Stuff the vegetable, as seen in picture above. Once you have done this, sprinkle a pinch of corn flour onto each piece, where the meat is. In a pan with shallow oil, fry the vegetable, meat facing down. Cook this on a medium heat until meat has browned. The vegetables may need some turning. Avoid frying/drenching the vegetables in oil as this will make them soggy later. Remove the vegetables once the meat has browned, the veg should only be more or less half cooked.
For the sauce:
3 x tbsp soya sauce
2 x tbsp fish sauce
1 x teaspoon sugar
2 x tbsp rice wine
2 x tbsp dried black beans
Water
1 x tbsp corn flour
1 x chopped birds eye chilli
Chopped fresh garlic
In a bowl, mix these ingredients together (minus the garlic and corn flour). Using a pan and a drop of oil, cook the garlic slightly. Once the garlic has cooked, add the sauce mix with 1/4 of a small bowl of water. Let this boil and then add your vegetables. Ideally you want to use a pan that can fit all your pieces. I have a small pan but managed, so you should be fine! Cover the pan with a lid once the pieces have been added and turn the fire down to cook slowly. After a few minutes, turn the pieces and place the lid back on. Be careful when moving the pieces as the meat could easily slip out!
Once the veg has softened, check that the meat is also cooked. I think I had mine on there for about 15 mins (or longer?) as I wanted to be sure sure that the meat was cooked as my aubergine pieces were kind of huge..
Mix the corn flour with a bit of water and add this to thicken the sauce.

Serve hot and garnish with chopped spring onions and coriander.
I served this meal with my boyfriends fav (steamed egg ofc) and boiled gem lettuce with oyster sauce. All three dishes are perfect to eat with a bowl of nice fluffy rice!
Tasty!
xo thiskidlovesink
#cookingwiththiskidlovesink#homecooking#chinesemeal#recipe#method#china#vegetables#blackbeansauce#chinese
0 notes
Photo

Chinese Dinner - Spicy aubergine with cod, Garlic pakchoi, Soup with wontons, tofu, enoki mushrooms and fishballs, steamed egg
Funnily enough, being Chinese, I love eating boiled rice with side dishes. I’d probably pick home-cooked Chinese dinners over most dinners.. or would I? Anyway, I attempted to have a nice home-cooked Chinese meal which consisted of the following side dishes:
Spicy aubergine and cod mix
Garlic pakchoi
Soup with pork and prawn wontons, tofu, enoki mushrooms and fish balls
steamed egg
Spicy aubergine and cod mix
Ingredients:
garlic
one large aubergine
Boneless cod
one bird’s eye chilli
water chestnuts
spring onions
I seasoned my cod with a bit of sesame oil, salt, pepper, fish sauce, chicken powder and left it for 30 minutes. After that I cut it into pieces – I probably should have done this the other way round lol. Ideally for this dish I would have preferred to use salted cod but here in Bristol, I had no idea where I could find that so just went with cod I purchased from Sainsbury’s.
In a big and deep pan heat up some olive oil and add the chopped garlic. Cut the large aubergine into long wedges, chop the chillies and drain the tinned water chestnuts (these were already sliced). Add the pieces of cod to the pan to cook them slightly. Once you have cooked both sides of the cod pieces add the aubergine pieces, chopped chilli and water chestnuts. Add more seasoning and a tablespoon of oyster sauce and soy sauce. Be a bit careful with this dish, the more you move it around, the fish will break into pieces – if you’d prefer it to be broken up then fine, if not, handle with care!

Garlic pakchoi
Ingredients:
garlic
pakchoi
oyster sauce
Wash the pakchoi and separate the leaves from one another. Cut off the chunky end bit. In a pan, add oil and chopped garlic (the more the better!). After 30 seconds or so, add the pakchoi along with a teaspoon of oyster sauce. Cook for a few minutes and that’s it!
Soup with pork and prawn wontons, tofu, enoki mushrooms and fishballs
Ingredients:
soup stock (or use prawn heads and shells like I did haha)
fish balls
enoki mushrooms
silken tofu
wontons
In a pot, I boiled water and added my prawn heads and shells. I then removed the heads and shells from the soup and added one tomato which I sliced into 6 pieces. In went the wontons along with some chicken powder and fish sauce (taste and add accordingly).
Enoki mushrooms were washed and the soiled ends removed. The fishballs were sliced into halves and I drained the tofu and sliced the block into chunky cubes. These were all added in at the same time. As tofu, fishballs and enoki mushrooms cook really fast, I didn’t keep them cooking for too long. Just a few minutes until the fishballs floated.


A few days ago, I made some pork and prawn wontons (apologies I only took pictures for my Instagram story and did not save them.. dopey moment of mine) to store in the freezer so that I could whip up quick fix meals with them whenever. I remember watching a chef cook something and he mentioned the heads and the shells had a lot of flavour and to store these cause you could use them – I’m glad I remembered that! Because I used fresh prawns, I took the shells and heads and stored them in my freezer. I used those for my prawn soup base.
Steamed egg
I’ve never made this type of steamed egg before but my boyfriend introduced it to me a few years ago. It’s one of his favourite dishes so I thought I’d try it. I used this method from here to do it but did not garnish the top and added my own seasonings: – https://snapguide.com/guides/make-chinese-steamed-egg-zheng-shui-dan/
Hope you find this handy! Enjoy!
xo thiskidlovesink
0 notes
Photo

My take on beef lasagne is to basically add all vegetables that I enjoy eating and believe would go well together. That includes sweetcorn, mushrooms and coloured peppers. Whenever I order a lasagne in a restaurant I usually get bored after a few bites… mainly because that’s it. There’s nothing exciting about it other than the layers of pasta and cheese for me. I’m a pig, I want more!
I decided to make a lasagne for our first dinner in our new home. I haven’t made one in ages and thought hey why not! Read on to see how I made it..
Ingredients:
400g of minced beef
assorted peppers
mushrooms
tinned sweetcorn
purple onion
garlic
Dolmio’s lasagne tomato sauce
Dolmio’s lasagne cream sauce
lasagne sheets
mature cheddar cheese
Seasonings:
Salt
Pepper
Chicken powder
Fish sauce
Prepare the vegetables first so that you can just add everything when necessary - Peppers, onion, mushrooms and garlic were all washed and cut. The tinned sweetcorn was drained.
Heat the pan and add the garlic and onion to the pan. Once this has cooked slightly, add the mince beef and start browning the meat. Throw in the seasonings (I’m no expert so add a bit of everything and if it’s not enough you can have a taste later!). Once the meat has browned, add the tomato sauce, assorted peppers, mushrooms and sweetcorn and put the pan on a medium heat. Once this has boiled, taste the sauce to see anything needs to be added.. the mince is now ready!

In a deep tray, add a layer of tomato mince followed by a layer of lasagne sheets. It is likely that you’ll need to break some lasagne sheets as all pans are different in size etc. After the layer of lasagne sheets, in goes a layer of cream sauce. Repeat the layer step as many times as your tray can handle (I managed three layers, just about). On the last layer, add a layer of cheese. The lasagne is ready to be cooked in the oven for around 40 mins - I made a mistake of using cheddar cheese on top which burnt quite easily!

Ta-da! Here are my end results.. it was actually really nice and I served it with a salad (mixed leaves, cherry tomatoes and sweetcorn) with balsamic vinegar.
If you decide to follow this recipe, good luck and please show me :) I’d like to see how yours came out. And of course, any tips on how I could improve are always welcome!
Happy cooking :)
xo thiskidlovesink
#cookingwiththiskidlovesink#homecooking#lasagne#lasagnerecipe#recipe#method#lasagna#lasagna recipe#homemade
2 notes
·
View notes