
Our goal is to inspire an amazingly loud and incredibly proud community created to empower and motivate teachers | Go teach!
Don't wanna be here? Send us removal request.
Statistics
We looked inside some of the posts by go-teach and here's what we found interesting.
Average Info
Notes Per Post
0
Likes Per Post
0
Reblog Per Post
0
Reply Per Post
0
Time Between Posts
7 days
Number of Posts By Type
Photo
15
Text
2
Last Seen Tumblr Blogs


Fun Fact
12.7% of mobile users access Tumblr.
Photo

October Teacher of the Month
Susan Fields - October Teacher of the Month
Rock Hill high school teacher Susan Fields loves watching her students grow into adults during their time at South Pointe High School and is grateful for the opportunity to teach them multiple times.
What do you love most about teaching?
I love to see how my students grow into adults over the years here at our high school. I teach a variety of classes, so I have the lucky fortune of teaching many students at least twice during their high school years.
What is your favorite memory/story from the classroom?
I once dressed up as Marie Curie…and spoke to the students as if I was her. They totally forgot that it wasn’t her! They were in shock as I slowly removed the wire-rimmed glasses, took my hair down, and removed the costume.
Why are Expo Markers your favorite Go Teach! product?
I love Expo Markers because they come in a great variety of colors and sizes! Science class involves the creation of graphs, so having access to thinner Expo’s makes it much easier for graphing! Students having access to a variety of colors makes team/group activities that much easier because we can color-code work!
I love the interaction with my students, especially when the content that I’m teaching “clicks” and I can see the excitement on their faces!
0 notes
Photo

September Teacher of the Month
Amber Northern - Sept Teacher of the Month
1st grade teacher Amber Northern builds personal relations with her students to help them learn the material better!
In what city/state do you teach? Longview, TX
What grade level(s) do you teach? 1st grade
What do you love most about teaching? I enjoy building relationships with my students. I feel like getting to know them and allowing them to get to know me is a critical part of my teaching. I also love those “ah ha” moments. Watching my students learn and apply their knowledge is just the best!
What is your favorite memory/story from the classroom? My favorite memory from the classroom is when a struggling learner remembered a math skill we had been working on for a few weeks. He remembered it during our small group time and took over the lead in our lesson. He explained to his peers why using the doubles rule would help us solve a different problem. I was so very proud of him.
Why are Mr. Sketch markers your favorite Go Teach! product? I use Mr. Sketch smelly markers to make all of my anchor charts. The colors are bright and make a great display on the wall. The kids are able to see what is on the anchor chart and use the information. Also, I feel like the markers boost participation at whole group time. The kids want to come up and choose a fun marker to help build anchor charts and solve problems.
I love when my students use something from a previous lesson in a new lesson.
0 notes
Text
Back to School Classroom Tips!
Tip 1: Paper Mate Flair pens make taking running records a breeze. The fine line and smooth writing tip enables you to check off quickly and easily fit notes into the small margins.
Tip 2: While setting up your art or writing center, be sure to include fun and durable writing tools for students to use. Mr. Sketch Scented Gel Crayons are chunky enough for small hands and twistable to prevent breakage. They smell good too!
Tip 3 : To save time and give students more independence, keep an X-Acto Electric Stapler in the classroom. Safely teach students how to staple their own step books, center work, and other papers to be turned in without the noise and jamming issues of a regular stapler.
Tip 4: Teaching students to set learning goals is an important step toward academic achievement. Make a simple goal guy or gal using construction paper and Elmer’s Washable School Glue Sticks.
Tip 5: Use a level app on your phone to hang back to school bulletin boards. It saves a ton of time with no more climbing up and down to check that they are straight.
Tip 6: Use a simple system to display student work by gluing sprayed clothespins to a cut out. Spray lots of pins at once by clipping them onto a pizza box. Spray one side, close the lid, and spray the other side.
Tip 7: With the warm back to school temperatures, my students bring frozen water bottles to school. Cut foam craft sheets into coasters for students to place their bottles on. No more wet desks and soppy papers.
Tip 8: Make your own thematic sticky notes with removable glue sticks. This adds an interactive element where students can add their own writing to your charts and makes it easy to reuse them year after year.
0 notes
Photo

Best ways to Teach Kids to Write
Katie Turner
Preschool Inspirations
The most common comments I’ve heard when people stepped into my classroom are, “Look at all of those children drawing.” “Is your writing center always so popular?” and “My child loves to write, thanks to you.”
Today I’m sharing my favorite activities for teaching children to learn to write — the ones that have been successful for all of my students! Here’s a video of these fun and inviting writing activities, and you can read more about each process below!
The First Step
I used to think that the first step in teaching children to write was to sit them down and have them trace. While some children are absolutely ready for this, it’s because they already have a good foundation. My approach is much different now!

The first step to teaching kids to write begins with large arm movements. This allows children to strengthen their entire arms and even their core. Think about the motions you use when writing on a piece of paper. You are using your arms, crossing your body, and you may even feel it in your abdomen as well.
Children begin this process in two very common positions: writing while lying on the floor or writing on a vertical surface.
Teach Multi-Sensory Writing

I learned about multi-sensory writing while studying some of my Montessorian friends. One day I walked into a preschool classroom that had the most beautiful handwriting I had ever seen. In fact, I didn’t even know it was possible for preschoolers to write so neatly!
When I asked my friend how she did this, she said that she used a multi-sensory method. Maria Montessori taught children to write by tracing the letters first, before handing them a pencil. This made so much sense, and I have seen incredible results with multi-sensory writing techniques. I have also learned that there are lots of ways to do this besides sandpaper letters and sand trays.
One of my favorite multi-sensory writing hacks is with glitter glue. I’ve tried all kinds of glitter glue to do this, and I love the results of Elmer’s glitter glue the most! There are several different colors to choose from, and the glitter is subtle but gives children a nice texture to feel while tracing. Some glitter glues get stuck coming out of the container and make it tricky to make the letters just right. This doesn’t happen with Elmer’s glue. It comes out nice and smoothly, and the glue dries perfectly too.
To make multi-sensory tracing cards, write two numbers (or letters) on a 3-by-5 index card with Elmer’s glitter glue. Allow several hours for these to dry, and then cut them in half.
Then invite the child to trace the number. Teach children to trace from the top to the bottom and have them do it slowly. Put the cards on a binder ring to make them easy & convenient.
Supplies Needed:
· Elmer’s Glitter Glue
· Index Cards
· Binder Ring
Teach Kids to Write with Journals
One of the most inviting ways to teach kids to write is with journals. We make homemade journals with blank white paper. Sometimes lines can be distracting to children, so using blank paper is the perfect alternative. Simply put together 3 to 5 pages of copy paper. Fold them in half and staple the ends to make a journal.

For children who are in the pre-writing stage, you will see them making lines and circle-like shapes. These are all wonderful signs of progress. To help with this, provide circular items that they can trace such as bottle cap lids, small cups, or containers.
Tip: Lots of children naturally tend to hold a pencil or tall crayon up high (as pictured), so encourage them to hold it closer to the tip for better control.
Supplies:
· Blank Journals
· Mr. Sketch Gel Crayons
· Name Rocks

For children who are already learning to write, I start working on something that they all find to be extra special. When children are starting to write, the first word I teach them is their first name. It is one of the most memorable words they will learn to write, and we are setting the stage for kindergarten and beyond.
One of my favorite ways to help children learn to write their names is with a name rock. Each year I have my students go outside and pick out a nice smooth river rock. Then I write their name on it with a marker. We use this Elmer’s Paint Markers, which is perfect for name writing and decorating.
My students love finding their name rocks any time they need help remembering how to write their names. They can even make rainbow rocks!
Supplies:
· Elmer’s Paint Markers
· River Rock
0 notes
Photo

Gorgeous Black Glue Galaxy Craft
Rachel Nipper
I Heart Crafty Things
If you’re looking for a fun activity to keep the kids busy indoors the next couple weeks before school starts look no further! This black glue galaxy craft is not only a gorgeous art project but it will keep kids busy and happy for hours.
Now is the perfect time to stock up on Elmer’s School Glue when you are out doing your back-to-school shopping. Elmer’s School Glue is perfect for making arts and crafts projects year-round and the 4 oz. bottles help making small batches of black glue and slime a breeze.

Supplies Needed:
· Elmer’s School Glue
· Black acrylic paint
· Mixed media paper
· Skewer or stick for stirring
· Watercolors
· Elmer’s glitter Glue Pens
· Galaxy Template (optional)
Project Tutorial Steps:
1. Start by mixing together your black glue. To do this, use a bottle of Elmer’s School Glue that is about 75% full. Open the lid and squeeze in a generous amount of black acrylic paint. Put the lid back onto the school glue and then shake, shake, shake the bottle of glue for several minutes to incorporate as much of the black paint as possible.
2. Then remove the glue lid and give the mixture a stir using your skewer or stick. The end of a paintbrush works well for mixing too.

3. Before you begin tracing the template, test out the glue first on a napkin or separate piece of paper. Create some lines to experiment with the flow and spread of glue. Once you’re happy with the way the glue flows, download the free galaxy template and print out whichever galaxy picture you’d like to use on your mixed media paper.
4. Using a steady hand, trace the lines of the black glue galaxy craft with black glue. Don’t worry if the lines are not perfect or the glue pools a little, as this adds to the overall effect of the piece.

5. Leave the black glue to dry overnight. This step is important because if you paint your picture prior to the black glue drying your watercolors will mix with the black paint.
6. Once the black glue is completely dry, paint your picture with your watercolors.
7. After allowing the watercolors to dry, grab your Elmer’s Glitter Glue Pens. Use the different glitter glue pen colors to add details to your black glue galaxy craft such as a ring around your planet, extra bling in sections of your planets, stars and even colorful shooting stars.

8. After allowing the watercolors to dry, grab your Elmer’s Glitter Glue Pens. Use the different glitter glue pen colors to add details to your black glue galaxy craft such as a ring around your planet, extra bling in sections of your planets, stars and even colorful shooting stars. These Elmer’s Glitter Glue Pens are amazing because they are easy to use and you achieve the look of glitter without any of the mess!
I recommend layering several different colors of the glitter glue together when creating the ring around your planet as it creates a colorful galactic-looking swirl around the ring.

YOUR BLACK GLUE GALAXY CRAFT IS FINISHED!
Do you love this black glue art technique as much as we do?
0 notes
Photo

Word Family Activity (Word Work)
Jill & Cathy
The Curriculum Corner
This set of word work games includes five different spinner mats that are colorful and more engaging for students than worksheets.
Simply print on card stock, laminate and grab some EXPO Dry Erase Markers with Ink Indicator – available in six different colors – and you’re all set!

Be sure to read to the bottom to find out how you can be entered to win a set of 24 EXPO Dry Erase Markers with Ink Indicator AND we will also be giving away three fully printed and laminated sets of resources!
With centers such as these, we are catering to all teachers, but especially those who are needing or wanting to go more paperless with their curriculum and instruction. Creating centers and practice opportunities for students that are timeless and can be reused year after year is important. Especially as we are finding our funding for supplies such as copy paper dwindle.

And once again…in thinking about classroom supplies, we know how frustrating it is to pull out a basket of dry erase markers for a class activity only to find they are out of ink! Been there. Done that. Many. Times. Seems like for us, we spent the first few minutes of many lessons exchanging markers that were dried up and making sure each student had one that was working.
That’s why we LOVE EXPO’s newest product! Their Dry Erase Markers with Ink Indicator are simply amazing and we want you to try them out. You can tell with a quick glimpse if they’re running low and replace them before you even start! And the clear lines make it easy to read students’ handwriting. If you haven’t already, take a look at the specific product information for these awesome markers here: EXPO’s Ink Indicator Dry Erase Markers

PLUS – having centers like this printed, laminated and ready to go will save you time with all the prep work each year! Doesn’t that sound amazing??
This set of centers is particularly engaging for students because they will be busy spinning and creating either real words or nonsense words. Nothing seems to make a little one giggle like a good old crazy word that makes no sense, huh? This should be truly engaging so that you can work with a small guided reading group or even work on individual assessments with students.
This collection of word practice resources includes 5 colorful work mats and 2 recording pages. Here are the directions:
1. Students place the tip of their pencil inside a large paper clip in the center of the first spinner wheel on the mat. Then they flick the paper clip to make it spin and land on a letter(s).
2. They repeat the procedure with the second spinner wheel on the mat.
3. Next they put the first spinner’s letter(s) together with the second spinner’s letter(s) to see if they have created a real or nonsense word.
4. Then they use their EXPO Ink Indicator Dry Erase Marker to write the word they created in the correct column on their recording sheet mat. (We have provided this in black & white as well in case you were hoping to use the center as an informal assessment.)
You can download this word family activity here:
Word Work Spinner Game
0 notes
Photo

Mistakes to Avoid When Teaching Handwriting
Anna Geiger
The Measured Mom
I receive many emails from parents asking me for help when teaching their young children to form letters. When should they start? What should they use? What letters should they teach first? Let’s take a look at five common mistakes to avoid when teaching handwriting … and what to do instead.
Mistake #1: Rushing Into It
Children need lots of time exploring with markers, crayons, and other tools before we begin handwriting lessons. There’s no need to rush! My three-year-old is very busy with markers, crayons, scissors, and glue all day long. Mr. Sketch scented markers are a fun favorite!
Don’t get me wrong – we talk about letters a lot, and my Three loved our letter of the week series. But I haven’t attempted any formal handwriting practice with her just yet.
Mistake #2: Neglecting fine motor skills
It’s common for parents to think that the first step is teaching their child to hold a pencil and form letters, but that should come after many playful fine motor activities. These don’t have to be structured. Think simple!
- Spraying water from a spray bottle
- Stringing Cheerios on a piece of yarn
- Punching with a single whole punch
- Simple crafts with scissors and glue

Just today, my Ten helped my Three glue colored paper to some cardboard tubes for a pair of binoculars. (Yes, we go through a lot of glue sticks around here!)
Mistake #3: Jumping to worksheets before children are ready
Many early childhood educators feel strongly that no preschoolers should be doing handwriting worksheets. I wouldn’t go quite that far, but I’d definitely agree that most three and four-year-olds should not be using traditional handwriting pages.
Instead, give them a variety of surfaces and materials to write on/in. Here are some of our favorites!

- small dry erase boards with fine-tip, low odor Expo markers (these are our favorites) - writing in a sand, sugar, or salt tray - drawing with chalk on the driveway - using markers to draw on bed sheets during quiet time (I wasn’t too happy when my Three tried this one!)
Mistake #4 Teaching the letters in order
I like to start with the letters of my child’s name. (And yes, we do start in all capitals, because they’re easier to write.) Then we move on to the letters in this order – from easiest to hardest.
E, F, H, I, L, T, V, W, X, K, M, N, Y, A, Z, C, O, G, Q, B, D, J, P, U, R, S
I have found that after my children know how to write uppercase letters, they are ready to learn to write lowercase letters in any order. But if you want to have a more structured approach, start with letters that include all straight lines (such as t, i, etc.), move on to letters with slanted lines (v, k, x, etc.) and then conclude with letters that have curved lines or a combination of straight and curved lines (a, b, r, s, etc.).
Mistake #5: Neglecting proper letter formation
I prefer the Zaner Bloser handwriting style. In fact, that style has been the inspiration for all of the handwriting pages you can find on my site. It’s a simple block style that works well for young writers. I appreciate the emphasis of starting at the top when forming letters.

My Letters of All Sizes handwriting pages are great for young writers. Have your child start at the dot to form each letter inside the bubble. Your child can do just the large letters or – if (s)he is ready – all the letters on the page. I should note that my Three was happy to model this page for you, but I don’t plan to focus on these until she’s four or five years old.
A tip: Laminate the pages and store them in a 3-ring-binder for multiple use. We like the black Expo markers (they erase the best from laminate) so that we can use the pages again and again.
0 notes
Photo

Welcoming New Teachers
Tess Maguire
Tales from Outside the Classroom
I have been the new teacher (or staff member) several times, and no matter what it’s never fun.
I even returned to a building for a second time and was still incredibly nervous and felt out of place for quite some time. Teachers aren’t always the most welcoming at the beginning of the year, even if we’re the nicest people- we’re busy getting our rooms ready, putting names on eight hundred million items, cleaning up the mess from the summer, unpacking from the summer, sweltering in the heat… I digress.
New teachers, including the new-to-your-building teachers, are walking in stressed, probably busier than you are because they also have to do all of the above on top of learning everything new, and are feeling a certain amount of apprehension about the situation. They’re wondering who is going to help them out and show them where the staff bathroom is. They’re wondering if they are going to get along well with their grade level partners. They’re wondering if things are going to be managed differently in this building than the building they student taught at or that they were at before (newsflash: they will be different).
Because of these reasons, it’s great when a grade level, or a committee like a Sunshine Committee, can welcome these staff members with a little something. Sure, something that all of the new people get isn’t the most special, but it does show that you took that step to do something for them; to make them feel wanted. Here are some of my favorite ideas.

Every teacher needs help taming the paper beast. Brand new teachers often struggle immensely with this. One little way to help them out is by giving them clips to help them maintain and manage their piles. Use an Elmer’s Painters Medium Tip Paint Markers on a painted clothespin to label each one “copy, grade, file”. Or, just use the Painters Paint Marker on a regular binder clip. You could even attach a little ribbon or string!

Use Sharpie Water Based Paint Markers on a piece of bathroom tile to create personalized, custom drink coasters. I buy the tiles in boxes and they are super cheap! I usually get the box of 100 for like $25 and then I use them in different projects in the classroom. Personalize the tiles with the staff member’s name and the school name and add a fun design. After the paint has dried, and it dries super quickly, spray a coat or two of clear coat to seal it and help protect it from condensation. Then, use some glue to place a piece of felt on the bottom to help keep the coaster gentle on surfaces. This is even a fun project to get student groups like student council involved in.
All teachers, well maybe not all teachers but pretty much every teacher I know, enjoys (I could probably use the word ‘love’ couldn’t I?) markers, colorful pens, etc. So they’re a great welcome gift with these cute sayings! Click any of the pictures below to download the free printable file.

Paper Mate Ink Joy pens are my absolute favorite ballpoint pens! They guide very smoothly and the colors are vivid and bold. This time of year I can always find packs pretty inexpensively, like this one with a bonus pen. PaperMate has several varieties of Ink Joy pens, including clickable gel pens.

Paper Mate Flair Felt Tip Pens are virtually every teacher’s favorite! They are the perfect combination of pen and marker and are perfect for labeling and grading. Buy a pink one and give it with this cute “tickled pink” tag. The tag is perfect to give with a Pink Sharpie Fine Point Permanent Marker!

I love the colors that come in the Sharpie Color Burst Fine Point Permanent Markers (I also have and love them in the Ultra Fine Point Permanent Markers). The bright, vivid colors are the perfect addition to any teacher’s marker supply. And, because they’re a limited edition set, they may not be colors they already have.
You can download the free tags by clicking any of the links above or by clicking here: Teacher Welcome Gift Tags.
There are so many ways to welcome teachers into your building, whether it’s by lending a helping hand, giving a thoughtful gift, or just stopping in to check in on them. Whatever you’re able to do to help make them comfortable as a new addition to your staff is appreciated. Do you do something different in your building to welcome new teachers? I’d love to hear some new ideas in the comments below.
0 notes
Photo

August Teacher of the Month
Maureen Phend - August Spotlight
Whether they’re drawing, gardening or biking, Tanglewood Middle School teacher, Maureen Phend encourages her students to get creative.
In what city/state do you teach? Greenville, SC
What grade level(s) do you teach? 6th grade
What do you love most about teaching? The thing I love most about teaching is how my students keep me young and creative. Our bike club wasn’t going to settle for simply riding bikes, they wanted to impact the community as well. Several of the bike club members decided that we should paint stones with inspirational sayings on them. As we ride along the trail in Greenville, South Carolina, they stop and hide a rock for someone to find. When the rock is found, the finder posts a picture on our Tanglewood Bike Club Rocks page, then they rehide the rock to lift another person’s spirits.
What is your favorite memory/story from the classroom? My students painted stones to hide on the Swamp Rabbit Trail when we ride bikes during our bike club. We have a Facebook page for people to show the painted stones they have found. This has been one of my favorite memories. Another favorite memory is when the garden club students painted placard for all of the vegetables they started from seed in science class.
Why are Expo Ink Indicator Dry Erase Markers your favorite Go Teach! product? Expo Ink Indicator Dry Erase Markers are my favorite because they last longer, write cleaner, and clean up better than any other markers!
0 notes
Photo

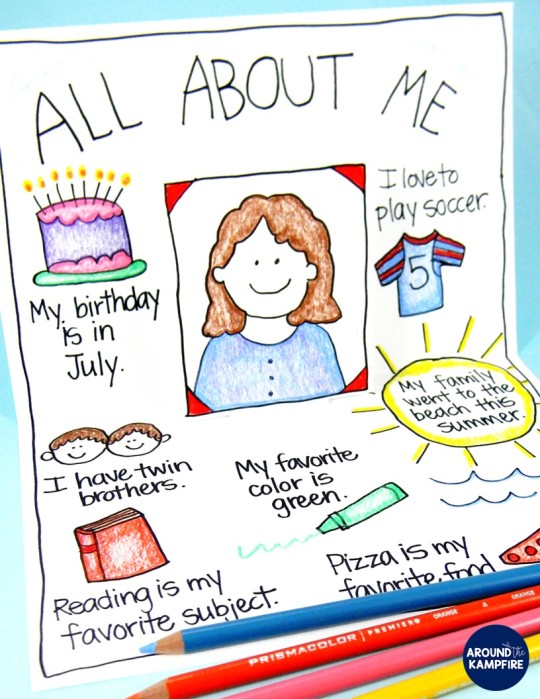
All About Me Pop-Up Cards
Linda Kamp
Around the Kampfire

ALL ABOUT ME POP-UP CARDS
Helping your students get to know one another is an important part of the first days of school. Here’s a new take on a tried-and-true first week activity that all students enjoy. This simple All About Me pop-up card is easy to make and makes a fun partner activity for students to compare things about themselves with a new friend. It’s virtually no-prep, which makes it ideal for your first writing center activity too.
Keeping tasks and activities simple is always a good thing when introducing center routines. As you teach your expectations, be sure to provide a variety of writing tools and paper in your center and teach students how to use them responsibly. One of the go-to tools my students always choose is colored pencils. I like Prismacolor Premier colored pencils because the core is sturdier which keeps them from breaking. They sharpen easily and quickly too. I definitely don’t want students spending their time sharpening instead of writing!
Making the Cards
TO MAKE THESE ALL ABOUT ME POP-UP CARDS YOU’LL NEED:
Prismacolor Premier colored pencils
a black Sharpie marker
1 sheet of construction paper
1 index card (cut off about 2 inches from the bottom to form a square shape)
Elmer’s Washable School Glue Stick

My second graders prefer colored pencils over crayons because they have more control while coloring the smaller pictures they tend to draw.
Making the Pop-Up Box

Teach Your Students to Make the Pop-Up Card:
Fold a sheet of construction paper in half.
In the fold, cut two snips, each about 1 inch long. A bit longer is OK too.
Open the paper and push out the box.
Make a crease at the top and bottom of each cut to form a box.
Next, have students open up the page then draw and write all about themselves.
Guide your students to include things like their age, siblings, favorite foods, school subjects, and colors.
Include Self-Portraits
Give each student an index card to draw their self-portraits. I cut about 2 inches off of the bottom of the index card so it would fit nicely into the card when folded.

Glue the self-portraits to the front of the pop-out box to complete the cards. And that’s it! You can display the cards too, for a fun back to school bulletin board!
If you like this idea, why not share? Be sure to pin it on Pinterest or share on Facebook with your teacher friends!

Happy teaching and have a wonderful school year, friends!
0 notes
Photo

Meet July’s Teacher of the Month
Katie Sabatini - July Spotlight
Creating personal connections with her students is 1st grade teacher Katie Sabatini’s favorite part of being a teacher.
In what city/state do you teach? Ridley, PA
What grade level(s) do you teach? K/1 Emotional Support
What do you love most about teaching? What I love most about teaching is connecting with the students on a personal level. I love getting to know their different personalities and see their growth, both socially and academically, throughout the year.
What is your favorite memory/story from the classroom? My favorite memory this past school year was our end of the year field day! The kids had so much fun running around and so did the adults! It’s just a wonderful way to end the year on a good note and let loose!
Why are Expo Ink Indicator Dry Erase Markers your favorite Go Teach! product? We are constantly using Dry Erase Markers throughout our day. From a quick check in on how we are feeling to answering questions on our desk! I love using Expo Ink Indicator Dry Erase Markers because they are easy to erase and don’t stain surfaces! More importantly I can trust that they are going to WORK!! While technology is taking over and wonderful there are glitches. I really don’t think my class could function without them!
I love getting to know their different personalities and see their growth, both socially and academically, throughout the year.
0 notes
Photo

Developing Mark Making and Letter Formation
Jane Medwell
Curriculum Development Study Overview
Conducted over a two-week period, the Curriculum Development Study, led by Professor Jane Medwell of the University of Nottingham, involved exercises with a team of seven early years’ teachers, two university lecturers, and 69 parents to understand the status of handwriting education at home and at school among children 3-5 years old.
The in-depth study unearthed a broad range of insights, including the fact that handwriting is not prioritized in the classroom or at home, with teachers and parents focused on a range of different reading and math related tasks. This unique research was designed to help reverse the current trend. Since handwriting is considered a fundamental learning tool, leading academics warn that the skill must be given renewed focus.
DOWNLOAD HERE
0 notes
Photo

What’s the use of handwriting?
Jane Medwell and David Wray
The Go teach! Handwriting White Paper, written by Jane Medwell, University of Nottingham and David Wray, University of Warwick, analyses and reviews existing literature to highlight the clear academic evidence that handwriting is an essential foundation for children’s learning.
The findings from the White Paper provide a clear call to action to teachers, parents, and policy makes to prioritize the effective teaching of handwriting and to encourage more children to write more often.
DOWNLOAD HERE
0 notes
Text
Quick classroom and product tips from Tessa Maguire
• Wanting to print a poster with a dark background or heavy color and worried about the cost of ink? Save money and ink by ordering heavy-color or dark posters as 8x10 pictures from your favorite photo printing place! Just upload as an image to your favorite photo printing shop and resize as needed. Coupon codes and deals are often e-mailed or found online to help bring down the cost. Plus, there's no need to laminate as the photo comes back thick and glossy and ready to hang.
• Tired of fighting with your anchor chart paper to try and get it onto your easel through those two little holes? Use a large binder clip to quickly and easily secure the paper pad onto the metal. Just line the pad up with the metal back, and secure with a binder clip. The paper stays put, and is still able to be flipped to the next page when needed.
•Use an extra basket or inexpensive dish pan to make a classroom "Borrow Bin". Students have a go-to place for extra supplies they need and it gives you a spot to put supplies found on the floor or left over at the end of the school year.
•Use the terms "portrait" and "landscape" to refer to page direction when doing art or craft projects. Students quickly learn the terms from a young age and are then able to apply it later when needed to print on a computer.
•Use the Sharpie Clear View Highlighter when highlighting text evidence with young learners. The see through tip allows students to see the words they're highlighting and know when to stop.
•Teach paragraph structure with Mr. Sketch Markers by using colors to showcase each sentence and its purpose in the paragraph. Students will love using the scented markers in their work and will be engaged in their writing!
•Make your anchor charts interactive by using Elmer's Glue to stick on necessary pieces like a story's sequence.
• Keep an Expo 2-in-1 Dry Erase Marker nearby for your small group instruction. The 2-in-1 color makes it easy to model specific steps you want to have stand out. For example, write a math equation in one color, and use the other to demonstrate the steps you do when regrouping.
0 notes
Photo

Paper Craft Pop Up Shop for Pretend Play
Kim Byers
The Celebration Shoppe
I have a super fun summer boredom buster idea for you: make a paper craft pop up shop for pretend play! It could be a fruit stand, or lemonade stand, or cupcake stand… anything to get the kids creative and playing.
My way of making this darling stand is super easy. You’ll be shocked how quick and inexpensive it is!
The key ingredient to making this stand is a Elmer’s 36 x 48 Tri-Fold Foam Board and a few other Elmer’s products! Spray Adhesive might just be my new best friend for large scale projects.

Let’s start from the beginning. Using a ruler, mark the interior cut of the board, leaving roughly a foot at the top. Basically you’re cutting the center out of the board.
This area is perfect for your new storefront’s name. I made this board for my sweet eight year old niece, Ashlyn. She loves pretend play!

I bet you’re wondering where I picked up all the paper embellishments for my storefront. You can get so many precut elements, like letter packs and bulletin board theme decorations at your local teacher supply store or craft store. Or, if you have a die cutting machine you can cut out your own.

For instance, the scallop is super easy to find in the teacher section. I cut these, but just get a few colors and layer them. With Elmer’s Spray Adhesive it’s honestly as easy as spray and attach. My only recommendation is to either lay down a large piece of paper or an old towel to spray against, or take the project outside.
After your store front is embellished, you’ll need something to sell! I chose to make paper craft berries for my niece to sell in her pop up shop. Think about a lemonade stand on garage sale day, or a stuffed animal grooming salon for all the stuffies in your house.

The purposes for a Elmer’s Tri-Fold Foam Board can be much more than a school project in the fall. As a matter of fact, let’s look at more paper strawberries and forget there will be any school in the fall! {wink}
0 notes
Photo

Flower Frisbee Summer Outdoor Game
Victoria Hudgins
A Subtle Revelry
I love a good frisbee game since it can fit in our beach bag and be played anywhere we might land. Plus you can play frisbee with any age kids and any amount of people. It’s basically the perfect summer outdoor game.
All of our games move outdoors this time of year and I love creating pretty takes on my favorite nostalgic outdoor summer games, like this extralarge jigsaw puzzle or a colorful ring toss game. Lately though, we’ve been playing A LOT of frisbee.
Turning our ho hum frisbees into pretty bright colored flowers makes the entire game feel much more fresh & fun. Make a set of these frisbee flowers and take this summer outdoor game to a new level of awesome!

Flower Frisbee Summer Outdoor Game
To make the flower frisbee summer outdoor game you will need:
· Basic frisbees – this can be a great chance to cover up a logo frisbee you may have gotten at a company picnic or one that’s been scratched up a bit
· Elmer’s Multi-purpose glue
· Thin colorful foam
· A basic flower template that is as wide as the frisbee
· Scissors

1. Start by cutting out the flower from the colorful foam using your flower template as a guide. Although you could make this project with paper, the foam actually adheres better to the frisbees and it makes them waterproof for that accidental miss on the sideways toss.
The flowers throw and fly just as they basic frisbee would, but look much prettier while soaring through the air.

2. Use the Elmer’s multi-purpose glue to attach the foam to the frisbee. Allow the frisbee to dry completely. This glue is one of our favorites to use for projects like this, because it is strong enough to hold the flowers to the frisbees even while tossing them on the beach, but it doesn’t glob up like some other glues. Instead it goes on light – making sure your frisbee is still able to catch the breeze and fly just as high as any frisbee could.

Make a set of these to share with friends for a summer of pretty beach day fun.
PS. The frisbees also make great party favors for a flower party, especially when combined with this flower garland and a pretty flower cake!
This post is done in partnership with Elmer’s Glue a brand we use around the studio daily.
(Photography ©A Subtle Revelry by Ashlyn Savannah Photo).
0 notes
Photo

Mess Free Glitter Slime Recipe That’s Safe for Kids
Maria Gavin
Kinder Craze
Until I discovered the ultimate three-ingredient glitter slime recipe that uses completely safe materials. Even better yet, this particular recipe doesn’t require any messy food coloring. Do I have your attention? I promise this slime recipe is every bit as amazing as it sounds, and it’s a great summer activity.

Here’s the fastest, easiest, mess-free slime recipe that you will ever need. The fact that it is glittery is an added bonus!
INGREDIENTS
1/2 TBSP baking soda
1 1/2 TBSP contact solution
6 fl oz Elmer’s Glitter Glue
DIRECTIONS
Find a bowl, cup, or plate to mix your slime in.
Pour the entire contents of a 6 oz Elmer’s Glitter Glue into the blow.
Add 1/2 TBSP baking soda to the glue and stir.
Add 1 TBSP contact solution to the glue mixture. Mix with a spoon until slime begins to form and gets firm.
Once slime becomes to difficult to stir with a spoon, take slime out of the bowl and use your hands to finish combining the ingredients.
If slime is too sticky, add 1/4 TBSP contact solution to the mixture. The slime will become significantly less sticky.
MAKING GLITTER SLIME
On this particular summer day, my friend brought her two daughters over for a little slimey entertainment. Making slime was an item on their summer bucket list, so this was a great opportunity to cross that item off the list and help me test out my new favorite recipe!
The first step was to dump an entire 6 oz bottle of Elmer’s Glitter Glue into our mixing bowl. All of the glitter and color for this recipe comes straight from the bottle of glue. This was my first time using Elmer’s Classic Glitter Glue, but I was an instant fan. All of the glitter and coloring stayed right in the glue. I love that I didn’t have to worry about getting stray drops of food coloring or bits of glitter on our fingers, clothes, or my cute little blue table.
My four year old slime assistant did an excellent job of squeezing out all the glue (and the teacher in me loved that it was a great way to strengthen her hand muscles!)

Once the glitter glue was poured into the bowl, it was time to add a few more ingredients. First up, a half tablespoon of baking soda.
Once the baking soda was added to the glue, the girls gave it a quick stir until it was evenly combined in the glue.
Then it was time for the magic ingredient: contact solution! We started by adding just one tablespoon of the contact solution. It only took a few seconds of stirring and we could see the slime actually beginning to form.
A few more rotations of the spoon and we had a firm, sticky slime-like mixture. At this point, the girls had to put down the spoon, reach into the bowl and finish mixing the slime by hand.
Our glitter slime was a little too sticky, so we added another quarter tablespoon of contact solution to our concoction.
The extra contact solution worked like a charm. The slimy bits that had been stuck to the girls fingers were easily removed as they finished kneeding the slime. The finished result was a firm, wet, slimy substance.

My little helpers stretched, squeezed, bent, and manipulated that slime in every imaginable way. They had a blast playing with their slime and I loved how this glitter slime recipe didn’t produce any mess or make me worry about the safety of their skin.

Elmer’s is the only brand of glue that I use in my classroom and it’s no surprise that Elmer’s Classic Glitter Glue was a great kid-friendly base for making slime. I am certain that I will be using this mess-free glitter slime recipe often in the future.
You can learn more about Elmer’s products and discover even more fun inspiration for kid’s crafts the Elmer’s website, as well as Instagram, Facebook, and Twitter
0 notes