
Don't wanna be here? Send us removal request.
Statistics
We looked inside some of the posts by grindforgains and here's what we found interesting.
Average Info
Notes Per Post
1
Likes Per Post
1
Reblog Per Post
0
Reply Per Post
0
Time Between Posts
4 days
Number of Posts By Type
Text
11
Photo
2
Last Seen Tumblr Blogs


Fun Fact
Tumblr has been providing a Korean-language service since 2013.
Text
How to Build a Strong Back with Bodyweight Exercises: Crush Weakness, Own Your Strength

How to Build a Strong Back with Bodyweight Exercises
Break The Chains of Weakness
Is your back strength getting murdered by your modern lifestyle? Too much sitting, not enough moving… This is how most people end up with weak backs. But guess what? You don’t need a gym or fancy equipment to fix it. Most parks now have fitness stations and bars. No Excuses! This guide will teach you how to build a strong back with bodyweight exercises that target every muscle, prevent injuries, and set you up for real gains.
The Anatomy of a Strong Back and Why It Matters
You can’t build something you don’t understand. Your back is more than just a flat surface >> it's a complex structure of muscles that power your every move. Latissimus dorsi, trapezius, rhomboids—these are the main players.

These muscles do more than make you look strong; they stabilize your spine, protect you from injuries, and keep you moving at your best. When you train your back, you’re not just sculpting muscles; you’re building the foundation of your strength. It’s what separates the strong from the weak. Every pull, twist, and bend in your daily life starts with a strong back. Skip this, and you’re setting yourself up for weakness and pain.
Warm-Up: Prime Your Body to Crush It
Jumping straight into intense exercises without warming up? Big no-no, my friend. Your back muscles are like a car engine—they need a little warm-up before you hit the throttle. Mobility Exercises to Get You Ready: - Cat/Cow Stretch: Loosens up your spine, and activates the muscles. - 90/90 Stretch: Opens up tight hips, engages the core, and preps your back for action. Spend 5-10 minutes warming up. It’s the difference between a solid workout and a trip to the physio. Pro Tip: Mind-Muscle Connection: Engage the back muscles consciously during each exercise to maximize effectiveness.
5 of The Best 10+ Bodyweight Exercises to Build a Strong Back
You don’t need weights; you need intensity. Here’s your go-to list of exercises that will hammer every muscle in your back. - Pull-ups - No excuses, pull-ups are king. If you can’t do one, do negatives. Grip the bar, pull with all your strength, and feel your lats ignite. No shortcuts. This is where the real work happens. - Ring Rows - When pull-ups aren’t enough, you go horizontal. Ring rows bring the burn, targeting those hard-to-reach muscles. Think you’re strong? Wait until you try these. Perfect for anyone who wants more muscle engagement with every pull. - Backward Lunge with Twist - This isn’t just about legs. The twist hammers your core and keeps your back engaged. It’s a full-body move that’s functional—think lifting, carrying, turning. You need this. - Floor Y Raise - Sitting at a desk all day? Your posture is probably trash. The Floor Y Raise hits those neglected shoulder and back muscles, fixing your posture one rep at a time. - Superman - You’ve been ignoring your lower back, haven’t you? The Superman drill ends that nonsense. You’ll hit the floor, extend your arms and legs, and lift. Feel the burn? That’s your weakness leaving the body. Learn More About Bodyweight Exercises.
How to Structure Your Workouts for Maximum Gains
It’s not just about doing the exercises; it’s about how you do them. Building a strong back with bodyweight exercises means you need to put these moves into a routine that challenges you every single time. Level Rounds Reps Rest Additional Beginners 3 8-10 60 seconds between rounds - Intermediate 4 10-12 45 seconds - Advanced Warriors 5 12-15 No rest Add isometric holds Key Principles: - Progressive Overload: Continuously challenge yourself by adding reps, increasing time under tension, or reducing rest periods. - Isometric Holds: Incorporate pauses and holds in exercises like mid-pull-ups or at the end of ring rows to increase muscle engagement.
Conclusion
No Weights, No Problem—Build That Unbreakable Back There’s no equipment excuse here—just hard work and discipline. You’ve got everything you need right now. Show up, do the work, and transform that weak, neglected back into an unbreakable powerhouse. Excuses are for the weak; results are for the committed. You’ve got this. Now go build that back and own your strength.
FAQs: Crushing Doubts About Back Training with Bodyweight
Can you build your back with bodyweight?Absolutely, you can build a strong, muscular back using just your body weight. Bodyweight exercises like pull-ups, ring rows, and supermans hit all the major muscles in your back. Consistent training with good form and increasing intensity will lead to noticeable gains. No gym? No problem.How can I make my back stronger without weights?To strengthen your back without weights, focus on bodyweight exercises that target your back muscles. Incorporate pull-ups, inverted rows, and exercises like the Floor Y Raise. Add progressive overload by increasing reps, using slower tempos, and integrating holds. Consistency and intensity are key.Can you build strength with just bodyweight?Yes, you can absolutely build strength with just bodyweight exercises. By mastering bodyweight movements like pull-ups, push-ups, and core exercises, you can develop significant strength. The key is to focus on proper form, progressively challenge yourself, and vary the exercises to keep your muscles guessing. Read the full article
#BackTrainingwithBodyweight#Bodyweightexercises#BodyweightExercisestoBuildaStrongBack#Exercises#HowtoBuildaStrongBack#HowtoBuildaStrongBackwithBodyweightExercises#StrongBack#StrongBackwithBodyweightExercises#Warm-Up
0 notes
Text
What Are Archer Pull-Ups? The Secret Weapon for Explosive Upper Body Power

You ever question what archer pull-ups are and why you haven't made them a staple in your workout routine yet? Let’s cut through the fluff and get straight to the point. Archer pull-ups are not just another exercise—they’re a game-changer. If you’re tired of your regular pull-up routine and looking for something that truly challenges you, then you’re in the right place. Stick around to discover why these bad boys are worth your sweat and tears.
What Are Archer Pull-Ups?
Archer pull-ups are a next-level variation of the standard pull-up that forces your body to adapt and overcome. Imagine the classic pull-up, but with a twist: one arm does the majority of the work while the other arm provides support. This makes it a fantastic exercise for developing unilateral strength and muscle balance. Here’s the scoop: In an archer pull-up, you pull yourself up while extending one arm out to the side, keeping the other arm bent. It’s like drawing a bow, hence the name. The extended arm serves as a counterbalance, but the pulling arm does the heavy lifting.
The Benefits of Archer Pull-Ups

Strength Building: Archer pull-ups are brutal on your muscles. They target your lats, biceps, and shoulders, giving you an upper body workout that’s off the charts. Muscle Isolation: Unlike regular pull-ups where both arms share the load, archer pull-ups isolate each side. This helps correct imbalances and enhances muscle definition. Improved Grip Strength: You need serious grip power to pull off these bad boys. Your forearms and hands will get a killer workout as they stabilize your body during the exercise.
How to Perform Archer Pull-Ups
Ready to give it a go? Here’s how you can nail archer pull-ups step-by-step: - Grab the Bar: Use an overhand grip, but keep your hands wider than shoulder-width apart. - Get into Position: Pull yourself up until your chin is above the bar. Extend one arm straight out to the side while keeping the other arm bent. - Pull Up: Engage your back and biceps to pull your chest towards the bar. Your extended arm should remain straight and stable. - Lower Down: Slowly lower yourself back to the starting position. Switch arms and repeat. Learn more on how to Perform Archer Pull Ups; https://youtu.be/ziQjz1-DmX8 Progressing with Archer Pull-Ups Once you’ve got the basics down, it’s time to up your game. Here are some variations and advanced techniques to consider: - One-Arm Pull-Ups: Progress to pulling yourself up with one arm while keeping the other arm straight out. - Weighted Archer Pull-Ups: Add weight to increase the challenge. - Archer Pull-Up Negatives: Focus on the lowering phase to build strength. Pro Tip: Focus on form before adding reps or weight: Perfecting your technique in archer pull-ups will ensure you’re engaging the right muscles and avoiding injury. How to Incorporate Them Into Your Routine: - Mix with Other Exercises: Combine archer pull-ups with other bodyweight exercises for a balanced workout. - Vary Reps and Sets: Adjust the volume to match your strength and endurance goals. Tips for BeginnersCommon MistakesStart with Assisted Versions: Use a resistance band to help with the initial pull.Not Engaging Your Core: Keep your core tight to avoid swinging.Build Strength Gradually: Incorporate these into your routine 2-3 times a week.Too Wide or Narrow Grip: Ensure your grip is just right to maintain balance.Focus on Form: Master the form before increasing the intensity.Neglecting Form: Focus on controlled movements rather than rushing through reps. Real Talk: Why Archer Pull-Ups Will Transform Your Training Listen up: if you’re serious about taking your training to the next level, archer pull-ups are your ticket. They’re tough, they’re demanding, and they will push you to your limits. But that’s exactly why they work. The progress you’ll see in your strength and physique is a testament to your hard work and determination.
Conclusion
So, there you have it. Archer pull-ups are not just a fancy variation of a pull-up—they’re a hardcore, muscle-building, strength-testing exercise that can seriously ramp up your workout game. You’re not just doing pull-ups; you’re testing your strength, discipline, and grit. Every time you grip that bar and pull yourself up, you’re battling your own weaknesses. You’re not just building muscles; you’re building character. Get out there, give them a shot, and see what you’re truly capable of. Your future self will thank you.
FAQs
What are the best progressions for archer pull-ups?Start with assisted versions and gradually move to unassisted. Incorporate other upper body strength exercises to build up your capability.Can archer pull-ups replace regular pull-ups?They can complement them, but replacing regular pull-ups entirely isn’t recommended. Each has unique benefits that contribute to overall upper body strength.How often should I do archer pull-ups?Aim for 2-3 times a week, allowing for adequate rest and recovery between sessions to avoid overtraining. Read the full article
#ArcherPull-Ups#Bodyweightexercises#Calisthenics#Fitness#Howtoperformarcherpull-ups#Pull-Ups#StrengthTraining
0 notes
Text
How to Do Inverted Rows at Home Without Equipment: No Gym Required!
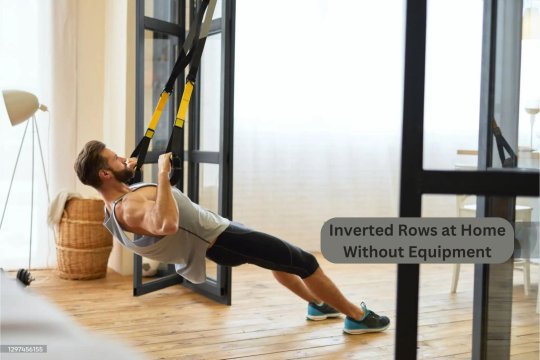
Ever thought about doing inverted rows at home with zero equipment? You’re not alone. If you’re stuck at home but still want to build a powerful back and improve your strength, inverted rows are your answer. No fancy gear is needed—just a bit of creativity and grit. Let’s dive into how you can nail this exercise and transform your home workouts.
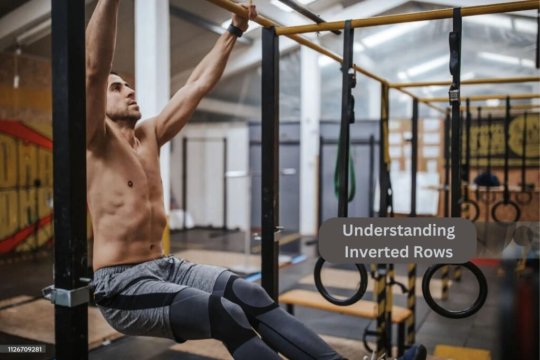
Understanding Inverted Rows
So, what the heck are inverted rows? Simply put, they’re a bodyweight exercise that targets your back, biceps, and core. You pull your chest towards a bar or surface, using your own body weight. They’re fantastic for building upper body strength and can be done just about anywhere.
How to do Inverted Rows at home Without Equipment No gym, no problem. You can still get a killer workout using stuff around the house. Here’s how: - Find a Sturdy Surface: Look for a solid, horizontal surface like a table, a sturdy broomstick between two chairs, or even a strong railing. - Position Yourself: Lie underneath the surface with your chest facing up. Grab the edge with an overhand grip, hands slightly wider than shoulder-width apart. - Pull Up: Keep your body in a straight line from head to heels. Pull your chest up towards the surface, squeezing your shoulder blades together. - Lower Slowly: Lower yourself back down with control. Aim for a slow descent to maximise muscle engagement. Integrating Inverted Rows into Your Routine Here’s how to make inverted rows a part of your workout: Sample Routine: Warm-Up:5-10 minutes of dynamic stretching.Inverted Rows: 4 sets of 8-12 reps.Bodyweight Squats:3 sets of 15 reps.Planks:3 sets of 30 seconds.Cool Down:Stretch your back and arms.Frequency:Aim to include inverted rows 2-3 times a week Tips for Perfect Form Nailing the form is crucial. Here’s what to focus on: - Keep Your Body Straight: Avoid sagging or arching your back. Maintain a straight line from your head to your heels. - Engage Your Core: Your core should be tight to support your back. - Full Range of Motion: Pull yourself all the way up and lower yourself fully. Short reps won’t give you the full benefit. - Controlled Movements: Avoid jerky movements. Slow and steady wins the race. Pro Tip: Use a sturdy, horizontal surface at the right height—like a low table or a broomstick between two chairs. The key is ensuring the surface is stable and at a height that lets you keep your body straight and pull yourself up effectively. Common Mistakes to Avoid: - Sagging Hips: Keep your hips in line with your shoulders and heels. - Incomplete Reps: Make sure to complete each rep by fully extending and contracting your muscles. - Poor Grip: Use a firm grip to prevent slipping and ensure proper engagement. https://youtu.be/hfGD-K11vPk Variations and Progressions Ready to level up? Try these variations to keep things interesting and challenging: - Elevated Inverted Rows: Place your feet on a chair or bench to increase difficulty. - Single-Leg Inverted Rows: Lift one leg off the ground while performing the exercise for added challenge. - Wide Grip Inverted Rows: Use a wider grip to target different areas of your back. Explore more Variations and Progression for Inverted Rows;
Final Thoughts
So, there you have it—how to do inverted rows at home without equipment. It’s a straightforward but incredibly effective exercise that can seriously boost your upper body strength. Get creative with your setup, focus on perfecting your form, and make these a regular part of your routine. Your future self will thank you.
FAQs
Can I do inverted rows with minimal space?Absolutely. You can use a low table or a broomstick between two chairs. Just make sure it’s stable.What if I can’t perform a full inverted row yet?Start with partial reps or use a lower surface. As you gain strength, gradually increase the difficulty.How can I modify the exercise for different fitness levels?Adjust the height of the surface or modify your body angle to make the exercise easier or harder. Start with easier variations and progress as you get stronger. Read the full article
#buildingupperbodystrength#ElevatedInvertedRows#HowtoDoInvertedRowsatHome#HowtoDoInvertedRowsatHomeWithoutEquipment#InvertedRows#InvertedRowsatHome#InvertedRowsatHomeWithoutEquipment#Single-LegInvertedRows
0 notes
Text
The Ultimate Calisthenics Back Workout for Beginners: Transform Your Strength Today!

Ever wondered why a calisthenics back workout for beginners is your gateway to a stronger, more resilient back? If you’re starting out, this isn’t just another workout; it’s your foundation for raw strength and endurance. Whether you’re struggling with basic exercises or aiming for a killer back, I’m here to lay out the ultimate blueprint. Buckle up and get ready to transform your back with powerful calisthenics that’ll test your limits and push you to greatness.
What is Calisthenics?
Calisthenics is all about using your own body weight to build strength and endurance. It's perfect for beginners because you don't need fancy equipment—just your body and some space. By focusing on bodyweight exercises, you build a solid foundation that can be further developed as you progress. The Ultimate Back Workout Routine for Calisthenics Back Workout for Beginners Ready to dive into the ultimate back workout routine? This isn't just a series of exercises; it’s a game plan to forge a powerful back using only your body weight. Let’s break it down step-by-step so you can get the most out of every rep. Warm-Up Exercises - Start with dynamic stretches: arm circles, torso twists, shoulder rolls. - Do 5-10 minutes of light cardio: jumping jacks, high knees. Essential Calisthenics Exercises for Back Strength

- Pull-Ups - Pull-ups are a cornerstone for building back strength. - If you're struggling, use resistance bands for assistance or perform negative pull-ups. - Aim for 3 sets of 5-8 reps. - Remember, focus on full range of motion and control. - Inverted Rows - Inverted Rows work the upper back and biceps effectively. - Set a bar at waist height or use rings. - 3 sets of 8-12 reps. - Pull your chest towards the bar with a straight body. - Bodyweight Rows - Another great exercise to target the back muscles. - Use a barbell or rings; maintain a straight body while pulling yourself up. - Perform 3 sets of 10-15 reps. - Tips for Proper Form and Technique - Keep your body in a straight line during exercises. - Engage your core to prevent sagging. - Controlled movements will yield better results and reduce injury risk. Pro Tip: Stay Consistent: Consistency is key. Stick to the workout routine and gradually increase the intensity as your strength improves. Listen to Your Body: Pay attention to any signs of pain or discomfort. It’s important to differentiate between muscle fatigue and potential injury. Avoiding Common Mistakes for Calisthenics Back Workout for Beginners - Overtraining - Avoid doing these exercises every day. - Give your muscles time to recover; aim for 2-3 times per week. - Incorrect Form - Bad form leads to injuries and less effective workouts. - Focus on maintaining proper alignment and movement. - Neglecting Rest - Your muscles need time to repair. - Incorporate rest days into your routine. Creating a Balanced Workout Plan for Calisthenics Back Workout for Beginners - Sample Weekly Schedule - Monday: Full back workout - Wednesday: Light activity or rest - Friday: Full back workout - Integrating with Other Workouts - Balance back workouts with leg and core exercises. - Ensure overall body strength and avoid overuse injuries. ProsConsHighly Effective: Targets multiple back muscles, including lats, rhomboids, and traps.Challenging for Beginners: Pull-ups can be difficult for those who are just starting, leading to potential frustration.Core Engagement: Strengthens the core along with the back, promoting overall body stability.Requires Equipment: Requires a pull-up bar or similar equipment, which might not be accessible to everyone.Scalable: Can be modified with assistance bands for beginners or weighted for advanced trainees.Risk of Injury: Incorrect form or excessive repetitions can lead to shoulder or elbow injuries.Great for Back Development: Targets the same muscles as pull-ups and inverted rows but with increased difficulty when feet are elevated.Progression Issues: May become less challenging as strength increases without additional modifications.Improves Grip Strength: Enhances grip strength, which is beneficial for other exercises.Form Dependency: Proper form is critical; poor form can reduce effectiveness and lead to injury. Additional Tips and Strategies - Progress Tracking - Keep a workout journal. - Track your reps, sets, and how you feel. - Staying Motivated - Set small, achievable goals. - Celebrate your progress, no matter how small.
Conclusion
You’ve now got the lowdown on the ultimate calisthenics back workout for beginners. This isn’t just about getting a stronger back; it’s about building a base that can handle whatever you throw at it. Stick with this routine, Read guides, stay committed, and push through the challenges. Remember, strength comes from effort and consistency. Keep grinding, keep improving, and you'll see that back transform into a powerhouse of strength and resilience.
FAQs
How often should beginners train their back with calisthenics?Aim to work your back 2-3 times a week. This allows for sufficient recovery while building strength. Make sure to include rest days in between to prevent overtraining.Should I include other muscle groups in my calisthenics routine?Absolutely. A balanced workout routine includes exercises for different muscle groups. Incorporate leg, core, and arm exercises to ensure overall strength and avoid imbalances.How important is proper form during calisthenics back exercises?Proper form is crucial to prevent injuries and maximize effectiveness. Focus on controlled movements, engaging the correct muscles, and maintaining good posture. If unsure, seek guidance from a trainer or use instructional videos.Can calisthenics back workouts help with improving posture?Yes, calisthenics exercises, especially those targeting the back, can help improve posture by strengthening the muscles that support your spine. Incorporate exercises that work the upper and lower back for the best results. Read the full article
#BackWorkout#BackWorkoutforBeginners#CalisthenicsBackWorkout#CalisthenicsBackWorkoutforBeginners#CalisthenicsExercisesforBackStrength#InvertedRows#Pull-Ups#UltimateBackWorkoutRoutineforCalisthenics#Warm-UpExercises#WhatisCalisthenics?
0 notes
Text
How to Crush Australian Pull-ups Without a Bar: No Excuses, No Limits!

No Bar, No Excuses: Mastering Australian Pull-ups Without a Bar! Ever wondered how to build serious upper body strength without a pull-up bar? Think Australian pull-ups are out of your reach because you don’t have the right equipment? Let me stop you right there. Australian pull-ups without a bar are not only possible but also essential if you're serious about turning your body into a machine. Stick with me, and I'll show you how to get it done, no excuses.
What Are Australian Pull-ups and Why They Matter
Let’s get one thing straight: Australian pull-ups aren’t just some watered-down version of pull-ups. They’re a hardcore, full-body exercise that hits your back, shoulders, arms, and core. Think of it as the perfect entry point into the world of calisthenics. If you’ve ever struggled with pull-ups or want to up your bodyweight game, Australian pull-ups are your gateway drug. Why should you care? Because they’re accessible. You don’t need a fancy setup. Just grit and a few solid objects you can find around your house. Pro Tip: When you're doing Australian pull-ups without a bar, don’t just pull your body—pull your mind into it. Every rep is a chance to prove you can push past your limits. No shortcuts. No excuses.
Get Creative: How to Perform Australian Pull-ups Without a Bar
Don’t have a pull-up bar? Good. It’s time to get creative. Here’s the deal:

Use What You’ve Got: Setup OptionProsConsTables- Sturdy and stable - Widely available in homes- Limited grip width - May scratch the surfaceChairs + Broomstick- Easy to set up - Adjustable height- Stability concerns - Requires two chairsSuspension Trainers- Provides a versatile workout - Adjustable tension- Requires purchase - Needs a secure anchor pointPark Benches- Outdoor option - Plenty of space- Weather-dependent - Public access required Pick the option that works best for you and get started. Here’s how: - Grip Tight: Grab the edge of your chosen surface with both hands, palms facing you. - Set Your Feet: Extend your legs straight out in front of you, heels on the ground, body in a straight line. - Pull and Squeeze: Pull your chest towards the surface, keeping your body straight and tight. Focus on squeezing your shoulder blades together at the top. - Lower Slowly: Don’t just drop down. Control the descent, keeping tension in your muscles the whole way down. Repeat until you feel the burn. Then keep going. Learn effective bodyweight exercises that mimic pull-ups by Nerd Fitness.
Perfecting Your Form: The Key to Real Results
Half-assing the form on Australian pull-ups without a bar is a sure way to get nowhere fast. You want results? You’ve got to get your form dialled in. Watch Out For: - Sagging Hips: Keep your body straight. Your hips should never sag. Imagine a rod running through your spine, from head to toe. - Flared Elbows: Tuck those elbows in tight. Your arms should work in unison with your back muscles, not against them. - Rushing: This isn’t a race. Slow and controlled wins every time. Focus on the contraction and extension phases equally.
Building an Unstoppable Routine
Consistency is king. You want to see progress? Make Australian pull-ups a non-negotiable part of your routine. Here’s how I like to break it down: Warm-Up: Get your blood flowing. Jumping jacks, shoulder circles, and a few dynamic stretches to prep those muscles. Main Set: 3-4 sets of Australian pull-ups (8-12 reps per set). If you’re just starting, aim for 3 sets of 8 reps. Rest 60 seconds between sets. Progression: Once you’ve got the basics down, add some intensity: - Elevate your feet: Place them on a chair or bench to make the exercise harder. - Add reps: Aim to increase your total rep count each week. - Decrease rest time: Shorten your rest between sets to keep the muscles under tension. - Cool Down: Don’t skip this. Stretch your back, shoulders, and arms. A solid 5-10 minutes to help your muscles recover.
Conclusion
The Battle Never Ends Mastering Australian pull-ups without a bar is just the start. This exercise is about more than just building muscle. It’s about building the mentality that no obstacle—physical or mental—can hold you back. This is where you turn a simple exercise into a statement: nothing will stop you. And if you’re thinking you can’t do it, remember this—you can. No bar, no excuses! Learn More with the article below. Explore creative pull-up alternatives to build strength without a bar.
FAQs
Can I build muscle with Australian pull-ups without a bar?Yes, they’re effective for building upper body strength with just bodyweight and common items like tables or chairs.How often should I do Australian pull-ups?2-3 times a week is ideal for strength and recovery.What if I can’t complete a full set?Start with fewer reps or lower the incline, and focus on good form.How do I know if I’m doing them correctly?Keep your body straight, engage your core, and feel the work in your back, shoulders, and arms.Will they help me with regular pull-ups?Yes, they build the foundational strength needed for regular pull-ups. Read the full article
#AustralianPull-ups#AustralianPull-upsWithoutaBar#howtobuildseriousupperbodystrengthwithoutapull-upbar?#HowtoCrushAustralianPull-ups#HowtoPerformAustralianPull-ups#Pull-Ups#Upperbodystrength#WhatAreAustralianPull-ups
0 notes
Photo

about me calisthenics coach 10 years of experience
#Calisthenicsexercises#PullUpWorkoutSuperSet#Pull-upworkout#Supersettraining#Supersetworkoutroutine#Upperbodystrength
0 notes
Text
Why Are Neutral Grip Pull-Ups Easier? Experts Reveal the Science
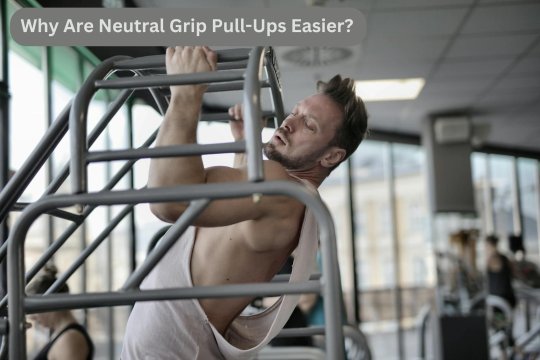
Why are neutral grip pull-ups easier? It's not just because they're a quick fix or an easy way out. No, it's because they’re the smarter way to push past your limits without your wrists screaming for mercy. Neutral grip pull-ups are the go-to for anyone serious about getting stronger without sacrificing their joints. So, if you're ready to stop whining and start winning, stick around.
Why Neutral Grip Pull-Ups Are Easier
Listen up. The human wrist isn’t built to twist like a corkscrew. When you do a standard pull-up, your palms face away from you, which forces your wrists into a less natural position. Over time, this strain can lead to pain, discomfort, and even injuries. Neutral grip pull-ups, however, keep your wrists in a straight line, which is a far more natural and comfortable position. This grip allows your arms to pull in a way that doesn’t twist or strain your joints. Why is this important? Because when your wrists are in a neutral position, your body can engage more muscles without the distraction of pain. It's not just about making the pull-up easier; it's about making it safer and more effective. And for those who have experienced wrist pain with traditional pull-ups, switching to a neutral grip can be a game-changer. For a detailed guide on mastering neutral grip pull-ups, including progressions and benefits, check out this article.
Benefits of Neutral Grip Pull-Ups
Neutral grip pull-ups are not just easier on the wrists; they’re also a powerhouse move for building upper body strength.
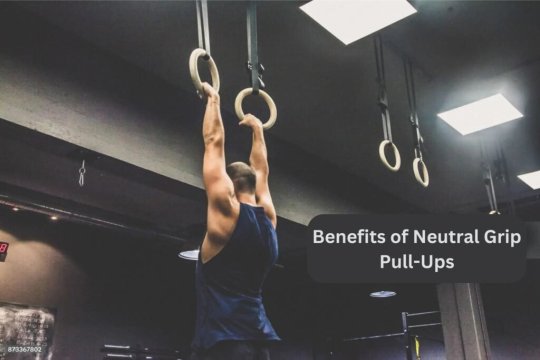
Here’s how: - Hits the lats hard: This grip puts your back muscles in the spotlight, letting you hit your lats like a sledgehammer to a wall. You want that V-shape? This is how you get it. - Biceps Bonus: With your hands facing each other, your biceps get in on the action. It's like getting extra reps in for free. Who doesn’t want that? - Shoulder Saver: By aligning your wrists, you also reduce the strain on your shoulders. Check out how they stack up: Traditional Pull-UpsNeutral Grip Pull-UpsHigh wrist strainMinimal wrist strainMore focused on latsBalanced between lats and bicepsCan exacerbate shoulder painGentler on the shouldersHarder for beginnersEasier for all levels Don’t just take my word for it – try it yourself. You’ll feel the difference after just a few reps. Your body will thank you, and your gains will speak for themselves.
Tips for Performing Neutral Grip Pull-Ups
Ready to add neutral grip pull-ups to your routine? Here’s how to do it right: - Set Up Strong: If your gym has a multi-grip pull-up station, you're in luck. If not, look for a bar attachment or even a pair of rings to get that neutral grip. - Grip It Right: Grab the handles with your palms facing each other. Your hands should be shoulder-width apart. - Pull With Purpose: Don’t just go through the motions. Pull yourself up like it’s the last rep of your life. Drive your elbows down, and squeeze those shoulder blades until you can’t squeeze anymore. - Avoid These Mistakes - No swinging: Keep your core tight to prevent arching. - No Half Reps: Go all the way up and all the way down. Full range of motion is key. Don't fully lockout but go below your elbows - Don’t Rush It: Control your descent to maximize muscle engagement. Remember, it’s not just about doing the pull-up; it’s about doing it right. Each rep should be controlled and powerful. No shortcuts.
Building Upper Body Power with Neutral Grip Pull-Ups
Neutral grip pull-ups aren’t just easier on your joints; they’re a powerhouse move for building serious upper body strength. Think of it this way: every time you pull yourself up, you’re engaging more than just your back. You’re pulling in your biceps, your shoulders, and even your core. Here’s how neutral grip pull-ups can take your upper body strength to the next level: - Target Multiple Muscle Groups: Unlike regular pull-ups, the neutral grip variation lets you distribute the load more evenly across your upper body. This means your back, biceps, and shoulders are all working together. It’s a team effort, and the result is a balanced, powerful physique. - Perfect for High Volume: Because they’re easier on the joints, you can do more reps without sacrificing form. This allows for higher training volume, which is key to building muscle and strength over time. - Versatile Workouts: You can incorporate neutral grip pull-ups into almost any workout. Whether you’re doing a pull day, a full-body session, or just need a quick finisher, these pull-ups fit right in. And they’re perfect for supersets or circuits. To really understand the impact, let me show you a quick routine: Workout PlanRepsSetsWarm-Up: jumping jacks, mountain climbers, dynamic mobility30/605Neutral Grip Pull-Ups8-124/6Superset: Push-Ups15-204/6Lat Pulldowns (Neutral Grip if possible)10-123Finisher: Plank Hold60 seconds3Hit me up if you have any questions about this quick pump. For a comprehensive guide on performing pull-ups with a neutral grip, including detailed muscle engagement and proper form, visit StrengthLog's extensive article. -
Conclusion
Neutral grip pull-ups aren’t just easier – they’re smarter. They protect your wrists, build a stronger back, and engage more muscles, making them a staple in any serious workout routine. Whether you’re just starting or you’re looking to add more muscle, these pull-ups can help you get there without the joint pain that holds so many back. So, stop making excuses, get on that bar, and start pulling. And Don't Forget to Squeeze! Ahhhh
FAQs
How many neutral grip pull-ups should I be able to do?The number varies depending on your fitness level. Beginners might start with just a few reps, while advanced athletes might bang out 15-20 in a set. The key is to focus on form and gradually increase your reps.Can neutral grip pull-ups replace regular pull-ups?Neutral grip pull-ups can definitely complement or even replace regular pull-ups, especially if you’re dealing with wrist or shoulder issues. They work slightly different muscles but are just as effective for building upper body strength.What if I don’t have access to a neutral grip bar?No neutral grip bar? No problem. You can use gymnastic rings or a pair of parallel bars. If you’re training at home, consider investing in a multi-grip pull-up bar that attaches to a door frame.Are neutral grip pull-ups good for beginners?Absolutely. They’re easier on the joints and typically easier to perform than regular pull-ups, making them a great starting point for beginners looking to build upper body strength.How can I improve my neutral grip pull-ups?Consistency is key. Incorporate them regularly into your workouts, focus on form, and don’t be afraid to add weight or vary your grip width as you progress. Mix in negatives to build strength, and make sure you’re fueling your body properly to support your training. Read the full article
#BenefitsofNeutralGripPull-Ups#GripPull-Ups#NeutralGripPull-Ups#Pull-Ups#standardpull-up#TipsforPerformingNeutralGripPull-Ups#UpperBodyPower#WhyAreNeutralGripPull-UpsEasier?
0 notes
Photo
about me calisthenics coach 10 years of experience
#ArePull-UpstheBestUpperBodyExercise?#BestUpperBodyExercise#Bodyweight#ChinUps#Pull-Ups#RealStrength#Wide-GripPull-Ups
0 notes
Text
Are Negative Pull Ups Effective? Discover the Untold Secrets!

Ever wondered if Pull-Ups are worth your time or Are negative pull ups effective? I get it—when you’re busting your ass in the gym, you want every rep to count. Negative pull ups might seem like a gimmick, but trust me, they’re not. These bad boys zero in on the often-overlooked eccentric phase of the exercise, giving your muscles a brutal workout that pays off big time. So, are they effective? Buckle up, because we’re about to dive deep into why negative pull-ups could be your secret weapon for crushing fitness goals.
The Basics of Negative Pull-Ups
Negative pull ups are not your run-of-the-mill exercise. They focus on the eccentric part of the pull up—where you lower yourself slowly from the top position. It’s different from the full pull up, which involves both lifting and lowering. Here’s the kicker: while regular pull ups are tough, negative pull ups zero in on building strength by forcing your muscles to work hard during the descent. The Science Behind Negative Pull-Ups

Muscles don’t just grow by lifting weights; they also need to handle controlled descents. Negative pull-ups engage your muscles intensely during the lowering phase. This eccentric contraction is a powerhouse for muscle growth and strength. Why? Because your muscles are under more strain when you lower yourself slowly compared to when you pull up. This prolonged tension is crucial for building endurance and muscle mass. Learn More about the science behind Negative Pull Ups. Benefits of Negative Pull Ups Let’s break it down: - Increased Strength: Negative pull ups force your muscles to work harder. This helps in building overall upper body strength. - Improved Pull Up Performance: They make regular pull ups easier by strengthening the muscles needed for the full movement. - Enhanced Control: By focusing on the descent, you improve your control and technique, crucial for progressing in calisthenics. Pro Tip: Focus on a slow, controlled descent during negative pull ups to maximize muscle engagement and strength gains. Are Negative Pull Ups Effective? Are negative pull ups really effective? It’s a fair question. Some might think they’re just a gimmick, but let’s be clear: they’re backed by science. The key is consistency and proper form. Potential drawbacks? Sure. If you’re not careful, you might overdo it and risk injury. Start slow and ensure you’re performing them correctly to reap the benefits. https://youtu.be/R8xNrImzdwI Sample Workout Plan for Negative Pull Ups: Warm-Up:5 minutes of light cardio and stretching.Negative Pull Ups:4 sets of 6 reps.Regular Pull Ups:3 sets of 8-10 reps.Cool Down:Stretch your arms and back. How to Incorporate Negative Pull Ups into Your Routine Ready to add them to your workout? Here’s how: - Find a Bar: Use a sturdy bar you can grip firmly. - Start at the Top: Jump or use a step to get into the top position of a pull up. - Lower Slowly: Take 3-5 seconds to lower yourself down. - Repeat: Aim for 3-4 sets of 5-8 reps. Tips for Maximizing Effectiveness: - Focus on Form: Ensure your movements are controlled. - Combine with Regular Pull Ups: Mix negative pull ups with full pull ups for balanced development. - Rest and Recover: Allow your muscles to rest, and take proper time to recover between each session.
Conclusion
Alright, let’s cut to the chase—negative pull-ups are more than just a fancy exercise. They’re a key player in building raw strength, improving your pull up game, and mastering control over your body. If you’re serious about leveling up your fitness routine, don’t sleep on these. They’re tough, they’re effective, and they’ll push you to new heights. So, get on that bar, embrace the grind, and let’s see what you’re really made of. Negative pull ups aren’t just effective; they’re a game-changer.
FAQs
How often should you do negative pull-ups?Aim for 2-3 times a week, allowing rest days in between to prevent overtraining.Can negative pull ups help with other exercises?Absolutely. They enhance your overall upper body strength and control, benefiting various exercises beyond just pull ups.What are the best tips for beginners?Start with a few reps and focus on controlled movements. Gradually increase the number as your strength improves. Read the full article
#AreNegativePullUpsEffective?#BasicsofNegativePull-Ups#BenefitsofNegativePullUps#NegativePullUps#NegativePull-Ups#PullUps#PullUpsEffective#WorkoutPlanforNegativePullUps
0 notes
Text
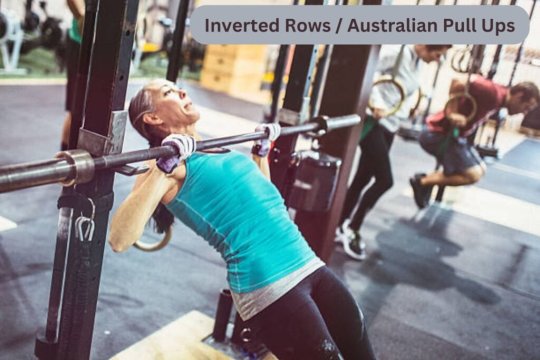
What is an Australian Pull Up? Discover the Exercise That Boosts Your Gains!

Ever wondered what is an Australian Pull Up? What if I told you that this single exercise could change your pull-up strength and drastically improve your upper body muscle definition? It’s a game-changer that not only builds power in your back and biceps but also engages your core, making it a must-have in any serious calisthenics routine. The Australian Pull Up—also known as the Inverted Row—is that exercise. It’s a foundational move in calisthenics that you need to know about if you're serious about bodyweight training. Let’s break it down.
Why You Need the Australian Pull Up in Your Routine
Here’s the deal. If you’ve been struggling with traditional pull-ups or just want to build a stronger, more defined upper body, the Australian Pull Up is your golden ticket.
This exercise is perfect because: - It’s easier on the joints than regular pull-ups. - You can adjust the difficulty, making it beginner-friendly but also challenging for seasoned athletes. - It targets the upper back, lats, and core like nothing else. I’ve been doing calisthenics for a decade now, and trust me, the Australian Pull Up is a game-changer. It’s especially useful for those who can’t do a full pull-up yet but still want to build the strength necessary to get there.
How to Perform the Australian Pull Up
Let’s get into the nitty-gritty. Performing an Australian Pull Up is straightforward, but getting it right is crucial. Here’s how you do it: StepInstructionTips for Execution1. Set Up Your BarFind a bar around waist height, or use a sturdy table at home.Ensure the bar is secure and can hold your weight.2. Position YourselfLie down under the bar, grabbing it with an overhand grip.Keep your hands shoulder-width apart.3. Engage Your CoreMaintain a straight line from head to heels.Avoid sagging your hips to keep your core tight.4. Pull Yourself UpDrive your elbows back, pulling your chest to the bar.Focus on control, not speed.5. Lower SlowlyLower yourself back to the starting position, arms fully extended.Use slow, controlled movements to maximize muscle engagement. Great and clean execution in this video from Breaking Muscle. https://www.youtube.com/watch?v=bHO0A4ZF_Zg
Common Mistakes and How to Avoid Them
Here’s the thing. You can do the Australian Pull Up wrong. And if you do, you’ll miss out on its benefits. Here are the common pitfalls to watch out for: - Using Momentum: If you’re swinging your body to get up, you’re not building strength. Focus on slow, controlled movements. - Arching Your Back: Keep your core tight to avoid putting unnecessary strain on your lower back. - Flared Elbows: Keep your elbows close to your body to engage your lats effectively. - These mistakes are common, but easy to fix with a bit of mindfulness during your workout. PRO TIP Unlock exponential gains by performing Australian Pull Ups with elevated feet for an intense core challenge!
Why the Australian Pull Up is a Step-Up from the Standard Row
Let’s be real. The standard row is great, but the Australian Pull Up is in a league of its own. Here’s why: - Increased Range of Motion: You’re moving through a greater range, which means more muscle activation. - Core Engagement: Unlike the standard row, you need to engage your core constantly to keep your body straight. - Scalability: You can easily make this exercise harder by changing the angle of your body or adding weight. - This move isn’t just for beginners. Advanced athletes use it to refine their technique and build serious upper body strength.
Integrating the Australian Pull Up into Your Workout Routine
Now you might be wondering, "Where does this fit into my workout?" Great question. Here’s how you can integrate the Australian Pull Up into your routine: Warm-Up: Start with Australian Pull Ups to activate your back and core before moving on to heavier lifts or more advanced calisthenics. Superset with Push-Ups: Alternate between pull-ups and push-ups to create a balanced upper body workout. Finisher: Use Australian Pull Ups at the end of your workout to burn out your upper back and lats. When I first started doing Australian Pull Ups, I was blown away by how quickly my upper body strength improved. I went from struggling with regular pull-ups to repping them out. Check out this detailed guide from Nerd Fitness for another view on the Australian Pull Up.
Conclusion
If you haven’t tried Australian Pull Ups yet, you’re missing out. This exercise is more than just a stepping stone to traditional pull-ups. it’s a powerful move in its own right. Whether you’re a beginner or a seasoned pro, integrating this into your routine will set you on the path to serious gains. And that’s the secret to Australian Pull Ups—they’re simple, scalable, and seriously effective. Give them a shot, and your back will thank you. Strength comes from within - don’t forget to squeeze!
FAQs on What is an Australian Pull up
What muscles do Australian Pull Ups work?They target the upper back, biceps, and core.How do Australian Pull Ups compare to regular pull-ups?They’re easier and focus on horizontal pulling, ideal for beginners.Can I do Australian Pull Ups at home without equipment?Yes, use a sturdy table or a bar between chairs.How can I make Australian Pull Ups more challenging?Raise your feet, add weight, or try single-arm variations.Are Australian Pull Ups effective for building strength?Yes, they effectively build upper body and core strength. Read the full article
#AustralianPullUp#Exercise#HowtoPerformtheAustralianPullUp#PullUp#Pull-Ups#WhatisanAustralianPullUp?#WorkoutRoutine
0 notes
Text
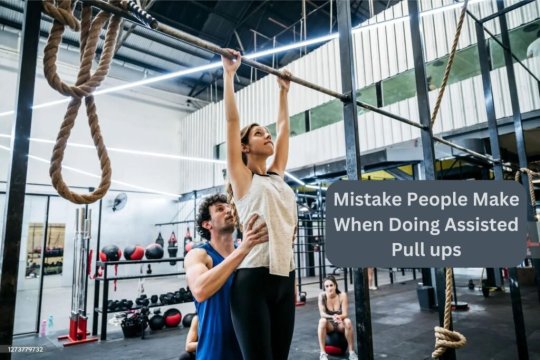
Are Assisted Pull Ups Effective? The #1 Mistake People Make When Doing Them

Are assisted pull ups effective, or are they just a waste of time? I've been in the game for over a decade, and I've seen countless people struggle with traditional pull-ups, only to turn to assisted pull-ups as a solution. But are they really worth it?
What are Assisted Pull ups?
Assisted pull-ups are a type of exercise that uses a resistance band or a partner to assist you in completing a pull-up. The purpose of assisted pull-ups is to make it easier for people to access the benefits of pull-ups, regardless of their fitness level. By using a resistance band or a partner to assist you, you can increase the weight and resistance, making it easier to build strength and muscle. Here's how assisted pull-ups work: - Resistance band: A resistance band is a lightweight, portable device that provides resistance to your movements. When you use a resistance band to assist you in a pull-up, it helps to increase the weight and resistance, making it easier to build strength and muscle. - Partner assistance: Partner assistance involves having someone assist you in completing a pull-up by providing resistance or support. This can be done by having someone hold your legs or provide resistance to your movements. The video below shows exactly how to use the resistance band to perform assisted pull ups. https://www.youtube.com/watch?v=9mVNP1_kDBs
Benefits of Assisted Pull ups
Assisted pull-ups offer several benefits, including: BenefitDescriptionIncreased accessibilityEasier to access the benefits of pull-ups, regardless of fitness levelImproved lat strengthTargets lat muscles for a strong backEnhanced muscle enduranceBuilds muscle endurance for high-intensity activities
The #1 Mistake People Make When Doing Assisted Pull ups
So, what's the #1 mistake people make when doing assisted pull-ups? It's actually quite simple: they don't use proper form. When you're using a resistance band or a partner to assist you, it's easy to get lazy and sacrifice form for the sake of convenience. But, here's the thing: poor form can lead to injury, and it can also prevent you from getting the most out of your workout. So, what's the solution? Use proper form, and make sure you're engaging your lat muscles and using your entire back to pull yourself up. Here are some tips for using proper form when doing assisted pull-ups:
- Keep your core engaged: Your core muscles are essential for stability and control, so make sure you're engaging them throughout the exercise. - Use your entire back: Don't just rely on your arms to pull yourself up - use your entire back to generate power and momentum. - Keep your shoulders down: Avoid scrunching your shoulders up towards your ears, as this can put unnecessary strain on your neck and shoulders. To avoid common mistakes and maximize the effectiveness of assisted pull-ups, check out this comprehensive guide.
Correcting the Mistake: Tips for Effective Assisted Pull ups
So, how can you avoid the common mistake of poor form and get the most out of your assisted pull-ups? Check below some tips: - Start with a lighter resistance: Don't be afraid to start with a lighter resistance and gradually increase it as you build strength and endurance. - Focus on proper form: Make sure you're using proper form and engaging your lat muscles and entire back to pull yourself up. - Practice regularly: Consistency is key when it comes to building strength and muscle endurance. PRO TIP Use the Assisted Pull-up Machine at the Gym to Get a Stronger Back and Avoid Common Mistakes Perfect execution of assisted pull ups with a lat machine at the gym. https://www.youtube.com/watch?v=AsUBri1uYzo
Conclusion
Assisted pull-ups can be a game-changer for those who struggle with traditional pull-ups. By using a resistance band or a partner to assist you, you can increase the weight and resistance, making it easier to build strength and muscle. However, it's essential to use proper form and technique to get the most out of your workout. Following the tips and advice outlined in this article, you can avoid common mistakes and get the most out of your assisted pull-ups. FAQs Here are some frequently asked questions about assisted pull-ups: What is the best way to use a resistance band for assisted pull-ups?The best way to use a resistance band for assisted pull-ups is to start with a lighter resistance and gradually increase it as you build strength and endurance.Can I use a partner to assist me with pull-ups? Yes, you can use a partner to assist you with pull-ups. This can be a great way to increase the weight and resistance, making it easier to build strength and muscle.How often should I do assisted pull-ups?It's recommended to do assisted pull-ups 2-3 times per week, with at least one day of rest in between.How long will it take to see results from assisted pull-ups?It can take several weeks to see results from assisted pull-ups, depending on your starting level of fitness and consistency with your workout routine. Read the full article
0 notes
Text
The Secret to a Stronger Back: 3 Pull Ups Exercises for Seniors You Can Do in Your Local Park!

Here, we'll explore three easy-to-do pull ups exercises for seniors that can be done in your local park, helping you build a stronger back and improve your overall fitness. Well, you're in luck because I'm about to reveal the three game-changing pull-up exercises for seniors that you can do in the comfort of your local park. Do you struggle to find exercises that cater to your needs and abilities? As someone who's been in the fitness game for over a decade, I've seen my fair share of seniors struggling to find exercises that work for them. But the truth is, with a few tweaks, anyone can get started with pull-up exercises, regardless of age or fitness level.
Precautions and Safety Measures
As a calisthenics coach, I always emphasize the importance of progressive overload and gradual progression in exercise routines. This means that you should aim to increase the difficulty of your exercises over time, rather than trying to do too much too soon. By doing so, you'll be able to build strength and confidence, and reduce the risk of injury. Here are some key principles to keep in mind: - Start with modifications: Begin with exercises that are modified to suit your needs and abilities, and gradually increase the difficulty level as you build strength and confidence. - Focus on proper form: Make sure to engage your core, keep your back straight, and avoid swinging or jerking movements. - Increase the difficulty gradually: Aim to increase the difficulty of your exercises by 10-20% each week, rather than trying to do too much too soon. PRO TIP Instead of just pulling yourself up, focus on contracting your back muscles and squeezing your shoulder blades together.
Pull Ups Exercises for Seniors
Now that we've covered the basics, let's get to the good stuff! Here are three pull-up exercises for seniors that you can do in your local park:

- Assisted Pull-Ups - What you need: A pull-up bar and a resistance band or a partner to assist you. - How to do it: Attach a resistance band to a pull-up bar, place your feet in the loop, and grip the bar. Pull your chest to the bar, then lower yourself slowly. Adjust the band's resistance as needed. - Negatives - What you need: A pull-up bar and a chair or bench to support you. - How to do it: Jump or step up to the top of a pull-up position with your chin above the bar. Slowly lower yourself down with control until your arms are fully extended. Repeat for the desired reps. - Inverted Rows - What you need: A sturdy pull-up bar and a resistance band or a partner to assist you. - How to do it: Lie under a parallel bar, grip it, and keep your body straight. Pull your chest to the bar, then lower yourself back down. Adjust foot position for difficulty. Check the video below to learn more about the proper execution of an inverted row. https://www.youtube.com/watch?v=KOaCM1HMwU0 Research indicates that resistance training, such as modified pull-up exercises, can significantly enhance muscular strength and functional performance in older adults, promoting overall health and mobility improvements. Read more.
Tips and Variations
Here are some additional tips and variations to help you get the most out of these exercises: - Use a pull-up bar with a lower height: If you're struggling to reach the bar, try using a pull-up bar with a lower height or a resistance band to assist you. - Try different grip positions: Experiment with different grip positions, such as a pronated (palms facing away) or supinated (palms facing towards) grip, to target different muscle groups. - Incorporate isometric holds: Hold the pull-up position for 10-15 seconds to increase the challenge and engage your muscles.
Common Mistakes to Avoid
When performing pull-ups, there are several common mistakes to avoid: - Swinging or jerking: Avoid swinging or jerking your body up and down, as this can put unnecessary strain on your joints. - Not engaging your core: Make sure to engage your core muscles and keep your body straight throughout the exercise. - Not using proper form: Use proper form when performing pull-ups, including keeping your elbows close to your body and your shoulders down.
Conclusion
In conclusion, pull-up exercises for seniors are a great way to build strength and improve overall fitness. By following the tips and variations outlined in this article, you can modify pull-up exercises to suit your needs and abilities. Remember to always focus on proper form and gradual progression, and don't be afraid to try new variations and challenges. FAQs: What are the benefits of pull-up exercises for seniors? Pull-up exercises for seniors can help build strength and improve overall fitness, reduce the risk of injury, and improve bone density.What are some common mistakes to avoid when performing pull-ups?Some common mistakes to avoid when performing pull-ups include swinging or jerking, not engaging your core, and not using proper form. Can I modify pull-up exercises to suit my needs and abilities?Yes, pull-up exercises can be modified to suit your needs and abilities. Try using a pull-up bar with a lower height, or incorporating variations such as single-arm pull-ups.How often should I perform pull-up exercises?Aim to perform pull-up exercises 2-3 times per week, with at least one day of rest in between.Can I do pull-up exercises at home?Yes, you can do pull-up exercises at home using a pull-up bar or a resistance band. However, it's recommended to start with assisted pull-ups or negatives before progressing to full pull-ups. Read the full article
0 notes
Text
Mastering Pull-up Exercises for Beginners: Your Ultimate Guide
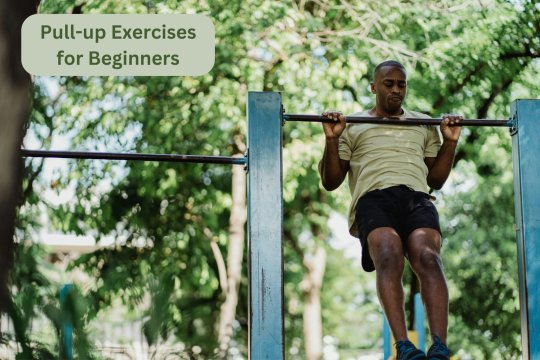
Are you struggling to master pull-up exercises for beginners but don’t know where to start? I’ve been there, feeling nervous about grabbing the pull-up bar and just hanging there like a dead weight. But trust me, every journey begins with that first pull. This guide is here to help you transform those jitters into gains.
Why Are Pull-Up Exercises Crucial for Beginners?
Pull-up exercises are one of the most effective ways to build upper body strength. They work multiple muscles at once—like the back, shoulders, and arms. And guess what? They also help improve your grip pull-up strength. Benefits You Can Expect - Increase in Muscle Strength: Pull-ups target major muscle groups. - Functional Fitness: Helps in daily activities involving pushing and pulling. - Improved Posture: Strengthening your back muscles aids in better posture. - Convenient: Needs minimal equipment, making it perfect for home workouts. Starting strong doesn’t mean you need to be a superhero fit from day one. You’ll get there.
Starting Point: Assess Your Fitness Level
Before you go all in, it’s essential to know where you stand. No two fitness journeys are the same. Fitness Level Assessment You don’t need to run a marathon to assess your fitness. A couple of simple checks will do the trick. - Grip Strength Test: Grab something heavy like a gallon of milk. Hold it for as long as you can. - Arm Strength: Can you manage a couple of push-ups? - Cardio Check: How’s your stamina? Can you walk a mile without puffing like a steam engine? Make a note of your results. This will help in tracking your progress.
Essential Equipment for Pull-Ups
You don’t need a full gym set-up to get started. Simple and cost-effective equipment will do.
Basic Equipment - Pull-Up Bar: An essential piece. - Resistance Bands: Ideal for assisted pull-ups. - Grip Pads: To avoid calluses. Having these ready helps in making incremental gains.
The Anatomy of a Pull-Up
Knowing the mechanics helps you understand what you’re doing. Let’s break it down. Key Muscle Groups Involved - Latissimus Dorsi: The major back muscle. - Biceps: For the pulling action. - Trapezius: Stabilizes your shoulders. - Forearms and Grip: To hold onto the bar. Steps to Perform a Pull-Up - Start with the Right Grip: Grab the bar, palms facing away from you, shoulder-width apart. - Engage Core: Tighten your abdominal muscles. - Pull Up: Use your arms and back to lift your chin above the bar. - Lower Gently: Come down slowly to avoid injury. Consistency with this form is key.
Progression is Key: From Zero to One Pull-Up
You might think it’s impossible now, but you can progress from zero to your first pull-up. Here’s how. Step-by-Step Progression Plan - Week 1-2: Focus on grip strength. Hang from the bar for as long as you can. - Week 3-4: Start with assisted pull-ups using resistance bands. - Week 5-6: Work on negative pull-ups. Jump to the top position and slowly lower yourself. Write down your achievements week by week. It feels amazing to see how far you’ve come. For a detailed breakdown of a comprehensive pull-up progression plan, check out this resource from Set for Set.

Alternative Exercises to Build Strength
You don’t always need to head straight for the pull-up bar. Alternative exercises can help build the muscles you need. Useful Alternatives - Body Rows: Use a low bar. Pull your chest towards it. - Dumbbell Rows: Mimics the pulling action. - Lat Pull-Downs: Great if you have access to a gym. - Chin-Ups: Easier than pull-ups, and a good start. Incorporate these into your routine for balanced improvement.
Common Mistakes and How to Avoid Them
When performing pull-up exercises for beginners, everyone makes mistakes, but avoiding common pitfalls can expedite your progress. Common Mistakes - Swinging: Using momentum rather than muscle. - Rushing: Performing too quickly increases injury risk. - Wrong Grip: Different grips target different muscles. Awareness is the first step in preventing these.
Pull-Up Variations to Keep It Interesting
Doing the same routine can get monotonous. Spice it up with variations. Exciting Pull-Up Variations - Wide-Grip Pull-Ups: For a broader back. - Close-Grip Chin-Ups: Targets the biceps more. - L-Sit Pull-Ups: Adds core workout into the mix. - Commando Pull-Ups: Hold the bar in a vertical grip. Being playful with your workout can keep your motivation high. Check out the video below for more information on pull ups progression. FAQs on Pull-Up Exercises for Beginners How Many Pull-Ups Should a Beginner Aim for Initially?Start small. Even one or two pull-ups is progress. Aim for incremental gains.How Often Should I Practice Pull-Ups?Three times a week with rest days in between is optimal to allow muscle recovery.Is It Normal to Feel Sore After Pull-Ups?Absolutely. Soreness means your muscles are working. Just ensure you’re not feeling sharp pain, which could indicate an injury.Can Women Do Pull-Ups?Definitely. Everyone can benefit from pull-ups, regardless of gender.How Long Does It Take to Master Pull-Ups?This varies. Some pick it up in weeks, others take months. Consistency is crucial.
Conclusion
Mastering pull-up exercises for beginners might seem daunting initially. But with the right approach, steady progress, and avoiding mistakes, you’ll see impressive gains faster than you think. Remember, incremental progress is still progress. Stick to your plan, and you’ll be pulling yourself up to new heights in no time. And yes, mastering pull-up exercises for beginners is truly within your grasp. To dive deeper into the specifics of pull-up form and common mistakes, refer to this detailed guide from Livestrong. Read the full article
#pullupsforbeginners#Pull-Up#pull-upexercises#pull-upexercisesforbeginners#Pull-Ups#StrengthTraining#WorkoutRoutine
1 note
·
View note