
Statistics
We looked inside some of the posts by guernissbd and here's what we found interesting.
Average Info
Notes Per Post
5
Likes Per Post
5
Reblog Per Post
0
Reply Per Post
0
Time Between Posts
6 days
Number of Posts By Type
Text
17
Last Seen Tumblr Blogs


Fun Fact
Tumblr is used by 21% of adults online aged 18-29 years.
Text
The Transformative Power of Vitamin C Serum

One of the key benefits of Vitamin C serum is its ability to stimulate collagen production. Collagen is a protein that maintains the skin's firmness and elasticity. As we age, collagen production naturally declines, leading to wrinkles and sagging skin. By incorporating a Vitamin C serum into your skincare routine, you can boost collagen levels, resulting in smoother and more supple skin.
Vitamin C also plays a significant role in reducing hyperpigmentation and evening-out skin tone. It inhibits the enzyme tyrosinase, which is responsible for the production of melanin, the pigment that gives skin its color. This can help to fade dark spots, sun spots, and acne scars, leaving you with a more even and luminous complexion.
Furthermore, Vitamin C serum offers protection against UV damage. While it is not a substitute for sunscreen, it can enhance your skin’s defense against harmful UV rays, reducing the risk of sunburn and photoaging.
To maximize the benefits of Vitamin C serum, apply it in the morning after cleansing and before moisturizing. This allows the serum to penetrate deeply into the skin and work effectively throughout the day. Consistent use can improve skin texture, tone, and overall radiance, making Vitamin C serum an essential addition to any skincare regimen.
0 notes
Text
How to Clean Your Makeup Sponge for Optimal Hygiene and Longevity

1. Warm Water and Soap Method :
- Wet the Sponge: Start by thoroughly wetting your makeup sponge with warm water. Ensure it is completely soaked.
- Apply Soap: Squeeze a small amount of liquid soap, preferably a mild facial cleanser or a baby shampoo, directly onto the sponge. Alternatively, you can use a bar soap by rubbing the sponge against it.
- Lather Up: Squeeze and massage the sponge to work the soap into a lather. Focus on areas with heavy makeup stains.
- Rinse: Rinse the sponge under warm running water. Keep squeezing it until the water runs clear and all the soap is washed out.
- Dry: Squeeze out excess water and then pat the sponge with a clean towel. Allow it to air dry in a well-ventilated area.
2. Microwave Method :
- Prepare the Solution: Mix warm water with a bit of liquid soap in a microwave-safe bowl.
- Soak the Sponge: Submerge your makeup sponge in the soapy water and ensure it is fully saturated.
- Microwave: Place the bowl in the microwave and heat it on high for about 1 minute. This process helps kill bacteria and break down makeup residues.
- Rinse and Dry: After microwaving, let the water cool down slightly. Rinse the sponge under warm water, squeeze out excess water, and let it air dry.
3. Olive Oil and Soap Method :
- Mix Olive Oil and Soap: Combine a small amount of olive oil with liquid soap. Olive oil helps to break down the makeup, especially if it's oil-based.
- Apply and Massage: Rub the mixture onto the sponge and massage it thoroughly.
- Rinse: Rinse under warm water, squeezing until the water runs clear.
- Dry: Pat with a towel and let it air dry.
Additional Tips :
- Frequency: Clean your makeup sponge at least once a week to prevent the buildup of bacteria and makeup residues.
- Replacement: Even with regular cleaning, replace your makeup sponge every 3 to 6 months, or sooner if it starts to deteriorate.
- Hygiene: Always ensure your hands are clean before handling the sponge to avoid transferring dirt and bacteria.
By following these steps, you can keep your makeup sponge clean, extend its lifespan, and maintain healthier skin.
0 notes
Text
Mastering the Art of Perfect Eyebrows: A Step-by-Step Guide
Drawing perfect eyebrows requires precision and an understanding of your facial features. Here's a step-by-step guide to help you achieve flawless eyebrows:
1. Determine Your Shape: Identify your natural brow shape. This involves recognizing the start, arch, and end points of your eyebrows. Generally, the start aligns with the inner corner of your eye, the arch is above the outer edge of your iris, and the end aligns with the outer corner of your eye.
2. Tools: Use high-quality tools such as an eyebrow pencil, spoolie brush, tweezers, and concealer. The pencil should be a shade that matches your natural brow color.
3. Map Your Brows: Mark the three key points (start, arch, end) lightly with the pencil. This serves as a guideline.
4. Fill In Sparsely: Using light, feathery strokes, fill in your brows starting from the inner edge and moving outwards. Follow the direction of your natural hair growth for a more realistic look.
5. Shape and Define: Use a spoolie brush to blend the pencil strokes and soften any harsh lines. This will also help distribute the color evenly.
6. Clean Up: Outline your brows with a bit of concealer to sharpen the edges and correct any mistakes. Blend the concealer well to avoid a stark contrast.
7. Set in Place: Apply a clear or tinted brow gel to keep the hairs in place and maintain the shape throughout the day.

With practice and attention to detail, you can achieve well-defined, symmetrical eyebrows that enhance your facial features.
1 note
·
View note
Text
Versatile Uses of Mascara: Beyond Just Lash Enhancement

1. Eyelash Enhancement: Mascara accentuates the eyes by adding volume, length, and color to the lashes. It helps create the illusion of fuller and longer eyelashes, which can make the eyes appear larger and more expressive. Various formulations, such as volumizing, lengthening, and curling mascaras, cater to different desired effects.
2. Defining Lower Lashes: Applying mascara to the lower lashes can enhance the eyes' definition and balance the overall eye makeup look. It can make the eyes appear more open and wide, adding to the facial symmetry.
3. Alternative Eyeliner: In a pinch, mascara can be used as an eyeliner. Using an angled brush or the waterproof mascara wand itself, one can apply mascara along the lash line to create a defined line, mimicking the effect of traditional eyeliner.
4. Eyebrow Gel: Clear or tinted mascara can double as an eyebrow gel. It can help set eyebrow hairs in place, providing a polished look and ensuring that the brows stay neat throughout the day.
5. Hair Touch-Ups: Mascara can be used to cover up gray roots or small patches of thinning hair. This quick fix is especially useful for those with dark hair, as it blends seamlessly and provides a temporary solution between hair color appointments.
6. Creative Makeup: For artistic makeup looks, colored mascaras offer a fun and creative option. They can add a pop of color to the lashes, complementing vibrant eyeshadow or providing a unique twist on traditional makeup.
7. Mascara for Lashes and Brows: Some formulations include nourishing ingredients like vitamins, peptides, and oils that condition and strengthen lashes and brows over time, promoting healthier growth.
In essence, mascara is a multifaceted tool in the makeup arsenal, offering not just lash enhancement but also versatility in various beauty applications. Its adaptability makes it a staple in both everyday makeup routines and creative beauty endeavors.
1 note
·
View note
Text
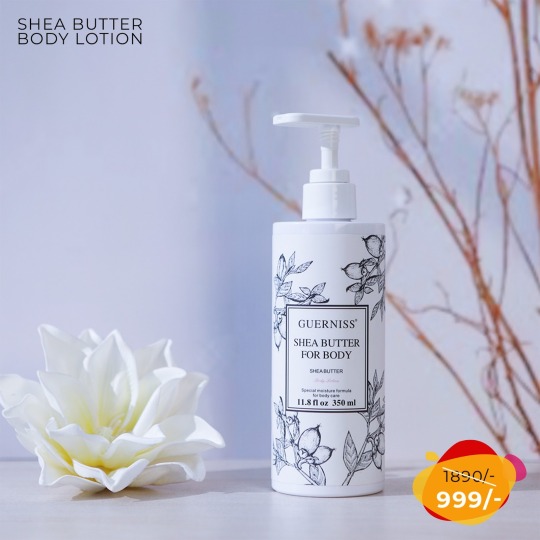
Shea Butter Body Lotion: Benefits, Uses, and DIY Recipes
Shea butter body lotion is a popular skincare product known for its moisturizing and nourishing properties. Derived from the nuts of the African shea tree (Vitellaria paradoxa), shea butter is rich in vitamins A, E, and F, and has a high concentration of fatty acids and natural oils that make it an excellent ingredient for skin care.
### Benefits of Shea Butter Body Lotion
1. Moisturizing: Shea butter deeply hydrates the skin, making it an ideal solution for dry and rough skin.
2. Anti-inflammatory: It can help reduce skin inflammation, making it suitable for conditions like eczema and psoriasis.
3. Healing: Shea butter promotes skin healing and regeneration, which is beneficial for minor cuts, scrapes, and burns.
4. Anti-aging: The presence of vitamins A and E helps in maintaining skin elasticity and reducing the appearance of wrinkles and fine lines.
5. Soothing: It soothes irritated skin and can be used after sun exposure to calm the skin.

### How to Use Shea Butter Body Lotion
1. Daily Moisturizer: Apply a generous amount of shea butter lotion to your body after showering to lock in moisture.
2. Spot Treatment: Use it on particularly dry areas like elbows, knees, and feet to soften and smooth the skin.
3. After-sun Care: Apply it to sun-exposed skin to soothe and repair.
4. Night Treatment: Use it as a deep moisturizing treatment before bed for overnight skin repair.
### DIY Shea Butter Body Lotion Recipe
If you prefer making your own lotion at home, here’s a simple recipe:
#### Ingredients:
- 1/2 cup shea butter
- 1/4 cup coconut oil
- 1/4 cup almond oil or jojoba oil
- A few drops of essential oil (optional for fragrance)
#### Instructions:
1. Melt the shea butter and coconut oil in a double boiler over low heat until fully melted.
2. Remove from heat and let it cool slightly before adding the almond oil or jojoba oil.
3. Optional Add a few drops of your favorite essential oil for fragrance.
4. Mix well and transfer to a container.
5. Let it solidify at room temperature or in the refrigerator.
6. Whip the mixture with a hand mixer until it reaches a creamy consistency if desired.
### Popular Shea Butter Body Lotions
1. Guerniss Shea Butter Body Lotion: Known for its rich texture and nourishing properties.
Using shea butter body lotion can significantly improve your skin's health and appearance, making it a staple in many skincare routines.
#shea butter#body lotion#healthycomplexion#glowingskin#beauty tips#skincareroutine#antioxidantbenefits
1 note
·
View note
Text
Step-by-Step Guide for Perfect Eye Definition of Kohl
Applying kajal (kohl) is a simple yet effective way to accentuate your eyes and enhance your overall look. Here’s a step-by-step guide to help you apply kajal the right way:
### Step-by-Step Guide
#### 1. Prepare Your Eyes

#### 2. Prime Your Eyes
Apply a thin layer of eye primer or foundation around your eyes. This helps in creating a smooth base and increases the longevity of the kajal.
#### 3. Choose the Right Kajal
Select a matte kohl pencil or stick that is of good quality. Opt for one that is smudge-proof and long-lasting. A creamy, smooth-textured kajal glides on easily without tugging on your delicate eye area.
#### 4. Begin with the Lower Waterline
Start by pulling down your lower eyelid gently with your non-dominant hand. With your dominant hand, apply the kajal starting from the outer corner of your eye and moving towards the inner corner. For a more intense look, you can apply multiple layers.
#### 5. Upper Waterline (Tightlining)

#### 6. Smudge for a Smokey Effect
If you prefer a smokey look, gently smudge the kajal along your lower lash line using a small smudging brush or a cotton swab. This creates a soft, blended effect.
#### 7. Set with Powder (Optional)
To prevent smudging and ensure longevity, lightly dust some translucent powder under your eyes after applying the kajal. This step is especially useful for those with oily skin or in humid conditions.
#### 8. Additional Touches
You can also apply kajal along your upper lash line for a more dramatic effect. Extend it slightly beyond the outer corner of your eyes for a subtle winged look.
### Tips for Perfect Kajal Application
- Steady Hands: Rest your elbow on a flat surface while applying kajal to keep your hand steady.
- Avoid Over-Applying: Too much kajal can make your eyes look smaller. Apply just enough to define your eyes.
- Hydration: Keep your kajal pencil sharpened for precise application, and ensure it is well-hydrated to avoid dryness and breakage.
- Removal: At the end of the day, remove kajal with a good-quality makeup remover to avoid eye irritation and infections.
By following these steps, you can achieve a well-defined, striking look with your kajal, making your eyes the focal point of your makeup.
1 note
·
View note
Text
Milk Body Lotion: The Key to Hydrated and Moisturized Skin
In the quest for radiant and healthy skin, the importance of hydration and moisture cannot be overstated. Among the myriad of skincare products available, milk body lotion stands out as an exceptional choice for achieving soft, supple, and well-nourished skin.
Milk has been celebrated for centuries for its skin benefits. Cleopatra, the ancient Egyptian queen, famously bathed in milk to maintain her legendary beauty. The secret behind milk’s effectiveness lies in its rich composition. Milk is packed with essential nutrients such as vitamins A, D, and E, proteins, and lactic acid, all of which play pivotal roles in skin care.

Hydration and moisture are often used interchangeably, but they serve different functions. Hydration refers to the water content in the skin, while moisture involves the skin's ability to retain this water. Milk body lotion excels in both areas, providing a dual benefit.
1. Hydration: The lactic acid in milk is a natural humectant, meaning it attracts and retains moisture. When applied as a lotion, it helps draw water into the skin, ensuring that it remains plump and hydrated. This is particularly beneficial for those with dry or flaky skin.
2. Moisture: The fatty acids and proteins in milk create a protective barrier on the skin’s surface. This barrier helps to lock in hydration and prevents the evaporation of water from the skin. It ensures that the skin remains moisturized for extended periods, resulting in a soft and smooth texture.
Additional Benefits
Apart from hydration and moisture, milk body lotion offers several other advantages:
- Soothing Properties: Milk is known for its anti-inflammatory properties, making it ideal for soothing irritated or sensitive skin.
- Brightening Effect: Regular use can help in reducing pigmentation and evening out skin tone, giving a natural glow.
- Anti-Aging: The vitamins and antioxidants in milk combat free radicals, which are responsible for premature aging, thereby helping to maintain youthful skin.
In conclusion, incorporating milk body lotion into your daily skincare routine can lead to significant improvements in skin health. Its ability to hydrate and moisturize, coupled with additional soothing and anti-aging benefits, makes it a valuable addition to any beauty regimen. For those seeking naturally beautiful skin, milk body lotion is a timeless solution.
0 notes
Text
Tips for a Perfectly Flushed Face
Applying blush can enhance your complexion, adding a healthy and radiant glow to your face. Here are some steps and tips to ensure you apply blush the right way.
1. Choose the Right Formula and Shade:
Blush comes in various formulas like powder, cream, and gel. Powder blush is great for oily or combination skin, while cream or gel blush works well for dry skin. Choose a shade that complements your skin tone. For fair skin, soft pinks and peaches work well. Medium skin tones can opt for rose or mauve, and deeper skin tones look great in berry or plum shades.
2. Prep Your Skin:

3. Use the Right Tools:
A fluffy blush brush is ideal for powder/ matte blushes, while a stippling brush or your fingers work well for cream blushes. For gels, fingers are often the best tool for blending.
4. Application Techniques:
Smile to find the apples of your cheeks—the round, fleshy part that lifts when you smile. Lightly dip your brush into the blush, tapping off any excess. Apply the blush on the apples of your cheeks and blend it outwards towards your temples in a sweeping motion. For a natural look, avoid placing the blush too close to your nose or too low on your cheeks.
5. Blend, Blend, Blend:
Blending is key to achieving a natural-looking flush. Use circular motions to blend the edges of the blush seamlessly into your skin. If you’ve applied too much, you can tone it down with a bit of translucent powder.
6. Adjust According to Your Face Shape:
If you have a round face, apply a blush slightly higher on the cheeks to create a more elongated look. For a heart-shaped face, focus on the outer edges of your cheeks. Oval faces can carry blush on the cheekbones, while square faces benefit from blush applied to the apples of the cheeks and blended towards the temples.
By following these steps, you can achieve a beautiful, natural-looking blush that enhances your features and brightens your complexion.
1 note
·
View note
Text
Zingiber Hair Serum: The Secret to Accelerated Hair Growth
In the pursuit of healthy, vibrant hair, the beauty industry continually introduces innovative products. Among these, Zingiber Hair Serum has emerged as a game-changer, harnessing the natural potency of ginger to promote accelerated hair growth and overall hair health.
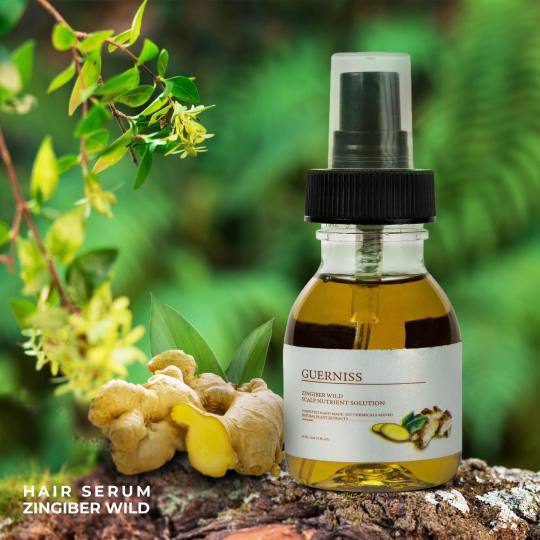
The serum's lightweight and non-greasy formula makes it suitable for all hair types, from fine to coarse, and straight to curly. It is effortlessly absorbed into the scalp, delivering a potent dose of nutrients directly to the roots, where hair growth begins.
One of the key mechanisms by which Zingiber Hair Serum promotes hair growth is by improving scalp circulation. Ginger contains active compounds that enhance blood flow to the scalp, ensuring that follicles receive an optimal supply of oxygen and nutrients. This increased circulation revitalizes dormant follicles, promoting the growth of thicker, stronger hair strands.
Moreover, this Hair Serum acts as a potent antioxidant shield, protecting hair follicles from damage caused by free radicals and environmental stressors. By neutralizing oxidative stress, the serum helps prevent premature hair loss and promotes the longevity of each hair follicle.
Consistent use of it can yield visible results within a relatively short period. Users report experiencing reduced hair fall, increased hair density, and noticeable improvements in overall hair texture and shine. Additionally, the serum's soothing properties provide relief from scalp irritation and dandruff, fostering a healthier environment for hair growth.
To incorporate Zingiber Hair Serum into your hair care routine, simply apply a few drops to the scalp and massage gently using circular motions. For best results, use the serum regularly, preferably daily, and allow it to remain on the scalp for optimal absorption.
In conclusion, Zingiber offers a natural and effective solution for those seeking to accelerate hair growth and achieve thicker, healthier locks. With its potent blend of ginger extract and nourishing botanicals, this innovative serum unlocks the full potential of nature to transform your hair care journey. Say goodbye to dull, lifeless hair and hello to the vibrant, voluminous hair you've always desired with Zingiber Hair Serum.
0 notes
Text
Finding the Perfect Face Powder for Oily Skin: Your Ultimate Guide
Oily skin can be a blessing and a curse. While it often means fewer wrinkles and a natural glow, it can also lead to pesky shine and makeup meltdowns. Thankfully, the right face powder can be your secret weapon in combating excess oil and achieving a flawless finish that lasts all day.
When shopping for face powder for oily skin, there are a few key factors to consider:

2. Long-lasting: Opt for powders with long-lasting formulas that will keep your makeup looking fresh throughout the day. Powders labeled as "long-wear" or "all-day" are usually a safe bet for oily skin types.
3. Oil-free: Avoid powders that contain oils or emollients, as these can exacerbate oiliness and cause makeup to slide off your face. Instead, choose oil-free formulas that provide shine control without adding extra moisture.
4. Translucent or Tinted: Translucent powders are a great option for oily skin because they provide a matte finish without adding extra pigment to the skin. However, if you prefer a little extra coverage, you can opt for a tinted powder that matches your skin tone.
5. Non-comedogenic: To prevent clogged pores and breakouts, choose powders that are labeled as non-comedogenic, meaning they won't clog pores or cause acne.
In conclusion, finding the perfect face powder for oily skin is all about choosing a matte, long-lasting formula that controls shine without clogging pores. With the right powder in your makeup bag, you can say goodbye to midday touch-ups and hello to a flawless, shine-free complexion.
0 notes
Text
Exploring Different Types of Face Highlighters
In the realm of makeup, one product has become synonymous with luminosity and radiance: the face highlighter. This magical tool has the power to elevate any look, adding a dewy glow that catches the light and turns heads. With a myriad of options available, it can be overwhelming to navigate the world of face highlighters. Let’s delve into the diverse types of face highlighters to help you find the perfect one for your desired effect.
1. Powder Highlighters: These are perhaps the most common type of highlighter found in the beauty aisle. Available in various shades and finishes, powder highlighters are easy to apply and blend onto the skin. They work well for all skin types, offering a buildable glow that can range from subtle to intense.
2. Cream Highlighters: Cream highlighters are perfect for those seeking a dewy, lit-from-within glow. They typically come in stick or pot form and are best applied with fingers or a damp makeup sponge. Cream highlighters are ideal for dry or mature skin, as they seamlessly blend into the skin for a natural radiance.
3. Liquid Highlighters: Liquid highlighters offer a sheer, weightless glow that melts effortlessly into the skin. They can be mixed with foundation or moisturizer for an all-over luminous finish or applied strategically to the high points of the face for targeted illumination. Liquid highlighters are versatile and work well for achieving a subtle, everyday glow.

5. Stick Highlighters: Stick highlighters offer convenience and precision, allowing for easy application on the go. They are typically creamy in texture and glide smoothly onto the skin, imparting a luminous finish with just a few swipes. Stick highlighters are great for travel or quick touch-ups throughout the day.
6. Gel Highlighters: Gel highlighters provide a lightweight, gel-like texture that blends seamlessly into the skin. They offer a fresh, dewy glow without any heavy or greasy feeling. Gel highlighters are perfect for achieving a natural, no-makeup makeup look or for those with oily or combination skin.
With so many types of face highlighters available, there’s a perfect option for every makeup lover. Whether you prefer a subtle shimmer or a blinding glow, experimenting with different formulas and textures can help you find your signature luminous look. So go ahead, embrace the radiance, and let your inner glow shine bright!
0 notes
Text
Unlocking the Power of Pine Seed Hair Oil
In the world of natural remedies for hair care, one ingredient has been gaining attention for its potential to promote healthy hair: pine seed oil. Derived from the seeds of pine trees, this oil has been used for centuries in traditional medicine for its various health benefits. In recent years, its effectiveness in nourishing and revitalizing hair has sparked interest in the beauty industry. Let's delve deeper into what pine seed hair oil is and how it works its magic.

Pine seed hair oil, also known as pine nut oil, is extracted from the seeds of pine trees, predominantly found in regions like Siberia, Korea, and China. These seeds are rich in essential fatty acids, antioxidants, vitamins, and minerals, all of which contribute to their potent hair-nourishing properties.
How Does it Work?
1. Nutrient-Rich Composition: Pine seed oil is packed with essential nutrients such as vitamin E, vitamin K, and a variety of fatty acids including omega-3 and omega-6. These nutrients deeply penetrate the hair shaft, nourishing the hair follicles and promoting healthy hair growth.
2. Moisture Retention: One of the key benefits of pine seed oil is its ability to moisturize the hair and scalp. Its lightweight texture allows it to be easily absorbed, leaving behind soft and manageable hair without greasiness. By locking in moisture, it helps prevent dryness, breakage, and split ends.
3. Antioxidant Protection: The antioxidants present in pine seed oil help protect the hair from environmental damage caused by factors such as pollution, UV radiation, and free radicals. This protection helps maintain the health and vitality of the hair, preventing premature aging and brittleness.
4. Strengthening Properties: Regular use of pine seed hair oil can strengthen the hair shaft, reducing breakage and promoting overall hair resilience. It helps improve the elasticity of the hair, making it less prone to damage from styling tools and harsh chemicals.
5. Scalp Health: A healthy scalp is essential for maintaining beautiful hair, and pine seed oil can help achieve just that. Its anti-inflammatory properties soothe irritated scalp conditions such as dandruff and scalp itching, promoting a balanced and healthy scalp environment for optimal hair growth.
How to Use Pine Seed Hair Oil?
Pine seed hair oil can be used in various ways depending on individual preferences. It can be applied directly to the scalp and hair as a pre-shampoo treatment, mixed with other hair oils, or incorporated into homemade hair masks. For best results, massage the oil into the scalp and leave it on for at least 30 minutes before rinsing off with a gentle shampoo.
In conclusion, pine seed hair oil is a natural elixir for promoting healthy and beautiful hair. Its nutrient-rich composition, moisturizing properties, antioxidant protection, and scalp benefits make it a valuable addition to any hair care routine. So, if you're looking to revitalize your locks and achieve luscious, vibrant hair, why not give pine seed hair oil a try? Your hair will thank you for it!
0 notes
Text
The Power of Vitamin C Toner: Your Key to Smoother, Brighter Skin
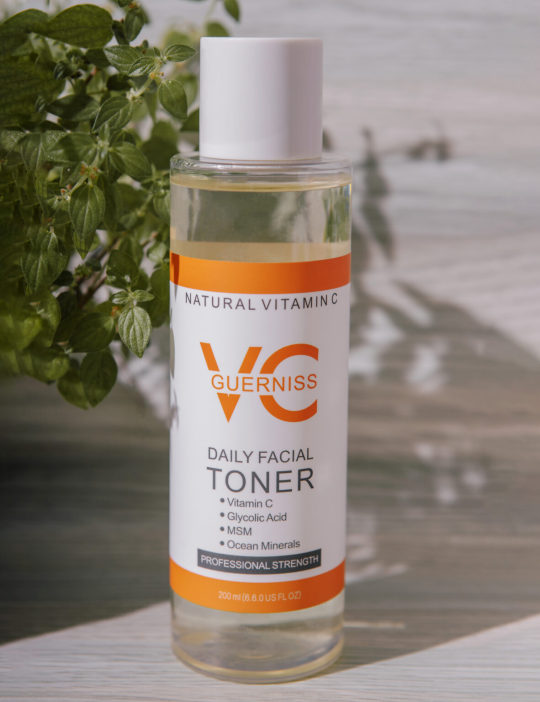
Vitamin C, renowned for its antioxidant properties, is a potent weapon against environmental aggressors like pollution and UV rays. When applied topically in the form of the best toner for glowing skin, it penetrates deep into the skin, neutralizing free radicals and promoting collagen production. As a result, pores appear smaller, and skin texture becomes smoother, giving you a refined, airbrushed look.
Furthermore, Vitamin C toner illuminates your complexion by fading dark spots, hyperpigmentation, and acne scars. Its brightening effect is attributed to its ability to inhibit melanin production, revealing a more even skin tone with a youthful glow.
Incorporating Vitamin C toner into your daily skincare routine is simple yet transformative. After cleansing, apply a few drops onto a cotton pad and gently swipe across your face and neck. Follow up with moisturizer and sunscreen for maximum protection and hydration.
Experience the transformative power of Vitamin C toner and unlock the secret to smoother, brighter skin. Embrace the glow and radiate confidence with every step of your skincare journey.
#beauty tips#glowingskin#skincareroutine#antioxidantbenefits#healthycomplexion#Vitamin C Toner#glowing skin#Collagen production
0 notes
Text
The Benefits of Orange Body Scrubs for Healthy, Glowing Skin

Ingredients:
- 1 cup of granulated sugar or sea salt (for exfoliation)
- Zest of 1 orange (for fragrance and additional skin benefits)
- 1/4 cup of coconut oil or olive oil (for moisturizing)
- Optional: a few drops of orange essential oil for a stronger fragrance
Instructions:
1. In a bowl, mix the sugar or salt and orange zest until well combined.
2. Gradually add the coconut oil or olive oil to the mixture until you reach your desired consistency. You want the scrub to be moist enough to hold together but not too oily.
3. If desired, add a few drops of orange essential oil for a stronger orange scent.
4. Transfer the mixture into a clean, airtight container for storage.
To use the orange face scrub:
- Take a small amount of the scrub and gently massage it onto damp skin in circular motions.
- Focus on areas with rough skin or dry patches, such as elbows, knees, and feet.
- Rinse off with warm water and pat your skin dry.
- Follow up with a moisturizer to lock in hydration.
Using this orange body scrub regularly can help exfoliate dead skin cells, improve circulation, and leave your skin feeling soft, smooth, and rejuvenated. Remember to perform a patch test before using any new skincare product, especially if you have sensitive skin or allergies. Enjoy your spa-like experience at home!
#glowingskin#beauty tips#skincareroutine#body scrub#face scrub#healthycomplexion#vitamin c#orange#scrub
0 notes
Text
Secret to Silky Smooth Skin
In the realm of skincare, Shea butter stands as a timeless ingredient revered for its unparalleled moisturizing properties. When infused into body lotions, it becomes a luxurious elixir, transforming dry and lackluster skin into a radiant and supple canvas. Let's delve into the wonders of Shea butter body lotion and why it deserves a prime spot in your skincare routine.
One of the most remarkable qualities of Shea butter body lotion is its versatility. Whether you're battling winter dryness, soothing sun-parched skin, or simply seeking everyday nourishment, this lotion caters to diverse skincare needs. Its non-greasy texture ensures quick absorption, leaving behind a velvety smoothness without clogging pores.
Furthermore, Shea butter body lotion holds immense therapeutic potential. Its natural anti-inflammatory and healing properties make it ideal for soothing irritated skin conditions such as eczema, psoriasis, and dermatitis. Regular use can promote skin elasticity, diminish the appearance of scars, and even alleviate muscle tension through gentle massage.
Beyond its skincare benefits, Shea butter body lotion offers a sensorial experience that indulges the senses. Infused with delicate fragrances or left unscented for sensitive skin, it envelops you in a cocoon of luxury, elevating your daily skincare ritual to a pampering spa-like experience.
In essence, Shea butter body lotion transcends mere skincare; it embodies a holistic approach to self-care, nurturing not only your skin but also your well-being. Embrace the nourishing embrace of Shea butter, and let your skin revel in its transformative touch.
0 notes
Text
Hyaluronic Acid Serum for Moisturized and Hydrated Skin
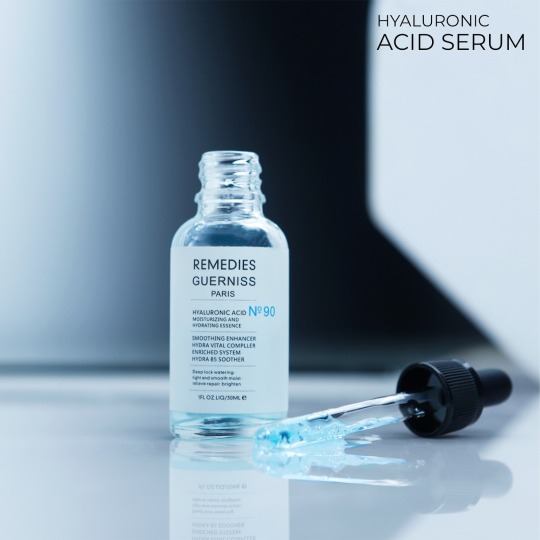
Hyaluronic acid is a naturally occurring substance in the body, renowned for its capacity to retain water. In skincare, it acts as a humectant, drawing moisture from the environment into the skin and preventing dehydration. Unlike heavy creams or oils that can feel greasy or occlusive, hyaluronic acid serum is lightweight and easily absorbed, making it suitable for all skin types, including oily and acne-prone skin.
One of the primary benefits of hyaluronic acid serum is its unmatched ability to replenish and maintain optimal hydration levels in the skin. By delivering intense moisture deep into the skin's layers, it helps plump up fine lines and wrinkles, giving the complexion a smoother and more youthful appearance. With regular use, hyaluronic acid serum can also enhance the skin's natural barrier function, fortifying it against environmental aggressors and preventing moisture loss.
Moreover, hyaluronic acid is renowned for its soothing properties, making it an ideal solution for sensitive or irritated skin. Whether you're dealing with redness, inflammation, or sensitivity, incorporating a hyaluronic serum into your skincare routine can help calm and hydrate the skin, promoting a more balanced and comfortable complexion.
When selecting a hyaluronic acid serum, opt for high-quality formulations that contain pure hyaluronic acid and minimal additives or fragrances. Apply a few drops of the serum onto clean, damp skin, gently patting it in until fully absorbed. Follow up with a moisturizer to seal in the hydration and maximize the benefits.
In conclusion, hyaluronic acid serum is a skincare essential for anyone seeking to achieve moisturized, hydrated, and healthy-looking skin. Its unparalleled ability to attract and retain moisture makes it a game-changer in the pursuit of a radiant complexion. Embrace the hydrating power of a hyaluronic acid serum and unlock the secret to dewy, luminous skin.
0 notes
Text
The Power of Melasma Toners for Flawless Facial Skincare
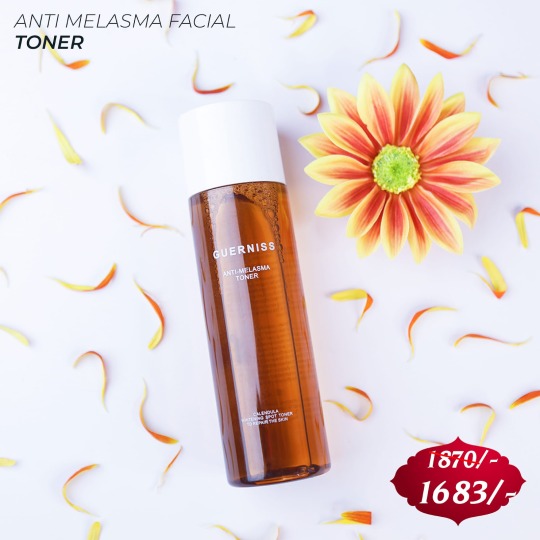
Melasma toners typically contain a blend of active ingredients like hydroquinone, kojic acid, vitamin C, and licorice extract, known for their skin-brightening properties. These ingredients work synergistically to inhibit melanin production, fade existing pigmentation, and promote a more even skin tone.
Regular use of a melasma toner can help to diminish the appearance of dark spots, while also refining the skin's texture and enhancing its overall radiance. When incorporated into a comprehensive skincare routine that includes sun protection and gentle exfoliation, the results can be even more pronounced.
When selecting a melasma toner, opt for products with clinically proven ingredients and gentle formulations suitable for your skin type. It's also essential to be patient and consistent with your usage, as melasma requires ongoing management and diligent skincare habits.
In conclusion, a high-quality melasma toner can be a game-changer in your quest for clear, luminous skin. By incorporating this targeted treatment into your daily regimen, you can take significant strides towards reducing the appearance of melasma and achieving a complexion you'll love to show off.
0 notes