she/her | Side blog where I put all of my gunpla stuff | pfp by sumjag | Main Account: @selkieshark
Last active 60 minutes ago
Don't wanna be here? Send us removal request.
Text


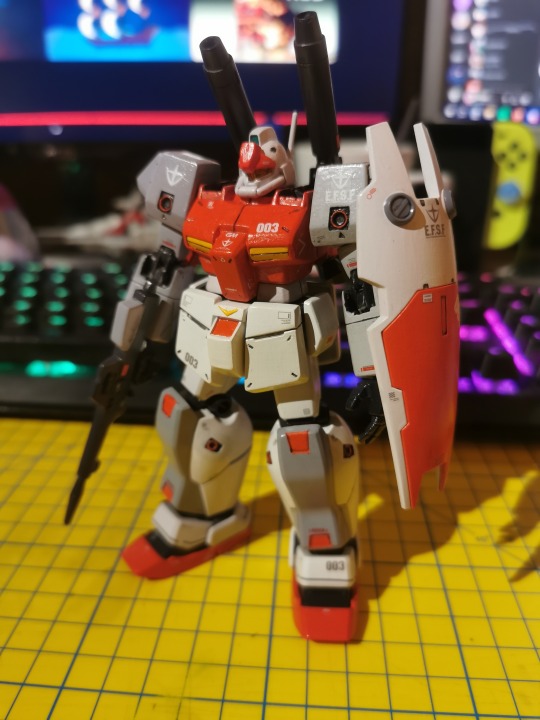
Here's a post to let yous know I'm still alive and building model kits! Finished off the Origin RX78 I started a while back and built the zowort heavy as something simple to get me back into the hobby cause it's really been a while.
Hopefully more kits to come as I get through my backlog and hopefully get stuck into some larger projects in the future!
11 notes
·
View notes
Text


HG 1/144 Principality of Zeon Mass Production Mobile Suit gMS-01 "Gelgoog" (Shiiko Sugai Colours)
Another GQuuuuuuX kit! This was one of the first main series kits that I really wanted to get my hands on, primarily due to its resemblance to my favourite suit design, the GM. It's an incredibly impressive kit, achieving some really notable colour separation and flexibility.
Despite being a Zeonic suit and the GQuuuuuuX universe's version of the Gelgoog, this suit more closely resembles the GM from the main UC universe. The reasoning behind this is pretty interesting - after Char steals the Gundam, he tells Zeonic to stop production of their current projects - their late war suit being the MS-14A Gelgoog - and begin reverse engineering the Gundam into a mass production suit. So Zeonic's new suit, the first proper gMS line mech, resembled a mass production Gundam - a GM (although the standard colours were still the green used on the original UC version of the Gelgoog). You can see some of Zeonic's design language in the suit still, especially retaining the Gelgoog's "snout". Funilly enough, it shares more design concepts from the later Gundam QuuuuuuX then it seems to from the original Gundam, especially with the arm design.

As with the other GQuuuuuuX kits, the colour separation is excellent, with the only correction needed being a little grey on the boosters in-between the piping details, which is honestly a really minor fix compared to a lot of other colour innacurate HGs. I was rather unhappy with how Bandai chose to depict the visor however, with it being a simple gloss green piece without even any metallic injection or shiny foil sticker. To give it a little more impact, I repainted the piece with a blue/green metallic marker, and added a little of my UV-reactive fluorescent green metallic marker to the three "eye" parts to get them to glow like they do in the box art.
Apart from this, and my usual weathering on the grey parts, there wasn't any other detal to add to the kit. There's a single detail sticker for Sugai's custom unit insignia, although I wish there were a few more markings. The build process was super streamlined - the arm really only contains 5 parts and still has more range of motion than a lot of older and more complex arm designs. There's some nice detail on the legs to achieve the yellow propellant tanks built into the legs while maintaining full colour separation.

There's a nice set of accessories for this kit. There are the two beam spray guns, redesigned to help them fit in with GQuuuuuuX's art style, as well as a beam saber with two beam effects. A cute gimmick of this kit is the fact that you can attach one blade to either end of the beam saber, reproducing a version of the beam naginata that the original UC Gelgoog had.


Another nice detail is an extra piece that clips to the back-skirt, that holds both beam spray guns and the beam saber. It's nice to be able to store all the extra weapons on the kit itself, rather then them getting lost in storage.
The kit also comes with an open left hand, and a specialised left-hand piece to replicate the "stigma" weapon that Sugai uses in the show. It's such a thematically interesting weapon - it's the communications cable that the mech uses to circumvent lack of radio communications due to Minovsky particles, but used as a sort of Scorpion-esque grappling tool, just like how Newtype abilities are co-opted for war instead of for communication. It's been replicated pretty faithfully, although I think the wire used is a little thick, given how the wires in the show are so thin as to be almost invisible.

I'm really pleased with how this kit turned out. I think it ended up being a super clean build, and the details really pop, plus it's a super easy and fun kit to pose. I might end up getting Bocata's custom as well somewhere down the line, given its Zeta-inspired colouring, but for now, my next project is going to be the Red Gundam (so I can get it out before the series finishes).

84 notes
·
View notes
Text


HG 1/144 Prototype Earth Federation Forces Mobile Suit RX-78-3 "G3 Gundam (Trans Pride Livery)" [Beyond Global] (Bling Knockoff)
Happy Pride everyone!!! This year's pride month build is pretty similar to last year's, adding a trans pride colour scheme and gradient shield onto an otherwise pretty standard kit.
This kit is a Bling knockoff of the Beyond Global version of the RX-78-2, with a custom cyan/magenta colour scheme that I felt would fit perfectly with a trans pride build. Bling's knockoff is pretty much identical to the base RX-78-2 Beyond Global, however unfortunately instead of recoloring the plastic for this scheme, they've simply painted over the sprue, which meant I needed to manually paint over all the nub marks. It's otherwise a very impressive knockoff, with smooth painting, perfect detail, and even a set of knockoff G3 decals with plenty of spares for customisation. The G3 is essentially another RX-78 that made it off Side 7 in pieces, and in the novels replaced Amuro's main Gundam later in the series.

The Beyond Global kit is nominally a High Grade, but it's designed to have as much articulation as possible, and be as colour separated and detailed as a Real Grade kit. There's a ton of articulation, including pivots at both the wrists and upper arm, a cleverly designed shoulder and torso for shoulder articulation, and even a torso flexion and ab-crunch! It can easily get a to lot of the human-like poses you see in the anime.

Apart from fixing up the visible nub marks with an extra layer of paint, and a basic silver and gunmetal weathering for all the grey parts, I added a trans flag and a trans rondel to emphasize the trans-flag adjacent colour scheme. I'm really proud of how the flag turned out, as I feel it's representative of my improved masking skills. The rondel is a little messy, unfortunately, but I still think it adds to the kit. I also ended up painting the eyes and head sensors with my gold marker, which helps them stand out, especially since there weren't any foil stickers included.

Apart from this, the kit was so well colour separated that there was no need for any further touch ups, apart from applying decals. I'm not sure what decal sheet was included, but it's one of the highest quality decal sets I've ever used. The decals are fairly durable and extremely thin, with minimal borders, and they lay super flat against the model. After topcoating, they look as though they've been tampo printed onto the kit, unlike Bandai's, which often notably stick up a little from the surface. I was even able to mask and paint on top of one on the thigh with no issues.

There's a nice little instruction sheet induced for decal placement, but I also improvised a little and included a few of my own spare decals to help bring everything together, especially on the shield and the beam rifle.
As above, the kit is super poseable, and can easily hit and maintain a lot of anime accurate poses, especially given the lack of polycap usage (although a lot of the plastic parts still resemble the polycaps they were derived from). I had a lot of fun trying out poses I couldn't quite hit with my older Origin version of the RX-78-2.

This kit comes with a few hand options for posing, including an open left hand, two open fists for the beam sabers and shield, and a right hand pistol grip. There's also the standard gundam Beam Rifle, with a little peg for attaching to the rear skirt, and both a curved and straight beam saber effect for different poses.


Overall, this is one of my favorite builds so far. I really enjoyed the decal process, and I love how the unique colour scheme helps it stand out on my shelf.

129 notes
·
View notes
Text


HG 1/144 E.F.S.F. (Principality of Zeon Capture/Upgrade) Psycommu Prototype Mobile Suit gMS-α "Gundam" (Char Recolour 0085 ver.)
Time for the Red Gundam, hopefully in advance of it returning for the finale! The Red Gundam is one of the more popular designs from GQuuuuuuX, and it's not unwarranted. It's super detailled, with lots of cool industrial detail including the exposed ammo chains for the head vulcans, and black and orange caution markings, although unfortunately a lot of these need to be painted on rather than being marking stickers.
In universe, the "Red Gundam" is simply a descriptive term, with the unit being the original E.F.S.F. RX-78-2 stolen by Char, painted in his signature red, and with Psycommu technology added, alongside 6 "bits", wireless drone weapons controlled by the Psycommu unit (which you can see as the extra grey parts on either side of the head). Funnily enough, all that was done for the shield was painting over the E.F.F. star with a Zeonic rose insignia. By its modern appearance in UC0085, the insignia is wearing off, and only two bits remain.

Similarly to the Gundam QuuuuuuX, while a lot of the colour separation is adequately done, there are still a ton of details that need to be filled in by painting. All of the orange detailing on the thighs, the orange and grey parts on the booster nozzles on both bits, and the orange piping on the hands and wrists all need to be painted, as well as a few of the smaller auxillary face cameras and some smaller grey details on the knees and backpack. There are some colour correction stickers for the red detailling on the bit nozzles and the black sections on the shield, as well as a couple of eye stickers, however I elected to paint these all as well for consistency, especially with the eyes, which were missing two stickers for the lower "eyes". The black sections on the shield not being colour correct is understandable, but a little disappointing. I do like the effect it gives in concert with the Zeonic rose, appearing like the wings of the Neo Zeon insignia.
I also used a little paint to detail the ridges on the bit fuel tanks, the beam rifle sensor, and the opening at the top of the shield, and added my usual metallic weathering to all of the grey parts.

There were also a few metallic stickers for the shoulders that added green and red "landing lights", which reminded me of the lights on the shoulders of the F00 1/1 Gundam model in Japan, and some green metallic stickers for the magnetic hardpoints on the shoulders, arms, and lower legs.
Theres a basic marking sticker for the Zeonic rose on the chest, and two options for the shield - a 0079 version in red and a more deteriorated 0085 version. As this kit only comes with 2 bits, like the 0085 appearance, I used the more deteriorated sticker.

This kit comes with a lot of cool extras. There's two open fist hand options (but unfortunately only a single left handed open hand, unlike the two included with the GQuuuuuuX). There's also the gundam shield, which can also attach to any of the 3mm hardpoints, as well as be held upright in an open fist or secured to a back attachment piece.
The version of the beam rifle included in the kit is a really interesting interpretation of the weapon, adding detail while remaining super faithful to the lines and silhouette of the original version.
There's also the afforementioned bits. These can can attach to any 3mm peg, including the 6 peg-equipped hardpoint pieces in the kit, as well as to any action base. It doesn't look like there's any way to easily chain them together in groups of three like in the anime, however.

There are two basic beam saber effects for the kit, although the pink colour seems to have been updated, making it more vibrant and opaque, and slightly pearlescent. It's certaintly a welcome upgrade, as it helps the colour stand out against all the salmon and red of the mobile suit itself.

The coolest part of this kit has to be the Gundam Hammer. GQuuuuuuX has upgraded the design in an interesting way, including some guiding nozzles (which I detailled in orange). This kit includes a runner from the RG 2.0 Gundam to allow for a poseable chain for the flail like weapon, which is likely where a lot of the parts budget went to (robbing us of the extra bits). This is fine from my point of view, since it lets us have the Gundam Hammer inthe GQuuuuuuX style without having to fork over for the P-Bandai Light Guncannon Sayla custom. There's a little specialised piece that lets it be held up by an action base, and it has just the right amount of play to it to be poseable without feeling too stiff. I just wish the chain was a little thinner, so it could be held in one of the other hands for a two handed pose.

This build was really fun to do. While I feel the hip design was a little too restrictive, limiting range of motion, everything comes together quickly and smoothly and you can get the kit to stand securely and hit a bunch of cool poses. I think, given the restrictions of HG pricing, this is probably one of the best HG kits to come out of the GQuuuuuuX line, although you do need to put in the paintwork to make it look good.

This pretty much completes my GQuuuuuuX collection for now, although I'll be keeping my eye out for the GFreD later in the year.
35 notes
·
View notes
Text


best girl deserves a proper custom
Kit is the HG Chuchu's Demi Trainer, plus the backpack gun from the Heindree Sturm, the heat hawk from the HGUC Zaku II, and the gatling barrel from the Demi Trainer Expansion Set.
Paints used:
Armor: Vallejo 72.013 Squid Pink and 72.014 Warlord Purple
Inner frame: Citadel Chaos Black primer drybrushed with Vallejo 72.052 Silver
Weathering: black paint applied with sponge and some more of the aforementioned Vallejo Silver drybrushed on top
788 notes
·
View notes
Text
my first gunpla!!
finally managed to find some time to build my first kit and it was a joy!
I had heard these kits were very well engineered but was still surprised at just how good the whole process felt, i can't wait to get my teeth sunk into the next kit.
I decided to start with Gundam Lfrith Thorn as she's one of my favs from my fav show and im even more in love with her design than i was before.


(more pics of the process below the cut)


55 notes
·
View notes
Text
my first gunpla!!
finally managed to find some time to build my first kit and it was a joy!
I had heard these kits were very well engineered but was still surprised at just how good the whole process felt, i can't wait to get my teeth sunk into the next kit.
I decided to start with Gundam Lfrith Thorn as she's one of my favs from my fav show and im even more in love with her design than i was before.


(more pics of the process below the cut)


55 notes
·
View notes
Text
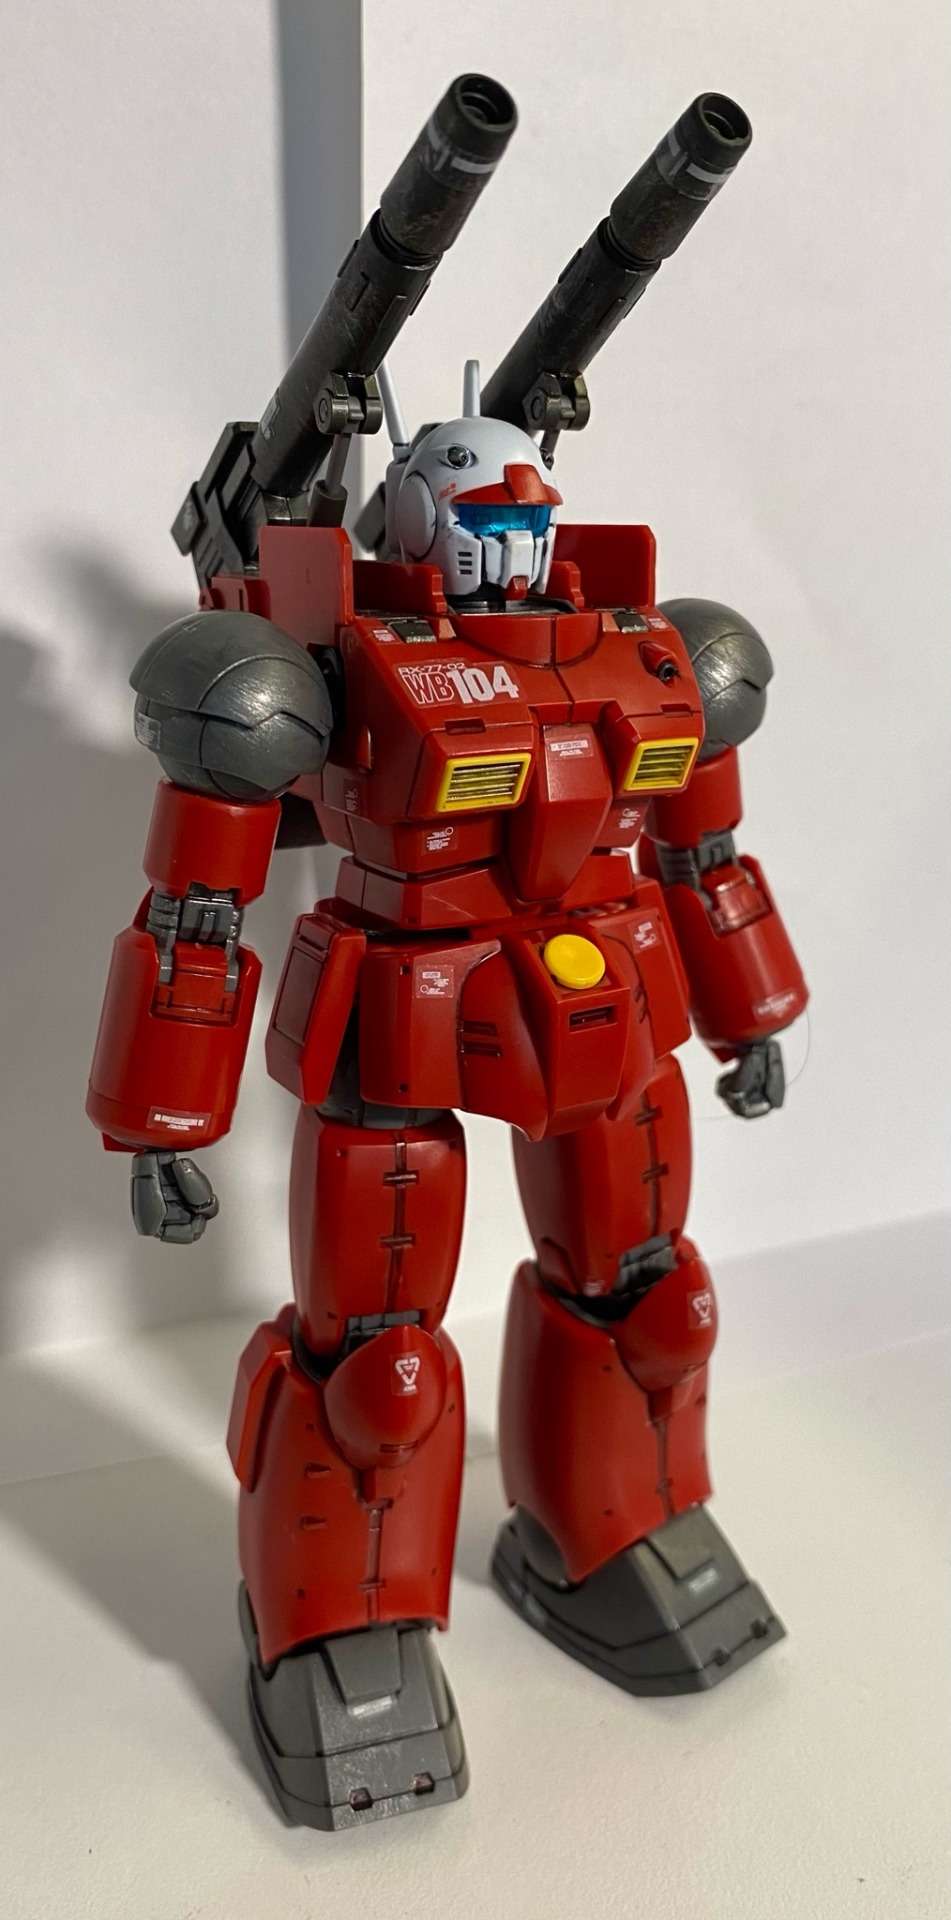
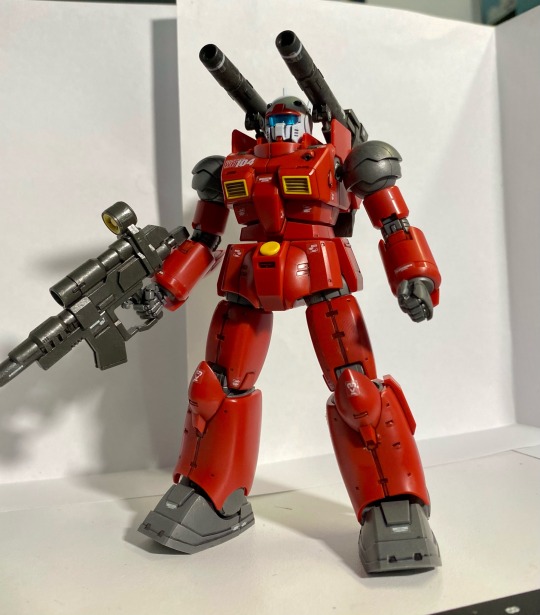
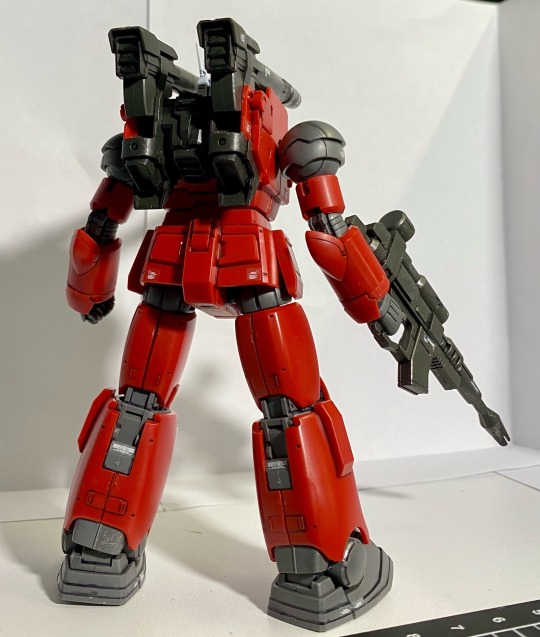
HG 1/144 E.F.S.F RX-77-02 Mid-Range Support Mobile Suit “Guncannon” Unit 104 (Cucuruz Doan's Island Ver.)
Been sitting on this kit for quite some time! While some older High Grade kits feel very much like starter kits, and often have rather flat or minimal detail, this kit from 2023 is almost as detailed as a RG kit (and at half the price!).
One detail I really like about this kit is the functional pistons under the cannons, which can expand and contract as you move cannons up and down. This gimmick makes the kit feel really premium, and is a cool detail considering older HG might've just had static molded parts. 2023's line-up indicates a very promising future for HG kits.
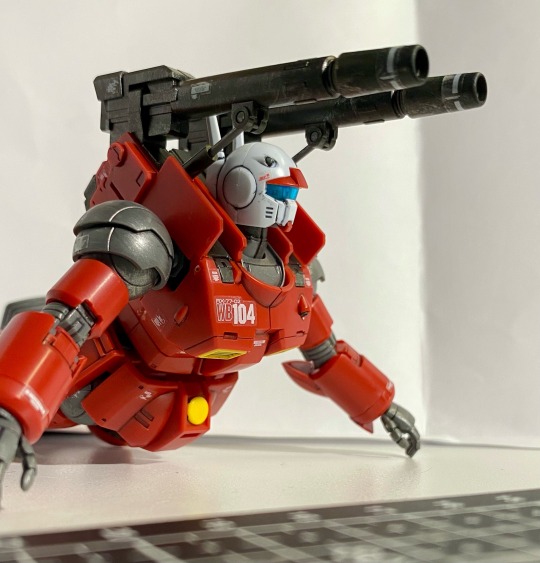
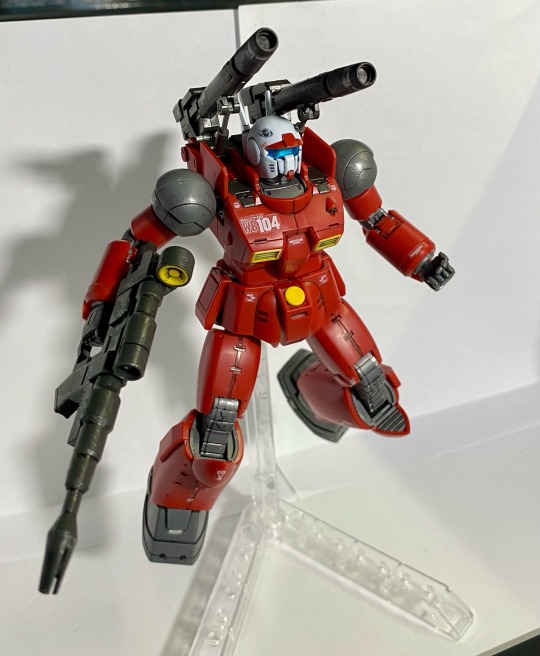
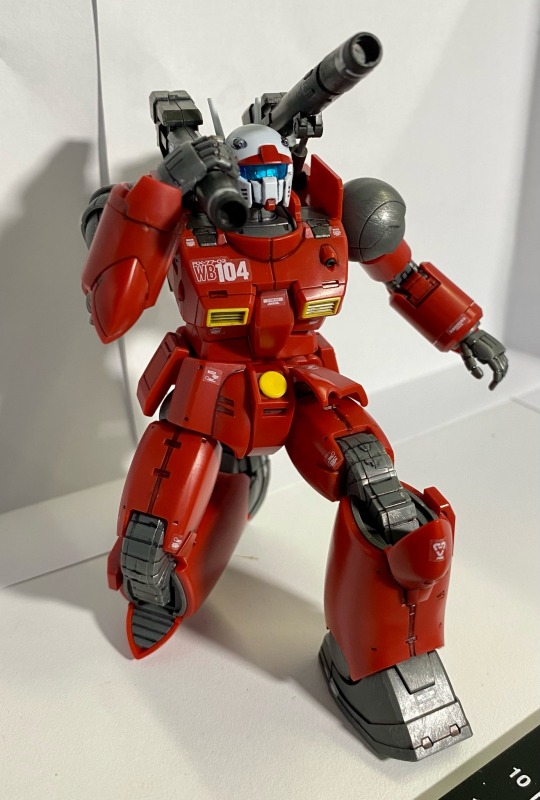
The Cucuruz Doan's Island version of the Guncannon is quite similar to the The Origin version, but has some neat extras including a full set of pre-posed hands (WFM collectors will know the frustration of HG kits missing the open hand pose) as well as an optional extra missile-pod backpack (for the Unit 109 alt. build, although I'm not removing my 104 sticker just to change the backpack).
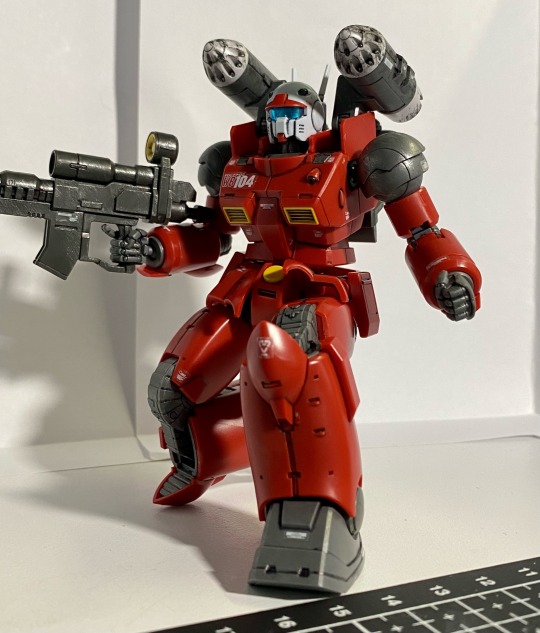
The poseability of the kit is really impressive, and it's a very solid kit with appropriately stiff joints despite the reliance on polycaps (which is surprising for a 2023 kit!). It holds poses very well and the colour separation is super impressive.
Definitely something worth adding to your collection both in terms of build enjoyability and final look!
62 notes
·
View notes
Text

HG 1/144 Principality of Zeon Prototype Psycommu Mobile Suit gMS-Ω "GQuuuuuuX"
GQuuuuuuX!!!! I was really lucky to get this kit on pre-order, and it arrived earlier this week, well before it'll be available in retail over here.
This kit was a tall order for a HG, given how detailed and complex the suit design is, but Bandai really knocked it out of the park. Just like a lot of the newer wave of HG kits, such as the WFM and SEED Freedom ones, polycaps are nowhere to be seen, giving it the ability to hold stiff poses.
I was initially a little worried about the skeletal foot design, as it doesn't look like it'll let the suit stand with any stability, however it seems to work fine, and there's some nice poseability with the ankle to help it balance.
In terms of colour separation, it's pretty good. The GQuuuuuuX is really detailed, with tons of layering and colored stripes, but the kit manages to replicate a lot of it through the build alone. There are quite a few yellow foil colour correcting stickers, as well as some fiddly yellow sticker decals to replicate markings, which went on relatively painlessly.
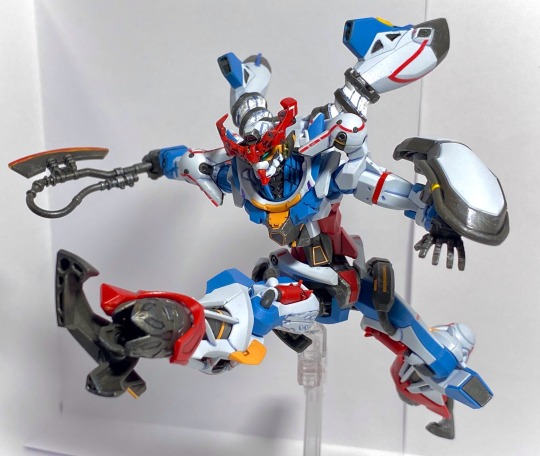
There was still quite a bit of painting necessary, especially on the beam rifle and backpack. There are some small white details on the handle which need to be done, and the piping on the thrusters also needs to be painted white. There are also a couple of extra spots along the suit where yellow detailing needs to be done manually, including on the shoulders and beam saber hilts, as well as the white arrows on the v-fin horns. The core-fighter cockpit also needs to be painted metallic blue. There are lots of smaller details on the fingers that can be painted but were a little too small for me to bother.
In addition to colour correction, I painted a bit of the heat effect on the heat hawk blade, as well as adding in some weathering, which I did as usual with a gunmetal and silver drybrush, and some Tamiya silver pigment powder, as well as a little soot smudging on the foot-thrusters and beam rifle.

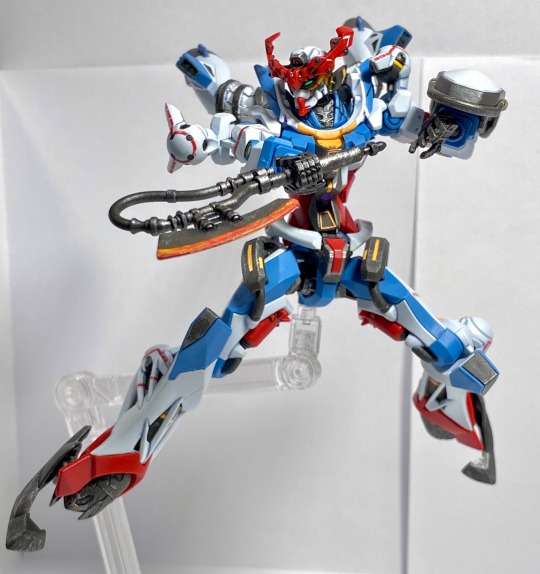
The kit comes with two weapon holding fist hand options as well as two open hands. It also comes with a few weapon options, including the industrial looking beam rifle, a large heat hawk, and two unique looking beam saber effects. These are done in a really nice trans-clear light green, with injection glitter, giving them a cool shine. The parts are sword-shaped, with a hollow space in the middle, giving them a super unique profile. There's a small shield that clips onto the suit's wrist, although I was a little disappointed it didn't have a logo decal on it.
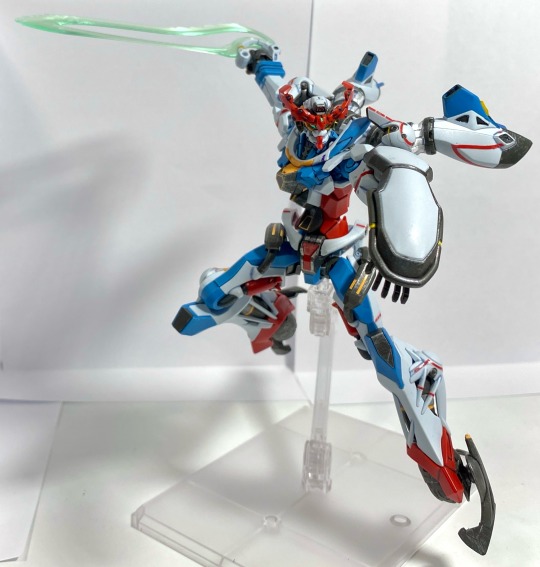
There's also an extra head option with the V-fin in Omega Psycommu deactivated mode, with the red parts folded over the eyes and front camera. You can also take the backpack off and add a part to recreate the core fighter, although this hasn't appeared on-screen yet, and the manual is unusually cagey about any details, meaning that they're probably going to reflect a major plot-point.
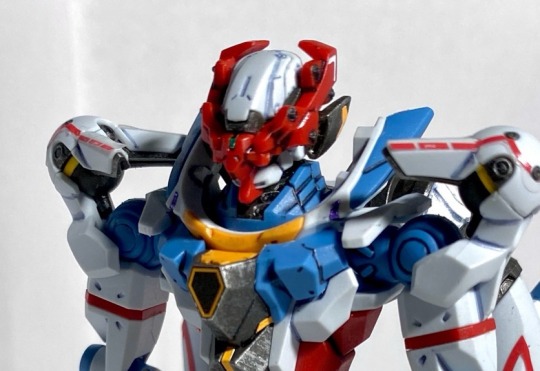
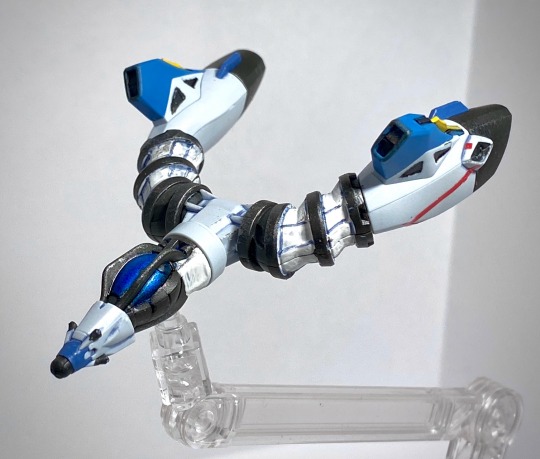
Overall the kit is a really fun and unique build, with tons of cool little details, such as the tanks and fuel piping winding around the legs, and the little bolt holes for the V fin. It's really flexible, with some clever design in the hips and waist. It poses solidly and goes together quite smoothly. If the GQuuuuuuX kit represents Bandai's ongoing plans for HGs, I'm definitely looking forward to the rest of this line.
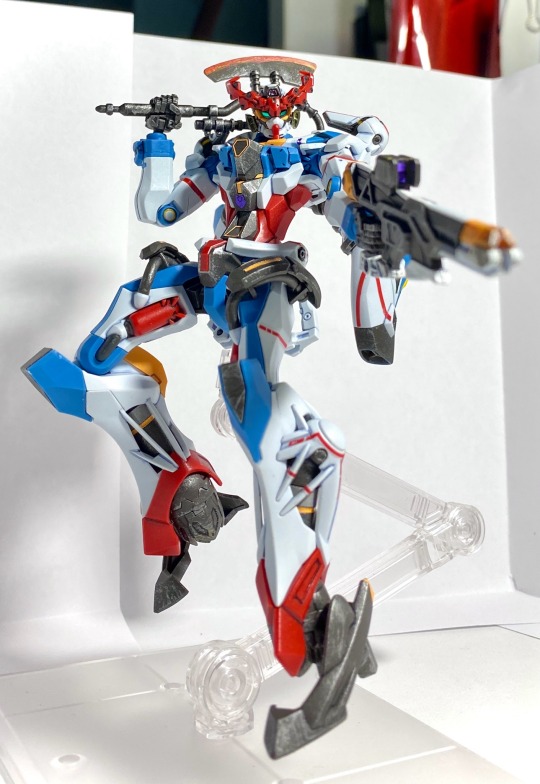
Hopefully the Red Gundam will be available soon!
#gunpla#plamo#gundam#mobile suit gundam#this looks incredible#well done#cant wait to get my hands on this kit
140 notes
·
View notes
Text
wait what the fuck, woodcarving gunpla?????
254 notes
·
View notes
Text

I actually finished this one a few weeks ago but I'm only getting around to posting it now, but here's the Michaelis! Left this one mostly OOB but did some minor modifications like panel lining and painting behind the visor with a chrome marker.
Really enjoyed the simplicity of this build! It shares a lot of parts with the Beguir-Beu so there was some familiarity between those two builds but it still felt very unique, especially the arm cannon weapon it has, very cool design!


For panel lining I opted to only use the fine tip marker and I think it works very well here! Especially on the larger recessed areas it works wonders to add that little bit of shading. My only problem with it is that it rubs off way too easily even just touching it with your fingers so I have to be careful handling it. Maybe next time I'll use some tamiya accent panel liner for those shading effects.
I don't have much else to say about this really! The articulation on the kit is fine, not the best in the HGWFM line by any means but it certainly gets the job done. I think the simplicity of the build ends up leaving the kit less articulate than others but that doesn't mean it can't strike a dynamic pose by any means! All the joints are solid enough and none of them are loose, though I worry that over time the clips on the arm cannon will loosen over time.
In the end I posed it together with my Darilbalde as a bit of an homage to the Guel vs Shaddiq fight in the latter half of the anime. I'm pretty happy with how it turned out!


40 notes
·
View notes
Text
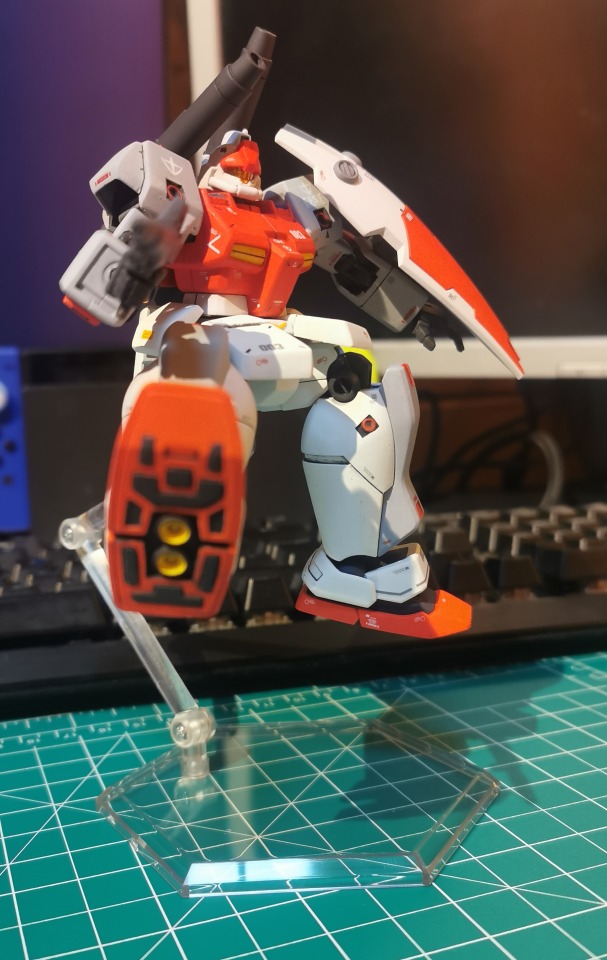
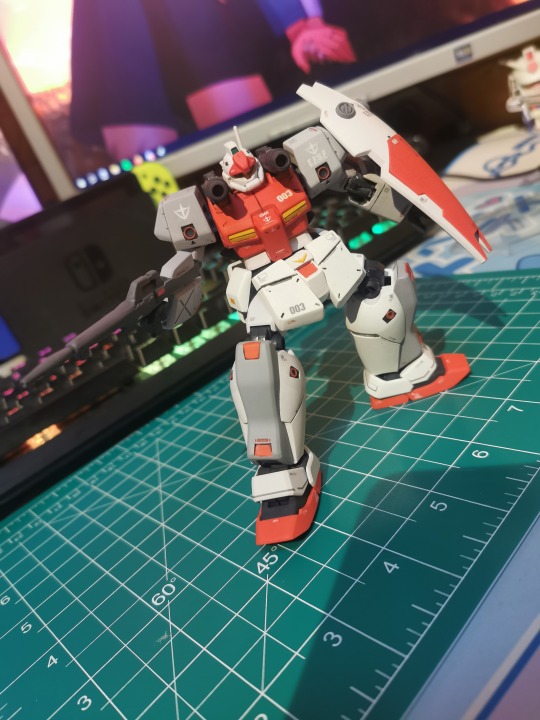
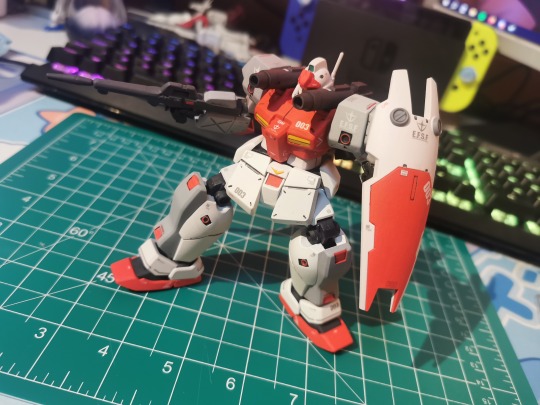
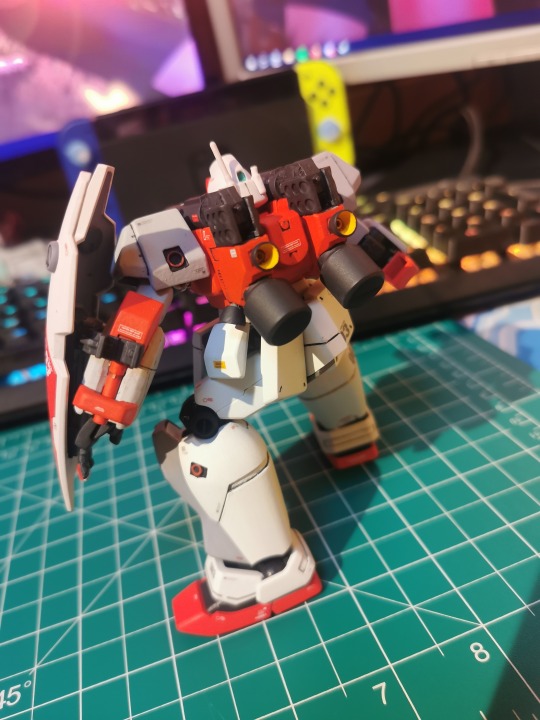
GM Cannon II (Space Command Type)
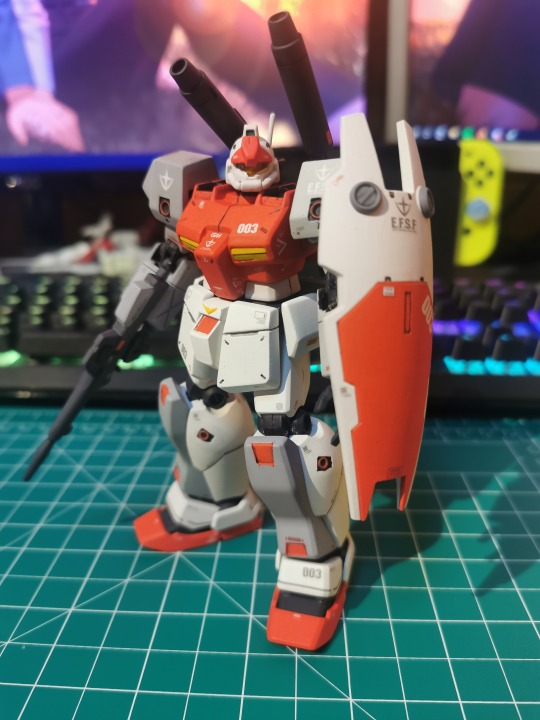
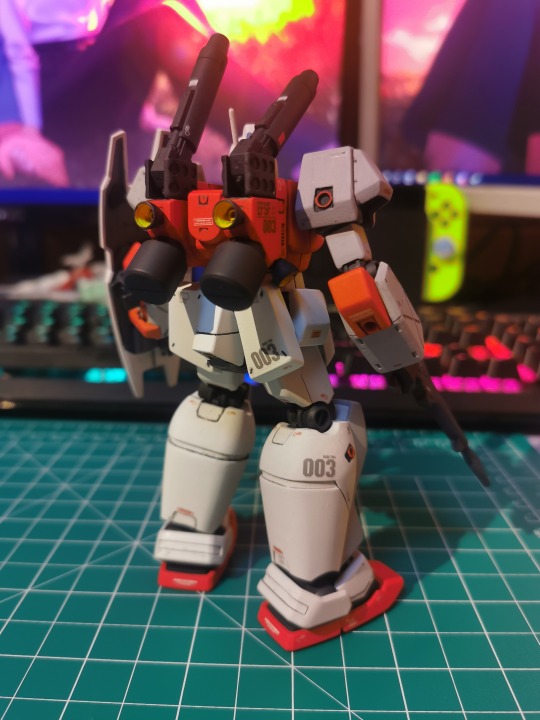
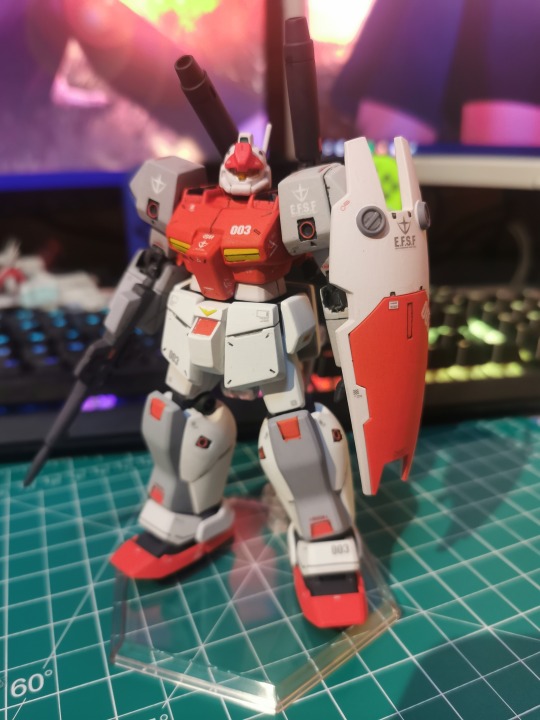
It honestly feels a little surreal posting this right before the new year rolls in, but it also feels so satisfying to put this project behind me so that I can focus on my backlog in 2025. This is a project I started a few months ago at this point, and at long last I can properly show it to you all! It's a custom colour scheme that I decided to paint on the GM Cannon II.
If you don't care to read about the process of painting this thing and just want to see some extra pictures and angles of the finished product, scroll down to the end of the post :)
I like the design of this mobile suit but I thought the original colour scheme was kind of gross and unpleasant to look at, so I decided that I would use this kit as a practice to familiarise myself with brush painting techniques. I decided to go for something simple enough and just adapt the GM Space Command colour scheme to use with the GM Cannon II. In case you haven't seen what the kit looks like out of box, here it is:
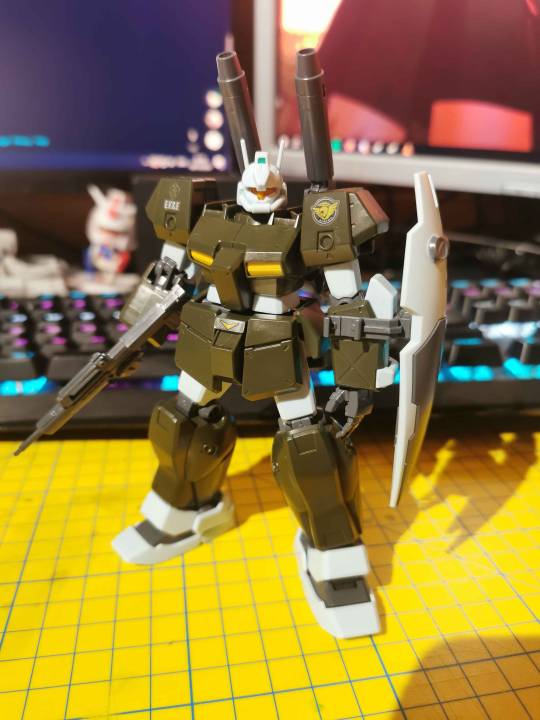
I originally expected this project to take me a few weeks, but it ended up spanning months, and for a first time attempt at this, I'm actually very proud of it! I think it looks very clean, and despite the GM Cannon II kit being kind of a piece of hot garbage when it comes to articulation and stability, it served as a good practice kit that I considered to be low stakes.
I'm not going to go into the entire process in detail about how to paint this and instead I will just point you towards the Tea and Gunpla youtube channel, specifically their video about brush painting gunpla. All of the videos on their channel are extremely informative, to the point and act as great tutorials for improving your gunpla customization skills.
The Process (Summarised)
To summarise the steps it took from start to finish though, I first had to familiarise myself with how the kit is assembled and identify the seam lines I wanted to remove (mainly around the arms, shoulders and legs). I then had to remove those seam lines, either by using plastic cement or putty, and then I had to sand every single part down so that paint would adhere to it more easily.
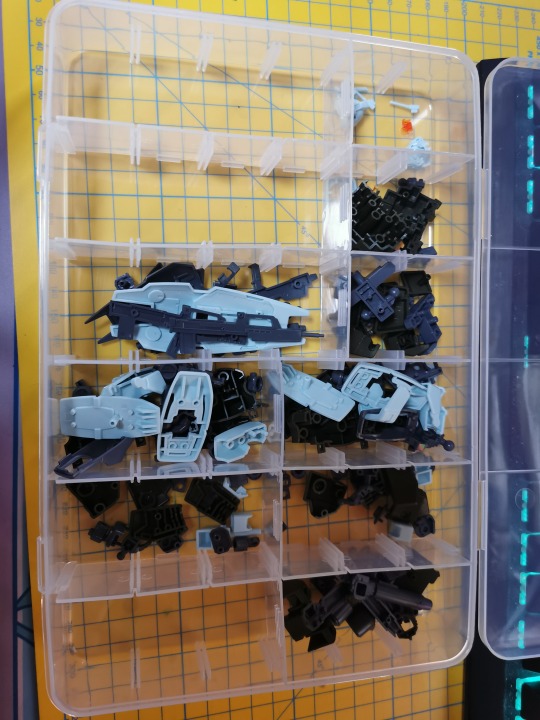
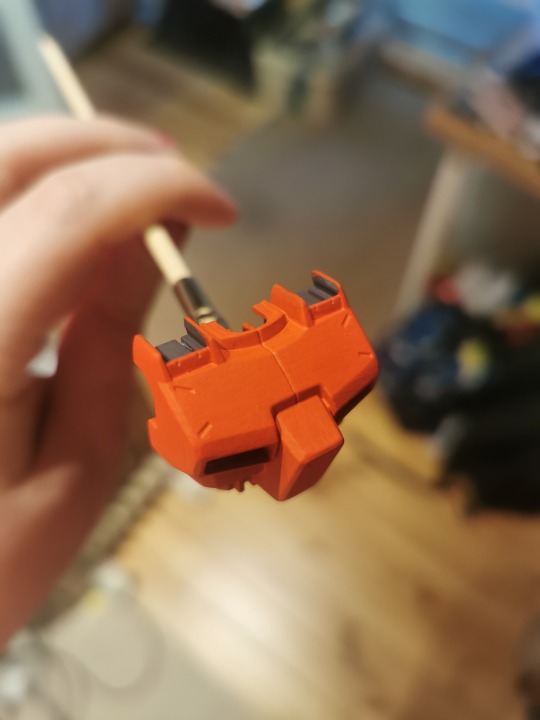
From there, I could start painting the kit, initially priming all of the parts and then painting them all with the respective colours I wanted them to be.
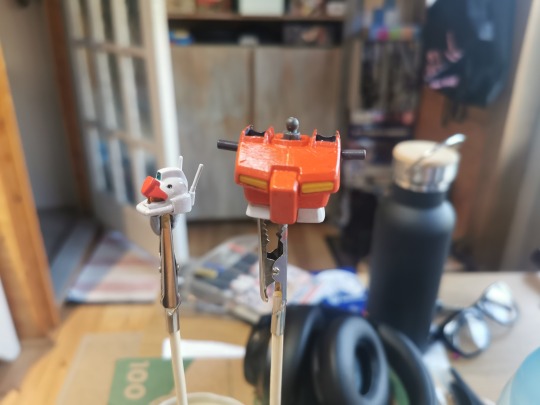
From there, my usual process would be to assemble the painted pieces very carefully as to not chip any paint, and then brush paint on a layer of gloss varnish in order to protect the paint and prepare the piece for panel lining and decals. For the decals, I used G-Rework's GM II decals, since there are no decals to be found for the GM Cannon II specifically and the GM II decals looked very good and appropriate for this kit.
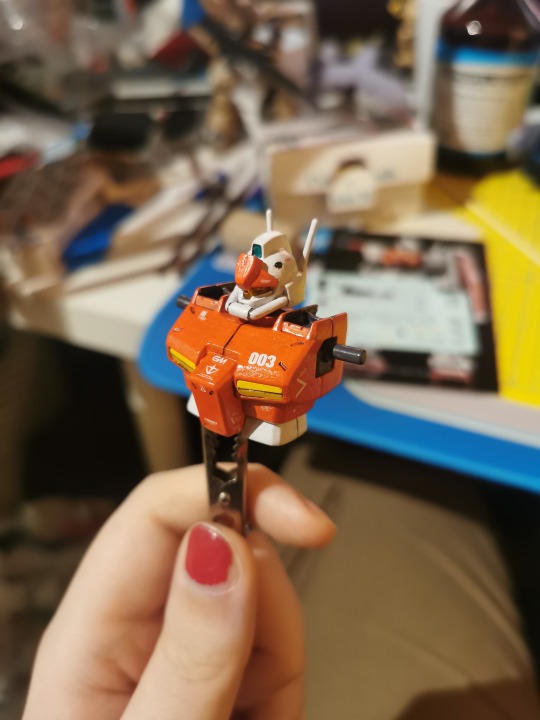
This process is repeated for the rest of the kit until everything is ready to be top coated with a matt spray coat.
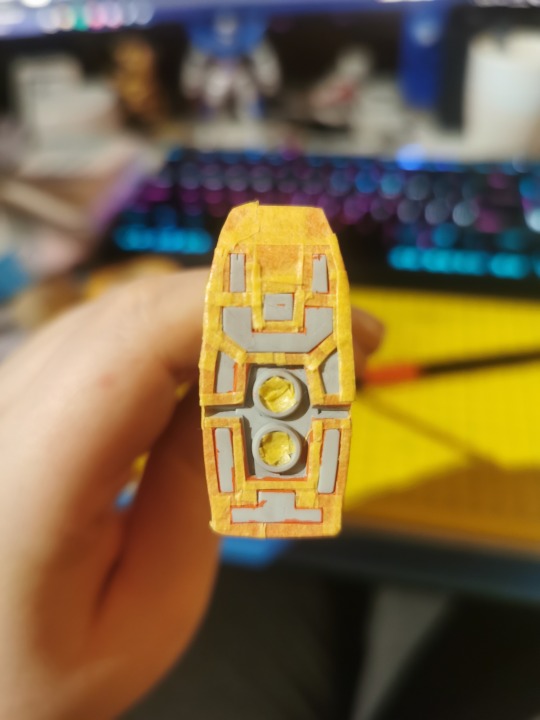
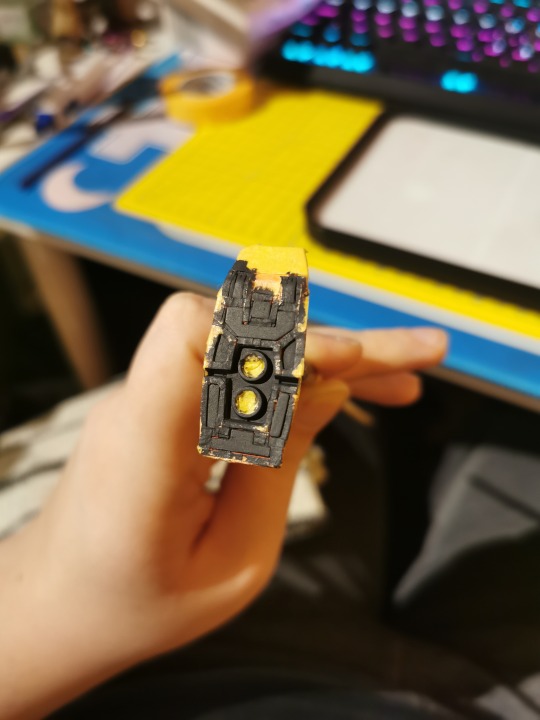
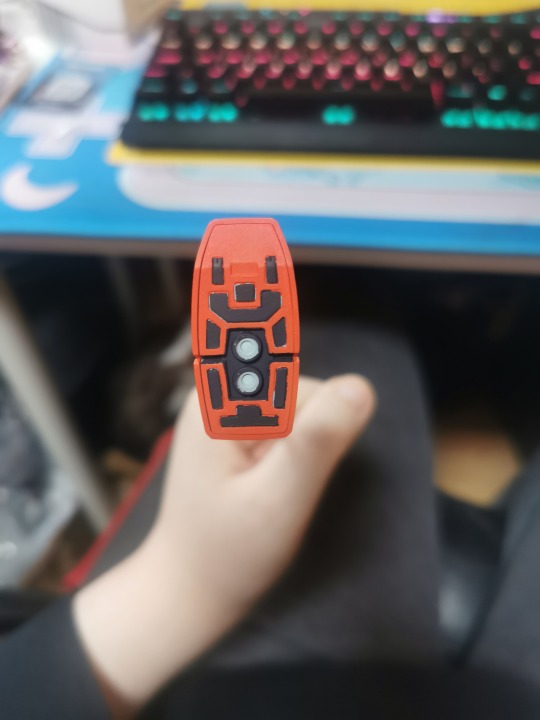
I incorporated some additional techniques to make the painting process a bit easier for myself when working on this kit, and the main one I want to point out is the use of masking tape to cover parts that you don't want to paint over. I found this to be most useful when painting the bottom of the feet, as I wanted to paint the thrusters on the feet as well as extra details in order to make it look nice, but I didn't want to stress myself out with needing to be precise when painting.
Lessons Learned
I highly recommend using masking tape when painting those kinds of details on a piece, though do be careful with it as you also risk the paint building up on the edges of the tape and making the finished paint job uneven and messy.
I unfortunately had some breakages on the kit as I was working on this project, the most noticeable one being one of the antennas on the back of the head breaking off. I tried to repair this using a piece of runner, but I decided it would be too much work in the long run so I decided to leave it. It's a practice kit after all, so I allowed myself to make some mistakes!
I also had the shield arm joints snap on me completely because I used too much gloss varnish on them and they stuck together, so do be careful when applying the brush varnish. I ended up fixing the arm using some plastic cement, but they no longer have any articulation and are basically stationary at the elbow joint. In future I will look into perhaps spraying the varnish on using a rattle can instead, but I have no idea when I will start another project like this lol.
This practice kit served as a very good lesson in how to pace my painting projects going forward. When working on this, I did every step one at a time for every piece of the kit. That is to say, I first sanded every piece, then I painted/panelled/decaled every piece, and then I matt coated every piece. That ended up being a mistake on my part, as it was incredibly easy to burn out of working on this project. I ended up missing the simplicity of just snap building a kit, and my one-kit-at-a-time policy will not work here for future. Next time I take on a project like this, I will do the painting in the background of other gunpla projects, and I'll treat it as more of a long-term side project.
I also learned to NEVER MIX PAINTS when working on a project like this, unless I'm mixing a large amount of a colour in advance to use multiple times. I originally didn't intend for the kit to have a two-tone white colour scheme with the offwhite and lighter gray, but a mistake when painting the gun arm made me improvise a bit and adopt the two-tone scheme. It ended up actually being a sort of happy accident, because I think it looks great, but keeping the colours consistent like that was a huge hassle and just added extra stress. In future I will be primarily using paints straight out of the bottle and minimising mixing paints.
One thing I didn't give enough attention to was priming my pieces. I sort of haphazardly primed my pieces for painting, and I should have been a lot more careful with it. I let primer build up in corners and it was unevenly applied, and it ended up making some of the painting take much longer than it should have, especially when painting offwhite on pieces that were originally darker in colour.
The last thing I would really want to mention is that matt coating certain colours, particularly metallic ones like what you can see on the head sensors, is not a great idea as it will end up dulling the colour. perhaps it might be better to spray a glossier coating on it, or leaving it un-coated so that the metallic aspect can shine through a bit more. It still looks pretty good overall I think, but definitely something to experiment with.
In Conclusion...
This was a really fun project, and while it was quite tedious and sometimes annoying, the finished product makes all that suffering worth it. I learned so many things and adopted new techniques that I can transfer into my usual gunpla works, which I'm really happy with. If you have any questions as to the process or anything else, feel free to ask! Reblogs are also appreciated <3
47 notes
·
View notes
Text


Starting the year off (relatively) simple with the HGUC Jesta! I think the kit I got must have been from a defective batch because literally all of the major armour pieces had flashing on them and I had to sand everything down so it didn't look awful. I also ended up removing the seam lines on the head, shoulders and arms mostly as practice.
Tried out the sticker decals for the first time with this kit and yeah I can see why people avoid these like the plague, they feel so cheap and look kinda terrible. I actually got a delivery for a bunch of water slide decals for some WFM kits and the RG 2.0 grandpa so I'm very excited to use those!


The next kit I have my eyes on is the Michaelis, which I don't plan on doing anything fancy with, just panel lining really. Will be a very welcome change of pace I imagine.
20 notes
·
View notes
Text


HG Immortal Justice Custom WIP
A new year comes with creating a new gunpla Custom, and it's the Hg Immortal Justice. With parts of the Hg Rising Freedom, add additional wings to the Immortal Justice Gundam. Think it fits well with the Immortal Justice wings. Always fun to customize and experiment with gunpla kits. Cheers to the New Year everyone!
7 notes
·
View notes
Text

Finished the Schwarzette today. First gunpla of the new year.
45 notes
·
View notes


