
Don't wanna be here? Send us removal request.
Statistics
We looked inside some of the posts by sida-wang and here's what we found interesting.
Average Info
Notes Per Post
0
Likes Per Post
0
Reblog Per Post
0
Reply Per Post
0
Time Between Posts
4 days
Number of Posts By Type
Text
17
Last Seen Tumblr Blogs


Fun Fact
Post activity is at the highest at 4:00 pm EDT; notes peak at 10:00 pm EDT.
Text
DAY 6
Date: 16 May, 2024
Time:13:00 PM - 5:00 PM
Location:Studio at 5 Kimber Street, Paddington, New South Wales 2021
Participants: Francis,Zinnia, Sida
Overview:
This week's primary tasks focused on editing interviews and supporting further exhibition promotions.
Chronological Record:
13:00 PM - 15:00 PM: Editing Interview Videos
- I integrated Francis's English audio recordings from last week into the existing Chinese timeline, synchronizing the visuals and audio to create a coherent English version.
- Edited the mutual interview video between Zinnia and Yuki, ensuring smooth transitions and clarity in dialogue.
15:00 PM - 15:30 PM: Break
- During the break, Zinnia shared insights into her daily workflow at the studio, discussing various aspects of her routine and offering tips on efficiency and creativity.
15:30 PM - 16:30 PM: Print Certificate of Authenticity
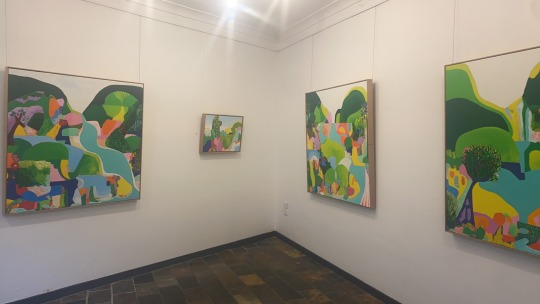
- Francis instructed me on printing certificates of authenticity for the "Daylight Moon" exhibit, crucial for both sales and collections.
16:30 PM - 17:00 PM: Talk with Artist
- Under Francis's guidance, I engaged in a conversation with the artist exhibiting downstairs.

Skills Learned and Application:
Besides editing, I gained significant knowledge in curatorial practices from Zinnia. The curatorial process is intricate, involving thorough research to identify suitable competitions, open calls, and exhibition opportunities. Effective communication is key, as it involves confirming participation requirements and deadlines. Zinnia’s approach of directly contacting organizers via emails or phone calls, instead of relying solely on automated systems, was an eye-opener. It showed the importance of personal touch and persistence in securing opportunities.
Analysis of Interviews and Events:
The artist's story was deeply moving. After dedicating twenty years to her family and her two sons, she made a courageous return to the art scene. This decision involved significant sacrifices and a remarkable level of determination. Her artwork, filled with vibrancy and life, is a testament to her enduring creative spirit. This conversation made me reflect on the societal pressures and personal challenges that women face in balancing career and family. It also underscored the importance of having the courage to resume one's passion after a pause. The artist's journey highlighted that persistence and continuous learning are vital. It's not just about catching up with deadlines but also cherishing the moments with loved ones, which often get overshadowed in our pursuit of success.
Reflections on Experiences:
This week’s experiences taught me that the real challenge is not in taking breaks but in having the courage to start again. It's easy to get caught up in the rush of deadlines and overlook the importance of our relationships and personal well-being. I hope that even if life takes me away from the field of art creation, I will find the time and courage to return to it. Art, for me, is not about fame or money but about following my heart and expressing my inner self.
Future Plans:
\Next week, Francis plans to conduct an outdoor shoot. This will depend on the specific time schedule and weather conditions.
0 notes
Text
Project 2: A moment in time
youtube
Project Title:CHASNG
Format:360 video on Youtube
Artist Statement:
Standing in the future, yet rooted in bygone days.
What we avoid is what we pursue.
Chasing moments, losing them.
Embracing new feelings, forgetting old ones.
Remember, memento mori.
CHASING is inspired by a conversation I had with my grandfather, "growing up is a series of departures." In this project, I place the audience on a constantly forward-moving trajectory. Along the path pursued by a glowing red ball, they encounter various twisted and distorted paths, endless corridors, dazzling traps of beauty, and the fading presence of loved ones. Ultimately, audiences discover that what they fear being caught by is also what they are relentlessly chasing—time. My intention is to convey that while we tirelessly pursue various deadlines, we must not overlook the present moments in life. Therefore, I believe a 360-degree video is an excellent format to express this dual-contrast theme because viewers can face the absurdity of life head-on while also sensing the urgent pursuit behind them.
During the animation process, I found the most challenging part to be particle disintegration in the final scene. I needed to create the disintegration effect for each image/event. The speed and direction of particle disintegration had to match the camera's speed to ensure that each event was not obscured or overlapped. Considering that all details are magnified in VR, precision was crucial, and this required a lot of time for frame-by-frame adjustments. Another difficulty was the transitions between different scenes. The scenes involved in this project included 360-degree videos shot on-site, 3D scanned models, point cloud modeled animations, models painted in Open Brush, and 2D plane images, all while also considering the path of the glowing ball. To avoid abrupt transitions, I chose to quickly insert glimpses of subsequent scenes in the 360-degree field recorded video part, providing viewers with a "foreshadowing" of what would happen next, accompanied by glitch effects in Premiere Pro to create an electronic malfunction transition effect. To make the glowing ball appear to flow smoothly between scenes, I used very brief transitions to blur the subtle differences between preceding and succeeding frames.
0 notes
Text
WEEK 11 Sound Design
(project file editing timeline in PR)
In terms of sound design, I aimed to convey the sensation of transitioning from the real world into a virtual space, specifically the "back room." I used glitch sound effects for transitions and the main music track, complemented by ambient drum beats to evoke a dark and urgent atmosphere fitting the chasing theme. In the "hole" scene, symbolizing an otherworldly space, I juxtaposed the innocence of a music box melody, transitioning abruptly to a distorted version in the latter part, symbolizing a beautiful yet unsettling breakdown in line with the overall surreal style. For the final scene, "Life," I integrated many field recording pieces to emphasize connections with reality. To enhance the sense of motion and speed in camera movements, I added transitions and woosh sounds during particle disintegration and passing by. Notably, I aimed for a granular sound in particle dissipation, utilizing sounds like instant water evaporation on a hot surface. Although this project revolves around themes of time and memories, it isn't until the very end, as viewers traverse the dissolving photos and memories to reach the sphere symbolizing time, that the ticking sound of a clock emerges. I employed surround sound here, panning from left to right, in line with the continuous clockwise rotation pattern, enhancing the three-dimensional aspect of the sound.
Next week, I will upload the finalized version on Youtube and use the headset for final testing.
0 notes
Text
WEEK 10 Rendering and Editing
(Completed Version of Rough Cut)
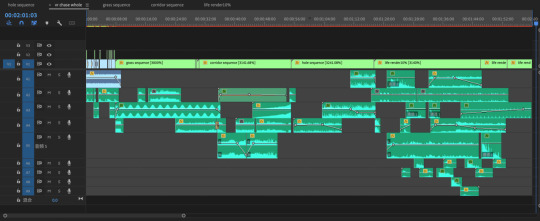
This week was all about troubleshooting, and rectifying errors. After completing the modeling and animating, my first task was to export a low-resolution version (10%) for smooth playback, allowing for detailed inspection and adjustments. The time-consuming nature of Blender rendering became a significant concern as it directly impacted the project's overall completion timeline. Render times varied widely due to differences in model sizes and its complexity, ranging from 2 hours per frame to 1 minute per frame for 4K resolution animations. To accelerate rendering, I applied a combination of reducing resolution and utilizing three computers with frame-skipping rendering techniques. For instance, computer one rendered frames 1-100, computer two rendered frames 100-200, and computer three handled frames 300-400.

(rendering with 100% resolution)(rendering with 10% resolution)

(An iterative process)
While Blender is still rendering higher resolution version, I utilized the 10% resolution version in Premiere Pro for editing and sound design. I structured the four main model scenes ("grass," "corridor," "Hole," "Life") as separate sequences, allowing for easy adjustment of the entire editing timeline when rendering higher-quality versions by simply replacing frames within the sequences.
When selecting the authoring platform, Vimeo was initially considered, but due to compatibility issues with Meta headsets and non-member upload limitations, I opted for YouTube. Uploading directly from the computer's web browser allowed for real-time updates in the headset. A crucial detail during video upload was selecting the "Not made for kids" option to ensure proper VR video playback in the headset.
However, during cross-checks between headset and web editing, I noticed that the Oculus Quest 2's audio quality was inferior compared to computers and headphones, particularly lacking in bass reproduction. Increasing bass levels marginally improved the situation, but not satisfactorily. Solutions considered include audio replacement for bass-heavy sections and exploring higher-end headsets for better audio fidelity.
In the upcoming weeks, I will embark on the lengthy rendering process while optimizing transitions between scenes in editing. After confirming that both modeling and animation are error-free, the best solution I can think of is utilizing a Cloud Rendering Service, which is priced at around 20 Australian dollars for 24 hours on Taobao. Through my testing, I have observed a significant improvement in rendering efficiency with the 4090 graphics card. Previously, rendering one image at around 50% resolution took about 40 minutes, whereas now, rendering at 100% resolution takes approximately 9 minutes per image. The only concern with remote controlling the computer is the risk of personal data leakage.


(Remote control computer for rendering)
0 notes
Text
DAY 5

Date: April 25, 2024
Time: 12:00 PM - 6:30 PM
Location: Studio at 5 Kimber Street, Paddington, New South Wales 2021
Participants: Francis, Zinnia, Sida
Overview:
The main tasks for today involved compiling data from last week's exhibition, editing bilingual promotional and interview videos, exporting them in various formats for different platforms, and creating a studio editing template accordingly.
Chronological Record:
- 12:00 PM - 12:10 PM: Review of New Photo Books
- Francis and I went through newly bought art books, learned about layout and cover design, and brainstormed ideas for the next project theme.
- 12:10 PM - 2:30 PM: Editing Promotional Video
- Exported and sorted videos from last week's exhibition the Daylight Moon.
- Outlined the editing themes and content, searched for suitable royalty-free music.
- Modified and exported the short video editing for ongoing exhibition promotion.
- 2:30 PM - 3:00 PM: Break
- 3:30 PM - 5:30 PM: Editing Interview Videos
- Decided the interview theme as "Introduction to Creation Concepts," with a duration of no more than one minute to align with current short video trends.
- 5:30 PM - 6:00 PM: Recorded English voiceover
- Recorded an English version of the artwork introduction using my mobile phone for Francis.
Skills Learned and Application:
Today's work primarily focused on video editing. Unlike previous narrative films or video essays, the purpose of these videos is to attract visitors to the exhibition physically. Therefore, I employed a fast-paced, fragmented editing style to convey a lot of information clearly in a short time. Francis specifically requested frontal shots of certain key individuals in the promotion clips, so I selectively interspersed these with footage of visitors engaging with the exhibits for diversity. Due to time constraints, I skimmed over the details of each artwork, leaving some gaps, as this video is not primarily about introducing each exhibit. The ending design echoes the font and layout of the posters for better audience retention. Delaying the logo disappearance directs attention to our studio's branding, serving both as attribution and promotion. While editing the interview videos, I kept them under 1 minute to maintain audience engagement. Each artwork's introduction in the video includes FRanci's visual descriptions and conceptual insights to stimulate viewers' imagination. I showcased each artwork from multiple angles and selectively used Francis's voiceover to increase the artist's exposure. However, in the English version, I replaced Francis's speaking clips to avoid mismatched lip-sync issues. The ending of the interview video was directly copied from the promotional video to maintain continuity since they are part of the same series.
Analysis of Interviews and Events:
During the break, Francis and I discussed funding for the independent studio. Curating exhibitions is more complex than anticipated, and gaining government funding is essential. Additionally, artists, like Zinnia being a GP, often have secondary sources of income to support their art endeavors. Spending years to secure startup funds is common and not something to be ashamed of. A mistaken belief is that if you studied film in undergrad or grad school, you must pursue a full-time filmmaking career, which is totally incorrect. Your artistic aspirations don't need to correlate with employment; they can be entirely separate. I also don't believe that we can work on our own style all the time at work; most of the time, we're serving clients' need. Therefore, as long as we maintain a passion for creation, we can still pursue art.
Reflections on Experiences:
Before starting the editing process, I organized and archived all materials. A clear asset library and storage hierarchy undoubtedly improve my editing efficiency. I plan to maintain clear naming conventions and hierarchies for each project from now on, especially for my final project, which involves thousands of assets. Editing is a balance of artistry and accessibility. When communicating with clients about innovative and experimental ideas, it's crucial to explain the reasons clearly with the finished project and seek their approval. After all, this isn't about showcasing personal style but meeting clients' needs. Some details can be discussed later, but discussions must happen before exporting, such as sponsor logos at the end, or credit lists.
Next week, I will continue unfinished video editing tasks. Also, next Thursday evening is the midterm lecture, where I will submit my work log and initial draft of the reflection paper to Robyn andGeorge.
0 notes
Text
WEEK 9 Workflow Testing
(test point cloud vr animation)
Through the lengthy and complex process of 3D scanning, converting to point cloud, creating animation, rendering to VR video, and finally publishing, I've encountered various challenges. However, I've confirmed that my initial project concept is achievable, and I've learned the necessary software, steps, and time required. This process has been quite demanding, and there is millions of times that I want to quite because of the geometry node and operational steps. Some difficulties I've faced include:
1. Problem: Blender, even with the Point Cloud Visualizer plugin, fails to display the colors of PLY files correctly.
Solution: Probably due to the incorrect import method in Blender; the correct approach is to use "add" instead of "import."

2. Problem: In Blender, PLY files cannot be converted to a geometry node for further editing.
Solution: No direct solution found. I employed an alternative method by manually adding geometry nodes to create a point cloud from a GLB file.
3. Problem: Lengthy rendering time in Blender for animations.
Solution: Utilize GPU instead of CPU for rendering. Additionally, reduce the “resolution scale” or set the “step” to 2 for lower-quality previews before rendering the final full-resolution animation.

4. Problem: Blender renders VR videos as PNG files instead of a complete video file.
Solution: Create a sequence in Premiere Pro (PR) using all the PNG frames to render a complete video. Rendering frames as PNG has the advantage of preserving previous progress in case of clash or pause, allowing continuous rendering.

5. Problem: Visible black boundaries in VR videos created from Blender-rendered PNG sequences in PR.

Solution: Ensure consistency between PR's sequence settings and Blender's render settings. A more simple and direct way is right click on the clip, and choose Scale to Frame Size.

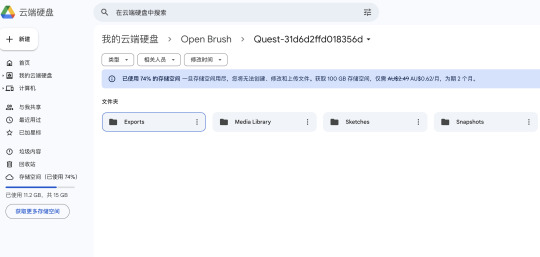
6. Problem: Incompatibility of Open Brush files exported in GLB format with Mac computers when using standalone VR headsets.
Solution: Create an Open Brush account and link it to a Google account to sync/back up all the media files to Google Drive, including desired GLB file. Then downloaded it from Google Drive on the Mac computer.
(OpenBrush model download and open in Blender using GLB file format)
Based on these challenges and solutions, I've documented a detailed workflow for creating a point cloud animation, following tutorial links:
1. Obtain a base model through 3D scan using Scaniverse (free, supports multiple formats) and Sitescape (for larger buildings, supports PLY format only).
2. Export 3d scan to GLB format, import into Blender, and follow tutorials to create nodes for point cloud and transformations:
youtube
3. Add noise for ambiance and lighting effects, referring to specific timestamps 57 and 60 minutes in tutorial videos:
youtube
4. Set up camera shots, animate using keyframes, and employ plugins like Camera Shakify for handheld motion effects:
manually add:
youtube
use plugin(recommend): https://github.com/EatTheFuture/camera_shakify
5. Render VR animation frames in Blender and compile them into a video sequence in PR.
youtube
6. Edit VR video in PR as per Canvas module course guidelines, or for headset editing, refer to Adobe's VR support documentation.
7. Preview and check for seamlessness in Vimeo before finalizing the project.
Currently, my concerns is still about Blender's slow rendering speed and seamless transition between clips. I plan to discuss these issues and explore previewing methods and final presentation options with my instructor next week.
0 notes
Text
WEEK 8 Concept Development & Technical Feasibility

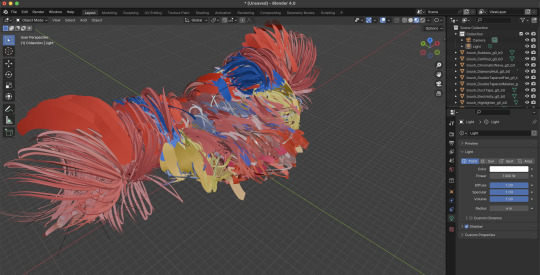
(Mantissa)
During my research, I come across artists such as Ruban, Benjamin and Mattissa, whose works prominently feature the “cloud point effect”. Particularly in Ruban's Vietnam series, capturing street scenes with changing and diffusing points to symbolize forgetfulness. This inspires me to look at common objects from a different perspective, possibly leading to unexpected surprises. Learning from Maxi's creative process, I discover that besides the conventional method of using nodes in Blender to convert 3D models into a “point cloud”, software like CloudCompare can directly transform photos,3D objects into point clouds for further animation in Blender. However, the specific steps and feasibility need further confirmation.


(Ruben) (Benjamin)
After confirming the technical feasibility, I start contemplating the theme of time. My initial thoughts revolve around creation and renewal, beginnings and returns, continuity and ruptures, past and future. Here is my concept for the second assignment:
当时矗立于未来,实为过往岁月。 Standing in the future, yet rooted in bygone days. 回避之物,是追随之物。 What we avoid is what we pursue. 追逐光阴,遗失光阴。 Chasing moments, losing them. 纵情新情,忘却旧情。 Embracing new feelings, forgetting old ones. Remember, memento mori.

I aim to create a “zone of indistinction” in the VR world, representing the blurred boundaries. Therefore, the visual representation I adopt may be abstract rather than linear narrative. Because time has a strong fluidity like water-flow, I want the audience to witness a fast-paced changing of scenes. Hence, I lean towards using 360-degree videos instead of solely static 3D model like Project 1. And after research and comparison, the simplest approach may be rendering 3D models into 360-degree videos in Blender using keyframes and cameras, and then importing them into Premiere Pro for VR video editing. For generating “point clouds” of models, I plan to use Metascan for physical 3D scanning, and import it into CloudCompare to generate “point clouds” in PLY format. Other scenes and models will be constructed using Open Brush or After Effects. This plan is based on considerations of the following technical challenges:
1. Compared to AE, PR's timeline is more suitable for trimming unwanted segments and adding VR-appropriate transition effects.
2. AE only supports OBJ format imports, while Blender has higher compatibility and supports keyframe node for animation.
3. Recording 360-degree videos in Open Brush requires high computer specifications, and it is difficult to create camera path. While importing Open Brush models into Blender seems more convenient, and combined with the Camera Track AR APP, it can achieve handheld camera motion effects in Blender.
4. Creating point clouds through "geometry nodes" in Blender is time-consuming and Blender only supports ONE shader for models, unsuitable for large or complex objects. Thus, I choose Cloud Compare to generate "point clouds" and then import them into Blender for animation.


(A test of export PLY "point clouds" file in Cloud Compare and success open in Blender with Point Cloud Visualizer plugin )
5. Blender does not natively support color display for "point clouds" in PLY format, requiring the purchase of the Point Cloud Visualizer plugin.
Overall, more technical details need discussion, especially regarding scene transitions and audience guidance. Next week, I will consult Sarah for more insights into the technical operations.

Check the videos below for detailed processing:
OK edits, https://www.youtube.com/watch?v=k92PPsj7glE
Massimo, https://www.youtube.com/watch?v=KDFEaLAjQkI
Ruben, https://www.youtube.com/watch?v=NdCVW1Ky0Js
Avatar, https://www.youtube.com/watch?v=yMWYSn6lIiI
Lidar, https://www.youtube.com/watch?v=IN1nyU_CL7A
0 notes
Text
WEEK 7.5 Mixed Reality & Posthuman

(Photo by julien Tromeur on Unsplash)
“The death of cinema” has become a cliché in film criticism. It dies when people no longer enter dark movie theaters for the cinematic experience but rely on small self-luminous screens like smartphones, TVs, or iPads. It dies when viewers cannot stay settled for two hours anymore but choose to pause, fast forward, or take a break at any time. The emergence of MR lightening a potential way of cinema. Viewers, along with headsets and controllers, non-human entities, are given new inspiration by posthumanism. Similar to a dark movie theater, in the dark world of VR headsets, viewers awaken from "reality." They enter a new "mirror theory" as a new world appears on the screen, temporarily disconnecting them from their current "reality." However, compared to small screens, constrained by VR headsets, people seem less likely to detach themselves from the virtual world at any time.
Below are some of my thoughts on Mixed Reality (MR) and posthumanism:
1. Fusion of Body and Digital: Mixed reality technology integrates digital information with the physical environment of the real world. Through Augmented Reality (AR) and Virtual Reality (VR) technologies, people can seamlessly switch between the digital and physical worlds. Controllers, sensor gloves - this fusion of body and digital reflects posthumanism's pursuit of transcending traditional human concepts, redefining the relationship between humans and technology.
2. Blurring Boundaries Between Reality and Virtuality: Posthumanism emphasizes the blurred boundary between reality and virtuality, asserting that technological intervention alters our perception and experience of reality. Mixed reality technology operates within this ambiguity, enabling people to experience the fusion of virtual content with the real environment, challenging traditional notions of reality and aligning with posthumanism's pursuit of boundary-transcendence.
3. Reshaping Identity and Belonging: The proliferation of mixed reality technology is reshaping people's identities and sense of belonging. Through virtualized identity expression and digital social interaction, individuals can have multiple identities and experiences in the digital space. This digitalized identity and belonging blur the traditional boundaries of human identity, aligning with posthumanism's exploration of new human identities and practices.
4. Subjectivity: Posthumanism focuses on the impact of technological intervention on human subjectivity. Mixed reality technology, as a medium for human interaction with the digital world, prompts people to rethink their position and role as technological subjects. This redefined technological subjectivity involves changes in the body, perception, and consciousness, resonating with posthumanism's call to transcend human-centered ideologies.
Combining the above analysis, I would like to point out that as the excitement from short videos for viewers diminishes, linking mixed reality technology with posthumanism to explore how technological innovations reshape our bodies, cognition, and social practices, as well as contemplate new human identities and values, might be a developmental direction for the entertainment industry.
0 notes
Text
DAY 4

Date: April 11, 2024
Time: 12:00 PM - 5:30 PM
Location: 5 Kimber Street Studio, Paddington, New South Wales 2021
Participants: Francis, Zinnia, Sida
Overview:
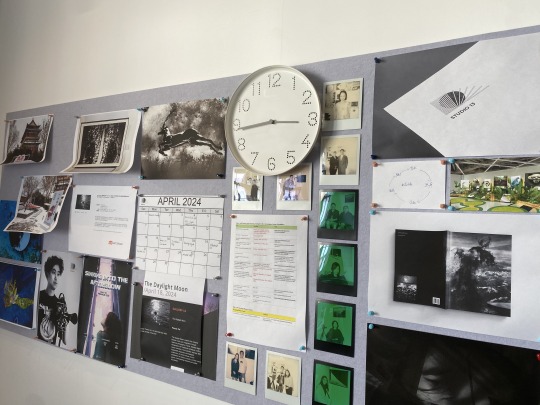
Today's primary focus was on preparing promotional materials for next week's exhibition——Daylight Moon in Canberra, including the design and print of posters and room sheets, which led to the creation of a studio working template and workflow.
Chronological Record:
- 12:00 PM - 12:20 PM: Introduction to Funding
- Francis introduced me and shared tips to websites for obtaining funding, such as NSW Government Small Projects Grants, Screen NSW, Verge Gallery, Creative Australia.
- 12:20 PM - 2:30 PM: Indesign AVALON series Layout Design
- Refined and modified the layout designs for two photo collections.
- 2:30 PM - 2:45 PM: Break
- 2:45 PM - 5:30 PM: Poster Design
- Designed a poster for Francis's exhibition "Daylight Moon" next week and printed it.
- Designed posters for Francis and Zinnia's exhibitions next year, "Avalon" and "On the Loose."
Skills Learned and Application:
While my previous work primarily involved digital media, today's internship allowed me to experiment with different paper types, printing techniques, and printers. The tactile quality of printed materials surpasses even high-quality electronic screens, and the differences in printing techniques' effects are significant. Sometimes, printed results may not be as vibrant as digital versions, possibly due to printer and settings issues. For important prints such as large-size artworks, specific color requirements, or special paper textures, seeking assistance from professional printing services is advisable. Even for seemingly minor items like flyers in physical exhibitions, printing plays a crucial role, not an area to cut costs. However, the harsh reality is that printing is also a part of studio cost control. Through our experiments, we found that copying instead of direct printing can speed up the printing process, especially for bulk printing, and make it easier to control color density.


Analysis of Interviews and Events:
I discussed with Francis strategies for obtaining funding from government and unions. Government grants for purchasing safety equipment are often overlooked by many studios. Another useful tip is to utilize online consultation sessions before submitting applications, where you can present your work ides to officials to gather feedback and establish connections, increasing your chances of success. While there are grants available for international applicants, many projects focus on Australian citizens only. Collaborating with citizen artists or excluding non-citizen artists' names from applications can be useful. Francis focuses more on fine arts applications, while I lean towards screen-related ones, both of which have lengthy application timelines, requiring early preparation. Overall, understanding each application's requirements and timelines is crucial for success.
Reflections on Experiences:
In summary, the studio's project efficiency significantly improved today due to our established workflow among the three of us. Francis and Zinnia handle textual content and find reference styles, which I then layout, integrate, print, and revise. An interesting observation was made by Francis regarding last week's layout design, where the lack of renaming or numbering photos wasted time during image searches. This week, he thoughtfully added simple numbering to the photos. Going forward, especially as our material accumulates, a comprehensive, standardized, and clear naming system is essential. This not only helps me quickly access the necessary files but also facilitates file handoffs among the three of us and collaboration with other departments such as printing companies, news departments, gallery managers, and so on.
Next week, the internship will pause as Francis begins an exhibition in Canberra. During this break, I will start drafting my essay and organize the internship blog up to this point.
0 notes
Text
Project 1:Capturing the essence of a space
Project Title: Women's Toilet Crisis
Format:3d photogrammetry in STYLY
Artist Statement:
My inspiration comes from a startling experience in a women's toilet at a hospital in China, where the walls were covered with advertisements for egg selling. I realized that illegal and targeted advertisements in women's toilets are a global issue. Often, walls covered with ads, flyers, and the potential presence of spy cameras turned what should be a private space into an unsettling and offensive public area. Therefore, my VR project aims to recreate the discriminatory trials faced by women, using immersive experiences to echo their plight.
Effectively conveying this complex social issue is a challenge. I choose to begin with the question, "Do you look around every time you enter a public toilet?" to provoke empathy and introduce the women's toilet crisis. As viewers navigate through the entire toilet space, they experience three main concerns: egg donation, sugar dating, and spy cameras, each presented in separate stalls. Given that the advertisements I use are in Spanish, Chinese, Korean, and English, I invite different women to portray victims, judges, researchers, and feminist activists to ensure audience comprehension of the ad contents. Their testimonies also articulate the global issue from various perspectives. To avoid audio interference between different sound sources, I utilize the "fake spatial" sound effect in STYLY for localized VoiceOver looping and smooth volume decreases between zones.
URL:https://gallery.styly.cc/scene/b1345568-0072-41fc-92ba-5db004450a9c
0 notes
Text
WEEK 7: Sound Design
After completing the modeling phase, my focus this week shifted to sound design. This is a crucial stage that can determine the overall tone and emotional conveyance of my entire project. In terms of sound design, my goal was to serve the theme of the women's unsettling in public toilets.

1. VoiceOver: Considering the presence of both Korean and Chinese advertisements in the 3d model, I opted to include English ads alongside VoiceOver to ensure clarity for the audience. Given that this is a global issue, I wanted more than just my VoiceOver to be present. Therefore, I gathered different statements and experiences from news sources related to the victims, and invited various women to read them, simulating an "interview" effect. Since these testimonies are mostly memories, I utilized "delay" in Adobe Audition to create an ethereal and immersive feeling. Setting it apart from my personal feelings, which serves as an introduction to the entire project.
2. Ambient Sound: I used a Zoom H3 to field record ambient sounds in the toilet. During AU processing, I amplified sounds like door closing, paper towel, and selectively shortened the toilet flush sound. Subsequently, I added sounds like iPhone camera clicks, water dripping, coughing, speaking, laughing, vacuuming, etc., placing them in different positions to create a more vivid and dimensional experience.
3. Background Music: To maintain the creepy, somber, and mysterious atmosphere of this project, I chose an ambient sound effect. By editing it with seamless transitions, I created a looped music track without interruptions.
In practice, my main challenge was the limited interaction and function within STYLY. To optimize the spatial experience in VR and to explain the meaning of each poster and advertisement clearly, I wanted visitors to hear different testimonies as they approached them, with other sounds muted. However, since STYLY lacks audio trigger functions, I used the "fake spatial" feature to simulate spatial perception. This required repeated attempts to balance the volume and distance between different sound sources, a process that could only be fully experienced through a VR headset. Additionally, STYLY does not allow adjustments; objects can only be deleted and re-imported.

(Steps to add fake spacial sound)

(Sound resource placement and its effective distance)
After numerous attempts, I left a 30-second silence before looping in my VoiceOver intro part to allow viewers to fully experience the toilet in a quiet setting. For the testimonies in different stalls, I set their effective distance very short to avoid interference with neighboring stalls and placed them at ear level for better immersion.

(Adjustment and test of parameters of different sound sources)
The process of adjusting parameters during computer editing, publishing, and VR headset testing was time-consuming. In future STYLY projects, I may use model with longer length rather than width (like corridors), reducing interference between sound sources.
0 notes
Text
WEEK 6.5: Troubleshooting Export Issues in Blender and STYLY
In this blog post, I will share the problems I encountered and the solutions I found while exporting my 3d models. This process has delayed my progress, therefore, I hope this will inspire others facing similar issues:
1. Is your Blender file size too large?
Solution: Use "File > Clean up > Unused Data-Blocks" to effectively remove unused data.

2. Do you have too many layers in Blender?
Solution: Save the file as a new one, select the layers you want to merge, and press "Ctrl + J" to merge them into one object.
3. Unable to export to glb format in Blender?
Solution: Make sure to check "Selected Objects" and "Apply Modifiers" before exporting. If errors persist, save the file, close Blender, reopen the file, and try again. Repeat the above steps
as necessary.

4. Is your glb file size too large?
Solution: Use the website https://gltf.report/ to optimize the file size to 2k or 3k and then export again.

5. STYLY cannot upload files larger than 100mb?
Solution: Repeat step 4 until the file size meets the upload requirements.
6. Unable to upload files in STYLY?
Solution: Use a non-Chrome browser such as Safari for smooth file upload.
7. Encountering errors when adding self-imported models in STYLY's edit scene (as shown in the image)?
Solution: Close the current window, reload the window, and try adding again. Avoid having two large objects in the same scene; delete unnecessary object before adding the correct ones.

8. Uploaded object missing texture in STYLY?
Solution: No solution. Upload seperately 2d image to cover the missing texture if applied.


(initial model with poster) (in STYLY miss poster)
Learning is a process of making mistakes and correcting them continuously. By implementing these solutions, hope you can overcome common export and upload challenges in Blender and STYLY, making your workflow smoother and more efficient.
0 notes
Text
WEEK 6: Advanced STYLY & Revised Project Plan
This week's lesson focused on advanced features of STYLY, where I discovered more functionalities such as audio and video hyperlinks, special effects, filters, and interactive triggers. These newfound features undoubtedly opened up more possibilities for my first VR project. As a result, I renewed the structure of my first assignment and adjusted audience expectations accordingly.
I will address four main themes in the women's toilet advertisements: egg donation, academic ghostwriting, sex trade, and spy-cam. To ensure clarity in theme, I will distribute these topics across three separate stalls and near the washbasin, balancing the novelty of exploration with cohesive storytelling for viewers. Given the constraints of project scope and my resources, I do not intend to dive deep into each theme or provide definitive solutions. Instead, using toilet advertisements as a medium, I aim to bring these issues concerning women to the forefront, raising awareness among female viewers and advocating for societal and governmental changes.


Hence, I will create hyperlinks within the advertisement images to related news articles or videos, allowing viewers to delve deeper based on their interests. Rather than playing a single audio track throughout or explicitly narrating the entire story, I aim to take the spatial advantages of VR. As viewers approach the themed stalls, relevant fake interview audio will play louder, enticing them to approach, enter, and stay. Additionally, I will use the newly added Zoom H3 recorder to capture ambient sounds in the toilet, enhancing the immersive auditory experience in the VR environment with a 5.1 surround sound recording. When setting the viewer's position, I opted to reduce height, reflecting a female perspective as the average height for women is generally lower than that of men.

However, despite John and Sarah demonstrating the use of auto-generated floors to replace transparent floors in STYLY to facilitate automatic navigation paths, this feature is not entirely suitable for my project. I intend to block viewers completely out of a specific area. Furthermore, due to the explicit nature of the advertisements involving adult content and explicit language, I plan to display a content warning message before viewers enter or begin exploring the scene. I will discuss these issues with Sarah during next week's class.
0 notes
Text
WEEK 5:More Details & STYLY
This week, I learned STYLY, an online platform where my final VR project will be experienced and shared. STYLY offers advantages such as online editing and instant previews within VR headsets, making it easier for me to make modifications. Upon my initial attempt at importing my first draft toilet, I discovered more flaws than I had noticed while editing in Blender. Therefore, I spent more time this week fixing these issues. If given another chance to scan and generate 3D models using my phone, I will strive to avoid space with too many blind spots.
Here are the problems I encountered while using Blender and possible solutions:
1. The Stamp Tool failed to draw colour on auto-filling error areas, and sometimes generated strange colors in other areas.
Solution: Directly use the brush in Texture Paint mode to patch colors on the desired areas of the texture.
2. When using Editing Mode - Face, I couldn't select entire adjacent areas for overall scaling and movement.
Solution: In Sculpt Mode, use Grab to select entire areas and adjust the brush size (Radius) to expand or shrink the selection. It's important to note that in Blender, the brush size does not automatically change with zooming in/out, so adjust the zoom level accordingly to modify the brush's selection range.
Additionally, I resolved a crucial issue in Blender by searching Google on how to quickly batch import 2d images:
1. Go to Edit -> Preferences -> Add-ons -> enable "Import Images as Planes."
2. Go to File -> Import -> Image as Planes to import the “image png”.


This method creates an independent object and layer for each imported image, making it easier to organize and export. To achieve a more three-dimensional and realistic texture effect, I converted the advertisements to PNG format in Photoshop before importing them. I also applied effects like water stains and paper folds using blending modes for an aged look.


Next Week:
1. Complete importing and attaching advertisements to walls.
2. Continuously experiment and make modifications using VR headsets in STYLY.
3. Resolve issues related to custom navigation paths.
0 notes
Text
DAY 3
Date: April 4, 2024
Time: 12:00 PM - 6:00 PM
Location: Coomber Street Studios, 5 Coomber Street, Paddington, New South Wales 2021
Participants: Francis, Zinnia, Sida
Overview:
Today was primarily focused on learning Adobe Aero and designing the layout for a new photobook, laying the groundwork for broader artistic endeavors in the future.
Chronological Record:
- 12:00 PM - 12:30 PM: News Release Editing
- Revised the exhibition news release drafted by Zinnia, including image formatting, detailed revisions, and final review.
- Researched advertising platforms and methods, such as USYD alumni groups, Little Red Book, etc.
- 12:30 PM - 2:30 PM: Adobe Aero Exploration
- Explored Adobe Aero to create interactive AR projects based on existing images.
- 2:30 PM - 3:00 PM: Break
- Discussed recent experiences with mid-journey ai generation.
- 3:30 PM - 4:00 PM: Indesign AVALON Layout Design Version 3
- Finalized spine, page numbers, and colophon for print version, and exported printable versions.
- 4:00 PM - 6:00 PM: Indesign LAND OF AMBITION Layout Design
- Preliminary layout design for Francis' new photo collection based on the previous template.
Skills Learned and Application:
During today's internship, I mainly explored using Adobe Aero to create AR experiences. Through practice, I learned the distinctions between using horizontal, vertical, and image anchors to trigger AR objects. Despite initial challenges with behavior setup, such as objects not popping up as intended, collaboration with Zinnia led to a successful resolution. Additionally, the given pop-up object is a 2D image, and the spheres in Adobe Aero assets cannot have their colors altered, I attempted to convert the pop-up object to 3D. I experimented with converting 2D to 3D in both Photoshop and Blender. Eventually, in Blender, I created the desired black sphere by the customizing sphere texture. Self-learning via Google searches and YouTube tutorials proved effective. I reinforced the idea that effective storytelling and motion convey surpassed technical proficiency.
Analysis of Interviews and Events:
Talking with Francis about mid-journey image generation was inspiring. I was amazed by the vast collection of AI-generated artworks Francis has accumulated. It made me realize that I don't need to be a perfect photographer or a Photoshop expert, nor do I require expensive equipment. The most important factors are having the courage to innovate, a broad knowledge base, and a good sense of aesthetics. Francis' new portfolio also inspired me; seemingly unrelated images, devoid of text, can convey a complete narrative solely through careful arrangement.

Reflections on Experiences:
Overall, today highlighted enhanced efficiency through familiarity. Especially when working on the second photobook, everything from determining image dimensions to establishing master page formats, font selection, and adding a copyright declaration on the final page was accomplished swiftly within a short period. This efficiency stemmed from familiarity with the initial format and two rounds of collaboration. For instance, when Francis was considering the narrative logic, I would scroll up and down the page to help establish connections between images quickly. When Francis was searching for images, I promptly opened the import page, and followed his actions to locate the images together, reducing the time spent searching. Similarly, Francis ensured that instructions were clear and double-checked each time, rather than simply urging me to catch up on progress. I believe that every collaboration involves a period of adjustment, and it's not just about one side compromising; it requires mutual effort. This is particularly crucial in situations where one party is responsible for providing ideas while the other handles operations. Clear and precise instructions are essential for improving efficiency.
Next week, I aim to create complex animation effects in Adobe Aero. Additionally, I plan to generate finer sphere details in Blender through custom texture creation based on images.
0 notes
Text
DAY 2
Date: March 28, 2024
Time: 12:00 PM - 6:00 PM
Location: Kimber Street Studios, 5 Kimber Street, Paddington, New South Wales 2021
Participants: Francis, Zinnia, Sida

Overview:
Today's work focused on deeper collaboration following initial familiarization. The emphasis of the day was on content generation, aimed at preparation for upcoming exhibitions.
Chronological Entries:
- 12:00 PM - 1:40 PM: Mid Journey Practical Sessions
- Francis instructed on setting up a personal server on Discord and adding bots for private creation.
- Learned to create prompt keywords, further filtering and saving images.
- Utilized community browsing to gather prompts and creative inspiration.
- 1:40 PM - 2:00 PM: Indesign Roomsheet Layout Design
- Utilized templates established last week to format English and Traditional Chinese manuscripts provided by Zinnia into complete exhibition invitations for print and email distribution.
- 2:00 PM - 2:20 PM: Break
- Francis shared experiences from non-film festival competitions he participated in, including insights into the Sydney Biennale.
- 2:15 PM - 3:30 PM: Indesign AVALON Layout Design
- Enhanced previous week's design, adding more photos and adjusting photo presentation sizes.
- 3:30 PM - 6:00 PM: ZEN Sound Design
- Communicated sound design ideas for Francis's upcoming exhibition and desired concepts.
- Preliminary screening of sound effect libraries and finding reference sounds.
- Produced a 1-minute 30-second sound design based on reference sounds, achieving seamless loop transitions.
Skills Learned and Application:
During today's internship, I learned to utilize AI tools to enhance work efficiency, particularly in communication. Starting with Mid Journey to quickly generate several concepts, which were then presented to the client for direction selection, followed by detailed design and modification. Additionally, through trial and error, I resolved the issue of errors displaying when exporting PDFs from InDesign, caused by Chinese fonts. Henceforth, especially in bilingual environments, efforts should be made to avoid mixing Chinese and English in the same document. This not only addresses workflow issues but also significant differences in Chinese font formatting. Furthermore, given the studio's frequent need for both Simplified and Traditional Chinese formats, I should familiarize myself with commercially usable fonts supporting PDF export in both forms to expedite future workflows.

(Mid-Journey Generated Photo)
Analysis of Interviews and Events:
Francis shared experiences from film festivals and competitions he participated in. Particularly interesting was EQUS's art creation on quantum science held at M2 Gallery last year, which excitedly combines art with physics. Moreover, this serves as a good means to connect with local artists through the numerous galleries and their regular events. This aspect, which I seldom considered during my student career, involves broadening my social circle beyond school, yet it's precisely what I need once detached from school's protection. Additionally, Francis mentioned that due to technological limitations, XR and VR are still relatively niche fields with high chances of winning awards at film festivals. Therefore, considering VR film production when I can still borrow XR equipment from school.

Reflections on Experiences:
Overall, today involved deeper collaboration and my first independent sound design within a limited time frame. This made me feel pressure stemming from insufficient skills and preparation. Hence, I will continue to refine my sound design techniques, especially in synthesizers. This being my first opportunity to participate in exhibition sound design, I shouldn't easily let go of this hard-earned opportunity.
Next week, I'll complete the design of the Avalon spine layout and export versions suitable for printing. Furthermore, I'll refine the installation's sound design. Simultaneously, I should start brainstorming the direction of my research paper and begin preparations accordingly.
0 notes
Text
DAY 1
Date: March 21, 2024
Time: 12:00 PM - 6:00 PM
Location: 5 Comber St, Paddington NSW 2021
Participants: Francis, Zinnia, Sida
Overview:
Today marks the beginning of my internship at Studio 13 Sydney under the guidance of Francis Cai. The focus of the day is on familiarizing myself with the studio, actively engaging in activities, networking with studio peers, and applying newfound insights to personal growth.


Chronological Entries:
12:00 PM - 12:30 PM: Introduction
- Francis provided an overview of studio operations, and safety protocols.
- Discussed current studio progress, future projects, and my potential involvement.
- Set up the day's agenda, including printer operations, layout design, and photography tasks.
12:30 PM - 1:00 PM: Printer Operations
- Downloaded and installed Canon Professional Printer & Layout software.
- Learned various format settings for color and black-and-white printing, manual paper loading, and ink cartridge replacement.
1:00 PM - 1:20 PM: Profile Photo Shooting
- Learned to use the Hasselblad x2D, focusing on manual focus and aperture selection.
1:20 PM - 5:30 PM: Indesign AVALON Layout
- Determined page dimensions, bleeding, and margins.
- Under Francis's guidance, organized static images into a cohesive layout using InDesign, covering aspects like cover pages, font selection, image arrangement, and acknowledgment page design.
- Set up parent pages, paragraph styles, and text styles to facilitate uniform modifications.
- Packaged project files according to industry standards for backup and final revisions next week.
2:30 PM - 3:00 PM: Break
- Engaged in discussions with Francis about creative philosophies and specialized areas.
- Inquired about specific shooting techniques, post-processing workflows, and commonly used tools.
5:30 PM - 6:00 PM: Indesign Roomsheet Layout
- Compiled Zinnia's provided text into a complete exhibition invitation, exported for printing and email distribution.


Skills Learned and Application:
During today's internship, I strengthened my skills in InDesign layout. However, encountering an error while exporting the Roomsheet as a PDF caused a delay for everyone. Consequently, I discovered that InDesign may not be as convenient and efficient as PowerPoint and Word for producing timely, easily editable, and shareable documents such as posters, notices, and roomsheets. Instead of spending extensive time on fine-tuning each text format, it might be more effective to quickly arrange content in PowerPoint to achieve the goal of disseminating information. This is a mistake I need to avoid in future work, as the purpose of tools should be to serve production rather than proving one's proficiency in the field.
Analysis of Interviews:
In conversation with Francis, he raised an important point about student works often lacking depth and continuity. This resonates with me as I possess a broad but undistinguished skill set. Over the past few years, my focus on completing assignments has led to a scattered portfolio with insufficient depth of research, making it challenging to develop my own complete "series" or "exhibitions", not to mention a distinctive personal style. This serves as a reminder that while it's beneficial to explore various fields in the early stages of learning, it's essential to gradually narrow down and specialize in one or two modules where I excel, forming my standout strengths. Moreover, completion of a work does not signify its end; it can be the beginning of a series or the foundation for a new series' development.
Reflections on Experiences:
Overall, today's internship was busy yet fulfilling. It provided me with my first insight into the operational dynamics of an independent artist's shared workspace, strengthening my determination to establish my studio. Working with Francis was a delightful experience as we approached tasks as equals, aiming for collaborative problem-solving and enhanced task management. I'm also excited to be credited for graphic design in Francis's upcoming AVALON collection, marking a significant step into the industry.
Next week, I will assist Francis in completing the collection's design and explore the utilization of Adobe Aero. Additionally, I intend to seek advice from Zinnia on strategies for funding support for the studio and effective communication with galleries.
0 notes