Blog dedicated to documenting progress on "Spellfist 3D", a game about a muscle wizard.
Don't wanna be here? Send us removal request.
Video
tumblr
Added a main and options menu, complete with saving and loading settings. Feels pretty good, i love nesting widgets and it was about time i got to this part.
12 notes
·
View notes
Video
tumblr
I’m swamped with work, so the progress been slow. I’ve also hit a conceptual wall with being able to juggle enemies and until i decide if i want to revert the ragdoll physics system back or if i can squeeze the juggle animation loop into the working system there won’t be much progress, since juggling enemies is one of the main mechanics and i can’t just hope it will kinda work and leave it at that.
How you’ve been doing?
17 notes
·
View notes
Video
tumblr
Putting the SPELL back into SPELLFIST. Having the systems interact is the most fun and i still have one small thing to add. but the ragdoll stuff keeps breaking, probably because it tries to exit the ragdoll twice or something like that. Then the demo level is all blocked out, i just need to add some midsections and a little bit of verticality, and then actually add the planned puzzles.
It’l feature just the basic goblins, since i’ve decided to scale back and make sure everything works proper before addign more enemy types. Once everything is in place i’ll figure out the boss. Lots of work to do, and the kind i don’t really like, but what is a game without level design, huh?
11 notes
·
View notes
Video
tumblr
I’ve been plenty of code cleanup, removing tons of things that are not working or simplifying things. The fire mechanics is a function library that “just works” into whatever you plug it into.
The mechanics are pretty much done, i jsut want to remove the old goblin and player skeletons and all of the related animations to clean some stuff up and then i’m going to try to construct a test level where all of the “new” mechanics would have their place. Not a lot to show off, mostly the blueprints being nice and tidy. I think another combover is in order to remove some unused variables or redundant stuff, but i’ve even managed to use some soft object references here and there.
26 notes
·
View notes
Photo
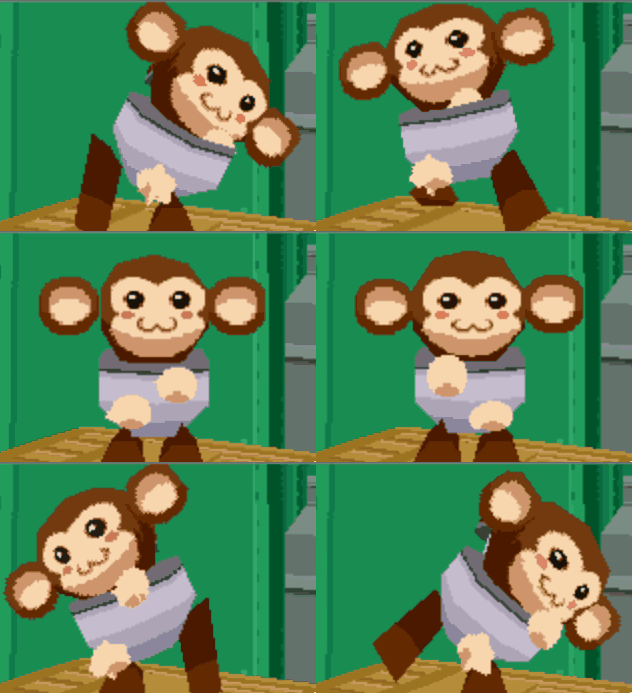
Guide to that elusive “PS1-pixelated-lowpoly”(but not really)
With the videogame playing population growing up we've finally broke from pixel-art nostalgia into the broadly called "low-poly" nostalgia. On closer look this broad categorization gets further described as “PS1 pixelated textures low-poly”, which is a bit better, but still is a really broad and a pretty wrong description of this style that’s so dear to a plenty of game-playing and game making individuals these days. I’ll try to dive into some of the technicalities and examples of this style in the attempt to find it’s characteristics and some actual technical requirements to meet this style.
Let’s start with the obvious, calling it PS1 low-poly is wrong, mostly because the same games were release on Nintendo 64, Dreamcast and PC. More so, games released later can be put into the same category, plenty of NDS or PSP games fit into the same style and adhere to the same economy principles. The only real surface level thing unifying these games is the game size, that is, the games came on CDs. The advent of a DVD format really changed up how the games look, so the graphical style we’re talking about here is called CD-3D in smaller circles.
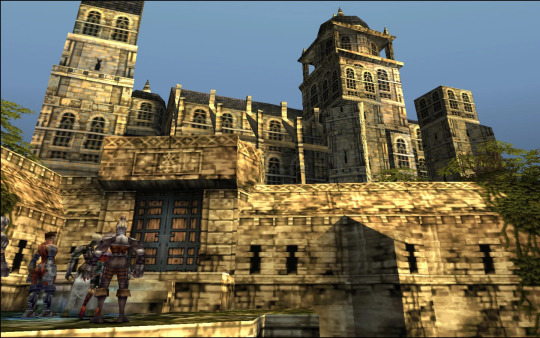
First let’s look at the games that fit the criteria would give you some information to describe the style, textures are obviously small enough to have visible pixelation (hidden by texture filtering) and models are obviously low-poly (that is around or less than 500 triangles for a character), but let’s see what doesn’t seem so obvious. Here’s Spyro and Crash, fan favorites
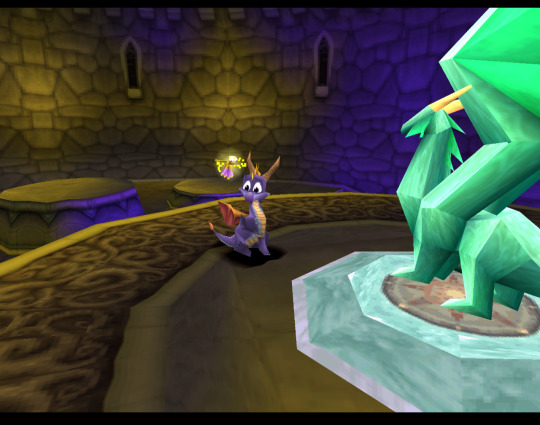
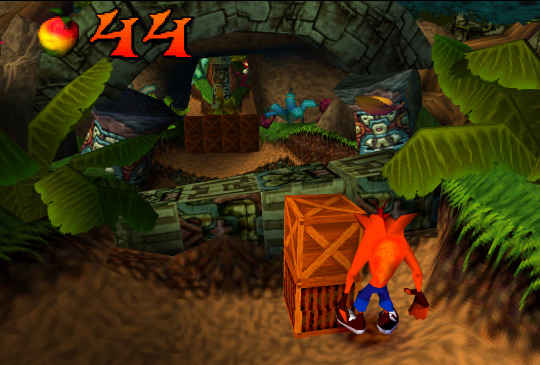
Both games check both points we’ve noted before, but what’s not obvious to an untrained eye is that these games both extensively use Vertex Color, the thing you’ll notice more and more in other games we’ll talk about. Vertex Color is absolutely simple, each vertex of a mesh can be assigned a RGBA value and they’re then linearly blended with other vertex colors. Notice how in Spyro the yellow and purple light is placed on places where texture is repeated, following that you can eyeball where the wireframe is and then you’ll see that the vertex color is used to simulate lighting. Crash himself is filled with Vertex Color, it’s a cheap way to avoid using textures, while having some control over the color of the thing, instead of it being a solid chunk. If you search-engine around you can also find some really fascinating notes on the development of the original Crash and the tricks they’ve pulled! The more ingenious way to use Vertex Color is to take a look at Spyro skyboxes:

Notice how the clouds are diamond-like in shape and are linearly gradiented to the next point in the wireframe.
Vertex color was used extensively and fell off with the increasing complexity of the meshes, delegated mostly to technical masking of stuff like foliage, it’s still a powerful tool for lower triangle counts.
Textures
Now, let’s talk about the textures. Pixelated textures look nice and crisp these days, at the age of 1080p being the norm, turning texture filtering really makes the games look crisp and feel right
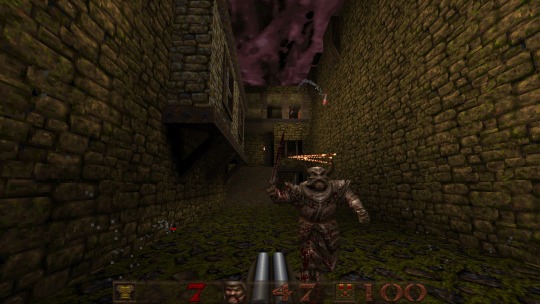
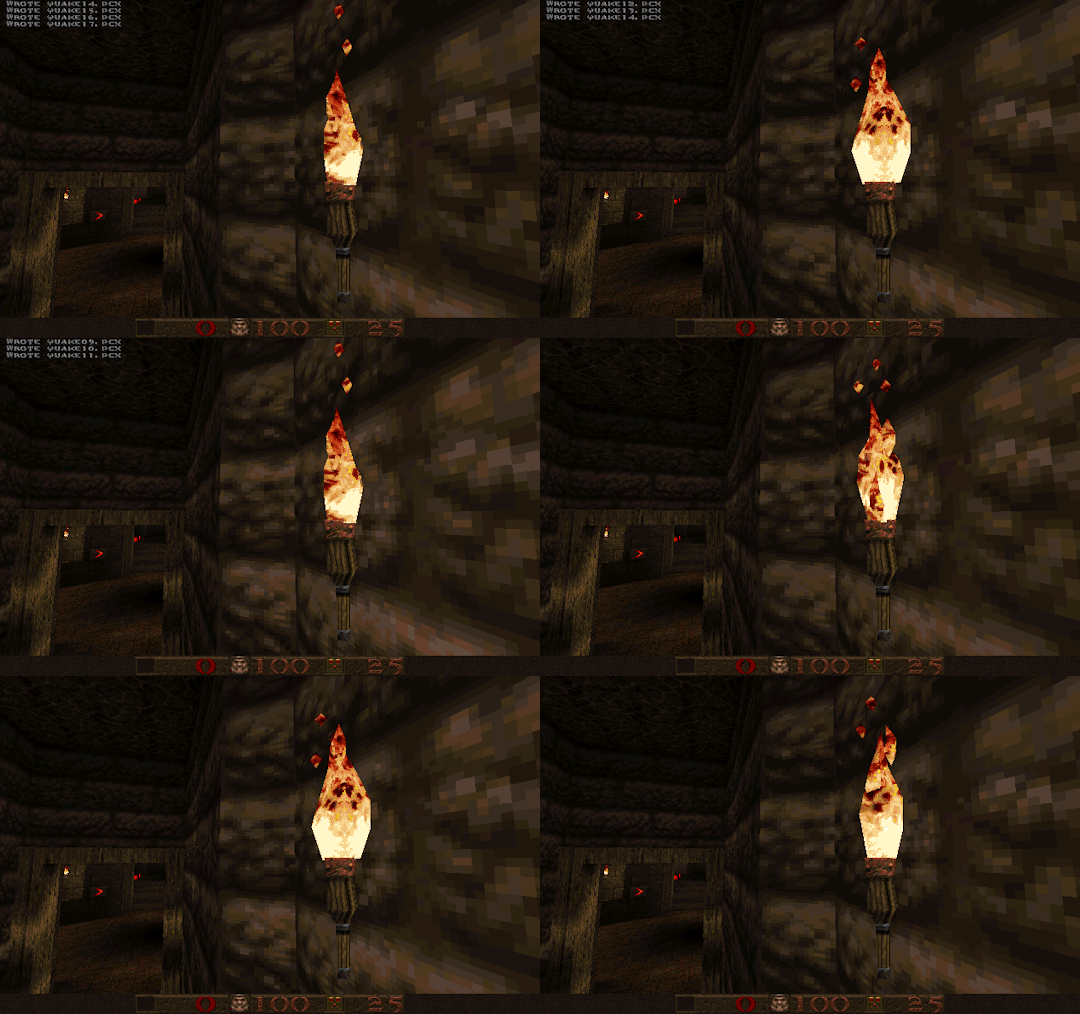
Quake 1 is a perfect example of CD-3D style, often undeservingly forgot in discussions about this style.
But this makes us forget that the textures were often authored with texture filtering in mind. Careful step gradienting to make textures seem smoother after being filtered is a craft in itself.
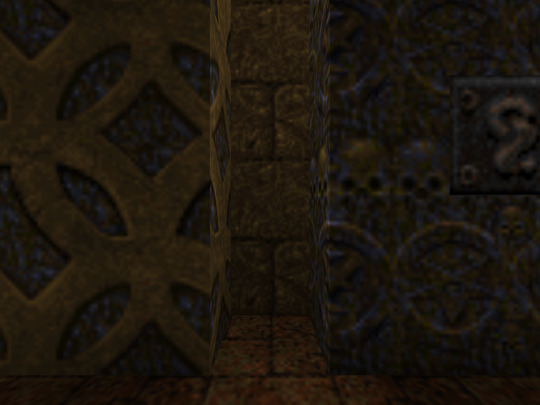
Texture filtering is not bad in itself, some games look better without it these days, because of the display resolutions, but it’s still a valid tool to apply, it can help push low-res texture a bit higher and produce a softening effect make those 4 pixels into a round circle or improve a visual effect.
Of course, some games took a deliberate approach of avoiding smudged look, like Megaman Legends, for example.
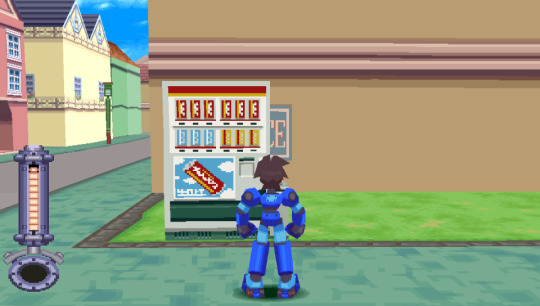
Via a very deliberate texture economy and unwrapping the developers were able to produce very crisp and pixel perfect textures (slightly warped by the infamous PS1 rendering), that look absolutely astounding when you render the game in a modern resolution. Pixel-aware UV Unwrapping, is being used in most games that are considered the pinnacle of CD-3D style, this technique is so powerful, that it was used to great effect in PS2 era games, PSP games and even modern games like Guilty Gear (for a different effect though). Let’s take a closer look,
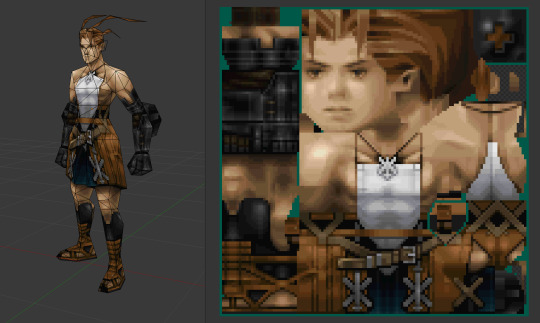
As you can see, our character is unwrapped in square pieces in such a way that a straight line on a texture will produce a straight line on a model. While Vagrant Story is an absolutely perfect in execution of this technique, it’s also used in a same way in Megaman Legends
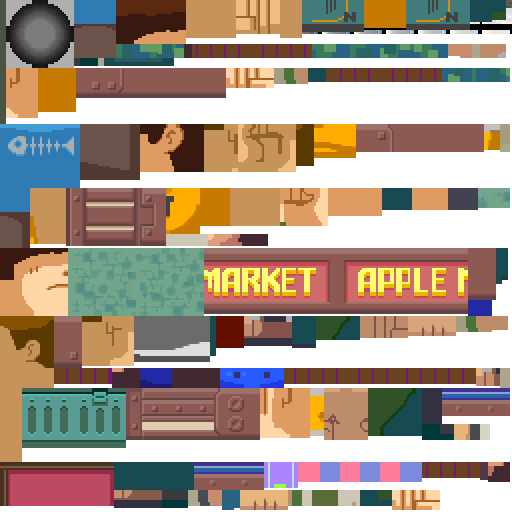
While I couldn’t find a reliable tool that works with modern 3D modeling software to allow pixel perfect alignment, just using a UV Checker will produce great results. This method also requires some thought put into your topology before unwrapping, but it’s strong point is that you can make changes into your unwrapping and geometry easily, making little tugs won’t break the whole thing.
As you can also note, Vagrant Story textures are authored in a single atlas, while Metal Gear Solid separates this atlas into smaller chunks like this:

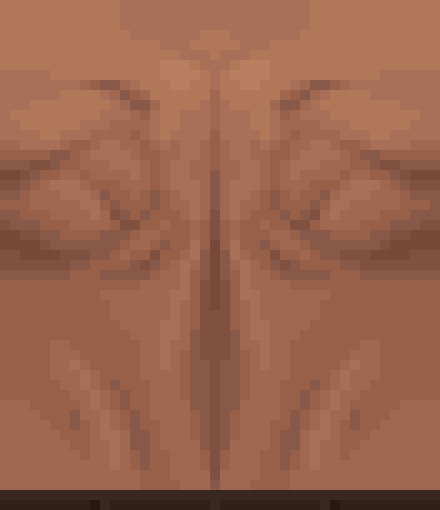
Allowing for easier unwrapping, since you can unwrap into the full UV space and then change the size of the texture to scale your results. The other important thing is that you probably want your characters in a T-pose when you’re unwrapping, since this allows for easier use of normal based unwrapping, considering your model would be authored with 4 to 8 sides for limbs and torso it could be box unwrapped and then tweaked for optimal results.
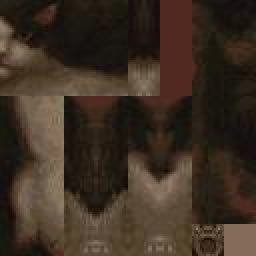
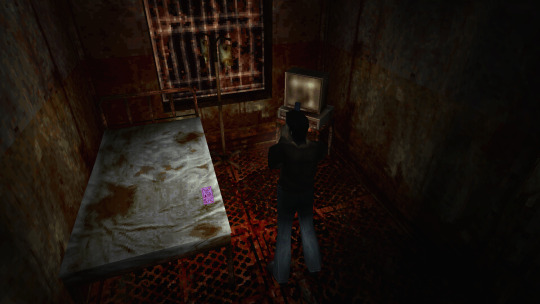
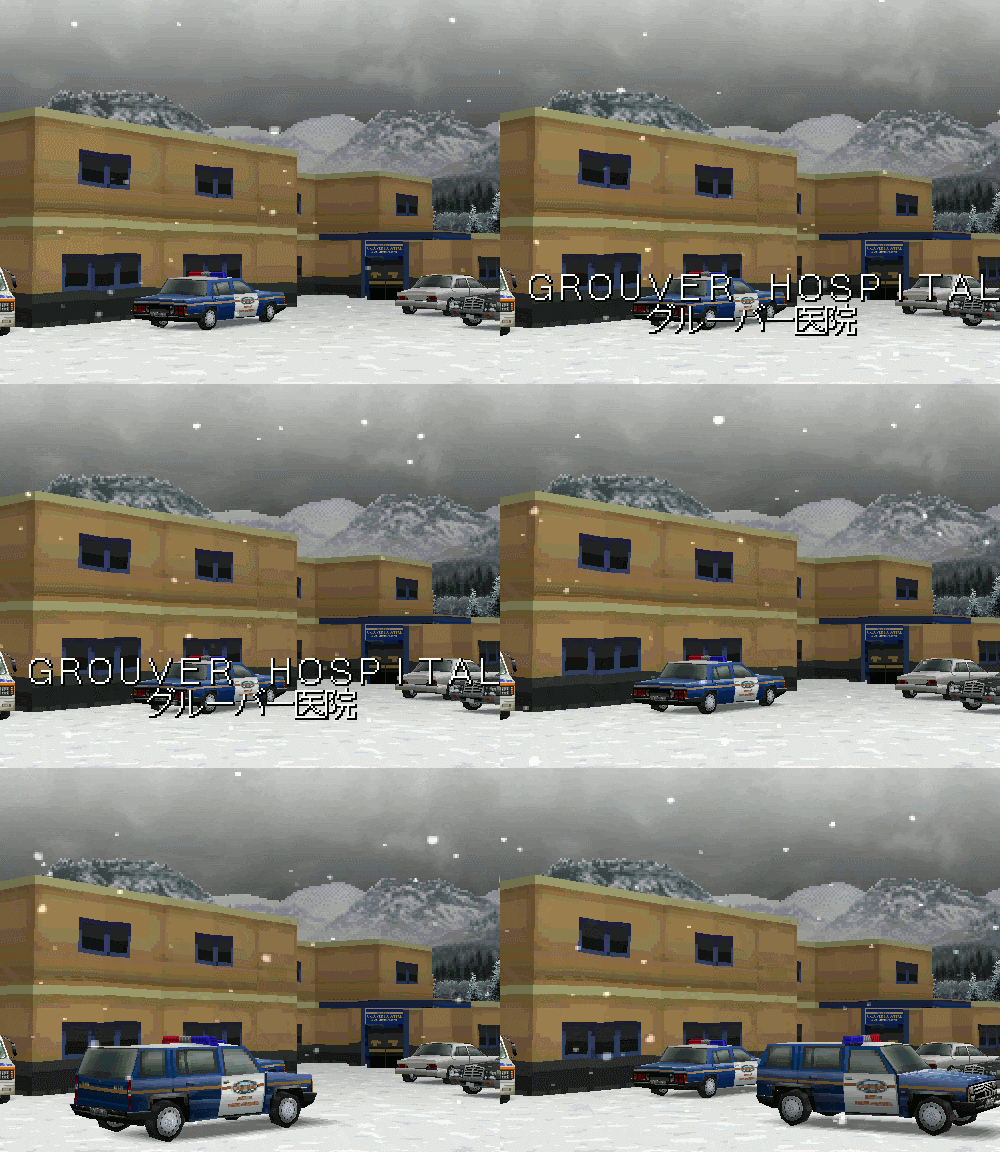
Silent Hill 1 used the same technique, and is also regarded as one of the best looking PS1 games.
While this is the best practice for this kind of look, it’s absolutely not required, Quake 1 used a really loose flat unwrap:
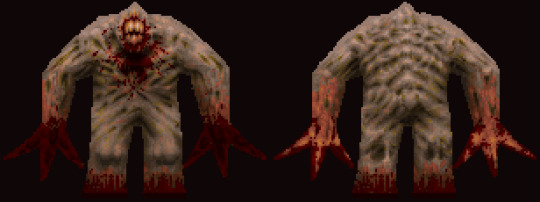
But it’s still looks bloody amazing in the end.
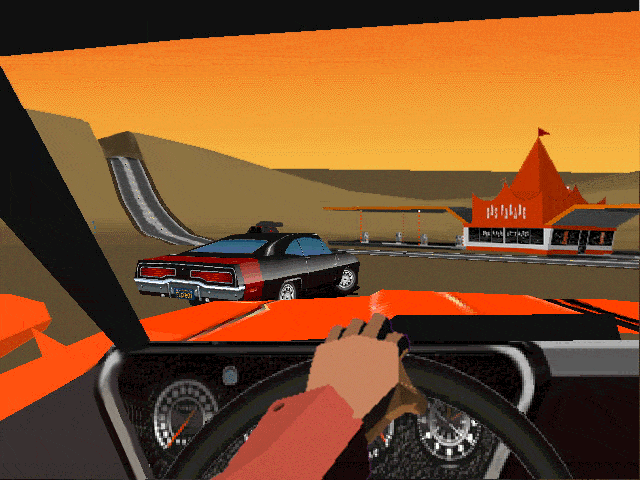
While the topic of using UV Unwrapping for crisper result is endless I’d also love to bring your attention to a certain Jet Set game
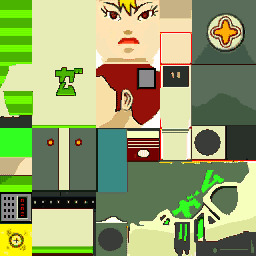
It also uses the same technique as Megaman Legends, but it tops it off with some cel-shading, producing crisp, stylish and iconic look.
Here’s some technicalities: Character textures are usually 256x256 for main characters, 128x128 for other characters, character usually have ~100-120 colors per full atlas. MGS breaks down the atlas into chunks so each chunks is usually 8 colors. So when authoring textures, make us of Indexed Color image mode or Save for Web.
Now let’s move from character textures to
World textures
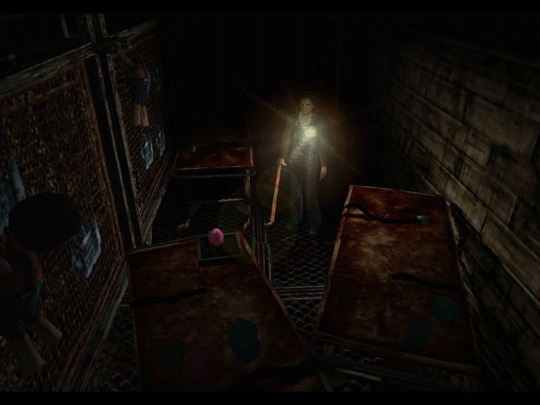
Universally regarded as best looking CD-3D games share the same trait, not only the characters look amazing, but the environments too. Despite hard limitations, the environments look very much affected by lighting. A lot of the times this is achieved with this one simple trick that was only improved with modern technology. That is, a lot of the lighting is baked into the textures
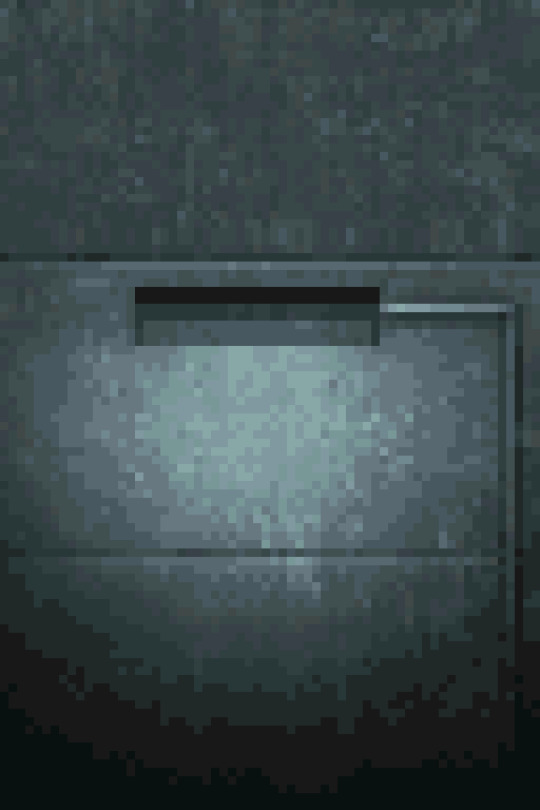
While this limits you on the amount of lighting scenarios or makes you produce more same-ish assets this certainly elevates the look. While nowadays baked lighting is not something that exciting, it’s also being done on a separate “layer”, so there’s no need to make a separate texture for every lighting scenario, however the resolution of a lightmap should not be higher than your texture, to not produce a cheap and uncanny effect. You still want to bake some fake lighting into your texture, which contradicts the rules of PBR, but since you’re not using normal maps, rules of PBR should not apply in the same way.
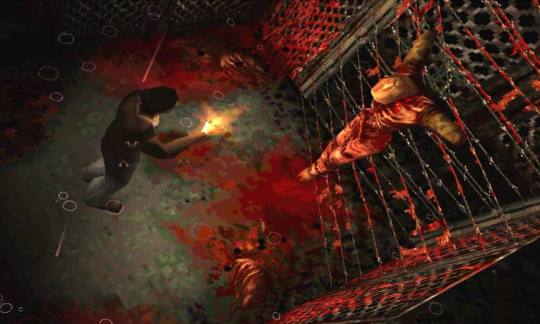
The other important tool to use, is the one we’ve talked about, that is, Vertex Color. Vagrant Story uses to great effect, while it’s environment textures don’t have lights baked, they use vertex color extensively to create a variety of moods and lighting scenarios.

Using best texturing practice, Vertex Color and making sure your lightmaps are matching resolution to your textures will produce the best results.
Now let’s talk why I don’t advise using a lot of normal maps for this style. The simple answer, it’s somewhat difficult to produce a normal map that will work with an unfiltered look, but it’s somewhat manageable to do it if you’re using texture filtering. The issue arises when you try make your normal maps unfiltered, this will make your result either a mess or a bunch of visual noise. If you’re trying to make sharp pixel-perfect textures and then will try to make normal maps to match you’ll get very harsh results. The only way I can see it working somewhat nice is to make a normal map that’s less detailed and then use it texture filtered to give some volume to your objects, while not trying to chase pixel details.
The suggested method is to do a rough sculpt -> bake it down -> use ambient occlusion and other masks to author a texture map with more details. Then use a detailed texture and less detailed normal map for optimal result.
As a closing thought, let’s talk about the
Meshes
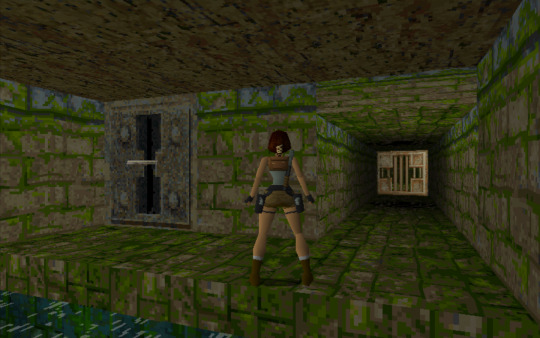
A lot of the time you can visually trace the wireframe of things, this makes it easy to pin the style as “low-poly”, but how lowpoly it really is?
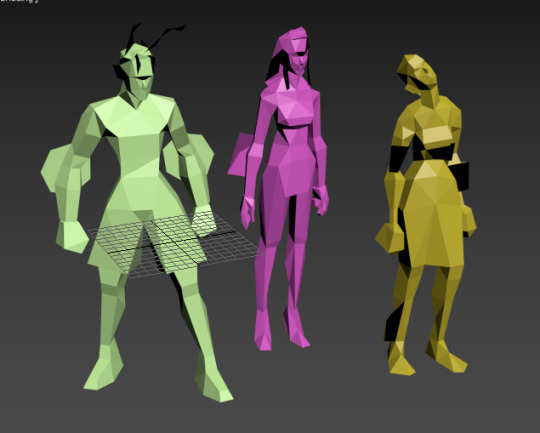
Characters in Vagrant story average 500 triangles per character. Characters in MGS go from ~450 for minor characters to ~650 for major characters. So 500-600 triangles is a solid baseline for a main character in a third person game.
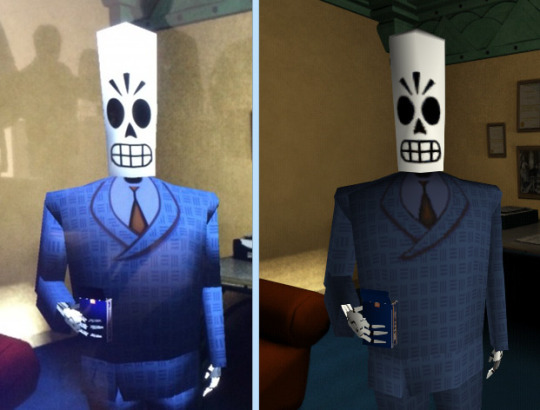
This limit brings out some great restriction for every aspiring 3D artist. You have to know your limb deformation techniques (search-engine “Limb Topology” and browse around the polycount wiki to find some great examples and deformation ready examples), but as you might’ve noticed, some games decided to not wrestle with skinning and deformation and straight up detached the limbs or even made their characters out of chunks. This is perfectly noticebla if you compare the OG Grim Fandango and the remaster, where they botched the shading and you can see the bits in all of their glory.
Another easy example is Metal Gear Solid. Characters arms are separate from their torse, but this is covered with other geometry or they’re of the same color and shaded closely.

This way of doing it was used in a number of other games and allows for unlimited range of motion, while not looking weird.
It’s easy to fall into the trap of adding more triangles and loops, but if you’ll follow the rule of “if it doesn’t add to the silhouette, you don’t need it”, you’ll keep to the style. Zoom out often and if an edge doesn’t add anything from the distance and is not critical to the deformation in a character, you really don’t need it.
These principles are so solid they’ve been alive for decades, in fact, one of the best looking PSP games “Peace Walker” sticks to these principles very closely, for example this soldier is just around 1500 triangles
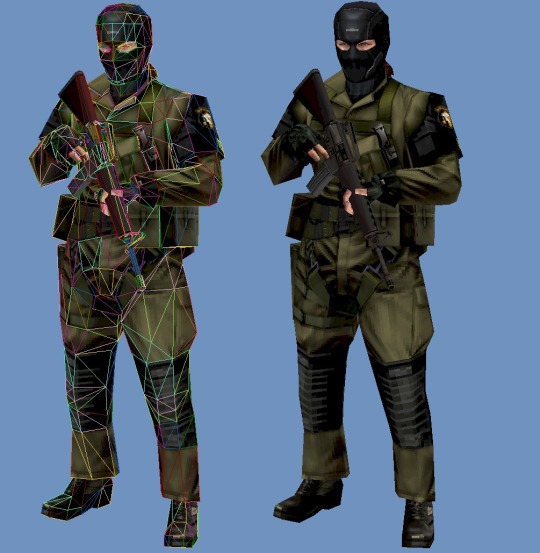
Spilling out of the “low-poly” territory it’s still made with the same economy principles used in CD-3D style, making use of every bit of texture and every triangle available.
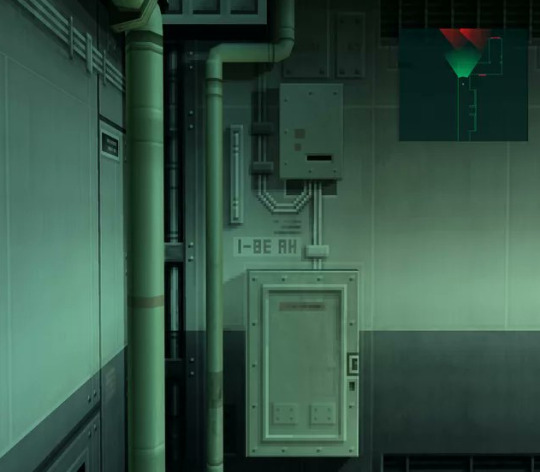
Here’s another game of Metal Gear variety, Metal Gear Solid 2 is a direct heir to the design philosophy of MGS1, perfectly pixel-aligned unwraps allow for crisp detailing:
Another honorable mention goes to Animal Crossing on Nintendo 64
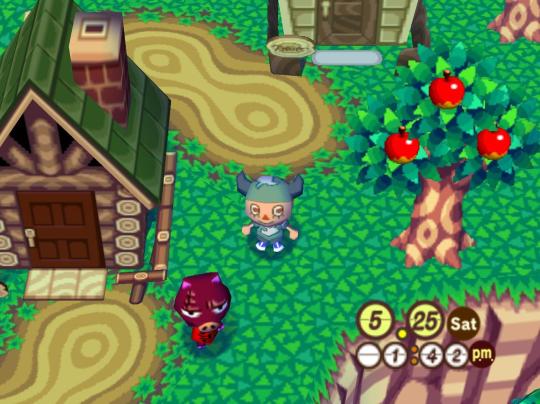
Animal Crossing combines meshes and sprites masterfully, uses pixel-aligned UV unwraps and makes up their own trick when creating landscape.
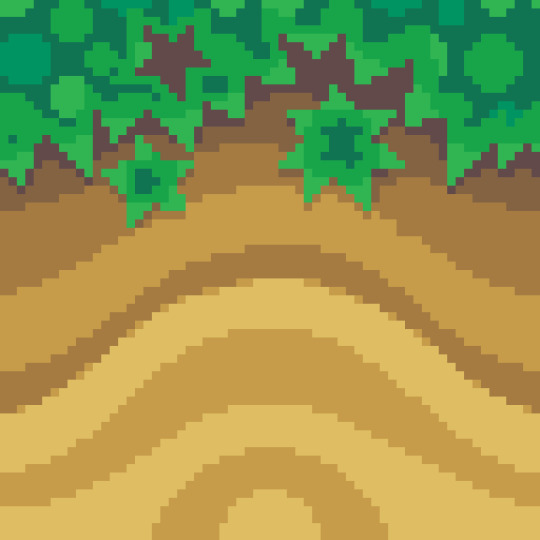
By unwrapping the repeating texture on each triangle of a hexagon they create these smooth patches of sand without the need for big or unique textures. It’s only 64x64 and 9 colors, but the mileage you can get out of it is insane!
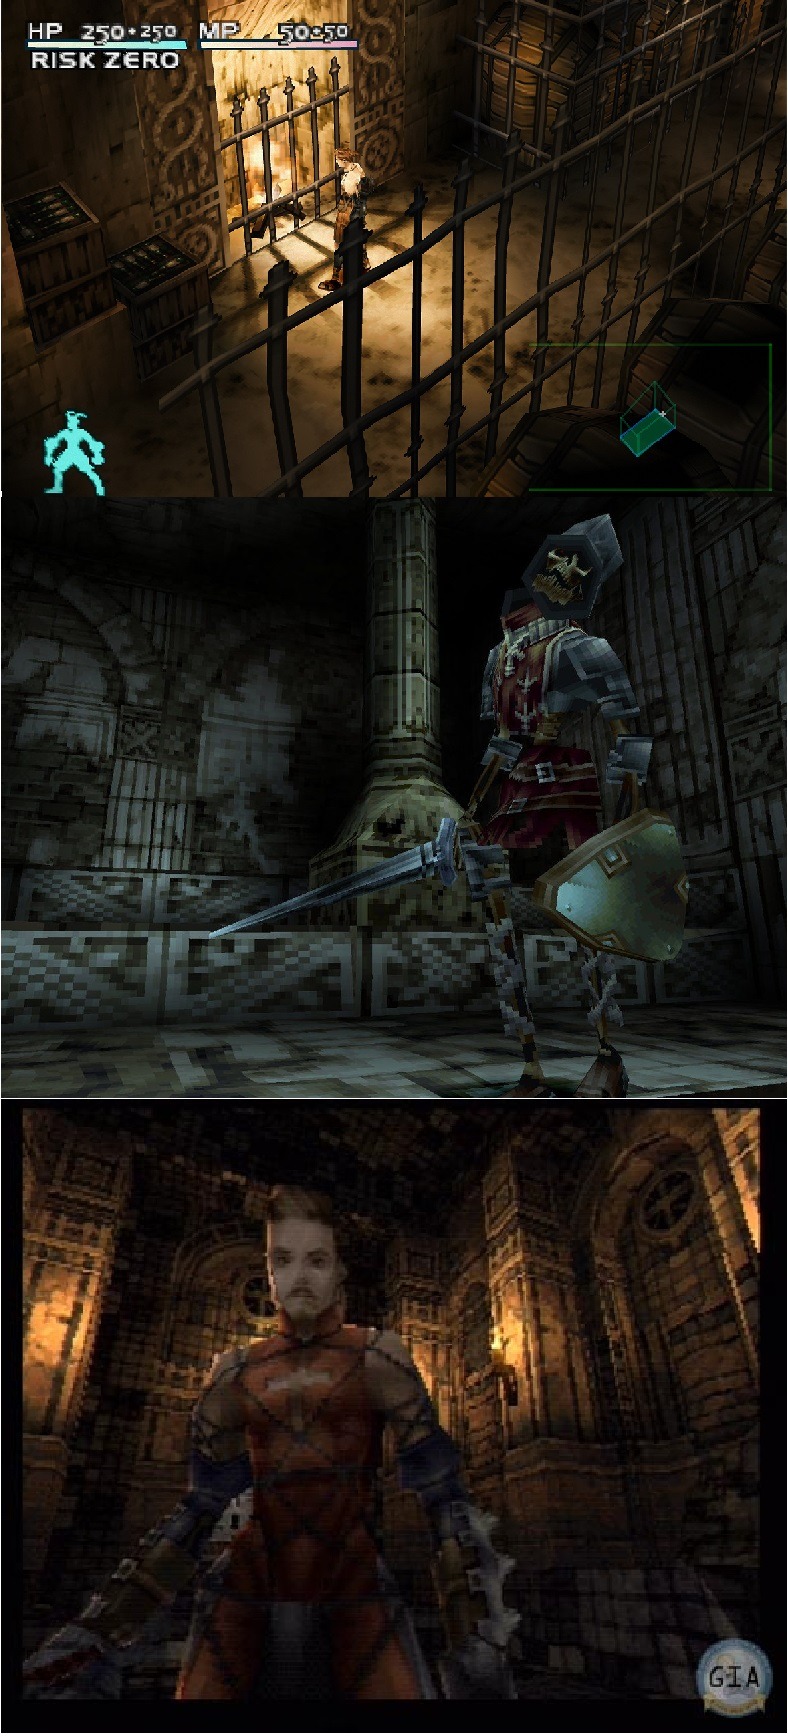
And this honestly sums up the CD-3D style perfectly, it’s the style governed by economy. There’s no need for insane textures for sharp lines, and millions of colors for smooth gradients. Now of course all of these are not rules, but recommendations, you can certainly bend the rules and improve on some aspects. Before we go, here’s some more pictures to get you inspired.
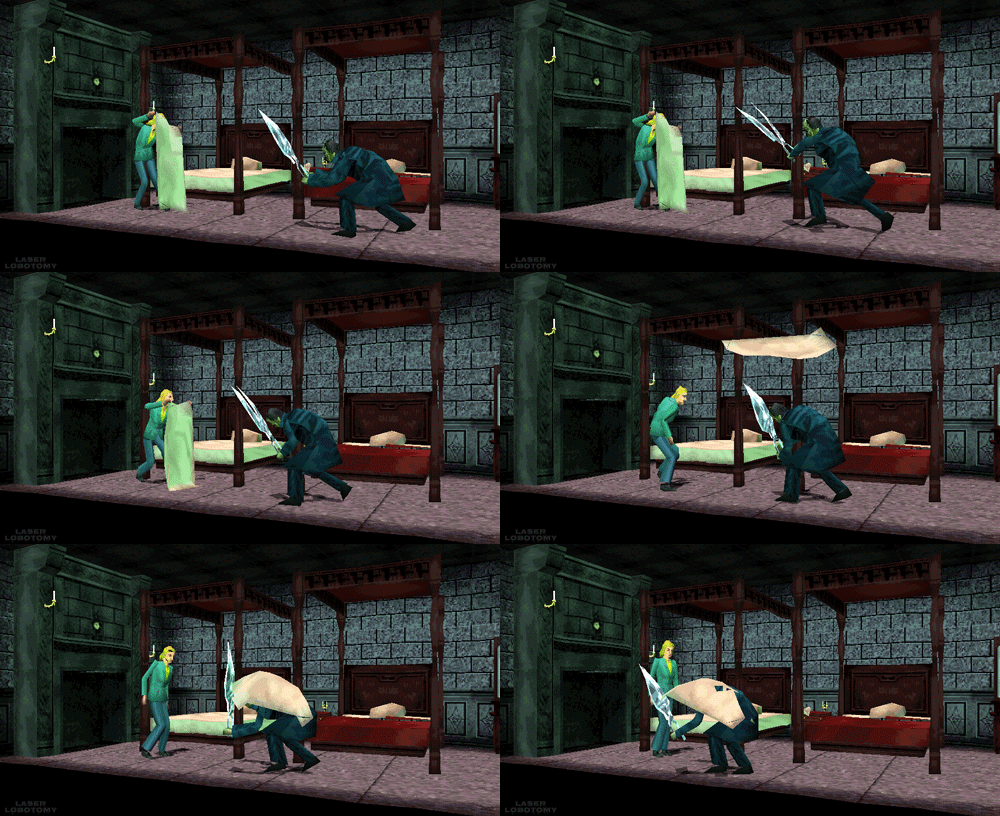
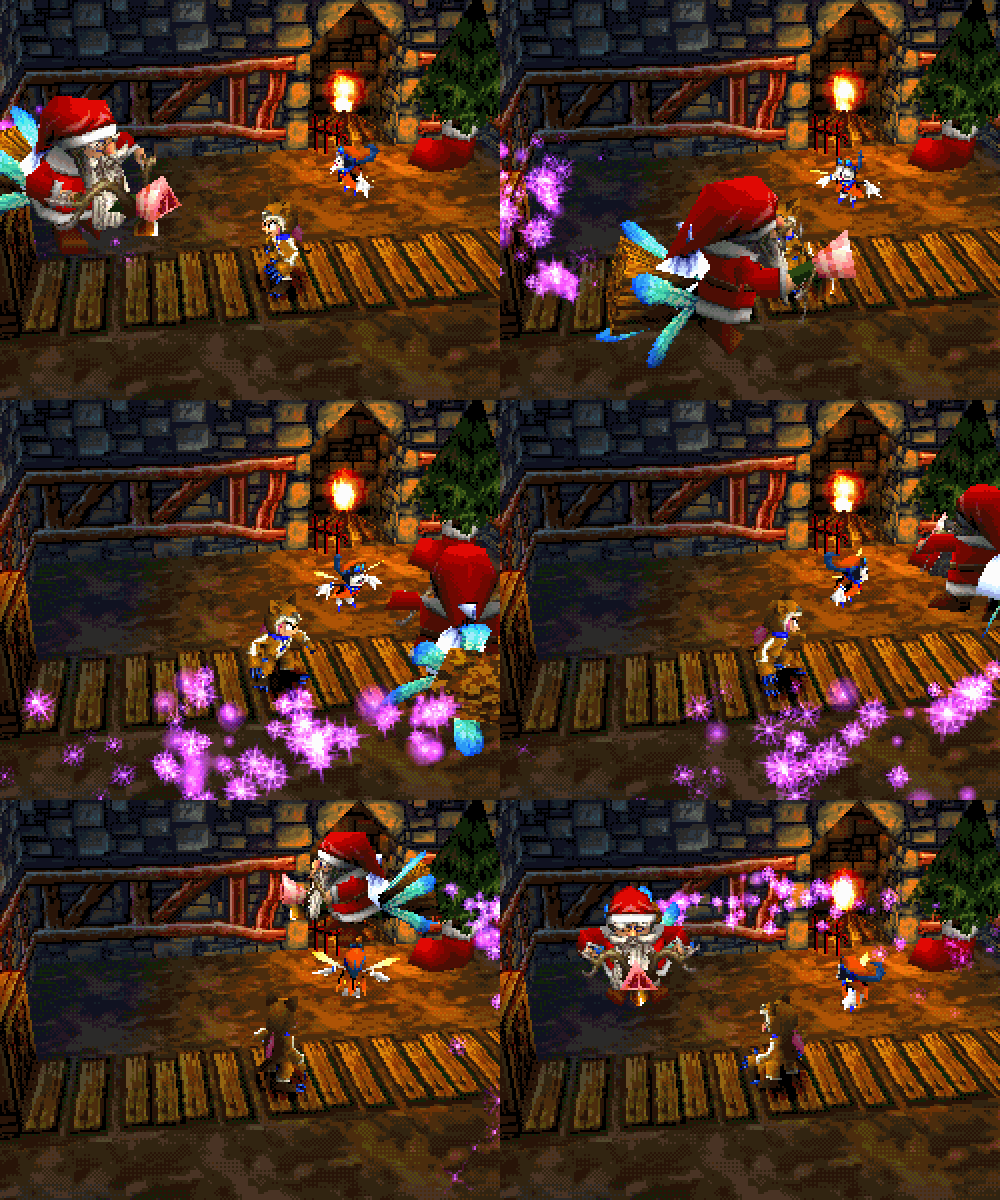
#playstation#psx games#psx#nintendo 64#low poly#3d#retro aesthetic#pixelated#gamedev#dreamcast#cd3d#retro
6K notes
·
View notes
Video
tumblr
FInishing up ironing out the ragdoll system combined with the hazards and the gravity gun and everything else. A lot of tiny things like stopping anim montages and making sure the rotation is not breaking, lot’s of boring blueprint combing.
The only thing that i’ve found while trying to record a video is that the ragdoll completely breaks if the capsule is not visible, for some unknown reason, i really can’t wrap my head around how could this happen. While i figure this out, the rest of the functionality is right on track and i’m nearing the alpha-beta test build just so people could try out the combat, if anyone is interested.
17 notes
·
View notes
Video
tumblr
Finally connected the new ragdoll functionality with the enemy that can actually ragdoll. had an annoying issue where the a-pose popped for a second, turns out it was becaus the blend weight started from 0 so when the montage ended it just slipped into a no-animation state. Now to make some not-so-crusty animations and make sure the environmental hazards work and i can finalize the enemy attacks and roll some kind of a preview.
12 notes
·
View notes
Video
tumblr
Switched over the goblins to a new rig. I honestly tried retargetting animations, but it proved useless. Editor either crashed, or just produced no result, so i just remade all of the animations. This allows me to save them as clips and poses, why is way more efficient than just saving a whole file for every animation, and besides, i need the practice.
I’ve also tried the combat after a long break, and it felt really good, so maybe i can just rush out some alpha combat test after tying up enemies working with the knockdowns and ragdolls. The gravity gun still seems broken-ish though, i have to look into why object are spazzing out when being picked up, something is probably still colliding with a held object.
Also did another texture pass on the goblin, gave it so more handpainted touches, something i can’t really do when doing the substance stuff.
21 notes
·
View notes
Video
tumblr
“Hey! This is not Spellfist, what the heck?!” you’d think?
I’ve had a really busy month and had no ability to gamedev, but now that i’m back, i wanted to use some free time last week to cobble up a Xena prototype.
Learned a lot by disassembling PS1 models and figuring how they did their mapping and joints. And also tried 3 different ways to rig the character. Keeping the geometry simple allowed me to iterate real quickly, and changing the geometry with how it’s unwrapped is compeltely not an issue, so i’d recommend trying using lowpoly for your prototype, it allows you to iterate quickly and resking things real quickly too.
We’ll continue our regular scheduled programming from now on, but maybe i’ll get some more thing into this prototype when i’m in the mood for some Lara Croft-esque adventure.
14 notes
·
View notes
Video
tumblr
Here’s some more improvement over the weeks.
I’ve unified the way throwables work, and now it’s incredibly easy to create new ones, all while being child blueprints of a single one.
i’ve made use of static mesh sockets and using the bounds to check if the object is heavy or not, it changes where the object is placed, in the hand or just in the center. I just need to add the animation cycle for the heavy objects.
The only real issue is that the objects spaz out when settling into the hand socket, especially when it’s moving, so if all fails, i’ll just hide the hands completely and do the throw thing like Dishonored does it, then again, DMoMM had full body holding animation and everything worked, i have some trouble with bigger objects scraping the floor on launch. Once this is done this finishes the gravity gun component and i’ll just add the grapple mode for the enemies.
I’ve also made some minor assets here and there and tweaked a bunch of animations, but the main headscratches is how to make the physics feel heavier. I guess i’ll set up a physics test chamber where i can try and find some workable values, but i really dislike how jittery the out-of-the-box physics stuff is.
7 notes
·
View notes
Video
tumblr
The funniest thing, when you have to get back into the code laid down almost at the start and restructure it.
In the last two weeks i’ve straightened out how the player receives damage, how traps give out damage, how enemies signalthe damage taken and how the ragdolling, ministuns, juggles and stuns interact and try not to break something along the way.
I’ve also made a better hurt widget, added a proper hurt indicator and laid out groundwork to add a proximity HUD indication, since i think it’ll aleviate the tightness of first person camera. I’m also looking into more on-screen effects and clearing up the hit particles, so they don’t clutter your view.
The biggest issue is still enemy pawns being pushable by player pawn. I feel like it breaks the tempo,as every attack has some forward movement, so in the end you’re just pushing the enemies around, literally.
8 notes
·
View notes
Video
tumblr
Here’s some more gameplay, showing the dodgin i’ve been working on. I’m still figuring out a way to leave a player trail to better indicate the dodge.
Besidethat i’ve redone some animations and made skellies a little bit more anatomically correct. I want to try some artstyle experiments, but i’ll probably do it on ghouls first.
I’ve also found and fixeda glaring hole in enemy BT, where they got stuck doing nothing, or forced to do retreating when there were attack tokens available, so now they are more active, while keeping the engagement logic i’ve made and they now can pick one of the top % of suitable attacks, making them more varied and not trying to headbutt you all of the time.
Now, the only real issue is enemies being pushed away by the player pawn, something i don’t want at all, since i’m relying on close pawn contact a quick googling did not yield anything, so i’ll try experimenting, but maybe i’ts me doing something wrong (as always).
in-between all of this i really need to make a backup and clean up all of the stuff that’s left over lying around in blueprints, since i feel like i’ve finally found a thread that works.
27 notes
·
View notes
Video
tumblr
Here’s the combat update i’ve been working on.
Some smoother lerping is in order and i really need to balance the damage/stunrate to get that extra bit of combat depth back in.
13 notes
·
View notes
Video
tumblr
Here’s what the skeleton workers have with Spellfisting and animations.
Next thing on the lsit for me was to look at arm animations and get them sorted out, which i did. Taking cues from Resident Evil 7 DLC i’ve figured some things and even realised that you don’t need to take the hand as far out as possible, since it looks even better when it’s fat on the screen.
They also use separate animation for when you hit something or not, and a different return animation make a whole lot of difference to the sense of impact. I’ve also tried a reductionist method and removed the amount of used frames to the minimum, making the shortest animation in just 7 frames. This way i could control the timing easier and then just tweak the speed with playrate.
After all of this done and the thing feeling snappy and responsive i’ve realised that i can’t really control where things on the screen as much as i want to. Not being able to match the camera view in Max and UE4 and considering the way FoV interact with the play window aspect ratio i’ve brainstormed some other solution.
Wanting to have more control while keeping the thing looking the same on all displays i gave a thought to the sprite approach, but knowing the Paper 2D being notoriously shite i’ve deducted a different approach. A separate camera and arms actor that captures the animations and displays it on the HUD. This way i can both get the advantage of 3D arms and materials while keeping them as a sprite. A solid solution, but the lighting is a bit static and i still don’t like how some things looked in 3D animation, with the deformation and things showing that i would rather not have be visible.
So i gave it some though and figured how to hook up the existing animation blueprint system and animMontages to make the sprites change.
Cue the Lich Simulator. The Skeleton animation is driven by the Anim Blueprint and all the separate actions are driven by AnimMontages, all while using the power of animnotifies and such.
I’ll also try a few thing with 3D arms, but finding a solid explanation on how to better match camera in your Modelling Software and UE4 is pretty damn high.
10 notes
·
View notes
Photo

Here’s some more asset work, and rocks in the environment, i can finally make this level a bit closer to what i was imagining it as. Here’s the rock variations i have, i think that’s more than enough to last me till the end, some material variation could go a long way.

10 notes
·
View notes
Video
tumblr
Things got fucked while i migrated everything to the new state system and was brave enough to remove some unused variables, the spike traps also got broken as a result of that (gotta fix that later).
using some physics asset magical profiles i’ve managed to get the holding working and throwing is somewhat working, which is huge and a pretty painless transition from a solution i did not like to a solution that allows me to do what i want.
If the next week is going to be somewhat easy on me i’ll take a hard long look at player animations and the whole hit-detection forced-player-movement shebang and try to tighten it so i won’t have to take a step back after every strike.
10 notes
·
View notes
Photo

Homing ragdolls, what could be worse?
After a period of contemplating i’ve come to conclusion that i NEED to add enemy juggling, and to do this my ragdoll system needs to be revised a bit, mostly i needed to find a way to keep the mesh and the capsule attached while still having the mesh be all floppy and stuff.
I’ve tried using Rigidbody and all it got me is more hurt, but before that, taking another look at the code allowed me to realise that i need to replace my countless bolls with a simple enum, and this in turn pushed me to go through the existing enemy code and animation blueprints. Turns out the most i do on enemies is damage handling, huh, the rest is done via BTs, which is kind of cool.
Soafter banging my head some more it turned out that Rigidbody hijacked the animgraph before it and prevented animation updates and going out of the ragdolled state, which kind of got solved by making another empty state machine with rigidbody hooked in and blending between it and the regular stuff, but then two issues persisted, the crazy blendouts and the actor still trying to follow me after not being supposed to. Oh, and going to ragdoll not inheriting the momentum at all, so 3 things.
The first and the most important thing was to solve the mystery of a dragging ragdoll, so i went ham on the print string and tried every combination of stop movement, but all was for naught. Even BT worked as it should

So what’s the probnlem? The problem is that once the AIMoveTo starts it’s not just going to stop, so i had to create a new service and just slap a Stop Movement in there and then stick in to BT just before Wait.
Then it went on for a real long and painful while until i’v decided to ditch Rigidbody in favor of PhysicalAnimations.
This solved both blending out issues, allows to keep the gameplay things the way i want and works in a somewhat natural way while also keeping me from the pain of managing the coexistence of the capsule and the mesh if that makes sense.
In the end i’ve cleaned up the code and pavedway for a new feature i hope to add soon, as soon as i figure out how to make my gravity gun work.
oh and i’ve also done some level work on the introduction level, going to connect it to my fun-dungeon.

12 notes
·
View notes