#Advanced Nginx Configuration Options
Explore tagged Tumblr posts
Visit Tumblr Blog
Explore Tumblr blogs with no restrictions, modern design and the best experience.
Last Seen Tumblr Blogs


Fun Fact
69% of Tumblr users are millennials.
Text
Setting Up Nginx Proxy Manager on Docker with Easy LetsEncrypt SSL
Setting Up Nginx Proxy Manager on Docker with Easy LetsEncrypt SSL #homelab #selfhosted #NginxProxyManagerGuide #EasySSLCertificateManagement #UserFriendlyProxyHostSetup #AdvancedNginxConfiguration #PortForwarding #CustomDomainForwarding #FreeSSL
There are many reverse proxy solutions that enable configuring SSL certificates, both in the home lab and production environments. Most have heard about Traefik reverse proxy that allows you to pull LetsEncrypt certificates for your domain name automatically. However, there is another solution that provides a really great GUI dashboard for managing your reverse proxy configuration and LetsEncrypt…

View On WordPress
#Access Control Features#Advanced Nginx Configuration Options#Custom Domain Forwarding#Easy SSL Certificate Management#Effective Port Forwarding#Free SSL with Nginx Proxy#Nginx Audit Log Tracking#Nginx Proxy Manager Guide#Secure Admin Interface#User-Friendly Proxy Host Setup
0 notes
Text
How Agencies Can Boost Performance and Security with VPS Hosting
🧩 Hosting for Agencies: Managing Multiple Client Sites on VPS
Why VPS Hosting is the Smart Choice for Web Design & Marketing Agencies
For creative agencies, web designers, developers, and digital marketers, managing multiple client websites efficiently — without downtime, performance issues, or high costs — is a challenge.
That’s where VPS hosting steps in.
Whether you manage 5 websites or 50, a Virtual Private Server (VPS) gives you the perfect balance of power, flexibility, and cost-efficiency, especially when compared to shared hosting or managing multiple hosting accounts.
Let’s break down why VPS hosting is the best fit for agencies, and how platforms like VCCLHOSTING help agencies grow faster with reliable hosting infrastructure.
⚙️ Why VPS Hosting Is Ideal for Agencies
✅ 1. Host Multiple Websites from a Single Dashboard
Instead of juggling dozens of shared hosting accounts, a VPS lets you:
Create multiple domains and subdomains
Isolate each client’s website
Use control panels like cPanel, DirectAdmin, or Webmin
Easily manage from a unified server dashboard
VCCLHOSTING VPS plans support multi-site management out-of-the-box with optional cPanel integration.
✅ 2. Dedicated Resources = Better Performance
On VPS, your agency gets:
Dedicated CPU, RAM, and disk space
Guaranteed resources for each project
Faster load times than shared hosting
Ability to run advanced tools or custom code
This is especially critical when handling eCommerce, WordPress, or heavy CMS projects.
✅ 3. Full Root Access for Customization
Agencies love flexibility — and VPS delivers it. With root (admin) access, you can:
Install custom software (Node.js, Laravel, Python, etc.)
Configure performance modules (Redis, OPcache, GZIP)
Run scripts, CRON jobs, and staging environments
VCCLHOSTING VPS supports both Linux and Windows, so you can build in whatever stack your client needs.
✅ 4. Enhanced Security and Client Isolation
Each website can be configured in its own user environment, reducing the risk of one hacked site affecting the others.
Plus, with VPS, you can:
Install firewalls
Add SSL certificates for each domain
Enable malware scanners and IP restrictions
VCCLHOSTING includes DDoS protection, secure SFTP access, and optional firewall setups to keep your clients' data safe.
✅ 5. Scalable as Your Agency Grows
Need more resources? Just upgrade your plan — no migration required.
Scale:
RAM
Storage (HDD or NVMe SSD)
Bandwidth
CPU cores
Whether you start with 2GB RAM or 16GB+, VCCLHOSTING lets you scale vertically or horizontally as needed.
✅ 6. Centralized Email, Backup, and DNS Management
With VPS, you can:
Set up custom email addresses per client (e.g., [email protected])
Use automation tools like JetBackup, Acronis, or manual snapshots
Manage DNS settings for all domains from one place
VCCLHOSTING VPS plans offer built-in DNS and email features, or you can integrate your own tools.
🛠️ Bonus: Developer & Automation Friendly
Use Git, SSH, staging tools, and CI/CD pipelines to streamline your development.
Popular tools you can install:
GitLab, Gitea
Docker
NGINX/Apache tuning
Node.js, Python, PHP-FPM environments
VCCLHOSTING supports all of this and more — giving you the power of a full server with none of the noise.
💡 Who This Is For
Web Design Agencies
Digital Marketing Firms
SEO Agencies
Freelancers managing multiple websites
Software development firms building client portals
🏁 Final Thoughts
If you're still managing client websites across different shared hosting accounts, it's time to simplify, secure, and scale with VPS hosting.
A VPS solution like VCCLHOSTING not only gives you the performance and flexibility you need — but also local Indian support, instant scalability, and full control over your hosting environment.
🚀 Ready to Scale Your Agency?
🔗 Explore VPS plans at www.vcclhosting.com 📞 Call us at 9096664246 for a quick consultation in English, Hindi, or Marathi
0 notes
Text
Why Linux VPS is the Best Choice for Developers and Businesses in 2025
In 2025, businesses and developers alike are seeking more reliable, scalable, and cost-effective hosting solutions. Whether you’re launching a web app, managing an eCommerce store, or running multiple client websites, choosing the right hosting environment can make a huge difference in performance, security, and scalability.
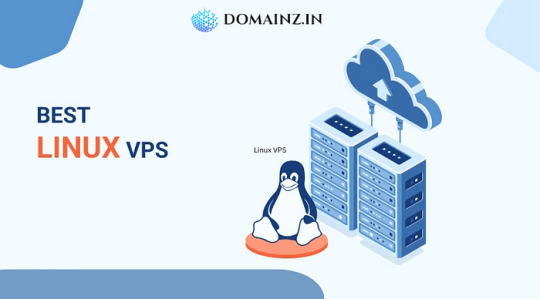
Among the many options available, Linux VPS (Virtual Private Server) hosting continues to stand out as a top choice. Known for its stability, flexibility, and developer-friendly environment, the Linux VPS server is becoming the backbone of modern digital infrastructure. But what makes it so appealing, especially in 2025? Let’s dive deep into the reasons.
1. Cost-Effective Without Compromising Performance
One of the most attractive features of a Linux VPS is its affordability. Unlike dedicated servers, VPS hosting allows you to get dedicated-like resources at a fraction of the cost. With Linux being open-source, there are no licensing fees, which significantly reduces overall expenses compared to a Windows-based VPS.
Businesses can scale their infrastructure efficiently without burning through their IT budgets, and developers can experiment or deploy projects without worrying about high monthly hosting costs.
2. Superior Performance and Uptime
In 2025, user expectations are higher than ever. Websites and applications need to load fast and be accessible 24/7. A Linux VPS server offers dedicated resources such as CPU, RAM, and SSD storage, ensuring that your applications perform smoothly even during high traffic spikes.
Unlike shared hosting, where resources are distributed among hundreds of users, VPS guarantees that your environment remains isolated. This leads to consistent uptime and fast load times — essential factors for SEO rankings and user experience.
3. Full Root Access for Complete Control
One of the key reasons developers prefer Linux VPS hosting is the root-level access it provides. This level of control allows for full customization of the server environment. Developers can:
Install and configure any software or packages
Modify system files and server settings
Deploy custom applications or scripts
This freedom makes Linux VPS ideal for complex development environments, testing, and production servers. In 2025, when developers need more power and flexibility than ever, having full access is a massive advantage.
4. Security and Privacy
With the increasing number of cyber threats in 2025, securing your server infrastructure is non-negotiable. A Linux VPS server is inherently more secure than shared hosting. You get isolated server resources, making your server less susceptible to attacks caused by neighboring users.
Moreover, Linux as an OS is known for its strong security protocols. Regular updates, strong community support, and customizable firewall configurations ensure your server remains secure. Users can also implement advanced security tools such as Fail2Ban, IPtables, and SELinux for added protection.
5. Scalability for Growing Projects
Whether you’re a startup with growing traffic or a development agency handling multiple client sites, scalability is crucial. A Linux VPS allows you to scale your resources as your needs grow. With just a few clicks (or commands), you can upgrade your server’s RAM, CPU, or storage without affecting your existing configurations or data.
This flexibility makes Linux VPS an ideal choice for businesses aiming to scale in a cost-effective and disruption-free manner.
6. Developer-Friendly Environment
Most developers are familiar with Linux-based environments, especially if they work with tools like Git, Apache, Nginx, Docker, Node.js, and MySQL. A Linux VPS server provides a native environment for these tools, making deployment and server management seamless.
Additionally, Linux distributions such as Ubuntu, CentOS, Debian, and AlmaLinux offer users the choice to work in environments they are most comfortable with.
7. Automation and Scripting Capabilities
In today’s DevOps-driven world, automation is key. Linux VPS servers allow developers to automate tasks using shell scripts, cron jobs, or more advanced tools like Ansible and Puppet. This improves efficiency and helps maintain consistency across deployments.
From automated backups to server monitoring, a Linux VPS environment supports robust automation capabilities that simplify the life of sysadmins and developers alike.
8. Large Community and Documentation
Linux has a massive global community and an abundance of resources. Whether you’re a beginner or an expert, you can find forums, tutorials, GitHub repositories, and documentation to help you resolve issues or improve server performance.
In 2025, this ecosystem is even more valuable. New developers can quickly learn and troubleshoot, while experienced users benefit from the community’s collective knowledge and tools.
Conclusion
As the digital landscape continues to evolve, the demand for reliable, scalable, and secure hosting solutions grows stronger. A Linux VPS server offers the perfect balance of performance, control, and affordability, making it the go-to solution for both developers and businesses in 2025.
0 notes
Text
StoreGo SaaS Nulled Script 6.7

StoreGo SaaS Nulled Script – Build Powerful Online Stores with Zero Cost If you're looking for a professional, cost-effective, and user-friendly way to launch an online store, the StoreGo SaaS Nulled Script is your ultimate solution. This dynamic script offers a fully-featured eCommerce experience, empowering businesses of all sizes to create stunning digital storefronts without investing in expensive software or subscriptions. What is StoreGo SaaS Nulled Script? StoreGo SaaS Nulled Script is a premium online store builder that allows users to create, manage, and scale eCommerce businesses with ease. The nulled version provides all premium features for free, making it accessible for entrepreneurs, freelancers, and agencies who want to launch professional web stores without financial barriers. Unlike traditional eCommerce platforms that require hefty licensing fees, this script is a fully customizable and open-source alternative. With zero limitations, it’s a fantastic option for users who want complete control over their store’s design, layout, payment methods, and more. Technical Specifications Script Type: PHP Laravel Framework Database: MySQL Frontend Framework: Bootstrap 4 Server Requirements: PHP 7.3+, Apache/Nginx, cURL, OpenSSL Payment Gateways Supported: Stripe, PayPal, Razorpay, Paystack, and more Multi-Store Capability: Yes Top Features and Benefits Multi-Tenant SaaS Architecture: Each user can have a fully independent online store under your main platform. Drag-and-Drop Store Builder: Design pages effortlessly without coding. Real-Time Analytics: Get insights into orders, revenue, and customer behavior. Integrated Payment Solutions: Accept online payments globally with multiple secure gateways. Subscription Packages: Create various pricing plans for your users. Product & Inventory Management: Manage stock, variants, SKUs, and more from one dashboard. Use Cases Whether you're starting a new eCommerce business or offering SaaS services to clients, the StoreGo SaaS Nulled Script adapts perfectly to different business models. Ideal for: Freelancers offering eCommerce development services Agencies launching SaaS-based online store platforms Small business owners looking to sell online without third-party dependencies Digital marketers creating customized product landing pages Installation Guide Setting up the StoreGo SaaS Nulled Script is quick and seamless: Download the script package from our website. Upload it to your server via cPanel or FTP. Create a MySQL database and user. Run the installer and follow the on-screen instructions. Log in to the admin panel and start customizing your platform! For advanced configurations, detailed documentation is included within the script package, ensuring even beginners can get started with minimal technical effort. Why Choose StoreGo SaaS Nulled Script? By choosing the StoreGo SaaS Nulled Script, you're unlocking enterprise-level features without paying a premium. Its modern UI, powerful backend, and full customization capabilities make it a must-have tool for building eCommerce platforms that perform. Plus, when you download from our website, you get a clean, secure, and fully functional nulled version. Say goodbye to restrictive licensing and hello to freedom, flexibility, and profitability. FAQs Is the StoreGo SaaS Nulled Script safe to use? Yes, the script available on our website is thoroughly scanned and tested to ensure it’s clean, stable, and ready for production. Can I use this script for multiple clients? Absolutely! The multi-tenant feature allows you to offer customized storefronts to various clients under your own domain. Does this script include future updates? While this is a nulled version, we frequently update our repository to include the latest stable releases with new features and security patches. How do I get support if I face issues? Our community forum and documentation are excellent resources. Plus, you can always reach out to us via our contact form for guidance.
Download Now and Start Selling Online Today! Get started with the StoreGo SaaS and experience unmatched control and performance for your eCommerce venture. Download it now and build your digital empire—no license needed, no hidden costs. Need more tools to supercharge your WordPress experience? Don’t forget to check out our other offerings like WPML pro NULLED. Looking for a stylish WordPress theme? Get Impreza NULLED for free now.
0 notes
Text
How to Set Up a Dedicated Server for Your Website?
Setting up a dedicated server for your website can greatly enhance performance, security, and reliability. Unlike shared hosting, where multiple users share the same resources, a dedicated server provides an exclusive environment tailored to your specific needs. This means faster load times, better uptime, and the ability to handle high traffic without disruptions. Additionally, dedicated servers offer improved security, reducing the risk of cyberattacks and data breaches, as you have complete control over security configurations, firewalls, and access permissions.

A dedicated server is particularly beneficial for business websites, e-commerce platforms, or high-traffic blogs that require high availability and customization. For businesses handling sensitive customer data or financial transactions, dedicated hosting ensures compliance with industry standards and regulations. Furthermore, dedicated servers allow for custom software installations, advanced caching techniques, and database optimizations that are not always possible with shared hosting or VPS solutions.
Although setting up a dedicated server requires technical expertise, the benefits far outweigh the challenges. From selecting the right hardware and software to configuring security and performance optimizations, this guide will walk you through the process step by step, ensuring that your website operates efficiently and securely in a dedicated hosting environment.
Step 1: Choose the Right Dedicated Server
Before you begin, it’s crucial to select a dedicated server that meets your requirements. Consider factors such as the processor (CPU), which should be powerful enough to handle your website's traffic and workload, with options like Intel Xeon or AMD EPYC. Memory (RAM) is another important consideration, as it determines how smoothly your website processes run. Storage should be chosen based on your needs—HDDs provide high capacity, while SSDs offer better speed and reliability. Bandwidth is also crucial, as higher traffic websites require more bandwidth to avoid slowdowns. Lastly, decide on an operating system, choosing between Linux (Ubuntu, CentOS, Debian) and Windows Server based on your software requirements. You can purchase a dedicated server from web hosting providers such as M2Host and WebHostingWorld, or set up your own physical server.
Step 2: Install and Configure the Operating System
Once you have your dedicated server, the next step is to install and configure the operating system. If you are using Linux, download the latest ISO file from the official website and use a bootable USB or remote management interface to install it. Follow the installation steps carefully, set up a root password, and create a new user with sudo privileges. After installation, update the system to ensure it runs smoothly. If you opt for Windows Server, download the Windows Server ISO and boot the server from the installation media. Follow the on-screen installation prompts, set up an administrator password, and update Windows to install necessary drivers.
Step 3: Secure Your Server
Security is a crucial aspect of managing a dedicated server. Begin by changing default SSH or RDP ports to reduce the risk of brute-force attacks. Set up a firewall using tools to restrict access. On Linux servers, disable root login by modifying the SSH configuration file and enforce the use of SSH keys instead of passwords. Enabling automatic updates ensures that security patches are applied regularly. Additionally, install security software such as Fail2Ban to monitor and prevent unauthorized access attempts.
Step 4: Install a Web Server
A web server is necessary to host your website files. The two most common options are Apache and Nginx. To install Apache on Linux, use the package manager to install it and enable it to start on boot. For Nginx, follow a similar installation process. If you are using Windows Server, install Internet Information Services (IIS) via the Server Manager by selecting “Add Roles and Features” and enabling the Web Server (IIS) option. Once installed, configure the web server settings as needed to optimize performance.
Step 5: Install and Configure a Database Server
Most websites require a database to store user data, content, and configurations. If you choose MySQL on Linux, install it using the package manager and secure it. PostgreSQL is another option that can be installed similarly. For Windows users, Microsoft SQL Server is a popular choice, which can be installed and managed through SQL Server Management Studio (SSMS). Ensure that your database server is configured for security and optimized for performance.
Step 6: Set Up a Domain Name and SSL Certificate
To make your website accessible via a domain name, purchase a domain from a registrar and configure the DNS settings to point to your server’s IP address. Securing your website with an SSL certificate is crucial for HTTPS encryption. If you are using Linux, install Let’s Encrypt SSL using Certbot. For Apache, run the Certbot command specific to Apache, and for Nginx, use the respective command. If using Windows, install SSL via the IIS Manager.
Step 7: Upload Your Website Files
Once your web server is set up, you need to upload your website files to the appropriate directory. File transfer tools like FTP (FileZilla) or SCP can be used to move files from your local machine to the server.
Step 8: Set Up Automatic Backups
Regular backups are crucial to prevent data loss in case of server failures or security breaches. On Linux, use tools to create scheduled backups of your website files and databases. For Windows, the built-in Windows Backup tool or third-party software like Veeam can be used. Additionally, you can store backups in cloud storage solutions like AWS S3 or Google Drive to ensure redundancy.
Step 9: Monitor and Optimize Performance
Monitoring your server’s performance is essential to ensure it operates efficiently. Linux users can utilize command-line tools, while Windows users can use Task Manager, Resource Monitor, or Performance Monitor. Installing dedicated monitoring tools like Netdata can provide real-time insights. Performance optimization techniques include enabling caching (using Redis or Memcached), integrating a Content Delivery Network (CDN) such as Cloudflare, and optimizing images and database queries to reduce load times.
Step 10: Keep Your Server Maintained
Maintaining your server is essential to ensure stability and security. Regularly updating the operating system and software prevents vulnerabilities. Checking for security patches and restarting services, when necessary, helps prevent memory leaks and downtime. Monitoring access logs can help identify unusual activity and mitigate potential threats. Routine maintenance ensures your dedicated server remains secure and performs optimally.
Benefits of a Dedicated Server for Your Website-
A dedicated server provides numerous advantages, making it an excellent choice for businesses, high-traffic websites, and applications that require enhanced security and performance. Some of the key benefits include:
Improved Performance and Speed – With dedicated resources, your website operates at optimal speed without being affected by other users. This ensures faster page load times and better overall performance, enhancing user experience and search engine rankings.
Enhanced Security – Dedicated servers provide a higher level of security since you are not sharing resources with other websites. You have full control over firewalls, security protocols, and monitoring tools, reducing the risk of cyber threats, data breaches, and malware attacks.
Better Reliability and Uptime – Since your server resources are not shared, your website experiences minimal downtime. Dedicated hosting ensures high availability, making it ideal for businesses that rely on continuous online presence.
Full Control and Customization – A dedicated server allows you to configure the operating system, software, and security settings to suit your specific needs. You can install custom applications, optimize performance settings, and adjust security measures according to your business requirements.
Scalability and Flexibility – As your website grows, a dedicated server provides the flexibility to upgrade hardware components such as RAM, CPU, and storage without affecting performance. This ensures your server can handle increased traffic and data loads efficiently.
Better Compliance and Data Privacy – Businesses handling sensitive information, such as financial institutions and healthcare organizations, benefit from dedicated servers due to enhanced compliance with data protection regulations. Since your data is not shared, it remains private and secure.
Dedicated IP Address – Unlike shared hosting, where multiple websites share a single IP address, a dedicated server provides a unique IP address, reducing the risk of being blacklisted and improving email deliverability.
Optimized Resource Utilization – With dedicated hosting, you avoid issues related to resource allocation, such as bandwidth throttling and CPU limitations that often occur in shared environments. This results in smoother operations and better website performance.
By leveraging the advantages of a dedicated server, businesses and website owners can ensure better performance, security, and reliability while maintaining full control over their hosting environment.
Conclusion-
Setting up a dedicated server for your website requires careful planning, but the rewards include better performance, security, and flexibility. By following this guide, you can establish a robust, secure, and optimized server that serves your website efficiently. Whether you choose Linux or Windows, a dedicated server gives you full control, making it the best option for high-traffic websites and businesses looking for reliability.

Ann Taylor
M2Host m2host.com We provide experienced web hosting services tailored to your unique needs. Facebook Twitter Instagram YouTube
#dedicated server#cheap dedicated server#dedicated hosting#webhostingprovider#best web hosting#m2host#webhostingservice#affordablehosting#cheap web hosting
0 notes
Text
How to Deploy Your Full Stack Application: A Beginner’s Guide
Deploying a full stack application involves setting up your frontend, backend, and database on a live server so users can access it over the internet. This guide covers deployment strategies, hosting services, and best practices.
1. Choosing a Deployment Platform
Popular options include:
Cloud Platforms: AWS, Google Cloud, Azure
PaaS Providers: Heroku, Vercel, Netlify
Containerized Deployment: Docker, Kubernetes
Traditional Hosting: VPS (DigitalOcean, Linode)
2. Deploying the Backend
Option 1: Deploy with a Cloud Server (e.g., AWS EC2, DigitalOcean)
Set Up a Virtual Machine (VM)
bash
ssh user@your-server-ip
Install Dependencies
Node.js (sudo apt install nodejs npm)
Python (sudo apt install python3-pip)
Database (MySQL, PostgreSQL, MongoDB)
Run the Server
bash
nohup node server.js & # For Node.js apps gunicorn app:app --daemon # For Python Flask/Django apps
Option 2: Serverless Deployment (AWS Lambda, Firebase Functions)
Pros: No server maintenance, auto-scaling
Cons: Limited control over infrastructure
3. Deploying the Frontend
Option 1: Static Site Hosting (Vercel, Netlify, GitHub Pages)
Push Code to GitHub
Connect GitHub Repo to Netlify/Vercel
Set Build Command (e.g., npm run build)
Deploy and Get Live URL
Option 2: Deploy with Nginx on a Cloud Server
Install Nginx
bash
sudo apt install nginx
Configure Nginx for React/Vue/Angular
nginx
server { listen 80; root /var/www/html; index index.html; location / { try_files $uri /index.html; } }
Restart Nginx
bash
sudo systemctl restart nginx
4. Connecting Frontend and Backend
Use CORS middleware to allow cross-origin requests
Set up reverse proxy with Nginx
Secure API with authentication tokens (JWT, OAuth)
5. Database Setup
Cloud Databases: AWS RDS, Firebase, MongoDB Atlas
Self-Hosted Databases: PostgreSQL, MySQL on a VPS
bash# Example: Run PostgreSQL on DigitalOcean sudo apt install postgresql sudo systemctl start postgresql
6. Security & Optimization
✅ SSL Certificate: Secure site with HTTPS (Let’s Encrypt) ✅ Load Balancing: Use AWS ALB, Nginx reverse proxy ✅ Scaling: Auto-scale with Kubernetes or cloud functions ✅ Logging & Monitoring: Use Datadog, New Relic, AWS CloudWatch
7. CI/CD for Automated Deployment
GitHub Actions: Automate builds and deployment
Jenkins/GitLab CI/CD: Custom pipelines for complex deployments
Docker & Kubernetes: Containerized deployment for scalability
Final Thoughts
Deploying a full stack app requires setting up hosting, configuring the backend, deploying the frontend, and securing the application.
Cloud platforms like AWS, Heroku, and Vercel simplify the process, while advanced setups use Kubernetes and Docker for scalability.
WEBSITE: https://www.ficusoft.in/full-stack-developer-course-in-chennai/
0 notes
Text
PHP Full-Stack Developer Certification Course
1. Introduction to Full-Stack Development
Understanding the full-stack ecosystem.
Role of PHP in modern web development.
Overview of front-end and back-end integration.
2. Frontend Development
HTML5 and CSS3: Building responsive and accessible web layouts.
JavaScript: Core concepts, DOM manipulation, and ES6 features.
Bootstrap: Designing responsive and mobile-first web pages.
React or Vue.js (Optional): Adding dynamic interactivity to your web apps.
3. Backend Development with PHP
PHP Basics: Syntax, variables, functions, and error handling.
Working with Databases: MySQL basics, CRUD operations, and PDO.
Advanced PHP Concepts: Object-Oriented Programming, sessions, and file handling.
Building APIs: RESTful APIs using PHP for dynamic data.
4. Full-Stack Integration
Combining front-end and back-end using PHP.
AJAX for seamless data exchange.
Creating and managing sessions for user authentication.
5. Database Design and Management
Normalization techniques for efficient databases.
SQL queries for complex data retrieval.
Using database management tools like phpMyAdmin.
6. Framework Mastery: Laravel
Setting up Laravel for rapid development.
Routing, controllers, and views.
Eloquent ORM for advanced database interactions.
Building scalable and secure applications.
7. Version Control with Git
Basics of Git and GitHub.
Managing code repositories and collaborating on projects.
8. Deployment and Hosting
Configuring web servers (Apache, Nginx).
Hosting on platforms like cPanel, AWS, or Heroku.
Managing domains and SSL certificates.
9. Capstone Project
Develop a complete full-stack application (e.g., an e-commerce site or blog platform).
Incorporate learned skills into a professional project.
10. Certification Exam
Online test to validate your knowledge.
Practical exam to demonstrate your development skills.
Who Should Enroll?
Aspiring full-stack developers.
Web designers aiming to enhance their back-end knowledge.
PHP developers seeking to expand their skill set.
Course Duration:
12–16 weeks (flexible learning pace).
Outcome:
Certification as a PHP Full-Stack Developer.
Portfolio of projects showcasing your skills.
Fullstack course in chennai
Fullstack developer course in chennai
Fullstack training in chennai

0 notes
Text
Ingress Controller Kubernetes for Optimal Traffic Management
An Ingress Controller Kubernetes is a critical component in managing external access to services within a Kubernetes cluster. It acts as a reverse proxy, routing incoming traffic from the outside world to the appropriate services inside the cluster based on defined rules. By leveraging an Ingress Controller, Kubernetes users can manage and control how traffic is distributed, ensuring efficient and secure access to applications.
Ingress Controller Kubernetes Work
An Ingress Controller Kubernetes functions by processing Ingress resources, which are Kubernetes objects that define rules for routing external HTTP and HTTPS traffic to internal services. When a request reaches the Ingress Controller, it examines the rules specified in the Ingress resources and determines how to forward the request to the correct service.
Popular Ingress Controller Kubernetes Solutions
Several Ingress Controller Kubernetes solutions are available, each offering unique features and capabilities. Popular options include NGINX Ingress Controller, which provides a robust and flexible solution with advanced load balancing and SSL termination capabilities Traefik, known for its dynamic configuration and support for modern application architectures and HAProxy Ingress, which offers high-performance load balancing and traffic management.
Configuring Ingress Controller Kubernetes for Your Cluster
Configuring an Ingress Controller Kubernetes involves several key steps to ensure that it effectively manages traffic within your cluster. Begin by deploying the Ingress Controller using Kubernetes manifests or Helm charts. Next, create Ingress resources that define routing rules for incoming traffic, specifying paths, hostnames, and backend services. Configure SSL/TLS certificates for secure communication if needed.
Best Practices for Managing Ingress Controller Kubernetes
Managing Ingress Controller Kubernetes effectively requires adherence to best practices to maintain performance and security. Regularly review and update Ingress rules to reflect changes in application architecture and traffic patterns. Implement security measures such as TLS encryption and access controls to protect against unauthorized access. Monitor the performance of the Ingress Controller and adjust configurations as needed to address issues such as load imbalances or latency.
Troubleshooting Common Issues with Ingress Controller Kubernetes
Troubleshooting common issues with Ingress Controller Kubernetes involves diagnosing and resolving problems related to traffic routing, SSL/TLS termination, and service connectivity. By systematically troubleshooting and resolving problems, you can ensure that the Ingress Controller Kubernetes operates effectively.
Securing Your Ingress Controller Kubernetes Deployment
Securing your Ingress Controller Kubernetes deployment is essential for protecting your applications and data from potential threats. Implement security measures such as enforcing TLS encryption for all traffic, configuring firewall rules to restrict access, and using access controls to limit administrative permissions.
Scaling Ingress Controller Kubernetes for High Traffic Loads
Scaling Ingress Controller Kubernetes to handle high traffic loads involves configuring the controller to manage increased volumes of incoming requests without degrading performance. Utilize horizontal scaling techniques to deploy multiple instances of the Ingress Controller, distributing traffic load across these instances. Configure load balancing mechanisms to ensure even distribution of traffic and prevent overload on individual instances.
Integrating Ingress Controller Kubernetes with Other Kubernetes Resources
Integrating Ingress Controller Kubernetes with other Kubernetes resources is crucial for creating a cohesive application delivery environment. Ensure that Ingress resources are properly linked to Kubernetes services and deployments, defining clear routing paths and backend service connections. Integrate with ConfigMaps and Secrets for managing configuration data and SSL/TLS certificates. Additionally, consider incorporating service meshes and network policies to enhance traffic management and security.
Successful Implementations of Ingress Controller Kubernetes
Examining case studies of successful Ingress Controller Kubernetes implementations provides valuable insights into real-world applications and benefits. Case studies often showcase how organizations have effectively used Ingress Controllers to manage traffic, enhance security, and optimize application delivery.
Conclusion
Understanding and implementing an Ingress Controller Kubernetes is essential for optimizing traffic management and ensuring secure access to applications in a Kubernetes environment. By exploring its functionality, benefits, and configuration best practices, you can effectively manage external traffic, enhance performance, and maintain security.
0 notes
Text
Ingress Controller Kubernetes: A Comprehensive Guide
Ingress controller Kubernetes is a critical component in Kubernetes environments that manages external access to services within a cluster. It acts as a reverse proxy that routes incoming traffic based on defined rules to appropriate backend services. The ingress controller helps in load balancing, SSL termination, and URL-based routing. Understanding how an ingress controller Kubernetes functions is essential for efficiently managing traffic and ensuring smooth communication between services in a Kubernetes cluster.
Key Features of Ingress Controller Kubernetes
The ingress controller Kubernetes offers several key features that enhance the management of network traffic within a Kubernetes environment. These features include path-based routing, host-based routing, SSL/TLS termination, and load balancing. By leveraging these capabilities, an ingress controller Kubernetes helps streamline traffic management, improve security, and ensure high availability of applications. Understanding these features can assist in optimizing your Kubernetes setup and addressing specific traffic management needs.
How to Set Up an Ingress Controller Kubernetes?
Setting up an ingress controller Kubernetes involves several steps to ensure proper configuration and functionality. The process includes deploying the ingress controller using Kubernetes manifests, configuring ingress resources to define routing rules, and applying SSL/TLS certificates for secure communication. Proper setup is crucial for the ingress controller Kubernetes to effectively manage traffic and route requests to the correct services. This section will guide you through the detailed steps to successfully deploy and configure an ingress controller in your Kubernetes cluster.
Comparing Popular Ingress Controllers for Kubernetes
There are several popular ingress controllers Kubernetes available, each with its unique features and capabilities. Common options include NGINX Ingress Controller, Traefik, and HAProxy Ingress. Comparing these ingress controllers involves evaluating factors such as ease of use, performance, scalability, and support for advanced features. Understanding the strengths and limitations of each ingress controller Kubernetes helps in choosing the best solution for your specific use case and requirements.
Troubleshooting Common Issues with Ingress Controller Kubernetes
Troubleshooting issues with an ingress controller Kubernetes can be challenging but is essential for maintaining a functional and efficient Kubernetes environment. Common problems include incorrect routing, SSL/TLS certificate errors, and performance bottlenecks. This section will explore strategies and best practices for diagnosing and resolving these issues, ensuring that your ingress controller Kubernetes operates smoothly and reliably.
Security Considerations for Ingress Controller Kubernetes
Security is a critical aspect of managing an ingress controller Kubernetes. The ingress controller handles incoming traffic, making it a potential target for attacks. Important security considerations include implementing proper access controls, configuring SSL/TLS encryption, and protecting against common vulnerabilities such as cross-site scripting (XSS) and distributed denial-of-service (DDoS) attacks. By addressing these security aspects, you can safeguard your Kubernetes environment and ensure secure access to your services.
Advanced Configuration Techniques for Ingress Controller Kubernetes
Advanced configuration techniques for ingress controller Kubernetes can enhance its functionality and performance. These techniques include custom load balancing algorithms, advanced routing rules, and integration with external authentication providers. By implementing these advanced configurations, you can tailor the ingress controller Kubernetes to meet specific requirements and optimize traffic management based on your application's needs.
Best Practices for Managing Ingress Controller Kubernetes
Managing an ingress controller Kubernetes effectively involves adhering to best practices that ensure optimal performance and reliability. Best practices include regularly updating the ingress controller, monitoring traffic patterns, and implementing efficient resource allocation strategies. By following these practices, you can maintain a well-managed ingress controller that supports the smooth operation of your Kubernetes applications.
The Role of Ingress Controller Kubernetes in Microservices Architectures
In microservices architectures, the ingress controller Kubernetes plays a vital role in managing traffic between various microservices. It enables efficient routing, load balancing, and security for microservices-based applications. Understanding the role of the ingress controller in such architectures helps in designing robust and scalable systems that handle complex traffic patterns and ensure seamless communication between microservices.
Future Trends in Ingress Controller Kubernetes Technology
The field of ingress controller Kubernetes technology is constantly evolving, with new trends and innovations emerging. Future trends may include enhanced support for service meshes, improved integration with cloud-native security solutions, and advancements in automation and observability. Staying informed about these trends can help you leverage the latest advancements in ingress controller technology to enhance your Kubernetes environment.
Conclusion
The ingress controller Kubernetes is a pivotal component in managing traffic within a Kubernetes cluster. By understanding its features, setup processes, and best practices, you can optimize traffic management, enhance security, and improve overall performance. Whether you are troubleshooting common issues or exploring advanced configurations, a well-managed ingress controller is essential for the effective operation of Kubernetes-based applications. Staying updated on future trends and innovations will further enable you to maintain a cutting-edge and efficient Kubernetes environment.
0 notes
Text
How to Optimize Your Computer Server for Maximum Performance?
Optimizing your computer server for maximum performance involves a series of steps that enhance its efficiency, reliability, and speed. Here are some detailed instructions to help you achieve this:
1. Hardware Optimization
a. Upgrade Server Hardware
RAM: Ensure your server has sufficient RAM. Upgrade to ECC (Error-Correcting Code) RAM for better reliability.
Storage: Use SSDs (Solid State Drives) instead of HDDs (Hard Disk Drives) for faster read/write speeds.
CPU: Upgrade to a more powerful CPU with higher clock speeds and more cores.
Network Interface Cards (NICs): High-speed NICs, such as 10GbE, are used to handle increased network traffic.
b. Maintain Hardware
Regular Cleaning: Dust and clean server components to prevent overheating.
Monitor Hardware Health: Use tools to monitor temperatures, voltages, and fan speeds.
2. Software Optimization
a. Optimize Operating System (OS)
Choose the Right OS: Select an OS tailored to your server's role (e.g., Linux distributions like Ubuntu Server or CentOS for web servers).
Update Regularly: Keep the OS and all software up to date with the latest patches and security updates.
Remove Unnecessary Services: Disable or uninstall services and applications that are not needed.
b. Optimize Applications
Database Optimization: Use indexing and query optimization techniques. Consider database clustering for load balancing.
Web Server Optimization: For Apache, use modules like mod_deflate for compression. For Nginx, adjust worker processes and caching settings.
Caching: Implement caching mechanisms such as Memcached or Redis to reduce database load.
3. Network Optimization
a. Configure Network Settings
Adjust TCP/IP Settings: Optimize parameters such as TCP window size and timeout settings.
DNS Configuration: Use reliable and fast DNS services.
b. Network Security
Firewall Configuration: Use firewalls to block unnecessary ports and protect against attacks.
Use VPNs: Secure remote access with VPNs to ensure encrypted connections.
4. Performance Monitoring and Tuning
a. Use Monitoring Tools
System Monitoring: Tools like Nagios, Zabbix, or Prometheus can provide insights into system performance and alert you to issues.
Log Analysis: Regularly analyze logs to detect and resolve errors and performance bottlenecks.
b. Regular Performance Tuning
Load Balancing: Distribute workloads across multiple servers to prevent any single server from being overwhelmed.
Scalability Planning: Plan for future growth by considering horizontal and vertical scaling options.
5. Security Enhancements
a. Regular Security Audits
Vulnerability Scanning: Use tools like Nessus to identify and address vulnerabilities.
Penetration Testing: Conduct regular penetration tests to find and fix security weaknesses.
b. Data Protection
Backups: Implement regular, automated backups and test restore procedures.
Encryption: Use encryption for sensitive data, both in transit and at rest.
6. Energy Efficiency
a. Power Management
Use Energy-Efficient Hardware: Choose energy-efficient hardware components.
Configure Power Settings: Adjust power settings to reduce consumption during low-usage periods.
b. Cooling Optimization
Efficient Cooling Systems: Use advanced cooling systems to maintain optimal temperatures.
Hot and Cold Aisle Containment: Implement hot and cold aisle containment in data centers to improve cooling efficiency.
Conclusion
By systematically addressing these areas, you can significantly enhance your server's performance, reliability, and security. Regular monitoring, updates, and proactive maintenance are key to maintaining optimal server performance over time. You can check more at Netseg.me.
0 notes
Text
Comparing the Best Ingress Controllers for Kubernetes
Comparing the best ingress controllers for Kubernetes involves evaluating key factors such as scalability, performance, and ease of configuration. Popular options like NGINX Ingress Controller offer robust features for managing traffic routing and SSL termination efficiently. Traefik stands out for its simplicity and support for automatic configuration updates, making it ideal for dynamic environments. HAProxy excels in providing advanced load balancing capabilities and extensive configuration options, suitable for complex deployments requiring fine-tuned control. Each controller varies in terms of integration with cloud providers, support for custom routing rules, and community support. Choosing the right ingress controller depends on your specific Kubernetes deployment needs, including workload type, security requirements, and operational preferences, ensuring seamless application delivery and optimal performance across your infrastructure.
Introduction to Kubernetes Ingress Controllers
Ingress controllers are a critical component in Kubernetes architecture, managing external access to services within a cluster. They provide routing rules, SSL termination, and load balancing, ensuring that requests reach the correct service. Selecting the best ingress controller for Kubernetes depends on various factors, including scalability, ease of use, and integration capabilities.
NGINX Ingress Controller: Robust and Reliable
NGINX Ingress Controller is one of the most popular choices for Kubernetes environments. Known for its robustness and reliability, it supports complex configurations and high traffic loads. It offers features like SSL termination, URL rewrites, and load balancing. NGINX is suitable for enterprises that require a powerful and flexible ingress solution capable of handling various traffic management tasks efficiently.
Simplifying Traffic Management in Dynamic Environments
Traefik is praised for its simplicity and ease of configuration, making it ideal for dynamic and fast-paced environments. It automatically discovers services and updates configurations without manual intervention, reducing administrative overhead. Traefik supports various backends, including Kubernetes, Docker, and Consul, providing seamless integration across different platforms. Its dashboard and metrics capabilities offer valuable insights into traffic management.
Mastering Load Balancing with HAProxy
HAProxy is renowned for its advanced load balancing capabilities and high performance. It supports TCP and HTTP load balancing, SSL termination, and extensive configuration options, making it suitable for complex deployments. HAProxy's flexibility allows for fine-tuned control over traffic management, ensuring optimal performance and reliability. Its integration with Kubernetes is strong, providing a powerful ingress solution for demanding environments.
Designed for Simplicity and Performance
Contour, developed by VMware, is an ingress controller designed specifically for Kubernetes. It leverages Envoy Proxy to provide high performance and scalability. Contour is known for its simplicity in setup and use, offering straightforward configuration with powerful features like HTTP/2 and gRPC support. It's a strong contender for environments that prioritize both simplicity and performance.
Comprehensive Service Mesh
Istio goes beyond a traditional ingress controller, offering a comprehensive service mesh solution. It provides advanced traffic management, security features, and observability tools. Istio is ideal for large-scale microservices architectures where detailed control and monitoring of service-to-service communication are essential. Its ingress capabilities are powerful, but it requires more setup and maintenance compared to simpler ingress controllers.
Comparing Ingress Controllers: Which One is Right for You?
When comparing the best ingress controllers for Kubernetes, it's important to consider your specific needs and environment. NGINX is excellent for robust, high-traffic applications; Traefik offers simplicity and automation; HAProxy provides advanced load balancing; Contour is designed for simplicity and performance; and Istio delivers a comprehensive service mesh solution. Evaluate factors such as ease of use, integration with existing tools, scalability, and the level of control required to choose the best ingress controller for your Kubernetes deployment.
Conclusion
Selecting the best ingress controller for Kubernetes is a crucial decision that impacts the performance, scalability, and management of your applications. Each ingress controller offers unique strengths tailored to different use cases. NGINX and HAProxy are suitable for environments needing robust, high-performance solutions. Traefik and Contour are ideal for simpler setups with automation and performance needs. Istio is perfect for comprehensive service mesh requirements in large-scale microservices architectures. By thoroughly evaluating your specific needs and considering the features of each ingress controller, you can ensure an optimal fit for your Kubernetes deployment, enhancing your application's reliability and efficiency.
0 notes
Text
How to Get Started with Magento Commerce: A Step-by-Step Guide

Why Choose Magento Commerce?
Magento Commerce, a leading ecommerce platform, offers a comprehensive suite of tools and features designed to help businesses thrive in the digital marketplace. Known for its scalability, flexibility, and extensive customization options, Magento Commerce is an ideal choice for businesses of all sizes. Whether you're seeking robust magento ecommerce solutions or working with a magento ecommerce agency, this guide will walk you through the essential steps to get started with Magento Commerce.
Step 1: Understanding the Requirements for Magento Commerce
Before diving into the setup process, it's crucial to understand the system requirements for running Magento Commerce smoothly. This includes:
Server Requirements: Ensure your hosting environment meets Magento’s technical specifications, including PHP, MySQL, and Apache/Nginx compatibility.
Hardware Requirements: Adequate server resources, such as sufficient RAM, CPU, and storage, are essential for optimal performance.
Software Requirements: Necessary software includes Composer, a suitable PHP version, and other dependencies specified in Magento’s documentation.
Step 2: Choosing the Right Magento Commerce Plan
Magento Commerce offers several plans tailored to different business needs. Assess your business size, budget, and specific requirements to choose the appropriate plan. Options include:
Magento Open Source: A free version with basic features suitable for small businesses.
Magento Commerce (Cloud): A paid version with advanced features, cloud hosting, and enhanced support.
Consulting with a magento ecommerce agency can help you select the best plan to match your business objectives and growth potential.
Step 3: Setting Up Your Hosting Environment
Choosing the right hosting environment is critical for the performance and reliability of your Magento store. Consider the following options:
Shared Hosting: Cost-effective but may lack the performance needed for larger stores.
Dedicated Hosting: Offers better performance and control but at a higher cost.
Cloud Hosting: Scalable and flexible, suitable for growing businesses with fluctuating traffic.
Ensure your hosting provider offers robust security measures and 24/7 support.
Step 4: Installing Magento Commerce
With your hosting environment set up, the next step is to install Magento Commerce. Follow these steps:
Download Magento Commerce: Obtain the latest version from the Magento website.
Upload Files: Transfer the Magento files to your server using FTP/SFTP.
Set Up Database: Create a new MySQL database for Magento.
Run the Installation Wizard: Access the installation wizard through your browser and follow the prompts to complete the setup.
Step 5: Configuring Your Store Settings
After installation, configure your store settings to ensure optimal performance and functionality:
General Settings: Set your store name, address, email, and other basic information.
Locale Options: Configure your time zone, currency, and language preferences.
Tax Settings: Set up tax rules according to your business location and legal requirements.
Step 6: Customizing Your Store’s Appearance
Magento Commerce allows extensive customization to reflect your brand identity. Key customization options include:
Themes: Choose from pre-built themes or create a custom design to enhance your store’s visual appeal.
Layout: Configure layouts for different pages, including the homepage, category pages, and product pages.
Branding: Add your logo, brand colors, and custom fonts to create a cohesive brand experience.
Step 7: Adding Products to Your Magento Commerce Store
Populate your store with products by following these steps:
Product Categories: Organize products into categories for easy navigation.
Product Listings: Add detailed product information, including names, descriptions, prices, and images.
Inventory Management: Configure stock levels, SKU numbers, and other inventory settings.
Utilize Magento’s bulk upload feature to save time when adding multiple products.
Step 8: Setting Up Payment and Shipping Options
Configure payment and shipping options to provide a seamless checkout experience:
Payment Methods: Integrate popular payment gateways like PayPal, Stripe, and credit cards.
Shipping Options: Set up shipping methods, rates, and regions. Offer options like free shipping, flat rate, and carrier-specific methods.
Ensure your payment and shipping configurations comply with your business model and customer expectations.
Step 9: Testing Your Store Before Launch
Before going live, thoroughly test your Magento store to identify and fix any issues:
Functionality Testing: Ensure all features work as expected, including product search, checkout process, and payment gateway integration.
Performance Testing: Test your store’s speed and responsiveness to ensure a smooth user experience.
Security Testing: Verify that your store is secure, with measures in place to protect against threats like SQL injection and cross-site scripting.
Step 10: Launching Your Magento Commerce Store and Post-Launch Tips
With testing complete, you’re ready to launch your Magento Commerce store. Follow these final steps:
Go Live: Make your store accessible to the public by updating DNS settings and removing any maintenance pages.
Monitor Performance: Continuously monitor your store’s performance, traffic, and sales.
Regular Updates: Keep your Magento installation, themes, and extensions updated to ensure security and functionality.
Seek Professional Help: Work with a magento ecommerce agency for ongoing support and optimization.
Related Post: A Complete Guide to Magento eCommerce: All You Need to Know
0 notes
Text
8 Best WordPress Development Tools (Free + Paid) in 2024
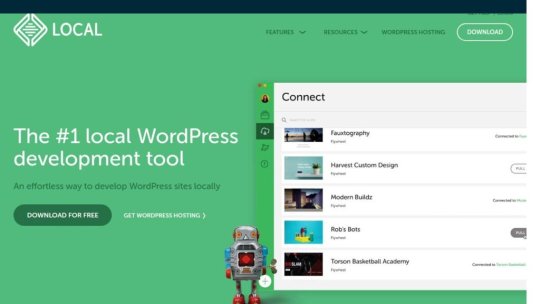
WordPress continues to stand out as a beacon for web developers and designers alike. Its flexibility, scalability, and user-friendly interface make it an ideal platform for building everything from simple blogs to complex e-commerce sites. However, to truly harness the power of WordPress, developers need the right tools at their disposal. This is where the best WordPress development tools come into play, offering capabilities that range from local server environments to sophisticated code editors, all designed to streamline the development process and enhance productivity. This article will navigate through the top WordPress development tools, both free and paid, that have proven indispensable in the digital toolkit of many developers. We will explore options like Local WP for setting up a local server environment, WPCode for managing code functions without hassle, Duplicator for site migration, and MAMP for cross-platform development. Additionally, innovative solutions like GitHub Copilot for code completion, XAMPP for a comprehensive local server solution, InstaWP for instant WordPress sites, and Theme Check for theme code validation will be covered. Each tool has its unique strengths, making them essential for anyone looking to elevate their WordPress development workflow. - 20 Best AnswerThePublic Alternatives & Competitors for 2024 - How to Install a WordPress Plugin (Step by Step for Beginners) - How to Remove Archive Pages in WordPress (4 Easy Methods) - 11 Best WordPress Affiliate Plugins (2024) - How to Easily Fix PHP Missing MySQL Extension Error in WordPress 1. Local WP Local WP stands out as a premier tool for WordPress developers looking to streamline their workflow and enhance productivity. This tool simplifies the process of setting up a local server environment, making it highly accessible even for those who are new to WordPress development. Setting Up Local WordPress Environments Local WP offers an incredibly user-friendly interface that allows developers to set up a new WordPress site with just a few clicks. Unlike traditional local server setups like WAMP, Local WP eliminates complex configurations and reduces setup time significantly. It supports both Nginx and Apache, providing flexibility depending on the developer's needs or preferences. Additionally, Local WP includes features like one-click SSL trust, which simplifies the process of running sites under HTTPS, a requirement for certain APIs like Stripe. Features for Streamlining Development Workflow Local WP is packed with features designed to optimize the development workflow: - Cloud Backups: Easily push and pull sites to cloud storage services like Google Drive or Dropbox, ensuring that all site files are safe and can be accessed from anywhere. - Image Optimizer: This tool enhances site performance by optimizing images for faster page loads on both mobile and desktop devices. - Local Connect: Streamline the process of editing offline and going live by pushing and pulling sites with services like Flywheel or WP Engine. - Live Links: Share secure, persistent URLs to showcase site developments to clients or team members without the need for deployment. - Hot Swap Environments: Effortlessly switch between multiple PHP environments or MySQL versions to test different configurations. - One-click Admin: Access WordPress dashboards with a single click, bypassing the usual login requirements. Pros and Cons Pros: - Quick setup and ease of use, even for beginners. - Extensive feature set enhances development efficiency. - Supports both Nginx and Apache, catering to a broad range of development preferences. Cons: - Higher memory usage compared to some alternatives like WAMP, which might be a concern for users with limited system resources. - The use of Nginx might require adjustments for developers accustomed to Apache-specific features like .htaccess. Local WP is recommended for its balance of advanced features and user-friendly design, making it an ideal choice for both novice and experienced WordPress developers. Its ability to simplify complex processes and integrate seamlessly with cloud services and other tools makes it a valuable addition to any developer's toolkit. 2. WPCode WPCode stands as a pivotal tool for WordPress developers who aim to streamline their workflow by managing custom code snippets directly from the WordPress dashboard. This plugin allows users to insert custom PHP, JavaScript, CSS, HTML, and text snippets without the need to edit theme files directly, which preserves the integrity of themes during updates. Custom Code Snippets Management WPCode simplifies the addition of custom code to your WordPress site. Users can manage their snippets through a user-friendly interface that categorizes code types and offers options for activation and deactivation. This management system ensures that snippets are easy to control and can be activated or deactivated as needed. Additionally, WPCode supports conditional logic, allowing snippets to be executed only on specific pages or under certain conditions, enhancing site performance and user experience. Syntax Highlighting and Code Editor The plugin features a robust code editor with syntax highlighting capabilities, making it accessible even for those with minimal coding knowledge. This editor supports various code types including PHP, JavaScript, and HTML. The syntax highlighting function helps in preventing common coding errors by allowing developers to easily read and write code, ensuring that custom snippets are added safely and efficiently. Pricing and Versions: Free + Paid WPCode offers both free and paid versions to accommodate different user needs. The free version, WPCode Lite, provides basic functionalities suitable for straightforward tasks. For more advanced features like priority support, extensive conditional logic options, and a broader range of code management tools, the premium version is available starting at $49 per year. This pricing structure makes WPCode accessible for both beginners and professional developers, ensuring that there is a version that fits every budget and requirement. By integrating WPCode into their development process, WordPress users gain a powerful tool for enhancing site functionality and user engagement without compromising site security or performance. 3. Duplicator Duplicator is a renowned WordPress plugin that excels in creating complete copies of WordPress sites, which can be used for migration or backup purposes. With its capability to bundle all site components into a single zip file called a "package," Duplicator simplifies the process of transferring a website to a new host, domain, or staging environment. This tool is especially valued for its straightforward approach and robust functionality, making it a top choice for over one million WordPress users. Site Migration and Backup Capabilities Duplicator is designed to facilitate easy site migrations with minimal downtime, ensuring a seamless transition between servers or domains. It handles complex tasks such as serialized and base64 serialized replacements, which are crucial for maintaining data integrity during the migration process. Users can migrate, copy, or clone their site with zero downtime, which is essential for maintaining continuous service and user experience. Additionally, Duplicator serves as a reliable backup utility, allowing users to create full site backups that can be restored in case of data loss or website failure. Creating Downloadable Site Packages The core functionality of Duplicator involves creating downloadable packages that contain all necessary site files and the WordPress database. This package can be easily transferred to any location, facilitating effortless migrations across different hosting environments. The process includes a few simple steps: setting up the package, running system checks, and building the archive. Once completed, the package is ready for download, which includes an installer file and the site archive. This method not only ensures that all components of the site are included but also simplifies the setup on the new server, as the installer automates the configuration and installation processes. User Experience and Efficiency Duplicator is praised for its user-friendly interface and efficient process management. It allows even those with minimal technical knowledge to perform complex migrations and backups without the need for professional assistance. The plugin's design focuses on simplifying each step, from creating a new package to executing the migration, thereby reducing the potential for errors and increasing the success rate of site transfers. For enhanced functionality, Duplicator Pro offers additional features like scheduled backups, cloud storage options, and multi-threaded support for larger websites, making it a robust solution for advanced users and developers. Duplicator's combination of powerful features, ease of use, and reliable performance makes it an indispensable tool for anyone looking to manage WordPress migrations and backups efficiently. Whether you are moving a site to a new host or creating a quick backup, Duplicator provides a streamlined, effective solution that safeguards your data and reduces the technical challenges associated with website management. 4. MAMP MAMP stands as a robust solution for developers seeking to establish a local server environment on macOS and Windows platforms. This tool is designed to simplify the process of running WordPress and other web applications directly from a desktop PC, making it an indispensable asset for testing and development purposes. Simplifying Local Server Setup for Development MAMP provides a straightforward installation process that allows developers to set up a local server environment with just a few clicks. Whether one prefers Apache or Nginx, MAMP caters to all by supporting multiple web server options alongside MySQL as the database server. Notably, MAMP includes the flexibility to work with various programming languages such as PHP, Python, Perl, or Ruby. This versatility ensures that developers can easily test their projects on mobile devices through the local DNS server, NAMO, enhancing the development workflow significantly. Support for Multiple PHP Versions One of the key features of MAMP is its support for multiple PHP versions, which is crucial for developers who need to test their applications across different environments. MAMP allows easy switching between PHP versions without the need to restart the server or alter configuration files extensively. This feature is available in both the free version of MAMP and MAMP PRO, the latter offering even more enhanced capabilities like setting up separate hosts for different projects and integrating with cloud services for seamless backups. Free and Open-Source Solution MAMP is available as a free tool, which provides a significant advantage for developers and small teams working on a tight budget. The open-source nature of MAMP means that it does not compromise any existing Apache installations on the system, and developers can add additional functionalities like the MAMP Cloud. This service enables users to backup their host and database data to Dropbox with a simple one-time payment, further adding to the tool's flexibility and utility. MAMP's combination of ease of use, comprehensive feature set, and robust support for multiple technologies makes it a recommended choice for anyone looking to enhance their WordPress development workflow. Its ability to run natively on both Intel and Apple CPUs ensures that MAMP remains a top choice for developers across different hardware platforms. 5. GitHub Copilot AI-Powered Coding Assistance GitHub Copilot stands out as an innovative tool designed to enhance coding efficiency and accuracy. It acts as an AI pair programmer, suggesting code snippets and entire functions based on the context of the work being done. This AI tool learns from a vast corpus of code available on GitHub, making it capable of understanding and predicting developer needs quite effectively. For instance, it can generate code for custom functions or suggest improvements and alternatives to existing code, significantly speeding up the development process. Integration with IDEs and Language Support GitHub Copilot integrates seamlessly with popular Integrated Development Environments (IDEs) such as Visual Studio Code, JetBrains IDEs, and Neovim, providing a wide range of support for various programming languages including Python, JavaScript, TypeScript, Ruby, Go, C#, and more. This broad compatibility ensures that developers can use Copilot in their preferred coding environments without hassle. The tool's ability to understand and provide suggestions for numerous frameworks and languages makes it an indispensable resource for developers looking to streamline their coding tasks. Subscription Costs and Free Trial GitHub Copilot offers various subscription plans to cater to different user needs. For individual developers, freelancers, students, and educators, the Copilot Individual plan is priced at $10 USD per month or $100 USD per year. There is also a free trial available which is particularly beneficial for verified students, teachers, and maintainers of popular open-source projects. For businesses and larger organizations, Copilot Business and Copilot Enterprise plans are available at $19 USD and $39 USD per user per month, respectively. These plans are designed to improve engineering velocity, code quality, and overall developer experience by integrating AI into the workflow. 6. XAMPP Comprehensive Local Server Environment XAMPP, an acronym for Apache, MariaDB, PHP, and Perl, provides a robust local server environment that is not specifically tailored to WordPress but is highly adaptable for various development needs. This open-source tool wraps the entire development stack into a minimalist interface, enabling developers to manage their projects with ease. Whether working on a WordPress site or any other web application, XAMPP offers a straightforward, no-frills environment that is perfect for developers who prefer a hands-on approach. Ease of Installation and Management Installing XAMPP is a streamlined process, thanks to its simple installer available for multiple operating systems including Windows, macOS, and Linux. During installation, users have the option to select the components they wish to install, with the ability to omit Perl if it's not required, as is the case with WordPress. Once installed, the XAMPP control panel facilitates easy management of its components, allowing users to start, stop, and configure settings as needed. Additionally, the dashboard provides access to useful tools such as the terminal and a local file explorer, enhancing the overall user experience. Open-Source and Free Development Tool As a free and open-source solution, XAMPP stands out as a popular choice among developers. It has been a reliable PHP development environment for over a decade, supported by a large community where users can engage through forums, social media platforms like Facebook, and Twitter. The inclusion of a Bitnami installer simplifies the process of setting up WordPress, although it does not provide additional management tools for handling multiple projects or more complex development environments. Despite these limitations, XAMPP's longevity and strong community support make it a valuable tool for developers looking for a cost-effective and flexible server solution. 7. InstaWP InstaWP is a comprehensive tool that significantly accelerates the WordPress development process, making it an essential asset for agencies and individual developers alike. This platform simplifies the creation, testing, and deployment of WordPress sites, providing a seamless experience from start to finish. Quick Setup of WordPress Environments InstaWP excels in its ability to quickly set up WordPress environments. Users can launch fully functional WordPress sites in seconds, thanks to its user-friendly interface. This rapid deployment is ideal for testing new features, plugins, or themes. Additionally, the platform supports the creation of staging sites, allowing developers to test and refine their websites in a controlled environment before going live. The integration of InstaWP with various hosting providers through the InstaWP Connect plugin further streamlines the process, enabling seamless migrations and updates. Template System for Consistent Development The template system in InstaWP stands out as a game-changer in web development. Templates allow developers to use pre-built designs and functionalities, which can be customized to meet specific needs without starting from scratch. This feature not only saves time but also ensures consistency across projects. Developers can create, share, and monetize their templates, providing a potential stream of income while fostering a collaborative community. The ability to quickly modify templates—adjusting colors, fonts, and layouts—empowers developers to maintain their unique style while leveraging the efficiency of pre-configured elements. Pricing Plans for Additional Features InstaWP offers various pricing plans that cater to different needs and scales of operation. From free options suitable for basic testing to advanced plans that include additional features like increased storage, enhanced support, and the ability to handle higher traffic volumes, there is a plan for every developer. Each tier is designed to provide specific benefits, such as the ability to create permanent sites on higher plans, which do not expire and offer more extensive resources. This flexible pricing structure ensures that developers can select a package that best fits their requirements, budget, and the scope of their projects. InstaWP's robust platform, with its quick setup, versatile templates, and scalable pricing plans, provides an invaluable tool for anyone involved in WordPress development, ensuring efficient workflows and high-quality results. 8. Theme Check Ensuring Themes Meet WordPress Standards Theme Check is a crucial plugin for WordPress theme developers, ensuring that themes adhere to the strict standards set by the WordPress Theme Review team. It is particularly significant because it is the same tool used by reviewers to approve themes for inclusion in the official WordPress theme repository. Themes that fail to pass the Theme Check tests may be rejected, highlighting the importance of this tool in the development process. Automated Testing for Quality and Compliance The plugin automates the testing of themes to identify coding and design mistakes before they are released. This automated process is vital for maintaining compatibility, especially following updates to the WordPress core. Theme Check helps to ensure that themes continue to function correctly with new versions of WordPress, preventing potential conflicts or issues that could arise from core changes. The tool tests for various elements crucial for a theme’s success, such as the presence of necessary WordPress functions like wp_footer and wp_head, adherence to safe coding standards, and the absence of unwanted features like embedded Adsense code. Free Tool for Theme Developers Theme Check is available for free, making it an accessible tool for all WordPress theme developers. Whether you are a seasoned developer or just starting, using Theme Check can provide insights into how well your theme meets the required standards. For developers aspiring to have their themes included in the WordPress.org Theme Directory, Theme Check acts as a pre-flight checklist that helps polish themes to meet the rigorous requirements of the review process. Read the full article
0 notes
Text
Why Linux VPS is the Best Choice for Developers and Businesses in 2025
In 2025, businesses and developers alike are seeking more reliable, scalable, and cost-effective hosting solutions. Whether you’re launching a web app, managing an eCommerce store, or running multiple client websites, choosing the right hosting environment can make a huge difference in performance, security, and scalability.

Among the many options available, Linux VPS (Virtual Private Server) hosting continues to stand out as a top choice. Known for its stability, flexibility, and developer-friendly environment, the Linux VPS server is becoming the backbone of modern digital infrastructure. But what makes it so appealing, especially in 2025? Let’s dive deep into the reasons.
1. Cost-Effective Without Compromising Performance
One of the most attractive features of a Linux VPS is its affordability. Unlike dedicated servers, VPS hosting allows you to get dedicated-like resources at a fraction of the cost. With Linux being open-source, there are no licensing fees, which significantly reduces overall expenses compared to a Windows-based VPS.
Businesses can scale their infrastructure efficiently without burning through their IT budgets, and developers can experiment or deploy projects without worrying about high monthly hosting costs.
2. Superior Performance and Uptime
In 2025, user expectations are higher than ever. Websites and applications need to load fast and be accessible 24/7. A Linux VPS server offers dedicated resources such as CPU, RAM, and SSD storage, ensuring that your applications perform smoothly even during high traffic spikes.
Unlike shared hosting, where resources are distributed among hundreds of users, VPS guarantees that your environment remains isolated. This leads to consistent uptime and fast load times — essential factors for SEO rankings and user experience.
3. Full Root Access for Complete Control
One of the key reasons developers prefer Linux VPS hosting is the root-level access it provides. This level of control allows for full customization of the server environment. Developers can:
Install and configure any software or packages
Modify system files and server settings
Deploy custom applications or scripts
This freedom makes Linux VPS ideal for complex development environments, testing, and production servers. In 2025, when developers need more power and flexibility than ever, having full access is a massive advantage.
4. Security and Privacy
With the increasing number of cyber threats in 2025, securing your server infrastructure is non-negotiable. A Linux VPS server is inherently more secure than shared hosting. You get isolated server resources, making your server less susceptible to attacks caused by neighboring users.
Moreover, Linux as an OS is known for its strong security protocols. Regular updates, strong community support, and customizable firewall configurations ensure your server remains secure. Users can also implement advanced security tools such as Fail2Ban, IPtables, and SELinux for added protection.
5. Scalability for Growing Projects
Whether you’re a startup with growing traffic or a development agency handling multiple client sites, scalability is crucial. A Linux VPS allows you to scale your resources as your needs grow. With just a few clicks (or commands), you can upgrade your server’s RAM, CPU, or storage without affecting your existing configurations or data.
This flexibility makes Linux VPS an ideal choice for businesses aiming to scale in a cost-effective and disruption-free manner.
6. Developer-Friendly Environment
Most developers are familiar with Linux-based environments, especially if they work with tools like Git, Apache, Nginx, Docker, Node.js, and MySQL. A Linux VPS server provides a native environment for these tools, making deployment and server management seamless.
Additionally, Linux distributions such as Ubuntu, CentOS, Debian, and AlmaLinux offer users the choice to work in environments they are most comfortable with.
7. Automation and Scripting Capabilities
In today’s DevOps-driven world, automation is key. Linux VPS servers allow developers to automate tasks using shell scripts, cron jobs, or more advanced tools like Ansible and Puppet. This improves efficiency and helps maintain consistency across deployments.
From automated backups to server monitoring, a Linux VPS environment supports robust automation capabilities that simplify the life of sysadmins and developers alike.
8. Large Community and Documentation
Linux has a massive global community and an abundance of resources. Whether you’re a beginner or an expert, you can find forums, tutorials, GitHub repositories, and documentation to help you resolve issues or improve server performance.
In 2025, this ecosystem is even more valuable. New developers can quickly learn and troubleshoot, while experienced users benefit from the community’s collective knowledge and tools.
Conclusion
As the digital landscape continues to evolve, the demand for reliable, scalable, and secure hosting solutions grows stronger. A Linux VPS server offers the perfect balance of performance, control, and affordability, making it the go-to solution for both developers and businesses in 2025.
0 notes
Text
StoreGo SaaS Nulled Script 6.7

StoreGo SaaS Nulled Script – Build Powerful Online Stores with Zero Cost If you're looking for a professional, cost-effective, and user-friendly way to launch an online store, the StoreGo SaaS Nulled Script is your ultimate solution. This dynamic script offers a fully-featured eCommerce experience, empowering businesses of all sizes to create stunning digital storefronts without investing in expensive software or subscriptions. What is StoreGo SaaS Nulled Script? StoreGo SaaS Nulled Script is a premium online store builder that allows users to create, manage, and scale eCommerce businesses with ease. The nulled version provides all premium features for free, making it accessible for entrepreneurs, freelancers, and agencies who want to launch professional web stores without financial barriers. Unlike traditional eCommerce platforms that require hefty licensing fees, this script is a fully customizable and open-source alternative. With zero limitations, it’s a fantastic option for users who want complete control over their store’s design, layout, payment methods, and more. Technical Specifications Script Type: PHP Laravel Framework Database: MySQL Frontend Framework: Bootstrap 4 Server Requirements: PHP 7.3+, Apache/Nginx, cURL, OpenSSL Payment Gateways Supported: Stripe, PayPal, Razorpay, Paystack, and more Multi-Store Capability: Yes Top Features and Benefits Multi-Tenant SaaS Architecture: Each user can have a fully independent online store under your main platform. Drag-and-Drop Store Builder: Design pages effortlessly without coding. Real-Time Analytics: Get insights into orders, revenue, and customer behavior. Integrated Payment Solutions: Accept online payments globally with multiple secure gateways. Subscription Packages: Create various pricing plans for your users. Product & Inventory Management: Manage stock, variants, SKUs, and more from one dashboard. Use Cases Whether you're starting a new eCommerce business or offering SaaS services to clients, the StoreGo SaaS Nulled Script adapts perfectly to different business models. Ideal for: Freelancers offering eCommerce development services Agencies launching SaaS-based online store platforms Small business owners looking to sell online without third-party dependencies Digital marketers creating customized product landing pages Installation Guide Setting up the StoreGo SaaS Nulled Script is quick and seamless: Download the script package from our website. Upload it to your server via cPanel or FTP. Create a MySQL database and user. Run the installer and follow the on-screen instructions. Log in to the admin panel and start customizing your platform! For advanced configurations, detailed documentation is included within the script package, ensuring even beginners can get started with minimal technical effort. Why Choose StoreGo SaaS Nulled Script? By choosing the StoreGo SaaS Nulled Script, you're unlocking enterprise-level features without paying a premium. Its modern UI, powerful backend, and full customization capabilities make it a must-have tool for building eCommerce platforms that perform. Plus, when you download from our website, you get a clean, secure, and fully functional nulled version. Say goodbye to restrictive licensing and hello to freedom, flexibility, and profitability. FAQs Is the StoreGo SaaS Nulled Script safe to use? Yes, the script available on our website is thoroughly scanned and tested to ensure it’s clean, stable, and ready for production. Can I use this script for multiple clients? Absolutely! The multi-tenant feature allows you to offer customized storefronts to various clients under your own domain. Does this script include future updates? While this is a nulled version, we frequently update our repository to include the latest stable releases with new features and security patches. How do I get support if I face issues? Our community forum and documentation are excellent resources. Plus, you can always reach out to us via our contact form for guidance.
Download Now and Start Selling Online Today! Get started with the StoreGo SaaS and experience unmatched control and performance for your eCommerce venture. Download it now and build your digital empire—no license needed, no hidden costs. Need more tools to supercharge your WordPress experience? Don’t forget to check out our other offerings like WPML pro NULLED. Looking for a stylish WordPress theme? Get Impreza NULLED for free now.
0 notes
Text
Mastering PHP: A Comprehensive Guide to Website Development with PHP
Introduction to PHP Website Development
PHP, or Hypertext Preprocessor, is a widely-used open-source scripting language that is especially suited for web development and can be embedded into HTML. It powers millions of websites on the internet and has become a cornerstone of modern web development.
What is PHP?
PHP Website is a server-side scripting language, which means that it is executed on the server and generates dynamic web pages. It is often used to create interactive and dynamic websites, such as e-commerce platforms, content management systems (CMS), and social media networks.
Importance of PHP in Website Development
PHP offers developers a powerful and flexible platform for creating feature-rich web applications. Its ease of use, extensive documentation, and large community of developers make it an attractive choice for building websites of all sizes and complexities.
Benefits of Using PHP for Website Development
Flexibility and Compatibility
One of the key advantages of PHP is its flexibility. It supports a wide range of databases, including MySQL, PostgreSQL, and SQLite, making it compatible with different backend systems. Additionally, PHP can run on various operating systems, including Linux, Windows, and macOS, providing developers with the flexibility to deploy their applications on different platforms.
Cost-Effectiveness
PHP is an open-source language, which means that it is free to use and distribute. This makes it an affordable option for businesses and individuals looking to develop websites without incurring hefty licensing fees. Moreover, the abundance of free resources, such as libraries, frameworks, and tools, further reduces development costs.

Strong Community Support
PHP has a vibrant community of developers who actively contribute to its development and maintenance. This community-driven approach ensures that PHP remains up-to-date with the latest web technologies and security standards. Developers can leverage community forums, online tutorials, and documentation to troubleshoot issues and learn best practices.
Basics of PHP Website Development
Setting Up Development Environment
Before diving into PHP development, it's essential to set up a development environment. This typically involves installing a web server (e.g., Apache or Nginx), a database server (e.g., MySQL), and PHP itself. Alternatively, developers can use pre-configured software stacks such as XAMPP or WampServer for quick setup.
Understanding PHP Syntax
PHP syntax is similar to that of other programming languages such as C, Java, and Perl. It uses variables, operators, control structures, and functions to manipulate data and control the flow of execution. Understanding the basics of PHP syntax is crucial for writing clean and maintainable code.
Working with Variables and Data Types
In PHP, variables are used to store data temporarily. They can hold various data types, including integers, floats, strings, arrays, and objects. PHP supports dynamic typing, meaning that variables are automatically converted to the appropriate data type based on the context in which they are used.
Advanced PHP Concepts
Functions and Control Structures
Functions allow developers to encapsulate reusable code into modular units, making their applications more organized and maintainable. PHP provides a vast array of built-in functions and allows developers to define their custom functions as well. Control structures such as loops and conditional statements enable developers to control the flow of execution based on certain conditions.
Object-Oriented Programming in PHP
Object-oriented programming (OOP) is a programming paradigm that revolves around the concept of objects, which encapsulate data and behavior. PHP supports OOP features such as classes, objects, inheritance, encapsulation, and polymorphism. OOP enables developers to write modular, reusable, and scalable code.
Handling Forms and User Input
Web forms are essential for collecting user input on websites, such as login forms, contact forms, and registration forms. PHP provides robust mechanisms for handling form submissions, including superglobal arrays ($_GET, $_POST, $_REQUEST), form validation, and data sanitization. Proper handling of user input is crucial for preventing security vulnerabilities such as SQL injection and cross-site scripting (XSS) attacks.
PHP Frameworks for Website Development
Overview of Popular PHP Frameworks
PHP frameworks are pre-built libraries that provide a foundation for developing web applications quickly and efficiently. Some popular PHP frameworks include Laravel, Symfony, CodeIgniter, and Zend Framework. These frameworks offer features such as MVC architecture, routing, database abstraction, and authentication, allowing developers to focus on building the core functionality of their applications.
Choosing the Right Framework for Your Project
When selecting a PHP framework for your project, it's essential to consider factors such as project requirements, developer expertise, community support, and scalability. Each framework has its strengths and weaknesses, so it's crucial to evaluate them based on your specific needs and preferences.
Best Practices in PHP Website Development
Security Measures
Security is paramount in web development, especially when handling sensitive data such as user credentials and payment information. PHP developers should follow best practices such as using parameterized queries to prevent SQL injection, validating and sanitizing user input, implementing CSRF protection, and keeping software dependencies up-to-date.
Performance Optimization
Optimizing the performance of PHP applications is essential for delivering a fast and responsive user experience. Developers can improve performance by minimizing database queries, caching frequently accessed data, optimizing code execution, and leveraging server-side caching mechanisms such as opcode caching and data caching.
Code Reusability and Maintainability
Writing clean, modular, and reusable code is crucial for maintaining PHP applications in the long run. Developers should follow coding standards, use meaningful variable names, document their code effectively, and adhere to design principles such as SOLID (Single Responsibility, Open/Closed, Liskov Substitution, Interface Segregation, Dependency Inversion). Code reusability reduces duplication and simplifies maintenance tasks.
Future Trends in PHP Website Development
Evolution of PHP
PHP is continuously evolving to meet the demands of modern web development. The PHP development team releases regular updates with new features, performance improvements, and security enhancements. Recent versions of PHP have introduced features such as type declarations, anonymous classes, and improved error handling, making PHP more robust and developer-friendly.
Integration with Emerging Technologies
PHP is not stagnant but integrates seamlessly with emerging technologies such as artificial intelligence (AI), machine learning (ML), blockchain, and the Internet of Things (IoT). Developers can leverage PHP libraries and frameworks to build AI-powered chatbots, ML-driven recommendation engines, blockchain-based smart contracts, and IoT-enabled web applications.
Conclusion
PHP remains a popular choice for website development due to its flexibility, affordability, and strong community support. Whether you're building a simple blog or a complex e-commerce platform, PHP provides the tools and resources needed to bring your ideas to life. By following best practices and staying updated with the latest trends, PHP developers can create secure, scalable, and high-performance web applications that delight users and drive business growth.
FAQs
Is PHP still relevant in 2024?
Yes, PHP continues to be relevant in 2024, with millions of websites powered by PHP and a vibrant community of developers actively contributing to its development and maintenance.
Which PHP framework is best for beginners?
Laravel is often recommended for beginners due to its elegant syntax, extensive documentation, and built-in features such as authentication, routing, and database migrations.
How can I learn PHP website development?
You can learn PHP website development through online tutorials, books, courses, and practical hands-on experience. Start with the basics of PHP syntax and gradually explore advanced concepts such as object-oriented programming and database integration.
What are some security vulnerabilities in PHP applications?
Common security vulnerabilities in PHP applications include SQL injection, cross-site scripting (XSS), cross-site request forgery (CSRF), and insecure file uploads. Developers should follow best practices such as input validation, output encoding, and parameterized queries to mitigate these risks.
Is PHP suitable for building large-scale web applications?
Yes, PHP is suitable for building large-scale web applications, provided that developers follow best practices in architecture, design, and performance optimization. PHP frameworks such as Laravel and Symfony offer features such as MVC architecture, dependency injection, and ORM (Object-Relational Mapping) for building scalable and maintainable applications.
1 note
·
View note