#Catchlight Studios
Explore tagged Tumblr posts
Visit Tumblr Blog
Explore Tumblr blogs with no restrictions, modern design and the best experience.
Last Seen Tumblr Blogs


Fun Fact
Average visit duration of Tumblr.com is 10 mins and 25 secs.
Text
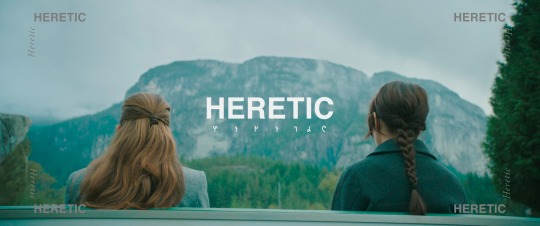
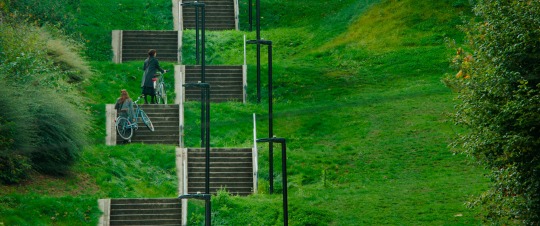

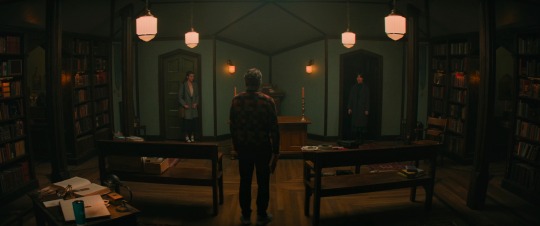

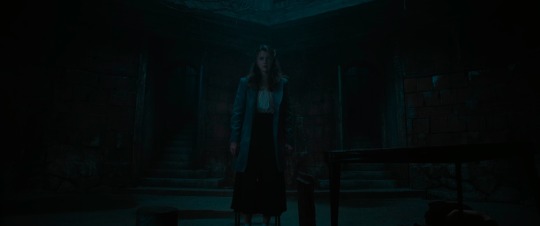
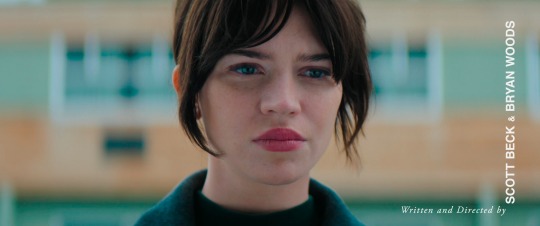
Heretic (2024)
Directed by Scott Beck & Bryan Woods
Cinematography by Chung Chung-hoon
#Heretic#Scott Beck#Bryan Woods#Chung Chung-hoon#Sophie Thatcher#Chloe East#Hugh Grant#Justin Li#Chris Bacon#A24#Beck/Woods#Shiny Penny Productions#Catchlight Studios#horror film#Movies Frames#movie in pictures#movie in frames#movie frames#movie#movies#film frames#film#films#cinematography#filmography#filmmaking#2024
10 notes
·
View notes
Text
Best light for streamers without a lot of space.

Amaran is the budget line of video equipment for Aputure. And it is surprisingly solid for the price. You can get knockoff versions of most of their stuff from Neewer or GVM, but if you want something reliable that won't break in a year or two, Amaran is a good medium budget option.
They just released what I am callng the anti-ring light.
The Verge Max.

This is a ring light where they fill in the hole and give you an entire light. You can read a long rant about ring lights here. But the short version is, you don't want one unless you put the camera in the hole and are doing a tight close up of a face.

If you aren't doing a close up of a face (like for a makeup tutorial) then you just have a normal light with a giant hole in it.
You will get no magical benefits from a ring light under any other circumstances.
The reason ring lights are so popular (outside of being a fad), is because they don't take up a lot of space. A lot of people are streaming from their computer desk which is usually up against a wall. And you just don't have a lot of room to set up a proper light with a modifier.

Before now, your best option would be an LED panel (with the hole filled in). This one by Godox is pretty good.

It has a little remote and you can add batteries to make it mobile.
But it is small and in order to get soft light, you have to place it very close to your face or set up two of them. And it might get uncomfortable blasting a small light source into your eyes for long streaming sessions.
This new Amaran light is just as thin as a panel light, but its lighting surface area is like a proper studio light.

And it is round so you will get nice catchlights in your eyeballs (if you care about that).
So you can place it a little farther back or against the wall and distribute the light over a larger area. It won't be as piercing and uncomfortable, and you get flattering soft light.
I realize $260 is an investment. You need to be sure you can make good use of this light. But if you are in cramped quarters and need a proper lighting setup, this is a great option.
Otherwise, if you do have a little space to work with, you can buy the Godox panel (or use any decently bright light you have), and tape a $10 umbrella in front of it.

Don't sleep on umbrellas. They work great. They just spill light all over the place, so you have to be mindful of that.
But I took this photo of Chris with a $10 umbrella.

All you are trying to do is make the light source bigger. You can even put the umbrella on a ring light if you already have one.
Or you can bounce the light off the wall behind your desk. If you have a big white wall, use it as a light source.
The gold standard for video lights is always going to be a COB LED light with a Bowens mount. That last part is important. The mount allows you to attach any light modifier there is.

This Godox is pretty good for an entry level continuous light. I like them as much as Amaran.
And then you can throw an octobox on there at the size of your choice.

It even has a grid to help prevent light spill.
This setup is also great for portrait photography.
The Verge Max comes out in June, but here is a video of it if you have any interest.
youtube
Good lighting is a superpower. You can be using a webcam or smartphone and lighting can improve your image much more than just about anything else.
Because I have to socialize mostly through video chats, I have a little LED panel set up near my computer. Makes a pretty big difference when compared to the regular room lights.


#I cheated a little by leaning forward so the light source would be larger and softer#but still that is quite a difference#wide angle distortion makes my head less sizeable#Youtube
312 notes
·
View notes
Text
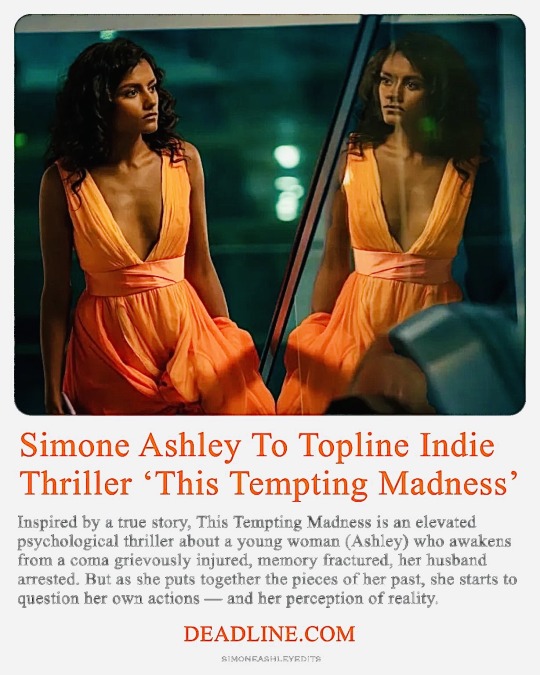
EXCLUSIVE: After breaking out with her lead role in the second season of Netflix’s smash hit series Bridgerton, Simone Ashley has moved on to star in This Tempting Madness, a new indie directed by Jennifer E. Montgomery, from her script written with husband Andrew M. Davis, which just wrapped production in Los Angeles.
A first look still from the pic, marking Montgomery’s feature directorial debut, can be found below.
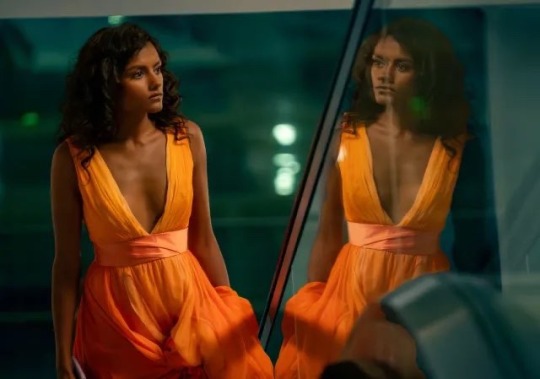
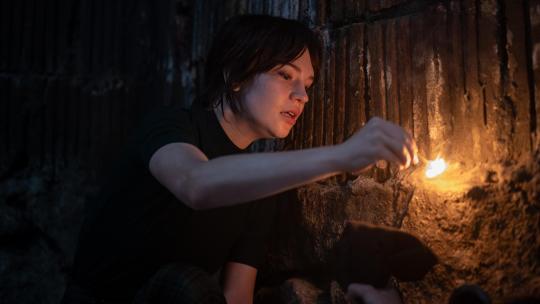
Inspired by a true story, This Tempting Madness is an elevated psychological thriller about a young woman (Ashley) who awakens from a coma grievously injured, memory fractured, her husband arrested. But as she puts together the pieces of her past, she starts to question her own actions — and her perception of reality.
Producers include Montgomery and Davis for their Smoke Jumper Films; Mango Monster Productions; Jessica Malanaphy and Marcei Brown for CatchLight Studios; and William Day Frank. Coming from a background as a cinematographer, Davis will also be lensing the film.
In the second season of Bridgerton, based on the hugely popular Julia Quinn romance novels, Ashley was introduced as Kate Sharma, who’s courted by Viscount Anthony Bridgerton (Jonathan Bailey) upon her arrival in London from India. For a moment snatching the record of the most-watched English-language series in Netflix history, with 251.7M hours viewed in its first seven days, the season was celebrated for breaking a race barrier with Ashley’s character, whose ethnicity was changed from the books so that her family would be of Indian descent.
Set to reprise the role in Season 3, Ashley has also recently appeared in Disney’s live-action reimagining of The Little Mermaid, as Ariel’s sister, Indira. Otherwise best known for her role as Olivia on Netflix’s BAFTA-winning series Sex Education, she also boasts credits including Pokémon Detective Pikachu (Warner Bros), Broadchurch (BBC America) and C.B. Strike (Cinemax), to name a few. The actress is represented by Identity Agency Group, CAA, and Myman Greenspan Fox.
Montgomery and Davis are repped by Anonymous Content.
Source: Deadline
#simone ashley#bridgerton#kate sharma#dailywoc#southasiansource#wocdaily#ladiesofcinema#wonderfulwomendaily#wonderfulwoc#femalestunning#wifesource#dailybridgerton#dailyfemale#femaledaily#dailykanthony#dailypoc#this tempting madness
135 notes
·
View notes
Text
Interlude
In between the 1989 timeline and the reputation timeline, I'd like to take a brief moment to chronicle all the things Taylor said about her plans (or lack thereof) for her next album in 2015 and early 2016.
February 3 & 4, 2015: Taylor is photographed at Catchlight Studios. I can not find any record of them producing any song for any artist ever and Google calls the a portrait studio, but the Mirror did call them a recording studio when Taylor was seen at it.
February 13, 2015: Taylor's interview with Vogue is published (likely conducted on January 14/15).
"I don’t worry that I haven’t started the next record yet. I don’t worry that I don’t know what it’s going to be. I’m not worried that I have absolutely no timetable as to when it needs to be done. It could be two years from now; it could be three, it could be four. Or it could be one. You get these bursts of inspiration right at the moment you’re not expecting to. You just have to live your life, and hopefully you’ll take the right risks."
March 2, 2015: Taylor is photographed leaving a studio. (Note: I can not find a place that specifies if this is a recording studio, dance, photography, radio, or television studio).
May 20, 2015: Taylor's interview with Marie Claire is published (likely conducted two months beforehand).
Taylor is not even sure she'll have made another album by the time 2020 rolls around (Author's Note: Taylor nearly doubled her discography between 1989 and the end of 2020). "I'm not going to put out an album until I've made one that's better than this one and that's going to be really hard," she says. And how might her music evolve if she does find love? "If that does happen, I think I could find complexity in happiness," she says. "I don't think anything's ever simple. Just because you're happy in a relationship doesn't mean there aren't moments of confusion or frustration or loneliness or sadness. Hopefully, if I ever find some sort of meaningful relationship, I'll be able to still find inspiration, just through everyday ups and downs."
October 7, 2015: Taylor is photographed leaving a recording studio in New York.
November 13, 2015: Taylor's interview with Vogue Australia is published (likely conducted two months beforehand).
Every two years since 2006 she has released an album, followed by a tour, then moved onto the next one. But her latest album, 1989, might change plans a bit. “This album has produced more number ones than any album in the past, so we’re just going to go with it,” she says, going on to explain how the usual album cycle could be extended. “Then I’ll feel like I’ll need to give people a breather from me because at a certain point they’re going to get a little sick of hearing about me, so I’ll need to go away for a while then, depending on my gauge on how sick of me they are, I’ll decide when to put out the next album.” [...] “I’ve been learning every single day what the right amount of sharing [of her personal life] is, and lately it’s been not natural because this album is such a snapshot of my life – it was so vivid, direct and honest.”
April 20, 2016: Taylor interview with Vogue is published (conducted in February).
So what the hell are you going to do with the rest of your life, Taylor Swift? “I have no idea,” she says, with a sigh that’s more blissful than anxious. “This is the first time in ten years that I haven’t known. I just decided that after the past year, with all of the unbelievable things that happened . . . I decided I was going to live my life a little bit without the pressure on myself to create something.” Do not freak: Swift is not abandoning making music. Those who know her know this is chemically impossible. (“Her not being creative is one of the last things I’d ever worry about,” the musician and producer Jack Antonoff tells me later.) “I’m always going to be writing songs,” Swift says. “The thing is, with me, I could very well come up with three things in the next two weeks and then jump back into the studio, and all of a sudden the next record is started. That’s an option, too.” But probably not for the moment. “I would really like to take a little time to learn things,” Swift says. “I have lots of short-term goals.”
27 notes
·
View notes
Text
Stella Winx - My Sims
Fiction Characters Series

cc links under the cut

Genetics
The Sims Resource - Curved Eyebrows | NO 35
STROBELITE. (tumblr.com)
The Sims Resource - Nightcrawler-Minty
Female body preset 1-3 + Blush,Freckles - full body | Patreon
MIX N MATCH FLOWER LASHES | Patreon
Studio 6 - Face paint eyes | Patreon
brntwaffles: all 24 of my sims 3 nosemasks... — Ridgeport's CC Finds. (tumblr.com)
Soloriya's custom content: ***Highlight 01-02, eye catchlight 02, lipstick... (tumblr.com)
chaotically : TOPAZ; a face highlight a simple highlight that... (tumblr.com)
fire walk with me : ABOUT FACE - SKIN DETAILS BY PYXIS A set of subtle... (tumblr.com)
GPME-GOLD Face Contouring | Patreon
A Time to Shine - Nose Highlight | Patreon
misc. face details | Patreon
SKIN 21 and mooore | Patreon
ALL HIGHLIGHTERS, more categories - by peachyfaerie | Patreon
Mysterious TS4 CC finds (tumblr.com)
Makeup
👹🎃 𝑯𝑨𝑳𝑳𝑶𝑾𝑬𝑬𝑵 𝑺𝑬𝑻 🎃👹 | Patreon
【333】Star Season-makeup bag. | Patreon
GPME-GOLD MAKEUP SET CC74 | Patreon
LEAN.OFFICIAL — leansims: LEAN SOFT SHADOW CC4 ( FREE ) ◈ MAKEUP... (tumblr.com)
GPME-GOLD Liner cc49 | Patreon
Clothes & Acc
OLYMPIA RINGS | Patreon
Miyuki Coat + Bag | Patreon
Simple satin headband | Patreon
patreon.com/posts/rimings-barbies-85568597
The Sims Resource - S-Club LL ts4 bracelet 201905
[EnriqueS4] Taylor Set | Patreon
*Overview*Chili Collection 03 | Patreon
[RIMINGS] Lovely Pajama Set Ver_1 & Ver_2 | Patreon
BUBBLE POP & SUGAR MILK Coffin Nails | Patreon
*Download* Retro Collection 04 | Patreon
Presets
Ah, here we go again | Patreon
velvet scout; (tumblr.com)
obscurus-sims.tumblr.com/post/178609869638/dl-6-sliders-for-nose-early-access-at-patreon
Pouty Lip-Slider ( ˘ ³˘)♥ | Patreon
Vanya skin, body blush & body preset | Patreon
Eyebrow slider 02 | Patreon
Eyebrow Slider | Patreon
Teanmoon Mouth Scale Slider Fix | Patreon
#sims4#creations#simcclinks#sim#cclinks#alpha-hair#accessories#clothes-alpha#ts4 cc#ccfinds#sharp fcseries
2 notes
·
View notes
Text
Tips for portrait photography
Essential Tips for Capturing Stunning Portrait Photography
Portrait photography is an art that requires a balance of technical skills and a keen eye for capturing the essence of your subject. Whether you’re a seasoned photographer or a beginner, understanding the nuances of light, composition, and interaction with your subject can elevate your portraits to new heights. Here are some essential tips to help you capture stunning portraits.
1. Master the Lighting
Lighting is the cornerstone of great portrait photography. The way you light your subject can dramatically influence the mood and impact of the photo.
Front Lighting: Lighting your subject from the front is a technique that inspires clarity and confidence. It evenly illuminates the face, reducing shadows and blemishes, which results in a clean and bright portrait. This type of lighting is perfect for headshots and professional portraits where you want to convey a sense of approachability and sincerity.
Side Lighting: For a more dramatic and character-filled portrait, light your subject from the side. Side lighting creates depth and texture, highlighting the contours of the face and adding a sense of mystery or intensity to the image. This technique is excellent for artistic portraits where you want to capture the emotional depth of your subject.
2. Choose the Right Background
The background of your portrait can either complement your subject or distract from them. Always aim for a background that enhances the overall composition without drawing attention away from the subject. Simple, uncluttered backgrounds work best. You can also use shallow depth of field (achieved by using a wide aperture) to blur the background and keep the focus on your subject.
3. Focus on the Eyes
The eyes are the windows to the soul, and in portrait photography, they are crucial. Ensure the eyes are in sharp focus, as they are typically the first thing viewers notice. Catchlights (reflections of light in the eyes) can add a sparkle and bring your portrait to life. Positioning your light source to create catchlights will make your subject’s eyes more engaging.
4. Experiment with Angles and Composition
Don’t be afraid to experiment with different angles and compositions. Shooting from a slightly higher angle can make your subject’s eyes appear larger and more expressive, while a lower angle can add a sense of power and dominance. Use the rule of thirds to place your subject off-center for a more dynamic and interesting composition.
5. Communicate and Build Rapport
Great portraits capture the personality and essence of your subject, which requires a level of comfort and trust between the photographer and the subject. Spend time getting to know your subject, make them feel at ease, and guide them through different poses and expressions. Genuine emotions and relaxed poses will result in more natural and compelling portraits.
6. Use Reflectors and Diffusers
Reflectors and diffusers are essential tools for controlling light in portrait photography. Reflectors can bounce light back onto your subject to fill in shadows, while diffusers can soften harsh light. These tools are especially useful for outdoor shoots where the lighting conditions can be unpredictable.
7. Post-Processing
Post-processing is the final step to enhance your portraits. Use editing software to adjust exposure, contrast, and color balance. Retouching can help remove blemishes and imperfections, but remember to keep it subtle to maintain a natural look. Enhancing the eyes, sharpening details, and adjusting the overall tone can make your portraits stand out.
By mastering these tips, you can create portraits that not only capture the physical appearance of your subjects but also convey their inner character and emotions. Whether you’re shooting in a studio or on location, the key is to experiment, communicate, and always be mindful of how light and composition can transform your portraits.
2 notes
·
View notes
Text
The Best Ring Light Stand for Professional Photographers

Good lighting? Non-negotiable. You could have the latest camera and the sharpest lens, but without solid lighting, your photos will fall flat. Shadows creeping in from the wrong angles, dull colors — the whole vibe goes down the drain.
That’s why ring lights are a staple for photographers. They soften shadows, bring out natural skin tones, and add that subtle glow that makes people go, “Wow, what lighting are you using?” And the best part? You don’t need a massive setup or a Hollywood budget.
I’ve got two solid picks from 5 Core that professional photographers (and let’s be honest, even us regular creators) will love. Let’s break it down.
5 Core 6-Inch Ring Light — Small But Mighty
Check it out here
Okay, so this one’s not massive. But trust me, size isn’t everything. The 6-inch ring light is a workhorse for photographers who need quick, controlled lighting for detail shots or portraits.

Ever tried capturing makeup details for a beauty shoot? Without the right light, good luck getting those fine textures and subtle tones to show up. With this light, you get soft, even lighting that makes every detail pop. It’s perfect for close-up work — jewelry, cosmetics, even small product photography.
And the adjustable brightness? Lifesaver. Some days, you’ll need that ultra-bright glow to eliminate shadows. Other times, a gentler, dimmed setting gives you that natural vibe. Flexibility matters.
Plus, it’s got a built-in phone holder. So, if you’re juggling behind-the-scenes content or snapping a few test shots with your phone, it’s got you covered.
Who’s it for?
Product photographers
Beauty and portrait photographers
Content creators who want clean, bright lighting
2. 5 Core 12-Inch LED Ring Light with Adjustable Tripod — The Big Player
Now, if you’re taking on bigger projects or shooting multiple angles, you’ll want something like this 12-inch model. It’s the sweet spot between portability and pro-level performance.

I’m talking about even lighting, no harsh shadows, and color temperature control. You can shift between cooler daylight tones and warm, golden hues. Perfect when the natural light keeps changing, and you’re racing against time.
The tripod? Solid. Unlike those flimsy stands that collapse mid-shoot, this one holds steady — even when you’re angling for that perfect top-down shot. And if you’re adjusting heights for standing portraits or flat lays? No problem.
Also, the catchlight effect is worth mentioning. Ever notice that ring-shaped sparkle in a subject’s eyes? That’s the signature of a ring light. It adds depth and makes your portraits look alive.
Who’s it for?
Portrait and fashion photographers
Studio owners and creators
Vloggers and live streamers who want top-tier lighting
Why Ring Lights Work So Well for Photographers
Here’s the thing — not all lighting is created equal. Overhead lights cast unflattering shadows. Natural light? Great when it cooperates, but it’s unpredictable. Ring lights solve both problems.

Even Lighting: No more harsh shadows or distracting glares. Everything is soft and balanced.
Catchlights: That signature gleam in the eyes? Instant depth, instant professionalism.
Portability: Need to shoot on location? No sweat. They’re easy to pack and set up.
Adjustability: Whether you’re photographing people or products, you control the brightness and warmth.
Honestly, once you use a ring light, going back feels impossible. It’s like discovering how coffee tastes with the right amount of cream — you’ll never settle for less.
Final Thoughts
For quick portraits, close-ups, or adding extra polish to product shots, the 5 Core 6-Inch Ring Light is a solid choice. It’s small, easy to adjust, and does the job without fuss.
But if you’re stepping up your game — think client sessions, in-depth shoots, or even livestreaming your editing process — the 5 Core 12-Inch LED Ring Light is the move. It’s stable, versatile, and gives you full creative control.
Whichever way you go, remember this — lighting isn’t just a technical choice. It’s how you set the mood, tell your story, and capture that moment. Get it right, and your photos will speak for themselves.
Happy shooting!
1 note
·
View note
Text
0 notes
Text

#ProyeccionDeVida
📣 Kino Cat / Cine Tulipán, presenta:
🎬 “HEREJE” [Heretic]
🔎 Género: Terror / Thriller Psicológico / Religión / Escenario Único
⌛️ Duración: 110 minutos
✍️ Guion: Richard LaGravenese
📙 Novela: Robert James Waller
📷 Fotografía: Chung Chung-hoon
🎶 Música: Chris Bacon
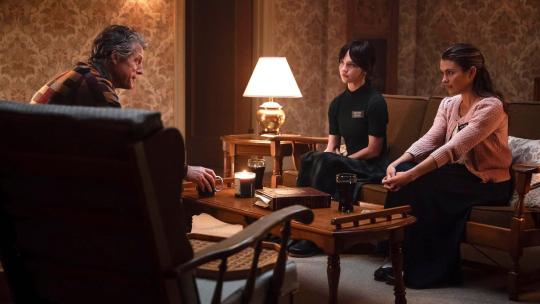
🗯 Argumento: Dos jóvenes misioneras se ven obligadas a demostrar su fe cuando llaman a la puerta equivocada y son recibidas por el Sr. Reed. Los tres se verán envueltos en un brutal juego del gato y el ratón durante una larga noche de tormenta.

👥 Reparto: Hugh Grant (Mr. Reed), Sophie Thatcher (Hermana Barnes), Chloe East (Hermana Paxton), Topher Grace (Elder Kennedy), Elle McKinnon (Teenager #2), Carolyn Adair (Conductora de Automóvil), River Codack (Misionario #1), Leanne Khol Joven Profeta) y Stephanie Lavigne.
📢 Dirección: Scott Beck y Bryan Woods

© Productoras: Beck Woods, Catchlight Studios & Shiny Penny Productions.
📼 Distribuidora: A24.
🌎 País: Estados Unidos
📅 Año: 2024

📽 Proyección:
📆 Martes 11 de Febrero
🕘 9:30pm.
🐈 El Gato Tulipán (Bajada de Baños 350 – Barranco)
🚶♀️🚶♂️ Ingreso libre
0 notes
Text


CALIFICACIÓN PERSONAL: 7.5 / 10
Título Original: Heretic
Año: 2024
Duración: 110 min.
País: Estados Unidos
Director: Scott Beck, Bryan Woods
Guion: Scott Beck, Bryan Woods
Música: Chris Bacon
Fotografía: Chung Chung-hoon
Reparto: Hugh Grant, Sophie Thatcher, Chloe East, Elle McKinnon, etc
Productora: Beck Woods, Catchlight Studios, Shiny Penny Productions. Distribuidora: A24
Género: Horror; Thriller
TRAILER:
youtube
0 notes
Text

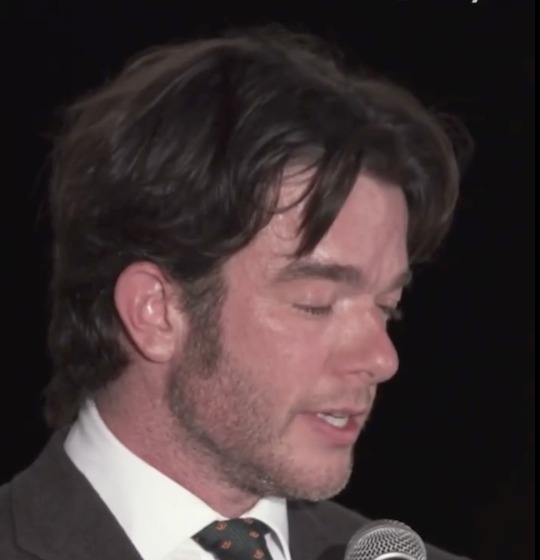
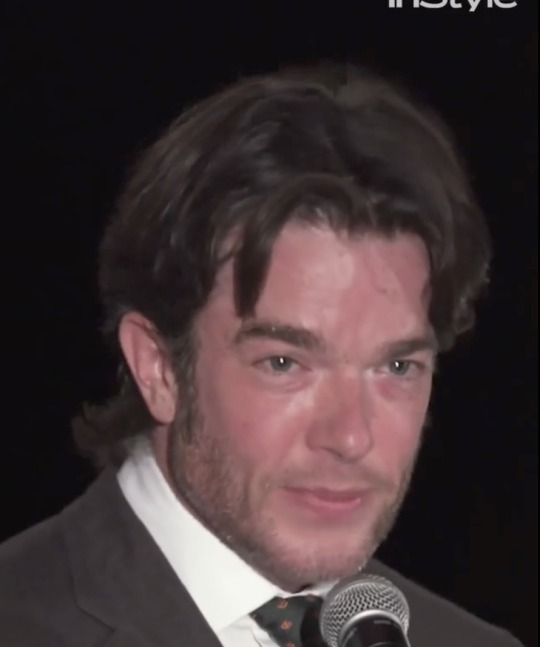


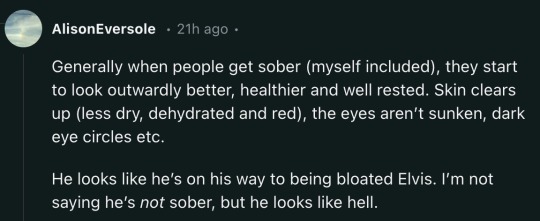

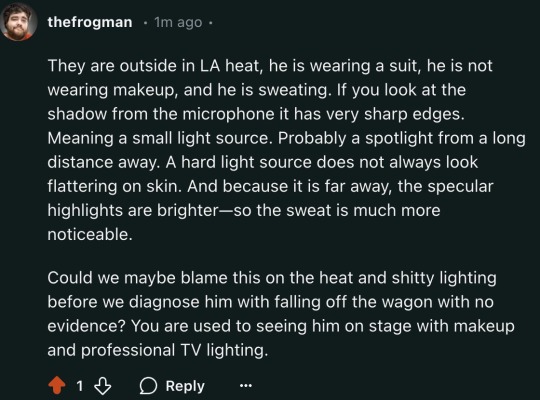
This is some speculative bullshit. I swear if these people saw me in 90 degree heat while wearing a suit they'd think I was a demon. My face turns beat red and I look like a damp naked mole rat.
I don't think some people realize how different you can look under various lighting conditions.
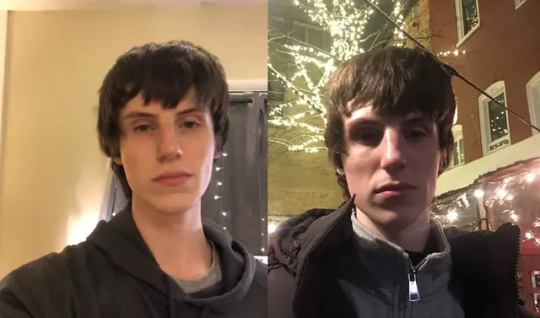
Specular highlights are direct reflections that appear as bright spots or sparkles. Think catchlights in the eyes or glare on the tip of the nose or glistening on freshly glossed lips.
Usually light obeys the inverse square law. It reflects much dimmer the farther it travels. But not *direct* reflections. So things like mirrors, glossy surfaces, or drops of water can all reflect light straight back instead of scattering and diffusing it. So that directly reflected light remains the same intensity as the light source.
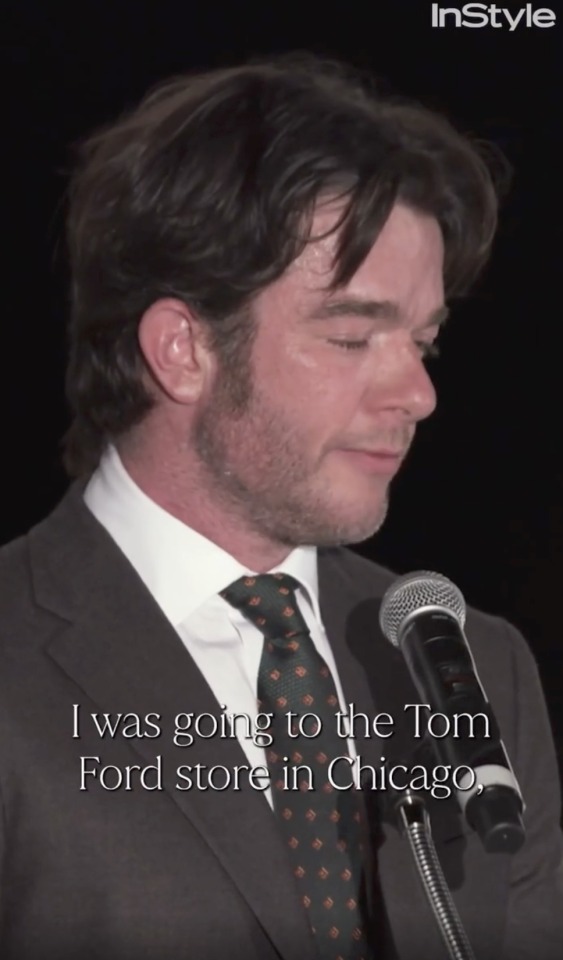
Now imagine a powerful spotlight that is 50 feet away. It has to be super bright to light a person up on stage because it is so far away. Every time you double the distance, light diminishes by a factor of 4. But all of those little beads of sweat are reflecting the full intensity of the spotlight, so they light up like a Christmas tree on someone's face. And they kind of group together to create bright patches on his skin. Our brains have been trained to register that as sweating. And the brighter and larger those patches, the sweatier we assume someone is.
You can see just how bright his sweat was reflecting by looking at the catchlight in his eye.
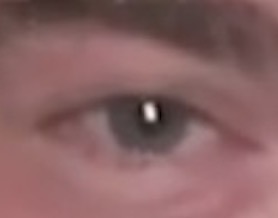
Look at the exposure of the whites of his eyes compared to the catchlight.
So he looks red from the heat and the lights are making his skin look super clammy. And as a fun bonus, a small, hard light source exaggerates pores, blemishes, wrinkles, and skin texture.
What's interesting is if you move that spotlight closer, the specular highlights will start to appear dimmer.

This is because the light source doesn't need to be as bright because it is closer. And those direct reflections match the intensity of the light source. They also spread out and appear softer because the light source is larger. Larger lights are more flattering.
John basically had everything working against him in this situation and now people think he's doing coke again because the event didn't set up a lighting truss a little closer.
Also, everyone's memory of what John looks like is mostly from TV appearances. They don't typically see him right after a jog, so their mental image is skewed towards a single circumstance.
This was only a few months ago where he is wearing makeup and under professional studio lights.

And here he is... fucking yesterday.

Maybe the fancy lights and makeup are covering up his drug addiction.
Here he is in the temperature controlled SNL writers room under soft room lights. Again, yesterday.

Looks fine to me.
I know he is a celebrity and he'll be fine, but a bunch of people who struggle with addiction are going to see all of these people judging and speculating and being shitty because a person was hot. And that sucks.
324 notes
·
View notes
Text
HERETIC Hugh Grant, Sophie Thatcher religious horror - first A24 poster
Heretic is a 2024 horror film about two female missionaries who become ensnared in a deadly game of cat-and-mouse after they knock at the house of a strange man. Written, directed and co-produced by Scott Beck and Bryan Woods (65; Haunt, writers of A Quiet Place). Also produced by Liliane Bedford, Julia Glausi, Kai Raka, Stacey Sher and Jeanette Volturno. The Beck Woods-Catchlight Studios-Shiny…

View On WordPress
#2024#Carolyn Adair#Chloe East#Elle McKinnon#Heretic#horror#Hugh Grant#movie film#preview#River Codack#Sophie Thatcher
0 notes
Note
https://www.instagram.com/p/CrbCju2uH8e/?igshid=NTc4MTIwNjQ2YQ==
Claire...another potential vault track
looks very similar to catchlight studios to me, which she entered the day before, and i can’t find any record of any songs (not just taylor, like literally anything) coming out of? i think she might have been doing photography/filming for the 1989 world tour
2 notes
·
View notes
Text
Mastering Model Photography: Techniques and Tips

Model photography is an art that combines technical skills with creativity to capture the essence of a person in an image. Whether you’re shooting for fashion, portraits, or editorial work, understanding the techniques behind model photography can help you produce stunning images that stand out. This comprehensive guide will cover the essential equipment, lighting setups, posing tips, and post-processing techniques needed to master model photography.
The Importance of Model Photography Model photography plays a crucial role in various industries, including fashion, advertising, and entertainment. High-quality images can enhance a brand’s image, attract customers, and tell a compelling story. For models, professional photographs are essential for building a portfolio that showcases their versatility and talent. Whether you’re working with seasoned professionals or new models, capturing their best angles and expressions is key to creating impactful images.
Essential Equipment for Model Photography Cameras A good camera is the foundation of any successful photoshoot. While DSLRs and mirrorless cameras are preferred due to their high resolution, manual controls, and interchangeable lenses, you can achieve excellent results with high-end smartphones as well. When selecting a camera, consider factors such as sensor size, resolution, and the ability to shoot in RAW format for greater post-processing flexibility.
Lenses The right lens can make a significant difference in the quality of your photos. Prime lenses, such as the 50mm and 85mm, are popular choices for portrait and model photography due to their sharpness and ability to create a beautiful bokeh effect. Zoom lenses, like the 24–70mm, offer versatility and allow you to quickly change framing without moving the camera. Macro lenses can be useful for capturing intricate details and close-up shots.
Lighting Equipment Lighting is one of the most critical aspects of model photography. Natural light can be beautiful, but studio lighting provides more control and consistency. Essential lighting equipment includes:
Softboxes and Umbrellas: These diffuse light, creating soft, flattering illumination. Ring Lights: Popular for beauty and fashion photography, ring lights provide even lighting with a unique catchlight in the eyes. LED Panels: Offer adjustable color temperature and brightness for precise control. Reflectors and Diffusers: Used to bounce and soften light, reducing harsh shadows. Tripods and Supports A sturdy tripod ensures stability and allows for precise composition. It’s especially useful for long exposure shots and when using heavy lenses. Additionally, consider using a monopod or a camera stabilizer for more dynamic shooting conditions.
Backgrounds and Props Backgrounds can range from seamless paper rolls in various colors to textured backdrops for adding depth and interest. Props can help tell a story or add context to your images. Choose props that complement the model and the overall theme of the shoot without overpowering the subject.
Other Accessories Remote Shutter Release: Prevents camera shake when taking photos. Light Meter: Helps measure the amount of light to ensure correct exposure. Tethering Cable: Allows you to connect your camera to a computer for real-time viewing and adjustments. Setting Up the Shoot Choosing the Location The location sets the tone for your photoshoot. Whether you’re shooting in a studio or on location, make sure the setting complements the theme and the model’s wardrobe. For outdoor shoots, consider factors like the time of day, weather, and natural light conditions.
Preparing the Model Communicate with the model beforehand to discuss the concept, wardrobe, and makeup. Encourage them to practice poses and expressions that fit the theme. On the day of the shoot, ensure they are comfortable and confident, as this will reflect in the photos.
Lighting Setup The lighting setup can dramatically affect the mood and quality of your photos. Here are some common setups for model photography:
Three-Point Lighting: This classic setup includes a key light (main source), fill light (to reduce shadows), and backlight (to separate the model from the background). Butterfly Lighting: Named for the butterfly-shaped shadow under the nose, this setup uses a single light source placed directly in front and above the model. Rembrandt Lighting: Characterized by a triangular highlight on the cheek, this setup creates a dramatic and classic look. Clamshell Lighting: Uses two lights placed at 45-degree angles above and below the model to create soft, even lighting. Experiment with different setups to find the one that best suits your vision.
Capturing the Perfect Shot Camera Settings Adjust your camera settings to achieve the best results. Here are some key considerations:
Aperture: A wide aperture (low f-number) creates a shallow depth of field, isolating the model from the background. For group shots, use a narrower aperture to keep everyone in focus. Shutter Speed: Use a fast shutter speed to freeze motion, especially if the model is moving. For creative effects, such as motion blur, use a slower shutter speed. ISO: Keep the ISO as low as possible to reduce noise. Increase it only if necessary in low light conditions. White Balance: Set the white balance according to the lighting conditions to ensure accurate colors. Posing and Directing the Model Effective posing is crucial for flattering and dynamic images. Here are some tips for directing the model:
Relaxation: Encourage the model to relax and breathe naturally. Tension in the body or face can be noticeable in photos. Angles: Experiment with different angles to find the most flattering view. Shooting slightly from above can elongate the neck and enhance facial features. Expressions: Guide the model to convey the desired emotion or story through their expressions. Subtle changes in the eyes, mouth, and posture can make a big difference. Body Language: Pay attention to the model’s body language. Small adjustments, such as shifting weight to one leg or tilting the head, can improve the pose. Interaction: If shooting multiple models, direct them to interact naturally. Genuine interactions create more engaging and relatable images. Composition Techniques Composition is the art of arranging elements within the frame. Use these techniques to create visually appealing images:
Rule of Thirds: Divide the frame into thirds horizontally and vertically. Place the model along these lines or at the intersections for balanced and dynamic compositions. Leading Lines: Use lines within the scene to guide the viewer’s eye towards the model. Framing: Frame the model using elements in the environment, such as windows, doors, or natural surroundings, to add depth and context. Negative Space: Incorporate negative space around the model to create a sense of simplicity and focus. Post-Processing Techniques Editing is an essential part of the photography process. Use post-processing software to enhance your images while maintaining a natural look.
Basic Adjustments Start with basic adjustments to correct exposure, contrast, and color balance. Ensure the skin tones are accurate and the highlights and shadows are well-balanced.
Retouching Retouching involves removing imperfections and enhancing the model’s features. Here are some common retouching techniques:
Skin Smoothing: Use tools like the healing brush or clone stamp to remove blemishes and even out skin tone. Be careful not to overdo it, as overly smooth skin can look unnatural. Dodge and Burn: Enhance the model’s features by selectively lightening (dodging) and darkening (burning) areas. This technique adds depth and dimension to the image. Teeth Whitening and Eye Enhancement: Subtly whiten teeth and enhance the eyes to make them pop. Advanced Editing For more advanced editing, consider these techniques:
Frequency Separation: This technique separates the texture and color information, allowing you to retouch skin without losing details. Liquify Tool: Use the liquify tool to make minor adjustments to the model’s body shape or facial features. Be subtle to avoid unrealistic results. Color Grading: Adjust the overall color tone of the image to create a specific mood or style. Final Touches After retouching, add any final touches to enhance the image. This may include sharpening, adding a vignette, or applying a slight grain for a film-like effect.
Creative Techniques and Tips Using Props and Wardrobe Props and wardrobe play a significant role in telling a story and adding context to your images. Choose items that complement the model and the theme of the shoot. Experiment with different outfits and accessories to create variety.
Capturing Motion Incorporate motion to add dynamism to your photos. This can be achieved through techniques such as:
Panning: Follow a moving subject with your camera while using a slow shutter speed to create a sense of motion. Hair and Fabric Movement: Use fans or ask the model to move their hair or clothing to capture natural movement. Experimenting with Perspectives Change your perspective to create unique and interesting compositions. Shoot from high or low angles, or through objects to add depth and dimension.
Utilizing Natural Elements Incorporate natural elements like sunlight, water, or foliage to enhance your photos. Use the golden hour (the hour after sunrise and before sunset) for soft, warm lighting.
Common Challenges and Solutions Managing Difficult Lighting Harsh or uneven lighting can be challenging. Use diffusers to soften harsh light and reflectors to fill in shadows. Adjust your camera settings to handle tricky lighting conditions.
Working with Inexperienced Models If your model is inexperienced, take the time to guide them through poses and expressions. Show them reference images and offer positive reinforcement to boost their confidence.
Handling Weather Conditions For outdoor shoots, unpredictable weather can be a challenge. Have a backup plan in case of rain or extreme conditions. Be flexible and ready to adapt your shoot to the environment.
Maintaining Consistency Ensure consistency in your images by standardizing your lighting setups, camera settings, and post-processing techniques. This is especially important for creating a cohesive portfolio or series of images.
Showcasing Your Work Building a Portfolio A well-organized portfolio is essential for showcasing your skills and attracting clients. Include a variety of images to demonstrate your versatility. Highlight your best work and regularly update your portfolio with new images.
Online Presence Create a professional website to display your portfolio. Use social media platforms like Instagram, Facebook, and Pinterest to share your work and connect with potential clients. Engage with your audience by posting behind-the-scenes content, tutorials, and tips.
Networking Attend industry events, join photography groups, and collaborate with other photographers and models. Networking can lead to new opportunities and valuable connections.
Measuring Success and Continuous Improvement Tracking Performance Use analytics tools to track the performance of your online presence. Monitor metrics such as engagement rates, website traffic, and client inquiries to gauge your success.
Seeking Feedback Request feedback from clients and peers to identify areas for improvement. Constructive criticism can help you refine your techniques and deliver better results.
Staying Updated Stay informed about the latest trends and techniques in model photography. Subscribe to industry publications, follow influential photographers, and continuously experiment with new ideas.
Continuous Learning Invest in your education by taking online courses, attending workshops, and reading books on photography. Platforms like Udemy, Coursera, and CreativeLive offer valuable resources for photographers at all levels.
Conclusion Mastering model photography requires a blend of technical skills, creativity, and continuous learning. By understanding the importance of high-quality images, setting up effective lighting, guiding your model, and employing post-processing techniques, you can create stunning photographs that capture the essence of your subject. Showcase your work through a professional portfolio and online presence, and continuously seek feedback and opportunities for improvement. With dedication and practice, you can excel in the art of model photography and produce images that make a lasting impact.
Lensclicker Model Photography in Jaipur
At Lensclicker Photography, we specialize in delivering exceptional model photography services in Jaipur. Our team of skilled photographers is dedicated to capturing high-quality images that elevate your brand and drive engagement. From individual portraits to fashion editorials, we cover all your model photography needs. Our expert editing team ensures your images are flawless and ready to impress. We offer tailored photography packages to suit your specific requirements and budget.
contact us:- +91 09521324743
For more information, please visit your website: — https://www.lensclicker.com/
#ecommerce#photography#product photography#photoshoot#across the spiderverse#artists on tumblr#michael cera#services#old bollywood#succession
0 notes
Text
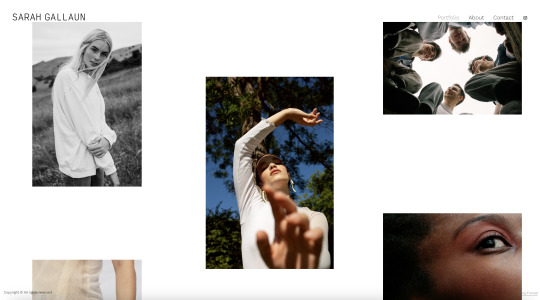
07_Sarah Gallaun
Sarah Gallaun is a freelance fashion + portrait photographer based in Austria. Below are some of her work that I like/elements of. I think one thing overall in her images is that I appreciate her range of styles. Of course shooting for clients who have a certain pallette in mind style-wise will direct how things will come out, nonetheless she has an interesting dyanmic range of styles.
The first is a series of fashion editorial shots from for Wildflower.
For starters I like that they are taken outside using either natural or architectural elements as backdrops/props especially as they contrast texturally from the model in all three cases.
(Right) Looks like natural light (diffused given how soft the higlights are) from above is illuminating the model whilst little is done to brighten the shadows in the lower half of the image or on the right side of the models face. The facial lighting is almost split lighting but detail is kept so you can see her right eye. Much of the background is out of focus but the bokeh isn't super strong so I would say an f stop of below 8 would've been used.
(Middle) The use of a cellophane or gel over 90% of the frame is quite fun and I like how it obscures the shot but also reflect the sky into the frame as well. It is a little flat contrast-wise but makes for an interesting style.
(Left) Definitely more editorial style, very posed shot. Looks like overcast light very well diffused with a reflector on the left to balance out the shadows - would even say a light may have been used on the left because of how evenly lit the concrete piece on the left it.

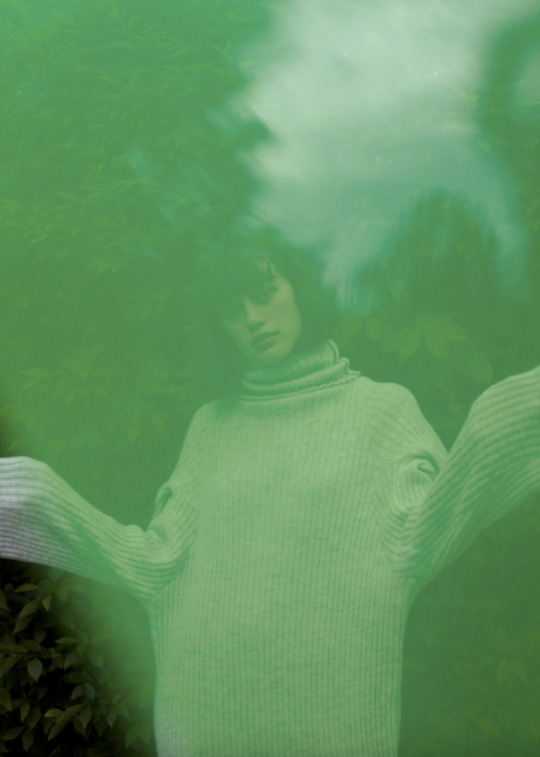

Wildflower (Fashion editorial)
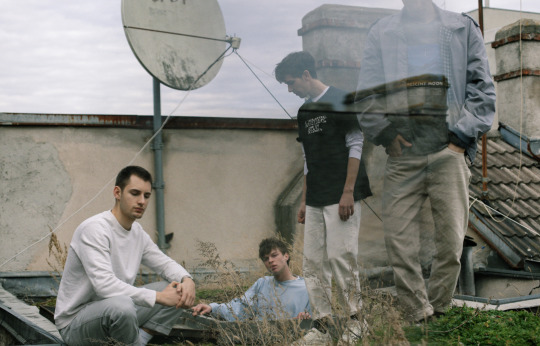
The second is another editorial shoot for a German boy band Kobrakasino.
Although we aren't into group portraits yet I like the experimentation with the coordination of these four images. The use of reflection is really interesting especially in the first and third shot below - using a transparent surface of some kind to create reflection/interferance (mimicing a prism in some ways in the third image). They are also landscape unlike a lot of the other portraits I've looked at (with the exception of no. 2 which stand out for being in portrait orientation).
In terms of lighting they are outdoor shots on what looks like very overcast weather. The lower right image in particular as the sky is blown out almost completely - this image also looks like there was a reflector used to bounce the lighting from the left side.
The fourth image stand outs for me as well in terms of composition - having one person in the foreground with three slightly out of focus in the background. It's an interesting way of creating a focal point. This image again is fairly evenly lit with shadows (slight butterfly lighting on all faces) - so I would assume reflectors either side of the frame to even out highlights?

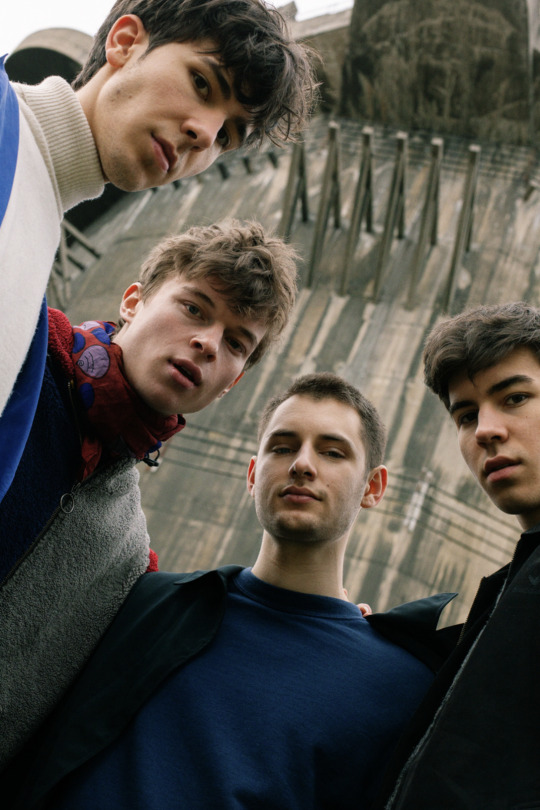


Kobrakasino, Vienna, March 2020 (Group/environmental)
The third is a series of creative portraits. What I appreciate about these is even in a small range of frames all taken shoulders and above theres quite a variety of angles and lighting changes (even with what looks like little change to the lighting set up).
The key light is definitely coming in from the right side, with fill lighting on the left only slightly to bring out facial features - though largely in even shadow the catchlight in the right eye brings out that darkened side of the face.
Gold reflector - particularly evident in the third image under the chin and in the coloured images warmth.
I also like the posing direction of the model - I've noticed as much as lighting is a huge part of portraiture so to is knowing how to direct a model. So looking at different poses and angles that different photographers have used is quite useful.
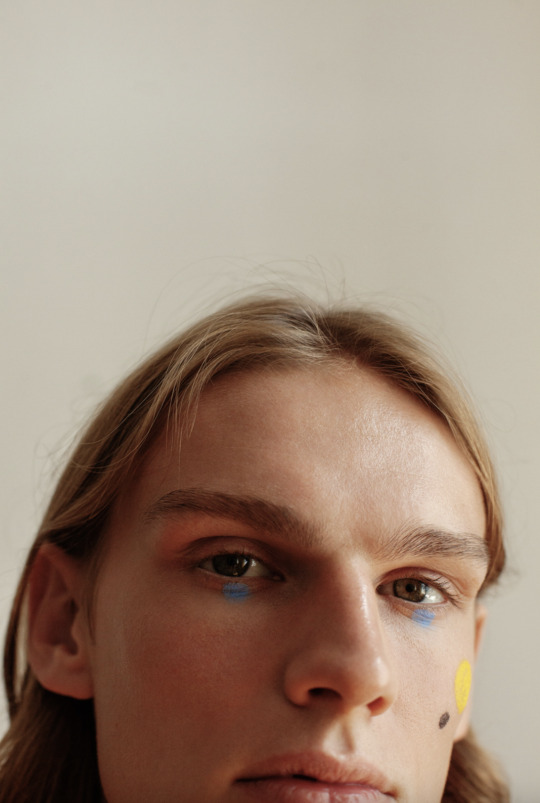


Jan (Studio creative)
0 notes
Text
Can I Use A Ring Light For Product Photography
Yes, a ring light can be used for product photography and is often a popular choice among photographers. A ring light is a circular light source that provides even and uniform illumination, reducing shadows and highlighting details in the subject.
Here are some benefits of using a ring light for product photography:
Even Lighting: Ring lights produce a soft and uniform illumination, minimizing harsh shadows on your products. This helps showcase the details and textures of the items you are photographing.
Circular Catchlights: Ring lights create circular catchlights in the eyes of your subject, giving a distinct and appealing look. In product photography, this can add a professional and polished appearance to your images.
Reduced Glare and Reflections: Ring lights can help minimize glare and reflections, especially when photographing shiny or reflective surfaces. This is beneficial for capturing products with glass, metal, or glossy finishes.
Versatility: Ring lights are versatile and can be used for various types of products, from small items like jewelry to larger products. They are particularly effective for close-up shots and macro photography.
Compact Design: Ring lights are often compact and lightweight, making them easy to set up and transport. This is advantageous for photographers who need to work in different locations or have limited studio space.
When using a ring light for product photography, consider the following tips:
Positioning: Experiment with the placement of the ring light to achieve the desired effect. You can place it directly in front of the product or slightly off to the side to create interesting highlights and shadows.
Adjusting Intensity: Some ring lights allow you to control the intensity of the light. Adjust the brightness according to the specific requirements of your product and the desired mood of your photographs.
Color Temperature: Pay attention to the color temperature of the ring light, as it can impact the color rendition of your products. Ensure that the light's color matches the ambient lighting or adjust it accordingly.
Overall, a ring light can be a valuable tool for enhancing the visual appeal of your product photos by providing consistent and flattering illumination.
0 notes