#Linux installation without CD
Explore tagged Tumblr posts
Visit Tumblr Blog
Explore Tumblr blogs with no restrictions, modern design and the best experience.
Last Seen Tumblr Blogs


Fun Fact
Tumblr was named as a finalist in Lead411’s New York City Hot 125 in Aug 2010.
Text
Diary of an OS defector
My old laptop was Windows 11, but the hardware had got to such a dire state that it had to go. This left me with a choice.
Aside from my main laptop, I had a second one "running" Windows 10. It is called Little Legs. I put running in quotes because it wasn't really running anything. It froze up, overwhelmed, when asked to do, well, anything really. I have no memory of how I came into possession of it, but there was absolutely nothing of importance on it. If I did something to brick it entirely, I would lose nothing. So I installed Mint xfce on it, mostly, at the start, for shits and giggles.
Then I noticed something. It was good. The 4GB of soldered ram from 2019 couldn't cope with Windows 10, but it was happy on Mint. I began doing things on it, and then it came into my rotation as a sexed-up second monitor.
But more than that. Linux was a better experience that Windows. So, when I got a new main laptop, I plugged the bootable media in, and made the switch.
And I'm glad I did. For context, what I do with my laptop is doing an internet, some spreadsheets and text editing, a little programming. Nothing to give me Edge Case Syndrome.
I am now typing this on that laptop. The main thing Mint has over Windows, in my opinion, is the filesystem. Everything is just there. I can find whatever I want easily; everything I see on the way, I know what it's doing. There's none of the directories I had on Windows with cryptic names that I didn't have permission to access, or couldn't understand at all. (The old laptop went to its grave with a directory called Jedi that had been there for years, defying any attempt to explain its existence). And when I want to rename something? Right click and rename it. If I want to change things? Into the command line; a lil bit of cd, mkdir, and rmdir. It's a breath of fresh air, and it feels like my computer. This might change as I keep using it and files and folders build up, but I don't think it'll ever get Windows bad.
There's also a simplicity I really like about Mint. Everything has a straightforward name, with a little description of what it does. And they're all nicely grouped up with their friends in the start menu. There's no ai, no weather forecasts for cities I'm not in, no ticker showing me the current currency exchanges. It's everything I could plausibly want and not an iota more. Love it, it's a hiking map compared to Windows' rambled vague directions accompanied with vague pointing and tangents about the history of the city.
The updates! The updates update. They don't close down things, cause my entire system to restart without my consent, or demand to be turned off and on again.
To be sure, it's not perfect. I'd love to be able to adjust the screen zoom to somewhere in between 100% and 200%, but doing it individually in the apps isn't too much of a hardship. I tried to change the lock screen, and caused the whole boot process to get grumpy with me in the process. Firefox can have an unexpected amount of trouble scrolling occasionally, and the amount of storage I have free at any given time goes up and down, and is always less than I feel it should be. No doubt this all due to my own incompetence.
On the whole, I am an absolute convert. Linux knocks Windows into a cocked hat (also chromeOS, which I have also had the misfortune of using). I've got the bug.
Little Legs is still here, and still something I can afford to lose, and I am still playing with it. I had a look at Manjaro, but I didn't vibe with that. What goes on my flash drive next?
72 notes
·
View notes
Text
obviously we'll have to wait and see, but i've been eyeing the steamdb page for silksong since i heard that team cherry uploaded language packs for the achievements, and i figure it might be a good idea to show what i've watched be uploaded in that time, for those curious about silksong development stuff.
for anyone who wants to review this themselves, here is the link to the steamdb page for the game.
so that others dont have to go to the page to verify what i'll be talking about here, i will provide screenshots. it's all under the cut, but if you don't want to read it all,
tldr; team cherry has uploaded translation packages for achievements in ten different languages (viewable on the steam page), uploaded two game packages (one of which uses the official title, the other being noted for developer & publisher use), updated a time or two more without adding details, and updated compatible operating systems to include mac & linux (not updated on the steam page).
JUNE 3RD, 2025.
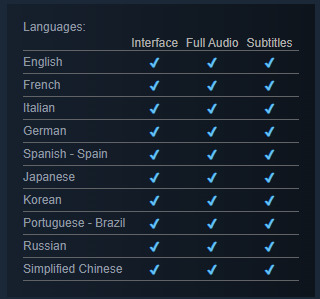
this was the translation package that restarted the silksong rumors! the steam page was updated to reflect the languages the game will be available in now, too, while steamdb specifically noted them to be achievement languages.
the added languages are brazillian portugese, english, french, german, italian, japenese, korean, russian, simplified chinese, and spanish.

after this, two more updates were released. the changelog doesn't note what they were,
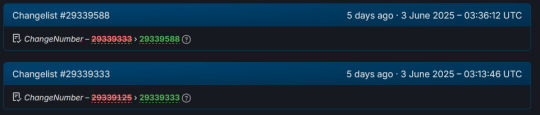
but if you head to the packages tab, you'll see a total of three packages noted. the first two are the ones that were updated during this day.

i had to look this up, so just to explain the billing type,
CD & Store Keys are how a game is verified after purchase. its their way of confirming that okay, yes, you did buy the game, and this is your copy. theyre called CD keys, because when games were distributed only on CD keys years ago, it was on the CD itself.
nowadays, it's basically a confirmation of purchase upon installation.
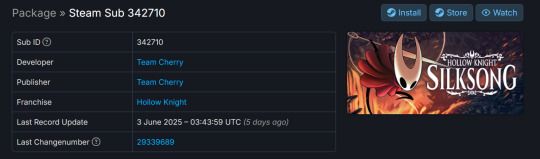
SO. let's start with that top one. Steam Sub 342710 (link to package) is for developer and publisher use only. it has ten different CD keys, is licensed for single purchase, and is listed as having 0 available. i would speculate here, but i know fuck all about game development, and i'm not gonna give any false hope.
...though i do wanna point out that if you go into the history for that package it has been there since 2019, and based on how it talks about a release override and counting as always being owned, this definitely is a dev-use only package. anyway.
you can see the information listed on the package's page below.

the other one, bearing the game's full name of Hollow Knight: Silksong (link to package), was actually updated like. twenty minutes before the other one. which unironically probably does not mean much, don't look too far into it, im giving you a timeline here. that's it.
this one has ten CD & Store keys, as opposed to only having CD Keys. i tried to look up the difference, but couldn't find anything. it's also only for single purchase, and is listed as having 0 available. it also has cross-region trading and gifting disabled.
you can see the information listed on the package's page below.


and that was all the changes for june 3rd, 2025.
JUNE 4TH, 2025.
there was one update on june 4th, and despite poking around, i couldn't figure out what the update was to. the changelog lists that there was an update, but it doesn't say what was changed. shrug.
you can see that below.

JUNE 6TH, 2025.
starting out strong with. well. a repeat of june 4th, we have a listed update that i could not find a notable change from.

and then, thirty minutes or so later, the compatible operating systems list was updated! i'll be honest, i don't understand all of what's listed here, but i do understand that this is confirmation that silksong will be playable on windows, mac, and linux.

unfortunately, as of the time this post has been made, the steam page still has not been updated to reflect this compatibility update.

that is, as of the time this post has been made, the last update listed on the steamdb page for silksong.
#our posts 🌊#silksong#hollow knight#team cherry#TELL ME THE RELEASE DATE FOR SILKSONG YOU AUSSIE PIECES OF SHIT [affectionate]#if they update shit more tonight after i already made this post im gonna start biting
60 notes
·
View notes
Text
OK- Here me out-
my daily driver is a 2006 dell, the first version of arch came out in 2002.. my computer should be able to support it without the use of a vm..
I have a spare hdd that I could install it on (although I think I have linux mint installed on it rn) and plenty of cds I could burn the ISO to. I could very easily make this work.
72 notes
·
View notes
Note
Now that the dust has settled what's your opinion about the legacy collections?
hey anon, i really don't think the dust has settled. BUT the legacy collection is out and has even had a patch and all and i wish i didn't feel vindicated.
ea did the bare minimum and the re-releases were rushed out the door without even proper qa (yet another big hit of ea understaffing their qa department i'd guess!). they over promised and under delivered and we got a product that doesn't know what it wants to be. is it a better experience than a patched ultimate collection / cd collection? for most cases, modded or not, it isn't. which isn't to deny the success stories i've seen, just that they seem to be a minority. i don't think that this is a meaningful upgrade for most people, and it comes with a hefty price tag at that.
personally, i will stick with my adored osab launcher install. switching to linux has fixed my issues, so i have nothing to gain from switching to legacy. but that's just me. i have no interest nor availability to police what other people do. i just urge people to consider exploring avenues to switch to legacy as there is the ongoing sag-aftra strike on ea (along with other companies). i also have no interest in seeing andrew wilson, ceo of ea since 2013, line his pockets with eye-watering amounts of money while we're seeing layoffs across ea owned studios.
9 notes
·
View notes
Text
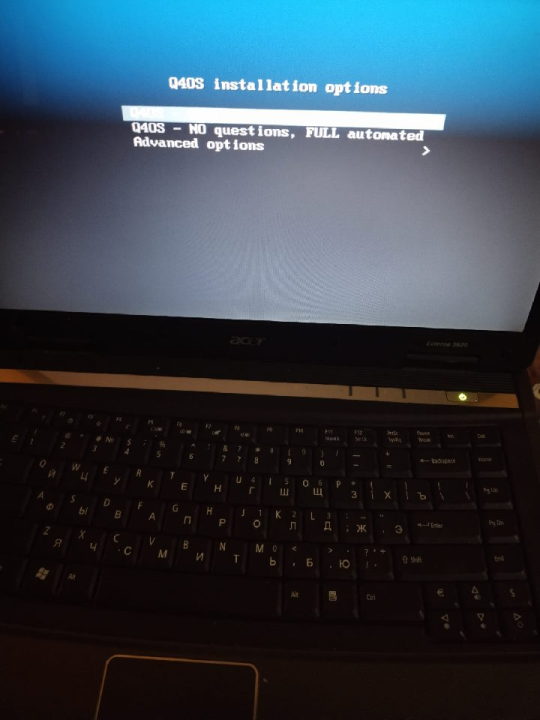
Q4OS – I setup for myself Linux with Trinity
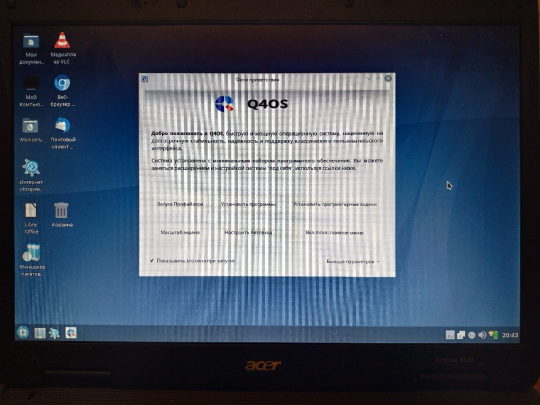
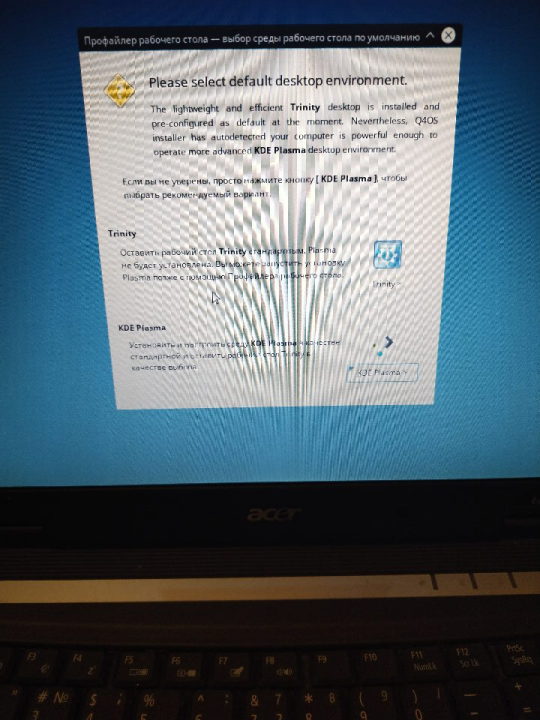
I setup a Linux for myself. For not powerful system. With my Acer Extensa. It has two cores with 1.5 ghz. And 4gb of ram. I select in result – Q4OS. As light Linux. For not powerful systems. With its own graphic environment. It is easier, lighter. It has a name Trinity. Firm development from system’s authors. Special for this purpose – to system not to require lots of resources. And it is very good for me.

With author`s website you to download distributive. It is written with flash as a boot. One little moment, check carefully. There are, also, Live CD images. It is for run system from device. Like flash or compact disk. And, there are for setup, install. So, for install, you need this version to download. I was not accurate and first, download Live Cd. And, I see – I cannot find option to install. But, you can run system at once! I was surprised. I see what is it. And, I start to understand, what is it all about.

Installation process. It is simple and easy. Nothing tricky. Nothing hard. This is good. Installation is friendly to the user. We are moving with steps of installation. And after - system, at last, launching. It is, already, installed. It is good to check updates. What is here. All is automatically checked by itself. It has a name packages for Linux. Lists with packages. You just need to start a certain purpose program. This means network is required. Without internet you cannot to do updates.

And, later, with manager packages. You start it and see what it can show you. So, it has lots of different. I am not expert with Linux. I take it as a probe. I setup for myself a whole pack, preset for packages. Little game. It is Chocolate Doom with some pack. So, this is not only Chocolate Doom. And, also, some files included. To have all included. So, it includes FreeDoom. And this is comfortable! So, you can start to play at once. To play. Levels for FreeDoom are unique. Even, its own graphics. But, mainly, it is same Doom.
Once again, I am not expert with Linux. And, better say, I try to try this with my own. But funny thing it is. Installer is looking like it is MS DOS. So, it has such install line. And, system itself. It reminds Windows. Level Windows Xp or even like Windows 98, maybe. Such background, similar color. And windows forms.

Interesting moment! Visually, I like a lot this Trinity scheme for desktop. About functions it is very good. I am very surprised. There are lots of things here. And main - there package manager. Using it to update. And install. And this is comfortable. For start – it is good way.

Visual side looks like something Windows 98 with plus. I like a lot this visual side. Functions are good. And now it is my first launch. I little about to play Doom. I visit websites with browser. First launch was successful! And positive!

iron (hardware) and programs. From time to time i restore computers, retro computers. Try retro soft. Check some programs. And write about all of these.
Dima Link is making retro videogames, apps, a little of music, write stories, and some retro more.
WEBSITE: http://www.dimalink.tv-games.ru/home_eng.html ITCHIO: https://dimalink.itch.io/
#os#retro computer#q4os#linux#try linux#light linux#boot cd#live cd#install os#windows 98#windows xp#chocolate doom#free doom#ms dos#simple install#trinity#soft#operating system#old computer#something new#simple linux#first launch#welcome#packets#manager#not powerful pc#pc#computer expiriments#new soft#penguin
3 notes
·
View notes
Text
Did you know that most linux distros let you do a sort of trial run without actually installing it on your computer? It's called a "live disc" because it used to be done using a CD, but it's normally done off a usb stick nowdays. If you want to give linux a test to see how you get on with it, you can gike it a go, here's a set of instructions how to go about it with ubuntu.
(There are some linux distros that really run with this idea, such as puppy linux which is designed to run full-time off a memory stick.)
46 notes
·
View notes
Note
can i ask how you installed linux on your laptop? ive been thinking about doing it for a while but dont really know what i need to do to prep for it
I'm just a beginner too so I totally understand how confusing it all seems but it's not too bad if you take your time! This is going to be as quick as possible, and I'm going to assume you're choosing the Linux Mint version of Linux because it's a widely accepted opinion that it's the best for people new to this OS. (You can always add another version of Linux or change to it later on once you've had success with this!)
Note: You'll need a USB stick with at least 4GB on it, and you will want to have it dedicated to the Linux install
Back everything up! How you do this is up to you. I did it by saving anything important to an External HD (I already have a clean install of windows on a CD). If you don't have a clean install of your current OS, you can burn a restore point to a CD or DVD, or put it on a USB stick. Note: You'll be able to access all of your files on your current harddrive even after partitioning and booting on Linux! So you don't need to make two copies or transfer things over. If you have an account for your browser, sync your tabs/passwords/history/etc for a muuuuch smoother transition! Linux comes with Firefox already installed, so if you don't currently use it but want to make the change, you can port your bookmarks in from Chrome.
Get information about your system: You'll want to know your current OS (mine was Windows 7), what graphics card you have, how much RAM (memory) your computer has, and what kind of booting your system does (BIOS or UEFI), and of course, how much space on your harddrive there is. Note: I use "harddrive" to mean wherever you're installing your OS, some people install it on an external HD, or an SSD and run it from there.
Pick which distribution of Linux to install: While you can install whichever one you want, Linux Mint is the safest bet for someone new to Linux - if your computer can run a Windows or Mac OS, it can run the version of Linux Mint called Cinnamon. And that's the one that's the most user friendly. It's a great way to learn how to use the Terminal (like command prompts on Windows) in a low stress way because you still have the User Interface. It also has a robust community with plenty of information/resources out there! Super helpful. If your computer doesn't have enough space (though Cinnamon does not take up much at all, I think people say something around 165GB for Linux Mint Cinnamon), Mate is smaller and XCFE is the smallest, though they are less beginner friendly.
Decide how you want to install it: Here is an installation guide I used to get Linux Mint. Some of it I had to read a few times and only really understood once I did it, but with my backups I did it without fear. I recommend doing a Dual Boot system if you have the space, partitioning your hard drive is not nearly as complicated as I thought it'd be and also it's good for if Linux doesn't have a version for some programs you like to use. Here's another installation guide, though I think it only focuses on going from Windows to Linux. It has some great tips for post-installation though if you're not going from Windows. It also assumes you didn't pre-partition your harddrive. I partitioned mine before installation so I used the "Something Else" option when it asked me which type of install I wanted. There are instructions on that in the first installation guide! P.s. - If you're on Windows 7, the recommended USB writer program isn't available for you. I used USBImager!
Wrap up any loose ends and do web searches for anything you're not sure of. Bring things up on your phone for reference while you're mid-install. NOTE: When you boot your computer from the USB Stick with Linux Mint on it (I'm assuming other varieties of Linux too?), you have the option to try it out without installing it. Then while you're trying it out if you're ready to install it, there's an icon on the desktop you click. If you don't install it, none of your settings or anything will save and the next time you boot from the USB stick it'll be a fresh version of Linux.
https://forums.linuxmint.com/ There are mountains of information in here! And plenty of them are helpful for beginners. https://easylinuxtipsproject.blogspot.com/p/first-mint-cinnamon.html This is helpful too!!! The whole site is.
If you don't like how something looks/feels/works, there's probably a system setting for it. Do a Timeshift snapshot when you first install Linux, then one after you've spent time setting everything up! That way you're covered. After you do that second Timeshift you can start looking for programs to install if you'd like! Definitely look up tutorials/etc on that.
Okay I hope this was enough to get your started and cover a lot of bases! Remember to have patience, re-read stuff, take breaks if you're confused, and that like a million people use Linux Mint successfully so once you get through the hard part (pre-install and installing) it's pretty smooth sailing.
Let me know if you have anymore questions!
2 notes
·
View notes
Text
Understanding the Boot Process in Linux
Six Stages of Linux Boot Process
Press the power button on your system, and after few moments you see the Linux login prompt.
Have you ever wondered what happens behind the scenes from the time you press the power button until the Linux login prompt appears?
The following are the 6 high level stages of a typical Linux boot process.
BIOS Basic Input/Output System
MBR Master Boot Record executes GRUB
GRUB Grand Unified Boot Loader Executes Kernel
Kernel Kernel executes /sbin/init
Init init executes runlevel programs
Runlevel Runlevel programs are executed from /etc/rc.d/rc*.d/
1. BIOS
BIOS stands for Basic Input/Output System
Performs some system integrity checks
Searches, loads, and executes the boot loader program.
It looks for boot loader in floppy, cd-rom, or hard drive. You can press a key (typically F12 of F2, but it depends on your system) during the BIOS startup to change the boot sequence.
Once the boot loader program is detected and loaded into the memory, BIOS gives the control to it.
So, in simple terms BIOS loads and executes the MBR boot loader.
2. MBR
MBR stands for Master Boot Record.
It is located in the 1st sector of the bootable disk. Typically /dev/hda, or /dev/sda
MBR is less than 512 bytes in size. This has three components 1) primary boot loader info in 1st 446 bytes 2) partition table info in next 64 bytes 3) mbr validation check in last 2 bytes.
It contains information about GRUB (or LILO in old systems).
So, in simple terms MBR loads and executes the GRUB boot loader.
3. GRUB
GRUB stands for Grand Unified Bootloader.
If you have multiple kernel images installed on your system, you can choose which one to be executed.
GRUB displays a splash screen, waits for few seconds, if you don’t enter anything, it loads the default kernel image as specified in the grub configuration file.
GRUB has the knowledge of the filesystem (the older Linux loader LILO didn’t understand filesystem).
Grub configuration file is /boot/grub/grub.conf (/etc/grub.conf is a link to this). The following is sample grub.conf of CentOS.
#boot=/dev/sda
default=0
timeout=5
splashimage=(hd0,0)/boot/grub/splash.xpm.gz
hiddenmenu
title CentOS (2.6.18-194.el5PAE)
root (hd0,0)
kernel /boot/vmlinuz-2.6.18-194.el5PAE ro root=LABEL=/
initrd /boot/initrd-2.6.18-194.el5PAE.img
As you notice from the above info, it contains kernel and initrd image.
So, in simple terms GRUB just loads and executes Kernel and initrd images.
4. Kernel
Mounts the root file system as specified in the “root=” in grub.conf
Kernel executes the /sbin/init program
Since init was the 1st program to be executed by Linux Kernel, it has the process id (PID) of 1. Do a ‘ps -ef | grep init’ and check the pid.
initrd stands for Initial RAM Disk.
initrd is used by kernel as temporary root file system until kernel is booted and the real root file system is mounted. It also contains necessary drivers compiled inside, which helps it to access the hard drive partitions, and other hardware.
5. Init
Looks at the /etc/inittab file to decide the Linux run level.
Following are the available run levels
0 – halt
1 – Single user mode
2 – Multiuser, without NFS
3 – Full multiuser mode
4 – unused
5 – X11
6 – reboot
Init identifies the default initlevel from /etc/inittab and uses that to load all appropriate program.
Execute ‘grep initdefault /etc/inittab’ on your system to identify the default run level
If you want to get into trouble, you can set the default run level to 0 or 6. Since you know what 0 and 6 means, probably you might not do that.
Typically you would set the default run level to either 3 or 5.
6. Runlevel programs
When the Linux system is booting up, you might see various services getting started. For example, it might say “starting sendmail …. OK”. Those are the runlevel programs, executed from the run level directory as defined by your run level.
Depending on your default init level setting, the system will execute the programs from one of the following directories.
Run level 0 – /etc/rc.d/rc0.d/
Run level 1 – /etc/rc.d/rc1.d/
Run level 2 – /etc/rc.d/rc2.d/
Run level 3 – /etc/rc.d/rc3.d/
Run level 4 – /etc/rc.d/rc4.d/
Run level 5 – /etc/rc.d/rc5.d/
Run level 6 – /etc/rc.d/rc6.d/
Please note that there are also symbolic links available for these directory under /etc directly. So, /etc/rc0.d is linked to /etc/rc.d/rc0.d.
Under the /etc/rc.d/rc*.d/ directories, you would see programs that start with S and K.
Programs starts with S are used during startup. S for startup.
Programs starts with K are used during shutdown. K for kill.
There are numbers right next to S and K in the program names. Those are the sequence number in which the programs should be started or killed.
For example, S12syslog is to start the syslog deamon, which has the sequence number of 12. S80sendmail is to start the sendmail daemon, which has the sequence number of 80. So, syslog program will be started before sendmail.
There you have it. That is what happens during the Linux boot process.
for more details visit www.qcsdclabs.com
#qcsdclabs#hawkstack#hawkstack technologies#linux#redhat#information technology#awscloud#devops#cloudcomputing
2 notes
·
View notes
Text


2023
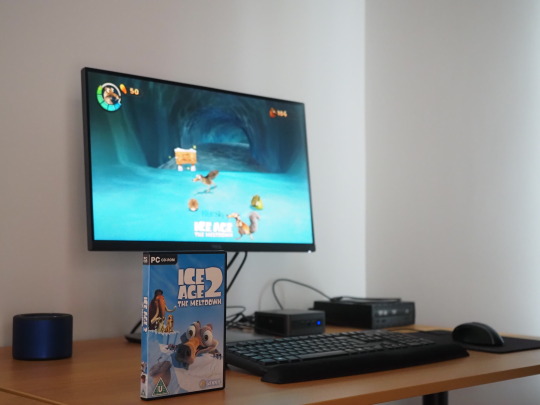
Ice Age 2 The Meltdown game.
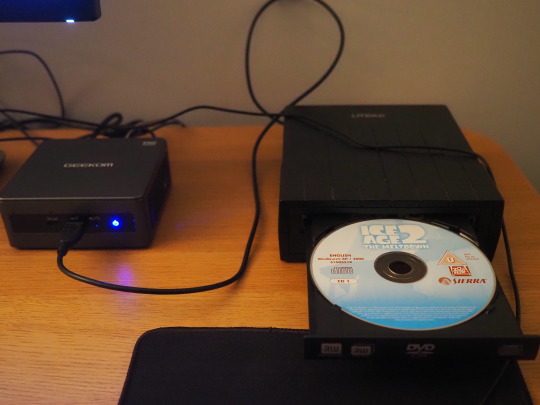
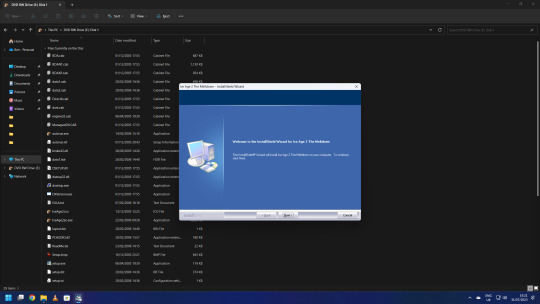
On the 31st July 2023, I installed Ice Age 2: The Meltdown onto my system to test-run it on Microsoft's Windows 11.
I connected a portable Liteon DVD-ROM optical drive to my Mini-PC to install it using the 2 CD discs.
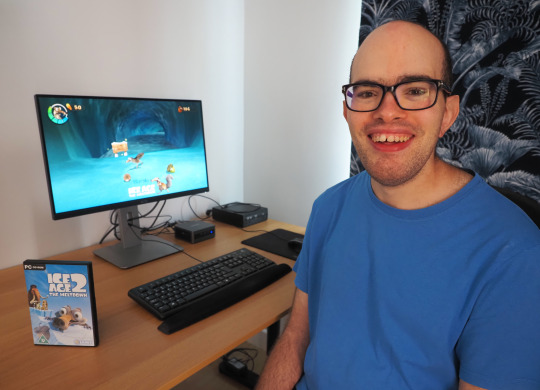
Here is a picture of me with the game box!
Ice Age 2: The Meltdown, based on Blue Sky Studios 2006 film of the same name, was developed by Eurocom and published by Vivendi Universal Games (Sierra Entertainment).
The game works on the latest versions of Windows and also works on Linux using Wine (PlayOnLinux).
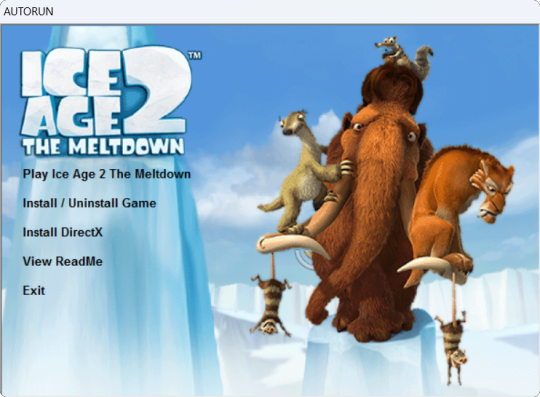
I put Disc 1 in first and opened the auto-run from the disc. I clicked the 'Install Ice Age 2: The Meltdown' option from the list. The game uses InstallShield software to install itself onto Windows. I switched the discs around towards the end of the install. Once it had finished installing onto the system, I chose to launch the game.
After going through the intros, I pressed the enter key to go to the main menu. Firstly before starting the game, I configured my favourite keyboard layout. Afterwards I then started a new game and selected a save game slot (Slot A).
As I was playing Ice Age 2, I got to the Forest 2 stage, shortly after going through this stage, Windows 11 asked if I wanted to run the game in 'Compatibility Mode', I chose to run the game with this. It offered this as it knew the game application running was intended for an older version of Windows. However compatibility mode didn't work and the game crashed to the desktop.
The app process name for the game is 'IceAge2pc.exe' (32-bit) when running. The CD (Disc 1) is required to play the game.
I re-launched the game and had to re-configure everything and start from the beginning again, however the game seemed to work much better without running it in the legacy mode Windows offered.
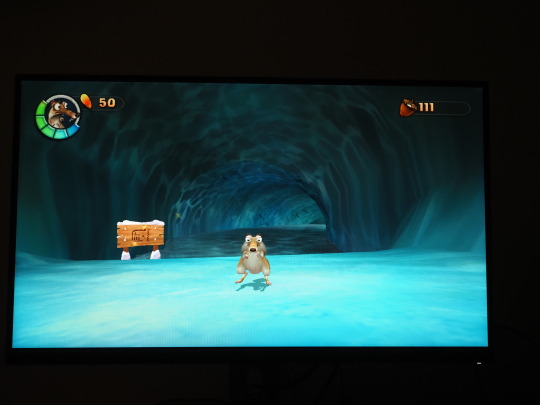
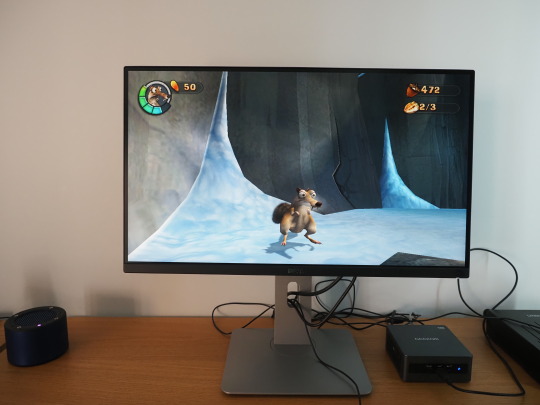
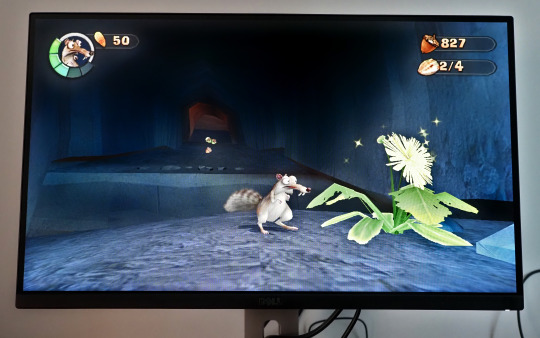
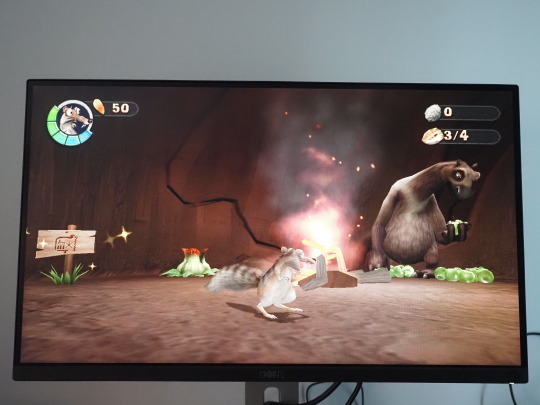
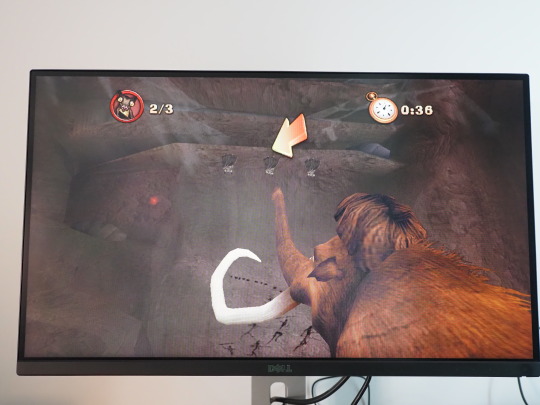
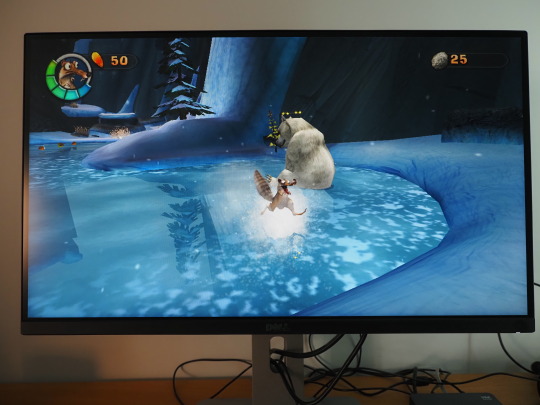
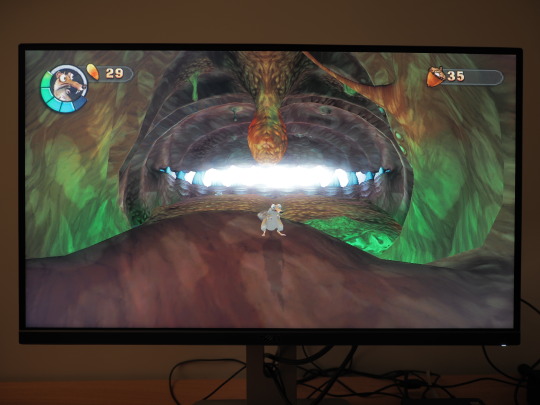
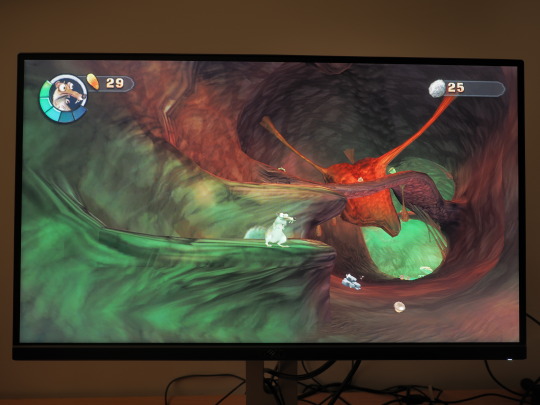
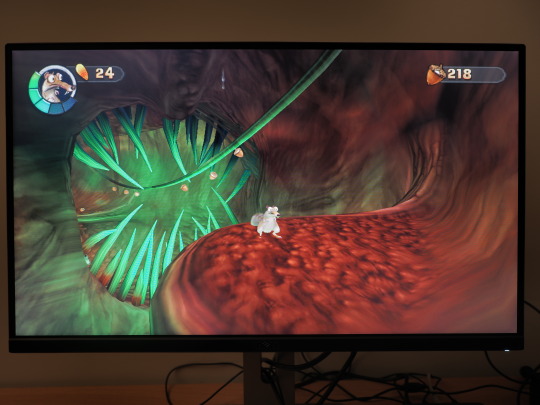
I tried again and successfully played the game up to the end of the Maelstrom level, completing this stage which in my opinion is the best level in the game! Here are the in-game pictures I took with the camera of some of the stages. I had to use HDR camera effect for some of the pictures. The levels shown in the pictures are the Waterpark, Forest, Ice River and Maelstrom.
I had to use my camera for the pictures as the game doesn't allow for print-screening due to Windows copy protection. When running Ice Age 2 in windowed mode, if you click out of the game it will darken the game screen and pause everything until you click on it again.
The game defaults to a screen resolution of 640x480, so I changed it to the maximum resolution of 1024x768. Interestingly the game didn't scale to full screen as when I tried it previously on another PC running Windows 10, but stretched to fit the screen instead. This was because of the 'Gaming Mode' function which is enabled in Windows 10. This mode is disabled by default in Windows 11 and the game worked perfectly without it. However, the game always runs in the 4.3 aspect ratio, but uses a fisheye lens effect which defaults to the 16.9 aspect ratio, so changing that fixed the gaming experience on this monitor. You can read more about display settings for the game in my write-up.
Audio played through my Mini-Rig Bluetooth speaker, which sounded great! The game uses a stereo sound set-up, which can act as surround through headphones.
Back in 2020, Dad gave me a copy of the Ice Age 2: The Meltdown video game which he found on eBay. I did a detailed review of the game and an unboxing review.
See my reviews in the links below:
There are a number of cheat codes you can enter in the pause menu, these include unlocking all the bonus content and the ability to unlock the 'Level Select' menu, plus more.
See all the cheat codes for the game here:
https://gamefaqs.gamespot.com/pc/931239-ice-age-2-the-meltdown/cheats
Playlist featuring all the levels:
https://www.youtube.com/playlist?list=PLyj4UFt4ma4_XQ0RZ3FjpFZAa7jvjhPc9
A link to the complete in-game music composed by Jim Croft:
https://www.youtube.com/playlist?list=PLO4jlmGoc6uDm0QVLyMqURTP2ciHWjCF_
Overall despite being 17 years old, running the game on Windows 11 worked a treat! It was great fun playing Ice Age 2: The Meltdown again as it is fun, humorous and challenging. Its music is memorable, vibrant and colourful just like its movie soundtrack!
However, I think that both Ice Age 2: The Meltdown (2006) and its Activision sequel Ice Age 3: Dawn of the Dinosaurs (2009) should be made available as a digital download through game distribution services such as Valves Steam alongside Ice Age: Scrat's Nutty Adventure (2019) to keep them running into the future without the need for a disc.
For a full list of all the Ice Age video-games see:
https://iceage.fandom.com/wiki/List_of_Ice_Age_video_games
See my video below. See videos underneath for the in-game bosses and also bosses in Scrat's Nutty Adventure on YouTube.
Scroll down to see my write-up on Cretaceous and Maelstrom!
5 notes
·
View notes
Text
It's honestly pretty wild that my beloved Art Nouveau toilet paper holder has been in service since at least 1906 (and functions better than anything made in my lifetime as well as being stunningly beautiful), and my stove has been in service since at least 1954 (with more features and beauty Truman modern stoves), and the first CD I bought in 1995 still plays, but there are so many games from my childhood which profoundly shaped me and I will never be able to play them again. I can't even find screenshots for many of them.
I have less than a year to decide between:
"Upgrading" to Windows 11 (which I loathe, and won't run all my software).
Trying to switch back to Linux again (which won't run all my software, and has eventually frustrated me back to using Windows 4 times over 20 years).
Permanently take my desktop offline (which won't run all my software, and be basically useless).
Keep Windows 10 and just rawdog using the malware-ad filled modern internet with no security patches ever again (worked IT helpdesk with an interest in infosec for too many years for this to not give me heart palpitations).
In the 1970s-1980s my dad worked as a backend systems programmer for a major bank on IBM mainframes. They wrote everything themselves in Assembly Language. In the 1980s he wrote a utility program with a date function that got widely used, and had the foresight to think "This could still be in use far into the future, so I better use a 4-digit date." It was still in use in 2000, and as a result the bank has to do very few Y2K upgrades to its backend systems.
In 2012, an old friend who still worked there for so frustrated at contractors saying they couldn't speed up some network login library feature because their preferred modern programming language didn't support it. It was taking over an hour to run. They didn't seem to believe something more efficient had ever been possible.
Finally out of frustration, that guy broke out Dad's old utility (that also processed partitioned data sets) had a and wrote a working demo. It maxed out the entire modern mainframe CPU, but accomplished the task in 1 min 15 seconds. It wasn't put back into production, of course, but it did effectively make the point that the specs were not unreasonable and if the fancy new programming language couldn't do it, then use another damn language that does work.
I did IT in a biolab a decade ago that still had Windows XP computers because it was the only operating system that could run the proprietary software to control the $20k microscopes. Which worked perfectly fine and we didn't have the budget to replace. They had to be on the network because the sneakernet violates biohazard lab safety rules, and there weren't enough modern computers in the lab to sneakernet the files through those without waiting for someone else to finish using it, and no one's work could afford the delays. I left before we fully solved that one, but a lot of firewall rules were involved (if we ever lost the install CDs we were fully fucked because the microscope company went out of business at least a decade earlier).
So yeah, the old magic persists because it worked perfectly fine and it's stupid capitalist planned obsolescence that convinces people the old magic is obsolete. We could actually just keep patching perfectly serviceable orbs forever if we valued ongoing maintenance.
“The old magic persists thanks to it’s unfathomable power.”
No, the old magic persists because the new magic can’t run the legacy spells I need to do my job, and keeps trying to install spirits I don’t want or need onto my orb.
62K notes
·
View notes
Text
Python Flask Tutorial for Beginners: Build Your First Web App
Are you a Python enthusiast curious about web development? Do you want to build dynamic websites without diving deep into complex frameworks? If yes, Flask Tutorial is the perfect starting point for you. In this beginner-friendly tutorial, we’ll walk you through everything you need to know to build and run your very first web application using Flask — a lightweight yet powerful Python web framework.
By the end of this tutorial, you’ll have a functional web app running on your local machine, along with a solid understanding of Flask’s core features like routing, templates, and request handling.
What is Flask?
Flask is a micro web framework written in Python. It’s called “micro” not because it lacks power, but because it keeps the core simple and extensible. With minimal setup, you can create powerful web apps, and when needed, you can plug in additional components like form handling, databases, and user authentication.
Why choose Flask?
Lightweight and minimalistic
Easy to learn and use
Ideal for small to medium-sized applications
Highly flexible and customizable
Great documentation and community support
Flask is widely used in startups, academic projects, and even in production at large companies when rapid development is a priority.
Getting Started: Prerequisites
To follow along with this tutorial, you should have:
Basic understanding of Python
Python 3 installed on your machine
A code editor like VS Code or PyCharm
Step 1: Set Up Your Environment
First, create a project directory:mkdir flask_app cd flask_app
Now, it’s a good practice to create a virtual environment:python -m venv venv source venv/bin/activate # macOS/Linux venv\Scripts\activate # Windows
Install Flask using pip:pip install flask
Step 2: Create a Simple Flask App
Create a file named app.py and add the following code:from flask import Flask app = Flask(__name__) @app.route('/') def home(): return "Hello, Flask!" if __name__ == '__main__': app.run(debug=True)
Explanation:
Flask(__name__): Creates an instance of the Flask application.
@app.route('/'): Defines a route for the home page.
debug=True: Automatically reloads the server when code changes and provides helpful error messages.
Run your app:python app.py
Open your browser and go to http://127.0.0.1:5000. You should see:Hello, Flask!
Congrats! Your first web app is up and running.
Step 3: Add More Routes
Let’s add another route to display an "About" page.
Update your app.py:@app.route('/about') def about(): return "This is the About page."
Visit http://127.0.0.1:5000/about in your browser to test it.
Step 4: Use HTML Templates
Flask allows you to use templates with the help of Jinja2, a templating engine.
Create a folder named templates, and inside it, create a file called index.html:<!-- templates/index.html --> <!DOCTYPE html> <html> <head> <title>My Flask App</title> </head> <body> <h1>Welcome to My Flask App!</h1> <p>This is your first dynamic web page.</p> </body> </html>
Now modify your home route in app.py:from flask import render_template @app.route('/') def home(): return render_template('index.html')
Reload the page at http://127.0.0.1:5000/ — now you’ll see the rendered HTML!
Step 5: Add Dynamic Content
You can pass variables to your templates:@app.route('/user/<name>') def user(name): return render_template('user.html', username=name)
Create templates/user.html:<!DOCTYPE html> <html> <head> <title>User Page</title> </head> <body> <h1>Hello, {{ username }}!</h1> </body> </html>
Now, visiting http://127.0.0.1:5000/user/Alex will display: "Hello, Alex!"
Step 6: Handle Forms
Let’s create a simple form.
First, add a form to your index.html:<form method="POST" action="/submit"> <input type="text" name="name" placeholder="Enter your name"> <input type="submit" value="Submit"> </form>
Now, update app.py to handle the form submission:from flask import request @app.route('/submit', methods=['POST']) def submit(): name = request.form['name'] return f"Hello, {name}! Thanks for submitting the form."
Now you have a working form that responds to user input!
What’s Next?
Now that you’ve built a basic web app with Flask, you can explore more advanced topics:
Working with Flask Blueprints for modular code
Connecting to databases using SQLAlchemy
Adding user authentication
Creating RESTful APIs with Flask
Deploying Flask apps on platforms like Heroku, Render, or AWS
Conclusion
Flask is the perfect starting point for Python developers stepping into the world of web development. With just a few lines of code, you can build powerful web applications, handle user input, and render dynamic content. Whether you're creating personal projects, prototypes, or production-ready web apps, Flask is a framework that grows with your needs.
In this tutorial, we covered:
Setting up Flask
Creating routes and views
Using HTML templates
Passing dynamic data
Handling forms
This foundational knowledge puts you in a great position to go deeper with Flask or transition into full-stack development. So go ahead — experiment, build, break things, and create something awesome with Python and Flask.
Ready to keep building? Stay tuned for more tutorials where we’ll show you how to build CRUD apps, integrate databases, and deploy your Flask apps to the cloud.
Happy coding! With Tpoint tech

#Flask#PythonFlask#FlaskTutorial#FlaskWebDevelopment#PythonWebDevelopment#WebDevelopment#BackendDevelopment#FlaskFramework#LearnFlask#FlaskForBeginners
0 notes
Text
Run AWS Locally: Simulate AWS services on your laptop

Developing and testing applications that rely on Amazon Web Services (AWS) can be complex and costly. That's where LocalStack comes in, offering a powerful solution to run AWS locally. This article will explore how LocalStack simplifies cloud development, its key features, and practical examples to help you leverage its benefits. The Problem: Challenges of AWS Development Traditional AWS development often involves: High Costs: Using real AWS resources during development and testing can lead to unexpected expenses. Slow Development Cycles: Internet dependencies and remote resource access can slow down development and testing. Complex Debugging: Debugging issues in a live cloud environment can be challenging. CI/CD Integration Hurdles: Integrating AWS services into CI/CD pipelines can be complex and time-consuming. Testing Limitations: Testing against real AWS services can be difficult to control and isolate. LocalStack addresses these challenges by providing a local, simulated AWS environment, enabling developers to run AWS locally with ease. What is LocalStack? LocalStack is an open-source tool that allows you to simulate AWS cloud services & run them locally on your machine. This enables you to develop, test, and integrate AWS applications without the need for a live AWS account. Key Features and Functionalities: Local AWS Simulation: Enables you to run AWS locally, simulating services like S3, Lambda, DynamoDB, and more. Multi-Service Support: Supports a wide range of AWS services, as detailed in the LocalStack feature coverage documentation. Cost-Effectiveness: Significantly reduces AWS costs during development and testing. Offline Development: Allows you to work without an internet connection. Cross-Platform Compatibility: Works on Windows, Linux, and macOS. Community-Driven: Benefits from a vibrant open-source community. Development Tool Integration: Integrates seamlessly with Docker and other development tools. CI/CD Support: Enables automated testing in CI/CD pipelines without real AWS interactions. Enhanced Productivity: Speeds up development and testing cycles. Easy Setup: Simple installation and configuration. The AWS services supported by LocalStack: LocalStack supports almost all major AWS Services. The complete list can be found at official LocalStack website.

Installation and Setup: To run AWS locally using LocalStack, you'll need Docker and the AWS CLI installed. You may also need Terraform. macOS (using Brew): brew install localstack/tap/localstack-cli Other Platforms (using Pip): python3 -m pip install localstack Binary Installation: Download the binary from the LocalStack GitHub releases page. Running LocalStack: Start LocalStack using the CLI: localstack start -d # -d to run in the background Configure the AWS CLI: aws configure Imp: Enter test For both the access key and secret key, select your desired region.

AWS CLI Examples (Using LocalStack): Create an S3 Bucket: aws --endpoint-url=http://localhost:4566 s3 mb s3://my-test-bucket List S3 Buckets: aws --endpoint-url="http://localhost:4566" s3 ls Upload Files to S3: aws --endpoint-url="http://localhost:4566" s3 sync "myfiles" s3://my-test-bucket Create a VPC: aws ec2 create-vpc --cidr-block 10.0.0.0/24 --endpoint-url=http://localhost:4566 For more examples, refer to this LocalStack AWS CLI examples gist. Benefits of Running AWS Locally: Cost Savings: Reduce AWS costs during development and testing. Faster Development: Improve development speed by working locally. Enhanced Testing: Create isolated and controlled testing environments. Improved Debugging: Simplify debugging and troubleshooting. Seamless CI/CD: Integrate with CI/CD pipelines for automated testing. Conclusion: LocalStack is an invaluable tool for developers looking to run AWS locally. By providing a simulated AWS environment, it streamlines development, reduces costs, and enhances testing capabilities. Start using LocalStack today to accelerate your AWS development workflow. We are giving you exclusive deals to try Linux Servers for free with 100$ credit, check these links to claim your 100$, DigitalOcean - 100$ free credit & Linode - 100$ free credit Check some Exclusive Deals, HERE. Also, check out DevOps Book You should read section. Read the full article
0 notes
Text
How Agencies Can Boost Performance and Security with VPS Hosting
🧩 Hosting for Agencies: Managing Multiple Client Sites on VPS
Why VPS Hosting is the Smart Choice for Web Design & Marketing Agencies
For creative agencies, web designers, developers, and digital marketers, managing multiple client websites efficiently — without downtime, performance issues, or high costs — is a challenge.
That’s where VPS hosting steps in.
Whether you manage 5 websites or 50, a Virtual Private Server (VPS) gives you the perfect balance of power, flexibility, and cost-efficiency, especially when compared to shared hosting or managing multiple hosting accounts.
Let’s break down why VPS hosting is the best fit for agencies, and how platforms like VCCLHOSTING help agencies grow faster with reliable hosting infrastructure.
⚙️ Why VPS Hosting Is Ideal for Agencies
✅ 1. Host Multiple Websites from a Single Dashboard
Instead of juggling dozens of shared hosting accounts, a VPS lets you:
Create multiple domains and subdomains
Isolate each client’s website
Use control panels like cPanel, DirectAdmin, or Webmin
Easily manage from a unified server dashboard
VCCLHOSTING VPS plans support multi-site management out-of-the-box with optional cPanel integration.
✅ 2. Dedicated Resources = Better Performance
On VPS, your agency gets:
Dedicated CPU, RAM, and disk space
Guaranteed resources for each project
Faster load times than shared hosting
Ability to run advanced tools or custom code
This is especially critical when handling eCommerce, WordPress, or heavy CMS projects.
✅ 3. Full Root Access for Customization
Agencies love flexibility — and VPS delivers it. With root (admin) access, you can:
Install custom software (Node.js, Laravel, Python, etc.)
Configure performance modules (Redis, OPcache, GZIP)
Run scripts, CRON jobs, and staging environments
VCCLHOSTING VPS supports both Linux and Windows, so you can build in whatever stack your client needs.
✅ 4. Enhanced Security and Client Isolation
Each website can be configured in its own user environment, reducing the risk of one hacked site affecting the others.
Plus, with VPS, you can:
Install firewalls
Add SSL certificates for each domain
Enable malware scanners and IP restrictions
VCCLHOSTING includes DDoS protection, secure SFTP access, and optional firewall setups to keep your clients' data safe.
✅ 5. Scalable as Your Agency Grows
Need more resources? Just upgrade your plan — no migration required.
Scale:
RAM
Storage (HDD or NVMe SSD)
Bandwidth
CPU cores
Whether you start with 2GB RAM or 16GB+, VCCLHOSTING lets you scale vertically or horizontally as needed.
✅ 6. Centralized Email, Backup, and DNS Management
With VPS, you can:
Set up custom email addresses per client (e.g., [email protected])
Use automation tools like JetBackup, Acronis, or manual snapshots
Manage DNS settings for all domains from one place
VCCLHOSTING VPS plans offer built-in DNS and email features, or you can integrate your own tools.
🛠️ Bonus: Developer & Automation Friendly
Use Git, SSH, staging tools, and CI/CD pipelines to streamline your development.
Popular tools you can install:
GitLab, Gitea
Docker
NGINX/Apache tuning
Node.js, Python, PHP-FPM environments
VCCLHOSTING supports all of this and more — giving you the power of a full server with none of the noise.
💡 Who This Is For
Web Design Agencies
Digital Marketing Firms
SEO Agencies
Freelancers managing multiple websites
Software development firms building client portals
🏁 Final Thoughts
If you're still managing client websites across different shared hosting accounts, it's time to simplify, secure, and scale with VPS hosting.
A VPS solution like VCCLHOSTING not only gives you the performance and flexibility you need — but also local Indian support, instant scalability, and full control over your hosting environment.
🚀 Ready to Scale Your Agency?
🔗 Explore VPS plans at www.vcclhosting.com 📞 Call us at 9096664246 for a quick consultation in English, Hindi, or Marathi
0 notes
Text
clavier arabe pour bureau : modèles et prixton
how to install linux without usb or cd
clavier arabe pc
0 notes
Text
I am a long time linux user, for real. While cleaning out my childhood bedroom I found a linux install cd from 2004. I always kept a windows dual boot tho, for school/work/gaming purposes. I started using Linux when you HAD to use the command line for things regularly.
For the past couple years I'd been using windows almost exclusively because the only way to get a third monitor working on my computer without a new video card was windows only. I was recently gifted a different third monitor tho, and subsequently realized I could switch back to linux!
I figured as long as I needed to do a major version update ANYWAY I might as well switch back to my old favorite kubuntu anyway. (mint and kubuntu are the same couch (ubuntu) with a different slipcover (desktop environment - kubuntu uses KDE, mint uses cinnamon)).
I haven't opened the command line once. No reason to. No need to. Everything I need to do can readily be done point and click.
If you're tired of the windows bullshit, I highly recommend some version of Ubuntu linux. Mint is targeted to those familiar with windows. The install process makes it easy to set up a dual boot so you still have access to windows if you want and don't have to separately back up your data from windows. (tho it's still a good idea to have a separate backup anyway, a USB stick or cloud drive or both.)
If you've got a super old computer that has trouble running windows, I suggest xubuntu. It uses the xfce desktop environment, which is very lightweight.
I swear to fucking god. I would claw out OneDrive from my computer if I could. I would burn down their servers if I could. I would run down their stocks to the ground if I could. I hope every single one of their workers gets a better offer from a competitor in the next 24 hours. I hope every single one of their light bulbs explodes at the same time. I hope every single carton of milk in their fridge will always be expired.
Stop backing up my fucking files.
Stop asking me to back up my fucking files.
Stop taking my fucking files off my fucking computer.
I don't want a fucking reminder in three fucking days. Let me fucking say no.
Fuckers.
46K notes
·
View notes
Text
Setting Up MATLAB and Navigating the Interface
MATLAB, short for Matrix Laboratory, is a powerful computational tool used widely in both academia and industry for mathematical computations, data analysis, algorithm development, and more. Whether you're a student just starting on your engineering journey or a professional looking to enhance your computational skills, MATLAB offers a robust platform for performing complex calculations and visualizations. This guide will walk you through installing MATLAB, exploring its environment, and writing your first script.
Navigating the Interface
Installing MATLAB
Step 1: Check System Requirements
Before installing MATLAB, ensure your system meets the minimum requirements. MATLAB is compatible with Windows, macOS, and Linux. Check the official MATLAB website for the most up-to-date system requirements regarding operating system versions, RAM, and processor specifications.
Step 2: Obtain a MATLAB License
MATLAB requires a license to run. You can obtain a license through your educational institution, purchase one from MathWorks, or use a trial version. Many universities provide free access to MATLAB for students, so be sure to check if you qualify.
Step 3: Download MATLAB
Visit the MathWorks website.
Log in or create a MathWorks account.
Navigate to the Downloads section and select the latest version of MATLAB.
Choose the installer appropriate for your operating system and download it.
Step 4: Install MATLAB
Locate the downloaded installer file and run it.
Follow the on-screen instructions, accepting the license agreement and choosing your installation options.
Select the installation folder or use the default path.
If prompted, enter your license information.
Allow the installation process to complete, which may take several minutes.
Step 5: Activate MATLAB
Once installed, MATLAB may need activation. Launch MATLAB, and if prompted, enter your license credentials to activate your copy.
Exploring the MATLAB Environment
The MATLAB Desktop
When you start MATLAB, you are greeted by the MATLAB desktop, a user-friendly interface comprising several components:
Command Window: The primary area where you can enter commands and see results.
Workspace: Displays variables created during your session.
Current Folder: Shows files and folders in your current directory.
Command History: Logs previously executed commands.
Editor: Used for writing, editing, and saving scripts and functions.
Command Window
Navigating the Interface
Command Window
The Command Window is where you interact directly with MATLAB by entering commands. To execute a command, simply type it and press Enter. For example, typing 2 + 2 will return the result 4.
Workspace
The Workspace panel shows all the variables you’ve created, along with their values and types. You can double-click a variable to open it in the Variable Editor, where you can view and modify its contents.
Current Folder
The Current Folder panel displays all files and folders in your current working directory. You can change directories by navigating through this panel or using the cd command in the Command Window.
Editor
The Editor is essential for writing scripts and functions. You can open a new script by clicking on the “New Script” button. The Editor features syntax highlighting, making it easier to read and debug your code.
Writing Your First MATLAB Script
Creating a New Script
Click on “New Script” in the Home tab of the MATLAB desktop.
The Editor will open, allowing you to write your script.
Writing a Simple Script
Let’s write a script that calculates the area of a circle:
% Circle Area Calculation radius = 5; % Radius of the circle area = pi * radius^2; % Formula for the area of a circle disp(['The area of the circle is: ', num2str(area)])
Saving and Running Your Script
Save your script by clicking “Save” or pressing Ctrl + S. Name it descriptively, e.g., circle_area.m.
To run your script, click “Run” in the Editor or type the script name (without .m) in the Command Window.
Understanding Script Output
When the script runs, MATLAB executes each command sequentially. The disp function is used to display the area of the circle in the Command Window. The num2str function converts numerical values to strings for display purposes.
Additional Tips for MATLAB Users
Customizing Your Environment
Layout: Adjust the layout of the MATLAB desktop to suit your preferences by dragging and docking panels.
Shortcuts: Use shortcuts like Ctrl + Enter to execute selected lines in the Editor.
Preferences: Customize MATLAB’s appearance and behavior via the Preferences menu under the Home tab.
Leveraging MATLAB Help
Documentation: Access MATLAB’s extensive documentation from the Help menu or by typing doc followed by a function name in the Command Window.
Examples and Demos: Explore built-in examples and demos to understand how to implement various functions and features.
Debugging Your Scripts
Breakpoints: Set breakpoints by clicking in the margin next to the line numbers in the Editor. This allows you to pause execution and inspect variables.
Step Execution: Use the Step In, Step Out, and Step Over functions to execute your code line-by-line for detailed debugging.
Customizing Your Environment
Frequently Asked Questions (FAQs)
1. How do I update MATLAB to the latest version?
To update MATLAB, you can use the built-in update feature. Go to the Home tab, click on “Help”, then choose “Check for Updates”. Follow the instructions to download and install any available updates.
2. Can I install MATLAB on multiple devices?
Yes, depending on your license type. Individual licenses typically allow installation on multiple devices, but only one instance can be active at a time. Check your license agreement for specifics.
3. How do I add toolboxes to MATLAB after installation?
To add toolboxes, go to the Home tab, click on “Add-Ons”, and then select “Get Add-Ons”. Browse available toolboxes and follow the prompts to install them.
4. What should I do if MATLAB crashes or doesn’t start?
If MATLAB crashes, try restarting your computer. Ensure your system meets all requirements and that there are no conflicting applications. Check the MathWorks support site for troubleshooting tips or contact their support team if needed.
5. Is there a way to collaborate on MATLAB scripts with others?
Yes, MATLAB offers collaboration features through MATLAB Online and MATLAB Drive. These platforms allow you to share scripts and data with others and work together in real-time. You can access them with your MathWorks account.
Conclusion
MATLAB is an incredibly versatile tool that can significantly enhance your computational abilities. By following this guide, you’ll be well on your way to mastering the basics of MATLAB, from installation to scripting. Happy computing!
HOME
#LearnMATLAB#MATLABBasics#MATLABSetup#MATLABInterface#ProgrammingWithMATLAB#TechForStudents#MATLABForBeginners#DataAnalysisMATLAB#EngineeringTools#ScientificComputing#AssignmentHelp#AssignmentOnClick#assignment
0 notes