#Netgear extender setup wizard
Explore tagged Tumblr posts
Visit Tumblr Blog
Explore Tumblr blogs with no restrictions, modern design and the best experience.
Last Seen Tumblr Blogs


Fun Fact
Tumblr posted its first advertisements in May 2012 and subsequently earned $13M in revenue.
Text
Netgear wireless extender login
The Netgear wireless extender login is a crucial step in enhancing and optimizing your home or office network. Designed to boost the existing Wi-Fi signal range, Netgear extenders require a seamless setup process, and the login interface serves as the gateway to configuration. To initiate this process, connect your extender to a power source and access its default network using a device like a computer or smartphone. Once connected, open a web browser and enter the default login web address or the extender's IP address. This prompts the Netgear extender login page, where users input their credentials, typically a username and password. After successful authentication, users gain access to the extender's settings, enabling them to customize network parameters, update firmware, and optimize performance. A user-friendly interface ensures a smooth Netgear wireless extender login experience, empowering individuals to tailor their network extension according to specific needs and preferences.
#Netgear wireless extender login#Netgear extender setup#netgear wifi extender setup#netgear extender set up#netgear extender setup wizard#netgear extender not working#wifi extender login netgear#netgear wireless extender login
1 note
·
View note
Text
Netgear EX2800 Setup to Boost Your Home WiFi
Netgear EX2800 WiFi range extender is the device you need, If you’re facing weak WiFi signals in certain corners of your home or office. Designed with dual band technology and offering pets up to AC750, this compact device helps exclude dead zones and ensures flawless internet content throughout your space. While the idea of extending your WiFi might sound complicated, the Netgear EX2800 setup process is incredibly straightforward when you follow the right way. Whether you’re a freshman or someone with introductory tech knowledge, this companion will walk you through everything from powering on the device to logging in after installation.
Step by Step Netgear EX2800 Setup Instructions
The Netgear EX2800 works by entering the signal from your primary WiFi router and rebroadcasting it to areas where your signal is generally weak or drops out. This process bridges the gap between your host device and WiFi- enabled bias located out of your router’s direct range. Once the Netgear EX2800 setup is complete, you’ll enjoy briskly pets, smaller connection drops, and extended content.
Power On the Extender
The first step in the Netgear EX2800 setup process is powering up the device
Netgear EX2800 should be unpacked first
Plug the extender into a power outlet near the main router for initial setup.
Press the power button on the extender to turn it on.
Stay for the Power LED to come solid green. This indicates that the device has successfully boggled up.
Once the light stabilizes, you’re ready to move on to the factual configuration.
Choose WPS or Web Grounded Method
You can complete the Netgear EX2800 setup using either the WPS system or the web- grounded setup. Both are effective, but the web- grounded system gives you further control over settings and customization.
WPS Method (WiFi Protected Setup)
This system requires that your router has a physical WPS button.
Press the WPS button on the Netgear EX2800 extender.
Within two minutes, push the WPS button on your main router.
The WPS LED on the extender will blink and also turn solid green once the connection is successful.
Connection to your primary WiFi network is complete.
Web- Grounded Setup( Recommended for Customization)
If your router does n’t support WPS or you want advanced settings.
Connect your smartphone, tablet, or computer to the NETGEAR_EXT network (the dereliction SSID of your extender).
Open any streamlined web cybersurfer and enter http:// www.mywifiext.net in the address bar.
When the login screen appears, use the dereliction credentials to subscribe in( these are published on the marker of your extender).
You’ll be guided through the Netgear EX2800 setup by the on-screen Netgear installation wizard.
Select your WiFi network from the list.
Enter your WiFi word when urged.
Choose a name and enter a password for your extended network to complete the setup.
Click Apply to finalize the setup.
Once the setup is completed, your extender will reboot. You can now connect your bias to the new extended WiFi network.
Optimal Placement of the Extender
After completing the Netgear EX2800 setup, the coming step is changing the right position to place the extender for the stylish content. Keep these tips in mind
Avoid placing the extender near broilers, cordless phones, or other sources of hindrance.
Do not install the extender in tight or cornered spots, as it may limit signal strength.
Choose a spot roughly interior between your router and the area with weak WiFi.
Ensure it's within the router’s range and that the signal LED on the extender shows a strong connection.
Optimal placement guarantees efficient coverage and high-speed, uninterrupted internet across your entire area.
Logging After Installation
Once your extender is configured and placed rightly, you might want to pierce the settings in the future for updates or changes. Then’s how to log in
Open a cybersurfer and go to http// www.mywifiext.net.
Enter your admin username and word.
You’ll now have access to the extender’s dashboard where you can modernize firmware, change network names, or tweak security settings.
Logging into your extender allows you to cover connected bias, manage performance, and even reboot the extender if demanded.
Troubleshooting for Netgear EX2800 Setup
Indeed though the setup process is generally smooth, you may sometimes run into issues. Then are quick fixes
Can’t pierce mywifiext.net? Make sure you are connected to the NETGEAR_EXT network.
LED not turning green? Power cycle the extender and confirm it’s positioned within the effective range of your WiFi router.
WPS not working? Try the web- grounded setup system rather.
Slow internet after setup? Budge the extender or reduce hindrance from near bias.
Final Words
With this complete companion, performing the Netgear EX2800 setup should be easy and stress-free. Whether you conclude for the WPS system or the web- grounded approach, extending your network content takes just a few minutes. Once everything is in place, you will enjoy presto, dependable WiFi across your home or office. Netgear’s support platoon is always available, If you need backing during the process. For the stylish performance, don’t forget to periodically log in and check for firmware updates.
0 notes
Text

To understand How To Setup Netgear Extender, plug it into a power outlet and connect your device to the extender's temporary WiFi network. Open a web browser and go to mywifiext.net. Follow the on-screen wizard to connect it to your existing WiFi network. For teh full details, come to us!
0 notes
Text
How do I reset my Netgear Extender Login?
Use these procedures to reset your Netgear extender login:
First, find your Netgear extender's "Reset" button.
Usually located on the device's back or side, this is a tiny, inset button.
Press and hold the button with a paperclip or other pointed item until the power LED begins to blink.
This restores the extender to its factory default settings, erasing any previously saved login credentials.
Await the extender's reboot after the reset.
Then, connect to the extender's default Wi-Fi network.
The network name will typically be something like “NETGEAR_EXT,” and you won’t need a password initially.
Open a web browser and go to either www.mywifiext.net or 192.168.1.250. This will take you to the Netgear extender login page.
You will be asked to create a new admin username and password on the login page.
To configure the extender for your network, according to the setup wizard's instructions. For future reference, be sure you write down your updated login information.
Make sure your browser's cache is empty and that the device you are using is linked to the extender network if you are having trouble seeing the login page.
Your Netgear extender login should be successfully reset after completing this method. Go to our website to know more about it.
0 notes
Text
Mywifiext.net: A Gateway to Access Your Netgear Extender
You can easily configure the Netgear Extender using the Web GUI method. For this, open the web browser and type the Mywifiext.net web address in the browser bar. Now, enter the login details and you reach the smart setup wizard of the repeater. To know more, stay tuned with us!
0 notes
Text
Netgear WiFi Extender Troubleshooting Tips and Login Process
Netgear extenders are networking devices that you can use to extend the WiFi network coverage in your home. Just connect it to the home router with cable or WPS method. Here, you will get to see WiFi Extender troubleshooting tips and solutions to dispel any technical issues. At the end, we will add sections to log in to the Netgear extender setup wizard via computer.
0 notes
Text
do you meed a router for google pixel vpn
🔒🌍✨ Get 3 Months FREE VPN - Secure & Private Internet Access Worldwide! Click Here ✨🌍🔒
do you meed a router for google pixel vpn
Router for Google Pixel VPN setup
Setting up a VPN (Virtual Private Network) on your Google Pixel device can enhance your online security and privacy by encrypting your internet connection. However, to ensure seamless and secure connectivity, it's essential to have a reliable router that supports VPN configurations.
When selecting a router for your Google Pixel VPN setup, several factors should be considered:
VPN Compatibility: Look for routers that are compatible with the VPN protocol you intend to use. Popular VPN protocols include OpenVPN, IKEv2/IPSec, and L2TP/IPSec. Ensure that the router supports the protocol recommended by your VPN service provider.
Performance: Opt for a router that can handle the VPN encryption without significantly impacting your internet speed. Routers with powerful processors and ample RAM are better equipped to handle VPN traffic effectively.
Security Features: Choose a router with robust security features such as built-in firewalls, intrusion prevention systems, and automatic firmware updates to safeguard your network against cyber threats.
Ease of Setup: Look for routers with user-friendly interfaces and intuitive setup processes to simplify the VPN configuration on your Google Pixel device. Some routers even offer dedicated VPN setup wizards for easy installation.
Compatibility with Google Pixel: Ensure that the router is compatible with your Google Pixel device and supports the VPN protocols and encryption standards required for seamless connectivity.
Popular router brands such as Asus, Netgear, TP-Link, and Linksys offer a wide range of models that meet the criteria mentioned above. Before making a purchase, thoroughly research the specifications and user reviews to find the best router for your Google Pixel VPN setup. Additionally, consider consulting with your VPN service provider for recommendations on compatible routers to ensure optimal performance and compatibility. With the right router in place, you can enjoy secure and private internet browsing on your Google Pixel device with ease.
Google Pixel VPN compatibility
Title: Unlocking the Full Potential of Your Google Pixel with VPN Compatibility
In today's interconnected world, privacy and security are paramount concerns for smartphone users. With the rise of cyber threats and data breaches, protecting your online activities has never been more critical. Thankfully, Google Pixel smartphones offer robust features to safeguard your digital life, including compatibility with virtual private networks (VPNs).
VPN compatibility on Google Pixel devices enables users to encrypt their internet connection and route their online traffic through secure servers. This functionality adds an extra layer of security, preventing hackers, ISPs, and other third parties from monitoring your online activities. Additionally, VPNs help users bypass geo-restrictions and censorship by masking their IP addresses and providing access to content from around the globe.
Setting up a VPN on your Google Pixel is a straightforward process. Users can choose from a variety of VPN apps available on the Google Play Store, many of which offer user-friendly interfaces and intuitive setup procedures. Once installed, users can configure their VPN settings to connect automatically whenever they access the internet, ensuring continuous protection without any manual intervention.
The benefits of VPN compatibility extend beyond security and privacy. By encrypting your internet connection, VPNs can also enhance your online experience by reducing the risk of throttling from ISPs and improving connection speeds, particularly when accessing content from remote servers.
Whether you're browsing the web, streaming videos, or conducting sensitive transactions online, VPN compatibility on Google Pixel devices empowers users to take control of their digital privacy and security. By leveraging the built-in VPN functionality, users can enjoy peace of mind knowing that their online activities remain private and secure, regardless of their location or network environment.
Network requirements for Google Pixel VPN
When it comes to using a VPN on your Google Pixel device, ensuring that you meet the necessary network requirements is crucial for a seamless and secure connection.
First and foremost, having a stable internet connection is key. Whether you are using Wi-Fi or mobile data, having a strong and reliable signal will help prevent any disruptions in your VPN connection. A poor connection can lead to slow speeds, dropped connections, and potential security vulnerabilities.
Additionally, it is important to consider the type of network you are connecting to. Public Wi-Fi networks, for example, can be risky due to potential security threats. Using a VPN on these networks can help encrypt your data and protect your privacy.
Furthermore, it is recommended to use a VPN service that is compatible with your Google Pixel device. Not all VPNs are created equal, and some may not work effectively on certain devices. Ensuring compatibility will help guarantee a smooth and hassle-free VPN experience.
Lastly, staying up to date with software updates and security patches on your Google Pixel device is essential for maintaining a secure VPN connection. These updates often include important security improvements that can help keep your data safe while using a VPN.
By meeting these network requirements, you can enjoy the benefits of using a VPN on your Google Pixel device while ensuring optimal performance and security.
Wireless connectivity setup for Google Pixel VPN
Title: Simplifying Wireless Connectivity Setup for Google Pixel VPN
In today's hyper-connected world, safeguarding our online activities has become paramount. With cyber threats lurking at every digital corner, utilizing a Virtual Private Network (VPN) is no longer just an option but a necessity. For Google Pixel users, setting up a VPN can enhance privacy, security, and access to geo-restricted content. However, navigating the intricacies of wireless connectivity setup for a VPN on your Google Pixel device may seem daunting at first glance. Fear not, as we've compiled a comprehensive guide to simplify the process.
Firstly, ensure your Google Pixel device is running on the latest software version. This step is crucial as it often includes security patches and optimizations for VPN usage. Next, select a reputable VPN service provider from the plethora of options available in the Google Play Store. Look for one that offers a user-friendly interface, robust encryption protocols, and a vast server network.
Once you've chosen your preferred VPN provider, download and install the app on your Google Pixel device. Follow the prompts to create an account and customize your VPN settings according to your preferences. Now comes the crucial part – configuring wireless connectivity for seamless VPN usage.
Navigate to your device's settings and select the "Network & Internet" option. From there, choose "VPN" and tap on "Add VPN." Enter the necessary details provided by your VPN service provider, including the server address, VPN type, and authentication credentials.
After saving your VPN configuration, toggle the switch to connect to the VPN server of your choice. Voila! Your Google Pixel device is now securely connected to the VPN, encrypting your internet traffic and shielding your online activities from prying eyes.
By following these simple steps, you can effortlessly set up wireless connectivity for a VPN on your Google Pixel device, ensuring peace of mind and enhanced online privacy wherever you go.
VPN setup guide for Google Pixel without a router
Setting up a VPN on your Google Pixel without a router is a straightforward process that can help enhance your online security and privacy. By utilizing a VPN (Virtual Private Network), you can encrypt your internet connection and keep your data safe from potential cyber threats.
To begin setting up a VPN on your Google Pixel, you will first need to download a VPN app from the Google Play Store. There are various VPN providers to choose from, so be sure to select one that fits your needs in terms of security features, server locations, and speed.
Once you have downloaded and installed the VPN app on your Google Pixel, open the app and follow the on-screen instructions to create an account and log in. Next, you will need to select a server location to connect to. Choosing a server closer to your physical location can help optimize your connection speed.
After selecting a server location, you can simply toggle the VPN connection switch to connect to the VPN server. You should now see a key icon in your notification bar indicating that your Google Pixel is connected to the VPN.
It is important to note that while using a VPN on your Google Pixel without a router can enhance your security and privacy, it may also impact your internet speed to some extent. However, the added layer of protection provided by the VPN is invaluable, especially when connecting to public Wi-Fi networks or accessing sensitive information online.
By following this VPN setup guide for your Google Pixel without a router, you can enjoy a more secure online experience and browse the web with peace of mind knowing your data is protected.
0 notes
Text
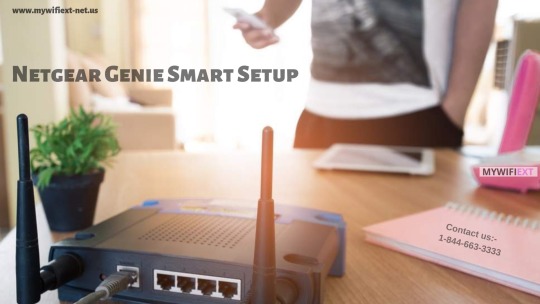
Netgear Genie Smart Setup
Netgear Genie Smart Setup is basically used to resolve all Wi-Fi problems instantly. The Netgear Genie App is compatible with all types of routers and range extenders. You can perform any task with Netgear Genie apps such as knowing the network name, check the status of any connected device, advanced reboot router facility and much more. So the transfer tool of this app provides flawless and targeted operations. If you want to get the good network performance, then you have to install the latest version of the Netgear Genie Setup. Version 2.4.48 is suitable for Windows PC and Mac OS whereas Version 4.2 or higher works well with Android Smartphones.
Main features of the Netgear Genie App
Here, we are going to discuss its salient features that are the following:
· It allows you to maintain your home network through desktop or Smartphone.
· You can easily monitor, handle and customize the network settings as per your requirements.
· Users can easily live stream videos or music files via their devices that must be connected to a network.
· It comes with Air Print feature so that you can take the print from any network connected device.
· This app contains the parental control feature and check, handle and control all guest access.
· It includes one important feature EZ Mobile that helps you connect and secure your network through phones or other devices by just scanning a QR code.
· You can also quickly repair any type of issue in a hassle-free manner.
Steps for Netgear Genie Smart Setup

You need to follow some instructions to set up the Netgear range extender via Netgear Genie Smart Wizard. Follow these steps:
· Put your range extender close to your network router.
· Now, connect your range extender to a power supply.
· Wait until the Power LED converts into green color.
· Click on the Network icon and it displays the list of available WiFi networks
· Open the internet browser and open the Netgear Genie Smart Setup page.
· Then, select your WiFi network and just click on the Continue tab.
· Enter the SSID network name for Netgear range extender and click on the Continue button.
· Moving further, follow the on-screen guidelines and complete the setup.
· Once you have done with it, disconnect the range extender from the power outlet and transfer your range extender to its new place where you get flawless wireless signals from your WiFi home or office network.
Use it properly for Good Performance
While using this tool, make sure that the router mode should be turned on, when you connect your devices to the network. It is because of that the access point modes and guest network works differently with each other. Moreover, you ensure that the Wi-Fi range extender is avoided as chances are it will not work properly. So, you will get the proper working of this tool for great performance.
If still, you face an issue, you can CHAT with our executives for help or call us at our toll-free Number or on Live Chat.
#Netgear genie setup#netgear extender setup#Netgear Extender Setup Wizard#Netgear Router Login.net#www.mywifiext.net smart wizard#mywifiext.net smart wizard#http //www.mywifiext.net smart wizard#www.mywifiext.net#netgear ex2700 setup extender#netgear n300 extender setup
5 notes
·
View notes
Text
Get The Steps For Netgear Extender Setup Wizard
The Netgear extender setup wizard allows you to set up your device. The setup wizard can be accessed with the default web address mywifiext.net. Enter the web address in the web browser and you will reach the login page. Put down the Netgear default username and password to get access to the setup wizard.
0 notes
Link
#New Netgear wifi extender setup#Netgear wifi extender new setup#Steps for how to configure Netgear extender#Setup New Netgear wifi extender#mywifiext net new extender setup#Netgear extender setup wizard#Netgear extender setup#my wifi extender setup#mywifiext net setup#Netgear wifi range extender setup#my wifi ext#Netgear wifi extender setup instructions#Netgear wifi extender n300#Netgear wifi extender n300 setup#Netgear wifi extender setup ex6100#www.mywifiext.net new extender setup#Netgear ex2700 setup#how do you connect a wifi extender?#Netgear wifi extender setup website#Netgear setup wn3000rpv3#Netgear plug in wifi extender setup#192.168.1.250 Netgear extender setup#new Netgear wifi range extender setup#netgear wn3000rpv3 setup
5 notes
·
View notes
Link
#New Netgear wifi extender setup#Netgear wifi extender new setup#Setup New Netgear wifi extender#Steps for how to configure Netgear extender#mywifiext net new extender setup#Netgear extender setup wizard#Netgear extender setup#my wifi extender setup#mywifiext net setup#Netgear wifi range extender setup#my wifi ext#Netgear wifi extender setup instructions#Netgear wifi extender n300#Netgear wifi extender n300 setup#Netgear wifi extender setup ex6100#www.mywifiext.net new extender setup#Netgear ex2700 setup#how do you connect a wifi extender?#Netgear wifi extender setup website#Netgear setup wn3000rpv3#Netgear plug in wifi extender setup#192.168.1.250 Netgear extender setup#new Netgear wifi range extender setup#netgear wn3000rpv3 setup
3 notes
·
View notes
Link
Netgear Support present how to setup Netgear Wifi Range Extender using the netgear smart wizard using mywifiext website. For the Netgear wifi extender setup, you need several things ready. The Netgear extender ac750 and the router, a tablet or laptop, and an Ethernet cable in case you don’t want to set up over wifi.
#netgear extender setup wizard#netgear extender setup website#netgear extender setup#netgear wifi extender setup
0 notes
Link
You can do the new extender setup with the Netgear genie. It is an application for computer. The Netgear genie lets you monitor, control, and manage the home network. You can use this application to install netgear extender. Just open a web browser and go to mywifiext.net. When you press the ‘Enter’ key, you will get into the Netgear genie setup wizard.
#new extender setup#netgear extender login page#mywifiext.net setup#netgear range extender setup#netgear extender setup wizard#netgear wifi extender setup#mywifiext.net not working
0 notes
Text
How To Setup WiFi Range Extender Netgear, plug it in, connect to the default WiFi network, and launch a web browser. Visit mywifiext.net, connect to your existing WiFi network using the setup wizard, and then configure the extender's SSID and password. Once set up, insert the extender halfway between your router and the desired coverage area.
#How To Setup WiFi Range Extender Netgear#How To Setup#WiFi Range Extender Netgear#Netgear WiFi range extender
0 notes
Video
tumblr
Netgear Extender Setup Wizard enables you to get connectivity in dead zones areas.If anyone is unable to setup Netgear wifi extender wizard then get in touch with the professional experts by visiting our website
0 notes
Link
Open a web browser and input mywifiext.net in the address bar. Enter the login web address to get on to the Netgear genie page. The default login credentials would be key for successful login. After getting on Netgear setup wizard, you can configure your device and extend your home network by following the on screen instructions.
#www.mywifiext.net smart wizard#netgear extender login#netgear range extender setup#mywifiext.net#netgear extender setup wizard
0 notes