#Netgear_ext setup
Explore tagged Tumblr posts
Visit Tumblr Blog
Explore Tumblr blogs with no restrictions, modern design and the best experience.
Last Seen Tumblr Blogs


Fun Fact
Tumblr has a low social media market share in South America.
Text
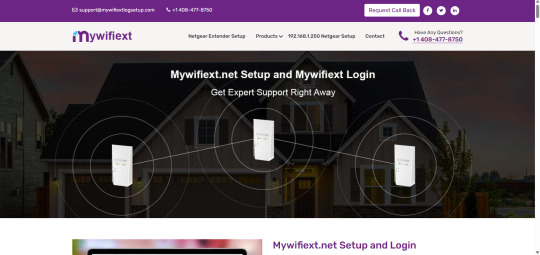
Netgear WiFi range extender setup
A Netgear WiFi range extender is a device that can help you extend the reach of your home's WiFi network. If you have areas in your home where your WiFi signal is weak or nonexistent, a range extender can be a great solution.
Here are the steps on how to set up your Netgear WiFi extender via mywifiext:
Connect your extender to a power outlet.
Connect your computer or mobile device to the extender's WiFi network.
The extender's WiFi network will have a name that is similar to your home's WiFi network name, but with an "_EXT" at the end. For example, if your home's WiFi network is called "NETGEAR," the extender's WiFi network might be called "NETGEAR_EXT."
Open a web browser and enter mywifiext.net in the address bar.
Enter the extender's default password in the password field.
The default password is usually printed on a sticker on the extender. If you have lost the sticker, you can reset the extender to factory defaults by holding down the reset button on the extender for 5 seconds.
0 notes
Text
Enjoy Uninterrupted Connectivity With Netgear Extender Setup
Want to eradicate dead zones from your home or office space but do not know how to conduct the Netgear wifi extender setup process seamlessly? If the answer to this question is yes, then you have found the right post. In this post we'll be sharing three different setup methods for your Netgear extender. Each method has its own advantages, so you can pick one which you find easier to conduct and serves your needs well. So let's start with the first Netgear wifi extender setup method which is done using the WPS button.
Quick Setup: WPS Method
Before you carry on with this setup method, ensure one important aspect. It is that your existing router must support a Wifi protected setup method. In case it doesn't, then you skip this one and move directly to the next head. Now let's check out the steps one by one for the WPS setup method:
✓ First if your Netgear extender has a mode switch button, then ensure it is set to extender.
✓ Now thoughtfully plot the wifi signal repeater in close proximity to your router. With the help of its adapter, activate it.
✓ Once the Netgear wifi range extender boots up properly, you can press the WPS button on it.
✓ While the WPS light on the repeater is flickering, press the wifi protected setup switch on the router.
✓ After you successfully complete the above Netgear wifi extender setup steps, you need to wait for the WPS LED as well as for the router LED to turn green or blue.
✓ When you get the above indication, you can unplug the Netgear range extender and locate it in an area where you require coverage. Turn it on.
Note: Do not move it to an area where the signals from the router are less than 50 percent. Because effective communication between the router and the Netgear wifi repeater is crucial for the seamless connectivity.
✓ Finally, enjoy the Netgear wifi extender setup by connecting your smart gadgets to the new network. The network identity remains similar to that of your router but it has EXT in the end.
Deep Configuration: Using Web Browser
Users who want to configure their Netgear wifi range extender deeply, can pick the web browser setup method. So the steps for it are:
First strategically plot the Netgear wifi extender in an area which is halfway from the router and the area where you require extended connectivity.
Now, ensure your router is linked to the Internet. As well as note down its details like password and the SSID as well.
Moving further, power on the range extender. Allow it to start up properly.
Thereafter, bring your smartphone or you can also use your laptop. Enable its wifi. From the list, link to the network “Netgear_EXT”. Although it is an open network, so you do not have to input any password. But if prompted then use the term “password” for the password. Tap on Connect.
Now comes the most important step for Netgear wifi extender setup. So what you need to do is, open an internet browser. Go to its address field. In it, without any error input, mywifiext.com. Press Enter.
As you click enter, a major window opens up. Tap on the New Extender Setup option. Read various terms and after that tap on I Agree.
Now you'll be prompted to fill up a few details. After you do that, answer security questions and tap Next.
Finally, select the network that resonates with your router. Tap Next. Input the password. Tap Next. Lastly, follow the directions one by one to wrap up the Netgear wifi extender setup using a web browser.
Do not log out of the setup panel, until you see a green or blue light on both router LED as well as the power LED of your Netgear range extender.
Hassle-free Setup Using Nighthawk App
If you want an alternative to both the above-written Netgear wifi extender setup methods then this is the one for you. The steps for it are:
First ensure the linkage of your router to the Internet source. Additionally note down its SSID and password.
Now open the Nighthawk application on your mobile phone. Don't have access to it? If yes, no issues. Install it from nighthawk-app.com. Alternatively you can fetch it down from the Play Store. Also available on the App Store.
Moving further, as you open the application, select the Menu option. From it tap on the “Set Up A New Nighthawk System”. Then click on “Get Started”. Thereafter, on the “Range Extender”.
Finally, turn on the range extender. Ensure its mode switch button is turned towards extender.
After your range extender turns on successfully, revisit the app and hit Next. Now to wrap up the Netgear wifi extender setup without any error, all you have to do is follow the Nighthawk app instructions one by one. Do not skip any step because this will lead to incomplete setup.
In case of any query or you need expert assistance for the setup, then you can connect to us through phone call, live chat or write to us through email.
0 notes
Text
Netgear EX2800 Setup to Boost Your Home WiFi
Netgear EX2800 WiFi range extender is the device you need, If you’re facing weak WiFi signals in certain corners of your home or office. Designed with dual band technology and offering pets up to AC750, this compact device helps exclude dead zones and ensures flawless internet content throughout your space. While the idea of extending your WiFi might sound complicated, the Netgear EX2800 setup process is incredibly straightforward when you follow the right way. Whether you’re a freshman or someone with introductory tech knowledge, this companion will walk you through everything from powering on the device to logging in after installation.
Step by Step Netgear EX2800 Setup Instructions
The Netgear EX2800 works by entering the signal from your primary WiFi router and rebroadcasting it to areas where your signal is generally weak or drops out. This process bridges the gap between your host device and WiFi- enabled bias located out of your router’s direct range. Once the Netgear EX2800 setup is complete, you’ll enjoy briskly pets, smaller connection drops, and extended content.
Power On the Extender
The first step in the Netgear EX2800 setup process is powering up the device
Netgear EX2800 should be unpacked first
Plug the extender into a power outlet near the main router for initial setup.
Press the power button on the extender to turn it on.
Stay for the Power LED to come solid green. This indicates that the device has successfully boggled up.
Once the light stabilizes, you’re ready to move on to the factual configuration.
Choose WPS or Web Grounded Method
You can complete the Netgear EX2800 setup using either the WPS system or the web- grounded setup. Both are effective, but the web- grounded system gives you further control over settings and customization.
WPS Method (WiFi Protected Setup)
This system requires that your router has a physical WPS button.
Press the WPS button on the Netgear EX2800 extender.
Within two minutes, push the WPS button on your main router.
The WPS LED on the extender will blink and also turn solid green once the connection is successful.
Connection to your primary WiFi network is complete.
Web- Grounded Setup( Recommended for Customization)
If your router does n’t support WPS or you want advanced settings.
Connect your smartphone, tablet, or computer to the NETGEAR_EXT network (the dereliction SSID of your extender).
Open any streamlined web cybersurfer and enter http:// www.mywifiext.net in the address bar.
When the login screen appears, use the dereliction credentials to subscribe in( these are published on the marker of your extender).
You’ll be guided through the Netgear EX2800 setup by the on-screen Netgear installation wizard.
Select your WiFi network from the list.
Enter your WiFi word when urged.
Choose a name and enter a password for your extended network to complete the setup.
Click Apply to finalize the setup.
Once the setup is completed, your extender will reboot. You can now connect your bias to the new extended WiFi network.
Optimal Placement of the Extender
After completing the Netgear EX2800 setup, the coming step is changing the right position to place the extender for the stylish content. Keep these tips in mind
Avoid placing the extender near broilers, cordless phones, or other sources of hindrance.
Do not install the extender in tight or cornered spots, as it may limit signal strength.
Choose a spot roughly interior between your router and the area with weak WiFi.
Ensure it's within the router’s range and that the signal LED on the extender shows a strong connection.
Optimal placement guarantees efficient coverage and high-speed, uninterrupted internet across your entire area.
Logging After Installation
Once your extender is configured and placed rightly, you might want to pierce the settings in the future for updates or changes. Then’s how to log in
Open a cybersurfer and go to http// www.mywifiext.net.
Enter your admin username and word.
You’ll now have access to the extender’s dashboard where you can modernize firmware, change network names, or tweak security settings.
Logging into your extender allows you to cover connected bias, manage performance, and even reboot the extender if demanded.
Troubleshooting for Netgear EX2800 Setup
Indeed though the setup process is generally smooth, you may sometimes run into issues. Then are quick fixes
Can’t pierce mywifiext.net? Make sure you are connected to the NETGEAR_EXT network.
LED not turning green? Power cycle the extender and confirm it’s positioned within the effective range of your WiFi router.
WPS not working? Try the web- grounded setup system rather.
Slow internet after setup? Budge the extender or reduce hindrance from near bias.
Final Words
With this complete companion, performing the Netgear EX2800 setup should be easy and stress-free. Whether you conclude for the WPS system or the web- grounded approach, extending your network content takes just a few minutes. Once everything is in place, you will enjoy presto, dependable WiFi across your home or office. Netgear’s support platoon is always available, If you need backing during the process. For the stylish performance, don’t forget to periodically log in and check for firmware updates.
0 notes
Text
Netgear EX6150 Setup
Enhance your WiFi coverage with a Netgear EX6150 setup. This high-performance extender delivers faster internet speeds and extended range. To set up, connect to the Netgear_EXT network, visit mywifiext.net, and follow the installation steps. If the page doesn’t load, try 192.168.1.250. Troubleshoot login or connectivity issues by resetting your device. Enjoy uninterrupted streaming, gaming, and browsing. Need expert setup support? Contact us now for a seamless Netgear EX6150 setup!
1 note
·
View note
Text
How do I reset my Netgear Extender Login?
Use these procedures to reset your Netgear extender login:
First, find your Netgear extender's "Reset" button.
Usually located on the device's back or side, this is a tiny, inset button.
Press and hold the button with a paperclip or other pointed item until the power LED begins to blink.
This restores the extender to its factory default settings, erasing any previously saved login credentials.
Await the extender's reboot after the reset.
Then, connect to the extender's default Wi-Fi network.
The network name will typically be something like “NETGEAR_EXT,” and you won’t need a password initially.
Open a web browser and go to either www.mywifiext.net or 192.168.1.250. This will take you to the Netgear extender login page.
You will be asked to create a new admin username and password on the login page.
To configure the extender for your network, according to the setup wizard's instructions. For future reference, be sure you write down your updated login information.
Make sure your browser's cache is empty and that the device you are using is linked to the extender network if you are having trouble seeing the login page.
Your Netgear extender login should be successfully reset after completing this method. Go to our website to know more about it.
0 notes
Text
Can’t Find New Extender Setup Button After Connecting To Netgear_Ext? -
Netgear WiFi range extender can be set up and installed using various different ways. However, the most used way to install a Netgear extender is the manual method. Whether you want to perform the Netgear EX3700 setup or the latest Nighthawk model setup, the manual method requires you to connect to Netgear_Ext SSID and access mywifiext.net.
Once you have logged in to mywifiext, you will see the ‘New Extender Setup’ button. That’s where a majority of users often stuck! If you are also not able to find the New Extender Setup button, we have got your back. This post is all about to get rid of this issue. Scroll down to read more.
For More Info - https://streamingwords.com/cant-find-new-extender-setup-button-after-connecting-to-netgear_ext/
0 notes
Text
Netgear WiFi Extender: Maximizing Connectivity for Smart Homes
Plugging your Netgear extender into a power outlet close to your Wi-Fi network will enable you to set it up. Use WPS configuration or join the extender's Wi-Fi network. For configuration, use a web browser or the Netgear installation aid to follow the on-screen instructions. By visiting our website, you can simplify the configuration of your Netgear wifi extender. Should you require more assistance with the process execution, don't hesitate to reach out to our experts.
1 note
·
View note
Text
Netgear wireless extender login
The Netgear wireless extender login is a crucial step in enhancing and optimizing your home or office network. Designed to boost the existing Wi-Fi signal range, Netgear extenders require a seamless setup process, and the login interface serves as the gateway to configuration. To initiate this process, connect your extender to a power source and access its default network using a device like a computer or smartphone. Once connected, open a web browser and enter the default login web address or the extender's IP address. This prompts the Netgear extender login page, where users input their credentials, typically a username and password. After successful authentication, users gain access to the extender's settings, enabling them to customize network parameters, update firmware, and optimize performance. A user-friendly interface ensures a smooth Netgear wireless extender login experience, empowering individuals to tailor their network extension according to specific needs and preferences.
#Netgear wireless extender login#Netgear extender setup#netgear wifi extender setup#netgear extender set up#netgear extender setup wizard#netgear extender not working#wifi extender login netgear#netgear wireless extender login
1 note
·
View note
Text
How do I setup Netgear Ex6110?

The Netgear EX6110 setup is a fast procedure. First, connect it to a power source. Open a web browser and navigate to http://www.mywifiext.net/ after connecting your device to the extender’s WiFi network. To choose and establish a connection to your current WiFi network, adhere to the on-screen directions. After adjusting the extender’s parameters or leaving them as they are, click “Finish” to finish the configuration. Move the extender to a location with a strong WiFi signal for best coverage.
How to setup Netgear EX6110 setup manually?
When the Power LED on the Netgear EX6110 illuminates, it is ready to be used.
Make that your device is connected to the “NETGEAR_EXT” default WiFi network.
Type http://www.mywifiext.net/ or http://192.168.1.250/ into the address bar of an open web browser.
Select the WiFi network you already have and input its password by following the on-screen directions.
You may choose to use the default values or modify the extension settings.
In order to maximize WiFi coverage, move the extender and click “Finish” to finish the manual setup.
Read More:-
1 note
·
View note
Text
How to Set Up Your Netgear Extender
Step 1: Plug in Your Extender
The first step is to plug in your extender to an electrical outlet. The power LED should light up to indicate that the extender is on. If the power LED does not light up, check that the extender is plugged in correctly and that the outlet is working.
Step 2: Connect to the Extender's WiFi Network
Connect your computer or mobile device to the extender's WiFi network. The extender's default WiFi network name (SSID) is NETGEAR_EXT. The extender network either has no password or the default password is password.
Step 3: Launch a Web Browser and Enter mywifiext.net or 192.168.1.250
Open a web browser and enter mywifiext.net or 192.168.1.250 in the address bar. This will open the New Extender Setup page.
Step 4: Click or Tap NEW EXTENDER SETUP
Click or tap NEW EXTENDER SETUP to begin the setup process.
Step 5: If Prompted to Accept Terms and Conditions, Click or Tap YES or I AGREE
If you are prompted to accept the terms and conditions, click or tap YES or I AGREE to continue.
Step 6: Select Your WiFi Network
Select your home WiFi network from the list of available networks.
Step 7: Enter Your WiFi Password
Enter your home WiFi password in the Password field.
Step 8: Click or Tap NEXT
Click or tap NEXT to continue.
Step 9: Select an Extender Name
Enter a name for your extender. This name will be used to identify your extender on your network.
Step 10: Click or Tap FINISH
Click or tap FINISH to complete the setup process.
0 notes
Link
Netgear_ext setup is not a big task because you will receive complete user manual with your Netgear WiFi extender and using that user manual you will able to make netgear_ext setup advance configurations.
0 notes
Link
When you install advance Netgear AC3000 X6S Tri-Band Extender devices for high speed wifi connections, you can easily able to remove the dead zones
0 notes
Link
Netgear_ext setup is not a big task because you will receive complete user manual with your Netgear WiFi extender and using that user manual you will able to make netgear_ext setup advance configurations.
0 notes
Text
How to login netgear wifi extender?
It is easy to modify and customize the settings of your Netgear WiFi extender by logging in.
Make that the extender is within range of your current WiFi network and that it is correctly connected to a power supply before starting.
After the extender has been turned on, link your PC or mobile device to the default network—usually called "NETGEAR_EXT."
Once connected, use a web browser and input 192.168.1.250 or http://mywifiext.net into the address bar.
This will launch the Netgear WiFi extender login page. When logging in for the first time, you'll be asked to either set up an account or configure the extender by providing the login credentials for your router.
If you’ve previously set it up, log in with the credentials you created during the first setup.
It's typically possible to reset the extender if you've forgotten your login information.
To accomplish this, press and hold the reset button for around ten seconds, which will reset the extender to its initial configuration. Resetting it will require you to set it up again.
Once signed in, you may adjust settings like the WiFi network name (SSID), password, or security options, and check the connection status between your router and the extender. You can keep an eye on performance, fix problems, and upgrade firmware for improved security and performance by logging in frequently.
For more details visit our website.
0 notes
Text
Setting Up WPA and WPA2 for Netgear WN2000RPT wifi extender
If you are happy with your Netgear WN2000RPT wifi extender device performance and you want to make sure that all data that is traveling to your device is totally secure then you can configure WPA and WPA2 settings for your devices. Using Netgear extender login page of your device, you can easily make these security settings for your devices.
When you Need to Make WPA Security for your Netgear WN2000RPT wifi extender, you must Know these Configurations
· You must know about IP address for your device login. Check the information regarding the Netgear wifi extender configuration for the replaced configuration.
· You must know about Netgear extender login user name and password.
· You must have high speed wifi connections for your computer device.
Steps to Make WPA and WPA2 Settings for Netgear WN2000RPT wifi extender
1. Get a computer device.
2. Get a LAN cable from any computer shop.
3. Remove power supply for your compute Netgear WN2000RPT wifi extender and other devices.
4. Connect one end of cable to WAN port of your wifi extender device.
5. Connect second end of cable to a computer.
6. Once again provide power supply to these devices.
7. Open web browser to this computer.
8. Fill Netgear extender login address to this web browser.
9. After that fill Netgear extender login user name and password.
10. Select “Advanced Settings” for your device.
11. After that select WPA or WPA2 settings for your wifi extender device.
12. Click on “Apply” button from this page.
These are steps to configure advance WPA and WPA2 security settings for your Netgear WN2000RPT wifi extender settings. Your data packets are totally safe now so you can connect as many as wireless devices to your extender device.
#Netgear_ext setup#Netgear extender setup#www.mywifiext.com#Netgear wifi extender setup instructions
0 notes