#Remove trims in wilcom hatch
Explore tagged Tumblr posts
Visit Tumblr Blog
Explore Tumblr blogs with no restrictions, modern design and the best experience.
Last Seen Tumblr Blogs


Fun Fact
The most popular pages on Tumblr are about Minecraft, GIFs, and David J. Peterson.
Text
Remove trims in wilcom hatch


Then save to the emb file and send the design file to the machine. Design of embroidery and digitization, I work in Wilcom, Pattern maker, Gis. Fixed bug when too many trims are defined for printout and outputting. PACK CREATION FABRIC AND TRIM SOURCING PATTERN AND SAMPLE MANAGEMENT. the Digitizer does NOT determine the type of material to be used- they prepare the st. In response to some comments in Mike Cyrus response: 1. An excellent one will provide a FREE quote and visual sample. Repeat the procedure above until the desirable outcome is obtained. We recommend you uninstall the previous version using the window control panel. Answer (1 of 2): A good digitizer will let you know IF the design needs to be simplified.

Please also note that the trim inside Branching is also controlled by “ Inside object” in Connectors.Īfter you have completed this procedure, you may exam the outcome by “ Travel by Trim” in Travel toolbar, or you may visually exam the outcome by turning on TrueView. Note: the lettering part is done with Branching, and the number of trims is reduced for the lettering part. The following procedure needs to be followed:Ģ) Click on the Branching button in the Arrange toolbox, or hit the “ i” key (the shortcut of Branching)ģ) Mouse click on the left side of the lettering to define the start point of the BranchingĤ) Mouse click on the right side of the lettering to define the end point of the Branching If the lettering part in the emb file is not the lettering object, then you need to apply Branching for the lettering part. Note: the number of trim should be reduced for the lettering object. Or highlight the number in the value box and type in a new number and hit the Enter key You can choose to turn off automatic trimming, to always trim connecting stitches, or to trim only when the connecting stitch is longer than a specified.
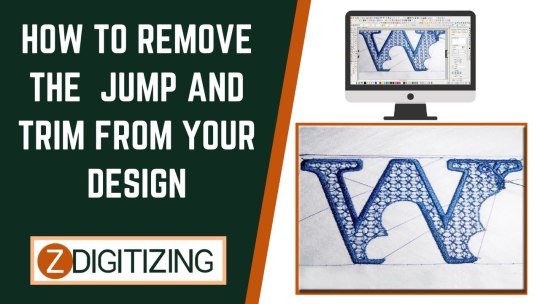
This can be achieved by following the procedure below:Ģ) In the Object Properties dialog box, go to the Connectors tabģ) Select “ Inside object” in the dropdown listĤ) Increase the value for “ If next connector > ” to 3mm or more by using the sliding bar in the value box. Level 3 includes advanced shaping tools, a comprehensive set of stitch types, and utilities to enhance artistic interpretation and. Made for anyone who loves creating designs, ready for commercial machine embroidery digitizers. If the lettering part in the emb file is the lettering object, then you need to adjust Connectors parameter for the lettering object. Home / Embrilliance Software / StitchArtist / StitchArtist Level 3. You have found that there are too many trims between letters when stitching on your machine. 1-4 Working Space - Exit & Remove Licenses with Hatch Embroidery Learn about your working space, Menu Bars, Ribbon Bar and how to exit the program.
0 notes
Text
How to Embroidering on Fleece – Complete Guide
Embroidering on fleece offers a wonderful opportunity to add personalized and decorative touches to your garments and accessories. Fleece, known for its softness and warmth, provides an excellent canvas for embroidery. In this comprehensive guide, we will walk you through the steps of embroidering on fleece, including converting images to embroidery files, ensuring your creations come out beautifully every time.
Introduction to Embroidering on Fleece
What is fleece fabric?
Fleece fabric is a soft and insulating material made from synthetic fibers. It is commonly used in making jackets, blankets, hats, and other cold-weather apparel.
Why embroider on fleece?
Embroidering on fleece adds a unique and personal touch to your creations. The soft texture of fleece complements embroidery well, resulting in beautiful and durable designs.
Importance of converting images to embroidery files
Converting images to embroidery files is crucial for translating your designs into stitches that can be sewn by an embroidery machine. This process ensures that your embroidery accurately reflects the details and intricacies of the original image.
Getting Started with Embroidering on Fleece
Choosing the right fleece fabric
When selecting fleece fabric for embroidery, opt for high-quality fleece that is not too thick or too thin. A medium-weight fleece works best for most embroidery projects.
Selecting suitable embroidery designs
Consider the size and complexity of the design when choosing embroidery patterns for fleece. Simple designs with bold lines tend to work well on fleece fabric.
Converting images to embroidery files (PNG to embroidery file)
To embroider an image onto fleece, you'll need to convert image to embroidery file format such as DST, PES, or EXP. There are various software programs available for this purpose, or you can outsource the digitizing process to a professional company.
Tools and Materials Needed
Embroidery machine
Invest in a reliable embroidery machine capable of handling fleece fabric. Look for machines with adjustable speed settings and multiple hoop sizes for versatility.
Stabilizers and hooping aids
Stabilizers help prevent stretching and distortion of fleece during embroidery. Use tear-away or cut-away stabilizers depending on the complexity of your design.
Embroidery threads and needles
Choose high-quality embroidery threads that complement your fleece fabric. Use ballpoint needles to prevent snagging or piercing of the fleece fibers.
Software for converting images to embroidery files
Explore software options like Embird, Wilcom, or Hatch for convert image to embroidery file. These programs offer various features for customizing and optimizing your designs.
Steps to Embroidering on Fleece
Preparing the fleece fabric
Start by washing and drying your fleece fabric to remove any residue or sizing. Press the fabric with a warm iron to smooth out any wrinkles before hooping.
Setting up the embroidery machine
Thread the machine with your chosen embroidery thread color and attach the appropriate hoop size for your design. Adjust the tension settings as needed for smooth stitching.
Hooping the fabric
Place the fleece fabric in the embroidery hoop, ensuring it is taut and wrinkle-free. Use clips or pins to secure the fabric in place, taking care not to distort the fibers.
Loading the embroidery file
Transfer the converted embroidery file to your machine using a USB drive or a direct connection. Select the desired design from the machine's menu and position it within the hoop using the on-screen guidelines.
Embroidering the design
Start the embroidery process and monitor the machine closely as it stitches out the design. Pause the machine if necessary to trim jump stitches or change thread colors.
Finishing touches and removing stabilizers
Once the embroidery is complete, carefully remove the fabric from the hoop and trim any excess stabilizer from the back. Press the embroidered area lightly with a warm iron to set the stitches.
Tips for Successful Embroidery on Fleece
Use appropriate stabilizers
Experiment with different types of stabilizers to find the best option for your fleece fabric and design complexity.
Adjusting tension settings
Fine-tune the tension settings on your embroidery machine to prevent thread breaks or puckering on fleece.
Choosing the right needle and thread
Use sharp needles and high-quality embroidery threads suitable for fleece to ensure clean and precise stitching.
Testing on scrap fabric
Before embroidering on your main project, test the design on a scrap piece of fleece to check tension, stitch density, and color choices.
Troubleshooting Common Issues
Thread breaks or bird nesting
Check for thread tension issues, needle damage, or debris in the bobbin area causing thread breaks or bird nesting.
Fabric puckering
Ensure proper hooping and stabilizing techniques to minimize fabric puckering during embroidery.
Misalignment of designs
Double-check the hoop placement and design positioning to avoid misalignment or off-center embroidery.
Machine skipping stitches
Clean and lubricate your embroidery machine regularly to prevent skipping stitches or incomplete designs.
Benefits of Outsourcing Digitizing Services
What is digitizing?
Digitizing is the process of converting images into digital embroidery files that can be read and stitched by embroidery machines.
Advantages of professional digitizing services
Professional digitizing services employ skilled digitizers who can optimize designs for clarity, detail, and stitch quality.
Choosing the right digitizing company
Research and compare digitizing companies based on their experience, turnaround time, pricing, and customer reviews to find the best fit for your needs.
Conclusion
Embroidering on fleece is a rewarding and enjoyable craft that allows you to create personalized and stylish garments, accessories, and gifts. By following the steps outlined in this guide and experimenting with different techniques and designs, you can achieve stunning results every time. Whether you're a novice or experienced embroiderer, exploring the possibilities of fleece embroidery is sure to spark your creativity and enhance your sewing projects.
1 note
·
View note