#SetScrews
Explore tagged Tumblr posts
Visit Tumblr Blog
Explore Tumblr blogs with no restrictions, modern design and the best experience.
Last Seen Tumblr Blogs


Fun Fact
Average visit duration of Tumblr.com is 10 mins and 25 secs.
Text
Best High-Quality Allen Grub Screw Manufacturers in India
Looking for trusted grub screw manufacturers in India? Sachiya Steel International offers high-quality Allen grub screws in various sizes and materials, including stainless steel, alloy steel, and carbon steel. Our precision-engineered screws ensure durability, strength, and reliability for industrial applications. We cater to diverse industries, providing corrosion-resistant and high-performance grub screws at competitive prices. With a commitment to quality and customer satisfaction, we ensure timely delivery across India.
Visit Sachiyasteel.com today for the best Grub Screw Manufacturers in India and get high-quality fasteners at competitive prices with fast delivery and excellent customer service.
#TopManufacturer#HighQualityScrews#ReliableFasteners#DurableScrews#PrecisionEngineering#AllenGrubScrews#GrubScrews#SetScrews#Fasteners#SteelScrews#PrecisionFasteners#MadeInIndia#IndianManufacturer#FastenersIndia#SachiyaSteel#TrustedSupplier
0 notes
Text
Enhancing Efficiency in Well Construction Projects Across India with Slip-On Heavy Duty Set Screws Stop Collars
Increase efficiency in India's well construction with slip-on heavy-duty set screw stop collars, ensuring secure pipe positioning and faster assembly.
Khasra No-23/1/2,22/2,22/1,24/1/1,23/1/1,23/3 & 23/2, Village-Prithla,Tehsil & Distt-Palwal-121102 contact-9811085352
0 notes
Text
Capstone #6: Solid
<-<- FIRST || <- PREV || NEXT ->

CAD is nearly done, and the design is 95% there. There's still some improvements to be made. Big 'ol hand to our CAD team especially for bringing this to life. Lets explore under the cut
There's 2 main parts of this thing. The main body has the fans and wheels. The gantry on top does all the doodling. Let's pop the top off.

The cover and walls are purely aesthetic and keeps the dust out. Originally the cover is held on using snap buttons, but that's been changed to the tiniest magnets pocket change can buy. The base plate is made from thin wood, or we've been exploring carbon fiber (but that's proven to be mad expensive for basically no gain. Like 400+$ expensive).
The wheels are servos, the fans sit side by side and run off wall outlet power. (Try making these drone motors that normally run off batteries, and make them run off a wall outlet. Sounds easy right? Good luck. It's been a time doing it. They eat something like 12-16v at 40-60+ amps... *each*). It's got tiny nubs on the bottom to stabilize it, because with only 2 wheels, it's going to want to rock side to side. It'll have some distance sensors on the sides to find where it is on the wall, and an accelerometer to find how it's tilted. I'm personally a little worried the vibrations from the fans will make the accelerometer unreliable, but we'll find out about that later. The whole thing will be controlled by an Arduino Mega.

Smooving over to the gantry, both axis will be on rails purchased from Igus. The rails are made from hard anodized aluminum, while the carriages are made from diecast zinc and some slippery bearing plastic. It's then pulled around by timing belts and steppers. We modified both axis a tad by reducing the rail size to the smallest ones Igus offers, and giving the horizontal axis 2 rails for more stability (The bearing situation on the timing belts were improved too)

The printer head uses an electro-magnet to pull the pen down. There are guide pins with springs to, well, guide and spring return the head. There are also stop screws that set the maximum engagement and disengagement. (The travel distance is kinda exaggerated here tho. The actual travel distance will be as little as possible. Like 3-4mm)
All in all, the bot body is something like 300 x 500mm, 60mm thick (+ 55mm for the fan tails), with a print area of 150 x 150mm. We've tried to cut as much weight as possible, and are looking at about 1.2kg or a little lighter than a small toaster

As a bonus pic, here's an early concept. This one uses a lead screw for the X, and a shaft and timing belt for the Y. If you're wondering what stops the axis from pivoting, it would have been some gibs located behind both axis. Commonly used on dovetails, a gib is when you intentionally design in a large gap between your mating surfaces, and shove a thin plate in there with setscrews to take up the slack. Look at the ways of basically any milling machine or lathe, and chances are you'll see one!
2 notes
·
View notes
Note
//my favourite part was when eunoia said “You have no recent background as a Setscrew? Then I have no offers.”
🖥️ Ok thats my goat right here
0 notes
Text
ok thats a ex friend suddenly being a setscrew and a hunter in the epic department server, ok.
#ori speaks#vent#yeah not like i fell in love with dream game the second i found it back in 2022#dream game is like a massive interest of mine too with it getting bigger thanks too its boost in popularity come on dude#at least im still a 2022 og. i remember when golden taco was required for silver net (i got silver net when it was required too:steamhappy:#so uh. to said ex friend you better not come at me i just want too enjoy this fucking game. thank you.
0 notes
Text
extreme cleaning the bathroom has gone a little awry
after 2 recurring dreams where my roommate leaves the vacuum cleaner outside my door, i finally decided to stop delaying and clean the bathroom again
and i went hardcore mode
i loosened the setscrews and popped off the handles from the sink to clean under them
i then cleaned the rest of the sink
i cleaned the mirror
i cleaned the toilet
i cleaned the toilet brush and plunger holder
i cleaned the walls in the shower
i cleaned and scrubbed the tub
i cleaned the floor
i took the bathmats and threw them in the wash
and its this last point where things have not gone to plan. the bathmats upset the front loader and it wont spin dry them. in fact, they are still full of soap.
so now the gameplan is to take them into the shower and keep rinsing and wringing them out by hand then hangdry them. maybe by tomorrow i can throw them into the dryer
0 notes
Photo
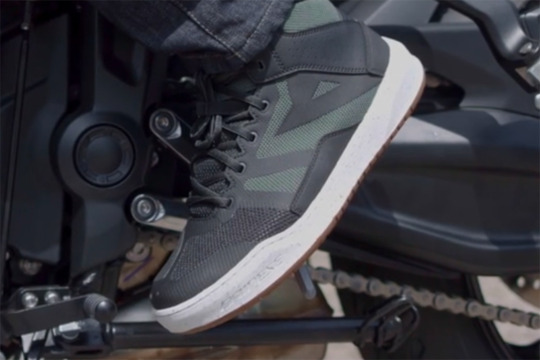
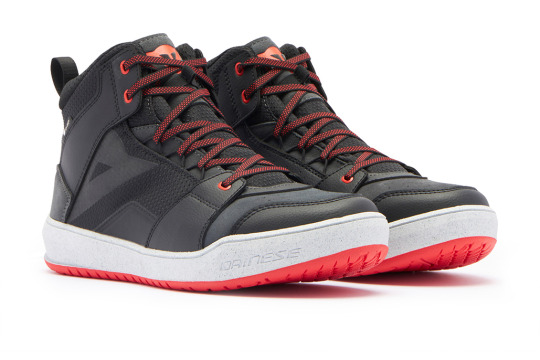
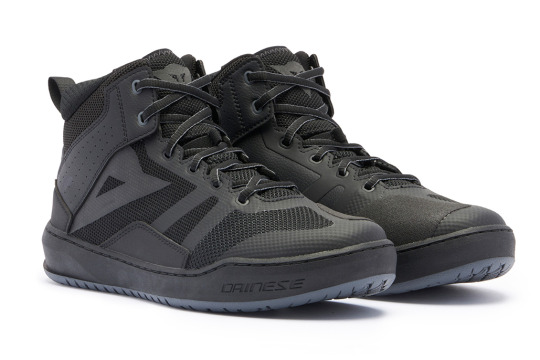
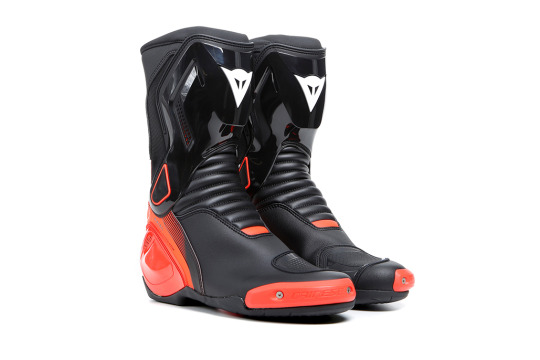
For 2024, Dainese is pleased to present several new boots to its range of riding footwear – including the urban, sneaker-style Suburb D-WP, Suburb Air and a new colour to the sporty Nexus 2 boots. [caption id="attachment_147017" align="aligncenter" width="1029"] Suburb Air[/caption] Suburb The new Suburb WP and Suburb Air are certified to CE – Cat. II – EN 13634 Standard, with rigid inserts on the malleolus area and soft D-Foam on the internal side for protection in the areas where it’s needed the most in the event of an accident. There is a gear shifter guard in PU to help with the longevity of the boots too. The Suburb WP is constructed from suede leather and an abrasion-resistant fabric upper with a waterproof D-WP® interior, ideal for wet days. The Suburb Air has the same great look as the Suburb WP but, as the name would suggest, is perfectly suited to those warmer rides thanks to its highly ventilated construction of a microfibre upper and mesh lining. To ensure comfort for all-day wear, both the Suburb Air and Suburb WP have an Ortholite® footbed and Groundtrax® outsoles. This technology has been specifically engineered to provide grip, stability and comfort on and off the bike. For ease, there is a bootstrap to help pull on the boots and fastening is achieved through lacing – with an elastic strap to secure the laces. [caption id="attachment_147016" align="aligncenter" width="1029"] Suburb WP[/caption] The Suburb WP has an RRP of £169.95. Available in sizes EU39-47, men can choose from three colours – Black/White/Iron-Gate, Black/White/Red-Lava and Black/Camo/Acid Yellow. Women can choose from Black/Iron Gate/Metal and Black/White/Metal Purple both in sizes EU36-42. The Suburb Air has an RRP of £129.95 and are available for men in sizes EU39-47 and women in sizes EU36-42. For men, there are three colourways – Black/White/Iron-Gate, Black/White/Army-Green and Black/Black – and women have the options of Black/White/Harbor Blue and Black/White/Apple Butter. [caption id="attachment_147018" align="aligncenter" width="1029"] Nexus 2[/caption] Nexus 2 The Nexus 2 boots from Dainese are the ‘ideal sports boots for any road’ and are now available in a Black/Lava-Red/Iron-Gate colourway. The boots are made from microfibre and D-Stone* for exceptional comfort and high abrasion resistance. Certified to CE – Cat. II – EN 13634 Standard, the Nexus 2 boots feature an Internal AXIAL Distortion Control System, an articulated structure integrated into the boot that serves a triple purpose: protecting against sprains, reducing the intensity of impact by distributing it over the structure‘s entire surface, and stopping objects from entering the boot. For further protection, there is a nylon heel, a protective inner nylon hull, a reinforced nylon toe and thermoplastic polyurethane inserts on the shin. Easy to wear and fit, there is a zipper at the back to close, flexible joints for extra walking comfort and an adjustment strap for a customised fit. The sliders on the toe are removable and the boots come with a setscrew wrench for any adjustments. The Nexus 2 boots have an RRP of £289.95 and are available in sizes EU39-47. Riders can choose from Black, Black/Anthracite, Black/Fluro-Red or the new colour Black/Lava Red/Iron-Gate. *D-Stone is an extremely tough material made of a high-density twisted nylon with elasticated inserts faced with nylon creating an armoured weave effect. To locate your nearest Dainese dealer, visit www.nevis.uk.com or call 01425 478936. Dainese
0 notes
Text
How to Make Your Own Laser Engraved Cutting Board
I'll show you how to make a laser engraved cut board and we'll walk you through the process from design to finish.
A cutting or serving board is an essential in any kitchen, it is where vegetables are cut and prepared and the surface on which they are presented and served. Here we are using the atomstack a10 pro laser engraver.
Follow along as we design and engrave a custom cut board with a laser engraver. how to carve wood You can carve wood in several different ways. Over the years, I've shared two wood-burning techniques that are both affordable and easy to master.
Watch how to carve a cutting board
A wood burning tool is a handheld heating tool that burns wood. You can use it like a pen to draw patterns on any type of wood surface.
Burnt markers apply a substance to the wood that, when used in conjunction with a heat gun, burns the design into the wood. This marker can be used with a template to create detailed wood fired designs.
Both of these techniques are great ways to create small designs by hand without breaking the bank.
The next level up in engraving is the laser engraver. I own an Aufero Laser 2, a high quality machine built for crafters and hobbyists. This machine is perfect for my craft room, engraving and cutting dozens of materials.
Watch me unbox and create a simple project with this laser.
Can it be engraved on a cutting board Yes, exactly! You can engrave custom text and images on the solid wood cutting board. These are great gifts for your friends and family.
Laser engraved cut boards require a few extra steps to ensure they work properly. Read on for all the details.
How to Design Graphics The first step is to create a design to use on the cutting board. I love using Canva, an easy-to-use and very affordable online design program. There is a free version to try, and I recommend the pro version, which costs $119 per year. Try using Canva to create your own laser engraved designs.
Use a blank canvas and add design elements and text to create exactly what you want engraved on the cutting board.
Once the design is complete, export it as a PNG file.
Using LaserGRBL There are 2 programs you can use to run your laser engraver; LaserGRBL and Lightburn. Lightburn is a more advanced paid program that allows you to design and create on a larger scale. I suggest you use LaserGRBL until you are happy with the machine, then upgrade as needed.
Connect your machine in LaserGRBL, click the unlock button at the bottom, and open the design file you just created in Canva.
For engraving on wood I use the following setup. Line to Line Tracking horizontal direction 8 lines per mm These settings work perfectly for me, but I encourage you to experiment with different variations and see what you like.
Next, crop the design to remove any white space around it, and click Next. On the next screen, you'll set the dimensions of your design in millimeters, as well as the machine speed. Use the book icon in the Speed section to select the recommended settings for your machine and material.
Now that the design is ready, you need to set up the laser. Click on the center at the bottom of the screen, this will move the laser to the center of the design. From here we can focus the laser.
Loosen the setscrew, slide the cutting board under it, and place the amber acrylic piece on top of the wood. Tighten the setscrew and remove the acrylic. Now the distance of the laser to the wood is perfect.
Back in the LaserGRBL software, click the frame button. This will draw a frame around the design on the wood, it won't leave a mark, but it's a good way to see if your design ends up the way you want it to.
Once everything is properly placed, it's time to carve. Put on the goggles and click the green play button to start the sculpting process.
How to Finish a Carved Cutting Board There are 2 more steps to ensure that this cutting board will work properly.
First, sand the surface and edges of the wood with 150-grit sandpaper. This removes any rough spots that would interfere with the food.
Wipe the cutting board with a soft cloth to remove surface dust.
Finally, coat with several coats of cutting board oil. This is food grade mineral oil that helps protect and nourish the wood. With regular use, the oil will ensure your boards don't dry out and crack over time. For a board of this thickness, I recommend 3 coats.
We cover how to make your own laser engraved cutting board, from start to finish. Be sure to watch the video and save this article for future reference. There are also laser engraving machines with the same power: longer ray5 10w, sculptfun s10, twotrees tts-10
0 notes
Photo

Not a new character, but I finally finished the ID of Gianni’s adopted father figure of sorts, Felix!
4 notes
·
View notes
Photo
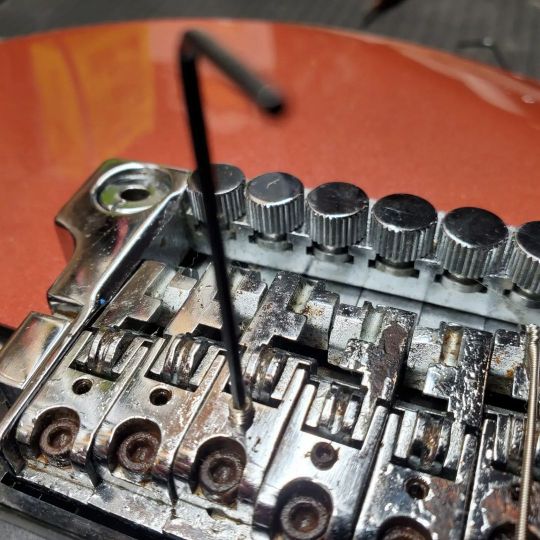
Fender Contemporary III tremolo was missing 1 x saddle height adjustment set screw. Had to improvise. Good to go now! #callowayguitars #fendercontemporary3 #setscrew #guitarrepair #luthier #seaforddelaware #customguitars #guitarlife (at Seaford, Delaware) https://www.instagram.com/p/CjAj7oDOU4-/?igshid=NGJjMDIxMWI=
#callowayguitars#fendercontemporary3#setscrew#guitarrepair#luthier#seaforddelaware#customguitars#guitarlife
0 notes
Photo
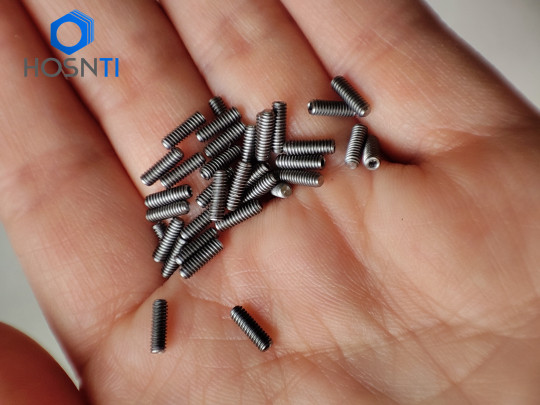
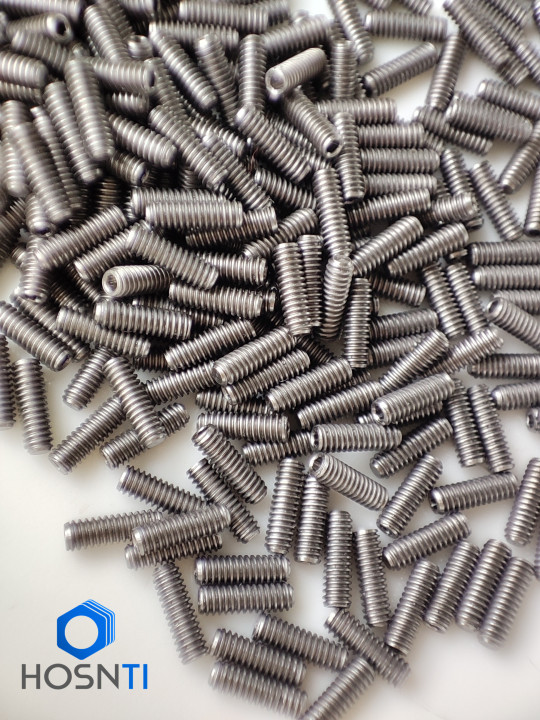
Titanium set screws
Titanium set screws, Fully set screws, Partially set screws, Tap End set screws, Double End set screws we can all produce.
0 notes
Photo
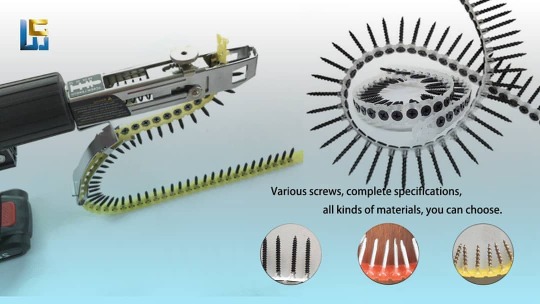
Colored Collated Drywall Screws. Cheap Price Phosphated / Zinc plated Collated Drywall Screws. Collated MDF screw/gypsum screw. #collatedscrews #hardwaretools #drywallscrews #fastener #fastenermanufacturing #fasteningsystems #instafixing #setscrew #chipboardscrew #fastenersupplier #tornillos #tornilleria #elementosdefixacao #pakumurah #baglantielemanlari #visserie #پیچ_خشکه #پیچ_لولا #پیچmdf #پیچ_mdf_چینی #метизи #крепежопт #철물 #화스너 #verbindungselemente #schrauben #parafusos #śruby #viteria #кріплення(在 Shimai Industrial Co.,ltd) https://www.instagram.com/p/CGZj_fuD3M5/?igshid=59z7ph8fado2
#collatedscrews#hardwaretools#drywallscrews#fastener#fastenermanufacturing#fasteningsystems#instafixing#setscrew#chipboardscrew#fastenersupplier#tornillos#tornilleria#elementosdefixacao#pakumurah#baglantielemanlari#visserie#پیچ_خشکه#پیچ_لولا#پیچmdf#پیچ_mdf_چینی#метизи#крепежопт#철물#화스너#verbindungselemente#schrauben#parafusos#śruby#viteria#кріплення
0 notes
Text
a comment reply

Tiny? It’s precisely 12″ long. :) It’s mostly the flash bringing it out because it’s a bit darker in regular light, but is indeed a redwood color. Check out the red on the gear plate too:
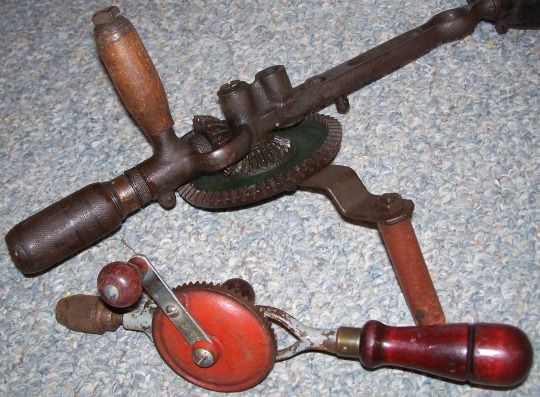
Funny thing, on the larger drill I thought the crank handle was a hard rubber tube over the axle, like a really old piece of garden hose, where the guide handle was real wood. On closer inspection, I think the crank handle might be real wood but it’s just smoother for some reason.
And you see that second socket, the one to the right of the one the gear axle goes into? I thought maybe the handle or the shoulder plate would go into it. Nope, the handle bolt is smaller (and the second socket throat is smooth, not threaded) and the plate is also a socket held onto the tool by a setscrew. Either there’s another handle or plate that slides in, or there’s an axle and gear that would attach in the first socket to change the power ratio and the handle-gearing would go in the second socket. I’m spitballing here, I just see that second socket and wonder what it’s for.
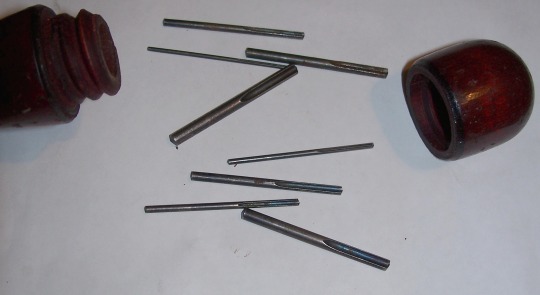
Back to the smaller tool: Here are the bits. Eight of them, not seven.
And if anyone wondered: the larger one doesn’t have any visible branding but it’s green on both sides of the handle’s gear plate; the smaller one is a Craftsman 107 so likely came from Sears-Roebuck.
51 notes
·
View notes
Photo
DIN7983 Basic Flat Head Self Tapping Screws Galvanized Steel Philip Oval Head Self Tapping Screw Material: Carbon Steel C1022 Galvanized: Blue white, White, Yellow Drive: Phillips Recess Point: Sharp point Application: Wood Fixing (Max4-10mm) #selftappingscrews #setscrew #throughbolt #reisserscrews #metalscrews #tornilloautorroscante #elementosdefixacao #skruva #pakumurah #sekrup #vidalar #visserie #پیچ_خودکار_سرتخت #پیچ_متری #پیچ_اچ_وی #پيچ_سازه #پیچ_سازه_به_سازه_سرمته #پیچ_مته_ای #саморез #саморезыпометаллу #schraubenliebe #саморізи https://www.instagram.com/p/CDShWZhj12d/?igshid=1h4qpzx1nfq4y
#selftappingscrews#setscrew#throughbolt#reisserscrews#metalscrews#tornilloautorroscante#elementosdefixacao#skruva#pakumurah#sekrup#vidalar#visserie#پیچ_خودکار_سرتخت#پیچ_متری#پیچ_اچ_وی#پيچ_سازه#پیچ_سازه_به_سازه_سرمته#پیچ_مته_ای#саморез#саморезыпометаллу#schraubenliebe#саморізи
0 notes
Photo


Finally acquired the final missing piece – the elusive dash plastic. Couldn’t be happier. During installation, I noticed one thing – there is a small hump in the plastic between the RPM meter and the start button. I have seen multiple cracked pieces where the damage seemingly starts here. While installing I did some inspecting to see if there was anything that could be causing this inside and sure enough, the stock set screw for the accelerator pot is a smidge too long. What happens it when this piece is secured down, that set screw ever so slightly rubs back and forth on the plastic from the inside, causing it to warp, weaken and eventually crack. A huge design flaw! The easiest solution would have been purchasing a shorter set screw, but I would have had to do that regardless if an error was made. So instead I simply removed my set screw and using a fine tooth hacksaw trimmed it down 2mm or so and filed the end to be smooth. After that, I was able to reinsert it into the coupling flush. No more rubbing. TLDR: Sit down owners: check your set screw to make sure it isn’t damaging your plastics!
0 notes