#SetupFiling
Explore tagged Tumblr posts
Visit Tumblr Blog
Explore Tumblr blogs with no restrictions, modern design and the best experience.
Last Seen Tumblr Blogs


Fun Fact
Users from the US are the majority of Tumblr visitors.
Text
🚀 Ready to start your business in Odisha?
Get your Shop and Establishment Registration today with SetupFiling.in! ✅ Quick, easy, and hassle-free service.
🔗 Visit: https://setupfiling.in/odisha-shop-and-establishment-registration/
📞 Contact us at: +91 9818209246 for assistance.
Start your business the right way! ✨
2 notes
·
View notes
Text
Tải PowerPoint 2016, 2019, 2020 Miễn Phí – Bản Chuẩn, Không Lỗi, Dễ Cài Đặt
PowerPoint là gì? Những tính năng nổi bật
PowerPoint là một phần mềm trình chiếu chuyên nghiệp do Microsoft phát triển, nằm trong bộ ứng dụng văn phòng Microsoft Office. Với giao diện dễ sử dụng, PowerPoint giúp người dùng tạo ra những bài thuyết trình trực quan, sinh động và hấp dẫn.
Các tính năng nổi bật của PowerPoint:
Thiết kế slide linh hoạt: Giao diện kéo thả đơn giản, dễ chỉnh sửa.
Kho hiệu ứng đa dạng: Hiệu ứng chuyển cảnh, hoạt hình và văn bản phong phú.
Tích hợp đa phương tiện: Chèn video, âm thanh, hình ảnh dễ dàng.
Làm việc nhóm hiệu quả: Đồng bộ OneDrive, hỗ trợ làm việc nhiều người cùng lúc.
Tương thích cao: Dễ dàng chia sẻ, trình chiếu trên nhiều thiết bị và nền tảng.
So sánh nhanh PowerPoint 2016, 2019 và 2020
Phiên bảnTính năng chínhĐộ ổn định Phù hợp với ai PowerPoint 2016 Giao diện truyền thống, nhẹ, ổn định Rất tốt Máy cấu hình yếu, người dùng phổ thông PowerPoint 2019 Cải tiến hiệu ứng Morph, hỗ trợ SVG, mô hình 3DTốtDân văn phòng, người cần thiết kế slide chuyên nghiệp PowerPoint 2020 / Office 365 Tích hợp AI, cập nhật liên tục, lưu trữ đám mây Tốt nhất Người thường xuyên thuyết trình, nhóm làm việc online
Link tải PowerPoint 2016, 2019, 2020 miễn phí
Bạn có thể tải các phiên bản PowerPoint dưới dạng file ISO hoặc bộ cài đặt chuẩn qua Google Drive tốc độ cao, hoàn toàn miễn phí.
Tải PowerPoint 2016
Bản 32-bit và 64-bit
Link Drive tốc độ cao
Dung lượng: ~1.5GB
Không cần key khi cài đặt
Tải PowerPoint 2016 (Link Drive)
Tải PowerPoint 2019
Bản cập nhật hiệu ứng Morph
Hỗ trợ mô hình 3D
Giao diện Fluent Design mới
Tải PowerPoint 2019 (Link Drive)
Tải PowerPoint 2020 / Office 365
Cập nhật AI thiết kế tự động
Làm việc nhóm thời gian thực
Yêu cầu đăng nhập Microsoft Account
Tải PowerPoint 2020 / Office 365 (Link Drive)
Hướng dẫn cài đặt PowerPoint từng phiên bản
Hướng dẫn cài PowerPoint 2016
Tải về file cài đặt PowerPoint 2016.
Giải nén nếu là file .zip hoặc .rar.
Chạy file setup.exe.
Chọn Install Now → chờ hoàn tất.
Mở PowerPoint để kiểm tra hoạt động.
Hướng dẫn cài PowerPoint 2019
Tải file ISO PowerPoint 2019 và giải nén.
Chạy file setup.exe dưới quyền Admin.
Chọn ngôn ngữ, phiên bản 32/64-bit phù hợp.
Chờ cài đặt hoàn tất → mở phần mềm kiểm tra.
Hướng dẫn cài PowerPoint 2020
Tải Microsoft Office 365 từ link Drive hoặc trực tiếp từ Microsoft.
Đăng nhập tài khoản Microsoft (hoặc tạo mới).
Cài đặt phần mềm từ Microsoft Installer.
Chờ vài phút là có thể sử dụng.
Hướng dẫn kích hoạt bản quyền PowerPoint
Sau khi cài xong, bạn cần kích hoạt bản quyền để dùng đầy đủ tính năng. Có 2 cách:
1. Kích hoạt bằng key bản quyền
Dùng key bản quyền nếu bạn đã mua Office chính hãng.
Vào File → Account → Activate Product → nhập key.
2. Kích hoạt bằng KMS
Dành cho người dùng cá nhân, không có key.
Sử dụng công cụ KMS như AIO Tools hoặc KMSAuto Net.
Tắt Windows Defender trước khi chạy.
Lưu ý: Hạn chế dùng phần mềm crack không rõ nguồn gốc, tránh rủi ro bảo mật.
Một số lỗi thường gặp khi cài đặt và tải PowerPoint
Lỗi thường gặpNguyên nhânCách khắc phụcKhông chạy được setupFile cài lỗi, thiếu quyền adminTải lại file, chạy với quyền AdminKhông hiển thị PowerPoint sau càiChưa kích hoạt Office đầy đủKích hoạt lại, kiểm tra lại gói càiOffice báo lỗi bản quyềnDùng bản crack không ổn địnhGỡ cài đặt, dùng KMS hoặc key sạchCài xong nhưng không mở được file pptxThiếu Office Viewer hoặc Office bị lỗiCài lại hoặc cập nhật bản mới
Câu hỏi thường gặp (FAQ)
PowerPoint có miễn phí không?
Microsoft cung cấp bản dùng thử, hoặc dùng miễn phí PowerPoint online tại office.com.
Cần cấu hình máy như thế nào để cài PowerPoint?
RAM tối thiểu 2GB, khuyến nghị 4GB.
Ổ cứng trống ≥ 3GB.
Windows 7 trở lên, khuyến nghị Windows 10.
Có thể cài riêng PowerPoint mà không cần Word, Excel?
Có, khi cài đặt bạn có thể chọn chỉ cài PowerPoint.
Nên dùng phiên bản nào?
Máy yếu: PowerPoint 2016.
Cần nhiều hiệu ứng: PowerPoint 2019.
Làm việc nhóm, lưu đám mây: PowerPoint 2020 (Office 365).
Kết luận
Việc sở hữu một phiên bản PowerPoint phù hợp giúp bạn trình bày nội dung rõ ràng, chuyên nghiệp và hiệu quả hơn trong học tập cũng như công việc. Với các link tải miễn phí, bản chuẩn, không lỗi, bài viết đã cung cấp đầy đủ hướng dẫn giúp bạn cài đặt và sử dụng nhanh chóng.
0 notes
Text
Convert Jest to Vitest: A Complete Migration Guide

Testing is an essential part of modern software development, ensuring that your code behaves as expected. While Jest has long been a reliable tool in the JavaScript ecosystem, Vitest offers a fresh alternative with a focus on speed, performance, and modern development workflows. If you're considering switching your test framework from convert Jest to Vitest, this guide will walk you through the steps to migrate your project smoothly.
What is Jest?
Jest is a JavaScript testing framework known for its simplicity, powerful mocking capabilities, and out-of-the-box setup. It's been widely adopted by React and Node.js developers due to its snapshot testing, fast assertions, and large community support.
What is Vitest?
Vitest is a modern testing framework designed to integrate seamlessly with Vite. It's built for speed, offering blazing-fast test execution thanks to Vite's bundling system. Vitest also features native TypeScript support and a lightweight configuration, making it a great option for modern JavaScript applications.
Why Switch from Jest to Vitest?
While Jest is still a powerful tool, Vitest brings some unique advantages:
Faster Test Execution: Vitest utilizes Vite’s efficient bundling, reducing test times.
Seamless TypeScript Integration: No need for extra setup for TypeScript support.
Better Frontend Tooling Compatibility: Vitest is optimized for Vite-based projects and modern frontend libraries.
Improved Developer Experience: Vitest supports live test updates with hot module replacement (HMR), making development more intuitive.
Prerequisites for the Migration
Before you begin the migration, ensure that your project has the following:
Node.js 16+ installed.
Existing Jest tests configured and running successfully.
Basic knowledge of Vite and its ecosystem, especially if your project uses Vite.
Step 1: Install Vitest and Dependencies
The first step is to install Vitest and any related dependencies:
bash
Copy code
npm install vitest @vitest/ui --save-dev
You may also want to install plugins such as @testing-library/vue or vitest-mock for additional capabilities based on your testing needs.
Step 2: Update Test Configuration Files
Vitest requires a vitest.config.ts configuration file, similar to Vite’s config. Create this file if it doesn't already exist:
typescript
Copy code
// vitest.config.ts
import { defineConfig } from 'vitest/config'
export default defineConfig({
test: {
globals: true,
environment: 'jsdom', // Use jsdom for browser-like tests
coverage: {
reporter: ['text', 'json', 'html'], // Optional: Add coverage reports
},
},
})
This configuration mirrors Jest’s capabilities, including global variables and test environment setups.
Step 3: Update Test Scripts in package.json
Modify the scripts section in your package.json to use Vitest instead of Jest:
json
Copy code
"scripts": {
"test": "vitest",
"test:watch": "vitest --watch"
}
This will enable you to run tests using npm run test and watch for file changes with npm run test:watch.
Step 4: Migrate Jest-Specific Code
While Vitest shares much of the same API as Jest, some key differences need to be addressed:
Mocking: Replace jest.mock() with vi.mock().
javascript
Copy code
// From:
jest.mock('./module')
// To:
vi.mock('./module')
Mock Functions: Use vi.fn() instead of jest.fn().
Setup Files: Jest’s setupFiles can be replaced with hooks inside vitest.config.ts.
Step 5: Handle Differences in API Usage
Most Jest API functions are available in Vitest, but there are slight differences:
Snapshot Testing: Vitest supports snapshots but may format them slightly differently.
javascript
Copy code
expect(component).toMatchSnapshot()
Global Variables: Ensure any references to Jest’s globals (expect, beforeEach, afterAll) are properly imported from Vitest.
Step 6: Run and Validate Your Tests
With your configuration and code changes complete, you can now run your tests:
bash
Copy code
npm run test
Review the output for any errors or incompatibilities. Debug any issues related to environment setup, such as missing modules or slight API changes between Jest and Vitest.
Step 7: Update CI/CD Pipelines (If Applicable)
If you use CI/CD pipelines to automate your tests, you’ll need to replace Jest with Vitest in your configuration files:
yaml
Copy code
# Example CI configuration (GitHub Actions)
jobs:
test:
runs-on: ubuntu-latest
steps:
- uses: actions/checkout@v2
- uses: actions/setup-node@v2
with:
node-version: '16'
- run: npm install
- run: npm run test
Ensure that your pipeline correctly identifies test results and generates any required coverage reports.
Tools and Plugins to Enhance Vitest Testing
Vitest supports a variety of tools and plugins to enhance testing:
@testing-library/vue: For testing Vue.js components.
vitest-mock: Adds enhanced mocking capabilities.
@vitest/ui: A web-based interface to view test results and debug errors.
Challenges You Might Encounter
While the migration from Jest to Vitest is generally straightforward, you may encounter a few challenges:
Custom Matchers: If you use custom Jest matchers, you'll need to ensure Vitest equivalents are available or create custom matchers.
Mock Behavior Differences: Some Jest mocks may behave slightly differently in Vitest, especially for advanced mock setups.
Snapshot Format Differences: Snapshots may require re-generation due to format differences between Jest and Vitest.
Best Practices for a Smooth Migration
Migrate Gradually: Move test suites in small increments to minimize disruptions.
Use Version Control: Keep your migration changes in a separate branch to avoid affecting the main codebase.
Test Thoroughly: Run tests in both Jest and Vitest during the migration to ensure nothing breaks.
Leverage Community Resources: Refer to Vitest’s documentation and forums for support during the transition.
Conclusion Migrating from Jest to Vitest offers many benefits, including faster test execution, seamless TypeScript support, and better integration with modern tools like Vite. By following the steps outlined in this guide, you can ensure a smooth transition and take full advantage of Vitest’s capabilities. With the right strategy and preparation, your testing workflow will become more efficient, allowing you to focus more on building great software.
0 notes
Text
Income Tax Deduction & Exemptions Explained
Understand income tax deductions and exemptions with Setupfilings. Our comprehensive guide provides clarity and helps you optimize your tax savings.
Read the article for complete information: https://setupfilings.com/learn/income-tax-deduction-exemption/

#IncomeTaxDeductions #TaxExemptions #TaxSavings #SetupFilings #TaxGuide #OptimizeTax #TaxPlanning #FinancialSavings #IncomeTaxTips #TaxKnowledge #FinancialClarity
0 notes
Photo

File Format😅😂 . . . . . #programmer #setupfile #exe #ios #apk #developers #computer #microsoft #windwos #developer #ai #vlog #fileformat https://www.instagram.com/p/B9CiwJkgkUn/?igshid=9h6w55iae1xe
#programmer#setupfile#exe#ios#apk#developers#computer#microsoft#windwos#developer#ai#vlog#fileformat
0 notes
Text
Create Custom Aspiration 103
Checked April 2021, Patch 1.72
Using: The Sims 4 Mod Constructor by Zerub
In this tutorial we will create a custom Aspiration that uses custom Aspiration Steps and belongs to an existing Aspiration Category.
I will assume you are familiar with what I did in 101, or check that out first since I will not explain any inputs that are the same as in that one. Which is pretty much everything apart from the actual step details.
1. Setup
Fill in everything but the Object Sets as directed in Creating an Aspiration 101.
2. Creating the Aspiration
Adding two steps to the Objective Sets just as in Creating an Aspiration 101, but instead of Game Reference we will go with New Elements and use the Open Element: Value.
The first step will use a Game Reference as part, while the second will be new. The first I do is add an Objective Set Info, otherwise the game doesn’t have a name for that step. I don’t bother entering a description or an icon since they won’t be used.

And for the Objectives I select an existing Game Reference, eg. Become an Adult. The last two, Complete Only In Sequence and Screen Slam on Completion I just leave on default values.
The other way is to create your own objectives, lets say you want to have a “Earn §300 000″ which is similar to Fabulously Wealthy’s “Earn §200 000″ to be reasonably sure to be possible. When creating a New Element a text as well as the amunt of aspiration points to be rewarded upon completion needs to be entered.

To specify the actual details press the Open Element: Value and add a few components; General → Tooltip (optional), Objective Types → Total Money Earned Objective.
The Display Text is prefilled with the text you entered in the previous step, but can be changed here for what to actually show in the UI. The Tooltip is the text that shows up when you hover over an objective to help with how to complete it.
Aspiration Points is prefilled if you speficied any in the previous view, and missing if you didn’t. And then the actual check and important part - Total Money Earned Objective. Select Greater Or Equal or Greater and then specifiy the amount 300,000 and we are done!

Repeat this for as many steps and objectives as you want to have, and look through the components for objectives to find things you can use to create the aspiration you want to have (Might make another tutorial on the options later, but that would be a ore advanced one).

3. Done!
And then export the aspiration as a package-file!
One thing worth noting before we end this: I never manage to make it work with just one Objective Set (aka one step), so there is something I’m not understanding. It should be possible since the Lifetime mod as only one step, but it is made directly in the XML so not sure I’m doing something wrong, or if the Mod Constructor can’t handle it.
Happy modding!
8 notes
·
View notes
Text
Effortless Entrepreneurship: Online Registration for Private Limited Companies
In today's digital age, starting a business has become more accessible than ever before. Gone are the days of lengthy paperwork and endless queues at government offices. With the advent of online registration services, aspiring entrepreneurs can now establish their own private limited companies with ease and convenience. One such platform that has emerged as a game-changer in the business registration space is Setupfilings. This article explores the benefits and features of private limited company registration online and how Setupfilings is revolutionizing the process.
Private limited company registration offers numerous advantages to entrepreneurs, such as limited liability protection, easy access to funding, and credibility in the market. However, the traditional methods of private Company Registration Certificate Online often involve complex procedures and bureaucratic hurdles. With Setupfilings, the process is streamlined and made accessible to all, regardless of their prior knowledge or experience in company formation.

Setupfilings stands out for its user-friendly online platform that simplifies the entire registration process. It provides a seamless experience, guiding entrepreneurs through each step while ensuring compliance with all legal requirements. By leveraging technology and automation, Setupfilings reduces the time and effort involved in company registration, allowing business owners to focus on their core competencies.
One of the standout features of Setupfilings is its comprehensive and customizable service offerings. Whether an entrepreneur needs assistance with company incorporation, obtaining a digital signature certificate, or opening a bank account, Setupfilings caters to all their requirements. The platform offers a range of packages tailored to different budgets and needs, making it accessible to startups and small businesses as well.
Moreover, Setupfilings takes pride in its team of experienced professionals who provide expert guidance throughout the registration process. Their expertise ensures that all legal compliances are met, minimizing the chances of errors or delays. Setupfilings also offers a dedicated customer support team that is readily available to address any queries or concerns that entrepreneurs may have during the registration journey.
Another key advantage of registering a private limited company online with Setupfilings is the speed of the process. Traditional methods of registration can often take several weeks or even months to complete. In contrast, Setupfilings leverages its digital platform and robust network to expedite the process significantly. This allows entrepreneurs to establish their companies swiftly and commence operations without unnecessary delays.
Private limited company registration online has revolutionized the way entrepreneurs set up their businesses. With Setupfilings, the process becomes simpler, more efficient, and accessible to a wider audience. By combining user-friendly technology, expert guidance, and comprehensive service offerings, Setupfilings has emerged as a trusted partner for entrepreneurs embarking on their business journey. Whether it's a startup or an established business, Setupfilings caters to all, ensuring a seamless registration experience. So, if you're ready to turn your entrepreneurial dreams into reality, Setupfilings is the platform to choose for hassle-free private limited company registration online.
1 note
·
View note
Link
In this article, I will guide you step by step to set up Storybook with Next, Typescript, SCSS, and Jest.
Storybook is an open-source tool for developing UI components in isolation. It makes building stunning UIs organized and efficient. However, it can be quite tricky to set up with Nextjs.
Requirements
Node.js 10.13 or later
MacOS, Windows (including WSL), and Linux are supported
Create Nextjs App
Create a new Next.js app using create-next-app, which sets up everything automatically for you. To create a project, run this command:
$ npx create-next-app ✔ What is your project named? … my-app ✔ Pick a template › Default starter app
Enter your project name + hit return
You will be asked to choose a template: Use arrow key ⬇ to choose a Default starter app and hit return
After the installation is complete, to start the development server:
cd my-app yarn run dev
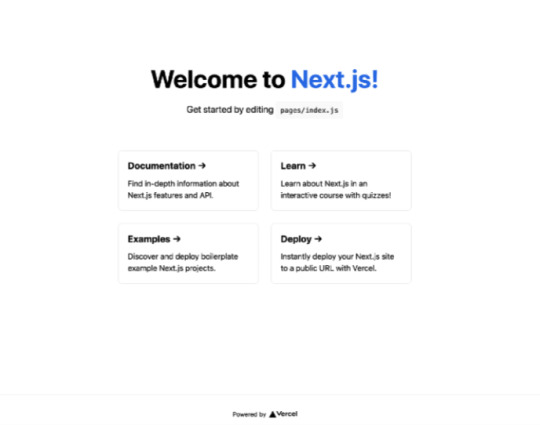
You should see this page on localhost:3000
TypeScript
Next, let’s configure Typescript for our Next app
$ yarn add -D typescript @types/react @types/node
Create a tsconfig.json in the root folder — this is where you will put your typescript configurations.
/* root folder */ $ touch tsconfig.json
And add the following config to the file:
Remove index.js and create index.tsx file. You can do it manually or use these commands in the root folder
/* root folder */ rm -f pages/index.js touch pages/index.tsx
Add the following to index.tsx:
Restart your server and check out your http://localhost:3000/ by running:
$ yarn run dev

Storybook
Next, we’ll configure Nextjs, SCSS, and Typescript for Storybook
$ yarn add -D @storybook/react @storybook/preset-typescript
Create .storybook folder and storybook config files:
/* root folder */ mkdir .storybook cd .storybook touch .storybook/main.js .storybook/next-preset.js .storybook/preview.js
Now we will go over how to configure these files.
next-preset.js
In this file, we will configure Typescript and SCSS to work with Storybook
$ yarn add -D sass style-loader css-loader sass-loader @babel/core babel-loader babel-preset-react-app
Add the following configuration to next-preset.js
SCSS
Create your style folder in the root and add global scss file.
/* root folder */ mkdir styles touch styles/global.scss
preview.js
In this file, we configure the “preview” iframe that renders your components. We will import your global scss file here.
main.js
main.js is the most important config file. This is where we place the main configuration of Storybook.
Create a story
Let’s create a simple Button component and a story to test our Storybook setup. First, create a components folder and 2 files Button.tsx and Button.stories.tsxin the folder.
/* root folder*/ mkdir components touch components/Button.tsx components/Button.stories.tsx
Then, add the following contents into 2 files:
Finally, add npm script to package.json to start storybook.
{ ... "scripts": { "dev": "next dev", "build": "next build", "start": "next start", "storybook": "start-storybook -p 6006 -c .storybook" } }
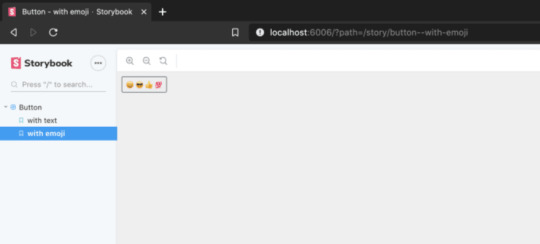
Now, let’s run our Storybook.
$ yarn storybook

You should see our global scss style took affect and 2 stories that we have created earlier to test the Button.

Jest
Next, we will add unit tests and snapshot tests in Jest for testing components in Nextjs and Typescript.
First, let’s install these development dependencies for Jest.
$ yarn add -D jest @types/jest ts-jest babel-jest @types/enzyme enzyme enzyme-adapter-react-16
We’ll need to configure Enzyme to use the adapter, which we can do in Jest’s bootstrap file. Let’s create a config folder and place the setup file in there.
/* root folder */ mkdir config touch config/setup.js
This code will run also before each test but after the testing framework gets executed:
Now let’s create a config file for jest. If you place your setup file above at a different location then make sure to change your setupFiles: […] in jest.config.js.
/* root folder */ $ touch jest.config.js
Config babel.config.json
Lastly, we will add babel configurations. Let’s add these dev dependencies to our package.json by running the following command:
yarn add -D @babel/preset-env @babel/preset-react @babel/preset-flow @babel/plugin-transform-runtime babel-plugin-transform-es2015-modules-commonjs
In the root folder, create a babel config file. For some reasons, babel.rc does not work and I have to replace it with babel.config.json
/* root folder */ $ touch babel.config.json
Let’s create a test
Now, let’s run a simple unit test to test the index file that we created earlier to make sure that it has the welcome message “Welcome to My Next App!” as a “h1” element.
First, create a __test__ folder to keep our test files in one place and create index.test.tsx file.
/* root folder */ mkdir components/__test__ touch components/__test__/index.test.tsx
Snapshot testing
Finally, I will show you how to create a simple snapshot test. We use Snapshot testing to keep a copy of the structure of the UI component or a snapshot so when after we make any changes we can review the changes and update the snapshots. You can read more about Snapshot testing here.
To start, let’s install react-test-renderer, a library that enables you to render React components as JavaScript objects without the need for a DOM.
$ yarn add -D react-test-renderer
Now, create a file called Button.snapshot.test.tsx to test create new snapshots for the Button component.
$ touch components/__test__/Button.snapshot.test.tsx
Now, add the add npm script to package.json to run your tests
{ ... "scripts": { ... "test": "jest", "test:watch": "jest --watch", "test:coverage": "jest --coverage" } }
Go ahead and run your tests.
$ yarn run test
You should see 1 unit test and 1 snapshot test are passed

If you run into errors such as “The default export is not a React Component in page: ‘/’” or “ReferenceError: regeneratorRuntime is not defined”, try to delete package-lock.json, node_modules folder, and .next folder and then restart your server, storybook and rerun your test again.
0 notes
Text
How to Set the Attach Directory Prefix for Org-Mode 9.3
TL;DR: There are two methods org-attach.el uses to determine where to store attachments, org-id and org-dir. I prefer org-id but also want to be able to specify the ./data directory prefix.
Thus:
* This will use =~/.charnock/data/4B/B068CA-8948-49F1-9C27-284FAA4E8B05/<attachment>= for its attachments :PROPERTIES: :ID: 4BB068CA-8948-49F1-9C27-284FAA4E8B05 :END: # Local Variables: # org-use-property-inheritance: nil # org-attach-use-inheritance: (quote selective) # org-attach-id-dir: ~/\.charnock/data # End:
Or, if you want a DIR Property based solution:
#+PROPERTY: DIR ~/.foo/bar * An entry that will use the inherited DIR property * An entry that overrides the DIR property. :PROPERTIES: :DIR: ~/.bar/foo :END: This entry will place attachments /directly/ in =~/.bar/foo<attachment file>=, /not/ =~/.bar/foo/XX/XXXXXXXXXXX/<attachment file>=. * As far as I know this entry will /still/ use the =DIR= property because it takes precedence over =ID= :PROPERTIES: :ID: BLOOFY-FLOOFY-JUICY-GOOSEY :END: # Local Variables: # org-use-property-inheritance: (quote ("DIR")) # org-attach-use-inheritance: (quote selective) # End:
I've been working on a small side-project to track and manage my information archive/wiki. I thought it would be fun to attempt to do this in Emacs org-mode and so far at least I haven't been wrong.
My wiki is an Org file that is partially populated by a directory in which I save repositories, videos, audio files, html, etc. that I find interesting. The Org entry for each one consists of a heuristic creation time and my thoughts on it, among other things. I express the attachment to the file, if there is one, by using org-attach.el's symlink support. org-attach, by default, maintains its attachments in a directory ./data alongside whatever org file you're editing. Beneath that a tree of hash prefixes is laid out. Partly because I wanted to maintain this particular Org file in Dropbox which has, shall we say, complicated, support for symlinks and partly because I think that maintaining a layer of indirection here allows the Org file to move while the attachments can stay put, I wanted to move the ./data attachment directory prefix somewhere else.
org-attach.el claims to support this so I went about following its advice and ran headlong into how little I understanding about Properties/Keywords/In-buffer Settings/etc.
I have always found this topic in org-mode to be confusing. I find the manual to be a bit vague on this point so, unfortunately, I often just thrash till it 'works' and then discover something subtle that I did wrong later. This time I figured I'd sit with it a bit more and ask for some clarification and I think it's paid off.
The manual states:
It is often useful to associate reference material with an outline node… [One] method is attachments, which are files located in a directory belonging to an outline node. Org uses directories either named by a unique ID of each entry, or by a 'DIR' property.
By default, org-attach will use ID properties when adding attachments to outline nodes. This makes working with attachments fully automated. There is no decision needed for folder-name or location. ID-based directories are by default located in the 'data/' directory, which lives in the same directory where your Org file lives(1). For more control over the setup, see *note Attachment options.
'org-attach-id-dir'
The directory where attachments are stored when 'ID' is used as method.
'org-attach-use-inheritance'
Inheritance works the same way for both 'ID' and 'DIR' property. If both properties are defined on the same headline then 'DIR' takes precedence. This is also true if inheritance is enabled. If 'DIR' is inherited from a parent node in the outline, that property still takes precedence over an 'ID' property defined on the node itself.
The library code itself is a little less scattershot:
;; Attachments are managed either by using a custom property DIR or by ;; using property ID from org-id. When DIR is defined, a location in ;; the filesystem is directly attached to the outline node. When org-id ;; is used, attachments are stored in a folder named after the ID, in a ;; location defined by `org-attach-id-dir'. DIR has precedence over ID ;; when both parameters are defined for the current outline node (also ;; when inherited parameters are taken into account).
I initially just fixated on the notion that org-attach-id-dir must be the same thing as the DIR property. This, it turns out, is not the case. DIR the property, if set for a particular node either directly or via inheritance, is a different attachment mechanism entirely, completely replacing the ./data/HA/HASH based directory structure set up by the default option. org-attach-id-dir is the variable that defaults to ./data but can be used to establish a new parent for the ID based attachment tree of org-id.
The components involved, then, are:
org-attach-use-inheritance (and thus org-use-property-inheritance)
Because I wanted to set this 'option' at the file level, I thought I needed to utilize some form of inheritance, and both of these variables are in play to do that. org-attach-use-inheritance defaults to 'selective which means to reference org-use-property-inheritance. org-use-property-inheritance defaults to nil which means, as you may have guessed, "Don't use inheritance".
One solution branch I explored here was to set org-use-property-inheritance to '("DIR") which means that I allow the use of property inheritance but only for the DIR property. Again, because I wanted to override the ./data directory location this was barking up the wrong tree but it's still useful to understand. If Org did allow me to change this behavior via properties this is how I could've done it.
The DIR and ID properties.
These properties can be defined at any level of the Org file, but to set them off-node you need to allow property inheritance, and DIR takes precedence over ID.
DIR means to abandon the automatic hash based attachment directory entirely and just use "this literal directory" for your attachments.
ID means "use the org-id strategy and make this string the thing you mangle to figure out where to put me under org-attach-id-dir".
In-Buffer Settings.
In-buffer Settings are interesting. I still don't know what defines what they can and can't be. There are several 'special' In-Buffer Settings, like AUTHOR, LINK, SETUPFILE, etc.
Some of these are particularly confusing because they can also be set as tree properties. But whene they're specified at the file level they seem to be referred to as Keywords.
You set these keywords via #+<KEYWORD> foo anywhere in the file. They don't need to be at the top or bottom. They don't need to be at the start of the line. If you set them anywhere (or multiple times!) they take effect for the whole thing.
The particularly relevant bit here is the #+PROPERTY: Property_Name Value Keyword. This is what really tripped me up for a good long while. To my eyes at least, #+PROPERTY read like #+<PROPERTY> but that is decidedly not the case. I'm not sure how I thought that in hindsight but the mind is a funny thing. The key (if you were doing a DIR based solution here) is that PROPERTY is the 'Keyword' and DIR is the 'Property' and ~/.foo/bar/bat is the 'Value'. So while I thought it was something like #+DIR: ~/.foo/bar/bat somewhere in the file it actually needed to be #+PROPERTY: DIR ~/.foo/bar/bat.
file-local variables
Because Org mode only exposes alteration of the org-attach-id-dir variable as a literal variable and not a property, the solution here is actually to use Local Variables. This is a mechanism where, with some specially formatted text in special locations in the file, you can set some variables every time any Emacs visits the file. This has the disadvantage of, depending on the variable, popping up a warning about the file setting some variables, but in this case it looks like org-attach-id-dir is marked as safe and so you don't get the warning.
So let's put it all together now:
If you want a DIR Property based solution:
#+PROPERTY: DIR ~/.foo/bar * An entry that will use the inherited DIR property * An entry that overrides the DIR property. :PROPERTIES: :DIR: ~/.bar/foo :END: This entry will place attachments /directly/ in =~/.bar/foo<attachment file>=, /not/ =~/.bar/foo/XX/XXXXXXXXXXX/<attachment file>=. * As far as I know this entry will /still/ use the =DIR= property because it takes precedence over =ID= :PROPERTIES: :ID: BLOOFY-FLOOFY-JUICY-GOOSEY :END: # Local Variables: # org-use-property-inheritance: (quote ("DIR")) # org-attach-use-inheritance: (quote selective) # End:
Or if you wanted to stick with org-id but wanted to change the directory prefix:
* This will use =~/.charnock/data/4B/B068CA-8948-49F1-9C27-284FAA4E8B05/<attachment>= for its attachments :PROPERTIES: :ID: 4BB068CA-8948-49F1-9C27-284FAA4E8B05 :END: # Local Variables: # org-use-property-inheritance: nil # org-attach-use-inheritance: (quote selective) # org-attach-id-dir: ~/\.charnock/data # End:
0 notes
Text

📝 File Your Income Tax Return for AY 2025–26 with Ease!
Tax season is here! Don’t let it stress you out — let SetupFiling handle your ITR filing smoothly and accurately.
✔️ Expert Assistance ✔️ Fast & Hassle-Free Filing ✔️ 100% Compliance Guaranteed
📍 Get started now: https://setupfiling.in/income-tax-return-filing-for-ay-2025-26 📞 Contact us: +91 9818209246
Leave the paperwork to us — file your return confidently!
0 notes
Text
🧾 File Your Income Tax Return for AY 2025-26 Hassle-Free! ✅ Accurate | ✅ Timely | ✅ Expert Support
Filing your ITR has never been easier! Let our experts at SetupFiling handle it all — whether you're salaried, self-employed, or a business owner.
📅 Avoid last-minute stress 📈 Maximize your refunds 🛡️ 100% Data Confidentiality
🔗 File Now: https://setupfiling.in/income-tax-return-filing-for-ay-2025-26/ 📞 Contact us: +91 9818209246
#ITRFiling#AY2025_26#IncomeTaxIndia#TaxSeason#TaxFiling#SetupFiling#IncomeTaxReturn#FinancialPlanning#FileYourITR
0 notes
Text

📢 Attention Government Employees! 📢
The Income Tax Return (ITR) filing deadline is fast approaching! ⏰ If you're a government employee, make sure to file your returns before 15th September 2025.
🚨 Why file now?
Avoid late fees and penalties.
Ensure you're eligible for refunds or tax benefits.
Get expert help in filing correctly and on time.
💼 At Setup Filing, we make the process easy and stress-free. Our experts are here to guide you through every step of the way.
📞 For assistance, call us at +91 9818209246 or
visit >>https://setupfiling.in/income-tax-return-filing-for-government-employees/
⏳ Don’t wait until the last minute! File your ITR today and stay compliant.
0 notes
Text
The deadline for Income Tax Return Filing for AY 2025-26 is here! Don’t wait till the last minute. File your ITR quickly, correctly, and stress-free with expert support.
✅ Fast & Reliable Service
✅ Hassle-Free Online Filing
✅ Expert Guidance Every Step
📞 Call us: +91 9818209246
🌐 File now: https://setupfiling.in/income-tax-return-filing-for-ay-2025-26/
#IncomeTaxReturn #ITRFiling #AY202526 #TaxFilingMadeEasy #SetupFiling

0 notes
Text
🌐 Start Importing & Exporting with Ease! 📦✈️
Want to expand your business globally? Get your Import Export Code (IEC) quickly and effortlessly with SetupFiling.in – your trusted partner for hassle-free registration.
✅ 100% Online IEC Registration ✅ No Hidden Charges ✅ Fast Processing by Experts
📞 Call Now: 9818209246 🔗 Apply Here: setupfiling.in/iec-code
💼 Whether you're a startup or a growing business, IEC is your first step to going international.
#IECCode#ImportExportBusiness#GlobalTrade#SetupFiling#BusinessGrowth#EntrepreneurIndia#ExportImport#DGFT
0 notes
Text
🚀 Start Your Business the Right Way in Assam! 🏪
Looking to register your shop or establishment in Assam hassle-free? Let the experts at SetupFiling.in take care of the paperwork while you focus on growing your business.
✅ 100% Online Process ✅ Quick & Easy Documentation ✅ Expert Support Every Step of the Way
📞 Call Now: 9818209246 🔗 Get Started Today: setupfiling.in/assam-shop-and-establishment-registration
0 notes
Text
🌍 Start Import & Export with IEC Code @ SetupFiling! 🚢
Ready to take your business global? Get your IEC (Import Export Code) today and unlock international trade opportunities! 🌐📦
✅ Mandatory for Import/Export in India ✅ One-Time Registration – Lifetime Validity ✅ Quick Process with Expert Support
💰 Affordable & Reliable 🌐 https://setupfiling.in/iec-code/ 📞 Contact Us: +91 9818209246
Let SetupFiling help you go global! 🌏
#IECCode#ImportExportIndia#SetupFiling#InternationalBusiness#StartupIndia#BusinessExpansion#ExportFromIndia#GoGlobal#EntrepreneurIndia
0 notes