#Tp-link extender setup guide
Explore tagged Tumblr posts
Visit Tumblr Blog
Explore Tumblr blogs with no restrictions, modern design and the best experience.
Last Seen Tumblr Blogs


Fun Fact
1,644 Tumblr posts in 1 second.
Text
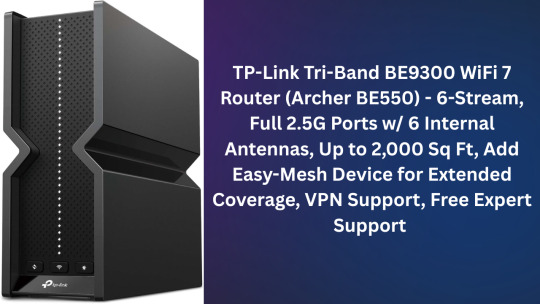
TP-Link Tri-Band BE9300 WiFi 7 Router (Archer BE550) Review (2025): Fast, Future-Ready, and Totally Worth It 🚀
Let’s be real—dealing with spotty Wi-Fi in 2025 feels like using a flip phone in the age of smartphones. Between smart TVs, Zoom calls, and half a dozen streaming devices, our home networks are stretched thin. That’s exactly why I upgraded to the TP-Link Archer BE550 (BE9300)—and honestly, I wish I had done it sooner.
If you're looking for a router that can keep up with your connected life (without costing more than your rent), stick with me. I tested the BE550 across my entire house, loaded it with devices, and pushed it to its limits. Here's what I found.
<< Click Here Get The Product -20% Discount >>
About this item
BE9300 Tri-Band Wi-Fi 7 Speeds: Archer BE550 features Multi-Link Operation, Multi-RUs, 4K-QAM, and 320 MHz channels, providing blazing-fast speeds of 5760 Mbps (6 GHz band), 2880 Mbps (5 GHz band), and 574 Mbps (2.4 GHz band).
Unmatched Performance for Streaming and Gaming: Ensures seamless 4K/8K streaming, engaging AR/VR gaming, and ultra-fast downloads for an optimal user experience.
Extend Your Coverage with EasyMesh: Add EasyMesh-compatible routers, range extenders, and wireless powerline adapters to form a seamless whole-home network that eliminates dead zones while reducing signal drops and lag when moving throughout your home.
Full 2.5G WAN & LAN Ports for Future-Proof Networking: Archer BE550 is equipped with one 2.5G WAN port and four 2.5G LAN ports, enabling peak device performance and offering an ideal solution for future-proofing your home network.
Enhanced Experience with Premium Components: Our proprietary Wi-Fi optimization technology, combined with six strategically positioned antennas and Beamforming, ensures higher capacity, stronger and more reliable connections, and reduced interference.
Buy with confidence - Our highly trained support team is ready to help resolve any setup or WiFi issues at [email protected]
<< Click Here Get The Product -20% Discount >>
Product information
Features & Specs
Other Special Features of the Product QoS, Guest Mode, Access Point Mode, WPS, Remote Access
Frequency Band Class Tri-Band
Compatible Devices Gaming Console, Personal Computer, Tablet, Smart Television, Smartphone
Frequency 6 GHz
Antenna Location Home, Gaming
Connectivity Technology Wi-Fi (802.11ac, 802.11ax, 802.11n, 802.11g, 802.11be), Ethernet, USB
Antenna Type Internal
Operating System IOS, Android, Windows, Mac OS
Security Protocol WPA2, WPA3, WPA/WPA2-Enterprise (802.1x)
Number of Ports 6
Control Method App
Data Transfer Rate 9300 Megabits Per Second
LAN Port Bandwidth 2.5 Gbps
Voltage 12 Volts
Controller Type App Control, Push Button
Maximum Upstream Data Transfer Rate 5760 Megabits Per Second
Number of Antennas 6
Coverage Up to 2000 square feet
Is Modem Compatible Yes
<< Click Here Get The Product -20% Discount >>
Item details
Brand TP-Link
Model Name Archer BE550
Built-In Media Power Adapter, RJ45 Ethernet Cable, Quick Installation Guide, Wi-Fi 7 Router Archer BE550
Model Number Archer BE550
UPC 840030708367
Global Trade Identification Number 00840030708367
Manufacturer TP-Link
Customer Reviews 4.2 4.2 out of 5 stars (5,984) 4.2 out of 5 stars
Best Sellers Rank #20 in Computer Routers
ASIN B0CJSNSVMR
Item Height 7.99 inches
Warranty Description 2 year manufacturer
Measurements
Item Weight 2.5 Pounds
Item Dimensions L x W x H 9.12"L x 2.99"W x 7.99"H
Additional details
Color Black
Warranty & Support
Amazon.com Return Policy:You may return any new computer purchased from Amazon.com that is "dead on arrival," arrives in damaged condition, or is still in unopened boxes, for a full refund within 30 days of purchase. Amazon.com reserves the right to test "dead on arrival" returns and impose a customer fee equal to 15 percent of the product sales price if the customer misrepresents the condition of the product. Any returned computer that is damaged through customer misuse, is missing parts, or is in unsellable condition due to customer tampering will result in the customer being charged a higher restocking fee based on the condition of the product. Amazon.com will not accept returns of any desktop or notebook computer more than 30 days after you receive the shipment. New, used, and refurbished products purchased from Marketplace vendors are subject to the returns policy of the individual vendor. Manufacturer’s warranty can be requested from customer service. Click here to make a request to customer service.
💰 So… Is It Worth the Money?
Absolutely. For under $250, the Archer BE550 gives you:
Future-proof tech
Excellent speeds across all bands
Full multi-gig wired ports
Reliable coverage
Effortless setup
And a clean modern look
Compared to the $400+ premium routers out there, this one hits the sweet spot between price and performance. Unless you absolutely need 10G or enterprise-level features, the BE550 will do everything you need—and then some.
🧭 Final Verdict

👉 Bottom Line:
If you're ready to future-proof your home network, the TP-Link Archer BE550 is a no-brainer. It’s fast, reliable, sleek, and surprisingly affordable for a Wi-Fi 7 router.
You won’t find a better combo of speed, simplicity, and value at this price point. Whether you’re a gamer, streamer, or just tired of laggy Wi-Fi, this router delivers exactly what it promises.
<< Click Here Get The Product -20% Discount >>
#wifi 7 router#tp-link tri-band be9300 wifi 7 router archer be550#best wifi 7 router#tp-link tri-band be9300 wifi 7 router#best wifi 7 routers#wifi 7#tplink wifi 7 router#tri-band router#best wifi router#wifi 7 gaming router#tp-link tri-band be9300#be9300 wifi 7 review#be9300 tri-band wi-fi 7 router#tp link wifi 7#wifi 7 speed test#wifi 7 routers#wifi 7 router review#wifi router#tp-link wifi 7 router#wi-fi 7 router
0 notes
Text
How to Use Tplinkextender.net ?
If you're having trouble accessing Tplinkextender.net, don't worry! Our guide makes it easy to log into your TP-Link extender and get your network running. Whether it’s a setup issue or fixing a weak signal, we’ve got you covered. For further assistance, contact us through our website for expert help to resolve any problems quickly!

0 notes
Text
How to Reset TP Link Extender: A Step-by-Step Guide!
Experiencing connectivity issues? Performing a How to Reset TP Link Extender can help. Locate the reset button on your extender, press & hold it for about 10 seconds until the LED indicators flash. This restores factory settings, allowing for a fresh setup. Need assistance with the process? Chat with our experts for step-by-step guidance!
0 notes
Text
Achieve Seamless Coverage With TP Link Extender Setup
Got your hands on TP link range extender and thus want a simplified and straightforward setup steps? If the answer is yes, then you are surely at the right destination. In this guide we'll share two most commonly used TP link extender setup methods. One is extremely quick that just takes less than 10 minutes. It is the WPS method. Whereas if you want a more hands on approach then Web GUI method is for you. Both the setup methods are extremely easy and can be performed without any expert help. So let's not waste any more time and dig straight into the process.
✓ Quick Setup Via WPS
Begin the process of TP Link extender setup by activating the range extender. Make sure you do this activation nearby to the host router. Meanwhile the extender is booting up, check the status of the host router. It should be actively working.
Moving further, first push the WPS key on the TP link range extender. In case the WPS LED didn't blink then push and hold the WPS key until the LED starts blinking.
Now it's time to push the WPS key on the host router. Here also make sure the WPS LED starts to blink. As this is the indication that the WPS function is enabled and the device is looking for its pair. Additionally remember, as soon as you push the WPS key on the TP link extender do not wait. Rather immediately push the WPS key on the router as well.
Now let the gadgets complete the synchronisation. As the TP Link extender setup process completes the wireless signal LED will light up. In case it doesn't light up, then it means the WPS connection has failed. So you need to redo the setup all over again. But in case everything went smooth, then it's time to relocate the extender to its desired location.
For placement select the area which is halfway from the host router and the area where you need coverage. Now as you replug the range extender, you’ll see both WPS LED as well as wireless signal LED light up. This indicates a successful setup.
✓ Manual Setup Using Web Browser
For conducting a smooth TP Link extender setup first collect the basic components and details. You need a smart gadget for initiating the setup. It can be anything like your smartphone, laptop, computer or an iPad. Next for a stable connectivity to the extender you need an Ethernet wire. Additionally, collect the username and password of your existing wifi network whose reach you want to extend. Further we advise you to keep the user manual by your side as it contains every little detail that you might need during the setup process. As you collect all these components and details, feel free to start with the setup steps:
✓ Activate The TP Link Extender
Begin the process by first bringing in the range extender to the same area where your host router is placed. Now avoiding any physical barriers plug in the range extender to activate it properly. Once done, now bring in the smart gadget. For the TP Link extender setup you need to connect this smart gadget to the extender. Now there are two methods for the same.
Either you can connect wirelessly or through ethernet wire. The details for wireless connection are written clearly on the product label which is stuck on the back panel of the extender. Additionally the details are written in the quick user manual as well. Once you build a connection between the TP Link extender and smart gadget, you can move to the next step which is Log In.
✓ Log In
To login first launch a web browser of your choice. You can go with Internet Explorer, Safari, Firefox or Google Chrome as well. Now hop on to the address field of the browser. In it fill up http://tplinkrepeater.net and press Enter. In case the web address doesn't work, then use another alternative which is http://192.168.0.254. As you press the enter key, a window pops up asking you to give in some details. So you need to enter your username and password. By default it is set to admin which you need to use in lower case only.
✓ Follow The Prompts
To complete the TP Link extender setup, now you need to follow the on-screen prompts one by one. So start by selecting the Quick Setup option and hit Next. Moving further, pick your region and hit Next. Now the web interface will automatically start scanning for the available networks. From the list choose your network name and give in its security key (password). Finally review all your settings and tap on Finish if it's appropriate. As you do so the extender will reboot itself. As it applies the changes.
Lastly, check the wireless signal LED to know whether the setup is successful or not.
0 notes
Photo
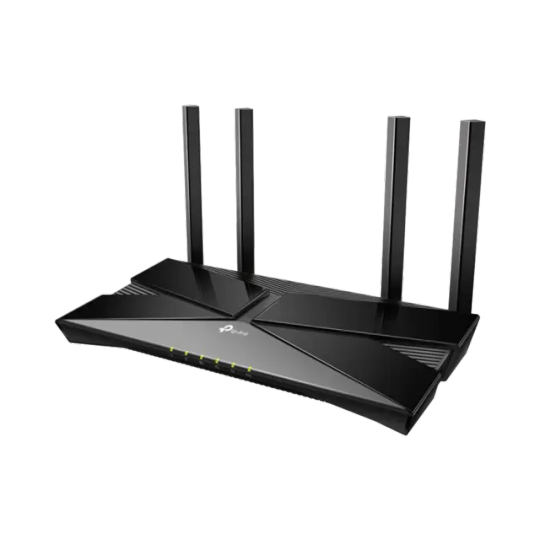
TP-Link Archer AX20 AX1800 Dual Band Wifi 6 Router FEATURES: Dual-Band Wi-Fi 6: Equipped with the latest wireless technology, Wi-Fi 6, for faster speeds, greater capacity, and reduced network congestion Next-Gen 1.8Gbps Speeds: Enjoy smooth streaming, downloading, and gaming all without buffering with Wi-Fi speeds of 1.8Gbps Connect More Devices: Wi-Fi 6 technology communicates more data to more devices using revolutionary OFDMA technology while simultaneously reducing lag Quad-Core Processing: The 1.5GHz quad-core CPU ensures communications between your router and all connected devices are smooth Extensive Coverage: Beamforming, independent FEM, and four antennas combine to deliver focused reception to devices far away Increased Battery Life: Target Wake Time technology reduces your devices’ power consumption to extend their battery life USB Easy Sharing: A USB 2.0 Port enables easy file sharing within your network or building private Cloud Storage Easy Setup: Set up your router in minutes with the powerful TP-Link Tether App Backward Compatible: Supports all previous 802.11 standards and all Wi-Fi devices WIRELESS Standards Wi-Fi 6 IEEE 802.11ax/ac/n/a 5 GHz IEEE 802.11ax/n/b/g 2.4 GHz WiFi Speeds AX1800 5 GHz: 1201 Mbps (802.11ax) 2.4 GHz: 574 Mbps (802.11ax) WiFi Range 3 Bedroom Houses 4× Fixed High-Performance Antennas Multiple antennas form a signal-boosting array to cover more directions and large areas Beamforming Concentrates wireless signal strength towards clients to expand WiFi range High-Power FEM Improves transmission power to strengthen signal coverage WiFi Capacity High Dual-Band Allocate devices to different bands for optimal performance OFDMA Simultaneously communicates with multiple Wi-Fi 6 clients Airtime Fairness Improves network efficiency by limiting excessive occupation 4 Streams Connect your devices to more bandwidth Working Modes Router Mode Access Point Mode HARDWARE Processor 1.5 GHz Quad-Core CPU Ethernet Ports 1× Gigabit WAN Port 4× Gigabit LAN Ports USB Support 1× USB 2.0 Port Supported Partition Formats: NTFS, exFAT, HFS+, FAT32 Supported Functions: Apple Time Machine FTP Server Media Server Samba Server Buttons WPS/Wi-Fi Button Power On/Off Button LED On/Off Button Reset Button Power 12 V ⎓ 1.5 A SECURITY WiFi Encryption WPA WPA2 WPA3 WPA/WPA2-Enterprise (802.1x) Network Security SPI Firewall Access Control IP & MAC Binding Application Layer Gateway Guest Network 1× 5 GHz Guest Network 1× 2.4 GHz Guest Network VPN Server OpenVPN PPTP SOFTWARE Protocols IPv4 IPv6 Parental Controls URL Filtering Time Controls WAN Types Dynamic IP Static IP PPPoE PPTP L2TP Quality of Service QoS by Device Cloud Service Auto Firmware Upgrade OTA Firmware Upgrade TP-Link ID DDNS NAT Forwarding Port Forwarding Port Triggering DMZ UPnP IPTV IGMP Proxy IGMP Snooping Bridge Tag VLAN DHCP Address Reservation DHCP Client List Server DDNS TP-Link NO-IP DynDNS Management Tether App Webpage PHYSICAL Dimensions (W×D×H) 10.2 × 5.3 ×1.5 in (260.2 × 135.0 × 38.6 mm) Package Contents Wi-Fi Router Archer AX20 Power Adapter RJ45 Ethernet Cable Quick Installation Guide OTHER System Requirements Internet Explorer 11+, Firefox 12.0+, Chrome 20.0+, Safari 4.0+, or other JavaScript-enabled browser Cable or DSL Modem (if needed) Subscription with an internet service provider (for internet access) Certifications FCC, CE, RoHS Environment Operating Temperature: 0℃~40℃ (32℉ ~104℉) Storage Temperature: -40℃~70℃ (-40℉ ~158℉) Operating Humidity: 10%~90% non-condensing Storage Humidity: 5%~90% non-condensing TEST DATA WiFi Transmission Power CE:
0 notes
Text
Professional guide to the TP-link cpe540 setup!
For an easy TP-Link CPE540 Setup process, open the web browser and type the 192.168.0.254 IP address in the browser bar. Now, enter your admin credentials and you will reach the setup wizard. To configure the other settings, go to the Basic & Advanced settings. For more information, approach us!
0 notes
Text
can you load nord vpn to router
🔒🌍✨ Get 3 Months FREE VPN - Secure & Private Internet Access Worldwide! Click Here ✨🌍🔒
can you load nord vpn to router
Nord VPN router compatibility
NordVPN is one of the leading names in the realm of virtual private networks (VPNs), offering users enhanced security, privacy, and access to geo-restricted content. For individuals seeking to safeguard their online activities across multiple devices, including routers, NordVPN provides comprehensive compatibility options.
One of the key advantages of NordVPN is its extensive router compatibility. With NordVPN, users can easily configure their VPN connection directly on their routers, thereby securing the entire network and all connected devices in one fell swoop. This means that devices such as smart TVs, gaming consoles, and IoT devices can also benefit from the protection and anonymity provided by NordVPN.
NordVPN supports a wide range of router brands and models, making it accessible to a broad spectrum of users. Whether you have a router from Asus, Linksys, Netgear, TP-Link, or another major manufacturer, chances are NordVPN is compatible with it. Additionally, NordVPN offers user-friendly setup guides and tutorials to assist individuals in configuring their routers for optimal VPN usage.
By leveraging NordVPN's router compatibility, users can enjoy seamless protection without the need to install the VPN client on each individual device. This not only simplifies the user experience but also ensures that all devices connected to the network are shielded from cyber threats and data surveillance.
Furthermore, NordVPN's router compatibility extends beyond security concerns, enabling users to bypass geographic restrictions and access region-locked content on various streaming platforms. Whether you're at home or on the go, NordVPN empowers you to enjoy a secure and unrestricted internet experience across all your devices.
In conclusion, NordVPN's robust router compatibility reinforces its position as a top-tier VPN provider, offering users unparalleled convenience, security, and freedom online.
Setting up Nord VPN on router
Setting up Nord VPN on your router can provide enhanced security and privacy for all devices connected to your network. By configuring your router with Nord VPN, you can ensure that all internet traffic from devices such as laptops, smartphones, smart TVs, and gaming consoles is encrypted and secure.
To set up Nord VPN on your router, you will first need to ensure that your router is compatible with the VPN service. Most modern routers are compatible, but it's always a good idea to check Nord VPN's website for a list of supported routers.
Once you have confirmed compatibility, you can proceed with the setup by logging into your router's admin panel. From there, you will need to locate the VPN section and enter the necessary configuration details provided by Nord VPN. This usually includes server addresses, login credentials, and encryption settings.
After saving the configuration settings, you can connect your router to Nord VPN's servers. Once connected, all internet traffic from devices on your network will be routed through the VPN, ensuring that your online activities are private and secure.
Setting up Nord VPN on your router can also be beneficial for accessing geo-restricted content and bypassing censorship. By connecting to servers in different countries, you can unblock websites and streaming services that may be restricted in your region.
Overall, setting up Nord VPN on your router is a relatively simple process that can offer a wide range of benefits in terms of security, privacy, and online freedom.
Benefits of using Nord VPN on router
Title: Unlocking the Power of NordVPN on Your Router: A Gateway to Online Freedom
In the digital age, safeguarding your online privacy and security has become paramount. With cyber threats looming large and privacy concerns escalating, using a Virtual Private Network (VPN) has become indispensable. NordVPN stands out as a leading provider, offering robust features and uncompromising security. While using NordVPN on individual devices is common, integrating it directly into your router offers a plethora of benefits that elevate your online experience to new heights.
Comprehensive Protection: By installing NordVPN on your router, every device connected to your home network receives instant protection. This includes smartphones, tablets, laptops, smart TVs, gaming consoles, and more. It ensures that all your internet traffic is encrypted and routed through NordVPN's secure servers, shielding your data from prying eyes.
Enhanced Security: With NordVPN on your router, you fortify your network against cyber threats such as malware, phishing attacks, and data breaches. Its advanced encryption protocols and cutting-edge security features create an impenetrable barrier, safeguarding your sensitive information and preserving your anonymity online.
Access to Geo-Restricted Content: One of the standout benefits of using NordVPN on your router is the ability to bypass geo-blocks and access region-locked content effortlessly. Whether you're streaming your favorite shows, accessing restricted websites, or gaming without limitations, NordVPN empowers you to explore the internet without boundaries.
Seamless Connectivity: With NordVPN running on your router, you no longer need to manually connect each device to the VPN individually. This streamlines the process and ensures seamless connectivity for all your devices, eliminating the hassle of toggling VPN settings and providing uninterrupted protection round the clock.
Cost-Effective Solution: Opting for NordVPN on your router offers a cost-effective solution compared to purchasing multiple VPN subscriptions for individual devices. It allows you to protect numerous devices simultaneously under a single subscription, saving you both time and money in the long run.
In conclusion, integrating NordVPN into your router amplifies your online security, grants you unrestricted access to content, and simplifies the VPN experience across all your devices. It's a smart investment that offers peace of mind in an increasingly interconnected world.
Router specifications for Nord VPN installation
Setting up NordVPN on your router can provide enhanced security and privacy for all devices connected to your network. However, not all routers are compatible with NordVPN, so it's crucial to consider the specifications before installation.
Firstly, ensure that your router supports VPN client capabilities. Look for routers that are compatible with OpenVPN, as NordVPN primarily uses this protocol for its connections. Additionally, check if your router allows for manual configuration of VPN settings, as this will be necessary for setting up NordVPN.
Another important specification to consider is the processor speed and memory of your router. NordVPN encryption can put a strain on the router's resources, so a powerful processor and ample memory are essential for smooth performance. Aim for routers with at least a dual-core processor and 256MB of RAM for optimal operation.
Furthermore, the firmware of your router plays a crucial role in VPN compatibility. Routers running custom firmware like DD-WRT, Tomato, or AsusWRT are often easier to configure for VPN use, including NordVPN. Make sure to check NordVPN's website for specific firmware compatibility before proceeding with installation.
Additionally, pay attention to the number and type of VPN connections supported by your router. NordVPN allows for simultaneous connections on multiple devices, so ensure your router can handle the desired number of connections without compromising performance.
Lastly, consider the availability of dedicated VPN setup guides and support for your router model. NordVPN provides detailed instructions for configuring various routers, but having readily available resources specific to your router can simplify the installation process.
By carefully reviewing and considering these router specifications, you can ensure a smooth and successful installation of NordVPN, providing comprehensive security and privacy for your entire network.
Enhancing security with Nord VPN on router
Enhancing Security with NordVPN on Router
In the digital age, protecting your online privacy and data security is paramount. One of the most effective tools to achieve this is by using a reliable VPN service like NordVPN on your router. By configuring your router to use NordVPN, you can encrypt all the internet traffic flowing through your network, thus providing an additional layer of security for all devices connected to it.
One of the primary benefits of using NordVPN on your router is that it secures devices that do not natively support VPN connections. This means that smart TVs, gaming consoles, IoT devices, and any other gadgets connected to your network can benefit from the VPN encryption without the need for individual setup on each device. This comprehensive protection ensures that all your internet activities are shielded from prying eyes and potential cyber threats.
Moreover, by encrypting your internet traffic with NordVPN, you can bypass geographical restrictions and access content that may be blocked in your region. This can be particularly useful for streaming services, allowing you to unlock a world of entertainment options without compromising your security and privacy.
Setting up NordVPN on your router is a straightforward process that typically involves installing custom firmware provided by NordVPN and configuring the settings through the router's admin panel. Once set up, the VPN connection is established at the router level, ensuring that all data transmitted between your devices and the internet is encrypted and secure.
In conclusion, enhancing security with NordVPN on your router is a proactive step towards safeguarding your online activities and protecting your sensitive information. By utilizing the robust encryption and advanced security features offered by NordVPN, you can enjoy a safer and more private browsing experience across all your connected devices.
0 notes
Text
🔒🌍✨ Get 3 Months FREE VPN - Secure & Private Internet Access Worldwide! Click Here ✨🌍🔒
can proton vpn be use with a router
ProtonVPN router compatibility
Title: Exploring ProtonVPN Router Compatibility: A Comprehensive Guide
In the realm of digital privacy and security, VPNs (Virtual Private Networks) have emerged as indispensable tools. ProtonVPN stands out as a robust option, known for its commitment to user privacy and stringent security measures. However, for users seeking to extend VPN protection to their entire network, compatibility with routers becomes a crucial consideration.
ProtonVPN offers extensive router compatibility, allowing users to safeguard all devices connected to their home or office network. The service supports a wide range of router models, ensuring flexibility for users with diverse setups. Whether you have a mainstream router from manufacturers like Asus, Linksys, Netgear, or TP-Link, or you opt for a less common brand, ProtonVPN likely has you covered.
Setting up ProtonVPN on your router is a straightforward process, typically involving installing custom firmware or configuring the VPN directly through the router settings. The ProtonVPN website provides detailed guides and tutorials for various router models, making the setup process accessible even for those with limited technical expertise.
By configuring ProtonVPN on your router, you can encrypt all internet traffic originating from devices connected to your network. This includes smartphones, tablets, smart TVs, gaming consoles, and IoT (Internet of Things) devices, providing comprehensive protection against cyber threats and surveillance.
Moreover, routing traffic through a VPN can bypass geo-restrictions, allowing access to region-locked content on streaming platforms and websites. Whether you're concerned about privacy, security, or accessing global content, ProtonVPN's router compatibility offers a versatile solution.
In conclusion, ProtonVPN's compatibility with a wide array of router models empowers users to fortify their entire network with top-tier encryption and anonymity. By extending VPN protection to all connected devices, users can enjoy peace of mind knowing their online activities are shielded from prying eyes.
Setting up ProtonVPN on router
Setting up ProtonVPN on your router is a smart way to ensure all devices connected to your network are protected by a secure VPN connection. ProtonVPN offers robust encryption and privacy features, making it an excellent choice for safeguarding your online activities.
To begin the setup process, you'll first need to ensure your router is compatible with ProtonVPN. Most modern routers support VPN configurations, but it's always a good idea to check the manufacturer's specifications or documentation to confirm compatibility.
Once you've verified compatibility, the next step is to access your router's settings. This typically involves entering your router's IP address into a web browser and logging in with your administrator credentials.
Once logged in, navigate to the VPN settings section of your router's interface. Here, you'll need to input the necessary ProtonVPN server information, including the server address, username, and password provided by ProtonVPN.
After entering the server information, you'll have the option to configure additional settings such as encryption protocols and DNS leak protection. It's recommended to enable features like kill switch functionality to ensure that your internet connection is automatically severed if the VPN connection drops.
Once you've completed the configuration process, save your settings and restart your router to apply the changes. Once the router has restarted, all devices connected to your network should now be protected by ProtonVPN.
Setting up ProtonVPN on your router offers a convenient way to protect all of your devices with a single VPN connection. By following these steps, you can enjoy enhanced privacy and security for your online activities.
Router VPN integration with ProtonVPN
Title: Enhancing Online Security: Integrating Your Router with ProtonVPN
In an age where online privacy is paramount, integrating a VPN (Virtual Private Network) with your router has become a crucial step in safeguarding your digital footprint. ProtonVPN, renowned for its commitment to privacy and security, offers users a seamless solution to enhance their online protection.
Router VPN integration with ProtonVPN extends the benefits of VPN encryption to all devices connected to your home network. This means that whether you're streaming content on your smart TV, browsing the web on your laptop, or conducting sensitive transactions on your smartphone, your data remains encrypted and your identity concealed.
The integration process is designed to be user-friendly, allowing even those with limited technical expertise to set it up effortlessly. ProtonVPN offers comprehensive guides and tutorials to assist users through the setup process, ensuring a smooth transition to a more secure online environment.
One of the primary advantages of router VPN integration with ProtonVPN is the ability to bypass geo-restrictions and access content from around the globe. By routing your internet traffic through ProtonVPN's servers, you can unlock a world of content that may otherwise be unavailable in your region.
Moreover, by encrypting your internet connection at the router level, you mitigate the risk of data breaches and cyberattacks targeting vulnerable devices on your network. This added layer of security is invaluable in safeguarding sensitive information and maintaining your privacy in an increasingly interconnected world.
In conclusion, integrating your router with ProtonVPN is a proactive step towards fortifying your online security and preserving your digital privacy. With its user-friendly interface, robust encryption protocols, and commitment to privacy, ProtonVPN offers a reliable solution for individuals seeking to enhance their online protection.
ProtonVPN router configuration guide
Title: ProtonVPN Router Configuration Guide: Securing Your Network with Ease
In an era where online privacy and security are of paramount importance, using a VPN (Virtual Private Network) service like ProtonVPN has become essential. While ProtonVPN offers user-friendly apps for various devices, configuring it directly on your router provides a streamlined solution to protect all connected devices within your network. Here’s a comprehensive guide to configuring ProtonVPN on your router:
Router Compatibility Check: Before proceeding, ensure that your router supports VPN configuration. Most modern routers do, but it’s always wise to double-check compatibility with your specific router model.
Access Router Settings: Access your router’s settings by typing its IP address into a web browser. Typically, this address is something like 192.168.1.1 or 192.168.0.1. You’ll need to enter your router’s username and password to log in.
Choose VPN Protocol: Navigate to the VPN section of your router’s settings and select the appropriate VPN protocol. ProtonVPN supports multiple protocols including OpenVPN, IKEv2/IPSec, and PPTP. OpenVPN is often recommended for its security and reliability.
Enter ProtonVPN Configuration Details: Input the ProtonVPN server address, your ProtonVPN username, and password into the designated fields. You can find this information on the ProtonVPN website under your account settings.
Save and Connect: Once you’ve entered the necessary information, save your settings and initiate the connection to the ProtonVPN server. Your router will establish a secure VPN connection, encrypting all data transmitted to and from your network.
Test Your Connection: After the configuration process is complete, it’s advisable to test your VPN connection to ensure everything is functioning correctly. You can do this by visiting a website like whatismyip.com to confirm that your IP address reflects the location of your chosen ProtonVPN server.
By following these steps, you can easily configure ProtonVPN on your router, providing comprehensive protection for all devices connected to your network. Enjoy enhanced privacy and security as you browse the internet with peace of mind.
Using ProtonVPN with a router
ProtonVPN is a reputable VPN service that offers advanced security features to protect your online privacy. By combining ProtonVPN with a router, you can enjoy the benefits of a VPN across all devices connected to your network. This means that every device, from smartphones to laptops to smart home gadgets, can benefit from the increased security and anonymity afforded by ProtonVPN.
Setting up ProtonVPN on your router ensures that all internet traffic passing through the router is encrypted and routed through ProtonVPN servers. This prevents your ISP, hackers, or any other malicious entities from monitoring your online activities or tracking your browsing habits. With your IP address masked by the VPN server's address, you can access geo-restricted content, bypass censorship, and engage in online activities without the fear of being surveilled.
Using ProtonVPN with a router also allows you to secure devices that do not natively support VPN connections. This includes smart TVs, gaming consoles, and Internet of Things (IoT) devices, which can all benefit from the increased security provided by ProtonVPN.
While setting up ProtonVPN on a router may require technical knowledge, ProtonVPN offers detailed guides and tutorials to assist you through the process. Additionally, many modern routers come with built-in VPN support, making the setup easier for users looking to enhance their network security.
In conclusion, integrating ProtonVPN with a router is a powerful way to extend VPN protection to all devices on your network, ensuring that your online activities remain secure and private.
0 notes
Text
can you use express vpn on any router
can you use express vpn on any router
ExpressVPN router compatibility
Title: Understanding ExpressVPN Router Compatibility: Enhance Your Online Security
In the digital age, safeguarding your online privacy and security is paramount. Utilizing a VPN (Virtual Private Network) like ExpressVPN offers a robust solution, encrypting your internet connection and anonymizing your online activities. While using VPN software on individual devices is common, integrating it directly into your router provides comprehensive protection for all connected devices. However, it's essential to ensure compatibility between ExpressVPN and your router to leverage this advanced security feature.
ExpressVPN supports a wide range of router models, enabling users to set up VPN protection at the network level. Popular router brands such as Asus, Linksys, Netgear, and TP-Link are compatible with ExpressVPN firmware or offer native support for the VPN service. Whether you have a traditional router or a newer model, ExpressVPN offers detailed guides and tutorials to facilitate smooth installation and configuration.
Router compatibility ensures seamless integration of ExpressVPN's features, including encryption protocols like OpenVPN, ensuring maximum security without compromising internet speed. By encrypting all data transmitted through the router, ExpressVPN shields connected devices from cyber threats, ISP surveillance, and geo-restrictions, granting unrestricted access to online content worldwide.
Moreover, utilizing ExpressVPN at the router level extends VPN protection to devices that do not support VPN installation, such as smart TVs, gaming consoles, and IoT devices. This comprehensive approach fortifies your entire network against potential vulnerabilities, safeguarding sensitive information and preserving anonymity online.
Before purchasing a router or subscribing to ExpressVPN, it's advisable to verify compatibility to ensure a seamless and secure VPN experience. With ExpressVPN router compatibility, users can enjoy enhanced online security and privacy across all connected devices, empowering them to navigate the digital landscape with confidence and peace of mind.
VPN router setup options
Setting up a VPN on your router provides an added layer of security and privacy to your internet connection. With a VPN router, all devices connected to your network will automatically benefit from the VPN protection, without needing individual installations on each device. There are a few options when it comes to setting up a VPN on your router.
One option is to purchase a pre-configured VPN router. Some companies offer routers that are specifically designed to work with VPN services, making the setup process a breeze. All you need to do is sign up for a compatible VPN service, enter your credentials into the router settings, and you're good to go.
Another option is to flash your existing router with VPN-compatible firmware. This option is more technical and requires some research to ensure compatibility with your router model. Popular firmware options like DD-WRT, Tomato, or OpenWRT can be installed on many routers, enabling them to support VPN connections.
If you're not comfortable flashing firmware yourself, you can also purchase a router that is compatible with VPN client apps. Some router models come with built-in support for popular VPN services, allowing you to easily configure and connect to a VPN directly from the router settings.
Whichever option you choose, setting up a VPN on your router is a great way to secure your internet connection and protect your privacy. Make sure to choose a reliable VPN service provider and follow the setup instructions carefully to enjoy a safe and private browsing experience for all your connected devices.
Router VPN service integration
Router VPN service integration refers to the process of installing and configuring a Virtual Private Network (VPN) service directly on your router. This setup allows all devices connected to the router to benefit from the VPN protection without the need for individual installations on each device.
The integration of a VPN service at the router level offers numerous advantages. Firstly, it effectively secures the internet connection of all devices within the network, enhancing overall digital privacy and security. By encrypting data traffic, VPNs prevent unauthorized access and monitoring, particularly important when using public Wi-Fi networks.
Moreover, router VPN integration enables users to bypass geo-restrictions and access region-locked content on devices that do not support VPN connections natively. This means streaming services, websites, and online platforms can be accessed from anywhere in the world, expanding the scope of online content available to users.
Setting up a VPN service on a router requires minimal technical expertise and can generally be done by following step-by-step instructions provided by the VPN service provider. Users generally access the router's settings through a web interface to input the VPN configuration details, such as server address and login credentials.
Overall, router VPN service integration offers a convenient and comprehensive solution for ensuring online privacy, security, and unrestricted access to global content for all connected devices within a network. It is a practical option for individuals and organizations seeking to fortify their online presence and enhance their internet experience.
Using ExpressVPN with any router
Title: Maximizing Security and Privacy: How to Use ExpressVPN with Any Router
In an era where online privacy and security are of paramount importance, utilizing a VPN (Virtual Private Network) has become essential. ExpressVPN stands out as a leading provider, offering robust encryption and worldwide server coverage. However, to ensure comprehensive protection for all devices in your network, integrating ExpressVPN directly into your router is a savvy strategy.
One significant advantage of configuring ExpressVPN at the router level is its ability to safeguard all connected devices simultaneously. Whether it's smartphones, laptops, smart TVs, or gaming consoles, every gadget benefits from the VPN's encryption, shielding your data from potential threats and surveillance.
Setting up ExpressVPN with your router is surprisingly straightforward, regardless of the router model you own. ExpressVPN provides comprehensive guides and support for various routers, ensuring compatibility and ease of installation. By following the step-by-step instructions provided by ExpressVPN, users can seamlessly establish a secure connection in a matter of minutes.
Moreover, integrating ExpressVPN at the router level eliminates the need to install individual VPN apps on each device, streamlining the process and reducing potential compatibility issues. This approach also allows for seamless VPN protection across devices that typically do not support VPN applications, such as gaming consoles and smart home devices.
Beyond security and privacy, using ExpressVPN with any router offers additional benefits, including access to geo-restricted content and improved internet speeds. By connecting to servers in different countries, users can bypass geographical restrictions and unlock content libraries from around the world.
In conclusion, leveraging ExpressVPN with your router is a proactive measure to fortify your online defenses and safeguard your privacy. With straightforward setup procedures and comprehensive protection for all connected devices, integrating ExpressVPN into your router ensures a seamless and secure online experience.
Broadband router VPN configuration
A broadband router VPN configuration allows users to secure their internet connection and protect their online privacy. By setting up a VPN (Virtual Private Network) on a broadband router, all devices connected to the network can benefit from encrypted data transmission and access to geo-restricted content.
To configure a VPN on a broadband router, users typically need to access the router's settings dashboard through a web browser. From there, they can enter the VPN credentials provided by their VPN service provider. The process may vary depending on the router model and the VPN service being used, but most VPN providers offer step-by-step guides for router configuration.
Once the VPN is configured on the router, all devices connected to the network, such as computers, smartphones, smart TVs, and gaming consoles, can automatically connect to the VPN server. This means that users can browse the internet anonymously, bypass censorship or geo-restrictions, and protect their sensitive data from cyber threats.
It is important to choose a reliable VPN service provider that offers strong encryption protocols, a large server network, and good customer support. Additionally, users should regularly update their router's firmware to ensure optimal security and performance.
In conclusion, setting up a VPN on a broadband router is a convenient way to enhance online security and privacy for all devices within a household or a small business network. By following the necessary steps and best practices, users can enjoy a safer and more unrestricted internet experience.
0 notes
Text
For the Tp-link range extender TLWA850RE Setup, first, open the web browser and type the tplinkrepeater.net web address in the URL bar. Now, log in to the extender using valid admin details. Hereon, click on ‘Quick Setup’ and then click next. Afterward, go with the on-screen guidelines. For a detailed process, visit our website!
#Tp-link range extender TLWA850RE Setup#TP-Link TLWA850RE extender Setup#TLWA850RE WiFi extender Setup
0 notes
Text
can nordvpn be used on a vpn enabled router
🔒🌍✨ Get 3 Months FREE VPN - Secure & Private Internet Access Worldwide! Click Here ✨🌍🔒
can nordvpn be used on a vpn enabled router
NordVPN router compatibility
NordVPN is one of the leading names in the VPN industry, known for its robust security features and extensive server network. For users looking to protect all devices connected to their home network, NordVPN router compatibility is a crucial consideration.
Fortunately, NordVPN offers support for a wide range of router models, making it easy for users to secure their entire network with just one subscription. Whether you have a popular router brand like Asus, Netgear, Linksys, or TP-Link, chances are NordVPN supports it.
Setting up NordVPN on your router provides several benefits. Firstly, it ensures that all devices connected to your Wi-Fi network, including smartphones, laptops, smart TVs, and gaming consoles, are automatically protected by the VPN. This means enhanced privacy and security for all your online activities, including browsing, streaming, and gaming.
Moreover, configuring NordVPN on your router allows you to bypass geographic restrictions and access geo-blocked content on devices that typically do not support VPN apps, such as gaming consoles and smart TVs. This opens up a world of streaming possibilities, allowing you to enjoy content from different regions with ease.
NordVPN offers user-friendly tutorials and guides to help you set up the VPN on your router, regardless of your technical expertise. Additionally, their customer support team is available 24/7 to assist with any troubleshooting or setup queries you may have.
In conclusion, NordVPN's router compatibility extends its protection to all devices on your home network, offering convenience, security, and access to geo-restricted content. With NordVPN, safeguarding your online privacy has never been easier or more comprehensive.
VPN-enabled router setup with NordVPN
Setting up a VPN-enabled router with NordVPN can offer enhanced security and privacy for all devices connected to your home network. NordVPN offers step-by-step instructions to make the setup process smooth and hassle-free.
Firstly, ensure your router is compatible with NordVPN. Most modern routers support VPN configurations, but it's always best to double-check compatibility on NordVPN's website or with their customer support.
Once confirmed, log in to your router's admin interface. This is typically done by entering the router's IP address into your web browser's address bar and logging in with your username and password.
Next, locate the VPN settings within your router's admin panel. This might be labeled as "VPN," "OpenVPN," or something similar, depending on your router model.
Follow NordVPN's instructions to download the necessary configuration files for your router. These files contain the settings required to connect to NordVPN's servers securely.
Upload the configuration files to your router's VPN settings. This usually involves selecting the file from your computer and clicking "Upload" or a similar button.
Enter your NordVPN account credentials into the router's VPN settings. This allows the router to authenticate with NordVPN's servers when establishing a connection.
Finally, save your settings and restart your router to apply the changes. Once restarted, all devices connected to your home network will benefit from the security and privacy features provided by NordVPN.
By setting up a VPN-enabled router with NordVPN, you can encrypt your internet traffic, hide your IP address, and access geo-restricted content on all your devices without needing to install individual VPN apps. It's a convenient and effective way to protect your online privacy and security.
Using NordVPN on a router
Using NordVPN on a router can significantly enhance your online privacy and security. NordVPN offers a convenient way to protect all devices connected to your home network by configuring the VPN directly on your router. Here's a comprehensive guide on how to set up NordVPN on your router and the benefits it brings.
Firstly, make sure your router is compatible with NordVPN. Most modern routers support VPN configurations, but it's always wise to check NordVPN's website for compatibility information or consult their customer support.
Next, log in to your router's admin panel. This can usually be done by entering your router's IP address into a web browser and logging in with your username and password. Once logged in, locate the VPN settings section.
In the VPN settings, you'll need to enter the connection details provided by NordVPN. This typically includes the server address, username, and password. NordVPN offers detailed instructions and configuration files for various router models, making the setup process straightforward.
After entering the necessary information, save your settings and establish a connection to the NordVPN server. Once connected, all internet traffic from devices connected to your router will be encrypted and routed through NordVPN's secure servers, protecting your data from prying eyes.
Using NordVPN on your router offers several advantages. It encrypts your internet traffic, preventing ISPs, hackers, and other third parties from monitoring your online activities. It also enables you to bypass geographical restrictions and access geo-blocked content from anywhere in the world.
In conclusion, setting up NordVPN on your router is a simple yet effective way to safeguard your online privacy and security. By encrypting all internet traffic at the router level, you can enjoy a more secure browsing experience on all devices connected to your home network.
Router VPN configurations for NordVPN
Router VPN configurations allow users to protect their online privacy and security by encrypting their internet connection. One popular VPN provider that offers router configuration options is NordVPN. By setting up NordVPN on a router, users can ensure that all devices connected to the network are automatically protected with the VPN connection.
To configure NordVPN on a router, users typically need to access the router's settings through a web browser and enter the NordVPN server details provided by the service. This process may vary depending on the router model and NordVPN's instructions, which can be found on their website.
Setting up a VPN on a router has several advantages. It allows users to secure multiple devices simultaneously without the need to install a separate VPN app on each device. This is especially useful for smart TVs, gaming consoles, and other devices that don't support native VPN apps.
Moreover, using a VPN at the router level encrypts all internet traffic, including devices that cannot run VPN software. This provides a seamless and comprehensive layer of privacy and security for all connected devices.
Overall, configuring NordVPN on a router is a convenient way to extend VPN protection to all devices on a network. It ensures that users can browse the internet anonymously and securely, safeguarding their sensitive data from potential cyber threats.
Compatibility of NordVPN with VPN-enabled routers
Title: Exploring the Compatibility of NordVPN with VPN-Enabled Routers
In the digital age, safeguarding online privacy has become paramount. Virtual Private Networks (VPNs) offer a reliable solution, encrypting internet traffic and masking IP addresses. While VPNs are commonly used on individual devices, integrating them with routers provides enhanced protection for all connected devices in a household or office.
NordVPN, a leading provider in the VPN market, offers compatibility with VPN-enabled routers, catering to users seeking comprehensive network-wide security. This compatibility extends NordVPN's benefits beyond individual devices, ensuring every device connected to the router enjoys encrypted traffic and anonymity.
Setting up NordVPN with a VPN-enabled router is a straightforward process. Users can either purchase a pre-configured router from NordVPN or manually configure their existing router to work with the VPN service. NordVPN provides detailed guides and support for both options, enabling users of varying technical proficiency to set up their router seamlessly.
Once configured, NordVPN secures all internet traffic originating from devices connected to the router. This includes smartphones, tablets, computers, smart TVs, gaming consoles, and IoT devices. By encrypting data at the router level, NordVPN protects against potential threats such as hacking, surveillance, and data interception, regardless of the device being used.
Moreover, integrating NordVPN with a VPN-enabled router offers additional benefits, such as bypassing geo-restrictions and accessing region-locked content on streaming platforms. Users can enjoy unrestricted access to their favorite shows, movies, and websites, irrespective of their geographical location.
In conclusion, the compatibility of NordVPN with VPN-enabled routers enhances online privacy and security for all connected devices. Whether for personal or professional use, integrating NordVPN with a router provides a convenient and effective way to safeguard digital interactions and access online content without restrictions.
0 notes
Photo

TP-Link Archer AX20 AX1800 Dual Band Wifi 6 Router FEATURES: Dual-Band Wi-Fi 6: Equipped with the latest wireless technology, Wi-Fi 6, for faster speeds, greater capacity, and reduced network congestion Next-Gen 1.8Gbps Speeds: Enjoy smooth streaming, downloading, and gaming all without buffering with Wi-Fi speeds of 1.8Gbps Connect More Devices: Wi-Fi 6 technology communicates more data to more devices using revolutionary OFDMA technology while simultaneously reducing lag Quad-Core Processing: The 1.5GHz quad-core CPU ensures communications between your router and all connected devices are smooth Extensive Coverage: Beamforming, independent FEM, and four antennas combine to deliver focused reception to devices far away Increased Battery Life: Target Wake Time technology reduces your devices’ power consumption to extend their battery life USB Easy Sharing: A USB 2.0 Port enables easy file sharing within your network or building private Cloud Storage Easy Setup: Set up your router in minutes with the powerful TP-Link Tether App Backward Compatible: Supports all previous 802.11 standards and all Wi-Fi devices WIRELESS Standards Wi-Fi 6 IEEE 802.11ax/ac/n/a 5 GHz IEEE 802.11ax/n/b/g 2.4 GHz WiFi Speeds AX1800 5 GHz: 1201 Mbps (802.11ax) 2.4 GHz: 574 Mbps (802.11ax) WiFi Range 3 Bedroom Houses 4× Fixed High-Performance Antennas Multiple antennas form a signal-boosting array to cover more directions and large areas Beamforming Concentrates wireless signal strength towards clients to expand WiFi range High-Power FEM Improves transmission power to strengthen signal coverage WiFi Capacity High Dual-Band Allocate devices to different bands for optimal performance OFDMA Simultaneously communicates with multiple Wi-Fi 6 clients Airtime Fairness Improves network efficiency by limiting excessive occupation 4 Streams Connect your devices to more bandwidth Working Modes Router Mode Access Point Mode HARDWARE Processor 1.5 GHz Quad-Core CPU Ethernet Ports 1× Gigabit WAN Port 4× Gigabit LAN Ports USB Support 1× USB 2.0 Port Supported Partition Formats: NTFS, exFAT, HFS+, FAT32 Supported Functions: Apple Time Machine FTP Server Media Server Samba Server Buttons WPS/Wi-Fi Button Power On/Off Button LED On/Off Button Reset Button Power 12 V ⎓ 1.5 A SECURITY WiFi Encryption WPA WPA2 WPA3 WPA/WPA2-Enterprise (802.1x) Network Security SPI Firewall Access Control IP & MAC Binding Application Layer Gateway Guest Network 1× 5 GHz Guest Network 1× 2.4 GHz Guest Network VPN Server OpenVPN PPTP SOFTWARE Protocols IPv4 IPv6 Parental Controls URL Filtering Time Controls WAN Types Dynamic IP Static IP PPPoE PPTP L2TP Quality of Service QoS by Device Cloud Service Auto Firmware Upgrade OTA Firmware Upgrade TP-Link ID DDNS NAT Forwarding Port Forwarding Port Triggering DMZ UPnP IPTV IGMP Proxy IGMP Snooping Bridge Tag VLAN DHCP Address Reservation DHCP Client List Server DDNS TP-Link NO-IP DynDNS Management Tether App Webpage PHYSICAL Dimensions (W×D×H) 10.2 × 5.3 ×1.5 in (260.2 × 135.0 × 38.6 mm) Package Contents Wi-Fi Router Archer AX20 Power Adapter RJ45 Ethernet Cable Quick Installation Guide OTHER System Requirements Internet Explorer 11+, Firefox 12.0+, Chrome 20.0+, Safari 4.0+, or other JavaScript-enabled browser Cable or DSL Modem (if needed) Subscription with an internet service provider (for internet access) Certifications FCC, CE, RoHS Environment Operating Temperature: 0℃~40℃ (32℉ ~104℉) Storage Temperature: -40℃~70℃ (-40℉ ~158℉) Operating Humidity: 10%~90% non-condensing Storage Humidity: 5%~90% non-condensing TEST DATA WiFi Transmission Power CE:
0 notes
Text
You can easily proceed with the TP-Link extender setup process. All you need to do is log into the extender’s web interface and follow the instructions to set up the extender. For the login, you require the default IP address, username, and login. Also, you can set up the extender using the WPS button. If you face any setup issues, check out the troubleshooting guide on our website.
0 notes
Text
How to Setup the TP-Link Extender?
A weak Wi-Fi network can be really frustrating, mainly when it causes dead zones and slow internet speeds in your home/office. To overcome such challenges, the TP Link Extender Setup acts as an excellent solution. Setting up the TP-Link extender is very easy to conduct, and you can do it very easily.
This blog post includes the complete TP Link Extender Setup through the WPS button, web browser, and the TP-Link Tether app. So read through the following blog post right away.
Steps for Setting Up the TP-Link Extender
Setting up your TP-Link extender is pretty simple and you can easily do it through the following steps:
Tplink Extender Setup through the WPS Button
The first thing you must do is place your extender near the router before you start the setup process.
After that, you need to plug your extender into a nearby power outlet and wait for it to completely power on. If you see the Green LED light, it means that the extender is successfully On.
Consequently, you must locate & hold down the “WPS Button” on your router and release it after a few seconds.
Next, you should also press the WPS button on the TP-Link extender within 2 minutes.
If you see the WPS LED blinking on the extender, you must know that it is successfully connecting to the router.
The WPS LED will become solid green once the connection is established between the extender and the router.
Tplink Extender Setup through the Web Browser
To set up the TP-Link extender through the Web Browser, plug the extender into a power plug in the first place.
After that, you must open a web browser and enter “192.168.0.1” or “tplinkrepeater.net” in the URL bar.
Next, you’ll be prompted to the TP-Link login page where you must enter the admin username & password.
Consequently, click on the “Login” button and choose your desired mode - Range Extender.
After that, the setup wizard will scan and connect to the available Wi-Fi network.
Finally, log into your extended Wi-Fi network and configure the Wi-Fi settings.
After configuring the Wi-Fi settings, you must click on the “Apply” button to save the settings.
Tplink Extender Setup through the “TP-Link Tether” App
To set up the extender through the app, download the “TP-Link Tether” from the Play Store or the App Store.
Next, you must open the app and follow the in-app instructions to create an account, if you don’t have one.
If you already have an account, try logging in to the app using your admin username & password.
After that, you must connect your smartphone to the TP-Link extender’s default network.
Then you must click on the “+” icon, choose the “Range Extender” and follow the on-screen setup wizard.
Finally, the app will guide you through the complete setup process, and customize the extender’s network issues.
Follow the above steps carefully and successfully complete the Tplink extender setup.
Wrapping It Up
With these effective methods, you can set up your TP-Link Extender easily to extend your Wi-Fi network, eliminate all the dead zones, and enjoy the internet experience across your office or home. Choose the appropriate method that befits your desire and prepare to improve your Wi-Fi network with ease.
But if you are unable to conduct the TP Link Extender Setup, feel free to connect with our technical experts. They’ll guide you through the complete setup process and help you resolve the possible setup issues. So, get in touch with our technical experts right away.
0 notes
Text
How to install TP-Link wireless router | +1-800-487-3677 | Tp-link Guide

We at tp-link support provide the best technical solution for Router Setup, router login password reset and all kinds of troubleshooting with wireless tp link router. You may call on our toll free : +1-800-487-3677.
Content : You've purchased a TP-Link Router and can hardly hold on to have your new web speed. In this article, we'll make sense of in 4 stages how for set up your switch. What's more, we've recorded the most widely recognized inquiries for you. Like that, you should rest assured that you can utilize your switch ideally.
Stage 1: track down the best spot for your switch
Stage 2: associate your links to the switch
Stage 3: actually take a look at the lights in your switch
Stage 4: sign in to your switch and set up your organization
1
Track down the best spot for your switch
Contemplate where you need to put the switch before you set it up. You'd, all things considered, need to put your switch in a focal spot. On the off chance that you have a house with 3 stories, you ideally put it on the subsequent floor. You could require a more extended Ethernet link to interface your modem to your switch. Ensure you don't mount the switch before you've tried the speed in the house. Perhaps you need to put it closer towards your concentrate after the test.
2
Interface links to the switch
Mount your switch or put it down with the receiving wires facing up. Then, interface the Ethernet link of your modem or from the wall to the WAN port of your switch. This is the orange Ethernet port. Boot your modem once more and associate the power connector to your switch. Sit tight two or three minutes for the power light to be on ceaselessly.
3
Reset your switch in the event that the establishment doesn't work
Sign in to your WiFi organization
Still don't have a remote association with your switch? Interface your gadget to one of the LAN ports of your Bowman through an organization link. You ought to likewise check whether the initial 4 lights of your switch are still on. Provided that this is true, reset the switch again with the reset button. You'll track down this button on the rear of your switch. This little button is right underneath the WPS button.
For more info you may call on our toll free :+1-800-487-3677
1 note
·
View note
Text
How to Setup TP-Link WIFI Extender?

To setup Tp-link extender to any power outlet closer to main Wi-Fi, and now the POWER light will turn to solid blue.
Tap on WPS button on main Wi-Fi, and now tap on button on tp-link extender in two minutes.
Whether you get connected with tp-link wi-fi extender to a dual-band Wi-Fi yet either 2.4 GHz or 5 GHz light is on, redo the Step one to attach with another band.
Attach your tp-link extender to any power socket which is between the main Wi-Fi and place with less Wi-Fi signal.
Location of the tp-link wi-fi range extender should be near to the main Wi-Fi router.
Finally, stand by till you see light is turned to solid blue.
You can now place your tp-link extender to improve signal strength and connection.
#Tp-link extender setup#tplink range extender setup#tplinkrepeater.net#how to#Tp-Link extender help#Tp-link extender setup guide#Tp-link repeater login
0 notes