#Userform
Explore tagged Tumblr posts
Visit Tumblr Blog
Explore Tumblr blogs with no restrictions, modern design and the best experience.
Last Seen Tumblr Blogs


Fun Fact
Tumblr’s reach among the 26-to-35-year-olds in the US is 11%.
Text
Add Minimize and Maximize Button in Userform | Excel Vba | Live At 08:00 PM Today #shorts
shorts Our Aim to Develop Skill in Excel : ============================= Excel Userform Development Excel Vba Projects … source
0 notes
Video
youtube
AutoCAD VBA #31. UserForm Kullanımı-2
1 note
·
View note
Text
Build a Dynamic Dashboard Using VBA and Excel
In today’s fast-paced business world, data visualization and automation have become essential tools for professionals. One of the most powerful ways to combine both is by creating dynamic dashboards using VBA in Excel. With the right VBA (Visual Basic for Applications) skills, you can automate data processing and build interactive dashboards that update with just one click.
In this blog, we'll explore how you can build a dynamic Excel dashboard using VBA, step-by-step. We’ll also show you how you can upgrade your skills with expert training from Innozant Institute, a leading name in smart tech learning.
🧩 What is a Dynamic Dashboard?
A dynamic dashboard is an interactive visual representation of your data that updates in real-time or with minimal manual effort. It includes charts, pivot tables, buttons, drop-downs, and reports that respond to user inputs like date selection, product filter, or region.
Unlike static reports, dynamic dashboards can be reused, refreshed, and reused with just a few clicks. And when combined with Excel VBA automation, they become even more powerful.
🛠️ Why Use VBA in Dashboards?
While Excel’s native tools like PivotTables and slicers are helpful, VBA offers added flexibility. Here’s what VBA can do:
Automate data import and cleanup
Dynamically refresh charts and PivotTables
Hide/show sheets, rows, and columns based on selections
Trigger actions with buttons or UserForms
Save or send dashboard reports in PDF or email
In short, VBA gives life to your static Excel files and makes your dashboards dynamic and intelligent.
📊 Step-by-Step: Build a Dynamic Dashboard Using VBA
Let’s look at how to build a simple yet dynamic sales dashboard using Excel and VBA.
Step 1: Prepare the Data
First, get your data ready. It could be from an Excel sheet, a database, or even an imported CSV file. Make sure it’s well structured — rows for records and columns for fields like Date, Region, Product, Sales, etc.
Step 2: Insert PivotTables and Charts
Use Excel’s built-in PivotTable feature to summarize your data — total sales by region, top products, monthly sales trends. Then, insert PivotCharts based on these tables.
To make the dashboard dynamic, we’ll now connect it with VBA.
Step 3: Add Form Controls (Buttons, Drop-downs)
Go to the Developer Tab in Excel and insert buttons and drop-downs. For example:
Combo box to select Region
Button to refresh data
Button to export dashboard as PDF
Name these controls so you can reference them in your VBA code.
Step 4: Open VBA Editor and Write Code
Press ALT + F11 to open the VBA editor. Create a new module and add code like:
Sub RefreshDashboard()
Sheets("Dashboard").PivotTables("SalesPivot").PivotCache.Refresh
MsgBox "Dashboard Updated!"
End Sub
You can also automate chart updates, formatting, and data filters. Connect your buttons to the macros via "Assign Macro."
Step 5: Add Export or Email Option
Want to share your dashboard? Try this code:
Sub ExportDashboardToPDF()
Sheets("Dashboard").ExportAsFixedFormat Type:=xlTypePDF, Filename:="Sales_Report.pdf"
MsgBox "Dashboard Exported as PDF!"
End Sub
This allows users to download or email the dashboard as a professional PDF report — all from within Excel.
Step 6: Build a UserForm for Advanced Control
Using a VBA UserForm, you can let users select multiple filters (like date range, region, or category) and click a button to view updated results. This adds a sleek, app-like feel to your Excel file.
🎯 Real-World Uses of Dynamic Dashboards
Sales Teams: Track targets, product performance, and regional trends
HR Departments: Monitor hiring status, attrition, and employee engagement
Finance Teams: Compare monthly expenses, profits, and forecasts
Project Managers: View project timelines, milestones, and risks
With just a bit of VBA, your Excel file becomes a powerful business intelligence tool.
📚 Learn Excel VBA Dashboard Design at Innozant Institute
Want to master the art of Excel VBA dashboards? Join Innozant Institute, the fastest-growing training hub for data, digital, and tech skills. Our Excel VBA course covers:
Macro recording and editing
VBA syntax, loops, and conditions
Working with charts, forms, and events
Creating real-time dashboards
Automating reports and emails
✅ Live Projects ✅ Expert Trainers ✅ Hybrid (Online + Offline) Classes ✅ Placement Support
Whether you’re a student, working professional, or business owner, Innozant Institute can help you upgrade your skills and boost your career.
🚀 Final Thoughts
Creating a dynamic dashboard using VBA in Excel is not only fun but also incredibly useful in real-world business situations. It gives you more control, automation, and speed.
If you want to go beyond the basics and become an Excel automation expert, start learning VBA today — and there’s no better place than Innozant Institute to begin that journey.
0 notes
Text
تحميل مجاني: برنامج "احسب عمرك" بالإكسل - حساب العمر مفتوح المصدر
تحميل مجاني: برنامج "احسب عمرك" بالإكسل - حساب العمر مفتوح المصدر تحميل مجاني: برنامج "احسب عمرك" بالإكسل - حساب العمر باليوم والشهر والسنة هل تبحث عن طريقة سهلة لحساب عمرك أو عمر أي شخص بدقة؟ مع برنامج "احسب عمرك" المصمم بواسطة Microsoft Excel، يمكنك إدخال تاريخ الميلاد في TextBox والحصول على العمر محسوبًا تلقائيًا بالسنوات والأشهر والأيام! هل تبحث عن برنامج حساب العمر بدقة؟ في هذا المقال، سنتعرف على: - كيفية عمل البرنامج. - طريقة تحميله مجانًا. - كيفية استخدامه وتعديله (حيث أنه مفتوح المصدر). كيف يعمل البرنامج؟ البرنامج بسيط ويعتمد على صيغ Excel ووظيفة VBA (لجعل الواجهة سهلة الاستخدام). إليك مكوناته الرئيسية: هذا النموذج يدعم حساب العمر باليوم والشهر والسنة 1. واجهة المستخدم (UserForm) - TextBox: لإدخال تاريخ الميلاد (مثال: `01/01/1990`). - زر "احسب": عند الضغط عليه، يعرض العمر بالتفصيل. - خانة النتيجة: تظهر العمر بالصيغة: `XX سنة، XX شهر، XX يوم`. 2. الصيغ المستخدمة في الحساب كيفية حساب العمر في Excel باستخدام دالة DATEDIF يستخدم البرنامج دالة DATEDIF` في Excel لحساب الفرق بين تاريخ الميلاد والتاريخ الحالي: =DATEDIF(تاريخ_الميلاد, TODAY(), "Y") ' لحساب السنوات =DATEDIF(تاريخ_الميلاد, TODAY(), "YM") ' لحساب الأشهر المتبقية =DATEDIF(تاريخ_الميلاد, TODAY(), "MD") ' لحساب الأيام المتبقية كيفية استخدام البرنامج؟ 1. افتح ملف الإكسل بعد التحميل. 2. اضغط على زر "فتح الواجهة" (إذا كان هناك ماكرو، فعّله من `خيارات الملف` → `تفعيل المحتوى`). 3. أدخل تاريخ الميلاد في `TextBox` (مثال: `15/05/1995`). 4. اضغط "احسب" لرؤية النتيجة. مثال على النتيجة: - إذا كان تاريخ الميلاد `01/01/2000`، ستكون النتيجة: `24 سنة، 4 أشهر، 10 أيام` (حسب التاريخ الحالي). كيفية تعديل البرنامج (مفتوح المصدر) إذا كنت تريد تطوير البرنامج، يمكنك: 1. تغيير واجهة `UserForm`: - تعديل الألوان، الخطوط، أو إضافة صورة. 2. تطوير الكود `VBA`: - إضافة ميزات جديدة مثل حساب العمر في تاريخ معين (وليوم الحالي فقط). 3. إضافة تقارير إضافية: - مثل حساب عدد الأيام المتبقية لعيد الميلاد القادم. تحميل ملف Excel جاهز لحساب العمر مجانًا برنامج "احسب عمرك" في Excel هو أداة بسيطة ومجانية تساعدك على حساب العمر بدقة. يمكنك تحميله وتعديله بسهولة لأنه مفتوح المصدر، مما يجعله خيارًا رائعًا للمبتدئين والمحترفين. جهز البرنامج الآن وحمّله مجانًا! كلمات مفتاحية برنامج حساب العمر حساب العمر بالتاريخ كيفية حساب العمر في Excel تحميل برنامج احسب عمرك حاسبة العمر مجانًا برنامج حساب العمر بالإكسل اكسل حساب العمر باليوم والشهر والسنة DATEDIF في Excel كود VBA لحساب العمر نموذج Excel جاهز لحساب العمر تحميل ملف إكسل جاهز لحساب العمر طريقة حساب العمر في Excel بالهجري والميلادي برنامج احسب عمرك مفتوح المصدر كيفية عمل حاسبة العمر في Excel خطوة بخطوة تنزيل برنامج حساب العمر بدون ماكرو تحميل مجاني لبرنامج حساب العمر نموذج Excel جاهز للاستخدام حاسبة العمر بصيغة XLSX رابط مباشر لتحميل ملف حساب العمر برنامج حساب العمر بدون برمجة شرح دوال التاريخ في Excel للمبتدئين كود VBA بسيط لحساب العمر تعديل برنامج حساب العمر حسب الرغبة أفضل صيغ Excel لحساب الفرق بين تاريخين تصميم واجهة مستخدم لحاسبة العمر كيفية حساب العمر في Excel باستخدام دالة DATEDIF تحميل ملف Excel جاهز لحساب العمر مجانًا كود VBA لبرنامج حاسبة العمر خطوة بخطوة هل تبحث عن برنامج حساب العمر بدقة؟ هذا النموذج يدعم حساب العمر باليوم والشهر والسنة. اكسل متقدم, برامج مجانية via عالم الاوفيس https://ift.tt/IVB6bO1 May 09, 2025 at 03:58AM
0 notes
Photo

New Post has been published on https://codebriefly.com/angular-19-forms-and-validation/
Angular 19 Forms and Validation
Forms are an essential part of any web application, enabling user interaction and data submission. Angular 19 brings enhanced features for building and validating forms with improved performance and flexibility. In this article, we will explore the fundamentals of Angular 19 forms, including template-driven and reactive forms, validation techniques, and best practices.
Table of Contents
Toggle
Why Forms and Validation Matter in Angular 19
Types of Forms in Angular 19
Comparison: Template-Driven vs. Reactive Forms
Template-Driven Forms in Angular 19
Setting Up a Template-Driven Form
Handling Form Submission
Validating Template-Driven Forms
Example of Validation
Reactive Forms in Angular 19
Setting Up a Reactive Form
Reactive Form Template
Custom Validation in Angular 19
Creating a Custom Validator
Using the Custom Validator
Best Practices for Angular 19 Forms
Final Thoughts
Why Forms and Validation Matter in Angular 19
Efficient and accurate form handling is crucial for creating robust applications. With Angular 19, developers can build forms that are easy to manage, validate, and maintain. Improved form handling ensures a smooth user experience and reduces the chances of submitting incorrect data.
Types of Forms in Angular 19
Angular 19 supports two primary types of forms:
Template-Driven Forms: Ideal for simple forms and based on Angular templates.
Reactive Forms: Suitable for complex and dynamic forms with greater control and scalability.
Comparison: Template-Driven vs. Reactive Forms
Feature Template-Driven Forms Reactive Forms Setup Complexity Simple Moderate Form Control Limited Extensive Validation Declarative Programmatic Performance for Large Forms Moderate High
Template-Driven Forms in Angular 19
Template-driven forms are easier to set up and are useful for simpler form requirements. These forms rely heavily on Angular directives and are defined directly in the HTML template.
Setting Up a Template-Driven Form
<form #userForm="ngForm" (ngSubmit)="onSubmit(userForm)"> <label for="name">Name:</label> <input type="text" id="name" name="name" ngModel required /> <label for="email">Email:</label> <input type="email" id="email" name="email" ngModel required /> <button type="submit">Submit</button> </form>
Handling Form Submission
onSubmit(form: NgForm) console.log('Form Submitted', form.value);
Validating Template-Driven Forms
Validation in template-driven forms is done using Angular directives such as required, minlength, and pattern.
Example of Validation
<input type="text" name="username" ngModel required minlength="4" #username="ngModel" /> <div *ngIf="username.invalid && username.touched"> Username must be at least 4 characters long. </div>
Reactive Forms in Angular 19
Reactive forms are highly flexible and suited for more complex scenarios. They use a model-driven approach and provide robust validation features.
Setting Up a Reactive Form
First, import the required modules:
import FormGroup, FormControl, Validators from '@angular/forms'; export class UserFormComponent userForm = new FormGroup( name: new FormControl('', [Validators.required]), email: new FormControl('', [Validators.required, Validators.email]), ); onSubmit() console.log(this.userForm.value);
Reactive Form Template
<form [formGroup]="userForm" (ngSubmit)="onSubmit()"> <label for="name">Name:</label> <input id="name" formControlName="name" /> <div *ngIf="userForm.controls.name.invalid && userForm.controls.name.touched"> Name is required. </div> <label for="email">Email:</label> <input id="email" formControlName="email" /> <div *ngIf="userForm.controls.email.invalid && userForm.controls.email.touched"> Enter a valid email. </div> <button type="submit">Submit</button> </form>
Custom Validation in Angular 19
Custom validators allow developers to implement validation logic that suits specific requirements.
Creating a Custom Validator
import AbstractControl, ValidationErrors from '@angular/forms'; export function usernameValidator(control: AbstractControl): ValidationErrors | null const forbidden = /admin/.test(control.value); return forbidden ? forbiddenName: value: control.value : null;
Using the Custom Validator
name: new FormControl('', [Validators.required, usernameValidator])
Best Practices for Angular 19 Forms
Use Reactive Forms for Complex Scenarios: Provides better scalability and maintainability.
Implement Custom Validators: Address unique business logic.
Utilize Angular Directives: Simplify form handling.
Always Sanitize and Validate User Input: To prevent security vulnerabilities.
Test Form Behavior: Ensure form validation works as expected.
Final Thoughts
Angular 19 forms and validation offer robust features that enable developers to build efficient and secure web applications. Whether using template-driven or reactive forms, mastering form handling techniques will significantly enhance your development process.
Keep learning & stay safe 😉
You may like:
Introduction to Angular 19
Angular 19 Fundamentals
Advanced Concepts and Features in Angular 19
0 notes
Video
youtube
إنشاء شاشات مستخدم مذهلة في برنامج Excel (خطوات سهلة!)user form in#vba
ان شاء الله مع بداية شرح المستوى الثانى من🌹 كورس برمجةvba 🌹 نبدأ 🌹بسم الله الرحمن الرحيم🌹 الدرس الاول 🔰بداية التعامل مع الشاشات فى vba userform 🟩يمكن لـ UserForms تحويل جداول بيانات Excel الخاصة بك إلى أدوات تفاعلية قوية. 🟩 يقدم هذا الفيديو دليلاً شاملاً لتصميم UserForms للمبتدئين، 🟩ويغطي كل شيء بدءًا من المفاهيم الأساسية وحتى تقنيات التخصيص المتقدمة https://youtu.be/k4ZOI8T6eAg
0 notes
Video
youtube
modern userform update in bangla
0 notes
Text
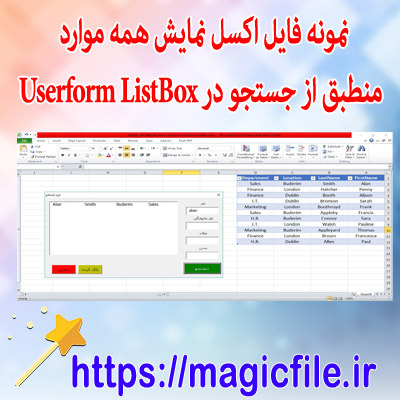
فایل اکسل جستجو در جدول شیت با فرم ( نمایش همه موارد منطبق از جستجو در Userform ListBox )
فایل اکسل جستجو در جدول شیت با فرم ( نمایش همه موارد منطبق از جستجو در Userform ListBox )
برای دانلود به لینک زیر بروید
برای دانلود اینجا کلیک فرمایید ( فایل اکسل جستجو در جدول شیت با فرم ( نمایش همه موارد منطبق از جستجو در Userform ListBox ) )
لینک کوتاه : https://magicfile.ir/?p=2808
0 notes
Text
Excel VBA Tips n Tricks 42 Put info on Userform and Save it to the Hidden Datasheet Q n A
Free Workbooks: … source
0 notes
Video
youtube
AutoCAD VBA #30. UserForm Kullanımı-1
1 note
·
View note
Text
Yapılacaklar Listesi Görev Matrisi dosyasında bir UserForm üzerinden görev takibi yapmanızı sağlayacak olan bir içerik yer almaktadır. Detaylı olarak buradan incele
0 notes
Text
نظام إدارة الموظفين باستخدام VBA في Excel
نظام إدارة الموظفين باستخدام VBA في Excel نظام إدارة الموظفين باستخدام VBA في Excel في عالم الأعمال الحديث، تُعد إدارة بيانات الموظفين بشكل فعال أمرًا بالغ الأهمية. ومع ذلك، قد تكون أنظمة إدارة الموظفين الجاهزة مكلفة أو معقدة للاستخدام. لحسن الحظ، يمكنك إنشاء نظام إدارة موظفين بسيط وفعال باستخدام VBA (Visual Basic for Applications) في Excel. في هذا ال��قال، سنتعرف على كيفية إنشاء نظام يتيح لك: 1. حفظ بيانات الموظفين في جدول Excel. 2. حفظ صورة الموظف في مجلد مخصص. 3. البحث عن موظف باستخدام اسمه أو رقمه. 4. تعديل بيانات الموظف وصورته. 5. حذف بيانات الموظف وصورته. المزايا الرئيسية للنظام سهولة الاستخدام: واجهة مستخدم بسيطة تتيح إدخال البيانات وإدارتها بسهولة. التكلفة الفعالة: لا حاجة لشراء برامج إدارة موظفين باهظة الثمن. التخصيص: يمكن تعديل النظام ليناسب احتياجاتك الخاصة. إدارة الصور: يمكن حفظ صور الموظفين واسترجاعها بسهولة. خطوات إنشاء النظام 1. إنشاء واجهة المستخدم (UserForm) افتح Excel واضغط على `Alt + F11` لفتح محرر VBA. أنشئ UserForm وأضف عناصر التحكم التالية: TextBoxes: لإدخال رقم الموظف، الاسم، العنوان، الرقم القومي، والقسم. CommandButtons: لأداء العمليات مثل الحفظ، البحث، التعديل، والحذف. Image: لعرض صورة الموظف. BrowseButton: لاختيار صورة من الجهاز. 2. حفظ البيانات في Excel يتم حفظ بيانات الموظفين في ورقة عمل Excel تسمى `Employees`. يتم حفظ الصورة في مجلد مسمى `Images` بنفس مسار ملف Excel. 3. البحث عن الموظف يمكن البحث عن الموظف باستخدام اسمه أو رقمه. يتم استرجاع البيانات وعرضها في النموذج، بالإضافة إلى عرض الصورة من المجلد المخصص. 4. تعديل البيانات يمكن تعديل بيانات الموظفين وحفظ التغييرات في ورقة Excel. إذا تم اختيار صورة جديدة، يتم حذف الصورة القديمة وحفظ الصورة الجديدة. 5. حذف البيانات يتم حذف بيانات الموظف من ورقة Excel. يتم حذف الصورة من المجلد المخصص. كيف يعمل النظام؟ 1. حفظ البيانات: يقوم المستخدم بإدخال بيانات الموظف في النموذج. يتم حفظ البيانات في ورقة Excel وحفظ الصورة في مجلد `Images`. 2. البحث عن الموظف: يقوم المستخدم بإدخال اسم الموظف أو رقمه. يتم استرجاع البيانات وعرضها في النموذج، مع عرض الصورة إذا كانت موجودة. 3. تعديل البيانات: يقوم المستخدم بتعديل البيانات وحفظ التغييرات. إذا تم اختيار صورة جديدة، يتم تحديث الصورة في المجلد. 4. حذف البيانات: يقوم المستخدم بحذف بيانات الموظف من ورقة Excel. يتم حذف الصورة من المجلد فوائد استخدام النظام مركزي: يتم تخزين جميع البيانات في ملف Excel واحد. مرن: يمكن إضافة ميزات جديدة بسهولة باستخدام VBA. محمول: يمكن نقل ملف Excel واستخدامه على أي جهاز. يُعد إنشاء نظام إدارة موظفين باستخدام VBA في Excel حلاً فعالاً ومنخفض التكلفة للشركات الصغيرة والمتوسطة. من خلال هذا النظام، يمكنك إدارة بيانات الموظفين بسهولة، مع إمكانية التخصيص والتوسع وفقًا لاحتياجاتك. إذا كنت تمتلك مهارات برمجية أساسية، يمكنك إنشاء هذا النظام بنفسك والاستفادة من ميزاته العديدة. اكسل متقدم via عالم الاوفيس https://ift.tt/cTS14OB March 07, 2025 at 03:09AM
0 notes
Text
أفضل 7 طرق لإصلاح عدم حفظ Microsoft PowerPoint للملفات على Windows

قد يكون الأمر مزعجًا عندما تقضي ساعات في العمل على عرض تقديمي مهم ، ويفشل Microsoft PowerPoint في حفظ الملف على جهاز الكمبيوتر الذي يعمل بنظام Windows. عند حدوث ذلك ، يعرض التطبيق عادةً خطأً غامضًا إلى حدٍ ما يقرأ ، "حدث خطأ أثناء قيام PowerPoint بحفظ الملف." إذا واجهت نفس المشكلة ، فيمكن أن يساعدك هذا الدليل.
يمكن أن تنشأ هذه المشكلة من عوامل مختلفة ، مثل الأذونات غير الكافية أو الشرائح التالفة أو تطبيق قديم. قبل التبديل إلى إصدار الويب من PowerPoint أو البحث عن برنامج عرض تقديمي بديل ، جرب الإصلاحات التالية لحل المشكلة.
1. تأكد من عدم فتح الملف في أي مكان آخر
يمكن أن يمنعك فتح ملف PowerPoint في تطبيقات متعددة من تغييره. تحتاج أولاً إلى التأكد من أن ملف PowerPoint الخاص بك ليس مفتوحًا في أي برنامج آخر. يمكن أن تنشأ مثل هذه المشكلات أيضًا إذا تم فتح الملف في جزء المعاينة في File Explorer. أبلغ العديد من المستخدمين في منتديات Microsoft عن حل المشكلة عن طريق تعطيل جزء المعاينة في مستكشف الملفات. يمكنك أيضًا تجربتها. اضغط على اختصار لوحة مفاتيح Windows + E لفتح مستكشف الملفات. انقر فوق القائمة عرض في الجزء العلوي ، وانتقل إلى إظهار ، وقم بإلغاء تحديد خيار جزء المعاينة. حاول حفظ الملف الخاص بك بعد ذلك ومعرفة ما إذا كان يعمل.

2. احفظ الملف في مكان آخر
قد يؤدي نقص الأذونات ذات الصلة للوصول إلى دليل معين على Windows إلى منع PowerPoint من حفظ الملفات. لإصلاح ذلك ، يمكنك محاولة حفظ الملف في دليل مختلف. في تطبيق PowerPoint ، اضغط على اختصار لوحة المفاتيح Ctrl + Shift + S لإظهار مربع الحوار "حفظ باسم". حدد موقعًا جديدًا للملف واضغط على حفظ.

إذا لم تتمكن من حفظ الملف بتنسيق PPTX ، فاستخدم القائمة المنسدلة "حفظ كنوع" لتحديد تنسيق PPT واضغط على حفظ.

3. انسخ العرض التقديمي إلى ملف جديد
إذا كان بإمكان PowerPoint حفظ PPT معين فقط ، فقد تكون هناك مشكلة في الملف نفسه. في هذه الحالة ، يمكنك حل المشكلة عن طريق نسخ الشرائح من ملف PowerPoint المشكل ولصقها في ملف جديد. فيما يلي خطوات نفس الشيء. الخطوة 1: افتح ملف PowerPoint الخاص بك وحدد أي شريحة. ثم اضغط على Ctrl + A اختصار لوحة المفاتيح لتحديد كل الشرائح.

الخطوة 2: انقر بزر الماوس الأيمن على اختيارك واختر نسخ.

إلى الخطوة 3: اضغط على اختصار لوحة المفاتيح Ctrl + N لإنشاء ملف PowerPoint جديد ، واضغط على اختصار لوحة المفاتيح Ctrl + V للصق الشرائح.

الخطوة 4: اضغط على اختصار لوحة المفاتيح Ctrl + S ثم احفظ الملف.

4. قم بإزالة عنصر التحكم في ACTIVEMOVIE من MICROSOFT المرئي الأساسي المستخدم
هناك شيء ��خر يمكنك القيام به عندما يعرض PowerPoint رسالة "حدث خطأ أثناء حفظ PowerPoint للملف" وهو إزالة عنصر تحكم ActiveMovie من Microsoft Visual Basic Userform. إليك كيف يمكنك القيام بذلك. الخطوة 1: في تطبيق PowerPoint ، قم بالتبديل إلى علامة التبويب Developer وانقر فوق خيار Visual Basic.

الخطوة 2: انقر فوق رمز إدراج UserForm على شريط الأدوات وحدد UserForm.

إلى الخطوة 3: انقر فوق القائمة ملف في الأعلى وحدد إزالة UserForm.

الخطوة 4: حدد لا للمتابعة.

الخطوة 5: انقر فوق القائمة "ملف" مرة أخرى وحدد "إغلاق والعودة إلى Microsoft PowerPoint".

حاول حفظ الملف مرة أخرى ومعرفة ما إذا كان يعمل.
5. قم بتسجيل الخروج وتسجيل الدخول مرة أخرى
يمكن أن تمنع مشكلات المصادقة مع حساب Office الخاص بك أحيانًا PowerPoint من حفظ ملفاتك. يمكنك تسجيل الخروج من التطبيق وإعادة تسجيل الدخول إلى التطبيق لإصلاح المشكلة. الخطوة 1: افتح تطبيق PowerPoint وانقر على قائمة ملف في الأعلى.

الخطوة 2: قم بالتبديل إلى علامة التبويب "الحساب" وانقر فوق خيار تسجيل الخروج.

سجّل الدخول مرة أخرى إلى التطبيق بحسابك وتحقق من استمرار المشكلة.
6. قم بتحديث تطبيق POWERPOINT
يمكن أن يؤدي استخدام إصدار قديم من تطبيق PowerPoint أيضًا إلى حدوث مثل هذه المشكلات. وبالتالي ، من الجيد التأكد من أنك تقوم بتشغيل أحدث إصدار من PowerPoint ، خاصةً إذا قمت بتعطيل تحديثات Office التلقائية. الخطوة 1: افتح تطبيق PowerPoint وانقر على قائمة ملف في الأعلى.
الخطوة 2: حدد علامة التبويب الحساب. انقر فوق خيارات التحديث وحدد التحديث الآن.

7. قم بتشغيل أداة إصلاح Office
يعد تشغيل أداة إصلاح Microsoft Office طريقة فعالة لإصلاح مشكلات تطبيقات Office مثل PowerPoint. لذلك ، إذا لم ينجح شيء ، يمكنك تشغيل أداة إصلاح Office كحل أخير. الخطوة 1: انقر بزر الماوس الأيمن على أيقونة ابدأ وحدد التطبيقات المثبتة من القائمة.

الخطوة 2: حدد موقع مجموعة Microsoft Office في القائمة. انقر فوق أيقونة القائمة المجاورة لها وحدد تعديل.

إلى الخطوة 3: حدد الإصلاح السريع وانقر على إصلاح.

إذا كان PowerPoint لا يزال لا يحفظ الملفات ، فكرر ا��خطوات المذكورة أعلاه وجرب الإصلاح عبر الإنترنت بدلاً من ذلك. سيسمح ذلك لأداة إصلاح Office بإجراء عملية إصلاح شاملة وتنزيل أي ملفات من الإنترنت إذا لزم الأمر.

حافظ على عملك
آخر شيء تريده بعد ساعات من العمل هو مواجهة الأخطاء أثناء حفظ ملفات PowerPoint. نأمل أن يكون أحد ال��لول المذكورة أعلاه مفيدًا ، ويمكنك حفظ ملفات PowerPoint الخاصة بك على Windows. Read the full article
0 notes
Video
youtube
خطوات تصميم شاشة رئيسية بفعالية للتنقل بين الشيتات فى الاكسل مع VBA
هل ترغب في تصميم شاشة رئيسية فعالة للتنقل بين الشيتات في الإكسل باستخدام VBA؟ تعرف على الخطوات اللازمة في هذا الفيديو! كيفية عمل شاشة افتتاحية فى الاكسل من خلال vba وهى نقطة تحول فى استخدام الاكسل كبرنامج الى برمجة وتصميم وابتكار مهارات التصميم للبرامج ولاغنى عن الشاشة الرئيسية وهى خريطة التنقل مابين الشتات داخل الاكسل اتعلم مهارات vba وطور فى مشاريعك والتطبيقات التى تصممها فى الاكسل من خلال برمجة الاكسل vba How to make an opening screen in Excel through VBA. It is a turning point in using Excel as a program to programming, designing, and creating design skills for programs. There is no need for the main screen, which is a map for moving between the diaspora inside Excel. Learn VBA skills and develop your projects and applications that you design in Excel through Excel VBA programming. وهانتناول فيها بعون الله الاتى : * كيفية فتح شاشة محرر الاكواد فى vba* تصميم الشاشة الافتتاحية من خلال userform * اضافة الايكونات لايقونات التنقل buton *كتابة الاكواد *اضافة زرار الرجوع للشاشة الرئيسية من خلال sheet * كيفية كتابة كود بمجرد فتح الملف يفتح الشاشة الرئيسية
0 notes
Video
youtube
VBA Session #7 - User Form in VBA
VBA Sessions for beginners - In this session# 7 Learn How to use Multipage control, Combo box, List box, Option button, Check box in User Form in Excel VBA. VBA Session # 6 and Session# 7 gives you complete understanding of User forms. SUBSCRIBE the channel and share your feedback, suggestion and queries in youTube Comments Section.
#excel vba#vba#excel#excel training#microsoft excel#ms excel#exceltips#userform#excel formulas#excel functions#excel tutorial#excel tips
0 notes