#WebApp Backend Template
Explore tagged Tumblr posts
Visit Tumblr Blog
Explore Tumblr blogs with no restrictions, modern design and the best experience.
Last Seen Tumblr Blogs


Fun Fact
Tumblr has been providing a Korean-language service since 2013.
Text
Material Lite – The Ultimate Free Bootstrap 4 Admin Template for Developers Who Mean Business
Why You Need the Material Admin Template If you’ve ever spent hours trying to build a backend from scratch—just to get a functional admin panel—you know the struggle. It’s not just about getting something that works. It’s about building something maintainable, responsive, and clean. And for developers or startup founders juggling multiple roles, the last thing they want is to start from zero.…
#backend ui#barbershop HTML5 template#Bootstrap 4 Admin Template#Clean#Datatables#Free Admin Dashboard Template#free template#Google Maps#material design#Material Lite Template#Multipage#On hover effect#Responsive Admin Panel Template#responsive dashboard template#web app admin template#WebApp Backend Template
0 notes
Text
Bootstrap Admin Template – Developing Complex Progressive Web App
Bootstrap Admin Template have become an integral part of web applications and websites. Whether for managing content, monitoring performance, or tracking business metrics, admin templates provide an organized way to interact with complex data. One of the most popular frameworks for developing admin dashboards is Bootstrap, an open-source front-end framework. Its flexibility, scalability, and ease of use have made it a go-to choice for developers.
Our Bootstrap Admin Template comes with a powerful set of features, including seven analytics dashboards and three CRM dashboards, all built with the latest Bootstrap 5 framework. In this article, we will delve into the importance of Bootstrap admin templates, explore the benefits of our master dashboard, discuss the web development process with our Bootstrap admin template, and explain why we stand out in the competitive market.
1. Importance of Bootstrap Admin Template
Admin templates serve as the backbone of modern web applications, providing users with a structured and functional interface to interact with data. In any web application, especially those dealing with large amounts of information or business operations, managing the backend is just as crucial as the frontend. Here's why a Bootstrap Admin Template is important:
a. Consistency and Efficiency
Bootstrap provides a consistent design system that ensures your Master Dashboard looks polished and professional across all devices. The admin template built on Bootstrap follows this system, which results in a responsive layout, intuitive user interface, and easy-to-use components. By leveraging Bootstrap, you avoid having to create these elements from scratch.
b. Time-Saving
For web developers, time is a precious resource. A pre-built Bootstrap Admin Template like ours saves a significant amount of time during the development process. Instead of building every feature from the ground up, developers can use the template’s pre-built features, like navigation menus, charts, and tables, which speeds up development without compromising on quality.
c. Mobile Responsiveness
In today’s mobile-first world, ensuring that your admin panel works flawlessly on mobile devices is crucial. Bootstrap’s grid system allows developers to create responsive layouts with minimal effort, ensuring your dashboard will look great on screens of all sizes—whether it’s a desktop, tablet, or smartphone.
d. Customization Flexibility
While WebApp Template come with a set of predefined elements, they also offer ample room for customization. Developers can easily modify or extend the templates to meet the specific needs of their project. From changing the color scheme to adding new widgets, Bootstrap admin templates allow easy modification to align with the brand’s identity.
e. Built-In Components and Widgets
Bootstrap is known for its comprehensive library of UI components. From buttons and cards to forms and modals, everything you need to create an admin dashboard is available. Bootstrap 5 offers enhanced features like improved grid layouts, native custom form controls, and additional utilities, all of which help in developing complex admin dashboards.
2. Benefits of Our Master Dashboard
Our Master Dashboard, built with the latest Bootstrap 5 framework, offers a comprehensive solution for managing and monitoring all aspects of your application or business. It is packed with features to ensure an efficient and productive experience for both administrators and end-users. Here are some of the key benefits:
a. Comprehensive Analytics Dashboards
Our dashboard offers seven analytics UI Dashboard, each tailored for specific use cases. Whether you’re tracking user engagement, sales data, traffic patterns, or marketing performance, these dashboards are designed to give you valuable insights at a glance.
Real-Time Data: The analytics dashboards provide real-time data, allowing you to make informed decisions quickly.
Advanced Charts and Graphs: With rich charts, graphs, and tables, the dashboard transforms raw data into digestible, visual representations.
Customizable Widgets: You can add, remove, or customize widgets to suit your specific needs.
b. CRM Dashboards for Customer Relationship Management
Our three CRM dashboards are designed to help businesses track and improve their customer relationships. The dashboards offer valuable insights that assist in managing leads, tracking sales pipelines, and improving customer satisfaction.
Lead Management: Easily track the status of leads and opportunities with detailed reports and timelines.
Customer Interactions: Monitor customer interactions, allowing your team to provide more personalized service.
Task and Activity Tracking: Keep an eye on sales activities, ensuring that important tasks are completed on time.
c. User-Friendly Interface
One of the core principles of our Dashboard UI is its user-friendly interface. Thanks to Bootstrap 5’s sleek and intuitive design, the dashboard is easy to navigate, even for non-technical users. The layout is structured logically, allowing users to access the information they need without confusion.
d. Customization and Scalability
Our Master Dashboard is not just functional but also highly customizable. You can change the design, add new features, or tweak existing ones to better fit your business requirements. Whether you need to add a new widget or adjust the layout for specific devices, the template allows easy modifications. Plus, the modular structure of the dashboard makes it scalable, meaning it can grow as your business or application does.
e. Optimized Performance
Our Admin Dashboard UI is optimized for performance. It’s lightweight, ensuring fast loading times, even when dealing with large datasets. Bootstrap’s modular design helps ensure that only necessary resources are loaded, keeping the page load time to a minimum.
3. Web Development Process with Our Bootstrap Admin Template
The web development process can be complex, especially when building an admin dashboard that requires features like analytics, CRM tools, and real-time data tracking. Our Bootstrap Admin Template simplifies this process and makes it more efficient.
a. Step 1: Planning and Requirement Gathering
The first step is to clearly define the project’s goals and understand the requirements. This involves determining the key metrics you want to track, understanding user roles (admin, manager, user), and identifying the features you need, such as the analytics dashboards, CRM tools, or data visualizations.
b. Step 2: Designing the User Interface
Once the requirements are set, the next step is designing the user interface. The UI design ensures the user experience (UX) is smooth and intuitive. Thanks to Bootstrap 5, developers have access to a modern, responsive grid system that adapts to any device, ensuring a seamless experience across desktops, tablets, and smartphones.
Our template provides pre-designed pages, including dashboards, login screens, and user management, allowing you to build a professional-looking admin panel without the hassle of custom design.
c. Step 3: Setting Up the Template
After the design phase, the next step is integrating the Bootstrap Admin Template into the project. This is where the real development begins. You can begin customizing the provided template, adding your desired components, and incorporating data into the analytics and CRM dashboards.
Our Admin Dashboard UI includes built-in components like charts, tables, forms, and modals, which can be configured to fetch data dynamically and be used in the backend of your web application. The template also includes pre-configured JavaScript and jQuery components for handling events and interactions.
d. Step 4: Data Integration
Once the design and layout are ready, the next step is integrating the data. Whether you are pulling data from a database or external API, you can configure the dashboard to fetch and display data dynamically. The analytics and CRM dashboards will be connected to your backend systems, allowing the data to update in real-time.
e. Step 5: Testing and Optimization
Testing is a critical part of the development process. Our Bootstrap Admin Template is built with cross-browser compatibility in mind, so it works seamlessly on different browsers (Chrome, Firefox, Safari, etc.). You can test the template on various screen sizes and devices to ensure its responsiveness.
Performance testing is another crucial aspect. The template is optimized to handle large datasets without compromising speed or performance. Developers can use tools like Google Page Speed Insights or Lighthouse to test and improve performance.
f. Step 6: Deployment and Maintenance
Once everything is in place and tested, it’s time to deploy the application to a live environment. Our Bootstrap Admin Template ensures that deployment is smooth, whether you’re using shared hosting, VPS, or cloud services. Post-launch, you can continue to make updates and improvements as needed, thanks to the template’s scalability.
4. Why We Are Better?
In a competitive market filled with various Bootstrap admin templates, what makes our Bootstrap Admin Panel stand out? Here are a few reasons why we are the best choice for your project:
a. Built with Latest Bootstrap 5
We’ve used the latest version of Bootstrap (Bootstrap 5), which comes with new features like custom form controls, enhanced grid systems, and improved utilities. This ensures the template is future-proof and delivers an outstanding user experience.
b. Fully Responsive and Customizable
Our Dashboard Template is fully responsive and adaptable to any screen size, providing a seamless experience on desktop, tablet, and mobile devices. Plus, it’s highly customizable, allowing you to tailor it to your specific business needs.
c. Pre-Built Dashboards
We’ve included seven powerful analytics dashboards and three CRM dashboards, offering a comprehensive suite of tools to help businesses track performance and customer data effectively. The dashboards are easy to use and packed with features to boost productivity.
d. Optimized for Performance
Our Bootstrap Admin Theme is optimized for high performance, ensuring quick load times even with large datasets. This makes it suitable for high-traffic web applications and enterprise solutions.
e. Detailed Documentation and Support
We provide detailed documentation, ensuring that developers can easily understand how to use and customize the template. Plus, our dedicated support team is always ready to assist you with any questions or issues you may have.
5. Contact Us
If you are looking for a high-quality Bootstrap Admin Template to power your web application, look no further. Our master dashboard comes packed with all the features you need, from analytics tools to CRM dashboards, all built on the latest Bootstrap 5 framework.
#admin dashboard ui#Bootstrap Admin Panel#Dashboard UI#Bootstrap Admin Template#UI Dashboard#Master Dashboard
0 notes
Text
Web App Development (PWA) - Ecommerce/Blog/Booking/ManagementSystem Apps.
Basic Features
Responsive Website
Client -ChatBot with Tawk -FrontEnd&BackEnd Any Type Of Logins Like Google OAuth. -Payment Integration: Customizable ( Custom Gateway Manually Have To Confirm From Admins Then Order Will Be Sent Via Mail Or The Product Will Be Delivered You Will Get Updates, When Any Admin Confirms The Order Will Be Delivered Paid Or Unpaid Doesn’t Matter.)
SEO ENABLED -Made On Latest NextJS 14 SSR(Customizable Back End & Front End AIO)
Admin
Add Categories
Add Products in Categories
Add Sub-Categories(Product-sub-categories)
Add Pricing
Add Tracking Code Once Someone Orders (Manually Confirmation From Admins Then Automated SMTP & Account Based Product Delivery. Digital/Physical Any Type).
Mark as Shipped/Delivered.
Mail Delivery System With Customizable Templates With Latest Resend SMTP.
Custom Payment Methods You Can Literally Add Any Type Of Method.
Can Add Icarry/Shiprocket API For Physical Delivery Related Things. (Get Shipping Prices & Ship Directly To Them Automatically Once Confirmed From Admins Using API Services).
User basic working, Smooth UI.
(AI INTEGRATED CHATBOT WITH DESIRED FUNCTION)
(Crawling,Blogs,SEO,MARKDOWN,RSS ALL CAN BE DONE WITH LATEST TECH)
Works On Linux,Desktop,iOS,Android. (PWA)
// Custom WebApp Related Services Available Too.
TELL US YOUR BUDGET & THE BEST WEB APP WILL BE LIVE FOR YOUR CUSTOMERS ASAP.
For More Info Hmu On Telegram @zirosyntax
1 note
·
View note
Text

Top 10 Code Generation Tools for Application Development
In today’s fast-paced software development environment, code generation tools have become essential for developers aiming to increase efficiency and reduce manual coding efforts. These tools automate the creation of code, allowing developers to focus on more complex and creative aspects of application development. In this blog, we will explore the top 10 code generation tools that can significantly enhance your development workflow. Among these, we will highlight the unique capabilities of Fab Builder, a leading tool in this space.
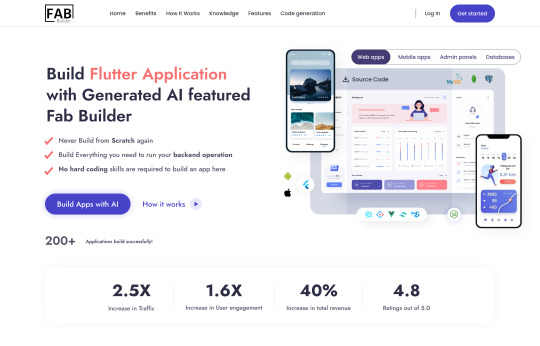
1. Fab Builder
Overview
Fab Builder is a versatile and powerful code generation tool designed to streamline the development process. It supports multiple programming languages and frameworks, making it an excellent choice for diverse development needs. Fab Builder’s intuitive interface and robust feature set help developers create high-quality code quickly and efficiently.
Key Features
Multi-language Support: Fab Builder supports a wide range of programming languages, including Java, Python, JavaScript, and C#.
Customizable Templates: Allows developers to create and customize code templates to match their specific project requirements.
Integration Capabilities: Easily integrates with popular development environments and CI/CD pipelines.
Code Quality: Ensures generated code adheres to best practices and coding standards.
Code Snippet Example
Here’s a simple example of how Fab Builder can generate a REST API endpoint in Python using Flask:
from flask import Flask, jsonify, request app = Flask(__name__) # Generated endpoint @app.route(‘/api/data’, methods=[‘GET’]) def get_data(): sample_data = { ‘id’: 1, ‘name’: ‘Fab Builder Example’, ‘description’: ‘This is a sample data generated by Fab Builder’ } return jsonify(sample_data) if __name__ == ‘__main__’: app.run(debug=True)
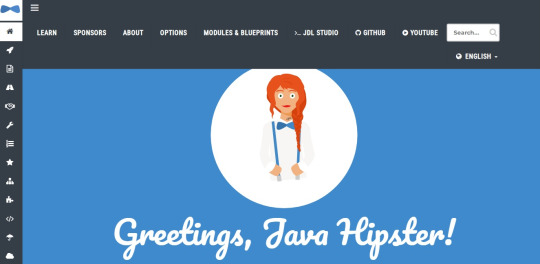
2. JHipster
Overview
JHipster is a development platform that generates, develops, and deploys Spring Boot + Angular/React/Vue web applications and Spring microservices. It provides an end-to-end solution with many out-of-the-box features.
Key Features
Full-Stack Code Generation: Supports both backend and frontend code generation.
Microservices Support: Facilitates the development of microservices architecture.
Integrated DevOps: Includes tools for continuous integration and deployment.
Extensive Customization: Offers numerous options to customize generated code.
Code Snippet Example
# Generate a new application jhipster # Generate an entity jhipster entity Product
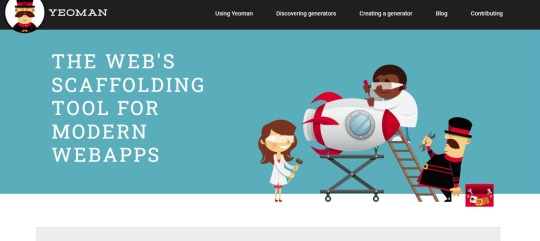
3. Yeoman
Overview
Yeoman is a scaffolding tool for modern web applications. It provides a robust and highly customizable toolset for generating boilerplate code for new projects.
Key Features
Wide Range of Generators: Thousands of generators available for various frameworks and libraries.
Customization: Highly customizable to fit different project needs.
Community Support: Large community contributing to the creation of new generators.
Code Snippet Example
# Install a generator npm install -g generator-webapp # Generate a new project yo webapp
4. CodeSmith Tools
Overview
CodeSmith Tools is a template-based code generation tool that helps developers create consistent and high-quality code across projects. It supports various data sources and can generate code for multiple languages.
Key Features
Template-Based: Uses templates to generate code, ensuring consistency.
Database Integration: Supports generating code from databases, making it ideal for data-driven applications.
Custom Templates: Allows creating custom templates to suit specific project needs.
Code Snippet Example
// Template code (C#) <%@ CodeTemplate Language=”C#” TargetLanguage=”C#” %> <% string className = “MyGeneratedClass”; %> public class <%= className %> { public int Id { get; set; } public string Name { get; set; } }
5. Swagger Codegen
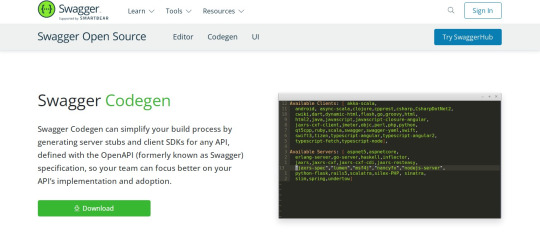
Overview
Swagger Codegen is a powerful tool that generates client libraries, server stubs, API documentation, and API clients from OpenAPI Specifications. It supports various languages and frameworks.
Key Features
API First: Promotes API-first development by generating code from API specifications.
Wide Language Support: Supports numerous languages and frameworks.
Customization: Allows customization of generated code to meet specific needs.
Code Snippet Example
# Generate a Python client from an OpenAPI spec swagger-codegen generate -i swagger.yaml -l python -o ./client
6. Rails Scaffold
Overview
Rails Scaffold is a feature in Ruby on Rails that automatically generates the model, views, and controller for a new resource. It speeds up development by providing a working starting point.
Key Features
Rapid Prototyping: Quickly generates code for new resources.
Convention Over Configuration: Adheres to Rails conventions, reducing the need for configuration.
Integrated: Seamlessly integrates with the rest of the Rails framework.
Code Snippet Example
# Generate a scaffold for a Product resource rails generate scaffold Product name:string description:text price:decimal # Run migrations to update the database rails db:migrate
7. Hibernate Tools
Overview
Hibernate Tools is a suite of tools for Hibernate and JPA development. It includes features for code generation, reverse engineering, and database schema synchronization.
Key Features
Reverse Engineering: Generates Java code from existing database schemas.
Code Generation: Automatically generates entity classes and configuration files.
IDE Integration: Integrates with popular IDEs like Eclipse and IntelliJ IDEA.
Code Snippet Example
# Command to reverse engineer a database schema hbm2java -config hibernate.cfg.xml
8. Angular CLI
Overview
Angular CLI is a command-line interface for Angular that generates boilerplate code for new projects and components. It simplifies Angular development by automating repetitive tasks.
Key Features
Code Generation: Generates components, services, modules, and more.
Project Management: Manages builds, tests, and deployments.
Best Practices: Ensures generated code adheres to Angular best practices.
Code Snippet Example
# Generate a new component ng generate component my-component
9. Plop
Overview
Plop is a micro-generator framework that makes it easy to create custom generators for your projects. It uses a simple and flexible approach to automate code generation.
Key Features
Custom Generators: Easily create custom generators to suit your needs.
Interactive CLI: Provides an interactive command-line interface for generating code.
Flexibility: Highly flexible and can be integrated into various workflows.
Code Snippet Example
// plopfile.js module.exports = function(plop) { plop.setGenerator(‘component’, { description: ‘Create a new component’, prompts: [{ type: ‘input’, name: ‘name’, message: ‘Component name:’ }], actions: [{ type: ‘add’, path: ‘src/components/{{name}}.js’, templateFile: ‘plop-templates/component.hbs’ }] }); };
10. Microsoft Power Automate
Overview
Microsoft Power Automate, formerly known as Microsoft Flow, is a service that helps automate workflows and tasks across applications and services. It includes capabilities for code generation and workflow automation.
Key Features
Workflow Automation: Automates workflows across multiple applications and services.
Integration: Integrates with a wide range of Microsoft and third-party applications.
Templates: Provides a library of pre-built templates for common tasks.
Code Snippet Example
While Power Automate doesn’t generate traditional code, it allows you to automate workflows using visual design tools and pre-built templates.
# Example of a Power Automate workflow (visual representation) Trigger: When a new email arrives Action: Save email attachment to OneDrive
Conclusion
Choosing the right code generation tool can greatly enhance your development efficiency and code quality. Fab Builder stands out among these tools with its versatility, multi-language support, and powerful features. By incorporating Fab Builder and other tools mentioned in this blog into your development workflow, you can streamline your processes, reduce manual coding efforts, and focus on creating innovative solutions.
Each tool has its strengths and is suited for different scenarios, so consider your project requirements and workflow preferences when making a decision. Happy coding!
#app development#code generation#code generator#fab builder#mobile app development#application development#application developer#app developers#software development#tech#code generation tools#technology#low code
0 notes
Text
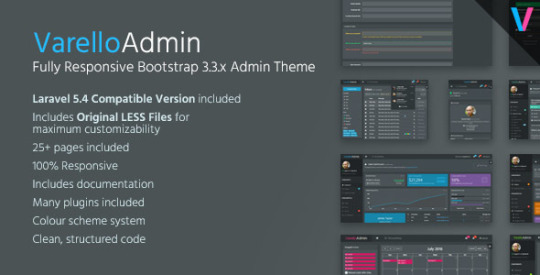
Varello Admin | Responsive Bootstrap Admin Template + Laravel 5.4 Starter Kit - Laravel
Varello Admin | Responsive Bootstrap Admin Template + Laravel 5.4 Starter Kit – Laravel
Varello Admin | Responsive Bootstrap Admin Template + Laravel 5.4 Starter Kit – Laravel LIVE PREVIEWBUY FOR $18 Demo Download Details
[ad_1]
Overview
UPDATE 24/01/2017: Upgraded for the brand new Laravel 5.4!
VarelloAdmin is a fully-responsive, well-featured and highly-polished dark admin template. It includes both Static HTML and Laravel 5.4 Blade versions (includes application routes and…
View On WordPress
#admin#admin theme#backend#bootstrap#cms#dark#dashboard#elixir#gulp#Kit#laravel#responsive#Starter#Template#Varello#webapp
0 notes
Text
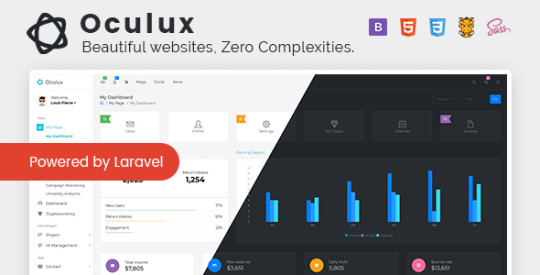
Oculux UI - Laravel Admin Dashboard Template
Oculux UI – Laravel Admin Dashboard Template
Oculux is a popular Premium WebApp template for admin dashboards and admin panels. It’s a responsive Admin template, which is based on the Bootstrap 4X framework. It utilizes all of the Bootstrap components in design and re-styles many commonly used plugins to create a consistent design that can be used as a user interface for backend applications. —SASS Supported SASS is completely compatible…
View On WordPress
#bootstrap 4x#clean#flat design#hr system#Laravel#laravel admin#laravel admin dashboard#Laravel Dark Admin#Laravel Dashboard#Laravel HR Management#Laravel Oculux Admin#Laravel Web App template#modern admin panel#payroll#responsive admin
1 note
·
View note
Text
How LiveView in Phoenix, the unique Elixir web framework with first class realtime support, came to be. To me the most interesting part is that Phoenix, similarly to Electric Clojure and HTMX, moves state and logic to the backend (BE) and handles efficiently communicating changes to the (mostly?) static frontend (FE). A lot of webapp complexity IMO stems from synchronizing state on the FE and BE, so this is refreshing. Highlights:
FE and BE are connected by bidirectional Channels, which exploit Elixir/Erlang messages to talk with external clients. The FE opens a single WebSocket, which multiplexes between channels and processes. Because Elixir is preemptively scheduled, processes load-balance on both IO and CPU. You can block on one channel, transcode video on another, and the other channels stay snappy.
(An interesting feature is Phoenix Presence, a distributed group manager with metadata backed by CRDTs. Presence gets used in IOT apps to track devices, cars, and other things. If you don't have something like Presence, you probably don't think to build the kinds of features it enables.)
With React, any state change triggers a re-render, followed by an efficient patch of the browser DOM. LiveView is the same, except the server re-renders the template and holds the state. [LiveView] compute[s] a minimal diff to send to the client of only the dynamic data that has changed. [..] we send a payload better optimized than the best hand-written JSON API.
0 notes
Text
Ample Admin - Ultimate Dashboard Template
Ample Admin – Ultimate Dashboard Template
LIVE PREVIEWBUY FOR $59 Ample Admin is a popular open source WebApp template for admin dashboards and control panels. It is a responsive HTML template that is based on the CSS framework Bootstrap 5. It utilizes all of the Bootstrap components in its design and re-styles many commonly used plugins to create a consistent design that can be used as a user interface for backend applications. Ample…

View On WordPress
0 notes
Text
Crypto Admin Dashboard Bootstrap 5 Template UI Kit with Sass
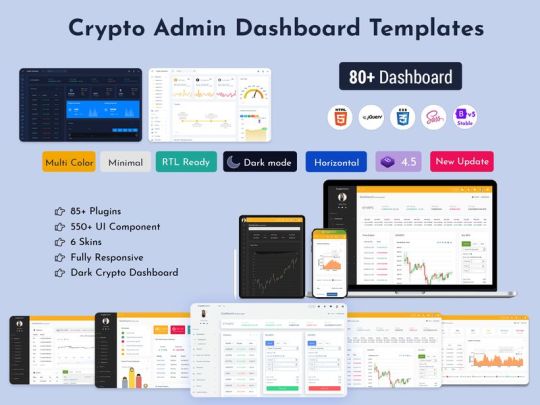
Bitcoin Crypto Admin Dashboard Bootstrap 5 Admin Template UI and WebApp Template is a fully responsive Cryptocurrency Dashboard Admin Template built with Bootstrap 5 and 4.2 Framework, modern web technology HTML5 and CSS3. Lightweight, SasS, and easy customizable which is basically designed for the developers who want to customize it. Crypto Admin can be used by developers developing web applications like custom admin panel, ICO, Bitcoin Dashboards, Bitcoin and other current website applications, project management system, admin dashboard, application backend, CMS, CRM, Stock chart, Stock Market, Business Analytics, business website, corporate, portfolio, blog, etc.
MORE INFO / BUY NOW DEMO
Like Us


#bootstrap 5 dashboard#Bootstrap 5Admin Templates#Bootstrap Admin Dashboard#Bootstrap Admin HTML#Bootstrap Admin Template#Bootstrap Admin Templates#Admin Dashboard#Admin Dashboard responsive template#Cryptocurrency Admin Dashboard Template#admin dashboard templates#admin dashboard ui#Admin Dashboard UI Kit#Admin Templates Bootstrap#admin theme#Responsive Bootstrap 5 Admin#responsive dashboard#crypto dashboard#cryptocurrency#creative dashboard design#Crypto Tokenize Admin Template#Tokenize Admin Template#Tokenize CryptoCurrency Admin Templates#Bootstrap 5 Template#Crypto Admin Dashboard
0 notes
Text
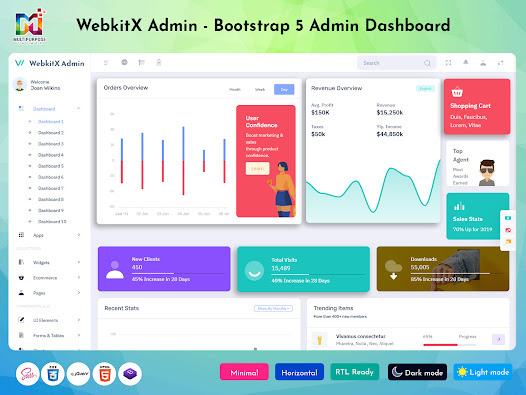
Bootstrap Admin Template Webapp - Restaurant
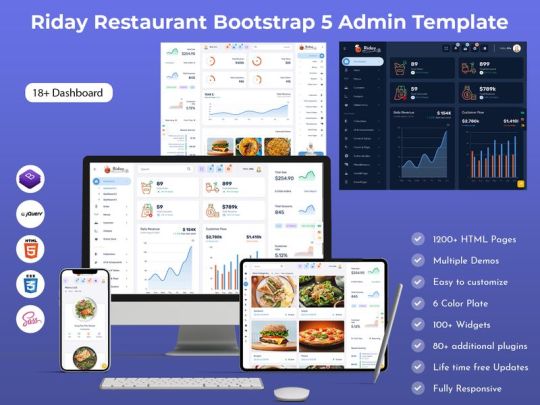
Restaurant Bootstrap Admin Template Webapp with features like Order, Revenue, menu, Sales visits, monthly revenue and performance tracking. Bootstrap Admin dashboard template. We have developed this admin template by unique and minimal look of the CRM’s software. Admin Theme panel for backend design and UI interface of your Web apps The Dashboard shows how much your store sales were in the current month.
MORE INFO / BUY NOW DEMO
Like Us


#Bootstrap Admin Dashboard#Bootstrap Dashboard#dashboard template#Admin Template Bootstrap#Bootstrap Admin Web App#HTML Template#Admin Panel#Admin Template#Admin Panel Dashboard#WebApp Template#ui design#software design#product design
0 notes
Text
Bootstrap 5 Admin WebApp Template - FOX
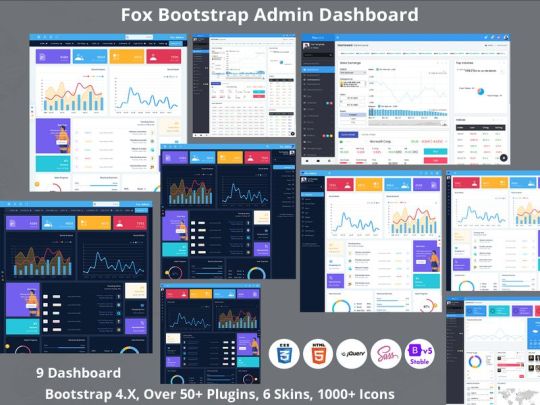
Fox is a Premium Responsive Bootstrap 5 Admin WebApp Template with a modern design concept. It is also easy to customize, which means it is basically designed for the developers who want to customise it. It can be used by developers developing web applications like custom Admin Panels, project management systems, admin dashboards, application backends, corporate, portfolios, blogs etc. It works on all major web browsers; desktop, iPhone, iPad, tablet, and all other smart phone devices
MORE INFO / BUY NOW DEMO
Like Us


#Bootstrap 5 Admin Dashboard#Bootstrap Dashboard#Admin Template Bootstrap#HTML Template#Bootstrap Admin Web App#Portfolio Admin Dashboard Template#Bootstrap Admin Templates#Admin Dashboard Templates#Dashboard Templates#best admin templates#Admin Panel Dashboard#ui design#ux design#Ux Ui#webapps#software design#product design
1 note
·
View note
Text
Why should you be using Bootstrap admin templates for WebApp Template
Bootstrap Admin Template may be thought of as pre-built pages that work nicely with WebApp Template. The integration’s goal is to carry out certain backend duties including content and user administration, website maintenance, and setup and installation of website software. The main job that templates carry out to improve the functionality of your website also includes data monitoring such as user visits to the website and network traffic
0 notes
Text
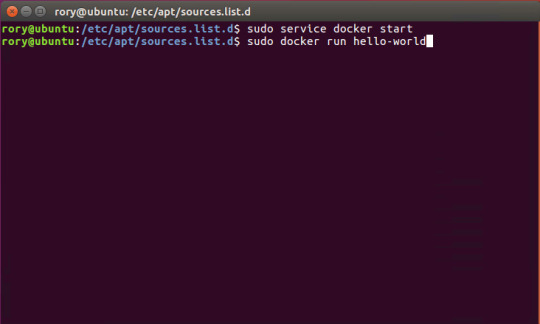
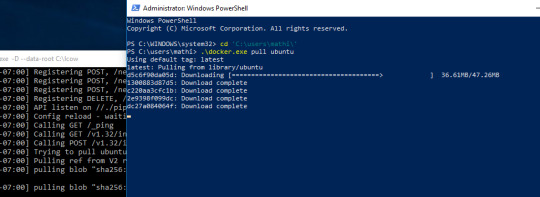
Start Docker In Ubuntu

A Linux Dev Environment on Windows with WSL 2, Docker Desktop And the docker docs. Docker Desktop WSL 2 backend. Below is valid only for WSL1. It seems that docker cannot run inside WSL. What they propose is to connect the WSL to your docker desktop running in windows: Setting Up Docker for Windows and WSL. By removing /etc/docker you will loose all Images and data. You can check logs with. Journalctl -u docker.services. Systemctl daemon-reload && systemctl enable docker && systemctl start docker. This worked for me.
$ docker images REPOSITORY TAG ID ubuntu 12.10 b750fe78269d me/myapp latest 7b2431a8d968. Docker-compose start docker-compose stop. After installing the Nvidia Container Toolkit, you'll need to restart the Docker Daemon in order to let Docker use your Nvidia GPU: sudo systemctl restart docker Changing the docker-compose.yml Now that all the packages are in order, let's change the docker-compose.yml to let the Jellyfin container make use of the Nvidia GPU.
Complete Docker CLI
Container Management CLIs
Inspecting The Container
Interacting with Container
Image Management Commands
Image Transfer Comnands
Builder Main Commands
The Docker CLI
Manage images
docker build
Create an image from a Dockerfile.
docker run
Run a command in an image.
Manage containers
docker create
Example
Create a container from an image.
docker exec
Example
Run commands in a container.
docker start
Start/stop a container.
docker ps
Manage containers using ps/kill.
Images
docker images
Manages images.
docker rmi
Deletes images.
Also see
Getting Started(docker.io)
Inheritance
Variables
Initialization
Onbuild
Commands
Entrypoint
Configures a container that will run as an executable.
This will use shell processing to substitute shell variables, and will ignore any CMD or docker run command line arguments.
Metadata
See also
Basic example
Commands
Reference
Building
Ports
Commands
Environment variables
Dependencies
Other options
Advanced features
Labels
DNS servers
Devices
External links
Hosts
sevices
To view list of all the services runnning in swarm
To see all running services
to see all services logs
To scale services quickly across qualified node
clean up
To clean or prune unused (dangling) images
To remove all images which are not in use containers , add - a
To Purne your entire system
To leave swarm
To remove swarm ( deletes all volume data and database info)
To kill all running containers
Contributor -
Sangam biradar - Docker Community Leader
The Jellyfin project and its contributors offer a number of pre-built binary packages to assist in getting Jellyfin up and running quickly on multiple systems.
Container images
Docker
Windows (x86/x64)
Linux
Linux (generic amd64)
Debian
Ubuntu
Container images
Official container image: jellyfin/jellyfin.
LinuxServer.io image: linuxserver/jellyfin.
hotio image: hotio/jellyfin.
Jellyfin distributes official container images on Docker Hub for multiple architectures. These images are based on Debian and built directly from the Jellyfin source code.
Additionally the LinuxServer.io project and hotio distribute images based on Ubuntu and the official Jellyfin Ubuntu binary packages, see here and here to see their Dockerfile.
Note
For ARM hardware and RPi, it is recommended to use the LinuxServer.io or hotio image since hardware acceleration support is not yet available on the native image.
Docker
Docker allows you to run containers on Linux, Windows and MacOS.
The basic steps to create and run a Jellyfin container using Docker are as follows.
Follow the offical installation guide to install Docker.
Download the latest container image.
Create persistent storage for configuration and cache data.
Either create two persistent volumes:
Or create two directories on the host and use bind mounts:
Create and run a container in one of the following ways.
Note
The default network mode for Docker is bridge mode. Bridge mode will be used if host mode is omitted. Use host mode for networking in order to use DLNA or an HDHomeRun.
Using Docker command line interface:
Using host networking (--net=host) is optional but required in order to use DLNA or HDHomeRun.
Bind Mounts are needed to pass folders from the host OS to the container OS whereas volumes are maintained by Docker and can be considered easier to backup and control by external programs. For a simple setup, it's considered easier to use Bind Mounts instead of volumes. Replace jellyfin-config and jellyfin-cache with /path/to/config and /path/to/cache respectively if using bind mounts. Multiple media libraries can be bind mounted if needed:
Note
There is currently an issue with read-only mounts in Docker. If there are submounts within the main mount, the submounts are read-write capable.
Using Docker Compose:
Create a docker-compose.yml file with the following contents:
Then while in the same folder as the docker-compose.yml run:
To run the container in background add -d to the above command.
You can learn more about using Docker by reading the official Docker documentation.
Hardware Transcoding with Nvidia (Ubuntu)
You are able to use hardware encoding with Nvidia, but it requires some additional configuration. These steps require basic knowledge of Ubuntu but nothing too special.
Adding Package RepositoriesFirst off you'll need to add the Nvidia package repositories to your Ubuntu installation. This can be done by running the following commands:
Installing Nvidia container toolkitNext we'll need to install the Nvidia container toolkit. This can be done by running the following commands:
After installing the Nvidia Container Toolkit, you'll need to restart the Docker Daemon in order to let Docker use your Nvidia GPU:
Changing the docker-compose.ymlNow that all the packages are in order, let's change the docker-compose.yml to let the Jellyfin container make use of the Nvidia GPU.The following lines need to be added to the file:
Your completed docker-compose.yml file should look something like this:
Note
For Nvidia Hardware encoding the minimum version of docker-compose needs to be 2. However we recommend sticking with version 2.3 as it has proven to work with nvenc encoding.
Unraid Docker
An Unraid Docker template is available in the repository.
Open the unRaid GUI (at least unRaid 6.5) and click on the 'Docker' tab.
Add the following line under 'Template Repositories' and save the options.
Click 'Add Container' and select 'jellyfin'.
Adjust any required paths and save your changes.
Kubernetes
A community project to deploy Jellyfin on Kubernetes-based platforms exists at their repository. Any issues or feature requests related to deployment on Kubernetes-based platforms should be filed there.
Podman
Podman allows you to run containers as non-root. It's also the offically supported container solution on RHEL and CentOS.
Steps to run Jellyfin using Podman are almost identical to Docker steps:
Install Podman:
Download the latest container image:
Create persistent storage for configuration and cache data:
Either create two persistent volumes:
Or create two directories on the host and use bind mounts:
Create and run a Jellyfin container:
Note that Podman doesn't require root access and it's recommended to run the Jellyfin container as a separate non-root user for security.
If SELinux is enabled you need to use either --privileged or supply z volume option to allow Jellyfin to access the volumes.
Replace jellyfin-config and jellyfin-cache with /path/to/config and /path/to/cache respectively if using bind mounts.
To mount your media library read-only append ':ro' to the media volume:

To run as a systemd service see Running containers with Podman and shareable systemd services.
Cloudron
Cloudron is a complete solution for running apps on your server and keeping them up-to-date and secure. On your Cloudron you can install Jellyfin with a few clicks via the app library and updates are delivered automatically.
The source code for the package can be found here.Any issues or feature requests related to deployment on Cloudron should be filed there.
Windows (x86/x64)
Windows installers and builds in ZIP archive format are available here.
Warning
If you installed a version prior to 10.4.0 using a PowerShell script, you will need to manually remove the service using the command nssm remove Jellyfin and uninstall the server by remove all the files manually. Also one might need to move the data files to the correct location, or point the installer at the old location.
Warning
The 32-bit or x86 version is not recommended. ffmpeg and its video encoders generally perform better as a 64-bit executable due to the extra registers provided. This means that the 32-bit version of Jellyfin is deprecated.
Install using Installer (x64)
Install
Download the latest version.
Run the installer.
(Optional) When installing as a service, pick the service account type.
If everything was completed successfully, the Jellyfin service is now running.
Open your browser at http://localhost:8096 to finish setting up Jellyfin.
Update
Download the latest version.
Run the installer.
If everything was completed successfully, the Jellyfin service is now running as the new version.
Uninstall
Go to Add or remove programs in Windows.
Search for Jellyfin.
Click Uninstall.
Manual Installation (x86/x64)
Install
Download and extract the latest version.
Create a folder jellyfin at your preferred install location.
Copy the extracted folder into the jellyfin folder and rename it to system.
Create jellyfin.bat within your jellyfin folder containing:
To use the default library/data location at %localappdata%:
To use a custom library/data location (Path after the -d parameter):
To use a custom library/data location (Path after the -d parameter) and disable the auto-start of the webapp:
Run
Open your browser at http://<--Server-IP-->:8096 (if auto-start of webapp is disabled)
Update
Stop Jellyfin
Rename the Jellyfin system folder to system-bak
Download and extract the latest Jellyfin version
Copy the extracted folder into the jellyfin folder and rename it to system
Run jellyfin.bat to start the server again
Rollback
Stop Jellyfin.
Delete the system folder.
Rename system-bak to system.
Run jellyfin.bat to start the server again.
MacOS
MacOS Application packages and builds in TAR archive format are available here.
Install
Download the latest version.
Drag the .app package into the Applications folder.
Start the application.
Open your browser at http://127.0.0.1:8096.
Upgrade
Download the latest version.
Stop the currently running server either via the dashboard or using the application icon.
Drag the new .app package into the Applications folder and click yes to replace the files.
Start the application.
Open your browser at http://127.0.0.1:8096.
Uninstall
Start Docker In Ubuntu Virtualbox
Stop the currently running server either via the dashboard or using the application icon.
Move the .app package to the trash.
Deleting Configuation
This will delete all settings and user information. This applies for the .app package and the portable version.
Delete the folder ~/.config/jellyfin/
Delete the folder ~/.local/share/jellyfin/
Portable Version
Download the latest version
Extract it into the Applications folder
Open Terminal and type cd followed with a space then drag the jellyfin folder into the terminal.
Type ./jellyfin to run jellyfin.
Open your browser at http://localhost:8096
Closing the terminal window will end Jellyfin. Running Jellyfin in screen or tmux can prevent this from happening.
Upgrading the Portable Version
Download the latest version.
Stop the currently running server either via the dashboard or using CTRL+C in the terminal window.
Extract the latest version into Applications
Open Terminal and type cd followed with a space then drag the jellyfin folder into the terminal.
Type ./jellyfin to run jellyfin.
Open your browser at http://localhost:8096
Uninstalling the Portable Version
Stop the currently running server either via the dashboard or using CTRL+C in the terminal window.
Move /Application/jellyfin-version folder to the Trash. Replace version with the actual version number you are trying to delete.
Using FFmpeg with the Portable Version
The portable version doesn't come with FFmpeg by default, so to install FFmpeg you have three options.
use the package manager homebrew by typing brew install ffmpeg into your Terminal (here's how to install homebrew if you don't have it already
download the most recent static build from this link (compiled by a third party see this page for options and information), or
compile from source available from the official website
More detailed download options, documentation, and signatures can be found.
If using static build, extract it to the /Applications/ folder.
Navigate to the Playback tab in the Dashboard and set the path to FFmpeg under FFmpeg Path.
Linux
Linux (generic amd64)
Generic amd64 Linux builds in TAR archive format are available here.
Installation Process
Create a directory in /opt for jellyfin and its files, and enter that directory.
Download the latest generic Linux build from the release page. The generic Linux build ends with 'linux-amd64.tar.gz'. The rest of these instructions assume version 10.4.3 is being installed (i.e. jellyfin_10.4.3_linux-amd64.tar.gz). Download the generic build, then extract the archive:
Create a symbolic link to the Jellyfin 10.4.3 directory. This allows an upgrade by repeating the above steps and enabling it by simply re-creating the symbolic link to the new version.
Create four sub-directories for Jellyfin data.
If you are running Debian or a derivative, you can also download and install an ffmpeg release built specifically for Jellyfin. Be sure to download the latest release that matches your OS (4.2.1-5 for Debian Stretch assumed below).
If you run into any dependency errors, run this and it will install them and jellyfin-ffmpeg.
Due to the number of command line options that must be passed, it is easiest to create a small script to run Jellyfin.
Then paste the following commands and modify as needed.
Assuming you desire Jellyfin to run as a non-root user, chmod all files and directories to your normal login user and group. Also make the startup script above executable.
Finally you can run it. You will see lots of log information when run, this is normal. Setup is as usual in the web browser.
Portable DLL
Platform-agnostic .NET Core DLL builds in TAR archive format are available here. These builds use the binary jellyfin.dll and must be loaded with dotnet.
Arch Linux
Jellyfin can be found in the AUR as jellyfin, jellyfin-bin and jellyfin-git.
Fedora
Fedora builds in RPM package format are available here for now but an official Fedora repository is coming soon.
You will need to enable rpmfusion as ffmpeg is a dependency of the jellyfin server package
Note
You do not need to manually install ffmpeg, it will be installed by the jellyfin server package as a dependency
Install the jellyfin server
Install the jellyfin web interface
Enable jellyfin service with systemd
Open jellyfin service with firewalld
Note
This will open the following ports8096 TCP used by default for HTTP traffic, you can change this in the dashboard8920 TCP used by default for HTTPS traffic, you can change this in the dashboard1900 UDP used for service auto-discovery, this is not configurable7359 UDP used for auto-discovery, this is not configurable
Reboot your box
Go to localhost:8096 or ip-address-of-jellyfin-server:8096 to finish setup in the web UI
CentOS
CentOS/RHEL 7 builds in RPM package format are available here and an official CentOS/RHEL repository is planned for the future.
The default CentOS/RHEL repositories don't carry FFmpeg, which the RPM requires. You will need to add a third-party repository which carries FFmpeg, such as RPM Fusion's Free repository.
You can also build Jellyfin's version on your own. This includes gathering the dependencies and compiling and installing them. Instructions can be found at the FFmpeg wiki.
Start Docker In Ubuntu Lts
Debian
Repository
The Jellyfin team provides a Debian repository for installation on Debian Stretch/Buster. Supported architectures are amd64, arm64, and armhf.
Note

Microsoft does not provide a .NET for 32-bit x86 Linux systems, and hence Jellyfin is not supported on the i386 architecture.
Install HTTPS transport for APT as well as gnupg and lsb-release if you haven't already.
Import the GPG signing key (signed by the Jellyfin Team):
Add a repository configuration at /etc/apt/sources.list.d/jellyfin.list:
Note
Supported releases are stretch, buster, and bullseye.
Update APT repositories:
Install Jellyfin:
Manage the Jellyfin system service with your tool of choice:
Packages
Raw Debian packages, including old versions, are available here.
Note
The repository is the preferred way to obtain Jellyfin on Debian, as it contains several dependencies as well.
Download the desired jellyfin and jellyfin-ffmpeg.deb packages from the repository.
Install the downloaded .deb packages:
Use apt to install any missing dependencies:
Manage the Jellyfin system service with your tool of choice:
Ubuntu
Migrating to the new repository
Previous versions of Jellyfin included Ubuntu under the Debian repository. This has now been split out into its own repository to better handle the separate binary packages. If you encounter errors about the ubuntu release not being found and you previously configured an ubuntujellyfin.list file, please follow these steps.
Run Docker In Ubuntu 18.04
Remove the old /etc/apt/sources.list.d/jellyfin.list file:
Proceed with the following section as written.
Ubuntu Repository
The Jellyfin team provides an Ubuntu repository for installation on Ubuntu Xenial, Bionic, Cosmic, Disco, Eoan, and Focal. Supported architectures are amd64, arm64, and armhf. Only amd64 is supported on Ubuntu Xenial.
Note
Microsoft does not provide a .NET for 32-bit x86 Linux systems, and hence Jellyfin is not supported on the i386 architecture.
Install HTTPS transport for APT if you haven't already:
Enable the Universe repository to obtain all the FFMpeg dependencies:
Note
If the above command fails you will need to install the following package software-properties-common.This can be achieved with the following command sudo apt-get install software-properties-common
Import the GPG signing key (signed by the Jellyfin Team):
Add a repository configuration at /etc/apt/sources.list.d/jellyfin.list:
Note
Supported releases are xenial, bionic, cosmic, disco, eoan, and focal.
Update APT repositories:
Install Jellyfin:
Manage the Jellyfin system service with your tool of choice:
Ubuntu Packages
Raw Ubuntu packages, including old versions, are available here.
Note
The repository is the preferred way to install Jellyfin on Ubuntu, as it contains several dependencies as well.
Start Docker In Ubuntu 20.04
Enable the Universe repository to obtain all the FFMpeg dependencies, and update repositories:
Download the desired jellyfin and jellyfin-ffmpeg.deb packages from the repository.
Install the required dependencies:
Install the downloaded .deb packages:
Use apt to install any missing dependencies:
Manage the Jellyfin system service with your tool of choice:
Migrating native Debuntu install to docker
It's possible to map your local installation's files to the official docker image.
Note
You need to have exactly matching paths for your files inside the docker container! This means that if your media is stored at /media/raid/ this path needs to be accessible at /media/raid/ inside the docker container too - the configurations below do include examples.
To guarantee proper permissions, get the uid and gid of your local jellyfin user and jellyfin group by running the following command:
You need to replace the <uid>:<gid> placeholder below with the correct values.
Using docker
Using docker-compose
0 notes
Photo

Download EmailChimp - Marketing Tool Admin Template on themeforest
Description EmailChimp - Marketing Tool Admin Template :
Download EmailChimp - Marketing Tool Admin Template. The Theme releases on Monday 1st March 2021 By The Author iqonicdesign on Themeforest. It’s makes use of for admin dashboard,backend,bootstrap 4,elastic e-mail dashboard,e-mail administration Dashboard,Email advertising and marketing dashboard,glup dashboard,premium dashboard,scss dashboard package,starter package,net app. Theme Title: EmailChimp - Marketing Tool Admin Template Category: web site-templates/admin-templates Price: $7 Author: iqonicdesign Published Date: Monday 1st March 2021 10:19:32 AM More Info / DownloadDemo
EmailChimp is like fashionable and clear Admin UI Template for making a Email Marketing Tool – Webapp. Its objective designed pages will assist you construct a phenomenal webapplication. Now focus on you logic and depart design worries to this Admin template. It is a contemporary and versatile dashboard with numerous prepared-to-use pages and integrations. Its design and tremendous clear seems will make your backend app look lovely and stylish. It works seamlessly on all main net browsers, tablets, and telephones. Each web page is totally responsive and retina prepared, making your creation look good on any machine.
Technologies used
HTML
SASS
Gulp
Handlebars
Pages
Dashboard
Campaign
Contacts
Forms
Pricing
Email Builder
Login
Maintenance
many extra..
Enjoy a lifetime FREE updates!
We are continuously working to make your expertise higher with each updates. Get all the newest updates completely FREE
Template Features
Built with HTML, Sass, Handlebars (HBS), Gulp
Clean Code
Hover Effects
Moveable Effect
UI Element and Charts Module
Easy To Customise
Unique, Clean and Modern Design
Fully Responsive
Cross Browser Optimisation
Free Google font and icon used
And far more….
You may also wish to checkout our extremely in style Admin Templates assortment.
LIKE THIS?
We love making admin dashboard designs. This is without doubt one of the many we have now launched and are working on. Stay knowledgeable about what we will probably be our subsequent BIG launch and obtain unique previews and reductions on our premium items, subscribe right here. We promise, you gained’t spam you.
Please price us
Love EmailChimp Dashboard? Please give us stars and share your love in opinions
Refund Policy
We don’t provide a refund. (If the item is downloaded)
Please learn the outline and compatibility content material completely earlier than buying as we don’t provide a refund for those who purchase it by mistake.
Support & Assistance
Faced an issue? Need help with the product? No worries – our customer help crew is at all times prepared that can assist you.
Please increase a ticket right here at https://iqonic.desky.support/
Support requests are being processed on enterprise days from 9:00 to 18:00 (GMT +05.30) [generally] inside 24h to 48h within the order they have been obtained.
We recommend, whereas our crew opinions your help request, please learn the documentation that comes within the zip file of ThemeForest. You can obtain it from ThemeForest: https://themeforest.net/downloads
We are in GMT+5:30 timezone. We handle all of the help queries 6 days weekly (Sunday off).
If any help ticket has no response from the item proprietor for 7 days, the ticket will probably be thought-about closed. If you want additional help you may create one other ticket or drop us an e-mail asking to re-open the ticket for you.
Have pre-gross sales questions or considerations, please write to us by way of our web site contact web page
If you want our product and help then please drop a price and write a overview at: https://themeforest.net/downloads
NOTE : Images utilized in demo are for reference solely. Item package deal include dummy placeholders solely
Images Credits
Unsplash
Pixabay
Freepik
Please Note: Live preview pictures can't be used instantly in shopper’s dwell challenge. Those are used for preview objective solely.
Changelog
Version 1.0.0 – 23th Feb 2021
- Initial launch.
More Info / DownloadDemo #EmailChimp #Marketing #Tool #Admin #Template
#admin_dashboard#All_Theme_amp_Template#backend#bootstrap_4#elastic_email_dashboard#email_management_Dashboard#Email_marketing_dashboard#glup_dashboard#premium_dashboard#scss_dashboard_kit#site-templates#site-templates_Weekly_bestsellers#starter_kit#Theme_amp_Template_Weekly_bestsellers#web_app#Weekly_bestsellers
0 notes
Text
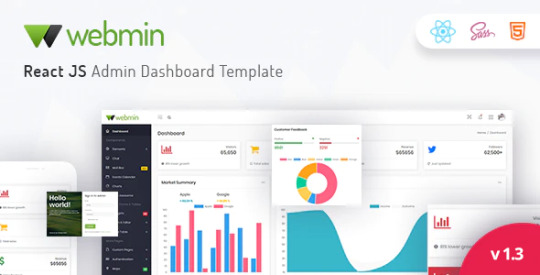
Webmin - React JS Admin Dashboard Template
Webmin – React JS Admin Dashboard Template
Webmin React JS Admin Dashboard Template is a powerful lightweight react js webapp template for backend admin panels. It includes 20+ Page Templates, 20+ Ready to Use react Components, Unique Dashboard and lots more for your backend applications. Webmin react admin dashboard is based on a modern responsive design, which allows it to be easily customized. We built Webmin react admin to be as much…
View On WordPress
#admin#bootstrap admin#bootstrap admin template#cms#crm#dashboard template#premium admin template#project management#react admin dashboard#react admin template#react bootstrap 4 admin#react bootstrap dashboard#reactjs
0 notes
Text
Deploy Infra in the Cloud using Terraform

Deploy Infra in the Cloud using Terraform Deploy Infra in the Cloud using Terraform Terraform is becoming the standard when it comes to deploying infrastructure into the cloud or on premise. In this course you will learn how to create and deploy Terraform templates. We will work with the different Terraform commands like init, plan, apply and destroy. We’ll explore terraform features like input and output parameters, the execution plan and the remote backend state. We’ll write templates for Web Apps, SQL Database, VMs, Storage, Kubernetes clusters and many more. We’ll create the DevOps CI/CD pipelines using Azure DevOps and Github Actions to deploy into multiple environments: dev, test and prod. Then we’ll implement GitOps for Terraform using Atlantis. Along all these demonstrations you’ll also learn the Best practices in terms of security, configuration and scalability. I hope you are ready and excited for this journey! Bring a coffee and lets get started. Current plan: Intro - Intro to Terraform (Init, Plan, Apply, Delete) - Requirements (Terraform, Azure subscription, Azure CLI, VS Code+TF plugin, any OS) ResourceGroup - Deploying Resource Group into Azure - Pay Attention to Resource Recreation - Validate and Format Templates WebApp - Deploying Web App - Adding Variables File - Creating Variables in .tfvars Read the full article
0 notes