#base font tag in html
Explore tagged Tumblr posts
Visit Tumblr Blog
Explore Tumblr blogs with no restrictions, modern design and the best experience.
Last Seen Tumblr Blogs


Fun Fact
Tumblr’s website traffic is steadily declining.
Text
Disco Elysium: The Final Cut Work Skin
I put together a work skin for Disco Elysium AO3 fics or any other HTML/CSS styling! It's compatible with and without dark mode or a dark site skin like Reversi, though I think it looks best with a dark site skin like Reversi, since it's made to look like the game (Final Cut version, anyway, which is what I started with).
Works that use this skin: KK57-1903-1145 THE SHINING MACHINE
Default Site Skin (without work skin | with work skin)

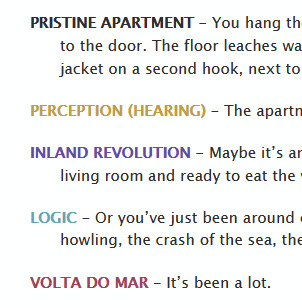
Reversi Site Skin (without work skin | with work skin)

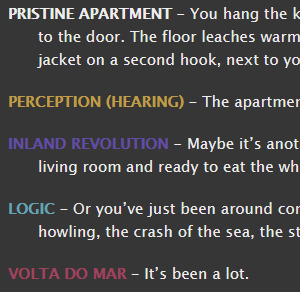
Not pictured but included in the full CSS: choices, active skill checks and skill check results. Full CSS under the cut!
.skill { text-transform: uppercase; font-weight: bold;} .psyche { color: #634CA8;} .intellect { color: #5BA6B7;} .physique { color: #A73F5C;} .motorics { color: #C39E3C;} .check-result { color: #808080;} p { text-indent: -2em; margin-left: 2em;} .white-check { background-color: white; border: 2px solid black; color: black !important; } .white-check-locked { background-color: RGBA(1,1,1,0.8); border: 2px solid black; color: RGBA(0,0,0,0.8) !important;} .red-check { background-color: red; color: white !important;} .choice { text-indent: 0; padding: 0; margin: 0;} .new { color: RGBA(168,60,41,1);} .hovering { background-color: RGBA(0,0,0,0.7); color: white; font-weight: bold;} .used { color: RGBA(168,60,41,0.8);}
Tutorial: Creating a Work Skin
How to use this work skin in particular:
Wrap your labels with tags and use class "skill" for all of them. Add the stat class if appropriate. For example: LOGIC for a LOGIC label (based in the INTELLECT stat, but KIM KITSURAGI for a person.
In the tags for your choice items, add "choice" and any other appropriate classes. You will need to add "new" if you want them to be colored red as they are in the game. This is to prevent incorrect cascading when used with other classes.
Be sure to preview your work skin before you post!
If there are issues or questions please feel free to @ me or drop me an ask 🩵💜🩷💛
#disco elysium#ao3#ao3 work skin#formatting#fanfiction#for as polished as the game is this was surprisingly quick to put together
123 notes
·
View notes
Text


# revolving door : theme 078.
↻ features:
png: 210x430px
polaroid's:160x140px
font size options (9px, 10px, 11px, 12px, 13px)
6 font title variants
3 font family variants
phostop gutter options (0px to 5px)
visible source link
optional extra link
optional tags
optional rounded edges
optional black and white effect on images
npf images fix! ( thanks to @glenthemes )
↻ terms of use and info:
don’t use it as a code base or steal it, do’t edit the credits or remove them and please don’t take parts of the theme and paste them into another’s.
please read my rules!
the appearance may change depending on the size of your computer screen.
↷ get this on patreon or payhip
( ps ). reblog if you actually mess with your HTML at 3am — be the algorithm you want 🙏🙂↕️
#themes#tumblr themes#theme#rp things#rpt#rpc#indie rp themes#rp themes#rp theme#rpg#01. codes : mine.#code: revolving door#tumblrthemes#paidthemes#customthemes#themeshop#tumblrtheme#indiethemes#minimalthemes#darkthemes#aestheticthemes#writersoftumblr#fanfictionthemes#blogthemes#dashboardthemes#themesale#customblog#tumblrcustomthemes#themesforfree#themecommunity
91 notes
·
View notes
Note
i would really love to get into writing fanfic on here,, i was wondering if you have any tips / tricks about how to start that. i feel so lost when it comes to profile customisation, having posts with gifs, images or customised writing. i would love to hear if you have anything to suggest because i LOVE your work and your profiles aesthetics.
starting out can feel intimidating but do not worry! with tips and practice it becomes easier over time.
i’ve put together a small guide for setting up your blog and getting into writing.
let’s start with setting up your blog.
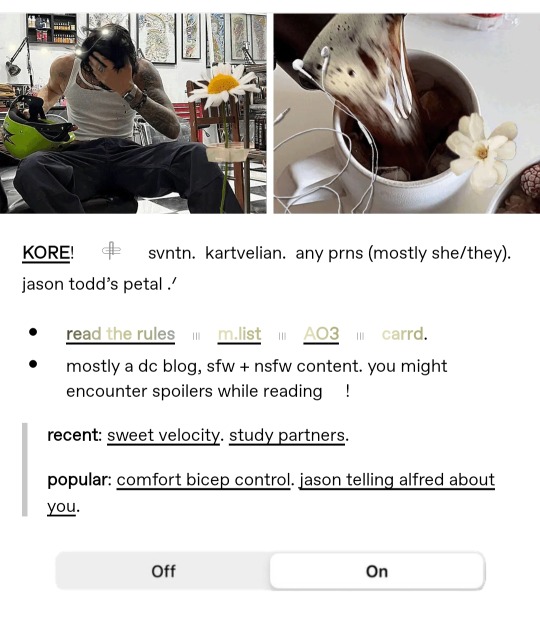
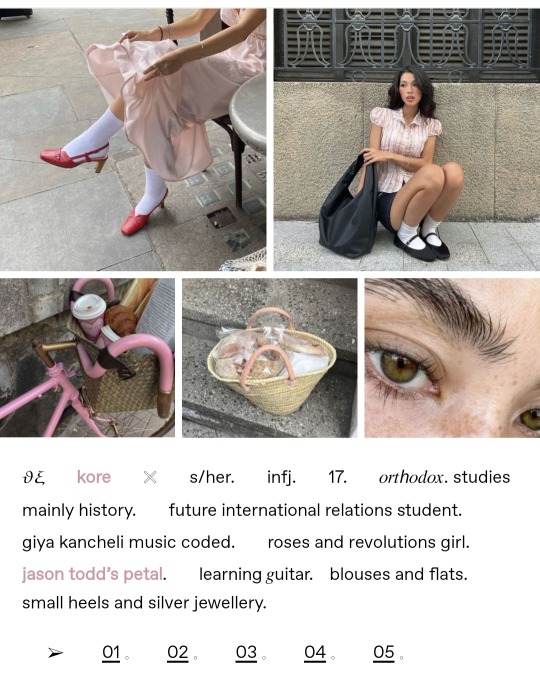
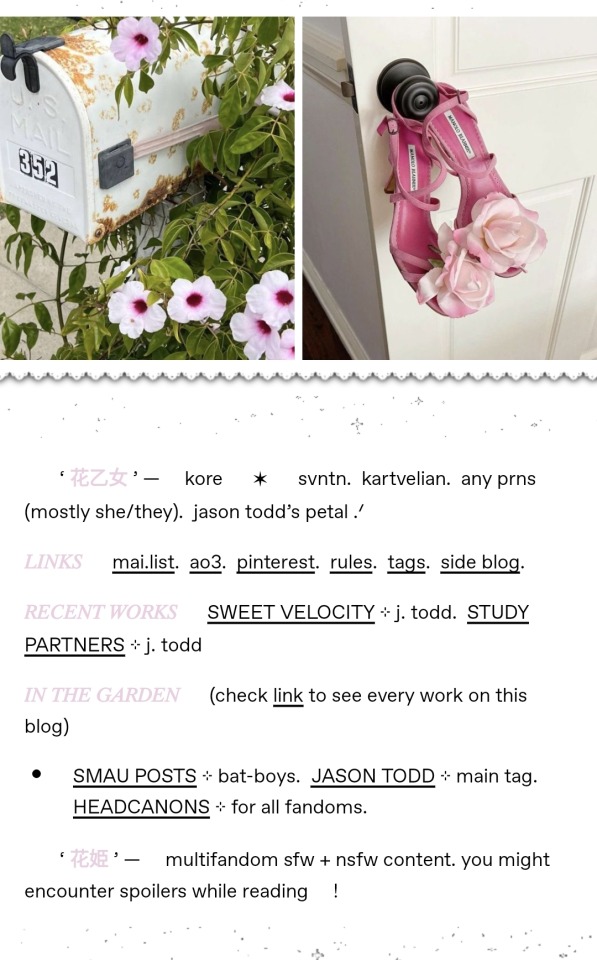
first, you need to chose an aesthetic you want your blog to have. currently mine is (as of july 27 ’25) strawberry themed.
second, i’d recommended checking out pinterest to find photos with the aesthetic you want.
for example, for my theme i searched up: “strawberry aesthetic,” “red aesthetic,” “gingham dress outfit,” and so on.
third, you can piece these photos together into a pinned post alongside with a bio.
i usually use this site for symbols. there is a search bar and i recommend using these keywords “symbols,” “layout,” “bio.” for fonts i use this site. in your pinned post you can enter your basic information: name, pronouns, age, zodiac and etc to your liking.
i’ll leave a few pictures of my old themes & pinned posts so you could get an idea of what i’m trying to explain.
of course you would need other posts linked in your pinned post, such as: about me page (detailed version, if you’d like), masterlist, rule page (tells others your boundaries and guidelines).
moving onto writing.
first, finding a good writing programme is important.
i use ellipsus. you can use it on web and download it as well. i recommend it because it has many features (version history; fonts; size control; themes; exporting into html, markdown, or normal text; ao3 connection) it’s flexible and has a great team managing it.
maybe you want to make smaus, for that i recommend the memi message app.
that brings us to another question, how do we customise our posts?
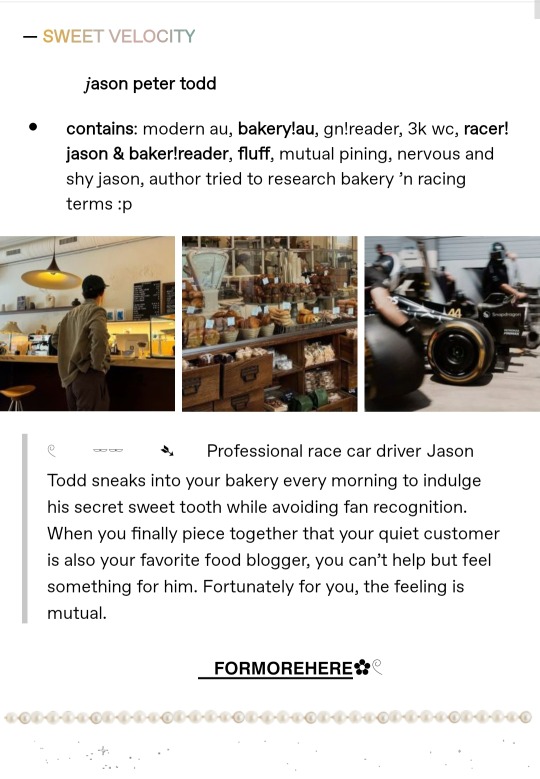
for this you need a layout. this is solely based on what you want. i can give you examples from my posts down below. you’ll see i follow this: 1. title 2. stating who the work is about 3. synopsis 4. you could add a moodboard if you’d like 5. dividers (you can search tumblr for these, just make sure to credit the creators) 6. the watermark at the end.

extra tips for starting out:
tag your works properly
interact with other writers
explore different topics to write about
don’t pressure yourself to be “perfect” at this, writing is something everyone can try
!! if you have any other questions please ask me 🥹🥹
#‿‿ㅤ𓈒 𝓶essages 📩#tips & help#<- you could visit that hashtag for all the posts i’ve made that have tips for writing
21 notes
·
View notes
Text
FELLOW TUMBLR USERS WHO ARE ALSO WRITERS WHO HATE GENERATIVE AI BUT USE GOOGLE DOCS DESPITE ITS AI SCRAPING AND CONSTANT PUSHING OF GEMINI BECAUSE THEY DON'T KNOW A GOOD, FREE ALTERNATIVE
I NEED TO PUT Y'ALL ON SOMETHING
MEET ELLIPSUS.
IF U WANT AN ALL-AROUND FANTASTIC, COMPLETELY FREE, WEB-BASED GDOCS ALTERNATIVE. USE ELLIPSUS.
SERIOUSLY, IT IS BETTER THAN GOOGLE DOCS IN LITERALLY EVERY WAY.
PROS:
-DRAFTS FEATURE CAN BE USED TO STORE NECESSARY INFORMATION SUCH AS EXCERPTS U PLAN ON PUTTING LATER ON IN WHATEVER UR WRITING, CHARACTER NAMES AND BACKSTORIES, ETC. EVEN IF U AREN'T USING THEM FOR COLLABORATION PURPOSES. I HAVE A DRAFT TO PUT ALL MY AO3 TAGS IN FOR EVERY FIC I WRITE
-THERE'S A TIMER BUILT-IN. WANT TO START CREATING A HABIT OF WRITING FOR A CERTAIN AMOUNT OF TIME EACH DAY? OPEN UP ELLIPSUS, CREATE A NEW DOC, START THE TIMER, AND GO.
-FOCUS MODE. OH MY GOD FOCUS MODE. I USE IT EVERY TIME I PROOFREAD ANYTHING. GETS RID OF THE WHOLE MENU, LEAVING YOU JUST THE TEXT. ICONIC
-THERE'S SO MANY THEMES. LIGHT, DARK, ULTRA DARK (MY PERSONAL FAVORITE), SEPIA, NATURE, THERE'S EVEN PRIDE THEMES CURRENTLY (LIGHT AND DARK). LIFESAVER FOR PEOPLE LIKE ME WHO HAVE SENSORY ISSUES AND HATE WHEN SHIT IS TOO BRIGHT
-WAY BETTER DEFAULT FONT THAN GOOGLE DOCS. I'M SORRY I AM FRANKLY SICK OF ACTING LIKE ARIEL IS NOT ONE OF THE WORST FONTS EVER. ELLIPSUS USES THE GENUINELY GORGEOUS "LITERATA" AS ITS DEFAULT FONT
-COLLABORATION! U CAN COLLABORATE! U CAN SHARE DOCUMENTS, U CAN COLLABORATE IN REAL-TIME JUST LIKE IN GOOGLE DOCS, EVERYTHING.
-GUYS. GUYS THERE'S AN EXPORT TO AO3 OPTION. U CAN CONNECT UR AO3, AND WHEN U'RE FINISHED WRITING, CLICK THAT "EXPORT TO AO3" BUTTON, AND ELLIPSUS WILL COPY UR ENTIRE WORK IN HTML AND OPEN AO3 IN ANOTHER TAB. A FUCKING LIFESAVER
-THERE'S A FOLDER SYSTEM. U CAN CREATE FOLDERS, AND THEN SUB-FOLDERS WITHIN THOSE FOLDERS. GENUINELY AMAZING FOR PEOPLE LIKE ME WHO WRITE A LOT BUT HATE HAVING A CLUTTERED WORKSPACE. I LITERALLY HAVE 140 WORKS ON ELLIPSUS BUT YOU KNOW WHAT MY DASHBOARD SHOWS? MY 8 FOLDERS.
-IT AUTOMATICALLY SHOWS YOUR WORD COUNT. U DON'T HAVE TO DO ANYTHING TO SEE IT EXCEPT SCROLL UP. AMAZING.
-AUTOMATICALLY CREATES AN OUTLINE WHEN U PUT HEADINGS ON YOUR DOCUMENT, ALLOWING FOR EASY NAVIGATION BETWEEN SECTIONS.
-NO GENERATIVE AI. EVER. NO AI SCRAPING, NO AI ASSISTANT SHOVED IN YOUR FACE, NOTHING.
CONS:
-IT'S WEB-BASED, SO NO APP ON MOBILE (ALTHOUGH IT DOES RUN INCREDIBLY WELL ON MOBILE) AND NO DESKTOP APPLICATION. THAT'S IT. THAT'S LITERALLY THE ONLY CON.
MAKE AN ACCOUNT. TRANSFER YOUR STUFF OVER FROM GOOGLE DOCS. USE IT INSTEAD. U WILL NOT REGRET IT
#angel rambles#yes this whole post is in all caps because I LOVE ELLIPSUS SO MUCH#i need everyone to use it i'm not even kidding#anti ai#anti generative ai#ao3 writer#writers of tumblr#writers on tumblr
25 notes
·
View notes
Note
Hi, Mr Prokopetz, I'm a big fan. Apologies if you've answered this before, but I was wondering what software you use to create the pdf and epub layouts of your ttrpgs, and whether you'd recommend it to a hobbyist who wants to try putting together something more professional than a gdoc for their own ttrpg?
My workflow is unfortunately not terribly accessible unless you have a fair amount of technical know-how.
In brief, I write all of my games in Notepad++ as HTML documents, taking care to use only the subset of HTML5 tags which are supported by most popular EPUB readers. I then use Calibre (or, more, precisely, the command-line utility that comes with Calibre, though you can get mostly the same results via the GUI) to bundle the HTML document as an EPUB3 file. I typically distribute both the HTML and EPUB versions (the former in a zipfile with all of the fonts and images and such) because web browsers tend to have much better screen-reader support than EPUB apps do.
The PDF, meanwhile, is generated from the same master HTML document using CSS paged media extensions – the layout is all generated automatically based on rules specified in a big, gnarly CSS file, and is never touched by human hands. There are a number of software packages which can do this sort of CSS-driven HTML-to-PDF conversion, some of them free or open source; I use a commercial product called Prince because, to the best of my knowledge, it's the only such software which has out-of-the-box support for PDF/UA semantic tagging (i.e., the stuff you need to do in order to make your PDFs screen-reader friendly), but you have more options if you're willing to tag your PDFs manually. (I am not.)
As for whether I'd recommend doing it this way? Like I said, unless you're a proper gearhead, not really; it's super efficient once you get it all set up – the only version of the game I actually maintain is the master HTML document, and generating updated versions of all the other formats is a one-click affair – but it's really only feasible for me because I already knew how to all that workflow automation stuff for unrelated reasons. I can't imagine teaching yourself all that from scratch just to write elfgames!
349 notes
·
View notes
Text
" X Reader" is such a fascinating sub-genre of fictional romance, especially on Tumblr.
You crack open a character tag and you scroll down a bit, and in less than five minutes you'll find a beautifully embellished post with custom separators and HTML coded text and fonts. The title? Spinky McHotman Fucks You At a Wendy's.
Then, when you open it, you're faced with the most unimaginative, generic and eye-roll worthy slop of a smut you could ever think of. You check again to make sure the writing is actually about Spinky McHotman, because his lines sound like they were written by an underpaid porn screenwriter and acted out by an even more underpaid porn actor. The tags match, it clearly says spinky mchotman x reader.
So, severely disappointed, you scroll for...A grand total of a minute and a half at most, before you're met with an almost identical post. You check the blog just to make sure it's not the same author, but no. It's actually an entirely different person who happens to use the exact same embellishments and the likes. You read this one too out of curiosity, and somehow this is even worse. It reads like a child who just learned the words for genitalia, plagiarizing a Harlequin story from memory after skimming through it for ten minutes before mom came in. Spiky McHotman sounds like a cardboard cutout with sentient family jewels taped to it.
You continue to scroll some more, and you find a blog that specialises in writing X readers for requests. One request seems... Actually interesting, anon might be onto something! And who knows, maybe the blog owner used the idea creatively and oh no, it's just more horny slop. The actual interesting parts of the idea are barely elaborated upon, almost as if the writer was in physical pain writing about something other than sex onomatopoeia and genitalia descriptors for more than two minutes. The rest of the story is more poorly written, generic smut.
Tired, you check the blog, out of exasperated boredom.
Turns out, the writer isn't even in the fandom Spinky McHotman originates from, so their perception of him is based on other fanfics of him. They post 3 x readers daily, and all of them follow the exact same formula, the only changes being in names and places. Each post has a 100 likes at the minimum.
Desperate, you scroll for a little longer, before you officially give up. You ask God to give you a sign of some kind - and moments after, you see it. The sign itself, louder and clearer than an infant's first cry :
Yandere!Spinky McHotman Kidnaps Fem!Reader At A Wendy's
But Spinky McHotman is heavily implied to be a gay man in canon, you remember while recovering from the psychic flash bang.
31 notes
·
View notes
Text
differences ive noticed between tumblr and cohost so far:
tumblr has numbers, like most social media sites, for almost every aspect of it. notifications, likes, reblogs, comments, followers, following, etc. cohost only had numbers for notifications (opt-in) and number of comments. the rest had nothing indicating a number, not even for the original poster.
tumblr has notifications for many actions, including "<person> liked a post you shared" and others. it seems you can turn them off but the fact tumblr has them in the first place is concerning. cohost, by design, had very limited notification scope. when someone rechosted your chost with added text, you only got one notification: that someone rechosted it. you won't know the likes and rechosts of it. you also didn't get mention notifications.
tumblr also offers push notifications on their mobile app, while cohost never offered notifications (and was purely a web app that could masquerade as a mobile app).
tumblr's ask system (which cohost's was based off of) is a LOT more robust. private ask answers, the option to allow media in your received asks, etc. the only leg-up cohost seemed to have was the option to allow for asks from logged-out accounts. cohost also allowed for media in asks until the feature was abused and it was globally turned off.
cohost's post format had an unstyled title that could be up to 240* characters long, and a post body that could be styled however you want. tumblr does not seem to have this title system, other than the "biggest" text style option.
cohost never had an algorithm for showing you chosts. it was reverse chronological only. the only system they had for a global feed is the #The Cohost Global Feed tag, and it was still only reverse chronological. tumblr has a For You page, with recommended posts that your mutuals liked or have many notes, but it seems to have a Following feed that's reverse chronological as well?
cohost had mostly unrestricted html and css (as long as it was inline)* as well as some basic markdown support. tumblr seems to just have a few fonts, some colors, and pretty much the same range of basic text styling.
cohost was very sex positive and allowed pretty much all porn with exceptions for csam and other illegal material. (18+ content needed to be tagged as such). tumblr, as of 2017ish (iirc?) does not allow for pornorgraphic content of any kind.
cohost's four staff members were queer as fuck and the atmosphere of cohost was EXTREMELY queer. tumblr has seemingly had multiple instances of bans of trans users for seemingly no reason other than "they were trans".
cohost had a cool mascot while tumblr seemingly doesn't have any. eggbug win
as someone who used cohost a ton before it shut down, moved to bluesky, and is now dipping their toes into tumblr, i think cohost did it better than tumblr on a lot of fronts, even if its features weren't as fleshed out. i'll do a full retrospective piece about cohost another time though
anyways shoutout to tumblr sending one of my bullet points to the void when i was changing the formatting. very cool
and if you used cohost as well, let me know what i missed!! i'll edit this post if so :3
15 notes
·
View notes
Note
Hi! Gonna start off and say that I love the work you're doing with the Welcome Home neocities website! It's perfectly stylized for the project/puppet show and I can see the work you're putting into it.
I'd love to learn how to make my own neocities website (for fun? For a personal project??), so I was wondering if you could provide some tips and/or pointers for a first-timer.
Thank you!
HAHA well first of all i'm flattered that someone would think i'm skilled enough to be giving pointers in the first place. i still consider myself a novice when it comes to web design (for example, if you're wondering why every page on welcome to welcome home has its own CSS, it's because CSS is Way harder for me to wrap my head around than HTML) so i can't give any Super advanced tips, but i can at least write about what's helped me so far:
GUIDES. neocities has its own tutorial and list of HTML/CSS resources, but user-made guides are your best friend when it comes to figuring out where to go from there. a.n. lucas and pauli kohberger both have really good guides for beginners, but for the more advanced stuff, i found myself referencing the resources on solaria's webspace and sadgrl.online the most. w3schools is also very helpful when it comes to answering more specific questions like "how do i use two different fonts on the same page?" (and probably more.) if all else fails, then usually just googling "how to (x) in HTML" or "how to (x) in CSS" will yield at least one useful result. for making your website more accessible, there's the accessible net directory and this masterpost by foxpunk on tumblr.
it sounds obvious, but it helps to have a solid idea of what kind of site you want to build before you actually dive in, and then snoop around on neocities to get an idea of how other users approach the same topic. for example, i got the idea to start a welcome home wiki on neocities after being reminded of the 8:11 wiki on the same site, and then i spent a couple days just looking up stuff like "wiki" or "fansite" on neocities and then clicking on any page that caught my attention to study it.
layouts! there's no shame in using a premade one, and you can even learn more about HTML/CSS in real time just by messing around with the base code before implementing any intentional changes. sadgrl.online's layout builder is a VERY popular choice, since you can already do a lot with the basic options it offers and it's easy to further customize once you have it set up on your page; it's what i used to make welcome to welcome home. sadgrl.online's webmaster links also feature a bunch of other options under the "layouts" tag, and if none of those work for you, then you can even find something just by looking up template/templates/layout/layouts/HTML/CSS on neocities itself.
side note: if you're reading this and you want to make a wiki then you can also use this wikitable code. it came out after i had already established the Look of welcome to welcome home, so i probably won't implement it any time soon, but i TOTALLY WOULD HAVE if it was around when i first set the site up.
you can scale images up or down using percentage, with 100% being the image's default size. i don't know how helpful or acceptable that is, but i use it a lot.
don't feel pressured to get everything done at once, even if you expect people to be visiting your site frequently. usually if you just slap on an "under construction" gif or even just write "hey this site is still under construction" then people will understand. i don't think i've ever seen anyone get super huffy about slow updates on neocities, anyway.
EDIT: OH. GRAPHICS. i mention all of these on welcome to welcome home's front page but i Also wanted to note them here: betty's graphics and websets by lynn both have HUGE collections of background tiles and other graphics that work especially well if you're going for that old web charm. i also like to use this mirror of patterncooler for backgrounds bc of the customization options. you can also make your own background tile and then use a seamless tile maker like this if all else fails.
EDIT 2: ALSO. obviously. do not be like me and use discord or any other chat client as a filehost, no matter how promising it looks, because one day you WILL get a very nasty surprise when the request signature on those urls expire and the images are no longer accessible on other sites. there are a myriad of other filehosts out there, but personally i recommend file garden (and also donating to file garden if you can, even if only for a couple months. i know i said that just yesterday, but if it gets more folks to subscribe then i'm gonna keep saying it.)
#imaginatorofthings#ask#welcome to welcome home#web design#? yeah i'll slap that tag on there why not#neocities
20 notes
·
View notes
Note
Hnnnghh I was informed by tatp that u know about about coding wdgvbb any tips or whatever I’m trying to make a neocitys website or smthg
Since it's neocities website all you need is: HTML, CSS and maybe some graphics. As I said before I'm shit at explaining stuff but I will try my best. So here's "I want to make my own website" the basics!
HTML - markup language, the base of your websiteCSS - style of your website, can change color of html elements, size, font etc. I linked w3schools website since it's pretty easy to understand.Do you need to learn all of this before coding? No. I think it's the best to just check things that you need for your website. If you need to change background color of your website just find a w3schools tutorial on it or simply search for "how to change background color in css". You just should know html tags and basic attributes: id and class and how to link your css in html file so your style actually works! Neocities has it's own tutorials on html and css so you could check them out too! Neocities also has it's own code editor. You can edit everything in browser. I personally like to code in Visual Studio Code then just paste the code into Neocities editor. VS Code has a lot of addons (some of them are there by default) that make coding way easier for example: autocorrection of syntax errors and giving you suggestions!
Example: If you type html in vs code html file you will get 3 suggestions:
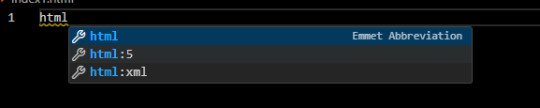
choose the html:5 one:
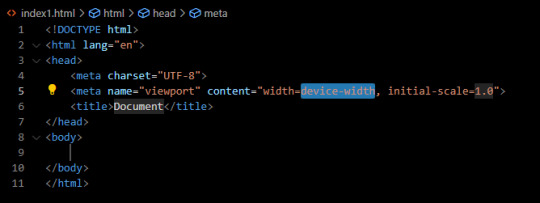
TAADAAAM!! VS Code just wrote the whole website structure for you! You can install more extensions here under extension section! There is this extension called vscode-pets it won't help you with coding but its really cute:
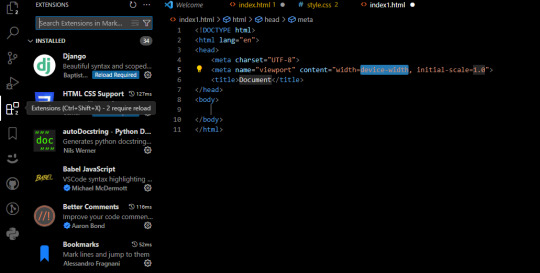
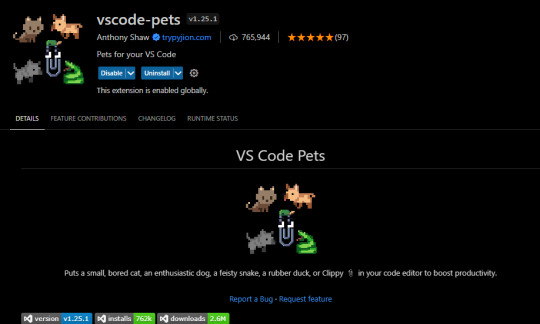
some yt tutorials: CINNIMANI (specifically for neocities), web coding playlist (this one is good for all websites in general); https://sadgrl.online if you were on neocities you probably saw her website. She has a lot of useful resources including image resources and also she made her own WEBSITE BUILDER or acutally layout builder! It's pretty simple website builder but still. If you are looking for premade layouts you can just search them on google or get sum from the website I linked ^__^ Uploading your website to neocities is really easy since all you need to do is to put all the files on there! I guess that's all for now. If you have any problems or questions just ask. I'm here to help ^^ websites with free to edit code: https://codepen.io, https://github.com
10 notes
·
View notes
Text
Self-Publishing on Amazon KDP: A Comprehensive Guide for Aspiring Authors
Shaina Tranquilino
November 13, 2023

The advent of self-publishing has revolutionized the world of literature, providing aspiring authors with an incredible opportunity to publish their work independently. Among the numerous platforms available, Amazon Kindle Direct Publishing (KDP) stands out as a popular choice due to its extensive reach and user-friendly interface. In this blog post, I will guide you through the step-by-step process of self-publishing your book on Amazon KDP.
Step 1: Prepare Your Manuscript Before diving into the publishing process, it is crucial to ensure that your manuscript is polished and ready for publication. Take time to proofread, edit, and format your book meticulously. You can seek professional editing services or enlist beta readers to provide valuable feedback.
Step 2: Create an Amazon KDP Account To begin the process, visit kdp.amazon.com and sign in using your existing Amazon account or create a new one specifically for KDP. This account will serve as the central hub for managing all aspects of your self-published books.
Step 3: Add a New Title Once logged in, navigate to your Bookshelf page and click on "Create a new Kindle eBook/Paperback/Hard Cover." Here, you will be prompted to fill in essential details such as title, subtitle (if applicable), series information, author name(s), description, keywords/tags, and language.
Step 4: Upload Your Manuscript Amazon accepts manuscripts in various formats like MOBI (.mobi), EPUB (.epub), HTML (.html), DOC/DOCX (.doc/.docx), RTF (.rtf), and others. Ensure that your manuscript adheres to their guidelines regarding font size, formatting, margins, etc., to guarantee optimal reading experience across different devices.
Step 5: Design Your Cover An eye-catching cover plays a vital role in attracting potential readers. Amazon KDP allows you to either design your own cover using their Cover Creator tool or upload a professionally designed cover. Make sure to follow their guidelines for dimensions, resolution, and file type.
Step 6: Set Pricing and Royalties Decide on the pricing strategy for your book based on factors like genre, length, market demand, and competition. Amazon provides two royalty options: 35% or 70%. The latter is available if you meet specific criteria (e.g., setting the minimum list price). Consider these options carefully while determining your preferred royalty rate.
Step 7: Choose Targeted Territories & Enroll in Programs Select the territories where you want to make your book available. Amazon KDP offers expanded distribution channels as well as Kindle Unlimited (KU) and Kindle Owners' Lending Library (KOLL) programs that can boost visibility and reach.
Step 8: Preview Your Book Before hitting the publish button, use Amazon's online previewer tool to ensure that your eBook appears as intended across different devices. This step allows you to spot any formatting issues or errors that may have been missed during manuscript preparation.
Step 9: Publish Your Book Once satisfied with the final preview, click on "Publish Your Kindle eBook/Paperback/Hard Cover" Within a few hours, your book will be available for purchase on Amazon's website worldwide.
Self-publishing on Amazon KDP empowers authors by removing many traditional barriers to entry. By following this step-by-step guide, you can successfully navigate the self-publishing process and unleash your creativity onto the world stage. Remember to invest time in creating a high-quality manuscript and captivating cover design while adhering to Amazon's guidelines. With persistence and dedication, self-publishing can open doors to new opportunities for aspiring authors everywhere.
#Amazon#Amazon KDP#kindle direct publishing#self publishing#author#writers life#book publishing#ebook publishing#self pub#writing#authorpreneur#kindle unlimited#self published author
4 notes
·
View notes
Text
Why Website Accessibility Will Impact Your SEO and Revenue in 2025
As the digital economy matures, accessibility is moving to the frontlines of SEO and revenue strategy. In 2025, businesses that fail to prioritise inclusive digital practices risk falling behind. Search engines, regulators, and consumers are aligned in their expectation - web platforms must be designed for all users, including those with disabilities. The impact of accessibility will not remain technical. It will directly affect rankings, user engagement, and long-term financial performance.
Search Engines Will Prioritise Inclusive Signals
Search algorithms are evolving to promote user-first websites. Accessibility is no longer a separate metric but a key indicator of site quality. Clear page structure, accurate HTML tags, and readable contrast ratios contribute to search visibility. These signals improve indexation, reduce bounce rates, and enhance session duration.

Core Web Vitals, which measure loading, interaction, and visual stability, already favour accessible sites. With Google’s AI-driven indexing advancing further in 2025, semantic accuracy and assistive compatibility will gain even greater weight in ranking decisions. Sites that ignore these areas risk sliding down results pages, even with strong content.
Digital Accessibility Expands Market Reach
An estimated 1.3 billion people globally live with some form of disability. A significant portion of that population interacts with online platforms through screen readers, voice commands, or keyboard-only navigation. Sites that are not coded to support these tools effectively cut off access for this audience.
Optimising for accessibility opens a measurable customer base. It ensures that all potential users can find, navigate, and transact with ease. Retail, banking, education, and healthcare sectors, in particular, are seeing direct conversion benefits by addressing accessibility barriers. What was once considered a niche adjustment is now a revenue multiplier.
Legal Compliance Will Impact Business Viability
Legislation around digital inclusion is tightening across jurisdictions. Web Content Accessibility Guidelines (WCAG) have become the benchmark for global compliance. Laws such as the Americans with Disabilities Act (ADA) and the European Accessibility Act are no longer limited to public institutions. Private businesses are now routinely audited and penalised for non-compliance.
In 2025, failing to meet digital accessibility standards will bring financial consequences, legal costs, and reputational loss. Litigation in this area is on the rise, with thousands of cases already recorded across key markets. Compliance is not only safer but also more economical than reactive legal defence.
Accessible Design Boosts Retention and Loyalty
Inclusive design benefits all users, not only those with identified needs. Clear navigation, readable fonts, and simplified layouts enhance usability. These improvements increase dwell time, boost customer satisfaction, and reduce support queries.
In sectors where competition is high and user trust defines success, accessibility is emerging as a brand differentiator. Businesses that integrate inclusive thinking into their design language are seeing higher return rates and more positive user reviews.
Competitive Advantage in 2025 and Beyond
By 2025, digital accessibility will not be an optional upgrade; it will be a fundamental expectation. Its influence on SEO and revenue will be measurable and direct. Businesses that treat accessibility as an embedded priority will lead the next phase of digital growth, powered by compliance, performance, and inclusivity. For more details visit our website:https://crushaderstech.com/
#digital marketing service provider in bhubaneswar#artificial intelligence#top digital marketing agency in bhubaneswar#top digital marketing company in odisha#online marketing solutions company in odisha#best company for business promotion in bhubaneswar
0 notes
Text


# manchild : theme 079.
↻ features:
png: 300x330px
postal pic: 75x75px
font size options (9px, 10px, 11px, 12px, 13px)
8 font title variants
3 font family variants
phostop gutter options (0px to 5px)
visible source link
optional extra link
optional tags
optional rounded edges
optional black and white effect on images
npf images fix! ( thanks to @glenthemes )
↻ terms of use and info:
don’t use it as a code base or steal it, do’t edit the credits or remove them and please don’t take parts of the theme and paste them into another’s.
please read my rules!
the appearance may change depending on the size of your computer screen.
↷ get this on patreon or payhip
( ps ). reblog if you actually mess with your HTML at 3am — be the algorithm you want 🙏🙂↕️
#theme#tumblr theme#themes#custom theme#theme maker#theme maker tumblr#html theme#theme code#free theme#tumblr layout#one column theme#contained theme#aesthetic theme#coding#tumblr code#theme hunter#rp indie theme#indie rp themes#indie themes#indie theme#tumblr themes#rpt#rp themes#rp things#01. codes : mine.#code: manchild
40 notes
·
View notes
Text
🌐 What Is Web Designing?
Web Designing is the art and science of creating the visual layout and user experience of websites. It focuses on the look, feel, structure, and usability of a website — how it appears and how users interact with it.
It blends graphic design, UI/UX design, and front-end technologies to create responsive, accessible, and visually appealing websites.
🧩 Core Elements of Web Design
ElementDescriptionLayoutArrangement of visual elements on a page (header, content, footer)Color SchemeColors that match the brand and create emotional impactTypographyFont styles that enhance readability and personalityImageryIcons, illustrations, photos, and animations that support the contentNavigationMenus and links that help users move through the siteWhitespaceEmpty space that improves clarity and flowResponsivenessDesign that adapts to all screen sizes (mobile, tablet, desktop)
💻 Web Designer vs Web Developer
RoleFocusTools/Languages UsedWeb DesignerVisual layout, colors, fonts, UI/UXFigma, Adobe XD, Photoshop, Canva, WebflowWeb DeveloperCode-based implementation of the designHTML, CSS, JavaScript, frameworks (React, Vue)
💡 Many people today do both — especially freelancers.
🎨 Popular Web Design Tools
ToolUseFigmaInterface design, prototyping, team collaborationAdobe XDUI/UX design, wireframes, clickable mockupsCanvaSimple designs for web banners, graphicsWebflowVisual web design + code-free website buildingWix / SquarespaceDrag-and-drop website buildersPhotoshop / IllustratorAdvanced visual asset creation
🧠 Design Principles You Should Know
Visual hierarchy – Use size, contrast, and placement to guide the user
Consistency – Keep fonts, colors, and elements uniform across pages
Accessibility – Ensure usability for all users, including those with disabilities
Mobile-first design – Design for smaller screens first, then scale up
User-centric design – Prioritize ease of use and simplicity
📱 Responsive Web Design
Responsive design ensures your site looks great on all screen sizes.
Use media queries (CSS)
Use flexbox/grid layout systems
Test with browser tools and tools like Responsively App
🧭 Web Design Learning Roadmap (Beginner to Pro)
✅ Step 1: Design Fundamentals
Color theory, typography, layout
Learn tools like Figma, Canva, or Adobe XD
Understand UX/UI basics
✅ Step 2: HTML + CSS
Learn HTML5: structure, semantic tags
Learn CSS3: styling, Flexbox, Grid, animations
Practice with tools like CodePen
✅ Step 3: Responsive Design
Mobile-first layout
CSS media queries
Use frameworks: Bootstrap or Tailwind CSS
✅ Step 4: JavaScript (Optional, but powerful)
Add interactivity (menus, sliders, tabs)
DOM manipulation
Use lightweight libraries (like Alpine.js or jQuery)
✅ Step 5: Build Projects & Portfolio
Portfolio website
Business landing page
Blog layout
E-commerce front page
Redesign of an existing site
📚 Best Resources to Learn Web Design (2025)
PlatformCourse NameCostfreeCodeCampResponsive Web Design CertificationFreeScrimbaLearn Responsive Web Design (interactive)$12/moUdemyWeb Design for Beginners: Real World Coding₹400–₹800CourseraUI/UX Design by California Institute of the ArtsFree/PaidFrontend MentorPractice real-world UI challengesFree/Paid
💼 Careers in Web Design
RoleSkills NeededWeb DesignerVisual layout, design tools, basic HTML/CSSUI DesignerInterface-focused designUX DesignerResearch, wireframing, user flow planningFront-End DeveloperCode the design using HTML/CSS/JSFreelancerCombo of design + dev + client communication
🛠 Web Design Project Ideas
Personal portfolio
Photography website
Small business landing page
Responsive blog site
Redesign of a famous website (your version)
🔥 Final Tips
Start small: Redesign your own resume as a website
Get feedback: Share your work on Dribbble, Behance, or Reddit
Learn from others: Browse Awwwards, One Page Love, and Mobbin
Practice, practice, practice — design improves with experience
0 notes
Text
How to Add a Table of Contents in WordPress 2025 Boost SEO, Improve User Experience & Maximize Site Navigation

Why a Table of Contents Matters in WordPress

What Is a Table of Contents (ToC) in WordPress? A Table of Contents (ToC) is a navigational element often placed at the top or within content that lists the main s of a page or post. Each ToC item is typically a clickable link that jumps the reader to a specific of the content. In WordPress, a ToC can be added automatically using plugins or manually using anchor links and heading structure. This guide from SEOHostKing will walk you through every possible way to create, optimize, and master the Table of Contents for WordPress — whether you're running a personal blog, WooCommerce store, or a massive content marketing engine. We’re not stopping at surface-level info — we’re going 15,000+ words deep. Let’s start by understanding the real power of adding a ToC to your WordPress site. Why Add a Table of Contents to Your WordPress Content? 1. Massively Improves User Experience (UX) When someone lands on a long-form article or guide (like this one), they don’t want to scroll aimlessly to find what they need. A Table of Contents allows them to see the structure immediately and skip to the that’s most relevant to them. Examples: - A developer wants to jump directly to “Manual HTML Anchor Method” - A beginner just needs the “Best WordPress ToC Plugins” - An SEO wants the “Schema Optimization for ToC” By creating clarity and immediate access, you reduce bounce rate and increase time on page — both critical SEO metrics. 2. Drives SEO Visibility and Rich Snippets Search engines, especially Google, reward well-structured content. When your post includes a ToC, Google may automatically extract those headings into clickable sitelinks in the SERPs (Search Engine Results Pages). This can result in: - Higher CTR (Click-Through Rate) - Occupying more SERP real estate - Better internal link structure signals to Google Adding a ToC is a step toward semantic structure, which is a pillar of modern SEO. 3. Essential for Long-Form and Evergreen Content If your WordPress content strategy includes long-form blog posts, evergreen guides, pillar pages, or knowledge hubs — then ToCs aren’t optional; they’re critical. They make your content scannable and user-friendly for both humans and bots.
Complete Breakdown of Methods to Add a Table of Contents in WordPress
Add a ToC Using a WordPress Plugin Using a plugin is the most common method, especially for non-technical users. Below, we’ll walk through the top options with full configuration steps, SEO tips, and pros/cons. 1. Easy Table of Contents (ETOC) Plugin – Beginner-Friendly Classic Overview: Easy Table of Contents is one of the most popular and reliable ToC plugins available in the WordPress ecosystem. It automatically inserts a ToC into posts, pages, or custom post types based on heading tags (H1, H2, H3, etc.). Key Features: - Automatic insertion by heading hierarchy - Supports posts, pages, and custom post types - Selective heading levels - Smooth scrolling and collapsible design - Customizable appearance (color, font, border) - Supports AMP and responsive design How to Install & Configure: Step 1: Installation - Go to your WP dashboard → Plugins → Add New - Search for “Easy Table of Contents” - Click Install Now and then Activate Step 2: Initial Setup - Navigate to Settings → Table of Contents - Enable automatic insertion for desired content types (posts, pages, etc.) - Choose which heading levels to include (e.g., H2-H4) - Set the position of the ToC (before content, after first heading, etc.) Step 3: Customize Appearance - Choose width, background, border, and link color - Enable smooth scrolling and collapsible functionality - Rename “Table of Contents” heading if desired Step 4: Fine-Tune Per Post - Each post/page will now include a checkbox to enable or disable the ToC - You can override global settings on a per-post basis SEOHostKing Pro Tip: Combine ETOC with schema markup (manual or plugin-based) to help Google display in-SERP jump links. Also, ensure your heading tags follow a logical hierarchy for best results. 2. AIOSEO’s Table of Contents Block – SEO-Friendly Gutenberg Integration Overview: If you’re using the All in One SEO (AIOSEO) plugin — which is one of the top-ranked SEO plugins for WordPress — it comes with a native ToC block built for Gutenberg. Features: - Native Gutenberg block (no shortcode needed) - Auto-pulls headings from the post content - Drag-and-drop reorder or exclude sections - Seamless integration with other SEO features - Performance-optimized and lightweight How to Add ToC with AIOSEO: Step 1: Install AIOSEO - Go to Plugins → Add New → Search “AIOSEO” - Install and Activate Step 2: Insert Table of Contents - In Gutenberg, click “+” to add a block - Search for “Table of Contents (AIOSEO)” - Insert and it will auto-generate headings Step 3: Customize - Rename section titles - Drag headings to reorder - Choose to hide specific subheadings Step 4: Save and Preview - Preview your content on desktop and mobile - Confirm the scroll behavior works smoothly SEOHostKing Insight: The AIOSEO ToC block is built with SEO in mind — unlike some bloated plugin alternatives. It integrates well with structured data, which increases your chances of showing ToC links in search results. 3. Qi Addons for Elementor – Best Visual Control Overview: If your site is built using Elementor, Qi Addons by Qode Interactive (yes, the same team that wrote the original article) offers a powerful and customizable ToC widget for free. Key Features: - Full drag-and-drop Elementor control - Visual custom styling (colors, borders, typography) - Responsive and animated behavior - Supports anchors and smooth scrolling Installation Steps: Step 1: Install Qi Addons - Go to Plugins → Add New - Search “Qi Addons for Elementor” → Install → Activate Step 2: Use Elementor Editor - Open a page or post in Elementor - Search for “Table of Contents” in the widget panel - Drag the Qi Addons ToC widget to where you want it displayed Step 3: Configure - Choose which headings (H2-H5) to include - Style colors, typography, padding, spacing - Enable collapsible functionality for mobile devices Best Use Case: Qi Addons is ideal for those who: - Use Elementor regularly - Want full visual design control - Need a responsive, collapsible ToC 4. LuckyWP Table of Contents – Lightweight with Gutenberg and Classic Support Features: - Compatible with Gutenberg and Classic Editor - Auto-insert or manual shortcode - Multiple themes and customization options - SEO-friendly with accessible markup Configuration: - Install from Plugins → Add New → Search “LuckyWP Table of Contents” - Enable auto-insert or use shortcode - Customize appearance and select post types
2: Manual Table of Contents for WordPress (No Plugin)
For users who want complete control or are performance-obsessed (avoiding plugins), a manual ToC is the way to go. 1. HTML Anchor Method (Manual ToC) This method involves linking a ToC list to individual anchor IDs manually assigned to your headings. Example: - Step 1 – Install Plugin - Step 2 – Configure Settings
Step 1 – Install Plugin
Content for step 1...
Step 2 – Configure Settings
Content for step 2... How to Add Anchors in Gutenberg: - Select a heading block - In the right sidebar, under “Advanced,” enter a unique HTML anchor (e.g., step1) - Link to that anchor using #step1 in your HTML list Pros: - Ultra-lightweight - Zero plugin dependency - Full control over structure and styling Cons: - Manual updates when changing content - Higher effort for long articles 2. Use Shortcode + Anchor Combo You can wrap your anchor links into a shortcode for reusability: function custom_toc_shortcode() { return ' - Section One - Section Two '; } add_shortcode('customtoc', 'custom_toc_shortcode'); Then, place where you want your ToC to appear.
3: Adding ToC in Custom Post Types and WooCommerce
Adding a ToC to WooCommerce product descriptions, FAQs, or CPTs like portfolios requires special attention. Tips: - Ensure ToC plugin supports CPTs (most do) - Manually wrap anchor tags in long product descriptions - Consider using Elementor + Qi for WooCommerce templates Example Use Case: A long single-product WooCommerce page with multiple sections (Features, Specs, Reviews) benefits greatly from a ToC to allow users to jump directly to what they care about.
Advanced Customizations, Styling, Accessibility, and SEO for WordPress Table of Contents
Styling Your Table of Contents with CSS
Why Customize ToC Appearance? A generic ToC often looks like a dull list. Custom styling allows your ToC to blend seamlessly with your website’s branding and improve user engagement. Common Styling Elements to Customize: - Background color & opacity — Make the ToC visually distinct but harmonious. - Borders & box shadows — Add depth and separation. - Font styles & sizes — Match your site typography. - Hover & active link colors — Improve interaction feedback. - Indentation & spacing — Show heading hierarchy clearly. - Collapsible toggle icons & animations — For better mobile experience. Example: Custom CSS for Easy Table of Contents Plugin Here’s some sample CSS you can add to your WordPress Appearance > Customize > Additional CSS or child theme stylesheet: /* Container Styling */ #toc_container { background-color: #f9fafb; border: 2px solid #0073aa; padding: 20px; border-radius: 8px; font-family: 'Segoe UI', Tahoma, Geneva, Verdana, sans-serif; } /* Heading Styling */ #toc_container .toc_title { font-weight: 700; color: #0073aa; font-size: 1.5rem; margin-bottom: 15px; } /* List Styling */ #toc_container ul { list-style-type: none; padding-left: 0; } /* List Items and Links */ #toc_container ul li { margin-bottom: 8px; padding-left: 12px; border-left: 3px solid #0073aa; } #toc_container ul li a { text-decoration: none; color: #005177; font-weight: 600; transition: color 0.3s ease; } #toc_container ul li a:hover { color: #e94e77; } /* Nested Lists for Subheadings */ #toc_container ul ul { margin-top: 8px; padding-left: 20px; border-left: 2px dashed #0073aa; } /* Collapsible Toggle Styling (for collapsible ToC) */ #toc_toggle { cursor: pointer; font-size: 1.2rem; color: #0073aa; margin-bottom: 10px; display: inline-block; } Tips for Styling Elementor or Qi Addons ToC - Use Elementor’s style panel for typography and spacing. - Add custom CSS classes and target them specifically. - Use Elementor motion effects to animate ToC entrance. - Test different colors on mobile to maintain readability.
2: Making Your Table of Contents Mobile-Friendly & Collapsible
Why Mobile Optimization Matters With over 60% of global web traffic on mobile devices, your ToC must be usable and unobtrusive on smaller screens. A giant always-visible ToC can overwhelm the mobile viewport. Best Practices for Mobile ToC - Use collapsible or toggle-able ToCs on mobile. - Ensure tap targets (links/buttons) are large enough. - Optimize font size and line height for readability. - Use smooth scroll to enhance navigation. How to Add a Collapsible ToC with Easy Table of Contents Plugin - Navigate to Settings → Table of Contents. - Enable “Collapsible” option. - Customize the default state (collapsed or expanded). - Save and preview on mobile devices. This creates a toggle button users can tap to expand or collapse the ToC, reducing screen clutter. Mobile ToC with Custom JavaScript Example (Manual ToC) document.addEventListener("DOMContentLoaded", function() { const toc = document.getElementById('toc_container'); const toggleBtn = document.createElement('button'); toggleBtn.innerText = 'Show Table of Contents'; toggleBtn.id = 'toc_toggle'; toc.parentNode.insertBefore(toggleBtn, toc); toc.style.display = 'none'; toggleBtn.addEventListener('click', function() { if (toc.style.display === 'none') { toc.style.display = 'block'; toggleBtn.innerText = 'Hide Table of Contents'; } else { toc.style.display = 'none'; toggleBtn.innerText = 'Show Table of Contents'; } }); }); This code snippet creates a mobile-friendly toggle button for manual ToCs.
3: Accessibility Best Practices for ToC
Why Accessibility Matters An accessible ToC ensures that screen readers and keyboard users can navigate your content effectively — a must for both UX and legal compliance (e.g., ADA in the US). Key Accessibility Features for Table of Contents - Use semantic HTML: - Proper heading hierarchy so screen readers can interpret structure. - Keyboard navigation: All links must be reachable via keyboard (Tab key). - ARIA roles and labels to describe ToC purpose. - Focus styles: Visually highlight links on keyboard focus. Example: Accessible ToC Wrapper
Contents
- Section 1 - Section 2 This informs screen readers about the navigation purpose.
4: Schema Markup & Rich Snippet Optimization for Table of Contents
What Is Schema Markup? Schema.org markup is structured data that helps search engines understand the content’s structure, improving how your pages appear in search results. Benefits of ToC Schema - Enables Google’s “Jump to Section” links in the search results. - Improves snippet appearance, increasing click-through rate. - Provides better content hierarchy context to crawlers. How to Add ToC Schema in WordPress 1. Using SEO Plugins (Yoast SEO, AIOSEO, Rank Math) Most major SEO plugins support adding FAQ or HowTo structured data but ToC schema is less common. However, some plugins and custom code can add ToC schema. 2. Manual JSON-LD Implementation Here is a basic JSON-LD example for ToC: You can add this to your theme’s footer.php or via a plugin like Header Footer Code Manager. 3. Using Plugins Specifically for ToC Schema - Some ToC plugins like LuckyWP Table of Contents include schema support. - You can add schema via specialized plugins or custom development.
5: Common Problems and How to Fix Them
Problem 1: ToC Not Showing on Some Posts - Check if ToC is enabled for that post type. - Ensure your headings are proper
, , etc. - Some page builders may interfere with auto-detection. Problem 2: Duplicate or Broken Links in ToC - Avoid duplicate headings with the same text. - Clear caching plugins. - Use unique anchors if manual. Problem 3: Slow Page Load Due to Plugin - Use lightweight plugins like AIOSEO ToC or LuckyWP. - Avoid stacking multiple ToC plugins. SEOHostKing Tip for ToCs: Keep your ToC updated with your content — each time you add or remove sections, update anchors or headings so the ToC remains accurate and useful. A stale ToC can frustrate users and harm SEO.
Table of Contents for WooCommerce, Large Content Hubs, and SEO Siloing Strategies
Adding a Table of Contents to WooCommerce Product Pages
Why Add a ToC to WooCommerce? Long product descriptions, specifications, FAQs, and customer reviews can make WooCommerce product pages lengthy and difficult to navigate. A ToC improves usability by letting customers jump directly to sections they want. Best Practices: - Include main sections: Product Overview, Features, Specifications, Reviews, FAQs. - Use anchor links to create jump navigation. - Ensure ToC fits visually within product page design. How to Add a ToC in WooCommerce Product Descriptions Method 1: Using a Plugin Supporting Custom Post Types Plugins like Easy Table of Contents or LuckyWP Table of Contents support WooCommerce products as a custom post type. - Enable ToC for Products in the plugin settings. - Use heading tags properly within product description and additional tabs. - The plugin will auto-generate a ToC inside product pages. Method 2: Manual Anchor Links in Product Tabs You can manually add anchors in product description or custom tabs: - Overview - Features - Specifications - Reviews
Overview
Product overview details...
Features
Product features... Styling and Responsiveness - Use CSS to integrate ToC visually with product layout. - Use collapsible ToC on mobile to save space. - Test on various devices and browsers.
2: Table of Contents for Large Content Hubs and Knowledge Bases
What Are Content Hubs? Content hubs are centralized sites or sections containing a large volume of interrelated content on a specific topic — think online encyclopedias, FAQ centers, or tutorial libraries. Why Use ToC in Content Hubs? - Improve navigation between related articles. - Help users find information quickly. - Distribute link equity through internal linking. Strategy: Hub & Spoke with ToC Create a hub page with a comprehensive ToC linking out to related spoke articles: - The hub page acts as a master ToC with categorized links. - Each spoke article can have its own smaller ToC. - Use keyword-rich anchor texts for SEO benefits. Example Structure: - Hub Page ToC: - SEO Basics - On-Page SEO - Link Building - Technical SEO - Spoke Article ToC: Smaller ToC within each article for subtopics.
3: Multi-Page Guides and ToC Navigation
When your content spans multiple pages or posts (pagination), ToCs can guide users through the entire series. How to Implement: - Add a master ToC on the first page with links to all pages. - Use "Next," "Previous," and breadcrumb navigation. - Maintain consistent styling.
4: Using Table of Contents for SEO Siloing
What Is SEO Siloing? SEO siloing organizes content into thematic groups (silos) to help search engines understand site structure and topical relevance. How ToC Helps Siloing - Internal linking via ToC strengthens topic clusters. - Improves crawlability by highlighting content relationships. - Enhances user experience with clear navigation paths. Steps to Build SEO Silo with ToCs - Create Pillar Content: A comprehensive article covering a broad topic. - Develop Supporting Content: Create smaller articles for subtopics. - Build ToCs: On the pillar page, add a detailed ToC linking to sub-articles. - Cross-Linking: Within sub-articles, add ToCs linking back to pillar and sibling articles. - Optimize Anchor Texts: Use exact or partial match keywords in links. - Use Breadcrumbs: For clear navigation and schema markup. Benefits of SEO Silo ToC: - Improves topical authority. - Boosts keyword rankings. - Increases average session duration.
5: Tools & Plugins for Advanced ToC and SEO Silo Management
- Yoast SEO & Rank Math: For breadcrumbs and structured data. - Table of Contents Plugins: With custom post type and shortcode support. Read the full article
#AccessibleTableofContents#HowtoaddTableofContentsinWordPress#SEOsiloing#TableofContentsanalytics#TableofContentsoptimization#TableofContentsschemamarkup#TableofContentsSEO#TableofContentsstyling#WooCommerceTableofContents#WordPresscontentnavigation#WordPressTableofContents#WordPressToCplugin#WordPressuserexperience
0 notes
Text
Web Designer in Bangalore: Build a Powerful Digital Identity with Hello Errors

The Digital Identity Revolution: Why Bangalore Businesses Need More Than Just a Website
Bangalore is a city of innovation—a place where startups rise, tech giants expand, and creative ventures flourish. Yet, in this fast-paced digital economy, having a generic website isn’t enough. You need a digital identity that reflects your brand’s purpose, personality, and promise.
That’s where the expertise of a web designer in Bangalore like Hello Errors becomes indispensable. We don’t just build websites—we build experiences. Whether you're a solopreneur, creative agency, SaaS brand, or enterprise, your website is your digital handshake, and it should be bold, confident, and memorable.
Branding Through Web Design: More Than Just Colors and Fonts
What separates a good website from a great one? Branding.
At Hello Errors, we specialize in integrating brand narratives into website design. We ensure that every font, every image, and every section of your website tells your story.
As a leading web designer in Bangalore, we ask deep questions like:
What does your brand stand for?
Who is your ideal customer?
What emotions should your site evoke?
From mood boards to brand-aligned typography and personalized icons, we build platforms that don’t just look good—they feel like your brand.
Specialized Web Design Solutions for Diverse Industries
Not all websites should look the same. A real estate website shouldn’t feel like a wellness blog. A SaaS dashboard shouldn’t resemble an eCommerce store.
Hello Errors provides niche-specific web design in Bangalore for:
Startups – Minimal, fast, pitch-friendly design
Healthcare – Trust-driven, accessible, and informative interfaces
Education – Dynamic dashboards for students and educators
Hospitality – Visual-heavy layouts with booking features
eCommerce – Conversion-focused product pages and seamless checkout UX
Each industry requires its own design logic, and we bring that nuance into every project.
Interactive Design That Drives Engagement
Modern websites are interactive. Hover effects, animated text, scroll-triggered visuals—these are no longer luxuries but expectations. At Hello Errors, we build interactive websites that enhance user engagement and drive deeper browsing sessions.
We incorporate:
Animated menus
Scroll-based transitions
Hover-activated CTAs
Sticky headers and dynamic content loading
As a future-focused web designer in Bangalore, our goal is to transform static pages into storytelling tools.
Local Optimization: Designing for Bangalore Audiences
When targeting a Bangalore-based audience, local optimization is key.
Our design process includes:
Localization of content and visuals
Integration with regional payment gateways
Maps, directions, and Google Business linking
Bangalore-specific SEO structuring
This hyperlocal approach gives you a competitive edge and improves search visibility among customers searching for services in Bangalore.
So when users Google “web designer in Bangalore,” your website won’t just show up—it’ll stand out.
Performance-Driven Design: Beyond Looks
Speed, accessibility, and technical compliance are non-negotiable for top-ranking websites.
Hello Errors uses:
Google PageSpeed Insights and Lighthouse tools
Image compression without compromising quality
Clean code with semantic HTML
Lazy loading for fast rendering
Accessibility features (ARIA labels, color contrast, alt tags)
We ensure your site meets the highest performance and compliance standards, making us a top-performing web designer in Bangalore for both user experience and SEO.
Hosting, Maintenance & Ongoing Support
Web design doesn’t stop at launch. We offer:
Hosting setup with SSL and CDN
Monthly backups
Uptime monitoring
Security updates
Content changes on demand
This end-to-end support helps clients stay worry-free, knowing their digital platform is monitored and maintained by professionals.
Collaborative Process: Design with You, Not Just for You
At Hello Errors, we follow a collaborative design process that ensures you're involved at every stage:
Discovery Call – Understand your vision, target audience, and goals.
Wireframes – Share rough layouts for feedback.
Design Prototypes – Interactive previews before development.
Testing – Device and browser testing to ensure perfection.
Launch & Support – Ongoing updates and growth.
That’s why many of our clients call us the most approachable web designer in Bangalore—we treat every project as a partnership.
Our Clients Speak: Testimonials That Matter
“Hello Errors transformed our basic business idea into a beautiful, functional website. Our customers love the interface, and we’ve seen a massive jump in inquiries!” — Anjali Mehta, Founder, GreenRoot Interiors, Bangalore
“The SEO-backed design Hello Errors created for us now ranks on page one for multiple Bangalore-based keywords. Amazing results!” — Siddharth Rao, Marketing Lead, StartLoop Technologies
These stories are just a glimpse into the client satisfaction we’re proud of.
Ready to Partner with the Best Web Designer in Bangalore?
If you’re looking for a design team that blends creativity, technical skill, and brand strategy, Hello Errors is your answer.
Let’s turn your digital vision into a compelling, high-performing website that drives leads, tells your story, and sets you apart in the Bangalore business ecosystem.
Contact Hello Errors Today
📍 Office: Bangalore, India 🌐 Website: https://helloerrors.in 📧 Email: [email protected]
#WebDesignerInBangalore#HelloErrors#WebsiteDesignExperts#BangaloreBusiness#ResponsiveDesign#DigitalBranding#CustomWebDesign#CreativeWebDesign#StartupWebsiteDesign#WebDevelopmentIndia
0 notes
Text
best WordPress course in Jalandhar
TechCADD presents the best WordPress course in Jalandhar, Punjab. Excel in website development and management with expert support for all skill levels!
https://techcadd.com/best-wordpress-course-in-jalandhar.php
A WordPress course offers a comprehensive pathway for individuals interested in creating, managing, and optimizing websites without needing deep coding knowledge. As the world’s most popular content management system (CMS), WordPress powers over 40% of all websites on the internet, making it an essential skill for web developers, bloggers, entrepreneurs, and digital marketers. A well-structured WordPress course introduces learners to the fundamentals of website creation, beginning with domain name registration, hosting selection, and WordPress installation—either manually or through a hosting provider’s one-click setup tools. From there, students explore the WordPress dashboard, learning how to navigate menus, customize themes, and install essential plugins to enhance site functionality. These courses typically cover both WordPress.com (hosted) and WordPress.org (self-hosted), explaining the pros and cons of each so learners can choose the best option for their goals.
As learners progress, they’re guided through designing pages and posts using the block-based Gutenberg editor or classic editor, with hands-on exercises on formatting content, embedding media, creating menus, and using widgets for added interactivity. Understanding how to structure a website for both user experience (UX) and search engine optimization (SEO) is a core focus, with tutorials on permalinks, categories, tags, and metadata. Many WordPress courses also introduce learners to theme customization, where they can explore both free and premium themes, and learn to adjust colors, fonts, layouts, and logos to match their branding or design goals. Some advanced courses even include lessons on using page builders like Elementor or Beaver Builder for drag-and-drop website creation, making the design process accessible to non-designers.
Beyond design, a strong WordPress course dives into functionality—teaching students how to install and configure plugins to expand their site’s features. This includes plugins for SEO (like Yoast or Rank Math), security (such as Wordfence), backups (like UpdraftPlus), contact forms, social sharing, eCommerce, and analytics. By using plugins effectively, learners can add professional-level features to their websites without writing a single line of code. Additionally, courses often touch on performance optimization, covering techniques like caching, image compression, and mobile responsiveness to ensure websites load quickly and perform well on all devices.
For those interested in online business, many WordPress courses offer dedicated modules on setting up eCommerce stores using WooCommerce, the platform’s most popular online store plugin. Learners get step-by-step guidance on how to list products, set prices, manage inventory, configure payment gateways, calculate taxes and shipping, and manage customer orders. They also explore marketing integrations, such as email list building, customer reviews, coupons, and abandoned cart recovery—all crucial for building a successful online business.
Another important aspect covered in WordPress courses is website security and maintenance. Students are taught best practices to protect their websites from malware, spam, and unauthorized access. Lessons typically include how to keep WordPress, themes, and plugins updated, use secure passwords, install SSL certificates, and schedule regular backups. Additionally, students learn about GDPR compliance and how to ensure their sites meet privacy regulations by incorporating cookie notices, privacy policies, and data handling practices.
Many modern WordPress courses also address basic HTML, CSS, and even introductory PHP for those who want to move beyond pre-built tools and gain more control over customization. This allows learners to make specific changes to theme files or child themes, troubleshoot errors, and create custom functionality. While not mandatory, this knowledge enhances the learner’s confidence and opens the door to freelance web development or offering client services.
The flexibility of WordPress means that learners can use their skills in a wide range of projects, from blogs and portfolios to business websites, nonprofit platforms, and educational sites. A good WordPress course encourages project-based learning, where students build real websites from scratch, apply new concepts, and receive feedback. These hands-on projects not only reinforce learning but also help students build a portfolio they can use to showcase their skills to potential clients or employers.
In addition to technical skills, many WordPress courses offer guidance on launching and maintaining a career or freelance business. This includes tips on pricing web design services, managing client relationships, creating contracts, and using platforms like Fiverr, Upwork, or personal websites to attract business. With WordPress development in high demand, completing a course can be the first step toward a rewarding and flexible career in tech or digital entrepreneurship.
WordPress courses are available in various formats—self-paced video tutorials, instructor-led classes, bootcamps, or even university-affiliated certifications. Platforms like Udemy, Coursera, LinkedIn Learning, Skillshare, and local training centers offer a wide selection of WordPress courses catering to beginners through to advanced users. Some courses include certification upon completion, which can be added to resumes or LinkedIn profiles to validate one's skills.
In conclusion, a WordPress course equips learners with the tools and knowledge needed to build professional, functional, and attractive websites—without requiring deep programming experience. It covers everything from setting up a basic blog to launching a full-fledged online store, all while emphasizing usability, performance, and scalability. Whether you're a student, entrepreneur, freelancer, or career changer, learning WordPress opens the door to countless opportunities in the digital space, offering a valuable and future-proof skillset in an increasingly online world.
#WordPress#WP#WordPressSite#WordPressBlog#WordPressDeveloper#WordPressDesign#WordPressThemes#WordPressPlugins
0 notes