#deck post connector brackets
Explore tagged Tumblr posts
Visit Tumblr Blog
Explore Tumblr blogs with no restrictions, modern design and the best experience.
Last Seen Tumblr Blogs


Fun Fact
130K people were victims of a chain letter scam that affected Tumblr in May 2011.
Text
Exploring Innovative Storage Solutions for Blocking Rods
As the blocking rod industry continues to evolve, many enthusiasts are looking for efficient ways to store and display their equipment. If you find yourself with a growing collection of blocking rods, consider investing in some smart storage solutions that not only keep your rods organized but also enhance your workspace's aesthetics.
One great solution is to use deck post connector brackets. These brackets provide a sturdy and stylish way to secure your blocking rods, making them easily accessible while keeping them neatly arranged. With the right setup, you can create an inspiring display that showcases your collection and encourages creativity.
Having a variety of blocking rods can also lead to enhanced experiences. Just like with any hobby, mixing things up can refresh your perspective and keep your enthusiasm alive. So, whether you're a seasoned pro or just starting, consider how you store and display your pieces.
I would love to see how you all organize your blocking rods! Sharing your unique storage ideas could inspire others to find the perfect setup for their own collections.
0 notes
Text
Exploring the Benefits of Muzata's Deck Post Connector Brackets WT08
The Blocking rod industry is thriving, and one standout brand making waves is Muzata. Known for its innovative solutions, Muzata has introduced the Deck Post Connector Brackets WT08, which are perfect for enhancing the stability and safety of your outdoor projects.
These connector brackets are designed with durability in mind, ensuring that your deck or garden structure remains secure for years to come. The easy installation process allows anyone, from DIY enthusiasts to professional builders, to achieve a high-quality finish without hassle.
Additionally, the versatility of the WT08 brackets means they can be used in various applications, making them a great choice for anyone looking to improve their outdoor spaces. Whether you are building a deck, fence, or other structures, Muzata provides the tools you need to succeed.
If you're in the market for reliable and efficient deck post connectors, look no further than Muzata's WT08. With a focus on quality and customer satisfaction, this brand continues to lead the way in the Blocking rod industry.
#professional builders#customer satisfaction#DIY#Deck Post Connector Brackets#blocking rod industry#safety
0 notes
Text
Deck Builder Recommendations for Wind and Tree Coverage in Barrington, IL
If you live in Barrington, IL, you already know the beauty of your neighborhood’s lush greenery and mature tree canopy. While these natural surroundings create a picturesque backdrop for your home, they also present unique challenges when it comes to building an outdoor deck. Factors like wind exposure and dense tree coverage require thoughtful design and construction to ensure your deck builders is both beautiful and durable.
At Decked Out Builders LLC, we specialize in creating custom decks tailored to the specific environmental conditions of Barrington and surrounding areas. Here’s our expert guide on what you need to know when planning your deck in a landscape dominated by wind and tree coverage.
Understanding Wind and Tree Coverage Challenges in Barrington, IL
Barrington is known for its wooded lots and seasonal gusts that can challenge the structural integrity of outdoor spaces. When building a deck here, you must consider:
Wind Load: Open areas or decks elevated above the ground are more exposed to wind pressure, which can cause movement or damage over time.
Tree Canopy: Dense trees offer shade and privacy but can drop leaves, branches, and sap onto your deck. Plus, roots may affect the foundation.
Moisture and Debris: Shaded areas may retain moisture longer, increasing the risk of wood rot and mold if not properly treated.
Sunlight and Temperature Variations: The interplay between shaded and sunlit spots can affect material choice and maintenance schedules.
Expert Deck Builder Recommendations for Wind Resistance
1. Choose Durable, Weather-Resistant Materials In Barrington, decks face wind, rain, and seasonal temperature swings. Opt for materials that hold up under pressure. Composite decking is a popular choice due to its resistance to warping, splintering, and fading. Pressure-treated lumber, when installed correctly, is another reliable option with great strength to withstand wind loads.
2. Reinforce the Deck Structure A strong foundation is key. Use deeper footings anchored below the frost line to secure posts firmly. Incorporate hurricane ties and heavy-duty brackets to reinforce joists and beams. These metal connectors add critical support against wind uplift and lateral forces.
3. Strategic Deck Orientation and Design Work with a builder familiar with Barrington’s microclimates to orient your deck in a way that minimizes wind impact. Consider windbreaks like privacy screens or built-in benches along the windward side. Open railings and lattice work can reduce wind pressure by allowing airflow rather than blocking it entirely.
Handling Tree Coverage Considerations
1. Select Deck Materials Resistant to Moisture and Decay In shaded, tree-covered areas, moisture can be a persistent issue. Composite decking resists mold and mildew better than natural wood. If you prefer wood, consider naturally rot-resistant species like cedar or redwood, paired with proper sealing and regular maintenance.
2. Design for Maintenance and Debris Management Plan your deck layout to facilitate easy cleaning of leaves, twigs, and sap. Slightly sloped surfaces, gaps between decking boards, and gutter systems can help prevent debris buildup and water pooling.
3. Work Around Tree Roots and Preserve Trees When Possible Avoid heavy excavation that damages tree roots. Instead, design floating decks or use post-and-beam systems to minimize ground disturbance. Healthy mature trees add value and beauty—preserving them should be a priority.
Why Choose Decked Out Builders LLC for Your Barrington Deck Project?
At Decked Out Builders LLC, we combine local expertise with top-quality craftsmanship to build decks that stand up to Barrington, Illinois, environmental challenges. Our team evaluates your property’s wind patterns, tree coverage, and soil conditions to recommend the perfect materials and design. We’re committed to creating outdoor spaces that not only look stunning but last for decades.
From initial consultation to final build, we prioritize communication, transparency, and attention to detail. Whether you want a cozy backyard retreat shielded by trees or a breezy, open deck perfect for entertaining, Decked Out Builders LLC has the skills and experience to bring your vision to life.
Decked Out Builders LLC
118 Barrington Commons Ct Ste 207, Barrington, IL 60010
(815) 900-5199
0 notes
Text
Construction Materials Delivered On Time: Streamlining Your Projects with Supply Ontime

Construction Materials Delivered On Time: Streamlining Your Projects with Supply Ontime
In the dynamic world of construction, timely access to quality construction materials is crucial. Delays can escalate costs and disrupt project timelines. Enter Supply Ontime, your reliable partner in ensuring that your building materials arrive precisely when and where you need them.
Why Choose Supply Ontime for Your Construction Materials?
Supply Ontime specializes in delivering a comprehensive range of construction materials directly to job sites across the Greater Los Angeles area. Whether you're a contractor, builder, or DIY enthusiast, our services are designed to keep your projects on schedule and within budget.
Extensive Product Catalog
Our inventory includes:
Drywall & Accessories: Drywall sheets, DensGlass, cement boards, steel studs, joint compounds, drywall tape, corner beads, screws, and tools.
Insulation: Fiberglass, foam, mineral wool, spray foam, housewrap, radiant barriers, and pipe insulation.
Lumber & Composites: Dimensional lumber, pressure-treated lumber, redwood, cedar, composite decking, moulding, casing, siding, and fascia.
Plywood & OSB: OSB, plywood, MDF, and small format panels.
Mortars & Aggregates: Concrete mix, aggregates, mortar mix, stucco, floor levelers, and tile setting materials.
Masonry: Bricks, blocks, rebar, concrete forms, wire mesh, and pavers.
Roofing & Facade: Roofing shingles, panels, underlayment, flashing, coatings, gutter systems, and James Hardie siding.
Building Hardware: Joist hangers, metal straps, corner braces, post brackets, mending plates, wood connectors, and nail plates.
Fasteners: Various screws (drywall, wood, sheet metal), nails, nuts, bolts, anchors, and fastening tools.
Electrical: Wires, electrical boxes, conduits, fittings, power distribution components, outlets, and switches.
Plumbing: Pipes and fittings (ABS, brass, copper, CPVC, PVC), valves, and plumbing accessories.
Paint Tools & Primers: Primers, caulks, sealants, adhesives, paint rollers, brushes, tapes, and sanding supplies.
Tools: Cutting tools, wrenches, screwdrivers, pliers, hammers, drill bits, shovels, and wheelbarrows.
Landscaping & Gardening: Fencing, landscape rocks, fabric, soil, soil amendments, and wood mulch.
Builders Fuel: Liquid and solid fuels.
Flexible Delivery Options
Same-Day Delivery: Place your order, and we'll deliver within hours.
Scheduled Delivery: Plan ahead and choose a delivery time that aligns with your project timeline.
Our delivery services are designed to be:
Fast: Minimizing downtime on your projects.
Reliable: Ensuring materials arrive in excellent condition.
Convenient: Delivering directly to your job site.
How to Order Supply Ontime
Browse our extensive online catalog.
Select the materials you need.
Choose your preferred delivery option.
Place your order and let us handle the rest!
For bulk orders or special requests, feel free to contact us directly.
0 notes
Text
Exploring the Benefits of Muzata's Deck Post Connector Brackets WT08
The blocking rod industry has seen significant innovations, and Muzata is at the forefront with their outstanding deck post connector brackets WT08. These brackets are designed to provide exceptional stability and durability for your outdoor projects.
Muzata's WT08 brackets are easy to install, making them a fantastic choice for both DIY enthusiasts and professional contractors. They offer a sleek design that enhances the aesthetic appeal of your deck while ensuring that your structure is secure and long-lasting.
One of the key advantages of using Muzata's deck post connector brackets is the high-quality materials used in their construction. They resist corrosion and wear, making them ideal for various weather conditions. This means you can enjoy your outdoor space without worrying about the longevity of your deck.
Furthermore, the WT08 brackets are versatile and can be used in a variety of applications, from residential decks to commercial outdoor spaces. Their adaptability makes them a smart investment for anyone looking to elevate their construction projects.
In conclusion, if you're in the market for reliable and stylish deck post connector brackets, Muzata's WT08 is an excellent choice. They combine functionality with aesthetics, ensuring your outdoor space is both beautiful and robust. Embrace the positive changes in the blocking rod industry with Muzata!
0 notes
Text
How to Install Stainless Steel Handrail Systems?

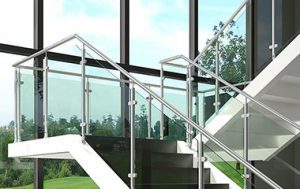
Glass railings (balustrades) gives a look of unequivocal elegance and complements a modern decor like other railings and balustrades. There are many companies offering custom-made balustrades, they are typically much more expensive than DIY stainless steel handrail installation kits that can be purchased and installed by you. Glass railings (balustrades) are clear view, modern, functional, and durable and are a great choice for both residential and commercial applications. They are quicker and easier to be installed, easier for cleaning and will last for many years. Glass railings (balustrades) can be used on decks and patios, or for staircases inside and outside of the doors.
Highco Metal is producing various glass railing (glass balustrade) fittings, also called handrail fittings, suitable for your DIY stainless steel handrail installation works. Here you will find the information needed to prepare a staircase for installation, and the installation of the frame for the balustrade. To install stainless steel handrail systems, follow these steps:
1. Measure and plan: Start by measuring the length of the area where you want to install the handrail. Consider the height and any angles or corners that may be present. Plan the layout of the handrail system accordingly.
2. Gather materials: Purchase all the necessary materials for the stainless steel handrail installation, including handrail components such as posts, brackets, handrail tubing, connectors, and screws. Make sure to choose high-quality materials that are suitable for outdoor or indoor use, depending on your installation location.
3. Prepare the installation area: Clear the area where the handrail will be installed. Remove any existing handrails or obstacles that may interfere with the installation process.
4. Install the posts: Start by installing the posts at regular intervals along the planned handrail route. Use a drill and appropriate screws or anchors to secure the posts to the floor or wall. Ensure that the posts are level and securely attached.
5. Attach the brackets: Once the posts are in place, attach the brackets to the posts. The brackets will hold the handrail tubing in place. Use screws or bolts to secure the brackets to the posts, ensuring they are level and properly aligned.
6. Cut and install the handrail tubing: Measure and cut the stainless steel handrail tubing to fit between the posts. Use a stainless steel cutting tool or a hacksaw to make precise cuts. Slide the tubing into the brackets and secure it using connectors or screws.
7. Secure the handrail: Once the handrail tubing is in place, make sure it is securely attached to the brackets. Tighten any screws or connectors to ensure a stable and safe handrail.
8. Test and inspect: After the installation is complete, test the handrail by applying pressure and checking for any movement or instability. Inspect the entire system to ensure all components are properly installed and secure.
Tips for installing stainless steel handrail systems:
Use stainless steel screws to prevent corrosion. Pre-drill the pilot holes to prevent the screws from splitting the wood. Use a level to make sure the handrail is installed straight. Be careful not to overtighten the screws, as this could damage the handrail.
0 notes
Photo
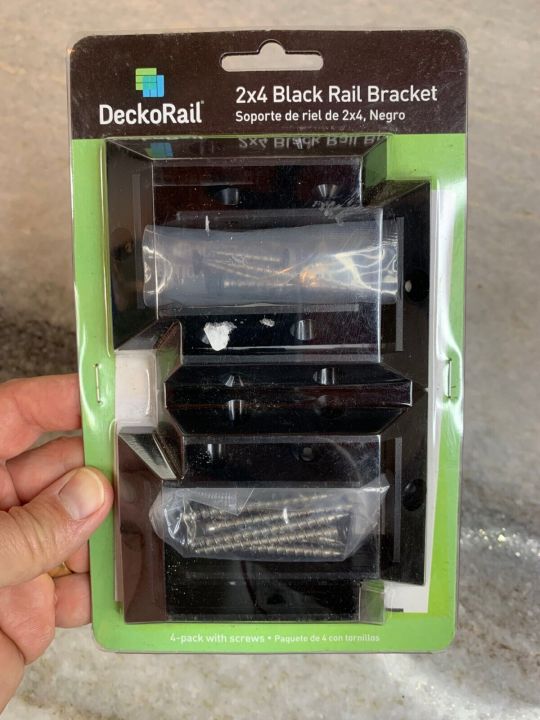
2x4 2 by 4 Black Rail Railing Deck Decking Connector Bracket (4-Pack)
New/Unused, but the retail package has some scuffing, dirty, wear etc.
4 Pack
These make it easy to connect your 2 by 4s to deck posts.
You are buying one set of 4; althouh multiples may be available.
I package well and ship out daily!
https://www.ebay.com/itm/2x4-2-4-Black-Rail-Railing-Deck-Decking-Connector-Bracket-4-Pack-/186134432354
0 notes
Text
Asus TUF Gaming A17 Review
Asus' TUF gaming laptops are priced and positioned below its elite Republic of Gamers (ROG) models, but the TUF Gaming A17 gives you more than you might expect for $1,099.99. It combines a beefy eight-core AMD Ryzen 7 4800H "Renoir" processor with a very ample 16GB of RAM and a positively generous 1TB solid-state drive. It backs its 17.3-inch full HD display with a capable Nvidia GeForce GTX 1660 Ti GPU. It offers longer battery life and tougher construction than many competitors, passing MIL-STD 810H tests against shock, vibration, and environmental extremes. The GTX 1660 Ti won't max out the system's 120Hz-refresh-rate screen—and the screen isn't the most gorgeous thing you've seen—but the A17 is a good option for plus-size gaming on a budget.
TUF-Guy Credentials
Available in Fortress Gray or Bonfire Black (my test model TUF706IU-AS76 was the former), the A17 combines an aluminum lid with a plastic keyboard deck and underside. The lid is decorated by four faux corner screws and an ungainly winged-shield logo that (sort of) spells "TUF" if you squint at it sideways. The rear edge of the lid is sliced away to reveal a strip of the deck with "TUF GAMING" lettering.
Medium-thin bezels surround the 1080p non-touch screen, and a slight bump in the top bezel accommodates the webcam. The camera lacks IR face recognition capability and there is no fingerprint reader, so you can't use Windows Hello to bypass typing passwords. Chiseled lines bracket the keyboard, which features translucent W, A, S, and D keys. A hexagonal power button occupies the top right corner.
Though ponderous next to a 15.6-inch system, the Asus is not too big and heavy for a 17.3-inch gaming rig, measuring 1.0 by 15.7 by 10.6 inches and weighing 5.7 pounds. That undercuts the HP Omen 17 (1.6 by 15.8 by 11 inches, 7 pounds). There's little flex if you grasp the screen corners, though some is noticeable if you press the keyboard deck.
The only ports on the notebook's right side are a USB 2.0 port and a Kensington lock slot. On the left, you'll find Ethernet and HDMI ports, two USB 3.2 Type-A ports, one USB 3.2 Type-C port, an audio jack, and the connector for the AC power brick. Asus forgot an SD or a microSD card slot.
Colorful, Comfortable Keys
Pricier gaming laptops tend to divide their RGB keyboard backlighting into multiple zones or allow for the programming of individual keys, but the A17 shows just one color at a time. Using the Fn and cursor arrow keys, however, you can adjust the ample brightness of the key lights, or choose among color cycling, breathing, or strobing effects.
There's a Home/End key at the far top right of the layout, but you're most likely to access Home, End, Page Up, and Page Down via the numeric keypad, which will mean awkward toggling of Num Lock as you switch from data entry to navigating a spreadsheet. The typing feel is pretty good, a little shallow and plasticky, but fairly snappy and firm. The good-size touchpad has two rubbery buttons. It glides and taps smoothly.
As for the TUF Gaming's biggest asset—the 17.3-inch screen—it offers support for adaptive sync and a 120Hz refresh rate for games. (Asus says the TUF works with G-Sync monitors plugged into the USB-C port via a DisplayPort adapter.) Alas, though, the native display is the least-appealing feature of the TUF Gaming A17. It's dim even at the top backlight setting, making white backgrounds look dingy, and colors appear muddy and muted. Viewing angles are broad, and the contrast and detail are decent, but overall the screen is no better than bearable.
The 720p webcam captures adequately bright and colorful but rather soft-focus and noisy images. Sound from the bottom-firing speakers isn't very loud, even cranked to the max, but it isn't bad—short on bass, but clear and able to distinguish overlapping tracks. DTS:X Ultra software lets you make a minimal difference in the audio's character by choosing among music, movie, RPG, shooter, strategy, and voice presets, or playing with an equalizer. A free 14-day trial of DTS headphone software is included.
High Marks in Performance Testing
We've tested 17-inch gaming rigs that cost three times as much as the TUF Gaming A17 (Asus' own ROG Strix Scar 17 comes to mind), but for our benchmark comparisons here I chose four more or less affordable gamers. Two are 17.3-inch machines, the Aorus 7 SA and HP Omen 17—which stretches the definition of "affordable" by some $500 over the TUF, splurging on a GeForce RTX 2070 GPU that makes it the favorite in our graphics tests. Two are 15.6-inch systems, the Dell G5 15 SE and our $999 Editors' Choice winner, the MSI Bravo 15. You can see the contenders' basic specs in the table below.
Productivity and Media Tests
PCMark 10 and 8 are holistic performance suites developed by the PC benchmark specialists at UL (formerly Futuremark). The PCMark 10 test we run simulates different real-world productivity and content-creation workflows. We use it to assess overall system performance for office-centric tasks such as word processing, spreadsheet jockeying, web browsing, and videoconferencing. PCMark 8, meanwhile, has a storage subtest that we use to assess the speed of the system's boot drive. Both yield a proprietary numeric score; higher numbers are better.
Like its rivals, the A17 blew past the 4,000-point mark that indicates excellent productivity in PCMark 10. Like nearly all modern laptops with PCI Express-based solid-state drives, all five contestants aced PCMark 8's storage subtest.
Next is Maxon's CPU-crunching Cinebench R15 test, which is fully threaded to make use of all available processor cores and threads. Cinebench stresses the CPU rather than the GPU to render a complex image. The result is a proprietary score indicating a PC's suitability for processor-intensive workloads.
Cinebench is often a good predictor of our Handbrake video editing benchmark, in which we put a stopwatch on systems as they transcode a brief movie from 4K resolution down to 1080p. It, too, is a tough test for multi-core, multi-threaded CPUs; lower times are better.
The eight-core, 2.9GHz (4.2GHz turbo) AMD Ryzen 7 4800H is one potent processor (in the 45-watt desktop replacement and gaming rather than 15-watt ultraportable class), and it gave the Asus, Dell, and MSI superb results in these tests.
We also run a custom Adobe Photoshop image-editing benchmark. Using an early 2018 release of the Creative Cloud version of Photoshop, we apply a series of 10 complex filters and effects to a standard JPEG test image. We time each operation and add up the total. (Lower times are better.) The Photoshop test stresses the CPU, storage subsystem, and RAM, but it can also take advantage of most GPUs to speed up the process of applying filters.
The MSI and Dell slipped a bit in this exercise, but the TUF posted a first-rate time, even if its ho-hum screen and lack of an SD card slot make it an unlikely choice for avid photo editors.
Graphics Tests
3DMark measures relative graphics muscle by rendering sequences of highly detailed, gaming-style 3D graphics that emphasize particles and lighting. We run two different 3DMark subtests, Sky Diver and Fire Strike. Both are DirectX 11 benchmarks, but Sky Diver is more suited to laptops and midrange PCs, while Fire Strike is more demanding and lets high-end PCs and gaming rigs strut their stuff.
As expected, the Omen 17's GeForce RTX 2070 graphics claimed first place, but the Asus delivered a creditable performance, a notch above low-cost gamers with GeForce GTX 1650 GPUs.
Next up is another synthetic graphics test, this time from Unigine Corp. Like 3DMark, the Superposition test renders and pans through a detailed 3D scene, this one rendered in the eponymous Unigine engine for a second opinion on the machine's graphical prowess.
The Asus, Dell, and Aorus essentially tied for second place behind the HP. Spending more will get you higher frame rates, but these are more-than-acceptable results.
Real-World Gaming Tests
The synthetic tests above are helpful for measuring general 3D aptitude, but it's hard to beat full retail video games for judging gaming performance. Far Cry 5 and Rise of the Tomb Raider are both modern AAA titles with built-in benchmark routines. We run these tests at 1080p resolution using both moderate and maximum graphics-quality presets—Normal and Ultra for Far Cry 5 under DirectX 11, Medium and Very High for Rise of the Tomb Raider under DirectX 12.
Once again, it trailed the Omen 17, but the A17 posted very satisfactory results for its price, easily surpassing the desirable 60-frame-per-second mark even at the games' finest image quality settings. We've tested many budget gaming laptops that wish they could do this well.
Battery Rundown Test
After fully recharging the laptop, we set up the machine in power-save mode (as opposed to balanced or high-performance mode) where available and make a few other battery-conserving tweaks in preparation for our unplugged video rundown test. (We also turn Wi-Fi off, putting the laptop into airplane mode.) In this test, we loop a video—a locally stored 720p file of the Blender Foundation short film Tears of Steel—with screen brightness set at 50 percent and volume at 100 percent until the system quits.
We like to see at least four hours of battery life from a gaming notebook. The Asus more than doubled that, winning this event. Actual gaming will, of course, drain the battery faster than mere video viewing, but with the A17 it's at least possible.
One of the Better Deals in a 17-Inch Gamer
With its 1TB SSD—and a second M.2 slot accessible by unscrewing the bottom panel—the Asus TUF Gaming A17 is a welcome change from low-cost gaming laptops with a skimpy 256GB of storage, and its Ryzen 7 processor is a real powerhouse. But while you can live with the screen, you won't be thrilled with it; I waffled between giving the laptop three-and-a-half and four stars on our rating scale, and the display narrowly tipped me to the lower score.
Still, its less-than-dazzling display doesn't negate the TUF Gaming A17's above-average value when you tally up the rest of the components. Good 17.3-inch budget gaming rigs are scarcer than their 15.6-inch counterparts, and if you desire a big screen but lack a big checkbook, this sturdy performer deserves consideration.
0 notes
Text
Choosing the Right Staircase Railing Components to Complete Your Home Decor
For anyone who isn't aware of creating a plan for the deck railings, you should know that a deck railing component is essential. It will help to give that all important finishing touch to the railings, and when it comes to creating that perfect deck railing, there are a number of different components that come into the equation.
Deck railing components
The baluster is one of the most important components which is used for the deck railings. Basically, these are the small structures which are placed between the other larger posts. Most of the traditional decks are usually built with balusters that are two by two wooden ones. The problem with a lot of homeowners these days is that they are after something that is not as traditional and they opt to choose different materials. These could include anything from glass, aluminum, iron or even glass. Another crucial element is brass tubing. You will generally find brass tubing being used for stair railings, other handrails, and even foot rails.

Popular components
One of the most popular choices is the aluminum type because of the different varieties of colors, and it is basically maintenance free. Another material which is starting to gain a lot of popularity is glass because it looks classy. Also, it comes available with different options for tinting, and it is also see through which is always good. However, it is not just the materials people like to change, but also the style of the baluster too. While some settle for the classic look, others may look into the Victorian architecture for inspiration.
The connectors are another important component when it comes to deck railings. These can have multiple purposes when it comes to the railings. The main importance of them is that they are used to connect the railings to each other as well as the wall and the stairs. Another use for the connectors is to connect the balusters to both the top and the bottom rails. Also, like the railings, the connectors also come in a range of different styles and a variety of colors. They can be made from various materials such as iron, wood, and some other metals too. Something that will need to be bared in mind is that the connectors have to be strong to create the correct support for the deck. If the connectors you choose are not up to the job, you will need some different connectors.
To finish off the components, you have the accessories for the deck. These are generally what is used to make everything look unique and elegant. You can even get centerpiece accessories which are for the balusters, and they come in different designs.
One piece of advice is that now you know about all of the components; make sure that you get all of the right ones for your deck railing plan. Otherwise, you will end up simply wasting money.
Similarly, a stair railing too consists of Newel posts, anchoring part, a Baluster, foot rails, foot rail bracket, brass tubing, and the actual top Rail, the part you grasp when walking on the stair. All these pieces come in different shapes and sizes but work together to keep you safe when needed.
When working with any of the above components be it stairs or railings, you will get a superior finished product and one that will last the longest without developing squeaks and sponginess.
0 notes
Text
Installing a full suspension on a 1967 Mustang for ultimate handling
Ride and handling are truly subjective things, like Goldilocks’ choice in beds or porridge. One person’s “harsh” ride is just right for someone else; a car that handles acceptably for Joe Blow feels like driving a semitruck to John Smith. Every driver has their own personal tastes and tolerance for the compromises between ultimate handling and/or ride softness/harshness. Similarly, some guys have no problem breaking out the plasma cutter and cutoff wheel to modify a Mustang, while others wouldn’t dream of changing Ford’s original design one iota. Vive la différence!
As we entered into another Week to Wicked project in July 2018, the plan of attack was to build a 1967 fastback (converted from a hardtop into a fastback with Golden Star parts/PG Customs & Bodies labor) and to power the car with a 2018 Gen 3 5.0L Coyote engine from Ford Performance. That obviously meant we weren’t afraid to cut and heavily modify the car—and that big Coyote engine would mandate it anyway—so we went whole hog when it came to the suspension and chose a Total Control Products full kit, front to back. Yes, it requires TCP’s weld-in front clip that replaces the stock front framerails, making it next to impossible to undo the modifications and return the car to stock, but in this case we didn’t care. We were building a hot street car from a beat-up rust bucket so originality mattered not. The goal was ultimate street/track performance without too much sacrifice in civility, and Total Control’s front clip and coilover suspension combined with their Stage 6 rear suspension would satisfy both goals.
Even if you’re not building a car to the level of our Week to Wicked ’67 fastback, the front TCP coilover and clip will dramatically improve both the ride and handling of an early Mustang. The lightweight, thin-wall factory framerails and sheetmetal stampings are not optimum for strength or integrity. Even in perfect condition, their strength (and geometry) pales in comparison to a dedicated performance clip like that from TCP. And if you’re contemplating a Coyote or mod motor swap (or a big-block), the stock shock towers will make you want to kill the closest living thing the first time you have to work on it—one big advantage to a front clip is the elimination of the shock towers, freeing up space underhood.
Complementing the TCP Front Frame Clip and Suspension kit are five different suspension and steering systems with a bunch of options, but they’re all based on a coilover setup that improves both ride and handling over stock, and rack-and-pinion steering that is far more precise than the early Mustang’s sloppy steering. We ordered the full boogie setup that includes upper and lower control arms, double-adjustable VariShock coilovers, a gun-drilled and splined antiroll bar, a power rack, and Wilwood brakes.
We also got the trick stuff for the rear suspension—TCP’s Stage 6 Torque Arm/Panhard Bar leaf-spring system that uses a torque arm, Panhard bar, new leaf springs, polyurethane bushings and shackle set, aluminum-body shocks, leaf-spring plates, and mounting hardware. Linking the front and rear suspensions are TCP’s subframe connectors and bolt-in center support that nearly turn the car into a full-frame car. While the coupe was undergoing the fastback conversion at PG Customs & Bodies in Texas, we had them weld in the front frame clip and subframe connectors before taking it to our shop in California for the suspension installation.
Once in our shop, we had all hands on deck during the Week to Wicked program and had the entire suspension installed in a day. Of course, that’s on a two-post hoist and with about six people working on it—it’ll take longer if you’re on your back in the garage or driveway.
1. Here’s the complete TCI Stage 6 front and rear suspension system for the 1967-1968 Mustang.
2. During the fastback conversion at PG Customs & Bodies in Decatur, Texas, we had them cut off the Mustang’s stock front framerails and install the Total Control Products front clip kit and the subframe connectors (not shown here).
3. Here’s an illustrated view of the TCP products we installed—front frame clip, subframe connectors, and center support—that essentially turn the car into a full-frame car.
4. For the full story on what’s involved with installing the TCP front clip setup, check out Mustang-360.com (mustang-360.com/how-to/chassis-suspension/1608-replace-weak-stock-mustang-framerails-with-a-new-front-subframe).
5. Since our car came to us as a bare, painted body shell, we sourced a 9-inch rearend from Currie Enterprises. It uses the new Currie Centurion heavy-duty Ford 9-inch housing, Sportsman nodular iron gear case, 31-spline performance axles, and comes with a choice of gear ratios—we chose 3.73s on a Truetrac differential. The “crate” rearend package comes with brake options, but we were using Wilwood brakes that we already have, so we left that off the list.
6. Here’s a shot of the TCP chassis brace kit installed aft of the front frame clip. The subframe connectors are welded on to the framerails, which is the best idea. This makes the Mustang stiff as a bridge girder.
7. The torque arm attaches to the rearend and also to the center brace, and it transmits axle rotation under acceleration into the chassis, planting the rearend harder for better traction. It helps in straight line acceleration like on the dragstrip and also on corner exit in a handling situation.
8. We had to remove the centersection from the Currie rear in order to install the torque arm bracket. TCP includes this “gauge” to properly locate the brackets; Tech Center Manager Jason Scudellari (right) then welded them in place before reassembling the rear.
9. TCP’s leaf-spring suspension system comes with new leaves, VariShock adjustable shocks, spring mounts, and all the hardware to install it—including new rear shackles.
10. The Stage 6 kit also includes a Panhard bar, which requires these brackets to be welded to the chassis.
11. The Panhard bar (bare aluminum piece) controls the lateral (side-to-side) movement of the rearend for more stable handling. Leaf springs serve that same function, but not nearly as well—they allow too much movement, whereas the Panhard bar keeps it to an absolute minimum and is adjustable.
12. Christian Arriero, tech center technician, is seen here installing the rod ends in the TCP tubular upper control arms. TCP says, “The most notable feature of our upper control arms is the double-adjustment couplers. Adjustment range is 1 inch, with travel centered at the stock control-arm length. Caster can be varied within a 6-degree range and camber within 5.5 degrees. Alloy-steel rod ends feature low-friction, polymer-bearing races, eliminating deflection and the increasing resistance found with rubber and polyurethane bushings. The arms come with Grade 8 fasteners and shims to compensate for any chassis variances.
13. The upper and lower TCP control arms allow the use of coilover shocks. We went with TCP’s VariShock double-adjustable units (part number VAS 86M21F2) that have 256 combinations of compression and rebound adjustment, allowing the ride and handling combination to be dialed in to the last degree. (Coilovers also allow easy adjustment of ride height.) TCP’s modular shock tower adapter system and spherical-stem assembly provides a choice of stock or lowered ride heights.
14. Part of the TCP front suspension system we went with includes race-and-pinion steering that is light-years better than the Mustang’s stock hydraulic ram-assisted system. TCP’s kit enables correct geometry and a quick ratio. Existing factory mounting locations are used whenever possible to simplify rack installation, and once installed, the rack becomes a rigid crossmember bracing the lower control arm mounts—an improvement over the original bent tubular design. These trick aluminum mounting brackets along with the centerlink are specific to engine type and are used to vary the height of the rack as needed for oil pan clearance.
15. TCP’s gun-drilled and splined antisway bar is full-on race car stuff, and a required option when doing a Coyote swap install in a classic Mustang.
16. The complete Total Control Products front suspension system works with the rear suspension to make our fastback a killer on the street, strip, and open track.
17. To stop the beast and complement the TCP suspension, we went with Wilwood brakes with 6-piston calipers front, 4-piston rear, and 13-inch rotors.
18. The best suspension in the world is worthless without good wheels and tires. We chose Legendary Wheels’ 17×7 and 17×8 LW90s with Gold Haze centers to pop with the Royal Crimson paint. Tires are Falken Azenis RT615Ks—P245/45R17 rear and P225/45R17 front.
19. About to come down off the lift, our Week to Wicked 1967 Mustang, presented by Golden Star Auto Parts, looks amazing. Check back next month for the final reveal!
More on our Week to Wicked 1967 Ford Mustang Build!
Week to Wicked Begins! Convert a 1967 Mustang Hardtop to a Fastback for Under $10,000! Week To Wicked 1967 Mustang Fastback Build Coming the Week of July 23! Day one of the Golden Star Presents Week To Wicked 1967 Mustang build! Day Two of the Golden Star Presents Week To Wicked 1967 Mustang Build! Day Three of the Golden Star Presents Week To Wicked 1967 Mustang Build! Day Four of the Golden Star Presents Week To Wicked 1967 Mustang Build! Day Five of the Golden Star Presents Week To Wicked 1967 Mustang Build! Installing a full suspension on a 1967 Mustang for ultimate handling
To see more behind the scenes photos, outtakes, and videos, search these hashtags on Facebook and Instagram:
#Goldenstarautoparts #Currieenterprises #Thefutureoftraditional #E3sparkplugs #E3ProMod #E3borntoburn #Whatareyourunning #Painlessperformance #Painlesswiring #Deraleperformance #Derale #Wilwood #Gforce1320 #Duralast #FordPerformance #CAChassisworks #Totalcontrolproducts #Gearstarstrong #Pertronix #Feelingblessed #Gearstar #Trustedbythebest #Yankperformanceconverters #Covercraft #Becool #ididit #Unitedpacific #Oldair #Drakeautomotive #Tanksinc #Mustangstofear #Powerbythehour #Dakotadigital #Procarbyscat #Summitracing #w2w #weektowicked #M360 #Mustangmonthly #Musclemustangsandfastfords #jbaperformanceexhaust #Drakeautomotive #Tanksinc #Mustangstofear #oldairproducts #UPcarparts #Pbhperformance #Dakotadigital #PGCustomsandbodies #67fastback
The post Installing a full suspension on a 1967 Mustang for ultimate handling appeared first on Hot Rod Network.
from Hot Rod Network https://www.hotrod.com/articles/installing-full-suspension-1967-mustang-ultimate-handling/ via IFTTT
0 notes
Text
5 Steps to the Perfect Backyard
Ashley Basnight, of Handmade Haven, loves to entertain, but didn’t have a great backyard space to host people. Being the avid DIYer she is, Ashley built her own floating deck!
Read on to see how Ashley created a backyard oasis perfect for entertaining her guests and find out how to build a floating deck and DIY chevron privacy wall.
5 Steps to the Perfect Backyard: Build a Floating Deck with a DIY Chevron Privacy Wall
Everyone dreams of their own backyard oasis, so I was super excited to build a floating deck with a DIY chevron privacy wall! My backyard was pretty sad, and for a girl who loves to entertain, I knew this DIY floating deck would be the perfect project for me!
Let’s take a look at how my backyard looked before the deck. I think we can all agree that this project was a much-needed addition to my home.
If you’re wondering if you can build a floating deck yourself, you can! With no experience at all, I built this floating deck on my own and I’m loving the results.
Materials
Paver Base/Stone Dust
Deck Blocks
4 x 4 Pressure Treated Lumber
2 x 8 Pressure Treated Lumber
Joist Hangers
Landscape Fabric
Lanscape Fabric Staples
Galvenized Nails
3 in. Screws
1 x 6 Pressure Treated Lumber
2 x 4 Pressure Treated Lumber
1 board of 1 x 3 lumber
3 in. Galvenized Nails
1 1/2 in. Galvenized Nails
2 x 4 Connectors
Bolts
Solid Color Behr Waterproofing Stain and Sealer – Slate
Graco Magnum X5
Paint Brush
Painters Tape
Paint Strainer
2 Buckets
UltraShield Naturale Voyager Series Roman Antique Hollow Compositie Decking
NewTechWood UltraShield Plastic T Clip Hidden Fastener
Tools
Ryobi Hammer Drill
12 in. Sliding Dewalt Miter Saw
Dewalt Tape Measure
Ridigd Palm Nailer
Milwaukee Framing Hammer
Ryobi Pancake Air Compressor
Level
Husky Gloves
Safety Glasses
Hearing Protection
Dewalt Circular Saw
Respirator Mask
Shovel
Bessey Clamps
Step 1: Laying the Foundation
This first step was the most labor intensive step, laying the foundation. With the use of deck blocks and pavor base I laid five 2 x 8 pressure-treated lumber beams down and then connected them together with 4 x 4 posts and 2 x 8 joists using Simpson Strongtie connector brackets and galavenized nails. I used my ridgid palm nailer to secure the brackets and I must say, that palm nailer was a life saver; I couldn’t imagine hammering all those nails in with a hammer.
It is very important to be meticulous as possible on this step; any imperfections in the foundation will show through on your final product. Using a level, I made sure that every part of the foundation was level. My deck was a little more complicating due to it being on a slightly sloped backyard, but with time and patience I got everything level.
Click here for the in-depth blog post and video tutorial on how I laid the foundation.
Step 2: DIY Chevron Privacy Wall
I knew I wanted some kind of privacy wall for my floating deck because the fence just didn’t give me enough privacy. I am pancaked between two houses so this wall just gives a feel of a more intimate deck area.
First, I started by securing four 4 x 4 pressure treated post to the foundation of the deck using crown bolts. Once the posts were secure I used 1 x 6 pressure treated lumber to create the chevron privacy wall. I built it section be section and secured the 1 x 6 pressure treated lumber with 3 in. galvanized nails using my palm nailer.
Click here for the in-depth tutorial on how I built this chevron privacy wall.
Step 3: Laying the Deck Boards
I ended up going with New Tech Wood Composite Decking for the top because I really wanted my patio to feel like a getaway area and I’m glad I went with it. These composite decking boards really make the deck look like it was done by a professional (humble brag).
To secure the decking down I used UltraShield Plastic T Clip Hidden Fasteners. This made the process really simple and I really love that the t clips are hidden. No ugly screw heads on the top of the boards. I just screwed the fasteners into each joist and the boards slide right on the clips.
Step 4: Painting the Floating Deck
I was excited to get to this phase of the deck done because I knew it meant I was that much closer to finishing. I went back and forth on whether to stain or paint my deck and I finally decided to just take a risk and go for black. So glad I did! I used Behr Waterproofing Stain and Sealer Solid Color in the color slate. It’s called stain but the solid color is more of a paint. If you want more of a stain, you can get your color as a semi-transparent.
I applied the paint using the Graco Magnum X5 machine and man, oh man, did this baby perform. I sprayed in small sections and then went back over the paint with a brush. This sprayer definitely cut my spray time down in half and the cleanup didn’t take too long.
The final result was breath-taking.
Finishing the painting was such a fulfilling moment because I knew I had actually pulled it off.
Click here to see the in-depth blog post and video tutorial on how I painted my deck and laid the decking boards.
Step 5: Styling the Deck
The best and final part was styling the deck and enjoying all of the hard work.
Seating
With any backyard oasis, you need plenty of seating, so I knew I wanted a patio sectional that was both stylish and comfortable, so I went with this Beverly 5 –Piece Patio Sectional Seating Set. What sold me on this one was the fact that you can buy additional seats to make it as big as you want. I will definitely be buying some add ons in the near future.
To make the sectional pop I used some colorful pillows and added some contrast with these Wicker Lattice Outdoor Throw Pillows.
You can never have enough places to sit, especially on a 16 ft. x 21 ft. deck, so I got this ottoman pouf for extra seating. I love that you can just move it around anywhere. Makes the perfect deck addition and even better Home Depot has the matching Sand-Geo Throw pillows to tie it all together.
Floating Deck Extras
I absolutely love the wicker on Beverly Patio sectional and to really tie in the sectional I placed this Round Metal Garden Stool in Chalk beside it to serve as an outdoor end table.
Before I even started to build a floating deck I knew I wanted this Hampton Bay 11 ft. LED Offset Patio Umbrella. I am in love. It gives off so much shade for my new deck and gives the deck that cozy feel.
And speaking of cozy, I was happy to move my AZ Patio 38 in. Decorative Steel Fire Pit onto my deck for the upcoming winter months. This fire pit was surprisingly bigger than I had anticipated when I purchased it a while back but the perfect addition for my new deck.
Lighting
In order to enjoy my deck after dark I hung up some Solar Powered Black Nautical String Lights for some deck lighting. I love that these lights are solar so I don’t have to worry about plugging them in.
I was also excited to learn that the Hampton Bay 11-ft. LED Offset Patio Umbrella has solar LED lights. This umbrella lights up the night sky like no other and I love it. The first day I took it out of the box, with some direct sunlight, she was lit up that same night.
Even though the fire pit isn’t necessarily a light, cranking it up definitely brings some illumination to the deck and the warm feeling just ties it all in.
Overall this project was lots of fun, and after some sore muscles and some crazy events, I am happy to be able to say I successfully completed this floating deck! Now it’s time to go enjoy it!
Build a floating deck with materials at The Home Depot. Check out more Backyard Ideas on The Home Depot Blog and follow our Outdoor Living board on Pinterest for more inspiration.
The post 5 Steps to the Perfect Backyard appeared first on The Home Depot Blog.
from garage2 http://ift.tt/2iL60QF via great info
0 notes
Text
5 Steps to the Perfect Backyard
Ashley Basnight, of Handmade Haven, loves to entertain, but didn’t have a great backyard space to host people. Being the avid DIYer she is, Ashley built her own floating deck!
Read on to see how Ashley created a backyard oasis perfect for entertaining her guests and find out how to build a floating deck and DIY chevron privacy wall.
5 Steps to the Perfect Backyard: Build a Floating Deck with a DIY Chevron Privacy Wall
Everyone dreams of their own backyard oasis, so I was super excited to build a floating deck with a DIY chevron privacy wall! My backyard was pretty sad, and for a girl who loves to entertain, I knew this DIY floating deck would be the perfect project for me!
Let’s take a look at how my backyard looked before the deck. I think we can all agree that this project was a much-needed addition to my home.
If you’re wondering if you can build a floating deck yourself, you can! With no experience at all, I built this floating deck on my own and I’m loving the results.
Materials
Paver Base/Stone Dust
Deck Blocks
4 x 4 Pressure Treated Lumber
2 x 8 Pressure Treated Lumber
Joist Hangers
Landscape Fabric
Lanscape Fabric Staples
Galvenized Nails
3 in. Screws
1 x 6 Pressure Treated Lumber
2 x 4 Pressure Treated Lumber
1 board of 1 x 3 lumber
3 in. Galvenized Nails
1 1/2 in. Galvenized Nails
2 x 4 Connectors
Bolts
Solid Color Behr Waterproofing Stain and Sealer – Slate
Graco Magnum X5
Paint Brush
Painters Tape
Paint Strainer
2 Buckets
UltraShield Naturale Voyager Series Roman Antique Hollow Compositie Decking
NewTechWood UltraShield Plastic T Clip Hidden Fastener
Tools
Ryobi Hammer Drill
12 in. Sliding Dewalt Miter Saw
Dewalt Tape Measure
Ridigd Palm Nailer
Milwaukee Framing Hammer
Ryobi Pancake Air Compressor
Level
Husky Gloves
Safety Glasses
Hearing Protection
Dewalt Circular Saw
Respirator Mask
Shovel
Bessey Clamps
Step 1: Laying the Foundation
This first step was the most labor intensive step, laying the foundation. With the use of deck blocks and pavor base I laid five 2 x 8 pressure-treated lumber beams down and then connected them together with 4 x 4 posts and 2 x 8 joists using Simpson Strongtie connector brackets and galavenized nails. I used my ridgid palm nailer to secure the brackets and I must say, that palm nailer was a life saver; I couldn’t imagine hammering all those nails in with a hammer.
It is very important to be meticulous as possible on this step; any imperfections in the foundation will show through on your final product. Using a level, I made sure that every part of the foundation was level. My deck was a little more complicating due to it being on a slightly sloped backyard, but with time and patience I got everything level.
Click here for the in-depth blog post and video tutorial on how I laid the foundation.
Step 2: DIY Chevron Privacy Wall
I knew I wanted some kind of privacy wall for my floating deck because the fence just didn’t give me enough privacy. I am pancaked between two houses so this wall just gives a feel of a more intimate deck area.
First, I started by securing four 4 x 4 pressure treated post to the foundation of the deck using crown bolts. Once the posts were secure I used 1 x 6 pressure treated lumber to create the chevron privacy wall. I built it section be section and secured the 1 x 6 pressure treated lumber with 3 in. galvanized nails using my palm nailer.
Click here for the in-depth tutorial on how I built this chevron privacy wall.
Step 3: Laying the Deck Boards
I ended up going with New Tech Wood Composite Decking for the top because I really wanted my patio to feel like a getaway area and I’m glad I went with it. These composite decking boards really make the deck look like it was done by a professional (humble brag).
To secure the decking down I used UltraShield Plastic T Clip Hidden Fasteners. This made the process really simple and I really love that the t clips are hidden. No ugly screw heads on the top of the boards. I just screwed the fasteners into each joist and the boards slide right on the clips.
Step 4: Painting the Floating Deck
I was excited to get to this phase of the deck done because I knew it meant I was that much closer to finishing. I went back and forth on whether to stain or paint my deck and I finally decided to just take a risk and go for black. So glad I did! I used Behr Waterproofing Stain and Sealer Solid Color in the color slate. It’s called stain but the solid color is more of a paint. If you want more of a stain, you can get your color as a semi-transparent.
I applied the paint using the Graco Magnum X5 machine and man, oh man, did this baby perform. I sprayed in small sections and then went back over the paint with a brush. This sprayer definitely cut my spray time down in half and the cleanup didn’t take too long.
The final result was breath-taking.
Finishing the painting was such a fulfilling moment because I knew I had actually pulled it off.
Click here to see the in-depth blog post and video tutorial on how I painted my deck and laid the decking boards.
Step 5: Styling the Deck
The best and final part was styling the deck and enjoying all of the hard work.
Seating
With any backyard oasis, you need plenty of seating, so I knew I wanted a patio sectional that was both stylish and comfortable, so I went with this Beverly 5 –Piece Patio Sectional Seating Set. What sold me on this one was the fact that you can buy additional seats to make it as big as you want. I will definitely be buying some add ons in the near future.
To make the sectional pop I used some colorful pillows and added some contrast with these Wicker Lattice Outdoor Throw Pillows.
You can never have enough places to sit, especially on a 16 ft. x 21 ft. deck, so I got this ottoman pouf for extra seating. I love that you can just move it around anywhere. Makes the perfect deck addition and even better Home Depot has the matching Sand-Geo Throw pillows to tie it all together.
Floating Deck Extras
I absolutely love the wicker on Beverly Patio sectional and to really tie in the sectional I placed this Round Metal Garden Stool in Chalk beside it to serve as an outdoor end table.
Before I even started to build a floating deck I knew I wanted this Hampton Bay 11 ft. LED Offset Patio Umbrella. I am in love. It gives off so much shade for my new deck and gives the deck that cozy feel.
And speaking of cozy, I was happy to move my AZ Patio 38 in. Decorative Steel Fire Pit onto my deck for the upcoming winter months. This fire pit was surprisingly bigger than I had anticipated when I purchased it a while back but the perfect addition for my new deck.
Lighting
In order to enjoy my deck after dark I hung up some Solar Powered Black Nautical String Lights for some deck lighting. I love that these lights are solar so I don’t have to worry about plugging them in.
I was also excited to learn that the Hampton Bay 11-ft. LED Offset Patio Umbrella has solar LED lights. This umbrella lights up the night sky like no other and I love it. The first day I took it out of the box, with some direct sunlight, she was lit up that same night.
Even though the fire pit isn’t necessarily a light, cranking it up definitely brings some illumination to the deck and the warm feeling just ties it all in.
Overall this project was lots of fun, and after some sore muscles and some crazy events, I am happy to be able to say I successfully completed this floating deck! Now it’s time to go enjoy it!
Build a floating deck with materials at The Home Depot. Check out more Backyard Ideas on The Home Depot Blog and follow our Outdoor Living board on Pinterest for more inspiration.
The post 5 Steps to the Perfect Backyard appeared first on The Home Depot Blog.
from together1 http://ift.tt/2iL60QF via recommended
0 notes
Text
5 Steps to the Perfect Backyard
Ashley Basnight, of Handmade Haven, loves to entertain, but didn’t have a great backyard space to host people. Being the avid DIYer she is, Ashley built her own floating deck!
Read on to see how Ashley created a backyard oasis perfect for entertaining her guests and find out how to build a floating deck and DIY chevron privacy wall.
5 Steps to the Perfect Backyard: Build a Floating Deck with a DIY Chevron Privacy Wall
Everyone dreams of their own backyard oasis, so I was super excited to build a floating deck with a DIY chevron privacy wall! My backyard was pretty sad, and for a girl who loves to entertain, I knew this DIY floating deck would be the perfect project for me!
Let’s take a look at how my backyard looked before the deck. I think we can all agree that this project was a much-needed addition to my home.
If you’re wondering if you can build a floating deck yourself, you can! With no experience at all, I built this floating deck on my own and I’m loving the results.
Materials
Paver Base/Stone Dust
Deck Blocks
4 x 4 Pressure Treated Lumber
2 x 8 Pressure Treated Lumber
Joist Hangers
Landscape Fabric
Lanscape Fabric Staples
Galvenized Nails
3 in. Screws
1 x 6 Pressure Treated Lumber
2 x 4 Pressure Treated Lumber
1 board of 1 x 3 lumber
3 in. Galvenized Nails
1 1/2 in. Galvenized Nails
2 x 4 Connectors
Bolts
Solid Color Behr Waterproofing Stain and Sealer – Slate
Graco Magnum X5
Paint Brush
Painters Tape
Paint Strainer
2 Buckets
UltraShield Naturale Voyager Series Roman Antique Hollow Compositie Decking
NewTechWood UltraShield Plastic T Clip Hidden Fastener
Tools
Ryobi Hammer Drill
12 in. Sliding Dewalt Miter Saw
Dewalt Tape Measure
Ridigd Palm Nailer
Milwaukee Framing Hammer
Ryobi Pancake Air Compressor
Level
Husky Gloves
Safety Glasses
Hearing Protection
Dewalt Circular Saw
Respirator Mask
Shovel
Bessey Clamps
Step 1: Laying the Foundation
This first step was the most labor intensive step, laying the foundation. With the use of deck blocks and pavor base I laid five 2 x 8 pressure-treated lumber beams down and then connected them together with 4 x 4 posts and 2 x 8 joists using Simpson Strongtie connector brackets and galavenized nails. I used my ridgid palm nailer to secure the brackets and I must say, that palm nailer was a life saver; I couldn’t imagine hammering all those nails in with a hammer.
It is very important to be meticulous as possible on this step; any imperfections in the foundation will show through on your final product. Using a level, I made sure that every part of the foundation was level. My deck was a little more complicating due to it being on a slightly sloped backyard, but with time and patience I got everything level.
Click here for the in-depth blog post and video tutorial on how I laid the foundation.
Step 2: DIY Chevron Privacy Wall
I knew I wanted some kind of privacy wall for my floating deck because the fence just didn’t give me enough privacy. I am pancaked between two houses so this wall just gives a feel of a more intimate deck area.
First, I started by securing four 4 x 4 pressure treated post to the foundation of the deck using crown bolts. Once the posts were secure I used 1 x 6 pressure treated lumber to create the chevron privacy wall. I built it section be section and secured the 1 x 6 pressure treated lumber with 3 in. galvanized nails using my palm nailer.
Click here for the in-depth tutorial on how I built this chevron privacy wall.
Step 3: Laying the Deck Boards
I ended up going with New Tech Wood Composite Decking for the top because I really wanted my patio to feel like a getaway area and I’m glad I went with it. These composite decking boards really make the deck look like it was done by a professional (humble brag).
To secure the decking down I used UltraShield Plastic T Clip Hidden Fasteners. This made the process really simple and I really love that the t clips are hidden. No ugly screw heads on the top of the boards. I just screwed the fasteners into each joist and the boards slide right on the clips.
Step 4: Painting the Floating Deck
I was excited to get to this phase of the deck done because I knew it meant I was that much closer to finishing. I went back and forth on whether to stain or paint my deck and I finally decided to just take a risk and go for black. So glad I did! I used Behr Waterproofing Stain and Sealer Solid Color in the color slate. It’s called stain but the solid color is more of a paint. If you want more of a stain, you can get your color as a semi-transparent.
I applied the paint using the Graco Magnum X5 machine and man, oh man, did this baby perform. I sprayed in small sections and then went back over the paint with a brush. This sprayer definitely cut my spray time down in half and the cleanup didn’t take too long.
The final result was breath-taking.
Finishing the painting was such a fulfilling moment because I knew I had actually pulled it off.
Click here to see the in-depth blog post and video tutorial on how I painted my deck and laid the decking boards.
Step 5: Styling the Deck
The best and final part was styling the deck and enjoying all of the hard work.
Seating
With any backyard oasis, you need plenty of seating, so I knew I wanted a patio sectional that was both stylish and comfortable, so I went with this Beverly 5 –Piece Patio Sectional Seating Set. What sold me on this one was the fact that you can buy additional seats to make it as big as you want. I will definitely be buying some add ons in the near future.
To make the sectional pop I used some colorful pillows and added some contrast with these Wicker Lattice Outdoor Throw Pillows.
You can never have enough places to sit, especially on a 16 ft. x 21 ft. deck, so I got this ottoman pouf for extra seating. I love that you can just move it around anywhere. Makes the perfect deck addition and even better Home Depot has the matching Sand-Geo Throw pillows to tie it all together.
Floating Deck Extras
I absolutely love the wicker on Beverly Patio sectional and to really tie in the sectional I placed this Round Metal Garden Stool in Chalk beside it to serve as an outdoor end table.
Before I even started to build a floating deck I knew I wanted this Hampton Bay 11 ft. LED Offset Patio Umbrella. I am in love. It gives off so much shade for my new deck and gives the deck that cozy feel.
And speaking of cozy, I was happy to move my AZ Patio 38 in. Decorative Steel Fire Pit onto my deck for the upcoming winter months. This fire pit was surprisingly bigger than I had anticipated when I purchased it a while back but the perfect addition for my new deck.
Lighting
In order to enjoy my deck after dark I hung up some Solar Powered Black Nautical String Lights for some deck lighting. I love that these lights are solar so I don’t have to worry about plugging them in.
I was also excited to learn that the Hampton Bay 11-ft. LED Offset Patio Umbrella has solar LED lights. This umbrella lights up the night sky like no other and I love it. The first day I took it out of the box, with some direct sunlight, she was lit up that same night.
Even though the fire pit isn’t necessarily a light, cranking it up definitely brings some illumination to the deck and the warm feeling just ties it all in.
Overall this project was lots of fun, and after some sore muscles and some crazy events, I am happy to be able to say I successfully completed this floating deck! Now it’s time to go enjoy it!
Build a floating deck with materials at The Home Depot. Check out more Backyard Ideas on The Home Depot Blog and follow our Outdoor Living board on Pinterest for more inspiration.
The post 5 Steps to the Perfect Backyard appeared first on The Home Depot Blog.
from mix1 http://ift.tt/2iL60QF via with this info
0 notes
Text
5 Steps to the Perfect Backyard
Ashley Basnight, of Handmade Haven, loves to entertain, but didn’t have a great backyard space to host people. Being the avid DIYer she is, Ashley built her own floating deck!
Read on to see how Ashley created a backyard oasis perfect for entertaining her guests and find out how to build a floating deck and DIY chevron privacy wall.
5 Steps to the Perfect Backyard: Build a Floating Deck with a DIY Chevron Privacy Wall
Everyone dreams of their own backyard oasis, so I was super excited to build a floating deck with a DIY chevron privacy wall! My backyard was pretty sad, and for a girl who loves to entertain, I knew this DIY floating deck would be the perfect project for me!
Let’s take a look at how my backyard looked before the deck. I think we can all agree that this project was a much-needed addition to my home.
If you’re wondering if you can build a floating deck yourself, you can! With no experience at all, I built this floating deck on my own and I’m loving the results.
Materials
Paver Base/Stone Dust
Deck Blocks
4 x 4 Pressure Treated Lumber
2 x 8 Pressure Treated Lumber
Joist Hangers
Landscape Fabric
Lanscape Fabric Staples
Galvenized Nails
3 in. Screws
1 x 6 Pressure Treated Lumber
2 x 4 Pressure Treated Lumber
1 board of 1 x 3 lumber
3 in. Galvenized Nails
1 1/2 in. Galvenized Nails
2 x 4 Connectors
Bolts
Solid Color Behr Waterproofing Stain and Sealer – Slate
Graco Magnum X5
Paint Brush
Painters Tape
Paint Strainer
2 Buckets
UltraShield Naturale Voyager Series Roman Antique Hollow Compositie Decking
NewTechWood UltraShield Plastic T Clip Hidden Fastener
Tools
Ryobi Hammer Drill
12 in. Sliding Dewalt Miter Saw
Dewalt Tape Measure
Ridigd Palm Nailer
Milwaukee Framing Hammer
Ryobi Pancake Air Compressor
Level
Husky Gloves
Safety Glasses
Hearing Protection
Dewalt Circular Saw
Respirator Mask
Shovel
Bessey Clamps
Step 1: Laying the Foundation
This first step was the most labor intensive step, laying the foundation. With the use of deck blocks and pavor base I laid five 2 x 8 pressure-treated lumber beams down and then connected them together with 4 x 4 posts and 2 x 8 joists using Simpson Strongtie connector brackets and galavenized nails. I used my ridgid palm nailer to secure the brackets and I must say, that palm nailer was a life saver; I couldn’t imagine hammering all those nails in with a hammer.
It is very important to be meticulous as possible on this step; any imperfections in the foundation will show through on your final product. Using a level, I made sure that every part of the foundation was level. My deck was a little more complicating due to it being on a slightly sloped backyard, but with time and patience I got everything level.
Click here for the in-depth blog post and video tutorial on how I laid the foundation.
Step 2: DIY Chevron Privacy Wall
I knew I wanted some kind of privacy wall for my floating deck because the fence just didn’t give me enough privacy. I am pancaked between two houses so this wall just gives a feel of a more intimate deck area.
First, I started by securing four 4 x 4 pressure treated post to the foundation of the deck using crown bolts. Once the posts were secure I used 1 x 6 pressure treated lumber to create the chevron privacy wall. I built it section be section and secured the 1 x 6 pressure treated lumber with 3 in. galvanized nails using my palm nailer.
Click here for the in-depth tutorial on how I built this chevron privacy wall.
Step 3: Laying the Deck Boards
I ended up going with New Tech Wood Composite Decking for the top because I really wanted my patio to feel like a getaway area and I’m glad I went with it. These composite decking boards really make the deck look like it was done by a professional (humble brag).
To secure the decking down I used UltraShield Plastic T Clip Hidden Fasteners. This made the process really simple and I really love that the t clips are hidden. No ugly screw heads on the top of the boards. I just screwed the fasteners into each joist and the boards slide right on the clips.
Step 4: Painting the Floating Deck
I was excited to get to this phase of the deck done because I knew it meant I was that much closer to finishing. I went back and forth on whether to stain or paint my deck and I finally decided to just take a risk and go for black. So glad I did! I used Behr Waterproofing Stain and Sealer Solid Color in the color slate. It’s called stain but the solid color is more of a paint. If you want more of a stain, you can get your color as a semi-transparent.
I applied the paint using the Graco Magnum X5 machine and man, oh man, did this baby perform. I sprayed in small sections and then went back over the paint with a brush. This sprayer definitely cut my spray time down in half and the cleanup didn’t take too long.
The final result was breath-taking.
Finishing the painting was such a fulfilling moment because I knew I had actually pulled it off.
Click here to see the in-depth blog post and video tutorial on how I painted my deck and laid the decking boards.
Step 5: Styling the Deck
The best and final part was styling the deck and enjoying all of the hard work.
Seating
With any backyard oasis, you need plenty of seating, so I knew I wanted a patio sectional that was both stylish and comfortable, so I went with this Beverly 5 –Piece Patio Sectional Seating Set. What sold me on this one was the fact that you can buy additional seats to make it as big as you want. I will definitely be buying some add ons in the near future.
To make the sectional pop I used some colorful pillows and added some contrast with these Wicker Lattice Outdoor Throw Pillows.
You can never have enough places to sit, especially on a 16 ft. x 21 ft. deck, so I got this ottoman pouf for extra seating. I love that you can just move it around anywhere. Makes the perfect deck addition and even better Home Depot has the matching Sand-Geo Throw pillows to tie it all together.
Floating Deck Extras
I absolutely love the wicker on Beverly Patio sectional and to really tie in the sectional I placed this Round Metal Garden Stool in Chalk beside it to serve as an outdoor end table.
Before I even started to build a floating deck I knew I wanted this Hampton Bay 11 ft. LED Offset Patio Umbrella. I am in love. It gives off so much shade for my new deck and gives the deck that cozy feel.
And speaking of cozy, I was happy to move my AZ Patio 38 in. Decorative Steel Fire Pit onto my deck for the upcoming winter months. This fire pit was surprisingly bigger than I had anticipated when I purchased it a while back but the perfect addition for my new deck.
Lighting
In order to enjoy my deck after dark I hung up some Solar Powered Black Nautical String Lights for some deck lighting. I love that these lights are solar so I don’t have to worry about plugging them in.
I was also excited to learn that the Hampton Bay 11-ft. LED Offset Patio Umbrella has solar LED lights. This umbrella lights up the night sky like no other and I love it. The first day I took it out of the box, with some direct sunlight, she was lit up that same night.
Even though the fire pit isn’t necessarily a light, cranking it up definitely brings some illumination to the deck and the warm feeling just ties it all in.
Overall this project was lots of fun, and after some sore muscles and some crazy events, I am happy to be able to say I successfully completed this floating deck! Now it’s time to go enjoy it!
Build a floating deck with materials at The Home Depot. Check out more Backyard Ideas on The Home Depot Blog and follow our Outdoor Living board on Pinterest for more inspiration.
The post 5 Steps to the Perfect Backyard appeared first on The Home Depot Blog.
from Roofing Pro http://ift.tt/2iL60QF Curated by a professional Roofing Contractor from Blogger http://ift.tt/2iktY1r via RoofingProToday
0 notes
Photo

5 Steps to the Perfect Backyard http://ift.tt/2iL60QF
Ashley Basnight, of Handmade Haven, loves to entertain, but didn’t have a great backyard space to host people. Being the avid DIYer she is, Ashley built her own floating deck!
Read on to see how Ashley created a backyard oasis perfect for entertaining her guests and find out how to build a floating deck and DIY chevron privacy wall.
5 Steps to the Perfect Backyard: Build a Floating Deck with a DIY Chevron Privacy Wall
Everyone dreams of their own backyard oasis, so I was super excited to build a floating deck with a DIY chevron privacy wall! My backyard was pretty sad, and for a girl who loves to entertain, I knew this DIY floating deck would be the perfect project for me!
Let’s take a look at how my backyard looked before the deck. I think we can all agree that this project was a much-needed addition to my home.
If you’re wondering if you can build a floating deck yourself, you can! With no experience at all, I built this floating deck on my own and I’m loving the results.
Materials
Paver Base/Stone Dust
Deck Blocks
4 x 4 Pressure Treated Lumber
2 x 8 Pressure Treated Lumber
Joist Hangers
Landscape Fabric
Lanscape Fabric Staples
Galvenized Nails
3 in. Screws
1 x 6 Pressure Treated Lumber
2 x 4 Pressure Treated Lumber
1 board of 1 x 3 lumber
3 in. Galvenized Nails
1 1/2 in. Galvenized Nails
2 x 4 Connectors
Bolts
Solid Color Behr Waterproofing Stain and Sealer – Slate
Graco Magnum X5
Paint Brush
Painters Tape
Paint Strainer
2 Buckets
UltraShield Naturale Voyager Series Roman Antique Hollow Compositie Decking
NewTechWood UltraShield Plastic T Clip Hidden Fastener
Tools
Ryobi Hammer Drill
12 in. Sliding Dewalt Miter Saw
Dewalt Tape Measure
Ridigd Palm Nailer
Milwaukee Framing Hammer
Ryobi Pancake Air Compressor
Level
Husky Gloves
Safety Glasses
Hearing Protection
Dewalt Circular Saw
Respirator Mask
Shovel
Bessey Clamps
Step 1: Laying the Foundation
This first step was the most labor intensive step, laying the foundation. With the use of deck blocks and pavor base I laid five 2 x 8 pressure-treated lumber beams down and then connected them together with 4 x 4 posts and 2 x 8 joists using Simpson Strongtie connector brackets and galavenized nails. I used my ridgid palm nailer to secure the brackets and I must say, that palm nailer was a life saver; I couldn’t imagine hammering all those nails in with a hammer.
It is very important to be meticulous as possible on this step; any imperfections in the foundation will show through on your final product. Using a level, I made sure that every part of the foundation was level. My deck was a little more complicating due to it being on a slightly sloped backyard, but with time and patience I got everything level.
Click here for the in-depth blog post and video tutorial on how I laid the foundation.
Step 2: DIY Chevron Privacy Wall
I knew I wanted some kind of privacy wall for my floating deck because the fence just didn’t give me enough privacy. I am pancaked between two houses so this wall just gives a feel of a more intimate deck area.
First, I started by securing four 4 x 4 pressure treated post to the foundation of the deck using crown bolts. Once the posts were secure I used 1 x 6 pressure treated lumber to create the chevron privacy wall. I built it section be section and secured the 1 x 6 pressure treated lumber with 3 in. galvanized nails using my palm nailer.
Click here for the in-depth tutorial on how I built this chevron privacy wall.
Step 3: Laying the Deck Boards
I ended up going with New Tech Wood Composite Decking for the top because I really wanted my patio to feel like a getaway area and I’m glad I went with it. These composite decking boards really make the deck look like it was done by a professional (humble brag).
To secure the decking down I used UltraShield Plastic T Clip Hidden Fasteners. This made the process really simple and I really love that the t clips are hidden. No ugly screw heads on the top of the boards. I just screwed the fasteners into each joist and the boards slide right on the clips.
Step 4: Painting the Floating Deck
I was excited to get to this phase of the deck done because I knew it meant I was that much closer to finishing. I went back and forth on whether to stain or paint my deck and I finally decided to just take a risk and go for black. So glad I did! I used Behr Waterproofing Stain and Sealer Solid Color in the color slate. It’s called stain but the solid color is more of a paint. If you want more of a stain, you can get your color as a semi-transparent.
I applied the paint using the Graco Magnum X5 machine and man, oh man, did this baby perform. I sprayed in small sections and then went back over the paint with a brush. This sprayer definitely cut my spray time down in half and the cleanup didn’t take too long.
The final result was breath-taking.
Finishing the painting was such a fulfilling moment because I knew I had actually pulled it off.
Click here to see the in-depth blog post and video tutorial on how I painted my deck and laid the decking boards.
Step 5: Styling the Deck
The best and final part was styling the deck and enjoying all of the hard work.
Seating
With any backyard oasis, you need plenty of seating, so I knew I wanted a patio sectional that was both stylish and comfortable, so I went with this Beverly 5 –Piece Patio Sectional Seating Set. What sold me on this one was the fact that you can buy additional seats to make it as big as you want. I will definitely be buying some add ons in the near future.
To make the sectional pop I used some colorful pillows and added some contrast with these Wicker Lattice Outdoor Throw Pillows.
You can never have enough places to sit, especially on a 16 ft. x 21 ft. deck, so I got this ottoman pouf for extra seating. I love that you can just move it around anywhere. Makes the perfect deck addition and even better Home Depot has the matching Sand-Geo Throw pillows to tie it all together.
Floating Deck Extras
I absolutely love the wicker on Beverly Patio sectional and to really tie in the sectional I placed this Round Metal Garden Stool in Chalk beside it to serve as an outdoor end table.
Before I even started to build a floating deck I knew I wanted this Hampton Bay 11 ft. LED Offset Patio Umbrella. I am in love. It gives off so much shade for my new deck and gives the deck that cozy feel.
And speaking of cozy, I was happy to move my AZ Patio 38 in. Decorative Steel Fire Pit onto my deck for the upcoming winter months. This fire pit was surprisingly bigger than I had anticipated when I purchased it a while back but the perfect addition for my new deck.
Lighting
In order to enjoy my deck after dark I hung up some Solar Powered Black Nautical String Lights for some deck lighting. I love that these lights are solar so I don’t have to worry about plugging them in.
I was also excited to learn that the Hampton Bay 11-ft. LED Offset Patio Umbrella has solar LED lights. This umbrella lights up the night sky like no other and I love it. The first day I took it out of the box, with some direct sunlight, she was lit up that same night.
Even though the fire pit isn’t necessarily a light, cranking it up definitely brings some illumination to the deck and the warm feeling just ties it all in.
Overall this project was lots of fun, and after some sore muscles and some crazy events, I am happy to be able to say I successfully completed this floating deck! Now it’s time to go enjoy it!
Build a floating deck with materials at The Home Depot. Check out more Backyard Ideas on The Home Depot Blog and follow our Outdoor Living board on Pinterest for more inspiration.
The post 5 Steps to the Perfect Backyard appeared first on The Home Depot Blog.
Ashley Basnight
0 notes
Text
End of Season Maintenance Tips for your Race Car (Part Two)
In Part One of this maintenance to-do list, we went through which chassis components you should check and what you should keep in mind when inspecting them. This installment of our End of Season Maintenance guide goes through some other very key components including safety.
Drive Shaft – If the drive shaft is not damaged, then just remove and replace the U-joints at this time. These parts are subject to high stress and are way too cheap to take a chance on failure.
Inspect the yokes and transmission tail shaft to make sure everything it all right. And check and replace the seal at the rear of the transmission while you’re at it.
Grease the U-joint cap bearings while the drive shaft is off the car. Better yet, replace them. Look for dings in the drive shaft that might affect the strength and/or balance. If it looks damaged, have it repaired or replace it.
The foot box and pedal assemblies need a lot of attention in this car. A whole year’s worth of dirt and grime are collected here. To prevent interfering with the brake balance and general operation of the pedals, you should remove the assemblies and clean and paint this area.
Seats, Belts, Window Net – For safety purposes, we need to look over the seat belts and seats. For all of the reasons previously given, stress from hard racing might have done damage to your seat belt system.
Inspect your head and neck restraint system and your helmet. Helmets are designed to sustain damaged at the front from the head moving forward in a hard impact. When this happens, you must send the helmet back to the manufacturer for replacement of the liner.
Don’t forget to recheck that fire suppression system to see if it will work properly when needed. The fire bottle is rarely needed, but when it is, things get real urgent in a hurry.
Remove and inspect the seat belts, especially the portions where they enter the seat openings. Check the date on the belts too. Most tracks and sanctioning bodies have rules governing the acceptable age of the belts. There should be no fraying or tears to the material. The mounts must be stress free and not bent from the original location.
Wiring and Switches – To insure your car doesn’t stop running at the wrong moment, all wiring and switches must be fresh and free of corrosion. The vibrations that go on during a race can cause the wire connections to break or come loose. Wiring is fairly simple stuff and it would make good sense to have someone rewire the entire car during the off season.
Recheck the grommets where the wires pass through the firewall or other panels. Cycle the switches and note if they feel tight or corroded. Replace the ones that are suspect. Many races have been lost due to the failure of a cheap switch or connector.
Check all of you wiring to detect worn or frayed wires. Where the wires pass through the fire wall or other partitions are areas of concern. Replace the rubber grommets and wiring if necessary to feel comfortable that a short will not ruin a good night of racing.
Crush Panels and Overall Cockpit Sealing – The driver’s compartment should be isolated from the engine heat, the exhaust fumes and from fire should the engine or fuel cell catch fire. The panels that mate to the fenders, floor and rear deck are supposed to be sealed so that the driver is isolated.
Recheck these seams and reseal if necessary. Replace bent or otherwise damages panels. Now would be the time to add heat barrier material to the panels to reduce heat transfer from the exhaust passing through to the driver.
When replacing the fenders, reseal or replace the panels that isolate the driver from heat, carbon monoxide and fire.
Rear End – The rear end should be removed, and all mounts cleaned and inspected. Replace all grease seals, axle bearings, and pinion bearings where necessary. Check the axle tubes for damage and to see if they are straight.
Shock brackets and trailing arm brackets need to be inspected for damage or wear. All heims should be looked at and replaced if worn excessively. Don’t forget to look at the third link, or lift arm too.
Look over the panhard bar mounting brackets to see if they are bent or cracked. These mounts take a beating, especially when small hits are experienced during a race. Not much attention is paid to these after the race, but we can all remember incidental contact that was made that might have caused some damage.
Go through the rear end and replace bearings, seals, locker spring, etc. Some diff’s are more high maintenance than others. This kind of maintenance should be done more than once a year.
Fuel Cell – After removing the fuel cell, inspect the container for rust or damage that might compromise the cell itself. The fill tube assembly should be removed from the cell and the foam removed. Clean the inside of the cell and get all of the dirt or other foreign material out.
The foam should be replaced. The fuel pickup should be inspected and cleaned. If you have a fuel pump that pushes fuel to the engine, as some cars do, inspect the wiring and general condition of the pump.
Fuel cells have a defined life span. Some newer fuels have been known to eat at the seams under certain conditions. Inspect your cell to make sure this is not a problem.
Roll Cage – If the body has been removed, the roll cage can be easily inspected. Look closely at all of the welds. If the car is older, you might try to inspect the inside of the tubing to look for corrosion that would weaken them.
If the car is unfamiliar to you, checking the wall thickness of the tubing would be a wise idea. Some racers get carried away with weight issues and might circumvent rules that require a minimum wall thickness for roll bar material. If you find weak or thin tubing for whatever reason, replace it.
Inspect all of the roll bar joints for broken welds or other types of fatigue. Pay close attention to where the roll bars attach to the frame rails and where trailing arms and rear shocks are connected.
Fender braces and other connectors should be replaced. These usually get bent and abused during the season and they are cheap units.
Body Mounts and “Glass” – The overall condition of the cars body can be evaluated during this process. Any panels, fenders, rivets, or body mounts that might have been damaged throughout the year can now be replaced.
Most racers who race hard will have some damage to the body parts. If the parts are fiberglass, they will be weaker as a result. New parts offer more resistance to being “leaned on” in the coming season. Also, loose body parts can ruin your aerodynamic advantage.
If you decide to replace your whole body or parts thereof, take advantage of newer designs of nose pieces, fenders or hoods. When replacing any of these parts, check to see if a more aerodynamic piece has been developed. Don’t settle for last year’s design.
Conclusion – The key points to remember are that we need to find any structural or mechanical problems with the chassis or components that are bolted onto the chassis. We need to correct any driver safety related problems that involve wear or age of the seat belts, restraints, fire suppression system, helmet or seat. And we need to make sure the drivers compartment is sealed properly against heat, carbon dioxide or fire intrusion.
After each season, we need to thoroughly go over our race car during the winter months so that when we hit the track again in the spring, it will be just like a new car. You can avoid failures that might have dire consequences if you do this job the right way. And anyway, getting there is more than half the fun.
Sources:
Allstar Performance www.allstarperformance.com 269-463-8000
AR Bodies www.arbodies.com 615-643-8827
Capital Motorsports Warehouse www.cmwraceparts.com 800-278-2692
Coleman Racing www.colemanracng.com 800-221-1851
DMI / Bulldog Rear Ends www.diversifiedracing.com 717-397-5347
Five Star Bodies www.fivestarbodies.com 262-877-2171
Frankland Racing www.franklandracing.com 888-873-2736
G-Force Racing Gear www.gforce.com
Hans Performance Products www.hansdevice.com 888-654-7223
Hawk Brakes www.hawkperformance.com 330-722-4295
Moser Engineering www.moserengineering.com 260-726-6689
Performance Friction Brakes – PFC Brakes www.performancefriction.com 800-521-8874
Port City Race Cars 231-767-8586 www.portcityracecars.com
QA1 www.qa1.net 800-721-7761
Quick Performance www.quickperformance.com 515-232-0126
RaceQuip www.racequip.com 813-642-6644
Race Day Safety www.racedaysafety.com 770-505-0193
Rod End Supply www.rodendsupply.com 800-284-2902
Simpson Racing www.simpsonraceproducts.com 800-654-7223
Superior Fuel Cells www.superiorfuelcells.com 541-895-4224
The Joie of Seating www.lajoieracing.com 704-795-7474
Turn One Steering www.turnone-steering.com 989-759-4206
Wilwood Motorsports www.wilwood.com 805-388-1188
Winters Performance www.wintersperformance.com 717-764-9844
The post End of Season Maintenance Tips for your Race Car (Part Two) appeared first on Hot Rod Network.
from Hot Rod Network http://www.hotrod.com/articles/end-season-maintenance-tips-race-car-part-two/ via IFTTT
0 notes