#digital raster graphics
Explore tagged Tumblr posts
Visit Tumblr Blog
Explore Tumblr blogs with no restrictions, modern design and the best experience.
Last Seen Tumblr Blogs


Fun Fact
The “We are the 99%” Tumblr blog became the slogan for the Occupy Wall Street movement.
Text

#Yean so my art went in different direction with time#I am so very proud of actually doing it but why is sharing it always the hard part??#print i made :3#printmaking#print#computer graphics#art#my art#digital art#raster#serigraphy#printing#serigrafia#video games#game graphics
22 notes
·
View notes
Text
CAT PAINTING CAT PAINTING CAT PAINTING
So in my Raster Graphics II class, we're learning how to do 'digital painting' in Photoshop, and for this project we have to take our own image (I used this picture of a stray cat on my porch), and digitally paint it via the mixer brush. here's the result:

Here's the original photo I used:

Her name is Coco (my little sister named her) and she's a stray cat that hangs out on the porch and we feed her from time to time.
FUN FACT: This cat doesn't have a tail! (She used to, but then she lost it one day, we don't know how but we think she either got stuck and lost it or some other animal attacked her and ripped her tail off) Either way, she is thriving tailess and looks absolutely adorable =3
#cat#cat pictures#cute cats#i love cats#cat photo#cat photography#adorable#illustration#photoshop#digital art#digital painting#digital illustration#artist#digital artist#digital artwork#original art#original artwork#photoshop illustration#raster illustration#raster#raster graphics#college#graphic design#graphic designer#graphic design student#college student#cat painting#painting#digital#sillyjaxposts
11 notes
·
View notes
Text
Being a graphic designer is fun, because nobody who isn't one seems to know how it works, and they will find new and interesting problems for you to solve that didn't need solving.
For instance, they will ask you to make a person's lips thinner even though that person's lips are going to be printed at 3/32 of an INCH (less than a quarter of a centimeter if you care). Will their label printer even show the difference on final print? Who knows?
#graphic design#label design#work complaining#also make his nose pointier like the photo reference when the person I used as reference does not actually have a pointy nose#this reminds me of something I saw online where the client zoomed in to 3000%#and was mad that some lines didn't touch at that magnification#like sure buddy but no one will ever know when it's printed#and nobody's getting a rasterized digital version big enough to zoom in that far besides you soooooo#maybe chill?#I just do this shit now. Who cares if no one can tell#I don't want to fight with my clients over stupid shit#but I do want to complain and whine and cry about it online#because life is hard when you're a kitty#things are tough and there's no pity#meow mow mow mow mow meow
3 notes
·
View notes
Text

traced a photograph of mars in Illustrator :P
#not a fan of that program.#SOME colors didnt transfer out of the program correctly >:(#raster > vector because at least WE dont have to buy a color library from pantone#working with adobe products is like trying to force a bucking bronco to obey.#art school#digital art#adobe illustrator#graphic design#mars#artists on tumblr
16 notes
·
View notes
Text

Space Suit Vector Tracing
To place your order Click on the link Fiverr: https://www.fiverr.com/s/EgEk1kD
You can also DM or Email Email: [email protected]
Facebook: https://web.facebook.com/emangraphics01/ Instagram: https://www.instagram.com/eman_graphics01/ Dribbble: https://dribbble.com/emanahsan Behance: https://www.behance.net/emangraphics Artstation: https://www.artstation.com/emangraphics4 Pinterest: https://www.pinterest.com/emanahsan990/ BSKY: https://bsky.app/profile/emangraphics.bsky.social VSCO: https://vsco.co/emangraphics/gallery Tumblr: https://www.tumblr.com/blog/eman-graphics
#vectortracing #vectortrace #vectortracingservice #vectordesign #vectorization #vectorized #vector #art #artwork #vectorart #graphic #graphicdesign #graphicdesigner #digitalart #redraw #vectorillustration #digitalilustration #rastertovector #coverttovector #imagetovector #vectorizeimage #lineart #logotracing #logoredraw #vectorlogo #highresolution #adobeillustrator #adobephotoshop #fiverr
#vector tracing#vector trace#vector tracing service#vector design#vectorization#vectorized#vector#art#graphic design#graphic designer#artwork#vector art#graphic#digital art#redraw#vector illustration#digital illustration#raster to vector#convert to vector#image to vector#vectorize image#line art#logo tracing#logo redraw#vector logo#high resolution#adobe illustrator#adobe photoshop#fiverr
2 notes
·
View notes
Text
We Are Your Connection With The Creative Mindset

Our Identity: Adroitsquare unique convergence of creative thinking, design acumen, and excellence in shared services. We offer a long-term value proposition of having an extended offshore delivery center that enables our clients to be more competitive, agile, and efficient.
With decades of domain expertise and business insight, we deliver unmatched creative design services for our clients. Our rapidly expanding domain expertise includes newspaper and publishing, custom print products, promotional products, sporting goods, and the automotive industries.
What We Do: We partner with newspapers/magazines, media companies, custom print, and promotional product companies by providing creative digital and graphic design solutions. Besides office supply stores and vehicle wrap companies, we also cater to the sporting goods industries for their embroidery and direct-to-garment designs.
Our domain knowledge and passion for excellence enable us to do more than meet the SLA, which delivers excellent value add to each client we serve.
Our partnership brings significant cost savings, which empower our clients to expand offerings and focus on optimizing operations to delight their customer base. 24/7 operations quickly scale to meet any volume or seasonal demand. We offer a long-term value proposition by having an extensive offshore delivery center that enables our clients to be more competitive, agile, and efficient.
#graphic design#embroidery digitizing#embroidery digitizing service#news page design#newspaper ad design#pagination#vector conversion#raster to vector conversion#convert image to vector#custom vehicle wraps designing#UI design services.#logo design#editorial design#poster#branding#digital illustration#digital art#animation#typography
1 note
·
View note
Note
You may have already answered this but what programs do you use to draw?
Paint.NET 4.3.12 (raster graphics editor) as a digital program; pencil, pen and paper for doodles 🖋 no secret
16 notes
·
View notes
Note
I've been using a mix of Krita and Paint tool SAI. I'd appreciate resources for Krita specifically too. Thank you for answering by the way. ♥️
Of course!
So! Here's my guide to making comics with Krita, down to the details such as layer setup, borders, speech bubbles, and SFX.
preface: it took me at least a year to figure this process out; but once when you've figured out the system & a template, it's smooth sailing. let's use this finished spread from the selfship comic last year to go through the process:

i'm going to assume a certian level of digital program proficiency (knowing what layers are, having a general idea of what vector vs raster graphics are, etc) since otherwise this post would be a book lol.
(if the read more does not work: the static permanent link for the full tutorial is on my website here: https://kradeelav.com/diary/tegalog.cgi?postid=312&1740096282
rest of the post under the cut; this one's going to be a long one as is.
let's start with talking about the layers for a single page of the above comic image.

(ignore the "orbs" and "titania bubble" layers - those were oddities for this specific spread.) Going from the top downwards:
SFX - sound effects. this is an optional layer to have if you don't have a lot of sound effects. you can use either render the sound effects by drawing them out (raster) or vector SFX; whatever you're most comfortable with. more on that below.
frame - this is the comic page borders.
speech bubbles - self explanatory. contains both the text inside the bubble and the bubbles themselves.
ink - main lineart & drawing layer; self explanatory.
tone - the shading layer.
(deleted) ruff/sketch - this is the sketchy thumbnail layer that is imported when i first start working on each spread, and naturally gets deleted when the lineart starts looking good on its own.
so!
there's two types of digital rendering krita can do: raster (most similar to drawing with a pencil or tablet) and vector (computer draws mathematical lines and shapes and text that you can manipulate). a lot of programs fully specialize in one or the other but the killer feature of krita is it can do both on a single page; you just need separate layers depending on the rendering..
that's what this "fx" symbol stands for by the way - these are the vector layers....

... and the symbols circled in purple clue you in that they're raster layers (ink, tone, sketch) where you do the actual drawing. with me so far?
speaking of those:
borders/frame
here's what the borders layer looks like + (the print layout layer above everything in black/yellow). the print layout layer is really only useful if you're physically printing this comic (it's basically bleed/trim if you've heard of those terms, ignore this otherwise).

i really struggled with doing borders in krita until finding this tutorial:
youtube
- since the thing is i make a lot of last minute changes. i need to be able to move and edit borders around easily if a panel's not working for me. so the method above makes it incredibly flexible to just ... up and move one, or to make a gutter wider.
i also really need to be able to see what's behind the borders while i'm drawing it to check anatomy sometimes -- the beautiful thing is you can simply turn the layer style to "multiply" and it's effectively transparent with one click.

like this, voila!
lettering
here's the lettering layer(s) with one bubble's text selected.

fair warning: krita is absolute ass with the text tool. it's the biggest failing but in newer versions i do believe they're slowly working on improvements. thankfully this program can do just enough to letter bubbles.
essentially, i use the same trick as the frames shown in the video above. if you slap a "layer style > stroke" on the whole "bubbles" layer, that's where that 2px black border comes from, and that layer-style-as-a-border "follows" every bubble so it's consistent.
(rule of thumb aesthetics-wise is speech bubble borders should be slightly thinner than frame borders, and on average about as wide as your lineart.)
SFX (sound effects)
technically you can hand-ink all of your SFX if vector art scares you or if you don't intend on doing much, but the vast majority of pros use vector work for efficiency. hentai/erotic work also has a lot of SFX versus other (non-NSFW) genres for the immersion factor with bodily functions.
the spread above didn't need a lot, though.

as you can see it's mostly the inorganic orb clinks and then the big SHING. (i put my for-the-web-kradeelav.com signature on the same layer for laziness).
here's part of my current sfx library below just to show you what i start with for erotic strips; usually i start with some base fonts and start moving the letters around individually.

(a lot of these are redone for every project; there's some in here that are already "outdated" in my eyes.)
miscellaneous
my favorite inking brushes are from this free resource pack. my favorite halftone (shading) brushes are from this (also free). thanks for reading!
26 notes
·
View notes
Text
New Pinned Post ...!
This blog is for adults only! If you are not at least 18 years old, expect to be blocked on sight.
NO MINORS PERMITTED! Period.
DNI list for quick reference: Please don't interact with this one if:
You believe in indiscriminate and unironic misandry
You are a minor
You support police and/or military
You are a TERF or otherwise are transphobic
You don't like autistic people
You would prioritize this one's happiness over your own
The DNI list may change if necessary! Don't forget to curate your tags if you decide to follow this one, it doesn't have a SFW side blog-
Everything this one posts on Tumblr is here!
Kink Section ...!
If you want to skip the kink section, scroll until you see purple!
This one likes posting about hypnosis and hypnokink! common tags this one uses for such posts, if you want to mute them or look for them specifically:
#cw hypnosis #hypnok1nk #hypnosis
This one is into a LOT more kinks than just hypnosis, and is generally very kinky, but does not like sex. As the term "sex" is subjective, this one will say that it doesn't enjoy the idea of:
Anal penetration
Vaginal penetration
"Face fucking"
In terms of physical intimacy, the following is typically fine!
Cuddling / Snuggling
Groping
Oral sex (no thrusting, just service)
Frotting/Humping
This one has a MASSIVE list of kink interests, so it will be easier to list limits it has regarding kink play:
detrans
anything with real actual minors
fascism/nazism/racism/etc
misogyny from someone who identifies as a man
scat
Feel free to ask for any clarification! This one tries to not bite unless explicitly and clearly requested.
"Normal" Section ...!
This one likes posting about random nonsense, or rambling about video games or other nerd shit, including (but not limited to):
Video Games! (Usually but not exclusively PC games on Steam)
Music (This one likes sounds! Music is a good sound)
VA/VO stuff
Various forms of fiction (Written, Filmed, Theatre, etc)
This one's art (typically raster, made in CSP with a stylus/tablet)
Various other forms of art (not made by this one, typically)
Other nerd shit that is too miscellaneous to sort
These will typically be tagged with: #thoughts on the brain The above tag is also used for random nonsense rambles! This one tags kinda lazily so browse with care (it is improving, but very rarely if ever does it delete posts)
Sometimes, this one will post art that it makes! Typically, this art is made in Clip Studio Paint utilizing a pen/stylus and tablet, on a raster layer! All of this one's art should be (in theory) tagged with: #my art #digital art Sometimes this one will put relevant content warnings/alt text, but this one is a forgetful bitch and you should browse its art tags with care, expecting rare/uncommon untagged depictions of blood (typically not very realistic, more graphical) Reblogging/etc to put alt text on this one's art is both welcomed and appreciated!
Important ...!
This one used to vent on its blog a lot so if you want to filter those out they are typically tagged with one or more of these: #cw vent #vent post #vent
Closing Remarks/Contact Info ...!
This one really likes yapping, even if it is forgetful and sometimes socially anxious. If you can get it talking about a hyperfixation when it's not busy with something, it can easily talk for a long time!
If you have any questions for this one, please ask! Be it an anonymous Tumblr ask, a Tumblr DM, or contacting it elsewhere, questions are highly sought after prizes!
If you wish to reach this one elsewhere:
Discord: mindgirl (friend requests welcome, and encouraged) BlueSky: latoreadora.bsky.social (hyperlink to this one's bsky) Steam: 135019947 (friend code, hyperlink to this one's steam)
12 notes
·
View notes
Text
People I want to get to know better
tagged by @wrenanigans THANK; gonna tag @idalenn, @eriyu, @cindernet-exploded, @wildstar25, @shadow-jack, @sylaurin; absolutely no pressure though!
last song: Ecco: The Tides of Time - Title Theme
favorite color: orange-ish - somewhere around 0xF8A624?
last book: uh, the technical specification for the Compressed ARC Digitized Raster Graphics (CADRG) format?
last movie: haven't really watched movies since the depression hit, I'm afraid.
last tv show: same with tv shows really.
sweet/spicy/savory: mainly sweet; my tongue has been a mess the last few years and it's utterly wrecked my ability to handle spicy foods.
last thing I searched for online: the Intel Intrinsics Guide
current obsession: finally getting this one old Gundam PG build fully sorted so I can move on from it
looking forward to: ?? no idea, completion of the above?
10 notes
·
View notes
Text
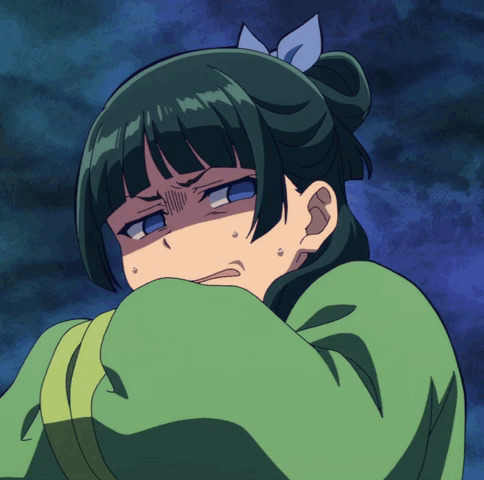
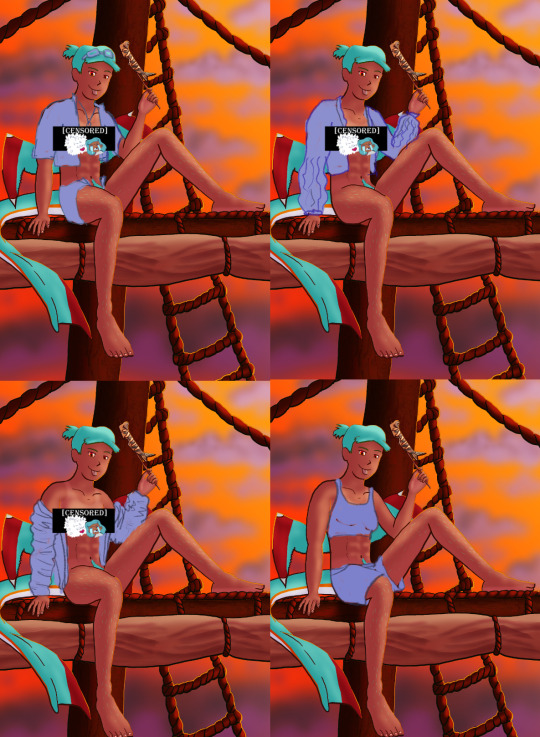
The Harriet Pinup Art Project
Session 2- Process till completion? But where're the other sessions?? Well that escalated both quickly and slowly
The last report was Early September 2024…. Dear god it’s been almost 7 months since last report. I would’ve like to have split what comes next into 2 more sessions but- it is what it is. This is gonna go all over the place so apologies.

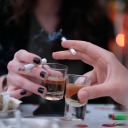
Finding some dissatisfaction with my end result in last-session I tweaked the fish-holding arm and the dangling leg a little bit more to my liking and sketched again.
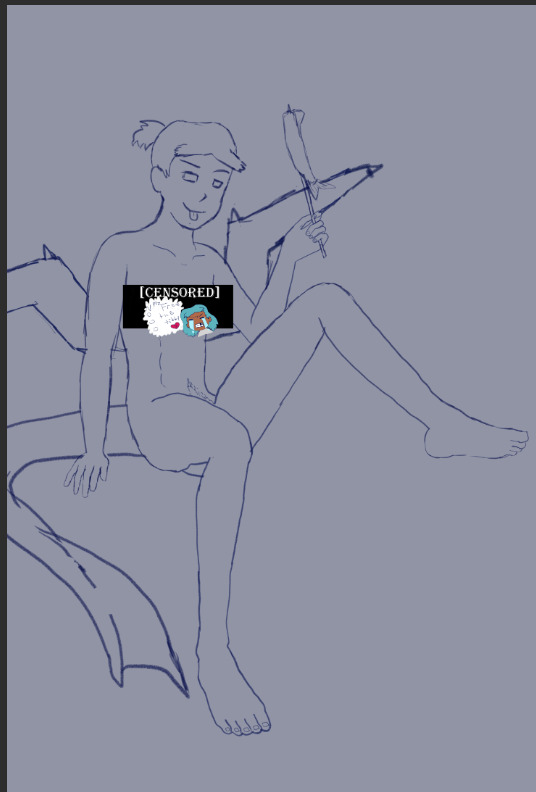
The nips got finally drawn and with it- the censor will now have to drop to keep tumblr-compliant and also to keep this blog sfw, hope you enjoy the humor (Harriet doesn’t).

The wings kept feeling wrong (looking more stretched and unnaturally tacked on vs being naturally relaxing from her backside) so between struggling wing csp assets to reference (not super great when there are no flipper-esque wings) and some more direct input from a friend I ended up landing on a more natural look.
Linearting
Now for my nemesis- linearting.
Despite my disdain for the process I did not want to half ass it by just cleaning up the sketchwork like I normally do. While I struggle to grasp its use, I really wanted to implement lineweight in my lineart. From what I’ve seen lineweight can be used in a lot of different ways; purely randomly, to emphasize mass, or to emphasize the light source of the piece. Of all the choices I tried to stick to the last option since I felt I could best understand it enough to attempt it.
I also decided to try a feature I’ve never used before; linearting with vector lines instead of rasterized ones. For those who don’t know what the difference is I’ll do the extremely dumbed down explanation; rasterized lineart is more common (I think) and is less memory intensive, vector lines are more common in graphic design (since they can be resized w/o the pixel distortion you can encounter with raster lines). I wanted to try this method in an attempt to make the process of linearting a little less painful; with vectors I can adjust the lineart without having to redraw said line if it’s a small tweak, and changing colours is a lot quicker too.
Sadly during this phase my tablet pen's nib broke in a way that was unfixable (leaving the broken part of the nib DEEP in the pen), and due to pricing (tldr- the pen was more expensive than just replacing the entire tablet, in which case it's better to upgrade altogether if possible) had to wait for a new tablet after researching my best choice for a replacement; definitely was a great upgrade but GOD I did not like that happening when it did. Upon a friend’s suggestion I adjusted pen sensitivity so I could try to avoid putting so much force on the pen when doing the thicker lines.

I think I’ve grown a little more confidence on linearting, but it’s still far from my favourite step. I both enjoyed and hated the process of using vectors for the lineart. I felt like there’s probably a lot more I could’ve done with the vectors than what I was doing, but in my opinion it is not that bad for someone jumping in with very minimal knowledge/understanding.
Colouring/Shading

Being colouring is one of my favourite steps I couldn’t resist I rushed right into it. Though I actually ended up doing the shading before the colouring this time. I did the method I’ve heard/seen for digital artists where you block the subject with just black/dark, and then erase it off where the lighting/highlights would be. I’ll say I definitely found this method put more strength into my shading from usual.
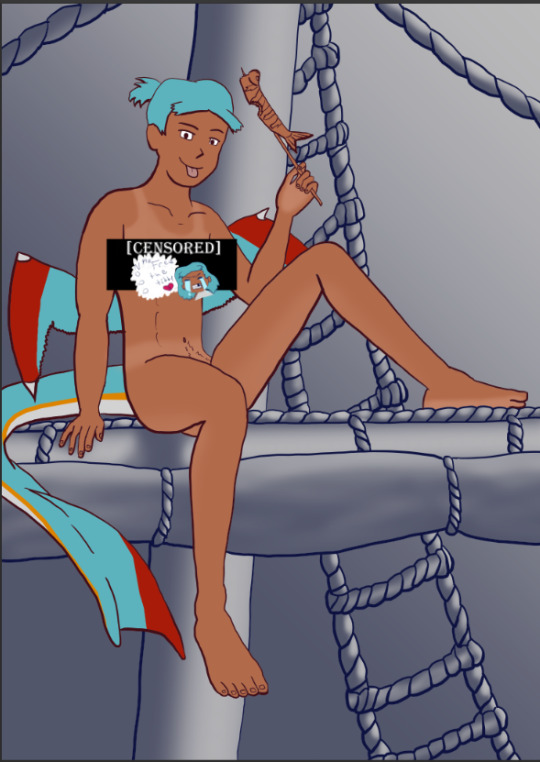
Then I rushed to colouring Harriet herself. Just did the ol-colour picker from her refsheet to throw her colours on, then did some adjustments to colour her nipples and tanlines (cause I WANTED DEM TANLINES!!!!!) though I tried to not make the latter too bold of a contrast since she imo has darker skin and not just tanned.
Then from there there was colouring the background and mast and just wrestling the colour balance and blends, there was a lot of it so I’m just gonna share one of the ones I went through.
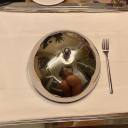
At one point I even took a sunset from google and maxed its size on the background (and crashed CSP as a consequence due to the large image resolution- which lead to me shrinking the canvas/image during this process) to try to help me get an idea of what I MIGHT want to do for the background.
Clouds 💢
After a point I started trying to make my own clouds- the first attempt wasn’t too bad save for the tiny little problem that was the brush made the clouds look wayyy too sharp and grainy on closer inspection so had to scrap them and try again, even going as far as looking at irl clouds to try to get an idea of how to emulate them.

I ended up using a generic soft brush and tried my best to do clouds again. It was okay, but not great and kept getting adjusted between other steps. fortunately we’ll better revisit/redux on these clouds far later in the chain-of-events.
Like the clouds I has having problems getting the nice folds look for the sails, grabbed some refs and kept trying to get it right. The results are far from perfection but they are sufficient. Folds on this sort gonna be a pain in general.
Clothes roughs
I did some rough draw-ups of different alternative outfits for her to wear. After a lot of wrestling I settled on her just wearing an opened poet’s shirt and the other two ideas got discarded.
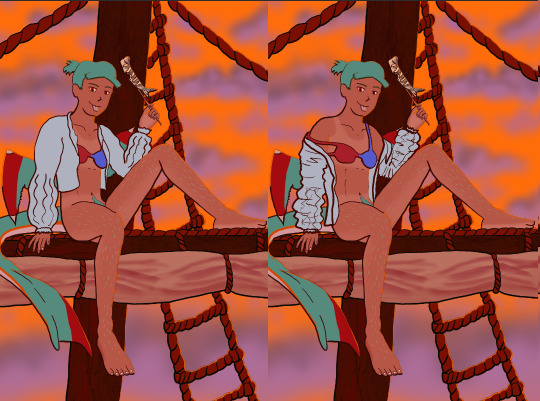
Added a bi-colour bra to make it that I don't have there's a variant that I can share in sfw spaces, and then I lined and coloured the rest of it up, only to stumble into an unfortunate realization-
Ew that went wrong for clothes- reference and redo

[image source 1, 2, and sadly 3 only leads to a pinterest result or a malicious site so 🤷]
With extreme dissatisfaction I ended up trying to tackle them again; I learned the term for the kind of shirt I was after (poet’s shirt, that way it also reduced the amount of AI messing with my results), got several reference photos then tried again while trying to mimic what I was seeing.
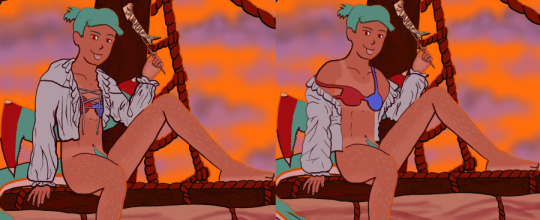
MUCH better.
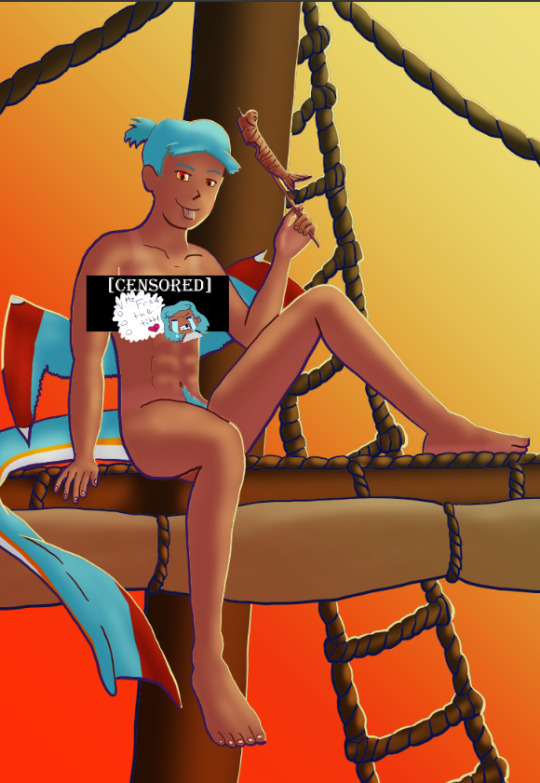
Clouds redo
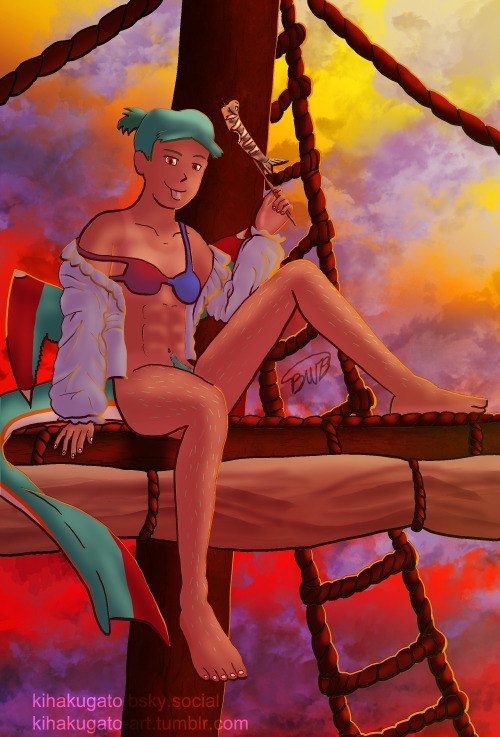
With that, let’s get the clouds looking better. I checked this tutorial to try to get a better idea, and found some cloud brushes that are in Official CSP but weren’t downloaded thanks to another tutorial and used them, used them then used the tutorial to help further elevate them a little bit. To further elevate said clouds I hilariously used my previous crummy clouds as a overlay to help the new clouds pop. Much better, and with that it’s done, slap dat signature and watermarks! Ready to throw onto the internets
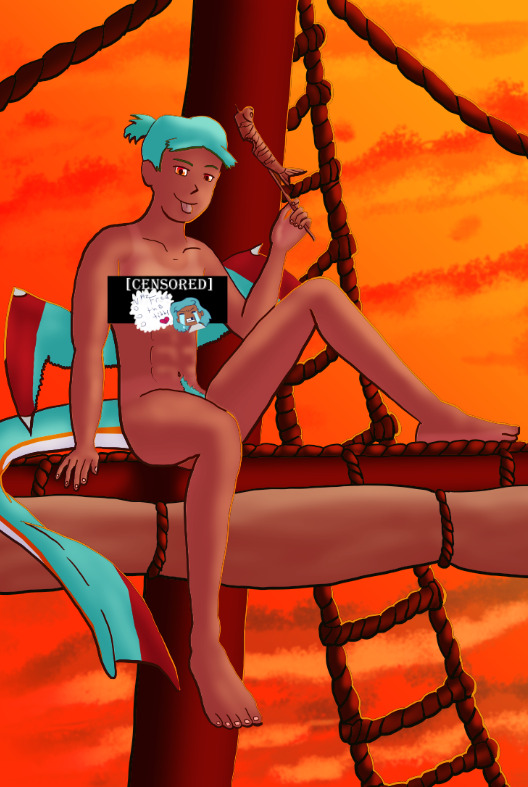
Personal Evaluation on this project
This project ended up taking much longer than I wanted; Some of it was due to real life kicking my butt, and some of it was from clumsy planning and impulsiveness to get to certain steps quicker.
I liked it taking longer cause it gave me more time to think about certain steps and chisel away at parts when I had time, like working on a super large puzzle. On the opposite end it ended up making me much more intimate with the flaws with the piece/project than I’d like to be during the process, since most artists nowadays including myself tend to hit that stage after they’ve completed and posted a work online.
This lead to a lot of times asking “am I gonna shrug off this flaw or go through the time/trouble to redo a part to make it better?” For the case of the clouds and clothes, yes I felt the redo was necessary and it helped strengthen the overall piece, but there were many other flaws I chose to ignore cause I was too far into it to be worth the backtrack.
The biggest example flaw is ironically the anatomy/perspective when sketching Harriet’s body; while using the 3D tool was very helpful, I feel I should’ve did more perspective exaggeration for certain parts of her body (the biggest case being her hands; they imo would’ve looked much better if I made them and her fingers a little bit bigger and chonkier). Another case were the folded sails of the ship that I feel could’ve been better shaped and the folds could’ve been more sensible, ironic for me to say considering I had done several references and do-overs for that part of the piece. Conversely there are probably still various flaws in the lineart itself; despite the convenience of being able to edit the lineart via the vector points it is still a lot of nitpicking if you don’t decide that it’d be better to just move on so long as the idea is brought across via the art, flaws be damned.
When it came to the clothes stage, in my opinion I should’ve done that LONG before colouring/shading Harriet’s body and back when I had just finished the lineart, as it would’ve lead to less visual confusion for my eyes when I had to sketch the clothes out. Some ofher steps were out of order enough to cause confusion to myself, but I won’t bash myself about it since this is probably the first piece I’ve worked on that’s taken this long, plus this winter alone has been very mentally taxing so dumb decisions are bound to happen thanks to that.
That being said, I’m glad I did this project. I got to experiment and test out strategies and tools I’ve never even considered delving into before, and I may even end up using some of them again. There were even some points in this project where said tools I just thought “well this could be handy for [this group of drawing ideas]”. It’s also lead to beautiful results and is probably my biggest high effort piece I’ve done in a long time, probably rivaling if not outclassing some of my bigger pieces that I still admire today from back in my highschool days.
Hearing from one friend talk about the flow of the piece made me happy since, despite never mentioning it during the journaling of this project, that it was something in the back of my mind on/off while working on this piece; the flow of the ladder and clouds all intentionally despite to try to point the eyes of the audience towards Harriet who’s meant to be the main feature of the piece. It really proves that considering flow is a vital element when you want to make a piece work.
I may actually try to print one of the several variants as a print to put on my wall. Not that I will hold my breath on the results as my track record of digital-to-print for my artworks has always been a hard hit/miss for results.
Thank you for those who decided to follow along on the journaling of this art project.
[Session 0] [Session 1]
#The Harriet Pinup Project#artists of tumblr#artists on tumblr#art process journal#wip art#wall of text#long post
6 notes
·
View notes
Text
Deranged Pizzaiolo

"Okay you look-a right here! I baked that into a pizza ONCE and nobody can ever know. Not even the health inspector. Capeesh?" Peppino Spaghetti, via Toppinbot.
Today is the 1st anniversary of Pizza Tower, so I had to post fan art of this indie game in this day. This time I could celebrate the anniversary of a specific work on time.
As its title implies, the subject of this fan art is Peppino Spaghetti, an Italian pizzamaker who is the protagonist of said indie game. Despite being a middle-aged heavyset balding man, Peppino has superhuman speed and strength. Peppino is also best known for his mental health, as he is usually seen being either scared or angry. Due to his expressiveness, Peppino is proven to be a relatable character, no matter the age or even the size he has.
I acknowledge that this is my first attempt to draw Peppino with the use of digital painting, including but not limited to a graphic tablet and a raster graphics editor with support for layers. Every time I draw Peppino, regardless if the drawing is digital art or traditional art, I have butterflies in my stomach. I remember that I managed to draw his face in a paper in late December 2023. Even so, the most difficult part was drawing Peppino's mouth when opened, as it required measures and references in order to get the desired result. Of course, I have difficulties with drawing above-average weight characters but I can improve this specific skill through trial and error.
It is possible that I will post more Pizza Tower fan arts (and possibly more Pizza Tower fan labor) in the near future, as a specific fan art of Peppino from Newgrounds had taken me down to the Pizza Tower rabbit hole as of September 23, 2023. And, yes, this is evidenced by a ton of Pizza Tower-themed posts that I liked en masse. In short, I am pleased to celebrate this anniversary of this indie game with a suitable fan art.
Peppino Spaghetti > Pizza Tower © Tour de Pizza (indie developer) and McPig (creator)
#peppino spaghetti#pizza tower#fan art#fanart#digital art#pizza tower peppino#peppino fanart#pizza tower fanart#pizza tower art#anniversary art#peppino pizza tower#first attempt
18 notes
·
View notes
Text
8 Best Logo Design tips/techniques
Logo design plays a vital role for any brand or company to make or break its business of a company can make or break its business vision. A well-designed logo can establish a new brand and also help a running organization to build rapport with the customers. Other than an imperfectly created logo fails to communicate a brand nature and ultimately harms business.

Avoid using multiple colors use a maximum of 3 Colors
A Logo should always neat and clean as it’s not only a piece of design it is also a brand communicator for the entire media. Using more color can distract your user’s interest also it’s very hard to create its chemistry with other media like printing and web display. Using less color will make your logo more prominent.
Use simple and avoid sharp edges / cursive fonts’ type
Uses of your logo can be in any size from bigger in hoarding to smaller in Ads, especially for the newspaper ads. Sharp edges font type can decrease the visibility of your brand also we shouldn’t use more than 2 font’s type.
Compatible with Black & White Background
Always create a reverse type of your logo (white on black & black on white). It’s better if the colors and font type we use should be in contrast on white & black background. If your logo suffices the given purpose it’s a well created Logo Design.

Stick to two-dimensional design
Your logo can either be two or three dimensional. But it’s recommended creating 2D Logo for beginner always. First, it’s easy to conceptualize if compared with 3D design. Also, it helps us to understand the process of logo designing.
Create a vector logo
The logo should always be in vector format as we discussed earlier that the uses of your logo can be anywhere right from giant size hoarding to a one columns newspaper ad. The best part of vector design is that most of the beginners wouldn’t aware as it doesn’t have a size limitation, means its pixels would not affect if we increase or decrease its size at any level. It will not affect its pixels. Other than bitmap format has a limited size. We will have in length discussion on Vector and raster Graphics in our future topics.

Avoid using shadow, bevel, gradient, or emboss techniques
There are N numbers of techniques which can make our design more beautiful and attractive but it’s hard or sometimes impossible to reproduce it on a various medias like screen printing, foil stamp printing & embroidery as it is unable to support gradient& shadow. Even the premium signages like ACP board doesn’t support it. The only process which supports all kinds of colors and effects is Digital printing but it has its own limitation.
Avoid using photos
As we already discussed the bitmap/ raster images for its limited resolution and photos supports the same format, so we should do avoid using photos in Logo Design. Also, it doesn’t reproduce well in many media like hoarding, many parts of sublimation/heat transfer printing, embroidery for T-shirts, etc.
Best Software for Logo Designing
There are many free tools online and offline to create Logo of your choice. You can take help of them to create some basic designs. But it all has some restricted features which won’t allow you to do experimental design. We Designs recommend Corel Draw (any version) and Adobe Illustrator (any version) as the best vector Logo Designing tool which is capable enough to suffice your entire designing requirement.
3 notes
·
View notes
Text

Cat in Box Vector Tracing
To place your order Click on the link Fiverr: https://www.fiverr.com/s/EgEk1kD
You can also DM or Email Email: [email protected]
Facebook: https://web.facebook.com/emangraphics01/ Instagram: https://www.instagram.com/eman_graphics01/ Dribbble: https://dribbble.com/emanahsan Behance: https://www.behance.net/emangraphics Artstation: https://www.artstation.com/emangraphics4 Pinterest: https://www.pinterest.com/emanahsan990/ BSKY: https://bsky.app/profile/emangraphics.bsky.social VSCO: https://vsco.co/emangraphics/gallery Tumblr: https://www.tumblr.com/blog/eman-graphics
#vectortracing #vectortrace #vectortracingservice #vectordesign #vectorization #vectorized #vector #art #artwork #vectorart #graphic #graphicdesign #graphicdesigner #digitalart #redraw #vectorillustration #digitalilustration #rastertovector #coverttovector #imagetovector #vectorizeimage #lineart #logotracing #logoredraw #vectorlogo #highresolution #adobeillustrator #adobephotoshop #fiverr
#vector tracing#vector trace#vector tracing sevices#vector design#vectorization#vectorized#vector#art#artwork#vector art#graphic#graphic design#graphic designer#digital art#redraw#vector illustration#digital illustration#raster to vector#convert to vector#image to vector#vectorize image#lien art#logo tracing#logo redraw#vector logo#high reslution#adobe illustrator#adobe photoshop#fiverr
0 notes
Text
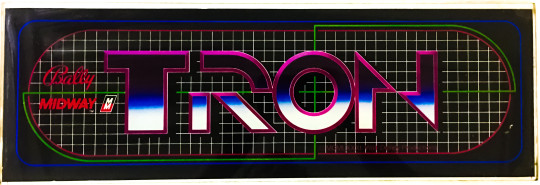
Bally Midway's "Tron" Arcade marquee
Released in 1982 by Bally Midway, "Tron" is an arcade game that was developed alongside the groundbreaking Disney film of the same name. Both the film and the game were instrumental in showcasing the potential of computer graphics in entertainment, making "Tron" a landmark in both cinematic and video game history. The game itself is not just a tie-in but an extension of the film's aesthetic and themes, exploring the concept of living inside a digital world, a notion that was revolutionary at the time.
Technological and Historical Context
The early 1980s marked a period of rapid evolution in video games, with developers exploring new ways to integrate storytelling and advanced graphics into gameplay. "Tron" was released during the golden age of arcade games, a time characterized by intense creativity and technological advancement. The film "Tron" was notable for being one of the first major motion pictures to make extensive use of computer-generated imagery (CGI), and the arcade game sought to bring that visual style to the gaming world.
Gameplay and Design
"Tron" consists of four distinct mini-games, each based on different scenes from the movie. The games include:
Light Cycles: Perhaps the most iconic of the four, this game has players controlling a light cycle that leaves a solid trail behind it. The goal is to trap the other cycles with your trail while avoiding walls and the trails of other cycles.
Grid Bugs: Players must destroy grid bugs and clear a path to the I/O tower within a set time.
Battle Tanks: In this mini-game, players control a tank and navigate a maze-like battlefield, destroying enemy tanks.
MCP Cone: The objective is to break through blocks spinning around the MCP's cone by firing at them, without getting hit by returning fire.
These mini-games are accessed from a central hub, a design choice that not only provided variety but also reflected the segmented nature of the digital world depicted in the film.
Graphical Innovations
"Tron" utilized colorful and detailed raster graphics, which were advanced for the time and provided a visual fidelity that mirrored the high-tech, neon-infused aesthetic of the film. The game was one of the first to use a blacklight in the cabinet, which made its fluorescent colors stand out, enhancing the visual experience and drawing players in arcades.
Control and Interface
The game featured a unique control scheme, including a rotary dial for aiming and a joystick for movement, which were innovative at the time. This setup allowed for precise control, which was necessary for navigating the game's various challenges.
Sound and Narrative Elements
"Tron" featured pioneering sound design, with audio that closely mimicked the electronic score of the film. This integration of sound helped immerse players in the digital world of Tron, enhancing the game's futuristic feel.
Impact and Legacy
"Tron" was critically acclaimed and commercially successful, becoming one of the most memorable arcade games of the 1980s. Its success helped solidify the concept of games as a viable promotional tool for films and demonstrated the potential for cross-media convergence.
Technologically, "Tron" pushed forward the notion that video games could be both visually stunning and complex in design. The game's emphasis on multiple types of gameplay within a single cabinet anticipated later developments in arcade and console gaming, where multi-genre games became more common.
Conclusion
The arcade game "Tron" stands as a significant achievement in the history of video gaming, notable for its technological innovation, distinctive design, and its role in the broader context of 1980s pop culture. By bridging the gap between cinema and video gaming, "Tron" not only captured the imagination of a generation but also pointed the way toward the future of interactive entertainment, where the lines between different media would continue to blur. As a historical artifact and as a piece of entertainment, "Tron" remains a fascinating study in the convergence of technology, art, and commercial entertainment.
4 notes
·
View notes
Text
Direct to Fabric Printer: Revolutionizing the Textile Printing Industry https://mtutech.store/direct-to-fabric-printer/
Direct to Fabric Printer: Revolutionizing the Textile Printing Industry Introduction The textile printing world has undergone a significant transformation in recent years. At the heart of this change is the direct to fabric printer, a technology that allows digital designs to be printed directly onto fabric with remarkable speed, color accuracy, and efficiency. From fashion designers and interior decorators to large-scale textile manufacturers, this printer has become a game-changer. In this article, we’ll explore what a direct to fabric printer is, how it works, its benefits, applications, challenges, and future potential in the global textile industry.
What Is a Direct to Fabric Printer? A direct to fabric printer (often abbreviated as DTF or D2F printer) is a type of digital textile printer that applies ink directly onto fabric materials without the need for intermediate transfer paper. It bypasses traditional methods like screen printing or heat transfer, using specially formulated textile inks and integrated fabric feed systems to print vibrant, durable designs. The fabric is printed and often simultaneously pre-treated or post-treated (like steaming or curing), depending on the printer’s technology and the type of fabric used.
How Does Direct to Fabric Printing Work? Design Preparation The process starts with creating a digital design using graphic design software. The file is formatted and color-managed using RIP (Raster Image Processor) software.
Fabric Loading The textile material (cotton, polyester, silk, linen, etc.) is loaded onto the printer in roll or sheet form.
Printing The printer applies ink directly onto the fabric through specialized printheads — typically piezoelectric — using dyes like reactive, pigment, or disperse inks.
Fixation Depending on the ink type, the printed fabric undergoes heat fixation (curing), steaming, or washing to lock the color and improve durability.
Types of Inks Used in Direct to Fabric Printing Pigment Inks – Suitable for a wide range of natural and synthetic fibers; no need for steaming or washing.
Reactive Dyes – Best for cotton, linen, and other cellulose fibers.
Disperse Dyes – Used for polyester fabrics.
Acid Dyes – Ideal for printing on silk, wool, and nylon.
Benefits of Using a Direct to Fabric Printer Shorter Production Time Eliminates multiple steps (like transfer printing), allowing for quicker turnaround from design to final product.
Eco-Friendly Reduces water and chemical use compared to traditional dyeing or screen printing methods.
High Customization Perfect for personalized textiles, fashion lines, or limited-edition prints.
Superior Image Quality Produces high-resolution, color-rich prints with fine detail and sharp lines.
Cost-Efficient for Short Runs No need for expensive screens or plates, making it ideal for small to medium production.
On-Demand Production Enables just-in-time manufacturing with minimal inventory.
Common Applications Fashion & Apparel From custom t-shirts and dresses to scarves and activewear, D2F printers are widely used in the fashion industry.
Home Textiles Curtains, upholstery, tablecloths, and bed linens are commonly produced with direct to fabric printing.
Interior Design & Décor Wall hangings, canvas art, and personalized home accessories benefit from this technology.
Soft Signage & Flags Lightweight, durable fabrics for banners, event backdrops, and promotional displays.
Sportswear High-performance polyester garments printed with vibrant colors and logos.
Direct to Fabric Printer vs. Direct to Garment Printer While they sound similar, these technologies serve different purposes: Feature Direct to Fabric (DTF) Direct to Garment (DTG) Substrate Rolls of fabric Finished garments (e.g. t-shirts) Ink Types Pigment, reactive, disperse, acid Primarily pigment Output Volume Medium to high Low to medium Best For Apparel manufacturers, home textile producers Custom t-shirt businesses, small batch
Choosing the Right Direct to Fabric Printer Before investing, consider these factors: Fabric Type Compatibility: Make sure the printer supports the materials you plan to use.
Ink Technology: Choose inks that match your fabric and desired durability.
Print Width & Speed: Larger printers (1.8m to 3.2m) support faster and larger production runs.
Color Accuracy & Resolution: Look for printers with advanced color profiling and 1200 DPI or higher.
Integrated Fixation System: Some models include inline curing or steaming.
Support & Maintenance: A reliable supplier and service network is essential for long-term use.
Leading Brands in Direct to Fabric Printing Epson (Monna Lisa series) Known for high-quality pigment printing on natural fibers.
Mimaki Offers reactive and pigment-based solutions with industrial speed.
Kornit Digital Specializes in sustainable pigment printing for fashion and home décor.
Roland Provides hybrid and dye-sub solutions with excellent color fidelity.
MS Printing Solutions A leader in high-speed, large-format direct to fabric systems.
Challenges to Consider Initial Investment: D2F printers can be expensive upfront, especially industrial models.
Fabric Pretreatment: Some fabrics require pretreatment to enhance ink absorption and durability.
Color Fastness: Inks must be fixed properly to ensure resistance to washing and light.
Learning Curve: Operators need training to master software, material handling, and post-processing.
The Future of Direct to Fabric Printing As demand for sustainable, personalized, and on-demand textiles grows, direct to fabric printing is becoming a cornerstone of the modern textile industry. Technological advances continue to improve speed, ink performance, and material compatibility. Brands are increasingly adopting this technology to shorten supply chains, reduce waste, and meet fast fashion cycles. The future promises even more automation, AI integration, and expansion into new fabric types.
Conclusion A direct to fabric printer is a powerful tool that combines speed, sustainability, and flexibility in textile production. From intricate fashion designs to home furnishings, this technology unlocks new possibilities for creativity and business growth. Whether you’re a small designer or a large manufacturer, adopting direct to fabric printing can set you apart in an increasingly competitive market. It's not just a trend — it’s the future of textile printing.
0 notes