#first time using CapCut yay!!!
Explore tagged Tumblr posts
Visit Tumblr Blog
Explore Tumblr blogs with no restrictions, modern design and the best experience.
Last Seen Tumblr Blogs


Fun Fact
Average visit duration of Tumblr.com is 10 mins and 25 secs.
Text
//minor flash warning⚠️
Do I look like him?
first time using CapCut! I make more fun stuff kinda like this on my Instagram :3
#my art#dhmis#chromakopia#first time using CapCut yay!!!#do i look like him#animatic#don’t hug me i’m scared#dhmis in the year of our lord 2024#yellow guy dhmis#red guy dhmis#duck dhmis#Lesley dhmis#roy gribbleston#Roy dhmis#procreate#artists on tumblr#artists of tumblr#animation meme
71 notes
·
View notes
Note
i need a full guide on how you edit/colour your gifs/banners/headers . they said its terminal . i have a day of living before i explode .
-mort
i certainly hope you didn't explode before i answer this... but let's go on a chaotic ass trip through my editing process for gifs mostly
getting the clips / assets i wanna use
first of all i Hate trying to screen record. hate it hate it hate it makes me wanna die. luckily there are people who love doing illegal things more than i do and i can pull from scenepack masterlists. i usually use this one right here for yellowjackets.

2. the clippening
probably the most tedious part honestly. making sure they look good, clipping at the right moments, etc etc.
for rudimentary, plain 'ol captioned gifs, i usually use capcut on my pc, use the text editor there for captions, cut out the clips i want as gifs, then use export selected clips to automatically separate them all as their own video files in a folder.

however, if we're doing something fancy with the text, then that's where this next part comes in
3. picsart text overlay is your bestie
PICSART YALL. it's saved my ASS with all it's free shit. i also use it for my headers on my fic posts
anyways, when making overlay text for fancier gifs, i go into picsart and do that.

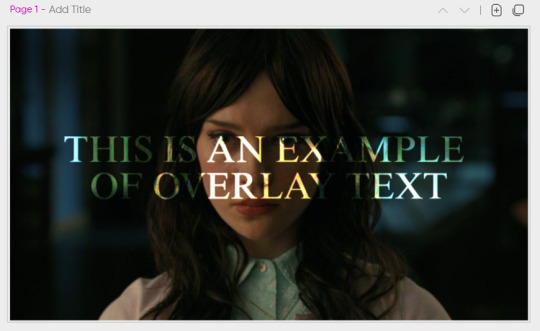
here's an example of how that works, feat. iris companion. thanks iris.
of course, you might have to play around / layer your text multiple times (duplicate, stack it, make the magic happen) but that's the gist of how i do it.
it works the same for videos that are put into picsart as well (sorry, iris).

4. please are we done yet (ez-gif is your bestie)
okay, so you've got a video... but how do you get that to a gif? ez-gif is literally your best friend. i literally used it to make the above gif.
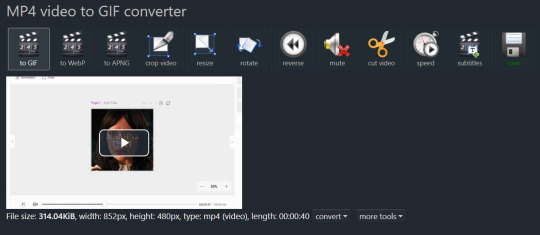
you can also do frame by frames, make a gif from frames, or turn a gif into a silent video. it also optimizes your gifs for you if they're huge files. ez-gif for the fuckin win.
5. final words (we're done now, yay!)
first of all. you can do this any way you see fit. my way is not entirely correct or efficient i'm just quite disorganized and this is how i roll. my files look like a warzone. please help me.
but, the tools above are all free and work (to my knowledge), so hopefully this helps someone out.
8 notes
·
View notes
Text
I MADE AN ALIGHT MOTION TUT!
super basic, but just to help people get started :p
youtube
TRANSCRIPT BELOW (is it called a transcript?)
so i use alight motion for most of my tweening and such and ill try to share what very little stuff i know for my sillies. im not good at explaning so err yay. this is on alight motion mobile!!!
i begin with drawing a sketch of whatever im gonna tween. the sketch is normal and not cut into pieces yet.
afterwards, when im outlining i draw all the body parts on different layers, so separating the body parts. a tip for doing any head movements is giving the neck a bit more height
do this, dont do this
when doing arms i tend to leave some parts open because itll appear as one when im tweening it later
if you have a part of the body you know will be moving more drastically than the others you should close it off/ like turn it into a nub so its less awkward to tween later
after thats done, colour it. first time tweeners should avoid going in with shading or whatever because it makes it harder to connect those lines lol (it might be easy for you tho i just found it hard. give it a go if u want)
afterwards i save all the layers as transparent.
now we are on alight motion. click the cross at the bottom of the screen. if you have certain ratios feel free to enter them by clicking the pen. mine was a preset ratio by ibis (4:3) so i wont be changing mine.
to input photos or videos, click media. click on your media and press the plus button on the upper right hand corner
some basics— click the bottom buttons to cut off or divide.
long press the arrows on the side and slide it left to shorten the clip and right to make it longer.
click your layer, then this button to duplicate the currently selected layer. long press it to move the entire layer.
to reorder layers , hold the three lines and move it up or down.
to input audio, select a video from media and click on the layer. find the button ‘extract audio.’ after that, a layer should appear which is the audio layer. delete the video layer if you have no use for it now.
ok now how to tween.
begin by putting in all your layers. you can reorder them once everything is in. it also helps to name everything, because it does get confusing when youve got lots of parts. click the layer and at the top right of your screen click (unnamed layer) and name it. i dont do this often because i cant be bothered but its helpful.
now im reordering it.
afterwards it is time to place pivot points. pivot points means where the thingy will be rotating around. or something. It makes tweening much more easier and is why i prefer alight motion to capcut in this aspect.
heres without pivot point placing. the pivot point is always auto set in the center.
and heres with. i have placed the pivot point at where the body parts would join.
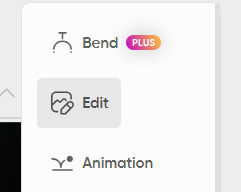
to place a pivot point, click on your layer and on the right side buttons click ‘move and transform’.
tap the first button out of the four that pop up. these four buttons control your movement, rotation, size and angle (in tha order). after clicking the first button, two blue coordinates should appear. these are the coordinates of your pivot point. glide your finger around the square to move the dot towards where you want ur pivot point. pivot pointe are typically at where the body parts would join (if ur tweening a person)
now for parenting layers. click on your layer, and on the top right hand side click the button next to the trash bin. parenting layers basically means we are connecting two layers together. if we have two layers here, and connect layer two to layer one, two will move whenever one does, but one will not move when two does.
ok so again, click your layer. click the button next to the trash bin. select the other layer which will become your parent layer.
now for keyframes. if youve used capcut this should be relatively familiar.
we begin with clicking the layer, then move and transform button. click on whichever of the four youd like to keyframe. i will click rotation. on the left side, beneath the undo and redo button should appear the keyframe symbol. place it wherever you want on your layer. there needs to be at least two keyframes to allow for movement. one of the keyframes should be the original placement, while the other has been altered.
after the two keyframes have been placed, beneath the keyframe symbol is now graphs. this dictates the easing of your animation. like how fast the animation goes from position one to position two.
you can also make bounces/loops with this, and it’s typically how i do headbopping. glide the yellow button to decide the speed of the bopping/movement.
if youd like to copy and paste a graph to a different layer, click on the three buttons at the bottom left. and click copy. go on your other layer, click the graphs button, the three buttons again then paste.
after all of your tweening is done, you can (if u want to) group it together. this way, if youre looking to move this thing around its much more easier to. long press over here until it lights up, and select the layers youd like to group together. once that is all done, you can move it around.
if u wanna use effects like bounce to make your silly thing go crazy, click effects. im not gonna go through them all because i honestly dont know what half of these do. click bounce, and scale it however you like. its liteally just keyframing and what we did before.
if you need to edit the grouped together layers, click on the layer and then u can edit it.
ok thank u for watching follow my socials i post there everyday. yay.
#eure-k-a#alight motion#tweening#oc animation#tutorial video#art tips#art resources#art tutorial#alight motion animation#alight motion tutorial#artists on tumblr#Youtube
13 notes
·
View notes
Text
two weeks.
two weeks this has plagued my existence.
get it away from me i dont want it (also first time drawing SKK! Yay!)
(animated on flipaclip at 8fps then i used capcut for the effects stuff. song is Cigarettes out the Window by TV Girl)
35 notes
·
View notes