#hat tutorial
Explore tagged Tumblr posts
Visit Tumblr Blog
Explore Tumblr blogs with no restrictions, modern design and the best experience.
Last Seen Tumblr Blogs


Fun Fact
Kazakhstan’s Minister of Communications and Informatics has blocked the Tumblr site because it contained 60 sites of terrorism, extremism, and pornography in 2015.
Note
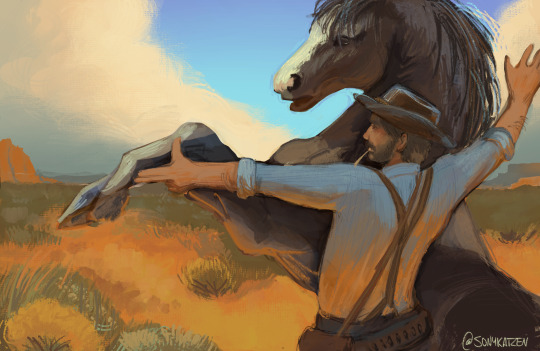
Hello!! I love your art!!
And I also have a question!! H o w in the world do you draw cowboy hats?? Idk if you ever answered this before but I just can't get them right and I love how you draw them on your cowboy au!!
Thank you!
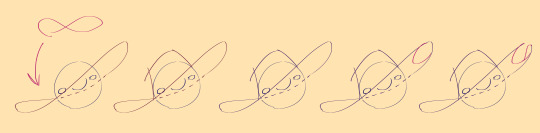
For hats I just draw infinity loop and add detail
178 notes
·
View notes
Text
youtube
Angel Starr Cosplay HAT Tutorial - ACE ATTORNEY 市ノ谷 響華 逆転裁判
#ace attorney#angel starr#angel starr cosplay#angel starr lunchbox specialist#ace attorney cosplay#the opal empress#逆転裁判#phoenix wright ace attorney#ace attorney fanart#ace attorney art#コスプレ#youtube#phoenix wright#ace attorney video#cosplay tutorial#cosplay#cosplay hat#onigiri#hat tutorial#市ノ谷 響華 コスプレ#市ノ谷 響華#Youtube
8 notes
·
View notes
Photo
NEAT
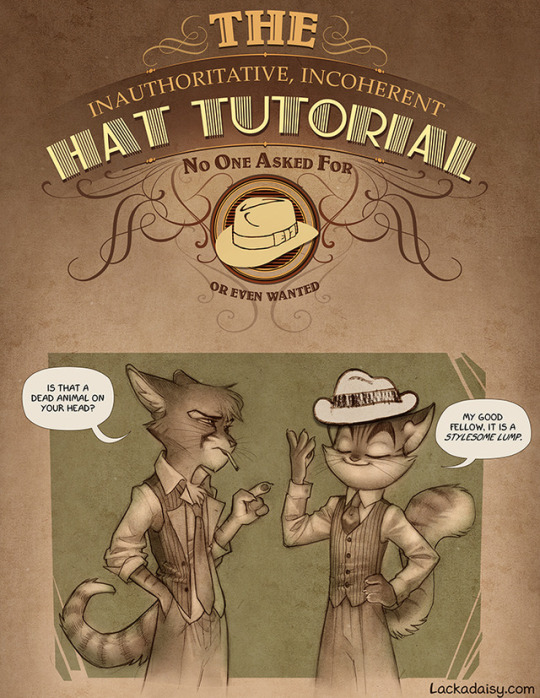

Some snippets from a Hat Drawing Tutorial I just posted to Patreon. I may share it openly, eventually, but for now it’s available to all patrons, $1 and up!
24K notes
·
View notes
Note
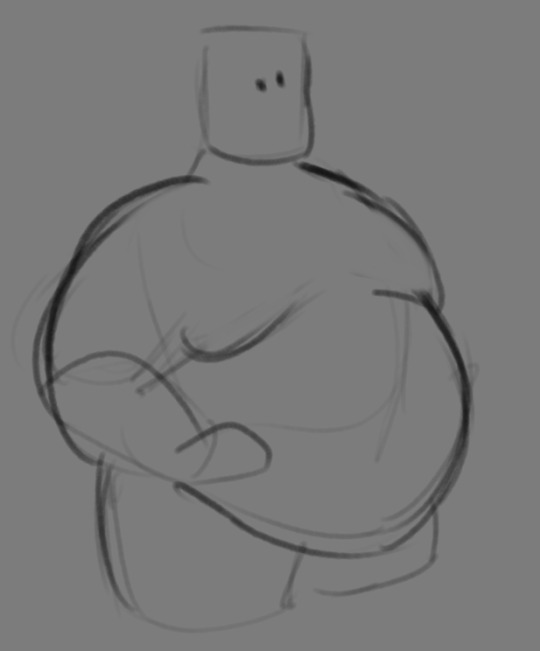
If you don't mind my asking, how do you go about drawing fat? :3
JUST THE EXCUSE I WAS LOOKING FOR
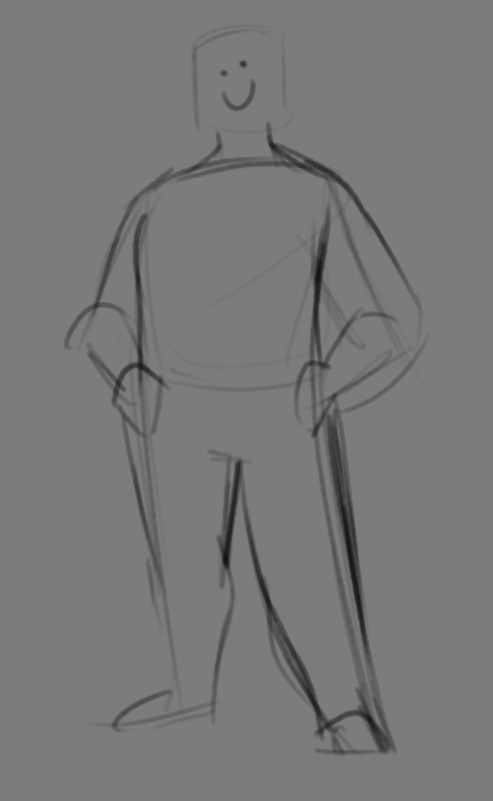
So, for me personally, a lot of the time when I draw fat characters, I'm not looking to specifically capture the specifics of fat as much as the feel of fat. Bulkier, rounder shapes in the right places that has a feeling of weight to em! A lot of that is intuition and simplification at this point, but it all works on the same frame as just any ol' person. Like take this-

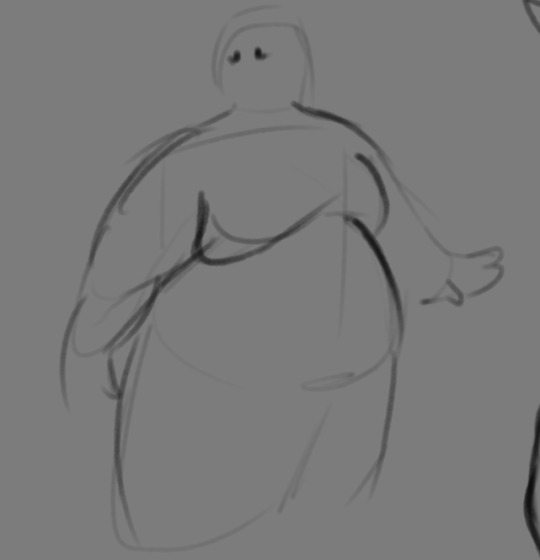
For example. This is the basis for any body shape, not just the more average one that it may imply. Sure- it can be that average body shape:
But also a fat one too!

And a big part of that is knowing where fat usually tends to bunch up on the body, so lets take a look piece by piece! (Please keep in mind this is very simplified, and not completely precise in some parts)
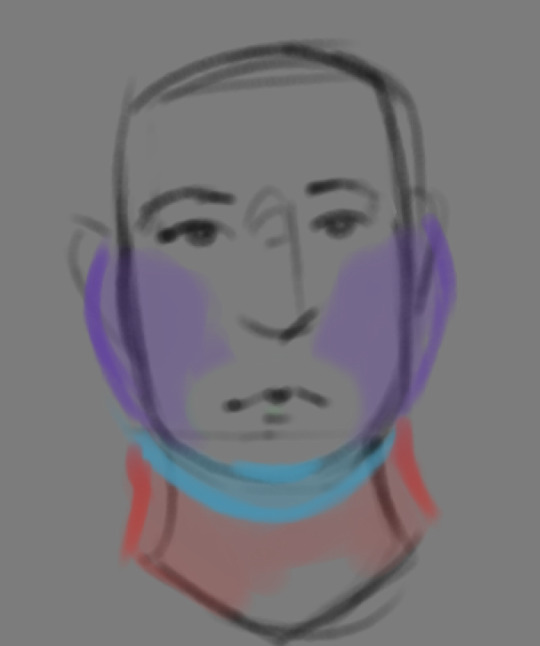

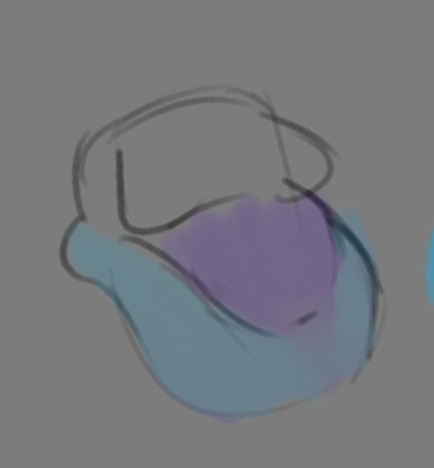
THE FACE: Cheeks (in purple) and especially the chin (in light blue) are the places where a lot of the fat is gonna wanna gather and round out on your face! Additionally, theres a small pocket of fat beneath the cranium on the backside of your head. It's small, but it is there. I believe fat can build up elsewhere like the bridge of your nose and forehead, but generally speaking, you're gonna have a whole lot more buildup in other places first.
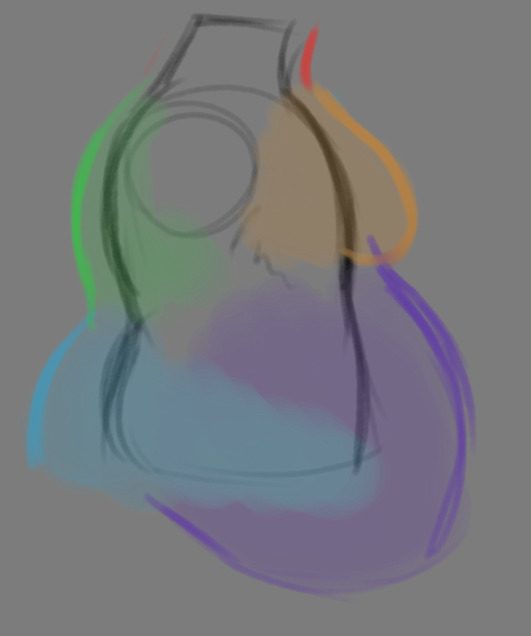
THE TORSO: A lot of the fat built up on the torso is gonna be sent to your tummy. More cushioning for vital organs, mostly out of the way, it just makes sense. Additionally, the lower backs fat builds up and joins with a patch of fat on your sides that forms what is typically referred to as the love handles to make that double belly look. Along with this, the immediate next target for the torso is the breasts, followed by the upper back!
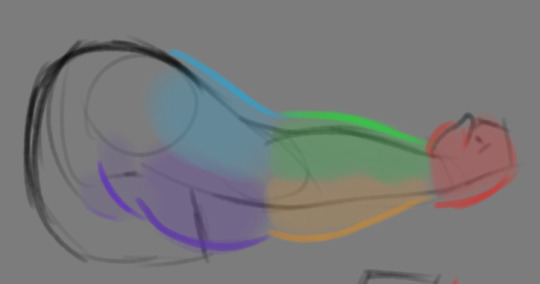
THE ARMS: For this limb, a VERY notable amount of the fat present builds up on the tricep and bicep areas, lessening once you get towards the flexor and extensor areas. You can almost think of the arm as a sort of triangular shape, wide side starting from the shoulder and tapering towards the hand, which itself mostly builds up fat around the back of the hand and the fingers. The shoulders themselves don't build up too much fat unless you got a lot
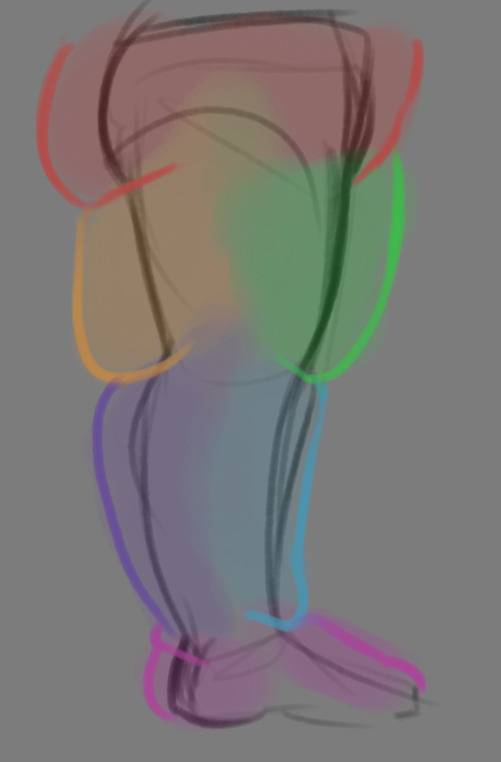
THE LEGS: And finally, you can think of the legs having pretty similar curves to what you're probably already used to thinking. The front of the thighs getting a big buildup, along with the back of the calves, the other parts being flatter in turn. As far as the feet go- similarly to the hands, the top of the feet, along with the heels get most of the buildup, as fat on your soles would impede mobility. The glute, hip and crotch area will also especially build up fat, lending to the same triangular shape that you can see in the arm!
A big thing to note with fat is that it tends to taper off towards joints. Your knees, elbows, shoulders, hips, and all the other places are gonna have significantly less fat so that you remain mobile and flexible, as that's important!
Now that we have an idea of where fat builds up on the body, you might have something that looks kinda like this
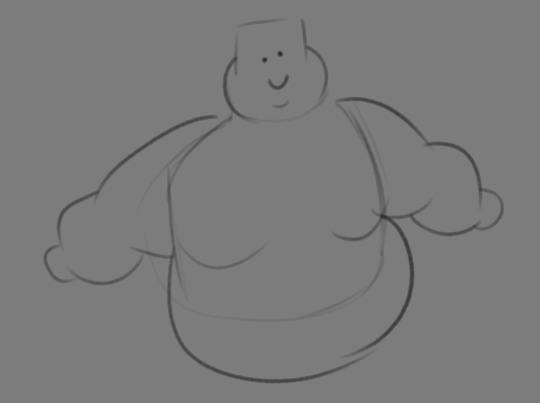
Which yes, does demonstrate a solid understanding of the places fat builds up, lacks the weight you're probably trying to convey, which brings us to out next point! Fat is well... heavy! Gravity is what gives fat much of it's shape, especially as you tread towards larger and larger bodies.
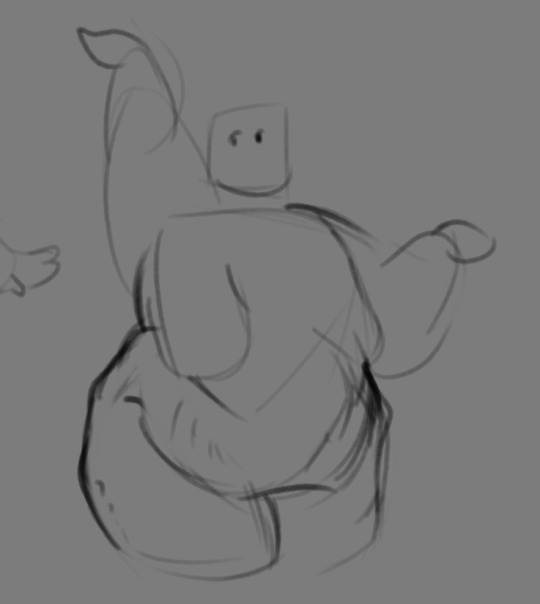
This is demonstrated really well on the arms especially-


Those big ol' bits of fat'll really start to sag when left hanging, and they will squish like hell if they run into something. I like to think of these bits of fat as big ol' ovals that squash and stretch depending on if there's an obstacle in their way or not


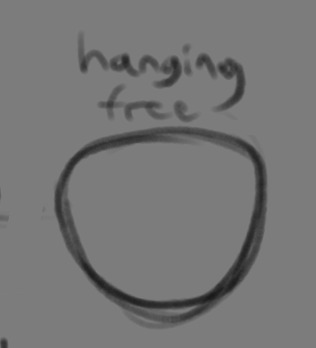
These are the important shapes to remember when it comes to the weightiness of fat! If you take all of this into mind, you should be getting something a lot closer to that shape you've been after!

Oh, and always remember that fat bodies come in all variety of shapes and sizes! Play around with a whole lot, and seek out all the resources you can! it'll really lend to your knowledge when it comes to this kinda stuff!
And as I always recommend when it comes to learning art- look at what your favorite artists do with fat bodies. See what you really like about the fat bodies they draw and try to replicate it in your own work, I promise you it's one of the most helpful things ever.
This is like the most basic of basics when it comes to drawing fat bodies though. If there's any additional thing about fat bodies, or maybe you want clarification on something, don't be afraid to ask! If there's enough to cover, I'll make an addition to this post!
#hat answers#my art#design talk#tutorials#yeah im unfortunately pretty tired so this gets a liiiitle rambly at the end but i think this covers like the basic basics#i hope this was helpful at all#and again dont be afraid to ask questions and stuff#if theres enough traction/questions on this i will most definitely try to clear up as much as i can in an addition to the post#whoops this took a bit!
3K notes
·
View notes
Text
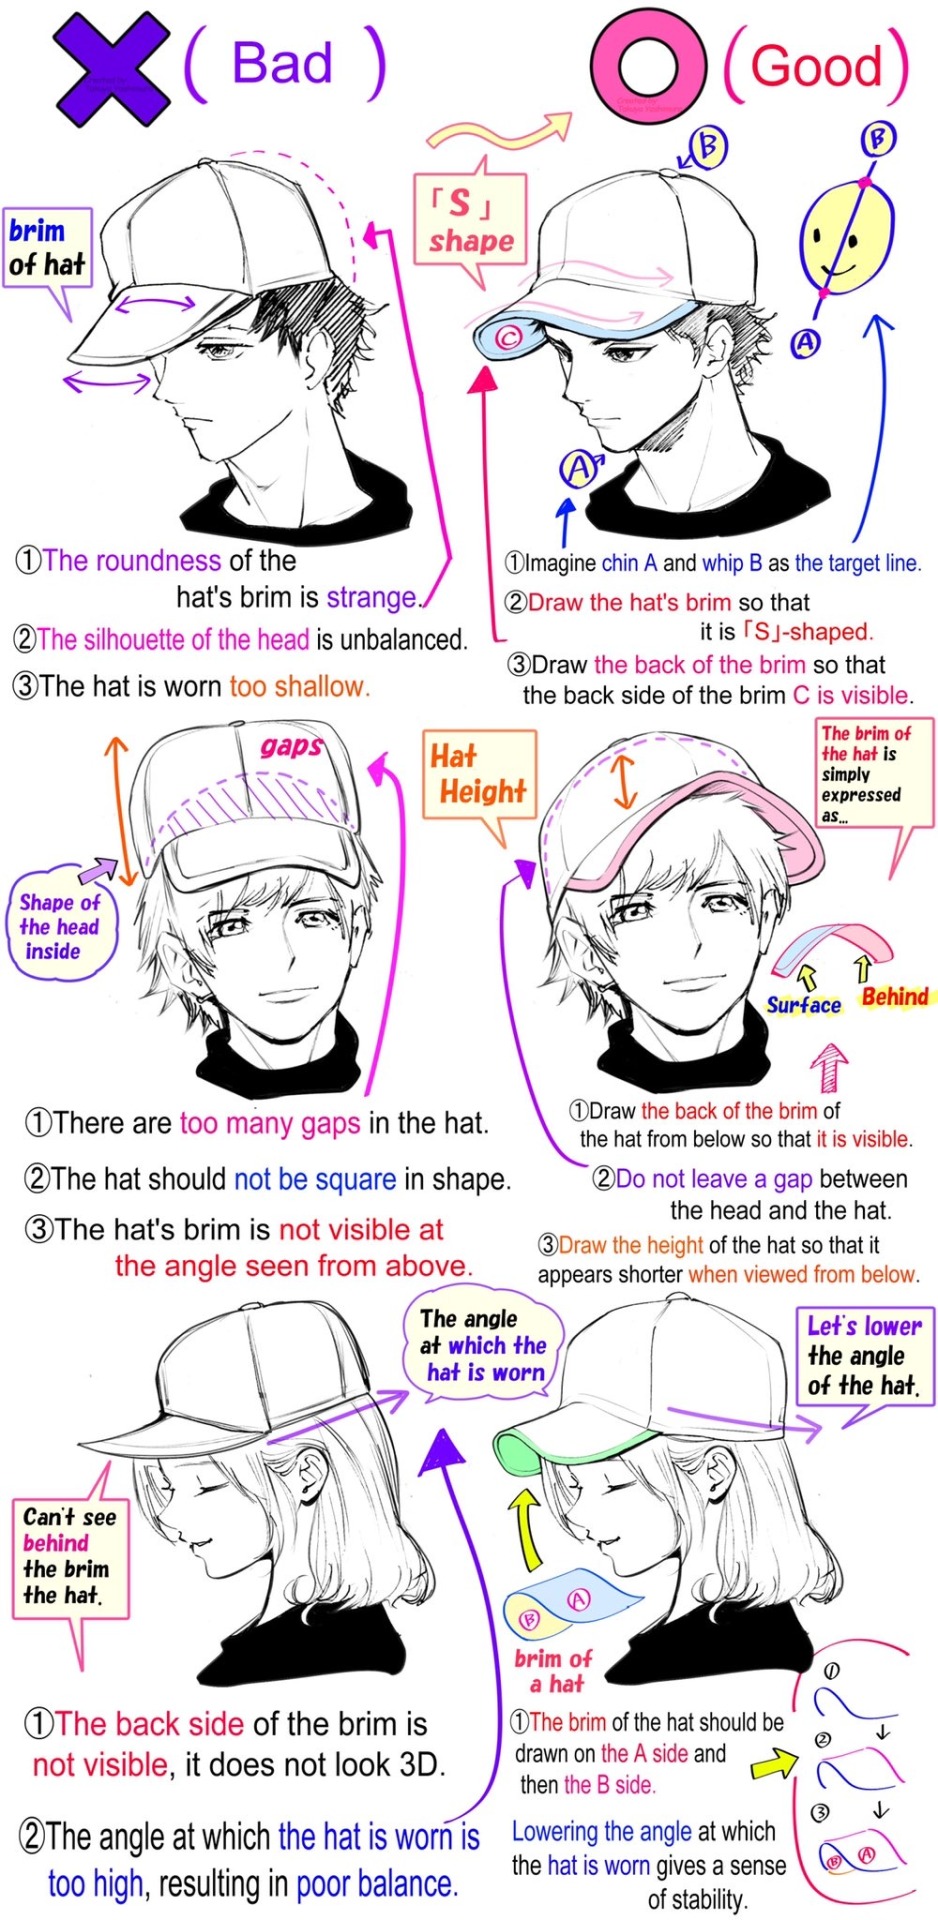
“Drawing techniques to improve the shape of baseball caps.”
Source: Twitter
2K notes
·
View notes
Text


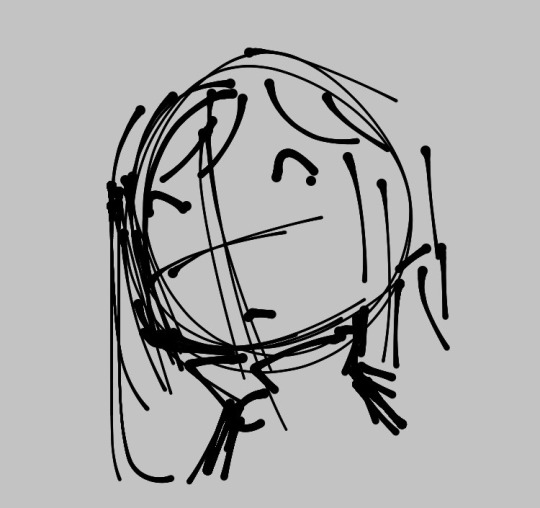
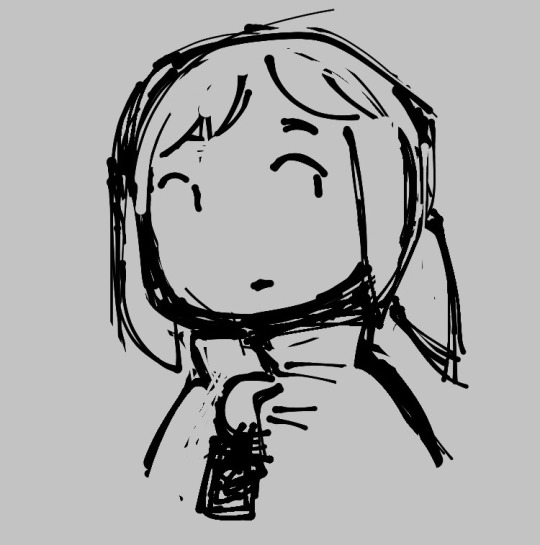
Mr. Puzzles Art Tutorial by @demoncatlady - Part 2 - Info Only ! Part 1 | Part 2 |
I wasn't sure how to guide from here so just info dump. ¯_(ツ)_/¯
Sorry if there's grammar errors or misspellings, English is my secondary language! (Finnish is my first!)
#mrpuzzles#mr puzzles#mr. puzzles#mr puzzles smg4#smg4 mr puzzles#mr puzzles tutorial#character study#hat#antenna#facial expression#emotions
259 notes
·
View notes
Text


Totally real and canon older Staroba sprites from the upcoming Undertale Yellow 2 game
#undertale yellow#north star#uty starlo#ceroba#uty ceroba#staroba#starlo x ceroba#the cowboy hat draws#Okay but I have barely attempted pixel art before so these might not look stellar. I just wanted to practice with a tutorial I found#Obviously drew some heavy inspiration from their canon sprites!#lucky clover au
461 notes
·
View notes
Text
for i know that nothing good dwells within me, that is, in my flesh. i can will what is right, but i cannot do it
#red dead redemption 2#red dead redemption#rdr2#arthur morgan#black shire horse from the stable tutorial#< yes it deserves its own tag#digital art#my art#i started this in late feb and didn’t finish it until yesterday because i couldn’t get the hat right 😐
61 notes
·
View notes
Note
the way you draw Luffy, i love him so much, can we get a tutorial?
Lutorial for your luffies


#art#digital art#doodle#procreate#one piece#luffy#tutorial#luffy fanart#one piece luffy#straw hat luffy#monkey d. luffy#monkey d luffy#op luffy#mugiwara no luffy
37 notes
·
View notes
Text

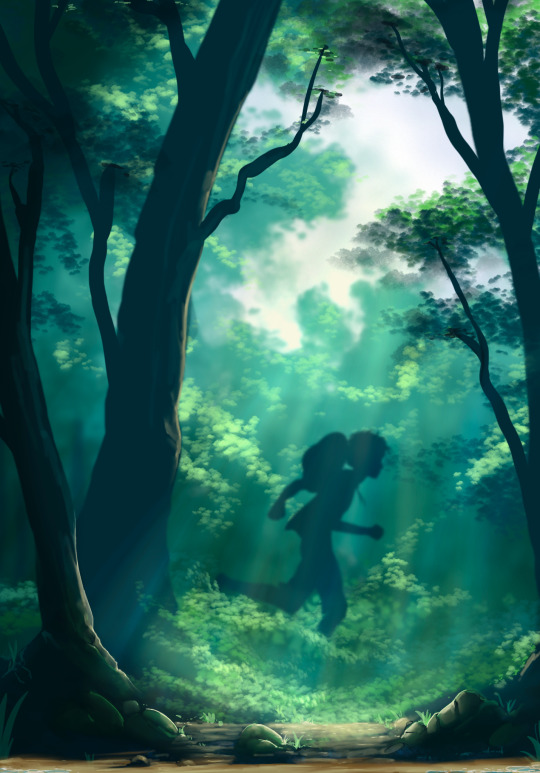
a sleepy wanderer 🌷
#i’m loving tumblr smmm#i wish there was a little tumblr tutorial cuz i don’t know how to interact with everyone ;-;#digital art#fanart#i love pink and purple hues is that too obvious#genshin impact#small artist#i can’t make a warm toned piece#artists on tumblr#sumeru#wanderer#hat guy#scaramouche#fatui harbingers#pink#art
76 notes
·
View notes
Note
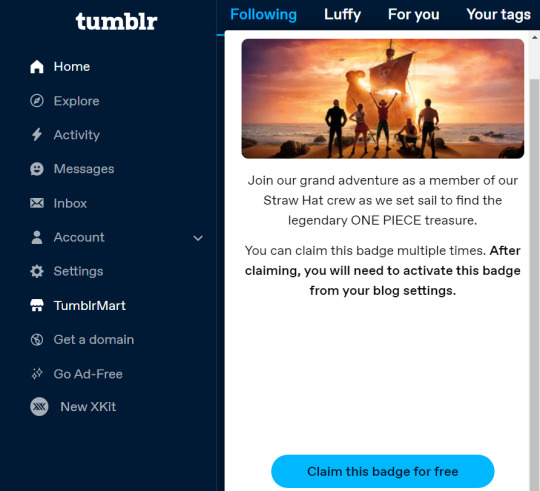
HOW DO YOU GET THE STRAW HAT BADGE???
Ok, I'll give a step-by-step tutorial to hopefully help you because it took me a hot minute to figure it out with Tumblr's new layout.
1. While on desktop, go to TumblrMart (it's on the left side of the dash, just beneath Settings) and click on that.
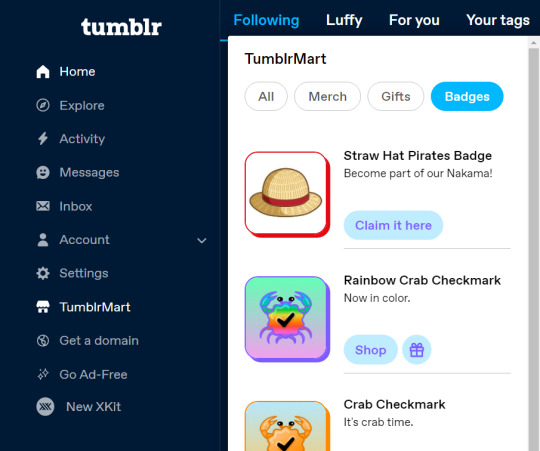
2. You can either go to Badges or just stick with All because it's thankfully right there. Click the "Claim it here" button. It's free and thankfully can be added to sideblogs. When you do this, you'll be taken to this window where you click the "Claim this badge for free" button.
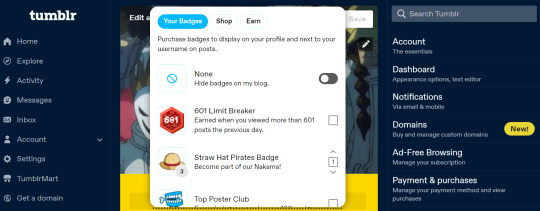
3. This will take you to the Edits page of your blog and you'll automatically be able to add it there. You can apparently collect multiple of the straw hat badges to add to your blog (I've heard up to 50), and they can be distributed to sideblogs too!
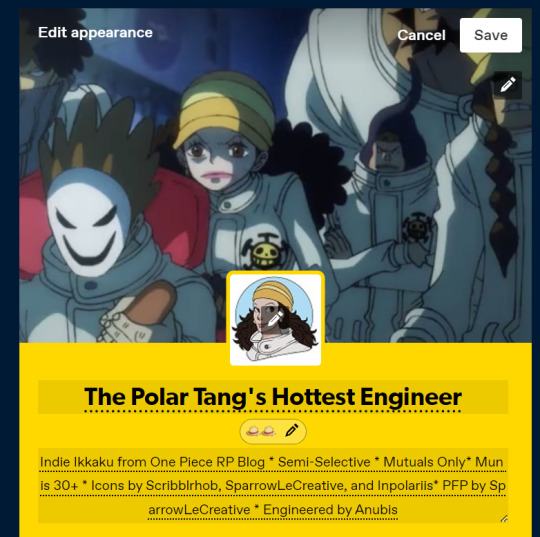
4. Hit save and you're good to go! If you get lost like I did the first time around, just go to your Edit Appearance page for your blog. There will be a little button under your icon that says Add Badges if you don't have any. You should be good to go!
#Time for Maintenance (OOC)#straw hat badge#straw hat badge tutorial#(figured I'd make it a tutorial with visuals to make it easy for anyone who might not know)#(visual aids definitely work better for me)#luffy#one piece#tumblr badge
452 notes
·
View notes
Note
@yourstruly9489
You draw hats so well and im like so amazed by it because every time i try it looks like they're wearing buckets?? how do you draw them?? :o


pringles
62K notes
·
View notes
Text
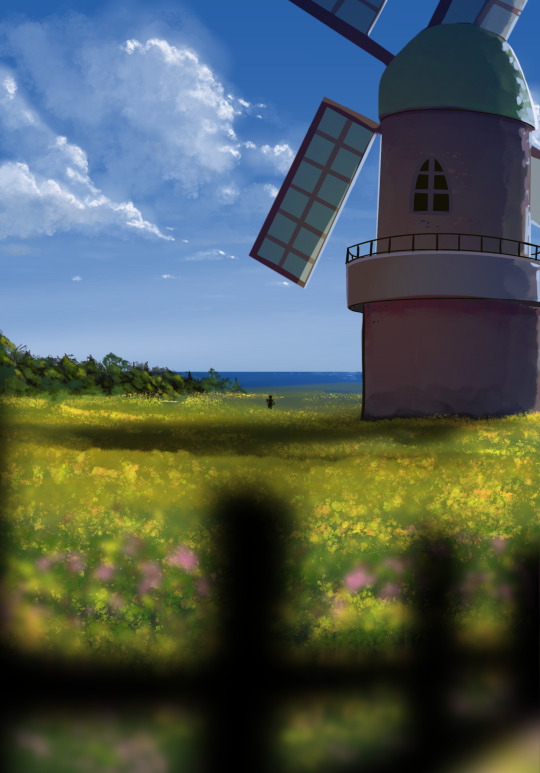
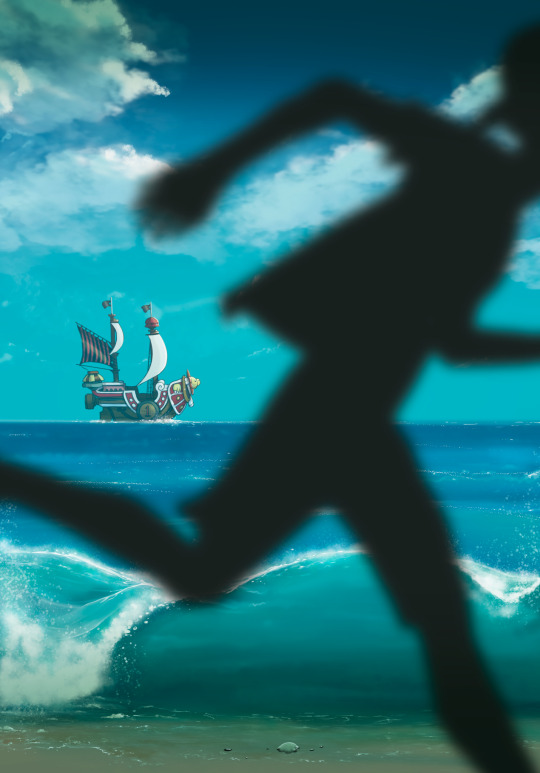
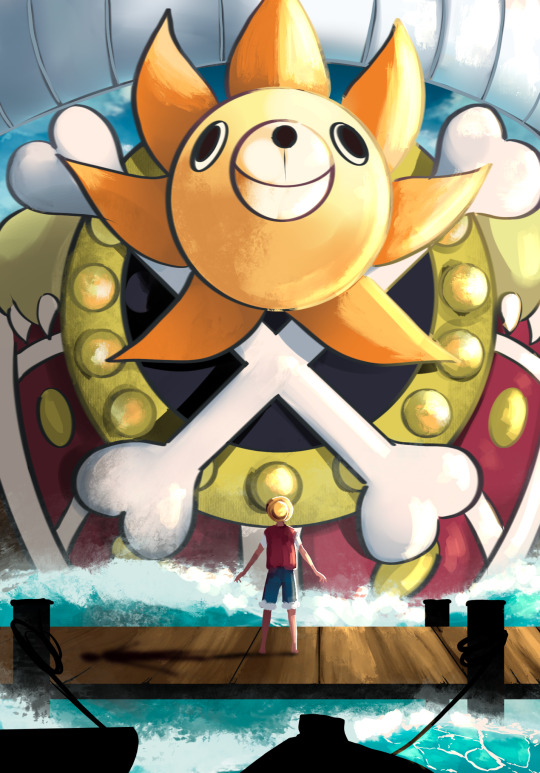
”The pirates are coming!”
#one piece#opfanart#monkey d. luffy#straw hat pirates#mugiwarapirates#thousand sunny#whas having a major art block#decided to try getting back by watching some art tutorials#here’s some of the results#finally feel motivated again#✍️💪🏴☠️#digital art
101 notes
·
View notes
Note
guhhh…. could you maybe give some pointers on how you render I adore it
thank you so much 🥹! it’s important to note I use procreate and mainly use the mercury brush for my rendering. buuuttttt we’re doing this on ibis paint on my phone because I don’t have my ipad with me, but the process remains mostly the same!
this is a bit lengthy so read more under the cut :3
1. rough sketch
this is just a base sketch and can look rough as possible or even just be a few lines, what matters is that we get something down on the canvas to make better later!
2. line art!…sorta
I don’t typically do the traditional lining as I’m awful and shaky with lines, so I often just clean up the sketch or make messy lines and render them up later! any way works though, the point here is you just want a cleaner sketch or lined form!
3. flats and shading or other doohickeys you may add
I do my flats with a big brush and lasso tool it all, I may also do minimal shading here.

4. merge those bad boys (layers) together
this is where the magic happens. I grab my lasso tool and begin to make shapes and highlight along with bigger blocks of shading. I like rendering this way because my brain doesn’t have to do too much work and can easily make new forms with just shapes.

5. color changes (can be done at any point in the coloring process)
one thing about me is I am indecisive as FUCK. I may like how one set of colors looks but then prefer another color, color balance is your friend! feel free to play or mess around with different hues or warm or cold colors to get the colors you want, I’m more partial to saturated colors.

6. final rendering touches along with cleanup, as well as going over lines and adding more flair
this is where I add a lot of triangles or hatching, decided to just do hatching here. this is where most cleaning happens.

and with that we’re done! I hope this was easy to understand I apologize if not I am terrible at explaining things 😭 but I hope this helps anyone who’s getting more into rendering or learning how to! this is just my process and isn’t the end all be all, feel free to switch around steps or just do things your own way, that’s the beauty of art we all do it differently!!
#long post#asks#asks open#artists on tumblr#rendering process#tutorial#hat kid#hoping I made no grammatical errors I will sob endlessly#unun art
29 notes
·
View notes
Note
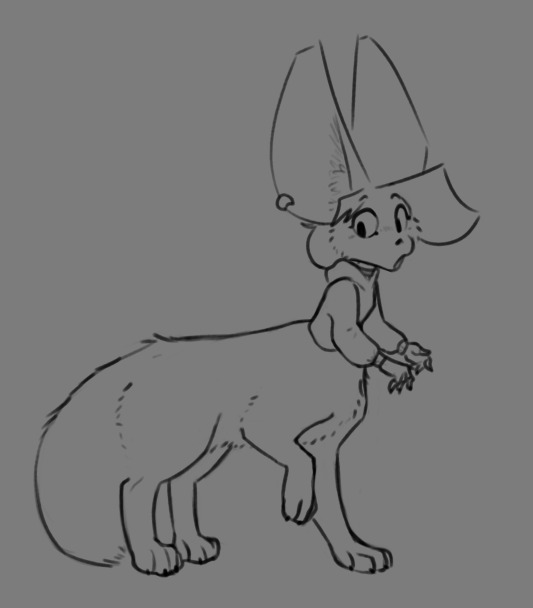
SHAKES YOU how do you draw taurs. i need help i genuinley cant wrap my head around the anatomy of it. optionally i need help with fat taurs but any kind of taur is okay
Ooh, I love these sorta questions!!!
So there are two main things folks usually struggle with when it comes to drawing taurs as a whole. 1, they struggle with quadrupedal anatomy and 2. connecting the humanoid upper body to the quadrupedal lower body. Obviously there's no shame in either of these things, drawing four legged animals, especially if you're more used to the anatomical structure of something more humanoid is quite tough! And finding the sweet spot where humanoid and quadruped meet to make a taur is a bit of a struggle for folks who're still figuring it out.
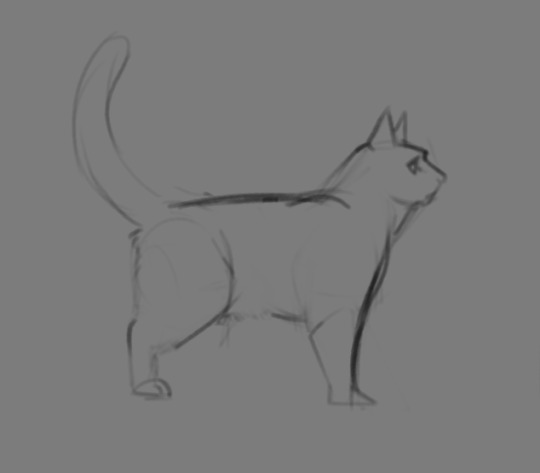
So! The first thing you wanna do really is just familiarize yourself with quadrupedal anatomy. Look at the skeleton of the creature you're trying to taur and see how things like their limbs bend differently or how they're just differently naturally posed as compared to someone who walks upright.
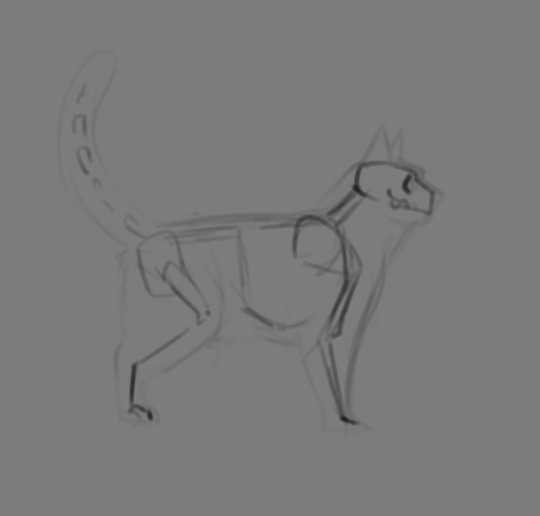
This is a very simplified skeleton of a cat, but you can pretty immediately see how differently everything bends. And I'm not saying it's something you have to perfectly master to know how to draw a taur (especially when you get to drawing fat taurs), but i highly recommend becoming familiar with how a quadrupedal body is structured, the silhouette of most animals is quite misleading! And absolutely use reference!
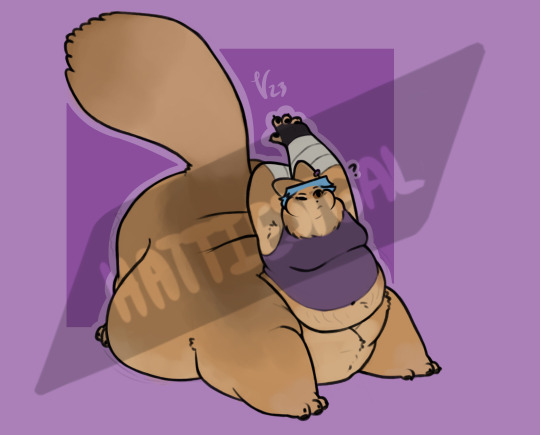
Heck, our first go at drawing taur Riley was super heavily referenced (I'll even share the ref image if anyone is interested!), and this still came out real jank. Practice makes perfect!
As for connecting the upper body to the lower body, this is a little more subjective and up to you, but I'll lay out some general guidelines.

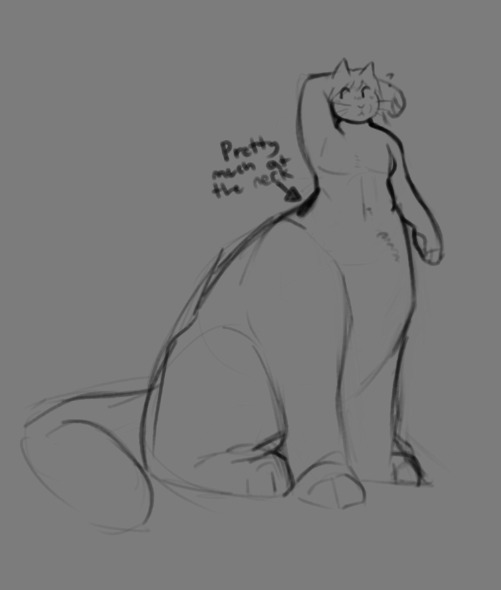
Generally speaking, you wanna put the humanoid torso where the base of the neck is, the front of the torso kinda merging with the rest of the taur body just after the tummy, basically just before the crotch starts.

As for the back, you're gonna want to shoot for just shy of where the butt starts, waist having curved back outwards. It gets a little awkward if you go higher or lower than that. And obviously, you wanna make sure the torso is firmly planted in the center of where the neck should be, ehehe.
That's pretty much the basics though! As always, i recommend looking at how your favorite taur artists draw the creatures and studying off of that! Familiarize yourself with quadrupedal anatomy, and use reference!! You will absolutely get it down with time. I will absolutely cover fat taurs if there's interest in it, and ofc, lemme know if there's anything I missed or need to go over! I hope this helps!
#hat answers#my art#my ocs#Riley Foxglove#design talk#tutorials#taurposting#i imagine this one'll find a much more niche audience but i really do hope its helpful!#these are the two things that definitely gave me grief when i was first figuring out how to Taur#but im sure theres plenty more i missed!#never be afraid to ask about stuff!!!!!!
218 notes
·
View notes
Text
Karow ist ja son richtiger Loser. Da hilft ja nicht einmal, dass Mark Waschke überdurchschnittlich hübsch ist. Er hat einfach so eine Loser-Aura
#spätestens wenn er den mund aufmacht ist dann auch klar dem mann ist nicht zu helfen#hat aber überraschenderweise immer noch rizz wenn er will. zeigt auch#das ist alles performativ#sein wahres ich ist ein loser aber er kann in rollen schlüpfen die das nicht sind#liebster soziopath#das ist das tolle an fiktion ich kann ihn als charakter lieben obwohl er mich richtig unwohl fühle wenn er mal wieder eine episode hat#wo er creepy unterwegs ist#mark waschke bring uns mal ein tutorial wie man sowas so lebensecht darstellt#wtf lass mal ein bisschen talent für den rest über#tatort berlin#tatort#robert karow#kommt aus meinen entwürfen. hatte offenbar vor ein paar wochen SEHR viel zu karow zu sagen
28 notes
·
View notes