#iStat Menus Network
Explore tagged Tumblr posts
Visit Tumblr Blog
Explore Tumblr blogs with no restrictions, modern design and the best experience.
Last Seen Tumblr Blogs


Fun Fact
There were a total of 171.5 billion posts on Tumblr in 2019.
Text
Commands For Terminal On Mac Os

The Terminal app allows you to control your Mac using a command prompt. Why would you want to do that? Well, perhaps because you’re used to working on a command line in a Unix-based system and prefer to work that way. Terminal is a Mac command line interface. There are several advantages to using Terminal to accomplish some tasks — it’s usually quicker, for example. In order to use it, however, you’ll need to get to grips with its basic commands and functions. Once you’ve done that, you can dig deeper and learn more commands and use your Mac’s command prompt for more complex, as well as some fun, tasks.
Mac Terminal Commands Pdf
Just open the Terminal and type in the following command: say 'Hello, from MacLife' This will cause the default selected voice in OS X to spring to life and say the words that are wrapped in quotes. You can view a full list of potential Mac terminal network commands using the networksetup tool by typing networksetup -help at the terminal. This will display the help list, with various examples on how to use the tool to view and change different network settings. Terminal (officially called Terminal.app) is, strictly speaking, an emulator and works off most typical UNIX commands (OS X is a UNIX-based system, as opposed to Windows, which is NT-based). Unlike OS X, which has a graphical user interface (shortened to GUI), Terminal works off a text-based interface and all commands have to be typed in - this.
Curated Mac apps that keep your Mac’s performance under control. Avoid Terminal commands, avoid trouble.
Download Free
How to open Terminal on Mac
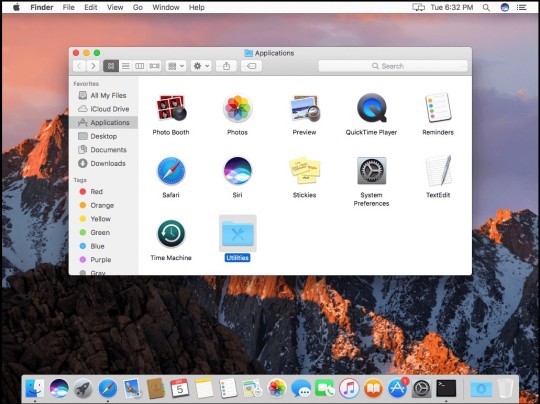
The Terminal app is in the Utilities folder in Applications. To open it, either open your Applications folder, then open Utilities and double-click on Terminal, or press Command - spacebar to launch Spotlight and type 'Terminal,' then double-click the search result.
You’ll see a small window with a white background open on your desktop. In the title bar are your username, the word 'bash' and the dimensions of the window in pixels. Bash stands for 'Bourne again shell'. There are a number of different shells that can run Unix commands, and on the Mac Bash is the one used by Terminal.
If you want to make the window bigger, click on the bottom right corner and drag it outwards. If you don’t like the black text on a white background, go to the Shell menu, choose New Window and select from the options in the list.
If Terminal feels complicated or you have issues with the set-up, let us tell you right away that there are alternatives. MacPilot allows to get access to over 1,200 macOS features without memorizing any commands. Basically, a third-party Terminal for Mac that acts like Finder.
For Mac monitoring features, try iStat Menus. The app collects data like CPU load, disk activity, network usage, and more — all of which accessible from your menu bar.
Basic Mac commands in Terminal
The quickest way to get to know Terminal and understand how it works is to start using it. But before we do that, it’s worth spending a little time getting to know how commands work. To run a command, you just type it at the cursor and hit Return to execute.
Every command is made up of three elements: the command itself, an argument which tells the command what resource it should operate on, and an option that modifies the output. So, for example, to move a file from one folder to another on your Mac, you’d use the move command 'mv' and then type the location of the file you want to move, including the file name and the location where you want to move it to.
Let’s try it.
Type cd ~/Documentsthen and press Return to navigate to your Home folder.
Type lsthen Return (you type Return after every command).
You should now see a list of all the files in your Documents folder — ls is the command for listing files.
To see a list of all the commands available in Terminal, hold down the Escape key and then press y when you see a question asking if you want to see all the possibilities. To see more commands, press Return.
Unix has its own built-in manual. So, to learn more about a command type man (name of command), where 'command' is the name of the command you want find out more about.
Terminal rules
There are a few things you need to bear in mind when you’re typing commands in Terminal, or any other command-line tool. Firstly, every character matters, including spaces. So when you’re copying a command you see here, make sure you include the spaces and that characters are in the correct case.
You can’t use a mouse or trackpad in Terminal, but you can navigate using the arrow keys. If you want to re-run a command, tap the up arrow key until you reach it, then press Return. To interrupt a command that’s already running, type Control-C.
Commands are always executed in the current location. So, if you don’t specify a location in the command, it will run wherever you last moved to or where the last command was run. Use the cdcommand, followed by a directory path, like in Step 1 above, to specify the folder where you want a command to run.
There is another way to specify a location: go to the Finder, navigate to the file or folder you want and drag it onto the Terminal window, with the cursor at the point where you would have typed the path.
Here’s another example. This time, we’ll create a new folder inside your Documents directory and call it 'TerminalTest.'
Open a Finder window and navigate to your Documents folder.
Type cd and drag the Documents folder onto the Terminal window.
Now, type mkdir 'TerminalTest'
Go back to the Finder, open Text Edit and create a new file called 'TerminalTestFile.rtf'. Now save it to the TerminalTest folder in your Documents folder.
In the Terminal window, type cd ~/Documents/TerminalTest then Return. Now type lsand you should see 'TerminalTestFile' listed.
To change the name of the file, type this, pressing Return after every step:
cd~/Documents/Terminal Test
mv TerminalTestFile TerminalTestFile2.rtf
That will change the name of the file to 'TerminalTestFile2'. You can, of course, use any name you like. The mv command means 'move' and you can also use it to move files from one directory to another. In that case, you’d keep the file names the same, but specify another directory before typing the the second instance of the name, like this:
mv ~/Documents/TerminalTest TerminalTestFile.rtf ~/Documents/TerminalTest2 TerminalTestFile.rtf
More advanced Terminal commands
Terminal can be used for all sorts of different tasks. Some of them can be performed in the Finder, but are quicker in Terminal. Others access deep-rooted parts of macOS that aren’t accessible from the Finder without specialist applications. Here are a few examples.
Copy files from one folder to another
In a Terminal window, type ditto (folder 1) (folder 1) where 'folder 1' is the folder that hosts the files and 'folder 2' is the folder you want to move them to.
To see the files being copied in the Terminal window, type -v after the command.
Download files from the internet
You’ll need the URL of the file you want to download in order to use Terminal for this.
cd ~/Downloads/
curl -O (URL of file you want to download)
If you want to download the file to a directory other than your Downloads folder, replace ~/Downloads/ with the path to that folder, or drag it onto the Terminal window after you type the cd command.
Change the default location for screenshots
If you don’t want macOS to save screenshots to your Desktop when you press Command-Shift-3, you can change the default location in Terminal
defaults write com.apple.screencapture location (path to folder where you want screenshots to be saved)
Hit Return
killall SystemUIServer
Hit Return
Change the default file type for screenshots
By default, macOS saves screenshots as .png files. To change that to .jpg, do this:
defaults write com.apple.screencapture type JPG
Press Return
killall SystemUIServer
Press Return
Delete all files in a folder
The command used to delete, or remove, files in Terminal is rm. So, for example, if you wanted to remove a file in your Documents folder named 'oldfile.rtf' you’d use cd ~/Documents to go to your Documents folder then to delete the file. As it stands, that will delete the file without further intervention from you. If you want to confirm the file to be deleted, use -i as in rm -i oldfile.rtf
To delete all the files and sub-folders in a directory named 'oldfolder', the command is rm -R oldfolder and to confirm each file should be deleted, rm -iR oldfolder
Just because you can use Terminal to delete files on your Mac, doesn’t mean you should. It’s a relatively blunt instrument, deleting only those files and folders you specify.
Another way to free up space
If your goal in removing files or folders is to free up space on your Mac, or to remove junk files that are causing your Mac to run slowly, it’s far better to use an app designed for the purpose. CleanMyMac X is one such app.
It will scan your Mac for files and recommend which ones you can delete safely, as well as telling you how much space you’ll save. And once you’ve decided which files to delete, you can get rid of them in a click. You can download CleanMyMac here.
As you can see, while Terminal may look scary and seem like it’s difficult to use, it really isn’t. The key is learning a few commands, such as those we’ve outlined above, and getting to know the syntax for those commands.
However, you should be careful when using Terminal, it’s a powerful tool that has deep access to your Mac’s system files. Check commands by googling them if you’re not sure what they do. And if you need to delete files to save space, use an app like CleanMyMac X to do it. It’s much safer!
Mac Terminal Commands Pdf
These might also interest you:
1 note
·
View note
Text
Istat menus 5.20

#Istat menus 5.20 cracked
Latest Winrar and extract password protected files without error. /rebates/&252fistat-menus-520-673. TO WIN USERS: If RAR password doesn't work, use this archive program: RAR Expander 0.8.5 Beta 4 and extract password protected files without error. TO MAC USERS: If RAR password doesn't work, use this archive program: Opening the menu shows a list of the apps using the most memory, and other useful info.Ī realtime graph to keep on top of what’s being sent and received for all network connections, including a bandwidth breakdown for the top 5 apps. Included are 8 menu extras that let you monitor. Memory stats for your menubar as a pie chart, graph, percentage, bar or any combination of those things. iStat Menus lets you monitor your system right from the menubar. Plus, GPU memory and processor usage on supported Macs, and the active GPU can be shown in the menubar. CPU usage can be tracked by individual cores or with all cores combined, to save menubar space. Realtime CPU graphs and a list of the top 5 CPU resource hogs. Our menubar and dropdown menus are now localised for Arabic, Catalan, Chinese (Simplified), Chinese (Traditional), Croatian, Czech, Danish, Dutch, Finnish, French, German, Greek, Hebrew, Hungarian, Italian, Japanese, Korean, Norwegian, Polish, Portuguese, Portuguese (Portugal), Romanian, Russian, Slovak, Spanish, Swedish, Thai, Turkish, and Ukrainian.
#Istat menus 5.20 cracked
Daylight is now indicated in the clock face (it even fades near sunrise and sunset). Download Nitro Pro 10 Serial Key Essential Anatomy Crack Download Jab Tak Hai Jaan Movie Download In Mkv 300mbl Procoder 3 0 Full Cracked IStat Menus 5.20. Improved GPU monitoring, including active GPU in menubar.Ī vastly improved time menu, with current time, sunrise, noon, sunset, dawn, dusk, sun azimuth, sun altitude, light map and more for over 120,000 cities. Wi-Fi stats, including channel, signal to noise ratio and many more. Upload and download activity is also shown per-app, making it far easier to track down the biggest bandwidth hogs.įar more detailed network information, including router address, subnet mask, DNS and MAC address. IStat Menus 5 features read and write disk activity on a per-app basis. /rebates/&252fistat-menus-520-687.
0 notes
Text
Download mongodb terminal mac

#DOWNLOAD MONGODB TERMINAL MAC FOR MAC#
Type cd ~/Documentsthen and press Return to navigate to your Home folder. So, for example, to move a file from one folder to another on your Mac, you’d use the "move" command mv and then type the location of the file you want to move, including the file name and the location where you want to move it to. To run a command, you just type it at the cursor and hit Return to execute.Įvery command comprises three elements: the command itself, an argument that tells the command what resource it should operate on, and an option that modifies the output. But before we do that, it’s worth spending a little time getting to know how commands work. The quickest way to get to know Terminal and understand how it works is to start using it. The app collects data like CPU load, disk activity, network usage, and more - all of which are accessible from your menu bar.
#DOWNLOAD MONGODB TERMINAL MAC FOR MAC#
Basically, a third-party Terminal for Mac that acts like Finder.įor Mac monitoring features, try iStat Menus. MacPilot allows getting access to over 1,200 macOS features without memorizing any commands. If Terminal feels complicated or you have issues with the setup, let us tell you right away that there are alternatives. If you don’t like the black text on a white background, go to the Shell menu, choose New Window and select from the options in the list. If you want to make the window bigger, click on the bottom right corner and drag it outwards. Bash stands for "Bourne again shell." There are a number of different shells that can run Unix commands, and on the Mac, Bash is the one used by Terminal. In the title bar are your username, the word "bash," and the window's dimensions in pixels. You’ll see a small window with a white background open on your desktop. To open it, either open your Applications folder, then open Utilities and double-click on Terminal, or press Command-space to launch Spotlight and type "Terminal," then double-click the search result. The Terminal app is in the Utilities folder in Applications. Curated Mac apps that keep your Mac’s performance under control.
0 notes
Text
Istat menus 5.20

Istat menus 5.20 serial key#
・Ability to search for states when adding world clocks Istat Menus Mac Free Istat Menus 5 20 (685) freeload Trial IStat Menus Crack brand new design and new menu bar icon for its sport, new drop-down menus, and apps and icons themselves have been redesigned to be completely clean, more at home in Yosemite and El Captain.
Istat menus 5.20 serial key#
IStat Menus 6 Crack Full Version Torrent (MacOS) Istats Menu Free The National Bureau of Statistics Menu 6.00 Serial Key completely freeloads the latest version of Mac OS X. Mac users interested in Istat menu os x 10.6.8 generally download: iStat Menus 6.41 iStat Menus is a Mac utility that displays various system performance details in your Menu Bar. CPU usage can be tracked by individual cores or with all cores combined, to save menubar space. IStat Menus provides real time CPU graphs and a list of the top 5 CPU resource hogs. IStat Menus covers a huge range of stats, including a CPU monitor, GPU, memory, network usage, disk usage, disk activity, date & time, battery and more. The most powerful system monitoring app for macOS, right in your menubar. Download iStat Menus for macOS 10.11 or later and enjoy it on your Mac. Sixtyfour 1 7 4 – boost your old macs performance. World clock display lets you see the time in multiple locations around the world. ・Date & Time - Date and time in your menubar. ・Bluetooth - Control bluetooth status plus monitor the battery level of your Apple wireless keyboard or mouse. 2 display modes, ability to hide sensors you don’t want to see. ・Fans - Monitor the fan speeds in your Mac. ・Temps - Monitor the temperature of your Mac. ・Network - Monitor current and total bandwidth, peak bandwidth, IP addresses, and the ability to hide network connections you don’t want to see. 6 display modes, ability to hide disks you dont want to see. ・Disks - Monitor disk usage and activity. 4 display modes, page ins/outs and swap usage display. Included are 8 menu extras that let you monitor every aspect of your system. IStat Menus lets you monitor your system right from the menubar.
0 notes
Text
How check disk space mac

#How check disk space mac how to
#How check disk space mac free
#How check disk space mac mac
#How check disk space mac mac
It helps your Mac treat cloud storage as a local disk, making access and managing files really simple.īest of all, CloudMounter uses 256-bit encryption, so your documents are always safe. It lives in your menu bar for easy access, and shows all your cloud storage options in Finder. If you have something else, CloudMounter is the easiest and best way to manage all your cloud storage containers. Apple’s iCloud is woven into your AppleID, and using it is a very straightforward approach it’s automatically added to the storage options for your Mac!īut iCloud is not the only solution for cloud storage on Mac. From the System Information menu, simply select the file or app you want to get rid of, and select the ‘delete’ button on the bottom right of the window.īut these two methods often don’t solve the issue! One clever way to better manage the storage on your Mac is to use cloud storage options like iCloud, Dropbox, Google Drive, and OneDrive. Right-click on that file or app, select ‘delete,’ and it’ll be removed. In Finder, select the category from the left side pane, then the application or file you want to delete. There are also easy ways to manage the files or applications taking up room on your Mac. Under General, look for Available and Used storage.Open Finder and find your disk in the left sidebar.
#How check disk space mac free
You can also use Finder to check how much free space is left on your drive: Keep in mind Disk Utility is meant for power users who want to manage their storage, and is a bit of overkill for most users. Open Disk Utility, and it will launch into a view of the volume(s) on your Mac, which also shows how much space is used, and how much is free. Check your Mac storage via Disk Utilityĭisk Utility is another resource.
#How check disk space mac how to
This is the easiest method for how to see storage on Mac – but you can go deeper! If you need a closer look at your Mac’s memory use, there are a few ways to go about it.įrom the Storage screen, you can select ‘Manage,’ which takes you to a new window.Īpplications, Documents, Photos, and other sections can be found on the left of this window, and a detailed view of those files on the right. If you don’t have access to iStat Menus, you can go with a bit more laborious method and check storage manually. Instead of clicking the icon, you can choose to have things like CPU or memory usage as icons so the information is always available in real-time. iStat Menus even allows you to keep the data surfaced directly on your menu bar. For information on disk space, go to SSD > Disks, and so on. If you want to see how much memory on Mac you have left, click MEM. Instead of dipping and diving through Apple’s hierarchal menus, you can just click on iStat Menus to get the same information in a much better interface. It gives a graphical overview of CPU and GPU use in real-time, network connections, and memory use. IStat Menus is an app that can keep tabs on your Mac’s health and performance, completely automatically. Let’s start with the easiest solution - a handy storage tracker in your menu bar.
0 notes
Text
Linein mac

Linein mac for mac#
Others access deep-rooted parts of macOS that aren’t accessible from the Finder without specialist applications. Some of them can be performed in the Finder but are quicker in Terminal. Terminal can be used for all sorts of different tasks. Mv ~/Documents/TerminalTest TerminalTestFile.rtf ~/Documents/TerminalTest2 TerminalTestFile.rtf In that case, you’d keep the file names the same, but specify another directory before typing the second instance of the name, like this: The mv command means "move," and you can also use it to move files from one directory to another. You can, of course, use any name you like. That will change the name of the file to "TerminalTestFile2". Mv TerminalTestFile TerminalTestFile2.rtf To change the name of the file, type this, pressing Return after every step: Now type lsand you should see "TerminalTestFile" listed. In the Terminal window, type cd ~/Documents/TerminalTest then Return. Go back to the Finder, open Text Edit and create a new file called "TerminalTestFile.rtf." Now save it to the TerminalTest folder in your Documents folder. Type cd and drag the Documents folder onto the Terminal window. Open a Finder window and navigate to your Documents folder. This time, we’ll create a new folder inside your Documents directory and call it "TerminalTest." There is another way to specify a location: go to the Finder, navigate to the file or folder you want and drag it onto the Terminal window, with the cursor at the point where you typed the path. Use the cdcommand, followed by a directory path, like in Step 1 above, to specify the folder where you want a command to run. So, if you don’t specify a location in the command, it will run wherever you last moved to or where the last command was run. To interrupt a command that’s already running, type Control-C.Ĭommands are always executed in the current location. If you want to re-run a command, tap the up arrow key until you reach it, then press Return. You can’t use a mouse or trackpad in Terminal, but you can navigate using the arrow keys. So when you’re copying a command you see here, make sure you include the spaces and that characters are in the correct case. Firstly, every character matters, including spaces. There are a few things you need to bear in mind when you’re typing commands in Terminal or any other command-line tool. So, to learn more about a command type man, where "command" is the name of the command you want to find out more about. To see a list of all the commands available in Terminal, hold down the Escape key and then press ywhen you see a question asking if you want to see all the possibilities. You should now see a list of all the files in your Documents folder - ls is the command for listing files. Type lsthen Return (you type Return after every command). Type cd ~/Documentsthen and press Return to navigate to your Home folder. So, for example, to move a file from one folder to another on your Mac, you’d use the "move" command mv and then type the location of the file you want to move, including the file name and the location where you want to move it to. To run a command, you just type it at the cursor and hit Return to execute.Įvery command comprises three elements: the command itself, an argument that tells the command what resource it should operate on, and an option that modifies the output. But before we do that, it’s worth spending a little time getting to know how commands work. The quickest way to get to know Terminal and understand how it works is to start using it. The app collects data like CPU load, disk activity, network usage, and more - all of which are accessible from your menu bar.
Linein mac for mac#
Basically, a third-party Terminal for Mac that acts like Finder.įor Mac monitoring features, try iStat Menus. MacPilot allows getting access to over 1,200 macOS features without memorizing any commands. If Terminal feels complicated or you have issues with the setup, let us tell you right away that there are alternatives. If you don’t like the black text on a white background, go to the Shell menu, choose New Window and select from the options in the list. If you want to make the window bigger, click on the bottom right corner and drag it outwards. Bash stands for "Bourne again shell." There are a number of different shells that can run Unix commands, and on the Mac, Bash is the one used by Terminal. In the title bar are your username, the word "bash," and the window's dimensions in pixels. You’ll see a small window with a white background open on your desktop. To open it, either open your Applications folder, then open Utilities and double-click on Terminal, or press Command-space to launch Spotlight and type "Terminal," then double-click the search result. The Terminal app is in the Utilities folder in Applications. Curated Mac apps that keep your Mac’s performance under control.
0 notes
Text
Istat pro mac widget

#ISTAT PRO MAC WIDGET FULL#
#ISTAT PRO MAC WIDGET FREE#
#ISTAT PRO MAC WIDGET MAC#
Cardhop will display any matching cards it finds.Īdding or editing contacts is just as easy just enter the name and details and Cardhop takes care of the rest. Search by name, address, birth date, or any criteria it’s as easy as clicking or tapping the Cardhop menu bar item and starting to type. Cardhop can show upcoming events and recent contacts, as well as all of the cards in the Mac’s Contacts app.Ĭardhop makes use of a powerful search capability that allows you to find contact information based on just about any detail that may be present in a contacts card.
#ISTAT PRO MAC WIDGET MAC#
For many Mac and iOS device users, Cardhop is the only method they use to manage their contacts that’s how powerful this menu bar app is. CardhopĬardhop is the preferred way to access, edit, add to, and just work with the Mac’s Contacts app. There are a number of contact managers for the Mac but most are full-fledged apps, with only minimal, if any, menu bar support. If you need additional information, you can open the Calendar app directly from Itsycal. Itsycal can display a monthly view of your Calendar app’s information, including showing events that are scheduled. If the Mac’s Calendar app is performing well for you, and the feature you’re really missing is access to Calendar from the menu bar, Itsycal is the menu bar app for you.
#ISTAT PRO MAC WIDGET FREE#
Fantastical 2 is $49.99, with a 21-day free trial.
This lets you set up calendars for work as well as home, and automatically switch between them. Fantastical provides easy access to your current calendar and upcoming events.įantastical supports multiple calendars, and calendar sets, which can automatically switch their active/inactive states depending on your location.
#ISTAT PRO MAC WIDGET FULL#
Thankfully, the folks who make Fantastical didn’t abandon the menu bar version 2 has all the original benefits of a lightweight menu bar app, as well as the power of a full app when you need it. FantasticalĬurrently at version 2, Fantastical started life as strictly a menu bar app but has grown into a full-fledged Mac app. That’s where menu bar-based calendar apps shine, letting you work with your calendars directly from the menu bar. But to add, edit, and view the calendars, the app needs to be running. Yes, your Mac comes with its own Calendar app, which does a pretty good job of keeping track of dates and notifying you of upcoming events. Let’s start our list of favorite menu bar apps with ones that enhance your productivity. Instead, I’ve gathered a list of menu bar apps that I’ve either used or are popular in the Mac community, and are worth trying out. Our list of 15 menu bar apps is by no means all-inclusive there are so many apps available that it would take quite a while to combine them into a single list. The basic menu bar with Apple-supplied menu items shown. They can bring additional productivity, utility, or security, or add useful information to your Mac’s menu bar. Improved and new localisations ( 36 languages in total).Menu Bar apps sit in your Mac’s menu bar and provide access to an array of features and services, all with just a simple click or tap of the app’s menu bar icon. Reorderable dropdown menus, with the ability to hide sections. Additional options, like dual line menu bar clocks, and condensed text for showing more in less space. Hotkeys to open and close menu dropdowns, for quick keyboard access. More colors and theme options, including light and dark vibrant menu dropdown backgrounds. Notifications, based on CPU, network, disk, battery, weather and other events. Refined menu bar items, dropdowns and other aspects match the new design of macOS 11 Big Sur. Weather with current temperature, hourly forecast, weekly overview and so much more.
0 notes
Text
Italian food has emerged from the crisis: export 11%, a record year.

Italian food has emerged from the crisis: and gathered this momentum through the deficit exports + 11%, a record year. Verona Economia.
The national agri-food sector has officially recovered after the decline caused by the health crisis. We expect an outcome of fifty-two billion euro by the end of the year; a historical value obtained thanks to exports and green policies carried out in the country - merit praise -.
The Italian agri-food industry has emerged from the crisis generated by the Covid pandemic stronger than before with the historical record in exports that record a jump of 11% for a value that will reach 52 billion at the end of the year maximum ever if the trend is maintained.
The rising index emerges from Coldiretti's analysis on the basis of new Istat data relating to foreign trade detected in the first ten months of 2021 on the occasion of its National Assembly.
A result also obtained of the arrival of Christmas Holidays despite the difficulties of commercial exchanges and the lockdown in all the catering continents that have heavily affected Italian cuisine. Furthermore, the Covid health emergency has caused a healthy change in consumers globally who have favored the choice in the shopping cart of products that are allies of well-being, such as those of the Mediterranean diet.
At the top of the ranking of agri-food exports, wine is about to break through the wall of 7 billion euros in value this year, according to Coldiretti's projections on Istat data.
The United States is among the main consumes of the Italian flag at the table, ranking in second place with an increase of 15% in January-October 2021.
The trend was also positive in Germany, which ranks first among the importing countries of Italian food with an increase of 6%.
France with + 7% is stable in third place while Great Britain ranks in a fourth-place where sales fell by 1% due to the difficulties linked to Brexit, between customs procedures and the increase in transport costs due to delays and stricter controls. Finally, we note the 14% growth in the Russian one and 39% in the Chinese one among the other markets.
Agriculture is at the base of Made in Italy's success, becoming the greenest in Europe. It holds the EU leadership in the organic sector with 80 thousand operators, the most significant number of recognized DOP / IGP / STG** specialties (316), 526 wines DOP / IGP, 5,333 traditional food products and with Campagna Amica the most expansive network of direct sales markets of farmers.
Effects and Causes
The Belpaese is the first EU producer of rice, durum wheat, wine, and many fruit and vegetables of each region typical of the Mediterranean diet.
Production excels from tomatoes, aubergines, artichokes, fresh chicory, endives, celery, and fennel. And a varied menu of fresh, local fruit changes with the seasons: from fresh apples and pears, from cherries to table grapes, from kiwis to hazelnuts to chestnuts.
**(TSG: traditional specialties guaranteed)
______________________________
Source: Verona Economia - initially published in ⏩ Il food Italiano è uscito dalla crisis: export +11%, anno record | 21st December 2021.

Verona Economia in Region of Veneto, which is currently developing and enhancing > Share it with others explores.
The Board Behind
#Verona Economia#italian food#sustainable agriculture#agriculture#the board behind#Campagna Amica#DOP#IGP#STG#export#agri products#made in italy#Veneto
0 notes
Text
How To Speed Up Mac App Store Downloads

Is the Mac App Store running at a snail’s pace on your Mac? Apparently this issue is pretty common for many Mac users, particularly those on OS X Lion. Thankfully, there’s a very easy and straight-forward tweak you can try in order to speed up the Mac Store App and reduce the amount of lagging and load time you may be experiencing. Mar 21, 2021 Troubleshooting slow app downloads. Make sure Apple’s services are all online. The problem isn’t always on your end. Reboot the device. Try downloading a different app. Sign out and back in again. Test your download speeds. Reboot your wireless router. Try the download on your cellular network.
photoshop scratch disk fullA slow Mac is never fun. Whatever the reason your computer is running slow, dealing with a Mac that doesn’t react quickly to your inputs is frustrating.
All Macs slow down with age. No matter how much you spend on them or which model you choose, they start to slow down and may overheat. A slow Mac can cause anxiety-bringing productivity issues, especially if you’ve got a deadline to meet.
Thankfully, there are a few things you can do. You don’t need to rush out and buy a new Mac straight away. Macs slow down for multiple reasons, from heavy startup menus to applications running in the background, to disk drives filled with files, apps, images, and documents you don’t really need anymore. Aging hardware can also slow Macs down.
Why is your Mac running slow?
There are a variety of reasons your Mac may be slow. The most obvious reason can be hardware — if your Mac is older, its CPU, RAM, and other hardware components may simply be too old to run modern applications and websites.
Another common issue is your Mac needs some tidying up. Apps can leave behind files long after you’ve deleted them, and even built-in tools like Spotlight search do better with a bit of reindexing now and then.
Here, we’ll tell you how to speed up Mac performance on any Mac, covering the main issues users see.
Find and close resource-hungry applications
Some apps take up more processing power than others. We expect more and more from our apps, but when Macs get older they have to work much harder. So you end up with a Mac taking on more tasks with less memory and processing power.
To avoid working on a Mac that feels as though it’s running uphill with a heavy backpack, you need to find and close or remove resource-hungry applications, especially if they’re running in the background and aren’t needed. One way to do so is with Activity Monitor, available in Applications.
Look out for CPU usage: pay attention to apps that are using a lot of processing power (normally shown as a percentage), then consider closing or uninstalling the ones you don’t need.
A quicker and better way to solve this problem is with iStat Menus, a handy monitoring app that will quickly identify what is absorbing so much CPU power. Besides regular CPU percentage, iStat Menus will also show you GPU, memory, network data, and disk usage.
To automate your Mac’s CPU problem completely, however, use App Tamer.
App Tamer is a smart CPU manager that can slow down power-hungry apps based on the restrictions you specify. For example, you can slow down your browser if it uses more than 10% of your CPU.
With App Tamer always in your menu bar, you can get the overall CPU load at a glance and then click to see the breakdown for all the apps as well as your CPU chart over time.
Malware and viruses
Your Mac does a good job of blocking most malware and viruses that are known, but new threats pop up daily. A Mac running slow may have a few viruses that are causing issues.
One of the best tools for scanning your Mac for malware or viruses is CleanMyMac X. It has a ton of tools in its arsenal, but its malware scanning tool is really special.
Here’s how to use CleanMyMac X:
Open CleanMyMac X on your Mac
Select Malware Removal from the side menu
Click Scan at the bottom of the window
Update your Mac’s software
Apple releases a new operating system every year. The most recent release is macOS 11.3.1 Big Sur. Providing you’ve backed up your files and are aware of any immediate issues (some Mac users prefer to wait until updates and patches have been published), it might be time to update.
Before upgrading, check compatibility. Apple says that the newest OS is available for Macs introduced in 2013 or later. Note that Apple gave up support for 2010 and 2012 Mac Pro models with recommended Metal-capable graphics cards with Catalina.
Hardware requirements have changed a bit, compared to the older versions:
Required memory: 4GB or more (macOS tends to run best with more memory)
Required disk storage: 35.5GB of free space to run an upgrade
Another awesome method for ensuring your Mac performs at its best is updating the apps on your computer. You can do this one of three ways:
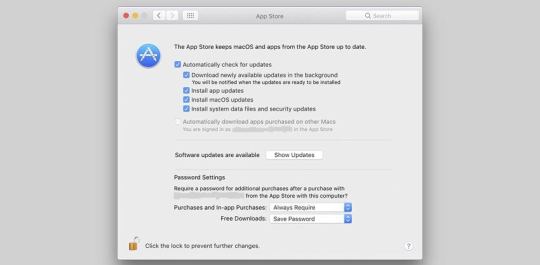
Mac App Store. On your Mac, head to the menu bar. Select the Apple logo on the top left. Select App Store. From the left-side menu, select Updates, and update all apps in the queue.
CleanMyMac X. In addition to Malware scans, CleanMyMac X can manage all of your app updates. On the left side of the CleanMyMac X window, select Updater and select all the apps you’d like to update, then select Update on the bottom of the window.
The app itself. From the menu bar, select the app name. There may be a direct method for updating the app in the dropdown menu, or it could be under Preferences.
Simplify your startup menu
Startup menus can take up more processing power than we imagine, since they stay running in the background, quietly slowing down programs you are actually using.
CleanMyMac X easily identifies and lets you manage all the items that start at login. Try to keep the list to a minimum, removing the ones you don’t need and considering that every app requires additional resources.
You can also do this directly on your Mac. Here’s how:
From the menu bar, select the Apple logo
Select System Preferences
Pick Users and Groups
Go to Login Items
Choose the items you no longer want to become active at login
Close unnecessary apps
Your Mac may be suffering from apps running in the background which simply don’t need to. Any open and running app takes up resources, and if you’ve got a lot of them running — well, there’s simply less resources for you to do what you want!
One easy way to manage apps running on your computer is to force quit the ones you’re not using. From the menu bar, select the Apple logo on the top left, and choose Force Quit. Select an app you want to close down and then Force Quit on the bottom right of the window.
Merge multiple open windows
Finder and Preview on your Mac can get overrun with multiple open windows. Each open window is its own process; it’s like having the same app open multiple times. Modern macOS builds operate in a tabbed view for these apps, but you can still end up with multiple windows open.

To merge all of your open windows, select the Window menu from the menu bar, and choose Merge All Windows. This will bring all open windows into one window, and the other instances of the app will become tabbed views! This is how to make Mac faster in a way you probably hadn’t considered before.
Another way for you to drastically reduce the strain on your CPU is to use Mission Control Plus.
Mission Control Plus natively integrates with Mission Control on your Mac (four-finger swipe up to activate) but adds a few essential actions, such as the ability to close windows, as well as hide and quit apps. Now you can quickly get rid of all the windows you don’t use.
Switch off visual effects
Visual effects look pretty, but they won’t help you get your work done if your Mac is running slowly. Under Systems Preferences, there is a short list of boxes you can untick: animate opening applications, automatically hide and show the Dock. Also, switch minimize effect from Genie to Scale. It may not make a huge difference, but every speed enhancement helps.
Manage device syncing
Everyone knows photos take up a lot of storage. When iCloud syncing is automatically setup (by default it is), deleting photos on one device would delete them on another, which can be inconvenient if you only want to remove photos from your Mac. To fix this, switch off iCloud syncing.
Declutter a messy desktop
Desktop can seem like such a convenient place to store files you are working on. Great for things you need to remember and access quickly. With numerous other apps in the Dock, it soon becomes a go-to place for everything you need.
Unfortunately, when you’ve got too much going on, it can slow your Mac down. Even a few weeks of allowing documents, files, downloads, and app shortcuts to pile up can leave anyone wondering where they last saw something they needed. It can seriously get in the way of productivity when you have to search all over your desktop or deeper in your Mac only to find a single file.
Use Spotless to clean everything up in seconds.
Clean up Mac’s hard drive
Your hard drive may be full of old files you no longer need. Like multiple instances of Finder or Preview, a full hard drive is using up valuable resources your Mac needs. Learn more about how to clone a hard drive on a Mac.
Instead, comb through your files and delete any you don’t need. Those you’re not using often should be stored on external drives; you can still access them any time, they just don’t occupy the memory your Mac needs to run apps.
Here are some quick tips to free up more disk space.
Clear cache files
CleanMyMac X also allows you to clear cache files quickly and easily. Essentially everything you touch within your computer leaves cache files: system, browsers, apps, user preferences, etc. Over time, the accumulation of those files slows your Mac down. They are very difficult to identify manually and delete, so using CleanMyMac here is by far the easiest choice.
Optimize storage
Another way to ensure your Mac operates at peak efficiency is by deleting files you don’t need and putting as much as you can into iCloud. Optimized storage — clearing out old, unused and idle items — comes part of the package with Sierra, but at the same time, storing files offline on a spare hard drive is equally useful since it avoids automatic syncs with iCloud, thereby potentially slowing your Mac down again. But you’ll see purgeable storage. Learn more about what to do when photoshop scratch disk full.
How To Speed Up Mac App Store Downloads Not Working

Other storage space contains data that the system hasn’t accessed in a long time. If you’re running low on disk space, macOS can safely remove them, and then downloaded from iCloud or generated again when data are required again by you or your Mac.
You can’t manually delete the files that are designated purgeable with the CleanMyMac X app, or macOS removes them as space is needed.
Delete large unused files
There are two ways to delete large, old, unused files. Here’s how to do it from the macOS system menu:
From the menu bar, select the Apple logo
Select About this Mac
Click Storage
Pick Manage
Choose the apps, files, or other large items you’d like to remove and select Delete…
Here’s a better way: use CleanMyMac X to remove useless data:
How To Speed Up Mac App Store Downloads Online
Open CleanMyMac X on your Mac
Choose Large & Old Files from the left-hand menu
Select Scan at the bottom of the window
Choose the files you want to remove, and choose to Remove at the bottom of the window
Reset your SMC & PRAM
Two applications to update before or after you’ve downloaded and installed the latest macOS are your System Management Controller (SMC) and your Parameter RAM (PRAM) device. Both are small cogs in a larger wheel and can be done by resetting your device for 5 to 10 seconds, but it can make a big difference when it comes to speed.
There are times when a Mac will perform poorly for no apparent reason. Systems crash, a battery doesn’t charge or takes longer than normal, Mac goes to sleep or even shuts down unexpectedly. If you’ve tried other fixes and these issues persist, you might need to reset your SMC (system management controller) and PRAM (parameter RAM).
Although most Mac batteries are no longer removable, you need to check first before proceeding down this road.
Speed Up Mac Performance
When a battery is removable, switch the Mac off, remove the battery, press the power button for 5 seconds, then put the battery back in and turn the Mac on.
For newer MacBooks, including Air and Pro, resetting the SMC and PRAM involves shutting the Mac down, then pressing Shift + Control + Option on your keyboard along with the power button for 10 seconds. Then, release all keys and press the power button to switch it on.
Other Macs, particularly the iMac, Mac Mini, Mac Pro, involve a slightly different process to reset the PRAM. Shut the Mac down, press the power button, then the ⌘ + Option + P + R keys until it restarts, and release the keys. Although all of these processes aren’t straightforward, they can work wonders when trying to speed up a slow Mac.
Upgrade Mac hardware
As you can see, there are a lot of things you can do to speed up your Mac. But what happens when you run out of space? There is only so much that can be done, even when you store files in the cloud and tidy up desktops and disk drives.
Once you’ve cleaned up and deleted everything you don’t need, it’s time to take a look at upgrading your standard HDD with an SSD (solid-state drive). We would recommend backing up all your files and consulting a professional before doing this, or having a certified Apple expert do the work to ensure everything transitions smoothly. Besides SSD, increasing the amount of RAM is also an effective way to speed up a slow Mac.
Mac Is Very Slow
Shutdown or restart your Mac more often
We hardly take care of our Macs — closing them for the night, then opening the next day to push them even further and handle ever-increasing workloads. We forget that computers also need a break. Instead of simply closing and letting them sleep, we should shut down or restart more often, thereby reducing the strain on processors, software, apps, and hard drives.
Speedtest and tweak your Mac often
How To Speed Up Mac App Store Downloads For Pc Windows 10
Following advice above will help you get your slow Mac to speed up again. All the apps mentioned in this article, such as iStat Menus, CleanMyMac X, Spotless, App Tamer, Mission Control Plus, and more than 210 others are available with a single subscription to Setapp. Now you can go on and make your Mac life a bit easier and a lot more productive.
Setapp uses cookies to personalize your experience on our website. By continuing to use this site, you agree to our cookie policy.
Is the Mac App Store running at a snail’s pace on your Mac? Apparently this issue is pretty common for many Mac users, particularly those on OS X Lion.
How To Speed Up App Store Downloads Mac
Thankfully, there’s a very easy and straight-forward tweak you can try in order to speed up the Mac Store App and reduce the amount of lagging and load time you may be experiencing. Following are the steps to follow:
Quit the Mac App Store with Command + Option + Q
Open Keychain Access from Applications > Utilities
Go to Keychain Access > Preferences > Certificates
Set “Certificate Revocation List (CRL)” to “Off”
Quit Keychain Access
Relaunch the Mac App Store
Fast Downloader For Mac
After having done the above steps, the Mac App Store should be running in general without lag or unreasonable loading times, although keep in mind that changing Keychain Access preferences is entirely at your own risk. That said, most of the users have stated that with security risks aside, this tweak fixed their key issue regarding Mac App Store.
0 notes
Text
Macbook Pro Software Update Not Working

System cleanup in one click

Which audio driver is used by MacBook Pro 7.1??? I'm running BootCamp (Windows7 Ultimate x64) and I'm having a problem with audio input, so I'm looking for anything taht will make it work. In Device Manager I had 'Cirrus CS4206A (AB13)' and three devices of 'NVIDIA High Definition Audio'.
Make your Mac fast and secure with CleanMyMac X.
The trackpad is a vital component for any desktop. It allows you to interact with the graphical user interface in ways keyboard shortcuts simply don’t allow.
With a trackpad not working Mac and PC devices may feel downright useless. As we’ve become accustomed to interacting with our computers using a trackpad or mouse, a Mac trackpad not clicking or responding to gestures is troubling.
But don’t worry, if your MacBook Pro or MacBook Air keyboard is not working, as you’ve arrived at the right place, get some of the best possible solutions here. Why Is MacBook Keyboard Not Working? Macs are usually smooth-running machines. However, software and hardware related issues can arrive during use. The documentation indicated that the update: 'Fixes a stability issue that could occur during heavy CPU load on 16in MacBook Pro (2019 and 2020) and 13in MacBook Pro (2020)'. Hopefully we won't. The 16-inch MacBook Pro brings a whole new class of performance to the notebook. Thanks to a more advanced thermal design, the Intel Core i9 processor with up to 8 cores and 16 threads of processing power sustains higher performance for longer periods of time — and delivers up to 2.1 times the performance of a quad-core MacBook Pro. Testing conducted by Apple in October 2020 using preproduction 13-inch MacBook Pro systems with Apple M1 chip, as well as production 1.7GHz quad-core Intel Core i7-based 13-inch MacBook Pro systems with Intel Iris Plus Graphics 645, all configured with 16GB RAM and 2TB SSD. Tested with prerelease Shapr3D 3.45.0 using a 288.2MB model.
We’ll discuss how MacBook trackpad problems can be solved, what to do when your trackpad fails, how to fix trackpad on MacBook, and the apps that keep any Mac running smooth so you can avoid issues with your trackpad in the future.
Why isn’t my trackpad working?
If a MacBook Pro trackpad not working is ruining your day, there could be a simple fix. First, let’s explore why your trackpad may be spontaneously unresponsive.
If the MacBook trackpad not working is an issue for you, the easiest fix is to plug in an external trackpad or mouse to your Mac.
The first thing to do is check if your version of macOS needs an update. To do so, click the Apple logo in the Mac’s menu bar, select ‘about this Mac,’ then ‘software update.’ If the Mac you’re using has new firmware available, download it.
The reasons for a MacBook trackpad not clicking are varied. It could be the macOS version it’s running, or an app that’s causing issues behind the scenes. It may even be that your system is overworked, and the trackpad is unable to keep up with your clicks and commands.
Finally, your settings may be to blame, especially if an app changed them without notifying you.
How to fix trackpad on your MacBook
There are six key ways to diagnose and fix an unresponsive trackpad on your Mac. Keep in mind an external mouse or trackpad plugged into a Mac is the simplest way to navigate these issues, as a plugged-in peripheral device has no connectivity issues.
Check system preferences
The aforementioned steps for updating Mac also apply, but you can do the same in system preferences. Here’s how:
Select the Apple logo at the top left corner of the Mac menu bar
Select “System Preferences”
Select “Software Update”
If prompted, download and update your version of macOS or OS X
Disable force click
The trackpad on your MacBook has two main interactivity types: force click, and tap to click. The difference between the two is how firmly you need to press your trackpad to get a response. Tapping allows you to simply tap the trackpad to select items, while force clicking demands you press firmly enough on your trackpad to hear (and feel) a click.
Macbook Pro Software Update Not Working Windows 8.1
If you’re tapping and not clicking, it may be the cause of your issues. Here’s how to toggle the setting:
Select the Apple logo at the top left corner of the Mac menu bar
Select “System Preferences”
Select “Trackpad”
Under the “Point & Click” heading, toggle the “Force Click and haptic feedback” off
In this heading, you can also tweak how forcefully you need to tap or click your trackpad to elicit a response. Simply select the “Click” slider, and change the setting to suit your needs.
Reset trackpad
A MacBook pro trackpad reset is not as daunting as it seems. All you’re really doing is toggling your MacBook’s trackpad back to the factory settings in System Preferences.
Most of us altered the settings of our trackpad to better suit our individual needs, and it may have caused issues in the background that causes a trackpad to become unresponsive. To toggle settings back to their original positions, follow the first three steps above to get into the “Trackpad” section in System Preferences.
Make sure “Tap to click” is unselected. In the “Scroll & Zoom” header, ensure “Scroll direction: Natural” is selected. These two setting should return your trackpad to its default state.
Reset NVRAM or PRAM
A lot of niggling issues can be solved with a simple NVRAM or PRAM reset. It’s a simple fix you can do any time, too. Here’s how:
Shut down the MacBook completely
Wait 30-60 seconds
Open MacBook and press the power button
Once the MacBook screen illuminates, immediately press and hold the option, command, P, and R keys
Hold the keys down for 20 seconds, or until you hear a startup sound
Release the keys and let your MacBook boot up normally
Reset the SMC
The SMC reset protocol depends on which MacBook you have. For those MacBooks introduced in 2017 or earlier, follow these steps:
Power down MacBook completely
With the MacBook off, press and hold the shift, control, and option keys
While holding those keys, press and hold the power button
Hold all four keys for ten seconds, then release
Press the power button to boot the MacBook
For MacBooks 2018 or later (with a T2 security chip) follow these steps:
Shut down your MacBook, and make sure it’s unplugged from any power supply
Wait 15 seconds, and plug the MacBook in
Wait five seconds, then power MacBook on by pressing the power button
Run Apple diagnostics
Your MacBook can run a simple diagnostics check from startup. Here’s how it’s done:
Disconnect the MacBook from all external devices except a power supply (if necessary)
Shut down your Mac completely
Power the Mac back on while holding down the D key
When you see a screen asking your language preference, release the D key and select your preferred language
Allow the diagnostics to complete its check
All of these diagnostic and repair steps may be avoidable, too. If you have CleanMyMac X on your MacBook, a routine checkup performed on a schedule of your choosing can help keep any Mac running in peak condition and your settings appropriately stable.
CleanMyMac X’s Smart Scan feature quickly checks the Mac for unnecessary files, privacy issues, and ensures its optimized for speed. There are also unique modules for speed optimization and privacy checks, which perform a deeper scan of a MacBook. CleanMyMac X is also the best way to update and remove apps from your MacBook, helping you feel confident the apps you love aren’t surreptitiously disabling your trackpad.
Bonus tips for your Mac
Repairing and maintaining a Mac is always important, but so is diagnosing it. iStat Menus helps you know exactly what’s going on with your Mac in real time, and lives in the background to keep you focused.
iStat Menus only appears in the Mac’s menu bar, with rich icons that provide a glimpse into your Mac’s performance. If you’re curious about what a Mac is doing, simply click the iStat Menus icon to bring up a full menu of the Mac’s CPU, memory, disk, network, and sensors.
Hovering over any of those categories brings up a sub menu with even more detail – and hovering over sections in the sub menu will surface a chart detailing Mac’s performance statistics in real time. There’s simply no better way to know what a Mac is doing behind the scenes than iStat Menus.
After you’ve diagnosed your MacBook with iStat Menus and maintained it with CleanMyMac X, your next step is backing your system up. That’s where Get Backup Pro comes into play!
Get Backup Pro allows you full control over what you backup, and when. You have the ability to run routine, scheduled backups of particular folders, or your entire system. It’s great for those who want to keep daily backups of their documents or photos, but only want to backup an entire system on occasion.
Get Backup Pro even provides the ability to create bootable backups of your entire system; it’s the perfect app for creating clean, thin, bootable backups in the event you need to restart from scratch.
A wonky trackpad is never fun to deal with, but it can be avoided. Often, trackpad woes are little more than an overtaxed system that can’t respond in time to your trackpad clicks and gestures. iStat Menus helps you understand if that’s the case.
CleanMyMac X allows you to keep Mac running smooth better than anything else, even Apple’s own built-in tools. And when you’re confident your Mac is in peak condition, creating a backup is always a smart idea.
All three of these wonderful apps are available for free during a seven day trial of Setapp, a robust suite of productivity apps for Mac.
In addition to these three apps, you’ll gain immediate and unlimited access to the entire catalog of nearly 200 other impressive apps for any Mac in Setapp. When your free trial is over, retaining unlimited access to all of those amazing apps is only $9.99 per month, so why wait? Give Setapp a try today!
Setapp lives on Mac and iOS. Please come back from another device.
Meantime, prepare for all the awesome things you can do with Setapp.
Read on
Sign Up
Setapp uses cookies to personalize your experience on our website. By continuing to use this site, you agree to our cookie policy.
Country / RegionModifying this control will reload this page
Apple has determined that a very small percentage of 13-inch MacBook Pro displays may exhibit one or more of the following behaviors:
Display backlight continuously or intermittently shows vertical bright areas along the entire bottom of the screen
Display backlight stops working completely
Affected devices were sold between October 2016 and February 2018. Apple or an Apple Authorized Service Provider will service affected MacBook Pro units, free of charge.
To identify your computer's model and to see if it is eligible for this program, choose Apple () menu > About This Mac. Eligible models are listed below.
MacBook Pro (13-inch, 2016, Four Thunderbolt 3 Ports)
MacBook Pro (13-inch, 2016, Two Thunderbolt 3 Ports)
Note: No other Mac notebook models are part of this program.
Please choose one of the options below for service. Your MacBook Pro will be examined prior to any service to verify that it is eligible for this program.
Find an Apple Authorized Service Provider.
Make an appointment at an Apple Retail Store.
Contact Apple Support to arrange mail-in service via the Apple Repair Center.
To prepare your unit for service, please backup your data.
Note: If your MacBook Pro has any damage which impairs the service, that issue will need to be repaired first. In some cases, there may be a cost associated with the repair.
Macbook Pro Software Update Not Working Windows 10
This worldwide Apple program does not extend the standard warranty coverage of your MacBook Pro.
If you believe your MacBook Pro was affected by this issue, and you paid to have your display repaired, you can contact Apple about a refund.
Why Won't My Mac Do A Software Update
The program covers eligible MacBook Pro models for 5 years after the first retail sale of the unit or 3 years from the start date of this program, whichever is longer.
0 notes
Text
macOS Big Sur
macOS Big Sur #apple #macmini #bigsur #macOS #macos11
macOS 11.0.1 Big Surが11月12日(アメリカ時間) 13日(アジア時間)に正式リリースになり、早速アップグレードしてみました。iOS / iPadOS っぽいインタフェースになって動作も(相変わらず)軽快で使いやすいと思います。
一番心配していたアプリの互換性は、Palo Alto NetworkのVPNクライアントアプリ GlobalProtect は Version 5.1.3 で変な挙動をしていましたが、 Version 5.2.3 へアップグレード後は特に問題なく動いているようです。
その他のアプリについては全て起動できていないものの、最近のリモートワークで大活躍のKrisp, Muzzleなども正常そうですし、Automounter, iStat Menus、一通り大丈夫そうです。

View On WordPress
0 notes
Text
This beautiful app tells you everything you want to know about your Mac
This beautiful app tells you everything you want to know about your Mac
[ad_1]
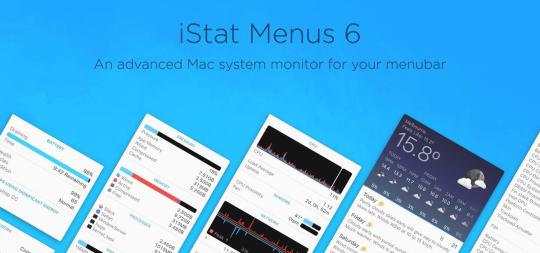
iStat Menus 6
What to know what’s going on with you Mac at a deep level? How much CPU and RAM applications are consuming? How much mush disk space you have available? What’s your network performance like? How much battery life you have left?
iStat menus 6 gives you access to this information, and much more.
In fact, this app makes so much information available at your fingertips that…
View On WordPress
0 notes
Text
MacPaw releases CleanMyMac X
Indie app maker MacPaw updated its Mac cleaning software with a new major version called CleanMyMac X (which is different from MacKeeper). It’s hard to believe, but CleanMyMac currently has 5 million users.
CleanMyMac X helps you remove unneeded files and get an overview of what is slowing down your computer. Most people don’t need this kind of apps. But if you know what you’re doing, it can speed up your maintenance process.
The app is now divided into four maintenance tasks. First, the app lets you scan your hard drive for gigantic cache files and unneeded language files. If you have a small hard drive, you can easily gain multiple GBs by cleaning up those big Spotify or Dropbox caches. The app also looks for iTunes data that you don’t need and mail attachments that you don’t need on your Mac. The company has built a database of rules to make sure that it doesn’t delete any of your personal files.
Second, CleanMyMac X now haw a malware scanning element. It can find adwares, spywares, miners and worms on your hard drive and help you get rid of them. You can also easily delete browser data and remove Wi-Fi networks you don’t trust so that you don’t automatically connect to them.
Third, the app provides a bunch of maintenance scripts to rebuild your Spotlight index, repair disk permissions, flush the DNS cache and more. You can also review apps and Launch Agents that automatically start when you reboot your Mac.
And fourth, CleanMyMac X now offers an update tab that lets you review all your installed apps to update them all. It works with apps that aren’t in the Mac App Store. You can also uninstall apps and their related support files using CleanMyMac X.
The app also comes with an updated menubar app so that you can view basic stats in one click — CPU, memory usage, network speed and more. This isn’t as powerful as iStat Menus, but it gets the job done.
CleanMyMac X costs $90, or $45 for existing users. You can also choose to subscribe to the app for $40 per year. MacPaw is also the company behind subscription service Setapp, and CleanMyMac X will be part of your Setapp subscription.
Overall, this update brings a couple of nice additions and is a nice evolution. Maybe you’re already using DaisyDisk, Hazel, Objective-See’s security apps, iStat Menus and other utilities that do some of CleanMyMac’s tasks. But CleanMyMac remains a nice package of utilities to take care of your device.
0 notes
Text
How to Check CPU Temperature on Macbook in 2020
macOS is undoubtedly much efficient than any other operating system, including Windows, but the OS has numerous errors as well. Even though the OS works efficiently, there is no system that can withstand too much heat efficiently. So if you want to compute your Macbook’s temperature, then read through the blog.
Why Track the CPU Temperature on Macbook?
There are several reasons to check the CPU temperature of your Macbook. Maybe you want to benchmark your new device or how well the fans are functioning. However, you can also find out your over killing the CPU while playing games or allowing high-octane frames or some hogging application to run on your device.
Ideal CPU Temperature
As an average CPU temperature, it changes from model to model, so it is difficult to point out an exact number that can be a capable representative for all. Although, it is simple to say that cooler CPU temperature is best for the healthy computer.
If you are at home, the average temperature of your room should remain between 70-75 degrees Fahrenheit. So if you are using your system above 50-degree Fahrenheit, then it is the perfect level for the CPU. The average CPU temperature must be 110 to 145-degree Fahrenheit for an excellent CPU.
How to Check CPU Temperature on Macbook via Fanny Application
Fanny application is one of the most used and accessible application to check Macbook CPU temperature. The best part of this application to the ability to work as an inhabiting macOS feature. When you have download and install the Fanny application on your Macbook and settings up, then you need to do some settings to performing aspects like GPU/CPU temperature. It is free available for Macbook users.
Follow the steps to download and running on your Macbook:
First, download and install the Fanny application on your Macbook.
When you have installed it on your Macbook, then tap on the “Notification Center icon” on the upper right corner as three horizontal lines on your screen.
Alternatively, you can also swipe from left to right to preview the “Notification Centre” on your computer screen.
Now make sure that the Today tab is chosen, then tap on 1New in the bottom of your screen.
Tap on (+) icon that appears on the right of the screen.
Now, you can able to check your Macbook CPU temperature in the notification center.
While using your Macbook, you can also check your current temperature. This application also allows checking your target speed, current speed, maximum speed, minimum speed, Fans, and GPU temperature of your Macbook.
Fanny Application Alternative View
Fanny has a notification center for tracking the temperature of the CPU along with the Computer system. It has two notable applications that are more significant. If you would like to spend some money to buy their pro version, then you get extra functionalities on your computer.
Monit
iStat Menus
1) Monit
If you want multiple features on your Macbook for CPU temperature tracking Macbook application, then you can try Monit to check the performance. For instant information, you can use this application to find several important performances like CPU, disk, network, memory, and battery. However, this notification center cost $2.99
2) iStat Menus
This is for those who are looking for complete information of their operating system. IStat Menus is a handy application that has several abilities to show a range of crucial performance, including GPU, COU, disk, memory, disk activity, network usage, battery, and more. This application is also fully customizable, so you can also hide unwanted notification that does not matter to you. To use iStat Menus, you need to spend $10.
Elisa Wilson is an avid technical blogger, a magazine contributor, a publisher of guides at mcafee.com/activate and a professional cyber security analyst. Through her writing, she aims to educate people about the dangers and threats lurking in the digital world .
Source :- https://projectmcafee.com/blog/how-to-check-cpu-temperature-on-macbook-in-2020/
0 notes
Text
MacPaw releases CleanMyMac X
Indie app maker MacPaw updated its Mac cleaning software with a new major version called CleanMyMac X (which is different from MacKeeper). It’s hard to believe, but CleanMyMac currently has 5 million users.
CleanMyMac X helps you remove unneeded files and get an overview of what is slowing down your computer. Most people don’t need this kind of apps. But if you know what you’re doing, it can speed up your maintenance process.
The app is now divided into four maintenance tasks. First, the app lets you scan your hard drive for gigantic cache files and unneeded language files. If you have a small hard drive, you can easily gain multiple GBs by cleaning up those big Spotify or Dropbox caches. The app also looks for iTunes data that you don’t need and mail attachments that you don’t need on your Mac. The company has built a database of rules to make sure that it doesn’t delete any of your personal files.
Second, CleanMyMac X now haw a malware scanning element. It can find adwares, spywares, miners and worms on your hard drive and help you get rid of them. You can also easily delete browser data and remove Wi-Fi networks you don’t trust so that you don’t automatically connect to them.
Third, the app provides a bunch of maintenance scripts to rebuild your Spotlight index, repair disk permissions, flush the DNS cache and more. You can also review apps and Launch Agents that automatically start when you reboot your Mac.
And fourth, CleanMyMac X now offers an update tab that lets you review all your installed apps to update them all. It works with apps that aren’t in the Mac App Store. You can also uninstall apps and their related support files using CleanMyMac X.
The app also comes with an updated menubar app so that you can view basic stats in one click — CPU, memory usage, network speed and more. This isn’t as powerful as iStat Menus, but it gets the job done.
CleanMyMac X costs $90, or $45 for existing users. You can also choose to subscribe to the app for $40 per year. MacPaw is also the company behind subscription service Setapp, and CleanMyMac X will be part of your Setapp subscription.
Overall, this update brings a couple of nice additions and is a nice evolution. Maybe you’re already using DaisyDisk, Hazel, Objective-See’s security apps, iStat Menus and other utilities that do some of CleanMyMac’s tasks. But CleanMyMac remains a nice package of utilities to take care of your device.
from RSSMix.com Mix ID 8204425 https://ift.tt/2wJUXer via IFTTT
0 notes
Link
Indie app maker MacPaw updated its Mac cleaning software with a new major version called CleanMyMac X (which is different from MacKeeper). It’s hard to believe, but CleanMyMac currently has 5 million users.
CleanMyMac X helps you remove unneeded files and get an overview of what is slowing down your computer. Most people don’t need this kind of apps. But if you know what you’re doing, it can speed up your maintenance process.
The app is now divided into four maintenance tasks. First, the app lets you scan your hard drive for gigantic cache files and unneeded language files. If you have a small hard drive, you can easily gain multiple GBs by cleaning up those big Spotify or Dropbox caches. The app also looks for iTunes data that you don’t need and mail attachments that you don’t need on your Mac. The company has built a database of rules to make sure that it doesn’t delete any of your personal files.
Second, CleanMyMac X now haw a malware scanning element. It can find adwares, spywares, miners and worms on your hard drive and help you get rid of them. You can also easily delete browser data and remove Wi-Fi networks you don’t trust so that you don’t automatically connect to them.
Third, the app provides a bunch of maintenance scripts to rebuild your Spotlight index, repair disk permissions, flush the DNS cache and more. You can also review apps and Launch Agents that automatically start when you reboot your Mac.
And fourth, CleanMyMac X now offers an update tab that lets you review all your installed apps to update them all. It works with apps that aren’t in the Mac App Store. You can also uninstall apps and their related support files using CleanMyMac X.
The app also comes with an updated menubar app so that you can view basic stats in one click — CPU, memory usage, network speed and more. This isn’t as powerful as iStat Menus, but it gets the job done.
CleanMyMac X costs $90, or $45 for existing users. You can also choose to subscribe to the app for $40 per year. MacPaw is also the company behind subscription service Setapp, and CleanMyMac X will be part of your Setapp subscription.
Overall, this update brings a couple of nice additions and is a nice evolution. Maybe you’re already using DaisyDisk, Hazel, Objective-See’s security apps, iStat Menus and other utilities that do some of CleanMyMac’s tasks. But CleanMyMac remains a nice package of utilities to take care of your device.
via TechCrunch
0 notes