#makeup tutorial step by step for beginners
Explore tagged Tumblr posts
Visit Tumblr Blog
Explore Tumblr blogs with no restrictions, modern design and the best experience.
Last Seen Tumblr Blogs


Fun Fact
Tumblr has a 66 index score for customer satisfaction in the US.
Text

Eid Al-Adha, the Festival of Sacrifice, celebrates faith and devotion with prayers, feasts, and sharing with the less fortunate. Wishing everyone a blessed Eid!
#engagement makeup#makeup academy#bridal makeup artist#hair#hairdo#hair artist#hair bride#bridal hairdo#bride#step by step hairdo#makeup tutorial step by step for beginners#makeup tutorial Indian#makeup tutorial video#makeup tutorials videos#makeup tutorial#makeup tutorial step by step#eye makeup tutorial#affordable & Easy#eye makeup bridal#Reception bridal makeup#Full makeup Tutorial#Reception MAKEUP TUTORIAL#Basic makeup tutorial#bridal makeup in summer season#Step by step bridal makeup tutorial#Professional bridal makeup kit#Long Lasting Makeup#Indian मेकअप#Reception makeup look#dulhan ko kaise sajate hain
0 notes
Text
https://www.themakeupandglam.com
#makeup tutorials#beauty tips#skincare advice#glam makeup looks#best foundation for oily skin#smokey eye tutorial#drugstore makeup reviews#high-end beauty products#skincare routine for glowing skin#everyday makeup look#bridal makeup ideas#seasonal makeup trends#haircare tips#beginner makeup guide#makeup for special occasions#beauty hacks#step-by-step makeup#makeup artist tips#flawless makeup routine#natural glam makeup
0 notes
Text
Makeup Tutorial for Beginners: 6 Steps You Can Master

Makeup Tutorial for Beginners: Easy Looks You Can Master
Welcome to makeup! Makeup is your key to self-expression, whether you're going out for the evening, having a lazy day, or simply wanting to feel amazing. It can be intimidating if you're new to the beauty game, but don't panic! We’re here to guide you through this fun ride. We’ll cover the basics, from choosing the right products to mastering cool techniques that will highlight your best features. With practical tips and ideas, you’ll learn how to turn any look from basic to showstopping! Okay, grab your makeup bag and let’s get started! 💄✨

Table of Contents
- Introduction to Makeup for Beginners - Essential Makeup Tools and Products - Preparing Your Skin for Makeup - Step 1: Foundation Application - Step 2: Concealer and Highlighting - Step 3: Eyeshadow Basics - Step 4: Eyeliner and Mascara Application - Step 5: Blush and Bronzer Application - Step 6: Lip Makeup Essentials - Complete the Look: Setting Your Makeup - Common Mistakes to Avoid - Conclusion: Embrace Your Unique Beauty - Q&A
1. Introduction to Makeup for Beginners
Makeup is a fun way to express yourself and enhance your natural beauty! We know makeup looks overwhelming, but it doesn’t have to be. Knowing the basics is key to making makeup easy peasy. Here are the essentials to get you started. We will break it down further, don’t worry: - Foundation - Evens out skin tone. - Concealer - Hides blemishes and dark circles. - Eyeshadow - Adds color to your lids. - Mascara - Lengthens your lashes. - Lipstick or Lip Gloss - Adds a pop of color and shine to your lips. Before applying makeup, you will want to have a good skincare routine down. Using moisturizers and primers makes a huge difference for a smooth application. Pro Tip - Apply all your makeup in light layers - This isn’t the 90s 😉 The most important thing is to have fun. When you feel more comfortable, try new colors and techniques! Makeup should reflect your personality so play around and try new looks that make you feel fabulous. Your face is your canvas! 💖✨
2. Essential Makeup Tools and Products
The right tools make all the difference when starting! Throw away those silly small eyeshadow sponges that come with the palette (unless you’re being creative). Start with a variety of brushes and sponges. Each of these have a place for eyes, face, lips, etc. Grab a beauty blender for a natural glow! You’ll also need great skin products. A good primer preps your skin and extends wear. You’ll want to grab a palette with a variety of colors for your eyes, lips, and cheeks. Finally, check out a few essentials like mascara, eyeliner and a few lip colors and you’re ready to go from day to night. You’re all set to glow! 💄✨ Great brush kit!

RUDE Silver Bullet Makeup Brush Kit - Skin Beauty (skin-beauty.com)
3. Preparing Your Skin for Makeup
Start with a clean slate. Make sure to cleanse your skin to remove all the dirt and oil from your face. You can gently exfoliate your skin to make a smoother surface. This will help minimize dry patches so makeup can glide on smoothly. Make sure to hydrate with a good moisturizer suited to your skin type for a comfortable base. Here are some great options for different skin types: Cleanser - Oily/Combination: Skin Script Raspberry Refining Cleanser 6.5 oz - Dry: Skin Beauty Chamomile Cleansing Milk | Cleanser & Makeup Remover - Sensitive: Rhonda Allison Herbal AHA Cleanser - 4 oz (R04) Next, apply a primer to help your makeup application. A primer is a barrier that extends makeup wear, but also blurs skin imperfections. Choose one that targets your skin concerns – mattifying for oily skin or illuminating for dry skin. Let your moisturizer and primer sit for a few minutes before applying foundation. This prep will give you the perfect base for your makeup to shine! ✨ Primer - Oily/Combination: Youngblood Complexion Correcting Primer - Dry: Skin Beauty Lemon Water Gel Cream | Hyaluronic Acid Treatment - Sensitive: Bare Escentuals BareMinerals Prime Time BB Primer Cream SPF 30 - 1 oz
4. Step 1: Foundation Application

Let’s start with foundation application. Start by choosing the right formula for your skin type and coverage. Consider: - Skin Type: liquid for dry skin and powder for oily skin. Just keep “opposites attract” in mind. - Coverage Level: This is solely up to you. Decide if you want sheer, medium or full coverage! - Finish: Dewy or matte to suit your overall look. Use your preferred tool: a brush, sponge or your fingers. Something to keep in mind is to apply the foundation in small amounts. Make sure to blend towards the hairline and jawline for a seamless finish. If you need extra coverage build it up gradually for a natural look. You’re on your way to a great base! 🌟
5. Step 2: Concealer and Highlighting

When your foundation is set the next step is to brighten and balance your complexion with concealer and highlighter. Begin by using concealer on areas that need extra coverage—under your eyes, blemishes or redness. Use a small fluffy brush or your ring finger to tap the product in gently—this helps avoid rubbing. Choose a shade that’s one or two tones lighter than your foundation for a natural brightening effect. Now let’s add some glow. Apply on these areas for definition: - Cheekbones - Bridge of the nose - Centre of the forehead - Cupid’s bow Use a fan brush or your fingers to blend the highlighter for a natural look. Cream or liquid gives a dewy finish, powder gives a more defined glow. Both options are great and don’t overpower your makeup! ✨ Check out this tutorial for more details on how to contour and highlight for your face shape!
6. Step 3: Eyeshadow Basics
Ready to slay the eyeshadow game? Start by choosing the right brushes: fluffy ones for blending and flat ones for packing on color. Don’t forget to experiment with powder, cream, and liquid shadows—each has its own flair! We recommend starting with a powder eyeshadow first. As you get more comfortable try out some cream and liquid eyeshadows. Next, pick a color palette that vibes with your skin tone. You'll want to always have neutrals on hand but go bold when you want to make a statement! Layering is where the magic happens: - Apply a base color - Deepen the crease - Highlight the brow bone and inner corners. With a little practice, you’ll blend like a pro and create eye looks that truly shine! 👁️✨
7. Step 4: Eyeliner and Mascara Application
Eyeliner and mascara are your BFFs if you’re looking for definition! Start with an eyeliner. You can choose between liquid, gel or pencil. - Liquid Eyeliner - Gel Eyeliner - Pencil Eyeliner For a classic look go for black or dark brown to define your lash line. Here are some quick tips: - Start at the inner corner and draw along your lash line. - For a wing, extend the liner outward with a small flick that follows your eye’s curve. - Build up the color for a bolder look! Now let’s get those lashes going with mascara! A few swipes of volumizing mascara will do the trick. To avoid clumps, follow these steps: - Wiggle the wand at the base of your lashes and sweep it up. - For drama apply a second coat while the first is still a bit wet. - Pro tip: Use a clean spoolie to separate any clumps.
8. Step 5: Blush and Bronzer Application

Blush and bronzer are essentials for illuminating your face! Start with the bronzer and apply where the sun would hit your face. Bronzer is like faux-sunshine in a bottle! Focus on these areas: - Forehead: Dust lightly along the hairline. - Cheekbones: Sweep just below the apples of your cheeks. - Jawline: Define by applying underneath the jaw. Next is time for blush! The right shade will brighten your complexion instantly. Pro-tip, smile gently to find the apples of your cheeks and apply lightly with a soft motion for a natural finish. Blend the bronzer and blush together for a seamless transition. It can be easy to overdo blush, so be careful! Now you’re done! ✨
9. Step 6: Lip Makeup Essentials
Here’s how to get the perfect lip look! For a smooth surface, you can exfoliate your lips before applying lipstick. I always like to begin with a nourishing lip balm to keep my lips hydrated and flake free. This step is important for lip makeup. Choosing the right color is key - We have a whole blog post about this here! These are the must-haves for your lip collection: - Lipstick: Choose a shade that suits your skin tone, matte, satin or glossy finish. - Lip Liner: Defines your lips, prevents feathering and extends wear. - Gloss: Adds dimension and shine for a fuller look. - Liquid Lipstick: For long lasting color! Don’t be afraid to be bold! 💋✨
10. Complete the Look: Setting Your Makeup
Once you’re done with your makeup it’s time to set it! Use a setting spray to lock it in and add a refreshing finish. Choose a matte spray for oily skin or a dewy one for dry or combination skin and hold it about 8-10 inches away. This is not essential but comes in handy for long days. With these steps your makeup will last all day! ✨💖
11. Common Mistakes to Avoid
When you start to get into makeup it’s important to avoid common mistakes. Here are some key tips to remember: - Planning: It might sound silly, but starting with a clear routine will help you prevent mistakes! Know the steps and the products you’ll use so you don’t get confused. It’ll take some time to get into a routine, but practice makes perfect. - Prep Your Skin: Skipping skincare can lead to uneven application. Always cleanse, exfoliate and moisturize before putting makeup on. Don’t forget to wash the makeup off, too! - Choose the Right Products: Don’t forget your skin type! Choose products that suit your skin for the best results. Sometimes this takes some time to figure out, but it’s worth your time. - Application Techniques: Don’t rush! Use the right tools (brushes, sponges) and take your time to blend. Eventually you’ll be a master! - Setting Your Makeup: Lock in your look with a setting spray or powder to set and prevent shine. So, there you have it! 💄✨
12. Conclusion: Embrace Your Unique Beauty

In a world that tries to fit you into a narrow box, remember true beauty is about being you! Your features are unique and gorgeous. Be what makes you different—self acceptance is powerful! Here are some ways to celebrate your beauty – we all need a pep talk sometimes! - Self-Love: Treat yourself like the rockstar you are! - Challenge the Norms: Redefine beauty on your own terms. Makeup is the perfect place to do this! - Positive Vibes Only: Surround yourself with good people who uplift your spirits. - Show Off Your Uniqueness: Experiment and have fun with makeup! Being yourself is not only good for your self-image but also good for others. Let’s celebrate YOU! 🌟💖
13. FAQs About Beginner Makeup
Q&A: Basics of Makeup Q1: What are the most important products and equipment I should begin with? A: Start with foundation, mascara, concealer, and a neutral lip color. For equipment, purchase a beauty sponge, blending brush, and foundation brush. Q2: How can I identify my skin type and pick the appropriate shades? A: Determine whether you have oily, dry, combo, or sensitive skin. Then, try products in natural light to find colors that work for you. Q3: How significant are primer and skincare before makeup? A: Skincare is essential! The surface becomes smooth after cleansing and moisturizing. Primer prolongs the wear of your makeup but is not required. Q4: As a novice, what methods and materials should I concentrate on? A: Master the application of foundation, eyeshadow mixing, and eyebrow definition. Makeup workshops and online tutorials are excellent learning options. Q5: Can I create my own look by combining different cosmetic brands? A: Indeed! Products can be mixed to create a unique look. Try out several methods and styles to see what suits you best. Q6: How can I correct errors and take off makeup? A: Apply micellar water or a mild makeup remover first, followed by a cleanser. Don't worry if you make a mistake; just use makeup remover and a cotton bud to correct it! That concludes everything! We hope you're prepared to embark on your road to beauty! Mistakes are cool! Bob Ross would absolutely agree. This is just the start; go wild with colors and styles. You may end up finding something unique and trendy to share with others! Now get those brushes out and show off your unique story. Happy applying, lovely! 💖✨ Read the full article
#step-by-step#applicationtechniques#Beauty#Beginners#Cosmetics#Fashion#makeup#self-care#Skincare#tutorial
0 notes
Note
What makeup videos do you suggest for beginners ?
Also do you workout at home ? How often and how long ?
Do you have any recommended social clubs for people trying to network in the medical field?
Thank you.
I’d recommend only watching videos made by women who look like you. I follow Octavia B. on YouTube and TikTok and love her makeup tutorials and lifestyle videos. What matters is following people who look similar to you, do makeup styles that you like, or put out content that you enjoy. I started watching a bunch of makeup artists and lifestyle influencers who looked like me and found that I looked best when wearing makeup that wasn’t overstated or super exaggerated.
As for working out, I work out at home and at the gym. I prefer to start my day with at home activities and then continue on elsewhere. I wake up, do a yoga video, walk to work, walk at lunch, go to ballet or Pilates after work, walk home, and then continue on with my day. This is an every day thing for me, and while my routine will change once I start school, I still plan on getting in 10,000 steps and keeping up with my exercise classes. Exercise is a constant for me.
There are no specific social clubs I’d recommend because the world of medicine is huge. If you’re looking to network with providers in certain specialties, then that world becomes a bit smaller, so I’d recommend figuring out what you’re looking for first. You should either have a job in the medical field or be interested in medicine (and have more than base level knowledge). You have to set yourself up for success before you go to events like these, so I’d keep an eye on the events insta pages and keep your mind active.
9 notes
·
View notes
Note
I come from a toxic and pathological home… I don't know much about self-care and things like that… can you give me some advice? I would like to start this… I never had a mother to teach me this and I'm on unfamiliar ground… I can't even put on makeup because it was forbidden.
First of all, I'm so sorry that you weren't allowed to experiment with self-care in your upbringing and I think it's great you want to take the initiative to learn now. I started getting into self-care around 13 and I think I can give a fairly simple and affordable run down. *take notes*
Skincare: The key to skincare is learning what your skin type is (dry skin, oily skin, or combination) and what issue you want to fix (hyperpigmentation, teen acne, etc). Then try to develop a morning and night routine that you do EVERY DAY. The simpler your routine is the better. 5 steps is usually normal. Invest in a good cleanser, exfoliator, moisturizer, serum, and SPF. There's a great YouTuber named Hyram who suggests great products for all different skin types. I suggest watching a few of his videos and taking notes.
Hair: Hair Care is different for everyone. Always look at hair tutorials and wash routines from people who have the same hair texture as you, and same hair struggle as you (length, frizz, split ends, etc.).
Always go for the slightly more expensive hair care products (but it doesn't have to be anything crazy) and try to avoid parabens if you can.
Keep your hair wrapped at night with a bonnet or silk wrap so it's preserved
Wash, Condition, and Moisturize it regularly
Keep it styled even if the style is a simple ponytail. You'll eventually find your signature style.
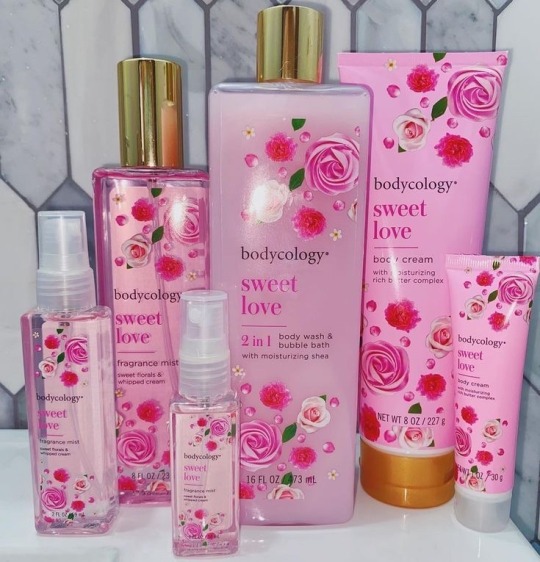
Body/Fragrance: Invest in some smell-good lotions, soaps, body scrubs, and perfumes.
Decide how you want to smell/feel every day.
Some really basic scents are cotton candy, vanilla, and strawberry but you can experiment.
Bodycology and Treehut have really good scents for an affordable price and can usually be found in Walmart or Target.

Makeup: If you're a beginner I'd search "Natural Everyday Makeup" tutorials on YouTube and take notes from women who are the same color as you.
Usually, a little concealer under the eyes, a nice sharpened eyebrow, a little eyeliner wing, mascara, and lip-gloss will suffice for beginners.
You'll need to buy a setting spray so your makeup doesn't melt throughout the day, a beauty blender, and a concealer brush.

Additional Tips
Make an "It Girl" playlist that you listen to in the morning or whenever you're getting ready with music that makes you feel pretty.
Buy a nail filer kit and keep your fingers and toenails filed and polished with a simple clear nail polish.

Dedicate relaxation time to yourself. This can be watching chick flicks on the weekend, or taking yourself out to eat when you have free time. Get used to treating yourself here and there.
I hope this helps and enjoy your journey💕✨

32 notes
·
View notes
Text
youtube
✨ Welcome to my Drag Transformation Masterclass! In today’s video, I’m walking you through every step of achieving a flawless drag look, from sculpting the perfect contour to creating that high-fashion diva glam. Whether you’re a beginner or a seasoned pro, you’ll learn essential drag makeup techniques that will elevate your transformations to a whole new level.
What you'll learn in this transformation:
💄 Sculpting a flawless contour to enhance your face and create that perfect diva silhouette.
✨ I will teach you how your makeup will pop from every angle.
👁️ Bold eyes that demand attention with dramatic lashes and eyeshadows for the ultimate diva stare.
💋 How to finish the look with the perfect pout and high-fashion glam attitude.
Products used in this video:
Anastasia Beverly Hills Contour Palette and Kryolan 8W:
- The secret to sharp, sculpted cheekbones and jawline.
Anastasia Beverly Hills Contour Palette and Kryolan 070:
- For that glow-from-within radiance that shines on stage or in any lighting.
Miss Fame Beauty Palette:
- Bold and dramatic shades to elevate your eye game.
YSL Beauty, Kryolan and beyond:
- For the perfect pout that completes your glam transformation.
Ready to slay? Let’s dive in!
Watch me transform into a high-fashion diva with flawless contouring, radiant skin, and bold eye makeup—you won’t want to miss this!
👉 Like this video if you’re ready to become a drag glam icon!
💬 Drop a comment below: What’s your #1 makeup tip for creating a flawless contour? Or, which part of the transformation would you love to try yourself? Let’s talk makeup in the comments!
🔔 Don’t forget to subscribe and hit the bell icon so you NEVER miss another drag makeover or beauty tutorial!
🎥 Share this video with your friends who need to level up their drag makeup game! The more we grow the Drag Glam Squad, the more tips, tricks, and transformations we’ll bring to you!
💖 Join the Drag Diva Squad: Follow me on Instagram, TikTok, and Twitter for exclusive behind-the-scenes content, beauty hacks, and all things high-fashion drag. You won’t want to miss the glam inspiration I post daily!
🛒 Shop my drag essentials to recreate this flawless glam look at home—links below!
Eyeshadow Palette:
https://missfamebeauty.com/
ABH:
https://www.anastasiabeverlyhills.co.uk/
Kryolan:
Kryolan.com
YSL Beauty:
https://www.yslbeauty.com/
Great Wigs:
https://wigsbyvanity.com/
#dragtransformation #dragqueen #dragqueenmakeup #makeup #makeupartist #makeuptutorial #fashion #beauty
3 notes
·
View notes
Text
The Ultimate Clean Girl Makeup Tutorial: Effortless Natural Beauty for Every Skin Tone
In this video, we focus on enhancing your natural beauty, starting with the most important step: skin preparation. Our seasoned makeup artist Daniela emphasizes the importance of using a lightweight moisturizer to hydrate and smooth the skin, creating a flawless canvas without relying on heavy primers.
The tutorial continues with spot concealing to address redness and blemishes using a foundation shade that matches your skin tone. A precise yet simple foundation application with a dense brush helps create an even, skin-like finish. Concealer is used sparingly, targeting only under the eyes and along the lash line to keep the look fresh and light. A touch of translucent powder locks everything in place, while maintaining a natural glow.
youtube
This tutorial is perfect for those who prioritize skincare in their makeup routine and prefer a minimalist, timeless look. Whether you’re a beginner or a makeup enthusiast, these tips will simplify your routine while elevating your everyday beauty.
For more information, please watch the full video on our YouTube channel.
2 notes
·
View notes
Text
themakeupandglam
Iam calsmark working for themakeupandglam as PR consultant.With more than 6 year’s experience in PR and Digital Industry,helping teams to achieve goals by streamlining the process
#makeup tutorials#beauty tips#skincare advice#glam makeup looks#best foundation for oily skin#smokey eye tutorial#drugstore makeup reviews#high-end beauty products#skincare routine for glowing skin#everyday makeup look#bridal makeup ideas#seasonal makeup trends#haircare tips#beginner makeup guide#makeup for special occasions#beauty hacks#step-by-step makeup#makeup artist tips#flawless makeup routine#natural glam makeup
1 note
·
View note
Text
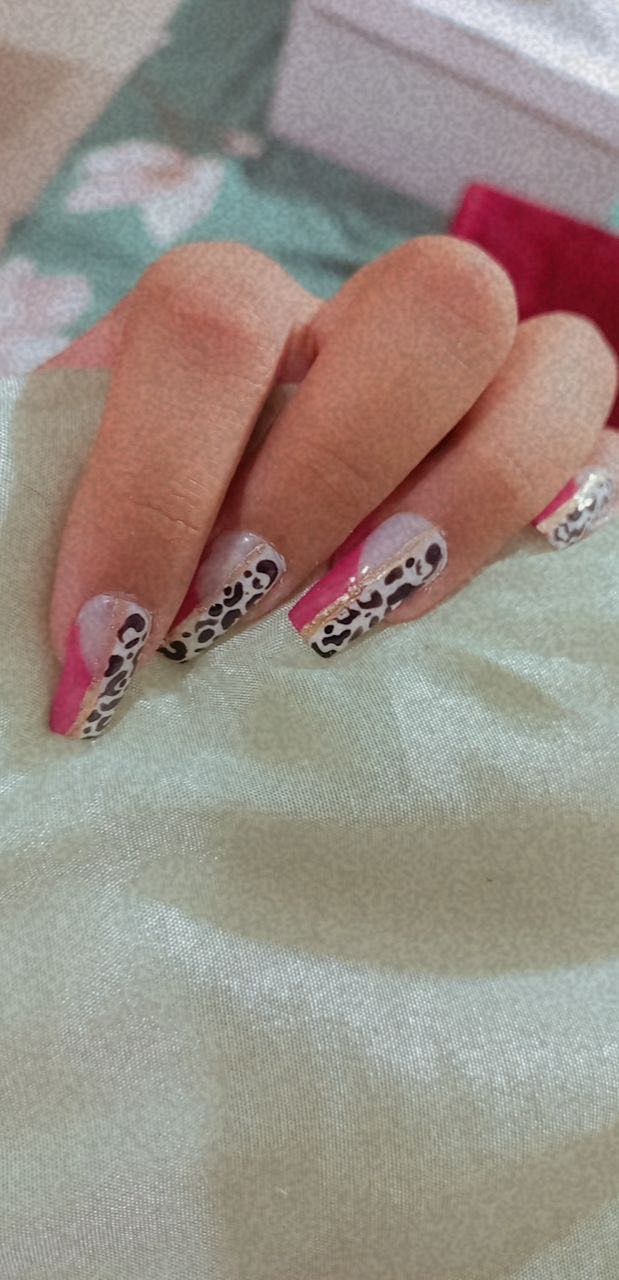
From Curiosity to Craft: How i learned to do Nail Extensions at Home.💅
Mastering nail extensions at home has been one of the most fulfilling and transformative experiences in my beauty journey. It all began when I enrolled in a cosmetology course in my hometown. My focus was on makeup, hair, and skincare, but I often observed other students practicing nail extensions. One day, they asked me to be their model. They only applied extensions on one hand, but that was all it took to spark my interest – I loved how polished and sophisticated my nails looked, and I knew I wanted to learn this art myself.
However, the cost of professional nail extension classes was beyond my budget. Determined to learn anyway, I turned to online resources and discovered a wealth of information. YouTube quickly became my primary teacher, offering tutorials from skilled nail artists. Pinterest provided endless inspiration, while Instagram Reels showcased creative tips and trending designs. Although TikTok was not available in India, these platforms offered me all I needed to start learning the basics of nail extensions and nail art.
Starting with Nail Art Basics I began by focusing on nail art as my starting point. Not only did it require minimal materials, but it was also a great way to develop steady hands, creativity, and an eye for detail. From color combinations to pattern designs, nail art helped me practice brush control and become familiar with nail anatomy. I enjoyed experimenting with small designs, which provided the perfect foundation before moving on to more advanced techniques.
Investing in Extension Supplies After saving up for a while, I finally purchased a beginner’s nail extension kit, which included nail tips, gel polish, acrylic powder, and other essential tools. I started with stick-on and press-on nails, practicing the process of application, shaping, and finishing. Each attempt taught me more about the importance of precision and patience, as even the smallest adjustments could make a huge difference. Practicing these steps gave me confidence and helped me build a steady foundation before I moved on to more complex nail extensions.
Advanced Training: Seeking Professional Guidance While online resources were excellent, I realized that certain advanced techniques—like acrylic overlays, gel extensions, and sculpting—were difficult to perfect without hands-on guidance. To improve, I reached out to a family member who had professional experience in nail artistry. Although she lived far away, I arranged a weekend visit and spent three days under her instruction. During this time, she taught me key techniques like sculpting, creating durable extensions, and layering for strength and style. This experience was a game-changer, as it allowed me to correct mistakes I didn’t even realize I was making and enhanced my skill level tremendously.
Perfecting the Craft After returning home, I practiced diligently, dedicating time each week to improve. I started creating full sets, experimenting with techniques like ombré fades, encapsulated glitter, and 3D accents. I joined online communities, where fellow nail enthusiasts shared tips, and found that feedback from other learners greatly boosted my confidence and skill. Gradually, my creations became more polished, and I could see the difference my persistence made with each set.
Final Thoughts Learning nail extensions at home has not only been a creative outlet but also a testament to the power of self-directed learning. What started as a curiosity has become a rewarding skill that brings beauty and joy to others. If you’re passionate about nail artistry, remember that with dedication, patience, and the right resources, you can achieve stunning results without stepping into a professional classroom. Whether it’s a new design or perfecting a technique, the journey is as enjoyable as the destination.
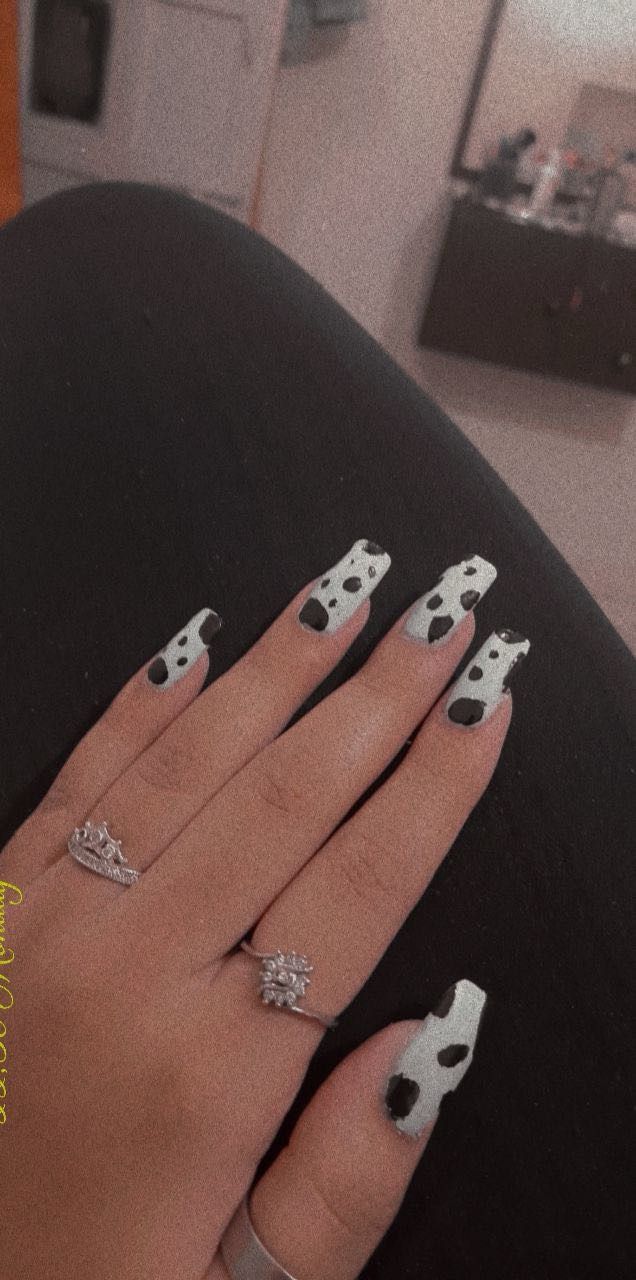
Some sets i did when i started learning.😁
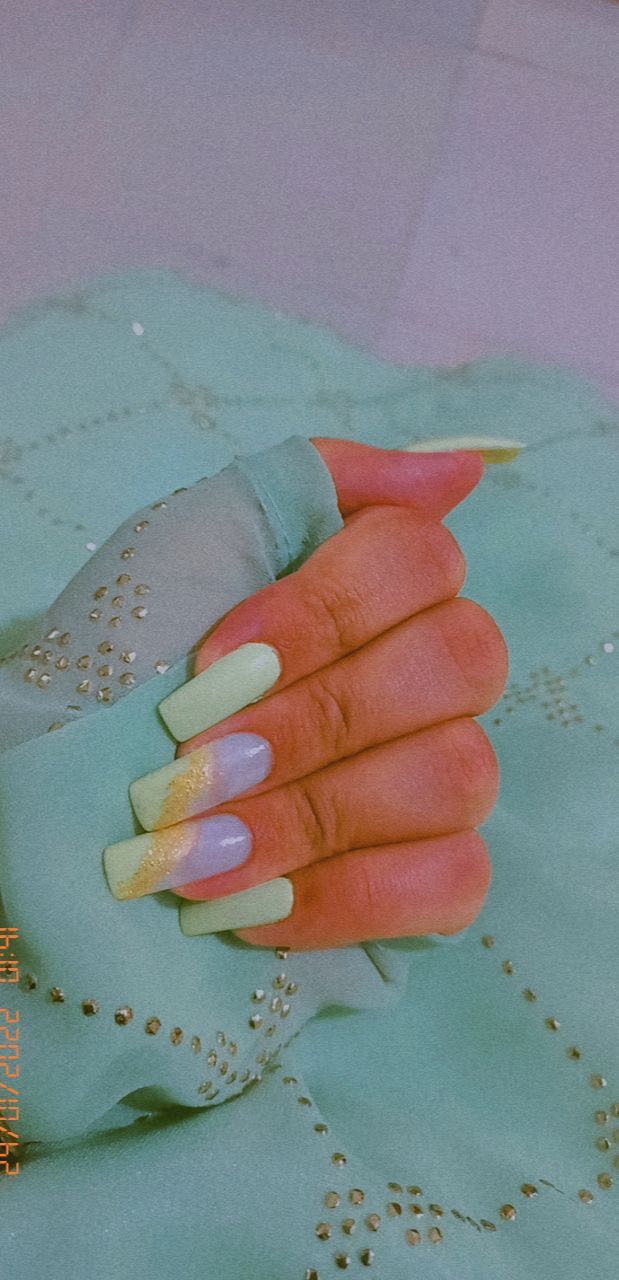
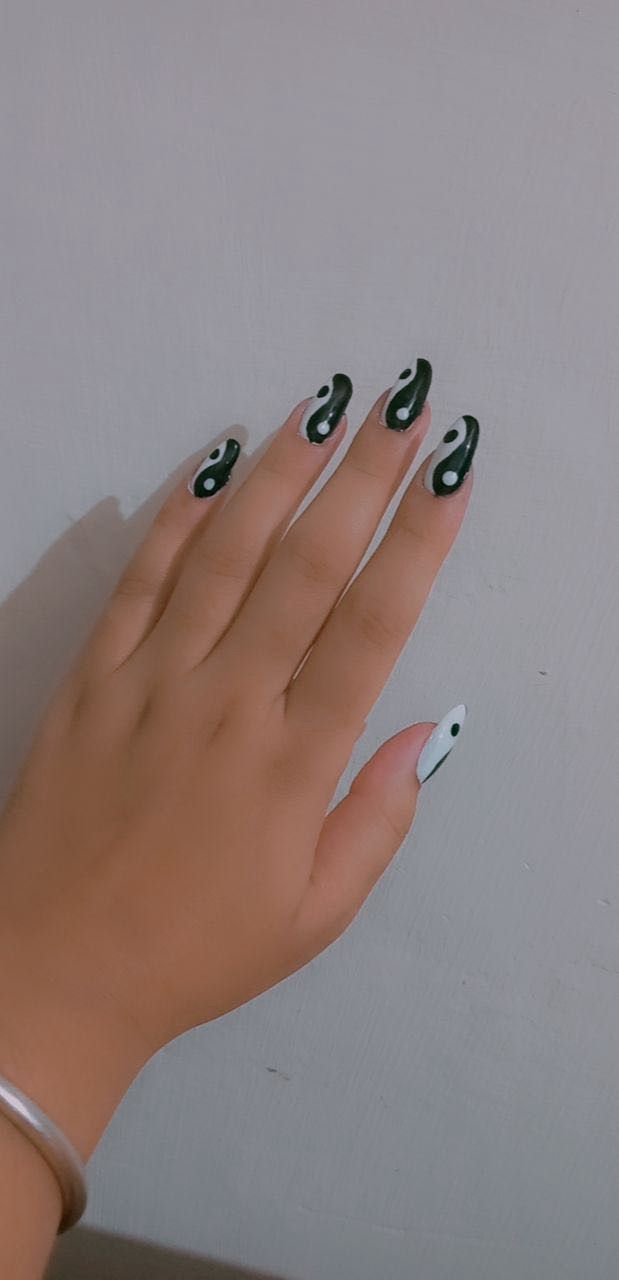
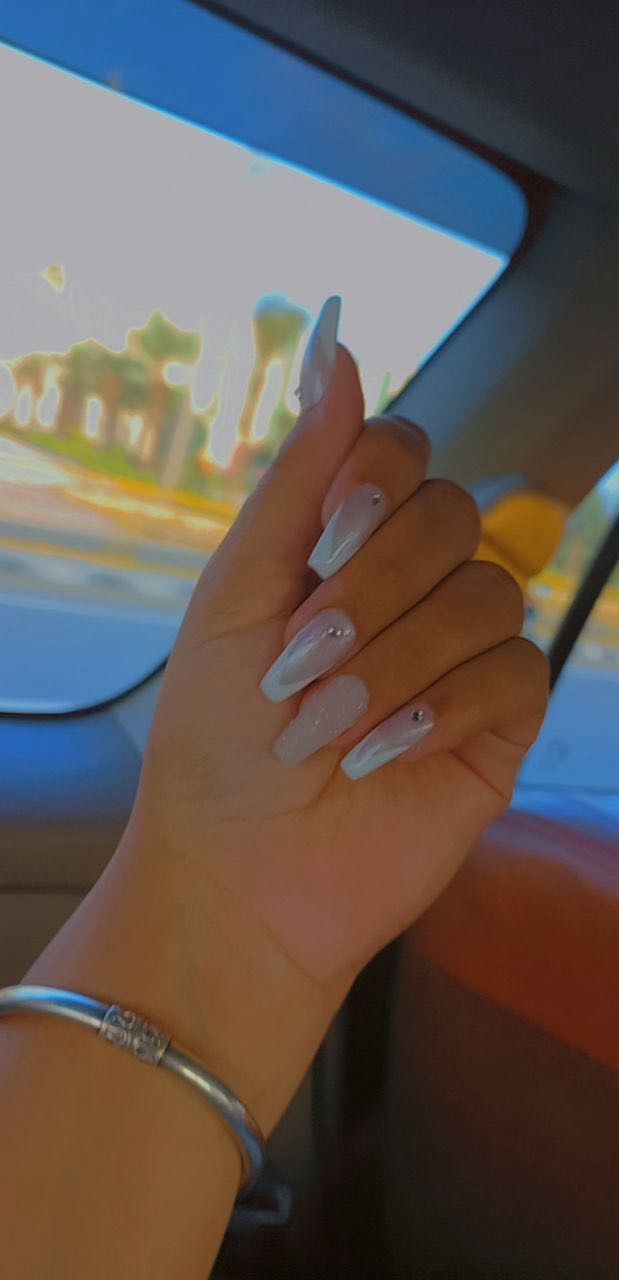
Then i got a little better. 🤭

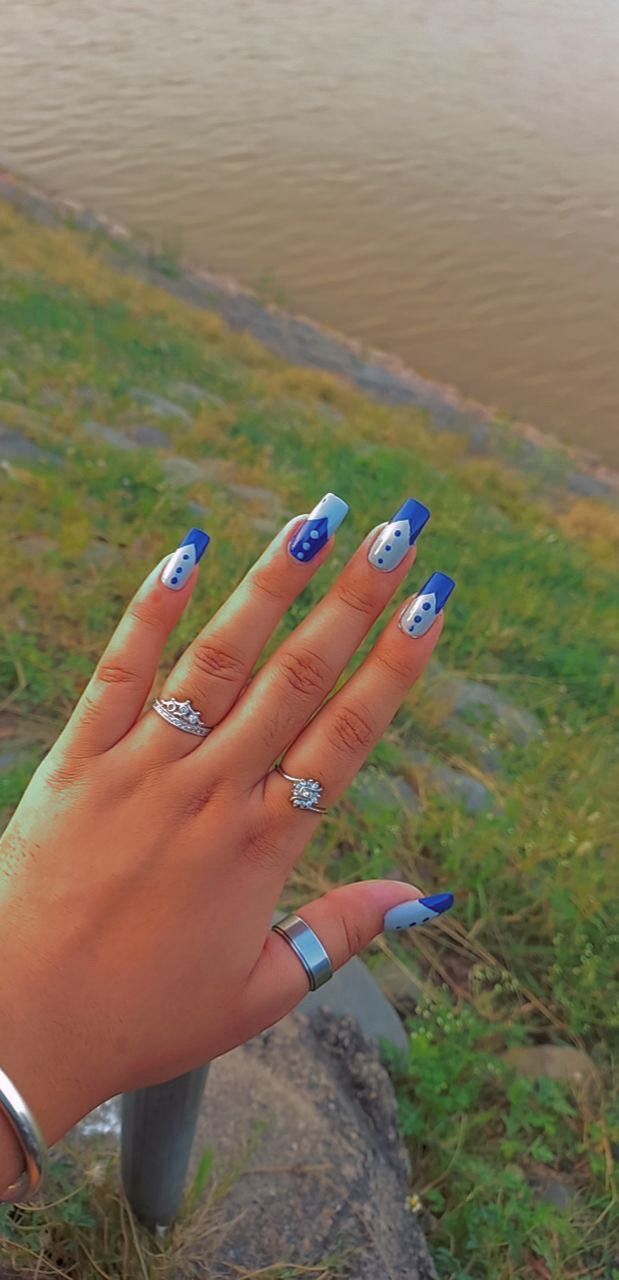
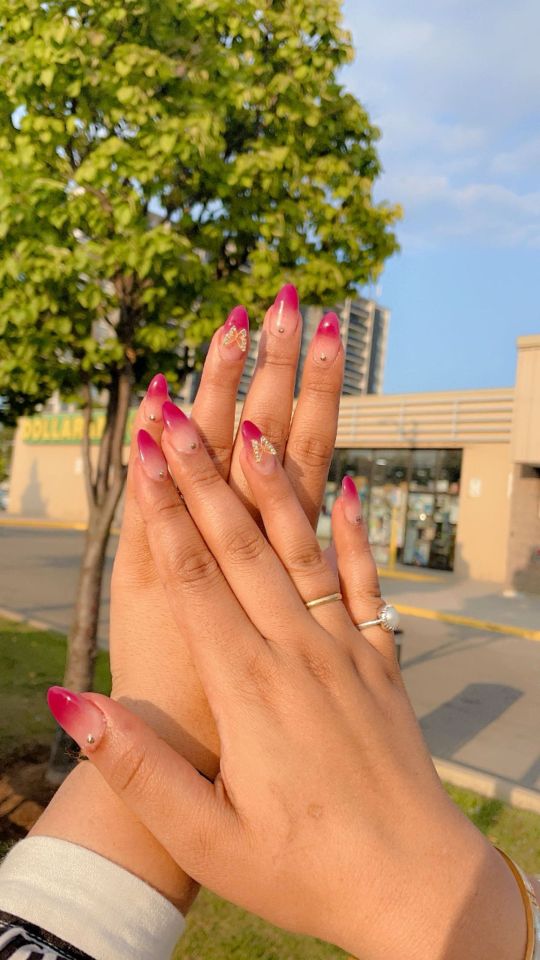
And this the latest set i did for my cousin on her birthday.💟
#nails#nail extension#learning#cosmetology#nail art#manicure#nail extension at home#nail style#acrylic#acrylic nails#gel nails#ombrenails#glitter#3d nail art#full set#nail polish#cute nails#nails at home#youtube#pinterest#tiktok#nail videos#tutorial
4 notes
·
View notes
Text
Makeup tips
The Basics Always wash your face morning and night to help breakouts and oily skin. Then apply moisturize each time with a moisturizer that works best for you.
Skin Prep 1st Step: Moisturizer 2nd Step: Primer
Base Apply foundation with a beauty sponge, apply concealer to
Above & Below the Brow. Blend a thin line of concealer on top of and underneath the brows to make eyebrows pop and open up the eyes.
The Inner Corners and Under the Eyes.
Across the Bridge and Down the Center of the Nose.
Around the Mouth.
Center of the Chin.
Around Each Nostril.
Apply contour/bronzer to
Apply your sculpting shade to the hollows of your cheeks, the temples, the jaw line, sides and tip of your nose. Never forget to blend, blend, blend!
Apply the Highlighting shade on top of the cheekbones, down the centre of the nose, the lip's cupid bow and your brow bone for candle-lit skin!
Than take a brush or sponge to apply baking powder to under the eyes, jawline, above the lips and anywhere else you'd like
After apply blush to cheek bones and tip of nose,
Eye makeup Apply eye shadow primer to eyelids
With a smaller makeup brush apply a light shade of your choice of eye shadow, onto your eyelid. than with a darker shade than before apply to the crease of your eyelid. If you'd like you can extend the eye shadow further. Add highlighter or a shimmer eye shadow to your eyelid that matches the color of eye shadow for a glowier look.
With eyeliner its a different story, there are many different eye shapes which all of them are beautiful. If you want eyeliner you can look at videos/tutorials to find a good liner look that works best for you.
Personally I don't know much about brows but for mine I apply eyebrow gel then fill them in with brown eye shadows. For more information for brows theres youtube, tiktik, twitter, and many other resources.
Add highlighter to cheekbones and temples, down the bridge of your nose, under brows, the inner corners of eyes, and above the cupid's bow. Do keep your other makeup like foundation, blush and bronzer softly matte and shimmer free.
After you are done and happy with your look spray setting spray to keep your makeup looking good for longer.
I hope this helps any makeup beginners or anyone trying to find a different way to do their makeup.
This is my first post and ive never had a tumblr or anything similar to this. Hopefully you like this post and I will post more different types of posts and more makeup tips.
If you have any suggestions, feedback, or comments feel free to tell me.
Have a nice day
6 notes
·
View notes
Text
How to Begin Your Web Design Journey: A Step-by-Step Guide in Simple Terms

Understanding the Basics:
Learn about HTML, which is like a web page’s skeleton.
Understand CSS, which is like makeup for web pages.
Know how to make websites look good on different screens.
2. Choose your tools:
Start with simple text editors like Notepad (for Windows) or TextEdit (for Mac).
Later, try fancier editors like Visual Studio Code.
For making pictures, try Adobe Photoshop or Illustrator.
3. Learn HTML and CSS:
Use websites like W3Schools or Codecademy.
If you want to learn more about web design with certification and placement, ACTE Institute offers comprehensive machine learning training courses that can give you the knowledge and skills necessary to excel in this field. Consider the infinite possibilities for data analysis, automation, and decision-making that machine learning may create.
YouTube: There are many video tutorials covering HTML and CSS for beginners.
They teach you how to make web pages and make them look nice.
You can also learn from courses on Coursera or edX.
4. Practice your skills.
Besides learning, make simple web pages to get better.
Try harder projects as you get more confident.
Make your own website to practice lots.
5. Responsive Web Design:
Make sure your websites work well on phones and computers.
Learn about media queries (they help your design fit different screens).
6. Master CSS Layouts:
Get really good at arranging web stuff using CSS (like making boxes and arranging them nicely).
7. Web Design Frameworks:
Think about using ready-made kits like Bootstrap.
They have pre-made pieces to help you design faster.
8. UI/UX Design:
Learn to make websites easy to use and nice to look at.
Think about how people will use your site.
9. Web Hosting and Domain:
To show your website to people, you need a place to put it (hosting) and a name for it (domain).
Lots of companies can help with this, like Bluehost or HostGator.
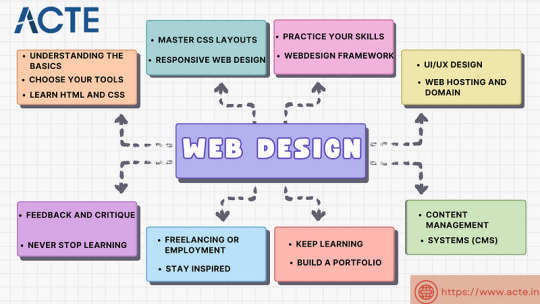
10. Content Management Systems (CMS):
Consider using tools like WordPress to manage your website easily.
11. Keep Learning:
Web design keeps changing, so keep learning new stuff.
Read blogs, watch webinars, and take more advanced classes.
12. Build a portfolio.
Make a collection of your best work to show others.
People who might hire you want to see what you can do.
13. Freelancing or employment:
Decide if you want to work alone or with a company.
Both ways have good things and not-so-good things, so pick what you like.
14. Networking:
Join groups of web designers to meet others like you.
Learning from others can help you become better.
15. Feedback and criticism:
Don’t be shy to ask for advice on your work.
When people give you tips, it helps you improve.
16. Launch your projects:
When you’re good enough, work on real websites.
Offer to make websites for friends or local businesses.
17. Stay Inspired:
Be creative and get ideas from different places.
Nature, art, and other designers can help you think of cool stuff.
18. Never Stop Learning:
Web design always changes, so keep learning new things.
Stay curious and open to learning more tricks and tools.
The secret to success in web design is to start with the fundamentals and gradually advance your abilities. Keep in mind that on this trip, patience and practice are the keys to success. As your skills advance, you’ll have the imagination needed to realise your ideas for websites. So put your hands in your pockets, launch your preferred coding editor, and start your web design experience!
4 notes
·
View notes
Text
Contouring Made Easy: Simple Tips for a Natural Sculpted Look!
Contouring can seem intimidating — all those lines, angles, and blending tutorials might make it feel like a technique best left to pros. But the truth is, with the right tools and a few easy tricks, anyone can achieve a sculpted, natural look in just a few minutes.
A good contour palette or concealer contour palette helps enhance your features, define your face, and even out your complexion, without making you look overdone. Whether you’re getting ready for a casual brunch or a special night out, contouring can elevate your makeup routine in a subtle but impactful way.
So, let’s break it down. No drama, no confusion — just contouring made easy.
What is Contouring, Really?
Contouring is the technique of using light and shadow to define the structure of your face. By applying darker shades to areas you want to recede (like the sides of the nose or under the cheekbones) and lighter shades to areas you want to highlight (like the tops of the cheeks and the center of the forehead), you create the illusion of a more sculpted, balanced face.
The goal isn’t to change your face — it’s to enhance what’s already there.
Meet Your New Best Friend: The Corrector & Contour Palette
Instead of juggling multiple products, a good colour correcting palette or camouflage palette gives you everything in one place: concealers, correctors, and contour shades tailored to different skin needs.
The 16 color camouflage HD palette is especially popular for this. Why? Because it combines concealing, color correcting, and contouring into a single, compact toolkit — ideal for both beginners and experienced users.
Concealer vs. Color Corrector vs. Contour: What's the Difference?
If you're just starting out, it's easy to confuse the many creams and powders out there. Here's a simple breakdown:
Concealer: Hides blemishes, dark circles, and redness using skin-toned pigments.
Color Corrector: Uses color theory to neutralize problem areas (green for redness, peach for dark circles, purple for dullness, etc.).
Contour/Camouflage Cream: Slightly darker than your skin tone, this creates shadows and definition when applied to the right spots.
A camouflage concealer palette often includes all three, making it a smart investment for anyone building a complete face routine.
Where (and How) to Apply for a Natural Look
The trick to natural contouring is understanding your face shape and using light layers. Here's a step-by-step:
Start with a Fresh Base Apply your regular foundation or BB cream. Let it set before layering anything on top.
Apply the Contour Shade Use a contour shade from your concealer contour palette that's 1–2 shades darker than your skin. Apply under your cheekbones, along your jawline, sides of your nose, and temples.
Highlight with a Lighter Shade Take a lighter shade (1–2 shades lighter than your skin tone) and apply it to the center of your forehead, bridge of the nose, under the eyes, and chin.
Blend Like You Mean It Use a damp sponge or blending brush to soften all lines. The goal is seamless transitions, not harsh edges.
Set with Powder (Optional) If you're going for all-day wear or a matte finish, lightly set the contoured areas with translucent powder or a matte compact powder.
Don’t Skip the Corrector
If you struggle with uneven skin tone, dark circles, or redness, a color corrector palette can work wonders. Here’s a cheat sheet:
Green: Cancels out redness (great for acne-prone skin)
Peach/Orange: Brightens dark under-eye circles (especially for medium to deep skin tones)
Lavender: Corrects dull, sallow skin
Yellow: Brightens and neutralizes mild redness
Apply these correctors sparingly before your concealer or foundation. A little goes a long way — blend well and let your base do the rest.
Choosing the Right Palette
When shopping for the best colour corrector palette, keep these tips in mind:
Shade Range: Look for a palette that offers multiple tones — especially if your skin tone shifts with seasons.
Texture: Cream-based palettes are easier to blend and build.
Pigment: Highly pigmented products work with just a small amount — meaning longer-lasting use and better value.
Portability: A compact, all-in-one camouflage cream palette is perfect for on-the-go touch-ups or travel.
Also, don’t stress about the concealer palette price — you don’t need to spend a fortune. The key is finding something well-formulated and versatile.
Final Thoughts
Contouring doesn’t have to be complex. With the right colour corrector palette, you can brighten, conceal, sculpt, and perfect your face in just a few easy steps. Whether you're going for everyday polish or a more defined glam, a contour palette gives you the tools to get it done — no makeup artist is required.
If you’re looking for a well-rounded option that combines correction, coverage, and sculpting in one place, check out the camouflage and concealer palettes available from Forever52. Their range includes the popular 16 color camouflage HD palette and other pro-level tools designed to make contouring easy for everyone.
0 notes
Text
Lash Extensions for Beginners: Common Mistakes to Avoid
Thinking about getting into the world of lash extensions? Whether you're doing it at home or starting your lash journey as a professional, knowing what not to do is just as important as learning how to apply lash extensions correctly. At Elega View, we specialize in lash extensions and guide beginners toward flawless application. This article covers the most common beginner mistakes and how to avoid them for beautiful, long-lasting results.
1 ) Not Prepping the Natural Lashes
One of the biggest mistakes is applying extensions on dirty or oily lashes. This can lead to poor adhesion and premature fallout. Clean, dry lashes are essential. Make sure the client's lashes are free from makeup, oils, or residue before starting. Proper preparation is the foundation of a successful lash extension tutorial and real-world application.
2 ) Using Too Much Adhesive
Beginners often think more glue means better hold, but that’s not true. Excess adhesive can cause clumping, stickies (lashes glued together), and irritation. A small bead at the base of each extension is enough. During any lash extensions for beginners session, precision and control are more important than quantity.
3 ) Skipping Isolation
Each natural lash should be isolated before an extension is applied. Skipping this step can cause lashes to stick together, leading to discomfort and damage. Mastering isolation takes time, but it’s one of the most important skills when learning how to apply lash extensions professionally.
4 ) Choosing the Wrong Lash Length or Curl
When you're new, it's tempting to go for dramatic lengths and curls. But if extensions are too heavy or long for the natural lashes, they won’t last and worse, they may cause damage. In our lash extension tutorial sessions at Elega View, we guide you on selecting appropriate lashes that suit the client’s natural lash health and eye shape.
5 ) Ignoring Lash Mapping
Lash mapping helps you create symmetry and a clean lash line. Not planning your layout can result in an uneven look. Every beginner should get comfortable with mapping even a simple one. It gives structure to your work and enhances the final appearance, whether you're doing a classic or volume set.
6 ) Poor Aftercare Instructions
Aftercare is crucial for longevity. Beginners often forget to educate clients about things like avoiding water for 24 hours, staying away from oil-based products, and not rubbing their eyes. Providing this information helps retain the set and builds trust in your lash extensions service.
7 ) Not Practicing Enough
Watching a lash extension tutorial is helpful, but hands-on practice is key. Working with mannequins or volunteer models allows you to apply theory with real-time feedback. At Elega View, we encourage repetition and offer guidance every step of the way for those just starting out.
Avoiding these beginner mistakes will make your journey into lash extensions for beginners much smoother. Whether you’re applying lashes on clients or learning for yourself, take the time to get the technique right. For more support or professional services, reach out to Elega View your trusted destination for beautiful, lasting lashes.
0 notes
Text

Ready to dive into the world of face makeup? This tutorial will walk you through easy steps to achieve a flawless look, whether you’re a beginner or just looking to refresh your skills. Grab your supplies, and let’s get started on enhancing your natural beauty!.seemore.
1 note
·
View note
Text
How to Use Hair Wig Tape Like a Professional: Step-by-Step Tutorial

When it comes to securing your wig comfortably, nothing compares to the effectiveness and grip of Hair Wig Tape. Whether a beginner at wigs or a well-seasoned wearer, being informed on how to correctly apply wig tape can be the difference between experiencing a natural and secure fit that lasts. In this tutorial, we'll take you by the hand step-by-step like a pro—making your wig-wearing experience more comfortable, secure, and perfect.
Let's proceed to the expert-recommended method of using Hair Wig Tape, simplified into simple-to-remember key points.
Select the Correct Type of Hair Wig Tape
Use double-sided Hair Wig Tape suitable for your wig type (lace front, full lace, etc.).
Think about the strength: light-hold for everyday wear, strong-hold for extended use.
Skin-friendly products are advisable if you have sensitive skin.
Opt for waterproof tapes if you sweat or intend to swim.
Get Your Scalp Ready Properly
Clean your scalp with an alcohol wipe to clear oils, dirt, and residues.
Avoid applying moisturizers or oily products before Hair Wig Tape is applied.
Dry the scalp nicely before continuing.
Use scalp protectors if you have reactive or sensitive skin.
Cut and Adapt the Tape Strips
Cut the Hair Wig Tape into suitable sizes according to each wig section.
Pre-cut strips are wonderful for ease of use but customize for more precision.
Round the edges of tape to avoid lifting or peeling.
Get the Wig in the Right Position Prior to Taping
Set your wig on a wig stand and put it in the correct position in relation to your hairline for precision.
Mark light guidelines on your forehead with a makeup pencil.
Always ensure that the wig is styled and fitted properly prior to taping.
Tape the Wig Base
Apply Hair Wig Tape directly to the inner lining of your wig where it meets the hairline.
Press firmly to ensure the tape adheres well to the wig cap.
Remove the backing paper from the outer side of the tape only when ready to place the wig.
Apply Tape to Your Scalp (If Needed)
In case you’re using both-sided taping, apply matching pieces directly onto your scalp.
Line up the tape with where the wig's tape will sit.
Don't misalign, as it might impact the final fit and hold.
Align and Press the Wig Securely
Gently place your wig beginning at the front hairline.
After aligning, press the taped portions of the wig against your scalp with your fingers or a comb.
Press each piece for 5–10 seconds to get optimum adhesion.
Smooth out creases or gaps carefully.
Use a Pressing Tool or Head Wrap
For a stronger bond, use a pressing comb or silicone spatula to apply pressure evenly.
Wrap a scarf or wig band around your hairline and leave it on for 10–15 minutes.
This will help the Hair Wig Tape set firmly and extend its wear time.
Avoid Water or Sweat for the First Few Hours
Keep your scalp dry for at least 4–6 hours post-application.
This allows the Hair Wig Tape to heal and create a long-lasting hold.
Avoid showering or exercising shortly after applying your wig.
Ensure Loose Edges or Reapply if Needed
Check taped areas for lifting or movement.
If an edge is loose, carefully peel back and reapply a new piece of tape.
Never apply tape over existing tape as this reduces hold and creates buildup.
Style Your Wig After Securement
Once your wig is fully secured, go ahead and style it as desired.
Use a low-heat setting on curling irons or straighteners if using synthetic wigs.
Styling should always come after secure application of Hair Wig Tape.
Tips for Sensitive Skin Users
Choose hypoallergenic or latex-free Hair Wig Tape brands.
Use scalp protection sprays or barrier wipes before taping.
Do a patch test 24 hours before full application.
Safely Remove Hair Wig Tape
With a wig adhesive remover or natural oil (coconut or olive oil).
Apply remover liberally along tape edges and let sit for a few minutes.
Carefully remove wig from one side, using gentle force.
Remove any residue left on scalp and wig base.
Wash the Wig and Scalp After Use
Gently wash your scalp to clean away adhesive residue.
Clean the base area or wig cap with wig-safe cleaning agents.
Air-dry the wig thoroughly before storing or applying tape again.
Store Tape Properly to Keep it Sticky
Seal Hair Wig Tape in an airtight, dry location.
Do not expose to humidity and direct sunlight that can reduce the adhesive strength.
Use a new strip for every use to get the best hold.
Mix Tape with Other Wig Adhesives (Optional)
For added hold, others mix Hair Wig Tape with a little glue.
Apply glue along the edges and tape in the middle for a hybrid hold.
Be careful because excessive use can ruin lace and natural hairline.
Wig Care Tips After Tape Use
Restrict daily removal and reinstallation to avoid lace wear and tear.
Clean tape areas frequently to prevent adhesive buildup.
Alternate between several wigs if daily-worn to stretch out the life of each wig.
Optimal Times to Use Hair Wig Tape
Ideal for weddings, parties, or extended workday when a secure hold is needed.
Excellent for travel, beach outings, and photo shoots because it lasts.
Excellent for individuals with energetic lifestyles who need their wigs securely in place.
Select Quality Hair Wig Tape Brands
Splurge on well-established brands that specialize in skin safety and long-term adhesion.
Read reviews, speak to stylists, and test samples prior to commitment.
walker tape, Vapon No Tape, and Supertape are some popular brands.
Common Mistakes to Evade
Do not use tape on moist or oily skin.
Never reuse strips of tape—it degrades hold and hygiene.
Do not remove the wig by pulling off; always use remover.
Do not omit scalp preparation; it is paramount for secure application.
Benefits of Using Hair Wig Tape
Easy to remove and apply.
Strong, long-lasting hold for all-day wear.
Perfect for lace wigs, toupees, and hairpieces.
Gentle on the scalp when removed properly.
A cleaner alternative to glue for numerous users.
Final Thoughts
Applying Hair Wig Tape like a pro is not hard—it just takes a little care, patience, and proper products. With the above steps, you can have an immaculate, secure fit that feels as natural as your own hair. Whether it's for a formal event or every day, learning to use wig tape will make you look confident and feel comfortable.
Take your time when selecting the proper tape, adhere to each process, and your wig will appear natural, feel great, and remain just where you've placed it!
0 notes