#misc: tutorial
Explore tagged Tumblr posts
Visit Tumblr Blog
Explore Tumblr blogs with no restrictions, modern design and the best experience.
Last Seen Tumblr Blogs


Fun Fact
Tumblr is available in 18 languages.
Text
Tutorial: Making High Heeled Shoes with Custom Elevation (so you don't need to use OMSP for it)
4 notes
·
View notes
Note
helooo! I wanna ask but..how do you do it when making the character come out the frame? Idk how and i really wanna start creating my own graphics!!
HERE YOU GO!!!! This ask was perfect timing cause I was thinking about making a tutorial for this!! I hope this helps you out
@amiaakiyamareal tagging you since you asked as well!!
Ac credits to _yapsharlene on twitter
#꒰ misc 𓇼#꒰ my stuff 𓇼#rentry stuff#rentry decor#rentry#rentry tutorial#graphics#rentry graphics#bundlrs graphics
121 notes
·
View notes
Text
How to add pixels to rentry!
Tutorial requested by anon ^x^
Firstly, you of course need to get your pixel! For the sake of this I'll be using this one I made

Now, you'll need an image hosting site - most popular ones for rentry being catbox and postimages. Simply import the image into the site and then copy the link! (Note; if you do it via postimages, you want to save the "direct link" version)
Once you have that, you want to use this format;

For example,,,

Now, once you have that, if / when you need to downsize the pixel, use this format;
{00px:00px}
Like this!

Now, it should go from this,,,

To this!

Hopefully that helps! My inbox is open for questions ^x^
#⋆⠀♡⠀⠀talking⠀/⠀misc⠀⠀—#⋆⠀♡⠀⠀rentry help⠀⠀—#rentry tutorial#rentry help#new post#rentry stuff#editblr#rentrypin#inbox open#asks open#feel free to ask questions
26 notes
·
View notes
Note
hello !! I was a little curious on how your supposed to use these ‘psds’ ( I think ? ) ,, you don’t need to answer ,, just asking ! ( please and thank you! )

hi ! thank you for this ask , here is how to use a psd for free without photoshop , on mobile and pc ! tutorial under the cut

first of all, download the psd file !
my psds available through google drive , just click the “click to download” and it should lead you to a google drive file where you can download from there !
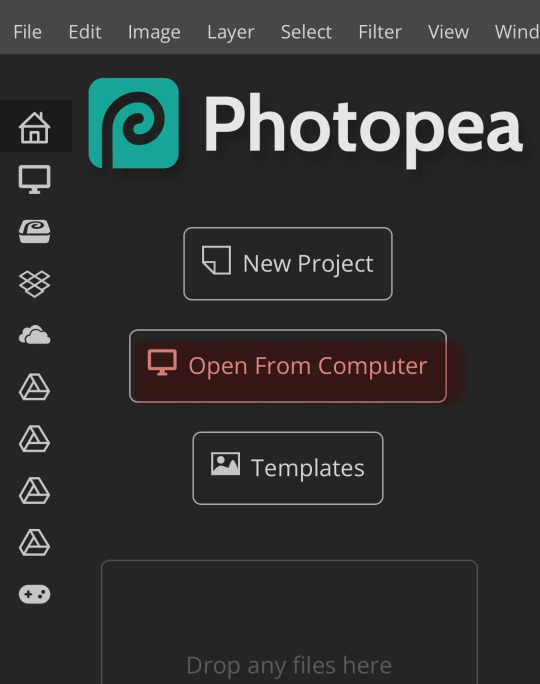
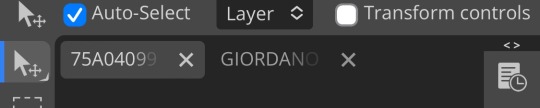
now go to photopea.com and select “open from computer” make sure to open the image/gif and the psd on separate canvases like shown above
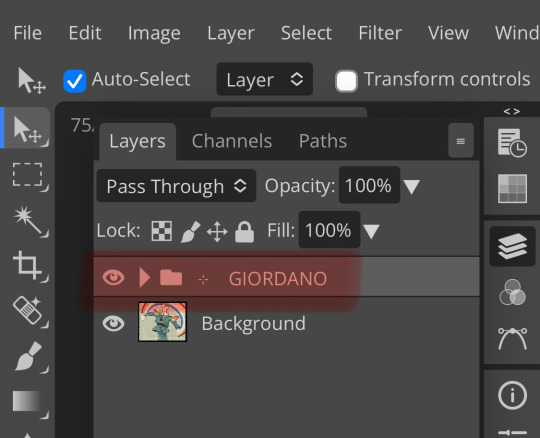
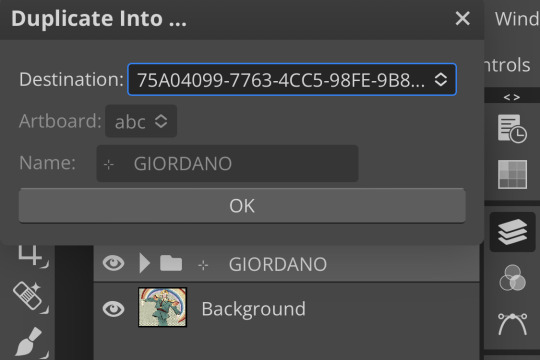
make sure you have the folder selected open the layer menu at the top (file edit image layer) and select “duplicate into..” then chose your image/gif canvas
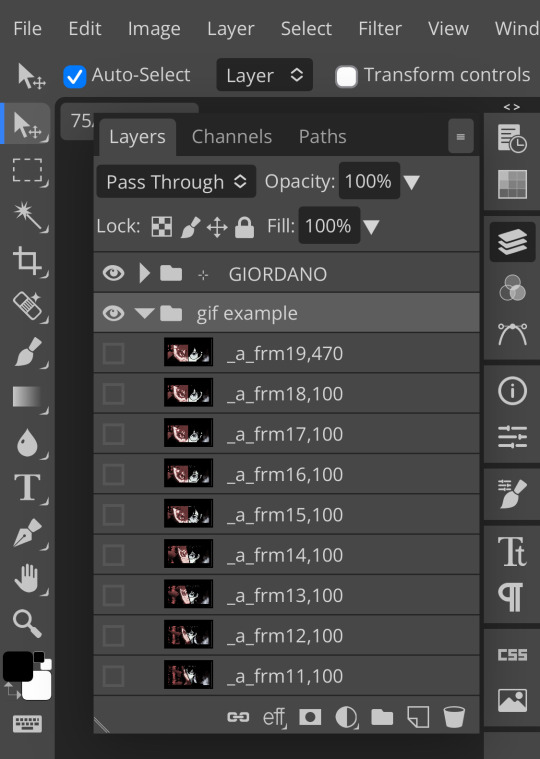
im using a gif example, so it looks like this
then hit file at the top menu , select “export as” then select your file type and thats it !
download your image / gif and thats the psd applied !

if you still need help or find that this method isnt working , you can dm me at manicly on discord for help !
thank you for using my psds and enjoy !

29 notes
·
View notes
Note
not a request id jst like to know how you color your graphics :3

‧₊˚౨ৎ good day to you, patron. indeed you may know how I color my graphics. I should share a fair warning beforehand, I do not claim my method of coloring images as the best or only method- there are many viable methods, though, I have found this one works best for my needs.

chapter I ⠀⠀✧ ⠀⠀image choice + program

‧₊˚౨ৎ for this tutorial, I will be using argenti's lightcone, 'an instant before a gaze.' such a beautiful lightcone will do wonderfully for a profile picture in my next edit, which you may want to keep an eye out for. the program I use is firealpaca, it is a free and easy to use drawing app that I have also found suitable for editing. however, this tutorial should apply to all programs usable for edits, so long as it has filters.

chapter II ⠀⠀✧ ⠀⠀color choice

‧₊˚౨ৎ the next step is to choose your colors. I typically only need two to begin recoloring my images, and if needed, I will change throughout the process. however, for simplicity's sake, I've chosen two colors for this edit. I quite like argenti in red, so I will be keeping him in red for this edit. I tend to memorize the general placement of my colors upon the color chart, but if you hold concerns for memorizing your colors, do not fret. I suggest placing your colors on a different layer so you may color pick them as needed. now that we have our colors, we may continue.

chapter III ⠀⠀✧ ⠀⠀beginning the recoloring

‧₊˚౨ৎ to begin coloring, create a new layer, and make sure it is above the image. I start off by using the gradient tool provided by firealpaca to place both colors in a nice gradient, in either order, and then change the blending filter to 'color.' you will see the image change into your desired colors in a natural way; if it does not look like how you imagined, attempt to adjust the opacity or the colors you are using before continuing. as you can see, the image is extremely red, so I will be turning the opacity down for a more natural recoloring.

‧₊˚౨ৎ that is a much better recoloring. it is less bright, and more akin to ambient lighting. this satisfies my needs, so I will continue onto the next step. to continue, you may either create a new layer with the gradient of colors again, or you may simply duplicate the layer from before and adjust as needed. I have chosen to do the latter. after you have the new gradient layer, combine the original gradient layer down to the image after you are certain it suits your tastes.
chapter IV ⠀⠀✧ ⠀⠀continuing to edit

‧₊˚౨ৎ now that you know the basics on how I personally choose to edit, it makes continuing the recoloring much easier. after this, you can duplicate the gradient as many times as needed, or create new gradients and adjust the opacity and the blending filters. I typically tend to use the following filters during my editing, though I may not use all of them if not needed- multiply, overlay, screen, lighten, darken, soft light, hard light, and then color. these are simply my most used filters, and I may branch out into hue or saturation change as needed, though rarely do. feel free to play around with your blending filters, it's important to find which filters suit your preferences and needs most, patron. for this edit, I used mostly multiply, overlay, and screen, and adjusted filters opacity as needed.
chapter V ⠀⠀✧ ⠀⠀returning to old roots

‧₊˚౨ৎ this step is entirely optional, but I enjoy doing this. I like to add a touch of different colors during my recoloring, and in this case, I would like to bring back argenti's green eyes. fetch an image of the character once more, and use it to color pick the color you wish to bring into the edit. in this case, I've used argenti's chibi sticker in order to return his original eye color. you may create a new layer with these colors as well, if you wish to, but I am usually fine to just remember it. this method is the same one I used to bring back the green hues in my personal graphics when editing them.

‧₊˚౨ৎ using your brush tool and on a new layer, color over and fill in the area you wish to recolor. since the area is small, this step is fairly easy, and I simply recolor over the pupil. then, set the blending filter to color, and adjust opacity as needed. you may also attempt to set the filter to overlay or multiply, the blending filter which works best to you is to be discovered by you, but I personally find the color filter to be enough. after this step, I tend to add another layer; in this case, I added an extra screen layer, to add more into it. be sure to add as much as you feel is needed.

chapter VI ⠀⠀✧ ⠀⠀finale
‧₊˚౨ৎ and this is the completed product. though it may not be the best recolor I've done to this day, it certainly befits a good tutorial and sample of how I tend to do my projects. I do hope this helps you color your graphics and images as well, patron. thank you for the question, it was a very fun experience writing up a small tutorial such as this one. do have a good day, now, and until we meet again, patron.


#༒ ꒰ daphne ┊ small talk . ꒱ ⚰︎#༒ ꒰ myrica ┊ questions . ꒱ ⚰︎#tutorial#graphics#graphics tutorial#editblr#editblr tutorial#༒ ꒰ flos ┊ misc . ꒱ ⚰︎
40 notes
·
View notes
Text
I love watching tutorial videos about things I would never even try doing for my muses
#//like why am I watching flower arrangements tutorials and tips I don't have any flowers at home#//if I got a plant I'd probably kill it within a week#misc; ooc
3 notes
·
View notes
Text

I don't understand rentry wuh woh
(No replycons or whatever yet head in hands)

#\\Talkin/Misc💫#LOOK!!!! I HAVE TAGS NOW!!!!!!!!#YAYYY!!!!!!!!#rentry#If anybody has tutorials I will gladly take them
2 notes
·
View notes
Text
moving My Documents Sims 4 folder to another hard drive (win 10)
via The_Only_Zac on reddit
Move your Mods folder to your external hard drive by clicking and dragging it from Documents\Electonic Arts\The Sims 4\ to the external drive while holding shift. Ensure that the popup that appears says "Moving files," not "Copying files." Once this step is complete, you should not have a Mods folder in your Electronic Arts\Sims 4 folder but you will have one on your external hard drive. If you want, you can rename it to something else to make your life easier (eg "Sims 4 Mods" rather than just "Mods").
Press the Windows Key and X at the same time, and click "Command Prompt (Admin)". Paste in the following command:
MKLINK /J "%UserProfile%\Documents\Electronic Arts\The Sims 4\Mods" "[insert path to mods folder on external hard drive here]"
Make sure you replace [insert path to mods folder on external hard drive here] with the actual path to where you copied the mods folder onto your external drive (eg. "F:\Gaming stuff\Sims 4 Mods").
3. Go to Documents\Electronic Arts\The Sims 4\Mods in the file explorer. If you see all your mods, that should mean it worked. Run TS4 and check the options menu to make sure your mods are showing as installed, but do not load any of your saves before checking or else they could become corrupted.
If all goes well, this should create a symbolic link in your EA\TS4 folder that points to the folder on your external hard drive. If you have any more questions, let me know. 👍
EDIT: Since there are a lot of questions, here’s some additional info that might help.
• Do not include the brackets [ ] in the path to your mods folder, but do put it in quotes “”, like this:
MKLINK /J "%UserProfile%\Documents\Electronic Arts\The Sims 4\Mods" "F:\Gaming stuff\Sims 4 Mods"
• If your “My Documents” folder is stored in OneDrive you will need to change the first part of the MKLINK command so it matches where your documents folder is. I don’t use OneDrive, but this should work:
MKLINK /J "%UserProfile% \OneDrive\Documents\Electronic Arts\The Sims 4 Mods" “Insert/path/to/external/drive/Mods/folder/here”
However, this might not actually work because OneDrive is stored in the cloud and it doesn’t like to have symbolic links to non-cloud folders, like your hard drive.
• If you get an error saying “The system cannot find the path specified” when you try to make the link, then you probably have a typo in the path to the folder on your external drive. You can open up your desired folder in File Explorer and copy/paste the path from the address bar into the command prompt to make sure you get it right, but if it has spaces in it then you need to make sure to put it inside quotation marks (“ “).
moving a folder to external drive
2 notes
·
View notes
Text
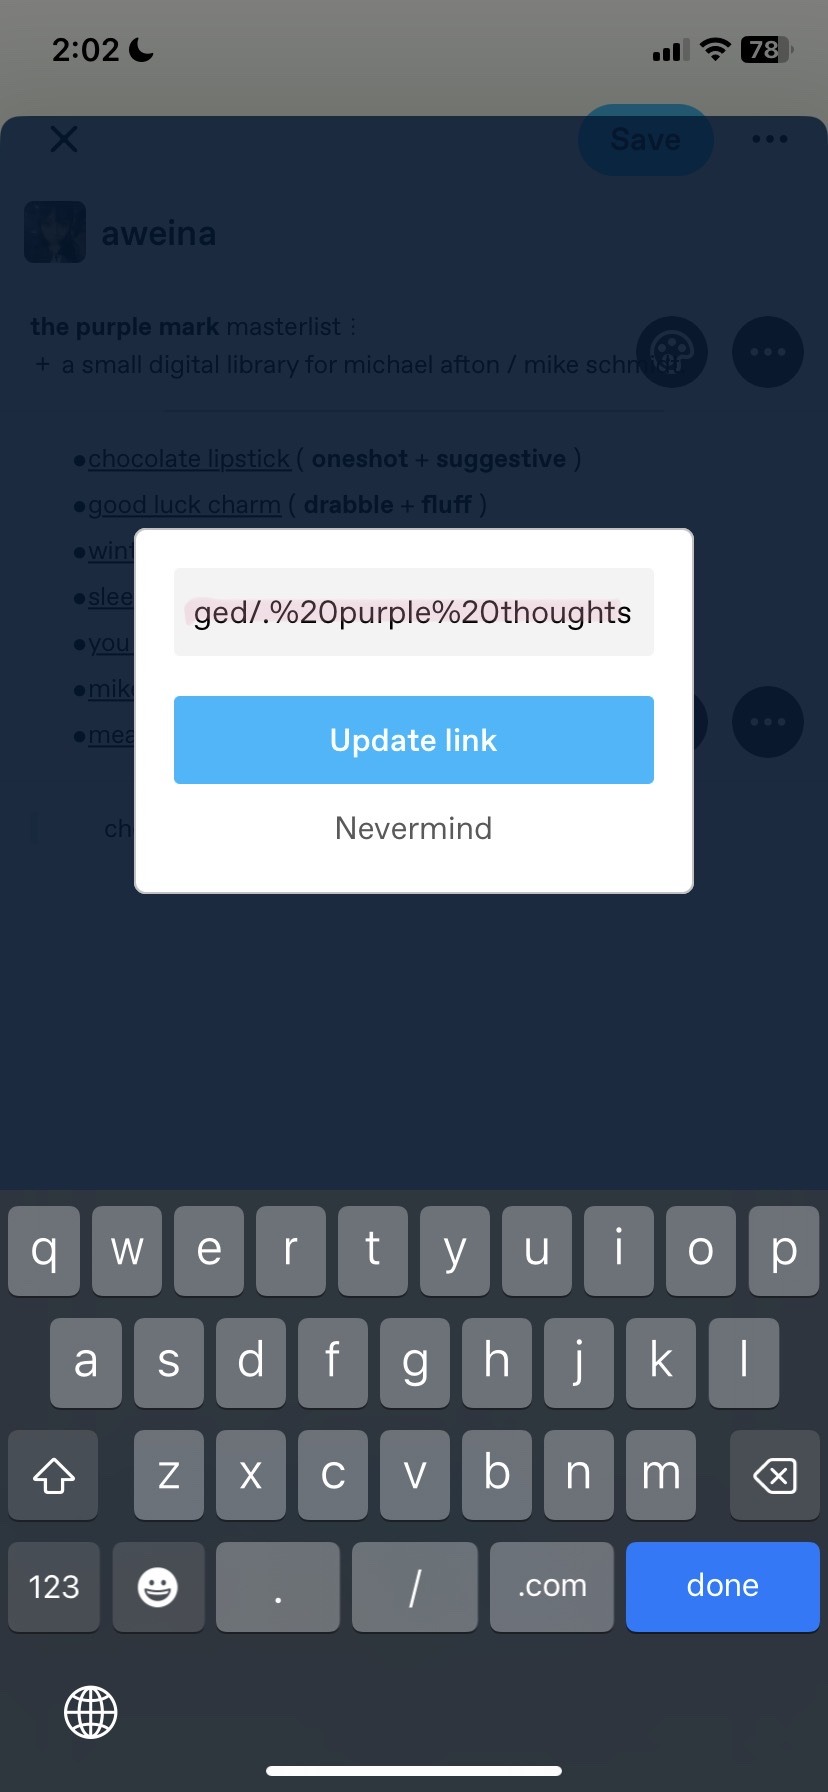
mini tutorial on how to link tags to your post (″ロ゛) ? !
this could be done all on your phone. just make sure to use a browser for most of the steps. it will transfer to your app !!

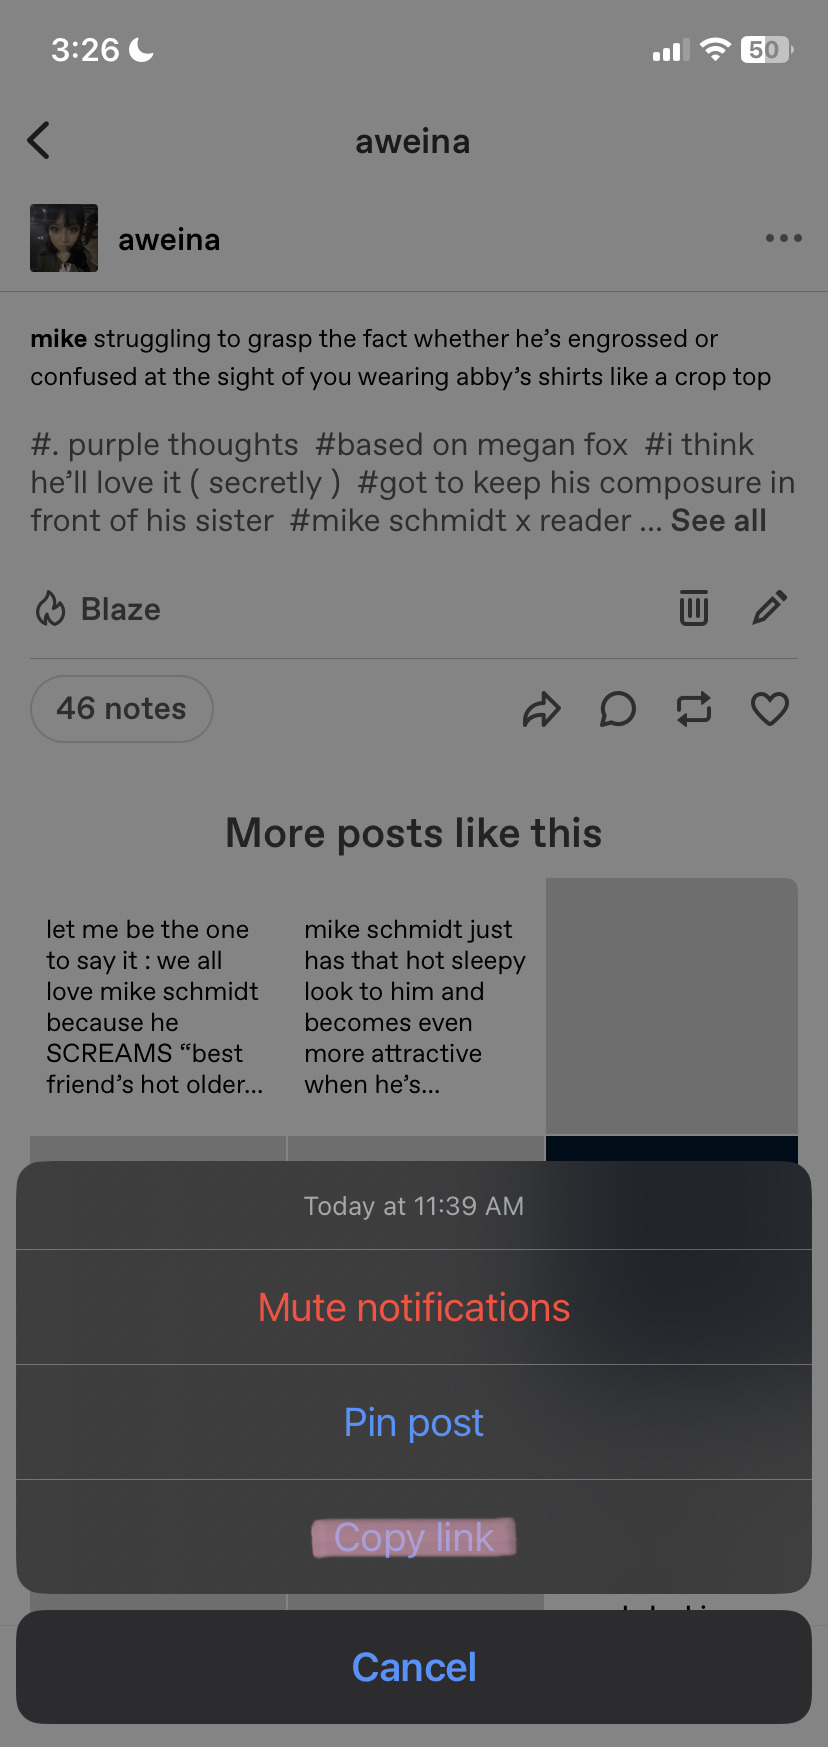
1. add your tag to your work / post. → make sure to open the post on a browser, you can do this by clicking the 3 dots on the post then copying the link + pasting on a browser if you’re exclusively on the app.
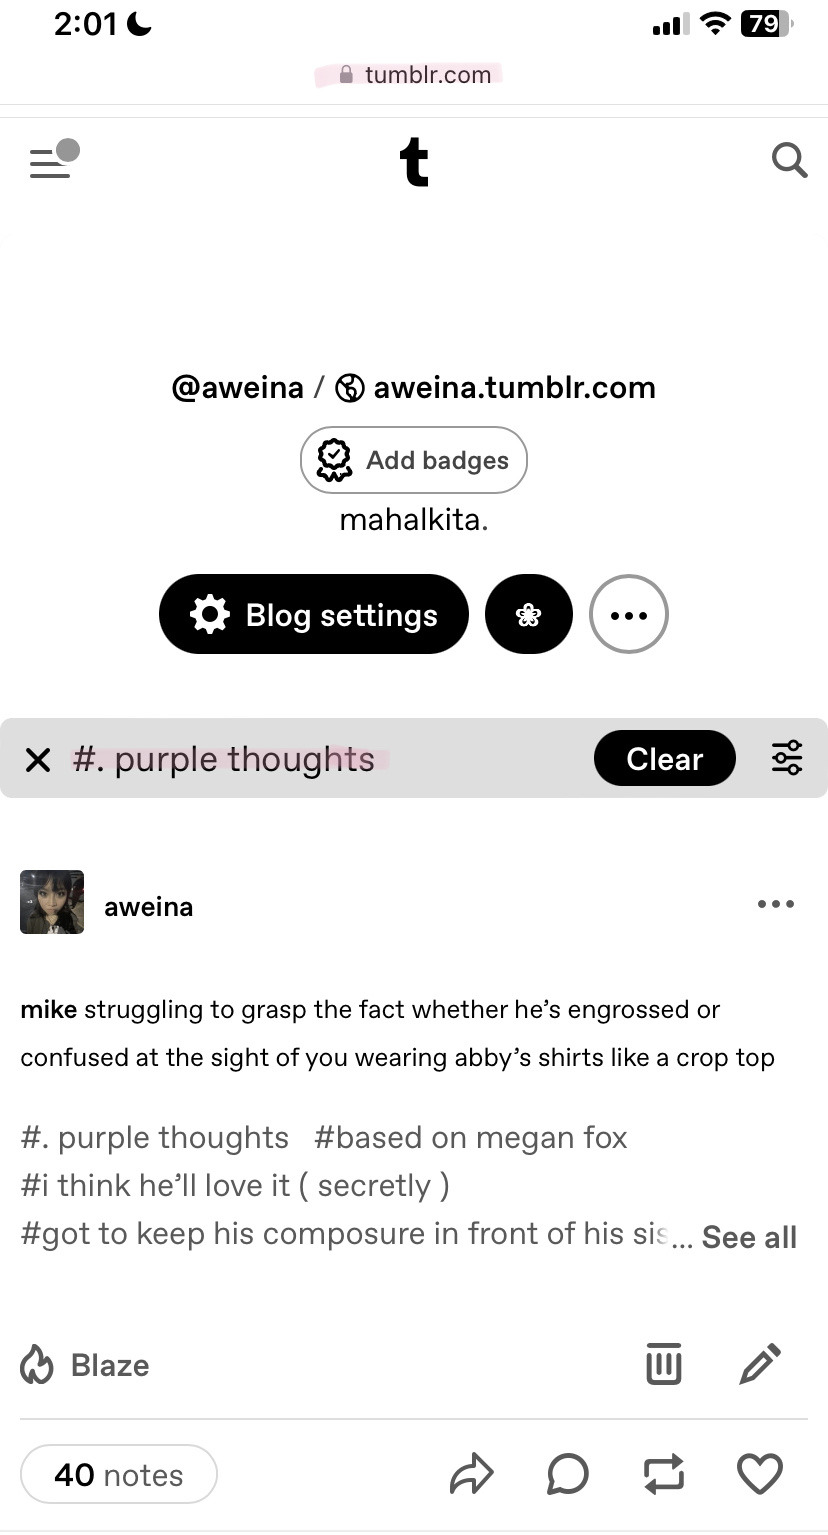
2. next, you’re going to simply tap the tag you want to link. there you will see it’s a searched tag on your blog.
3. copy the link on that browser, it should look like this : “ https://www.tumblr.com/blogname/tagged/(your tag) ”
4. now make a new post and highlight whatever word you would like to add the link to. it will be the joined circles on the bottom. → this can be done on the app or on a new browser, doesn’t matter.
important tips !!
please don’t use a lot of copy and paste symbols on your tag. it will not work and will just make your link disappear. i’m not entirely sure about emojis, but i would play it safe with a simple tag (・_・ヾ
i found that sometimes when you directly copy the link from another existing post, it won’t always work. so i recommend just opening it on a browser and copying it from there instead on the app.


#.misc#.tutorial#okay hope this helped#i figured this all out on my own LOL#feel free to come to my inbox for more tips
3 notes
·
View notes
Text
This is incredibly helpful and now I have to go through and edit the post titles for the current challenge I'm working on D:
how to make text in captions gradient or multicolored
I was asked by the lovely @an-idiot-in-a-trenchcoat about how I got the gradient caption to this edit, so I decided to make a mini tutorial! This is my first time doing something like this so if there’s anything that’s confusing, feel free to send me an ask and I will do my best to clarify!
We’re going to learn how to do something like this today:

Keep reading
4K notes
·
View notes
Text
main acc :: @pixiegiirl
they/she/vamp/idol , lesbian ^_^
#stamps 🎸#blinkies 🎸#pixels 🎸#pngs 🎸#dividers 🎸#gifs 🎸#frames 🎸#psd 🎸#graphics 🎸#tumblr layouts 🎸#discord layouts 🎸#layouts 🎸#misc 🎸#templates 🎸#textures 🎸#tutorials 🎸#site buttons 🎸#shiny buttons 🎸#metadata 🎸
1 note
·
View note
Text
One of the easiest & most helpful tutorials I've come across recently - I have so many lamps I have reluctantly kept out of my downloads because they didn't have proper lit states. I had no idea it was so easy to fix them!
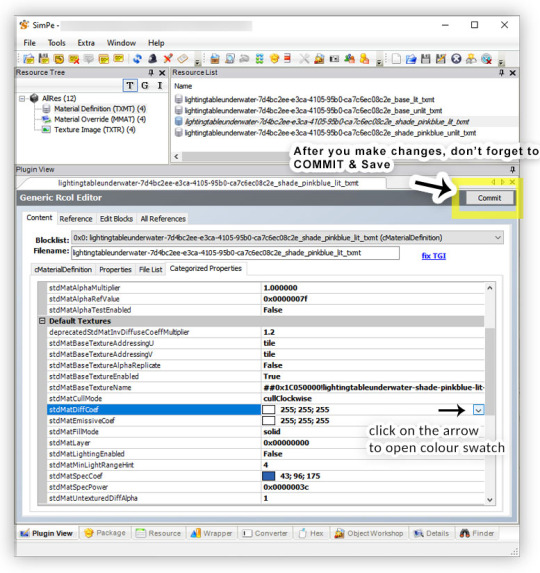
Mini-tutorial on how to make TS2 objects glow in the dark
This way you can fix lamps that do not glow when lit.
To edit glow settings, you need to open recolour file and look inside TXMT. Usual object recolour has one of these, but inside lampshade recolour you will find two: one for lit-up state, and one for unlit state.

Method A is the most commonly used in TS2 lamps even though it’s more tricky. The values for stdMatDiffCoef & stdMatEmissiveCoef are just an example - for best results these have to be adjusted, depending on reflection settings or how bright the texture is.
I only use the first method for stuff that’s not meant to be very luminous, like the lamp base. Or if method B is not an option ( object has only one subset and not all parts are glowing).

177 notes
·
View notes
Text
tags!!!! dont mind thiz laaawll
#ꝯϱㅤㅤ﹐ kyubao ⦂ random#ꝯϱㅤㅤ﹐ kyubao ⦂ chat#ꝯϱㅤㅤ﹐ kyubao ⦂ frames#ꝯϱㅤㅤ﹐ kyubao ⦂ masks#ꝯϱㅤㅤ﹐ kyubao ⦂ misc#ꝯϱㅤㅤ﹐ kyubao ⦂ pixels#ꝯϱㅤㅤ﹐ kyubao ⦂ tutorials#ꝯϱㅤㅤ﹐ kyubao ⦂ suggestions#ꝯϱㅤㅤ﹐ kyubao ⦂ appreciation#ꝯϱㅤㅤ﹐ kyubao ⦂ info#ꝯϱㅤㅤ﹐ kyubao ⦂ polls#ꝯϱㅤㅤ﹐ kyubao ⦂ favs
0 notes
Text
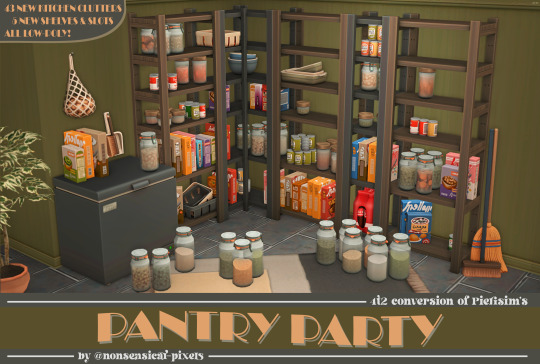
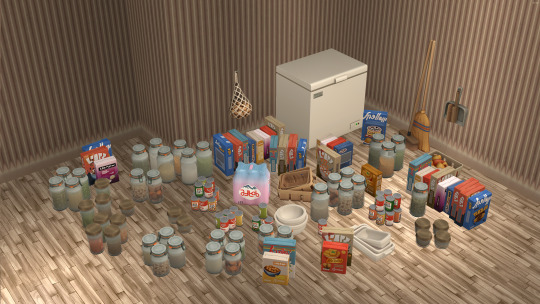
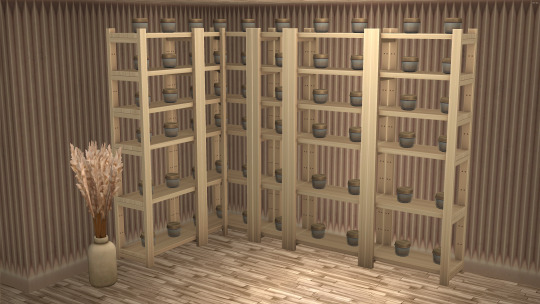
it's finally done!! @misa_caliente on the simscord requested this agesss ago, and i've been working on and off on it ever since. have @pierisim's incredible pantry party converted from ts4 to ts2, in 48-item entirety! as a kitchen clutter addict, i am IN LOVE!!
this has honestly been so, so rewarding. all items are either decorational, found under appliances -> misc, or functional shelving, found under surfaces -> misc. you get 43 items of kitchen clutter and 5 new shelves, all with slots thanks to @hugelunatic's awesome slots tutorial! i've included a readme and collection file for ease of browsing the catalogue, but peek below for a very extensive list, plus unedited previews 😃
DOWNLOAD: SFS | MF 🫙
credits go to @pierisim for the absolutely iconic ts4 meshes & textures, and to @hugelunatic for their incredibly helpful slots and repository tutorials! 🥰
ITEMS INCLUDED
they're also in a readme in the download, and shown in a collection file, but if you reallyyy want to see what you're downloading...
Baskets -> 782 polys, 10 swatches, $75 Bottles Pack -> 524 polys, 6 swatches, $60 Bowls -> 522 polys, 12 swatches, $125 Can -> 49 polys, 8 swatches, $38 Cans Pack A -> 443 polys, 17 swatches, $38 Cans Pack B -> 103 polys, 17 swatches, $38, repo'd to Cans Pack A Cans Pack C -> 205 polys, 17 swatches, $38, repo'd to Cans Pack A Cans Pack D -> 443 polys, 17 swatches, $38, repo'd to Cans Pack A Cans Pack E -> 147 polys, 17 swatches, $45, repo'd to Cans Pack A Pile of Dishes -> 524 polys, 12 swatches, $125 Dustpan -> 287 polys, 14 swatches, $35 Food Box A -> 13 polys, 6 swatches, $49 Food Box B -> 13 polys, 8 swatches, $49 Food Boxes A -> 97 polys, 12 swatches, $49 Food Boxes B -> 109 polys, 12 swatches, $49, repo'd to Food Boxes A Food Boxes C -> 49 polys, 12 swatches, $49, repo'd to Food Boxes A Food Boxes D -> 49 polys, 12 swatches, $49, repo'd to Food Boxes A Food Boxes E -> 25 polys, 12 swatches, $49, repo'd to Food Boxes A Food Boxes F -> 25 polys, 12 swatches, $49, repo'd to Food Boxes A Food Boxes G -> 37 polys, 12 swatches, $49, repo'd to Food Boxes A Food Boxes H -> 25 polys, 12 swatches, $49, repo'd to Food Boxes A Freezer -> 236 polys, 18 swatches, $375 Jar Small -> 205 polys, 14 swatches, $53, repo'd to Jar Small Pack A Jar Small Pack A -> 817 polys, 8 swatches, $53 Jar Small Pack B -> 409 polys, 8 swatches, $53, repo'd to Jar Small Pack A Jar Tall -> 215 polys, 12 swatches, $54, repo'd to Jar Tall Pack A Jar Tall Pack A -> 857 polys, 12 swatches, $54 Jar Tall Pack B -> 429 polys, 12 swatches, $54, repo'd to Jar Tall Pack A Le Parfait Medium Jar -> 261 polys, 14 swatches, $55 Le Parfait Medium Jar Pack A -> 1041 polys, 4 swatches, $55 Le Parfait Medium Jar Pack B -> 1041 polys, 4 swatches, $55 Le Parfait Medium Jar Pack C -> 521 polys, 4 swatches, $55, repo'd to Le Parfait Medium Jar Pack A Le Parfait Tall Jar 1 -> 261 polys, 14 swatches, $56 Le Parfait Tall Jar 1 Pack A -> 521 polys, 4 swatches, $56, repo'd to Le Parfait Medium Jar Pack A Le Parfait Tall Jar 1 Pack B -> 1041 polys, 4 swatches, $56, repo'd to Le Parfait Medium Jar Pack B Le Parfait Tall Jar 1 Pack C -> 1041 polys, 4 swatches, $56, repo'd to Le Parfait Medium Jar Pack A Le Parfait Tall Jar 2 -> 239 polys, 12 swatches, $57 Le Parfait Tall Jar 2 Pack A -> 1429 polys, 4 swatches, $57 Le Parfait Tall Jar 2 Pack B -> 715 polys, 4 swatches, $57, repo'd to Le Parfait Tall Jar 2 Pack A Le Parfait Tall Jar 2 Pack C -> 715 polys, 4 swatches, $57, repo'd to Le Parfait Tall Jar 2 Pack A Onion Basket -> 942 polys, 8 swatches, $75 Potatoes Bag -> 455 polys, 8 swatches, $45 Shelving Angle -> 332 polys, 26 swatches, $155 Shelving Left -> 280 polys, 26 swatches, $155, repo'd to Shelving Middle Shelving Middle -> 332 polys, 26 swatches, $155 Shelving Quarter -> 184 polys, 26 swatches, $155 Shelving Right -> 280 polys, 26 swatches, $155, repo'd to Shelving Middle
UNEDITED PREVIEWS


i would like to have a very special shoutout especially to rixon on the linus tech tips discord server, i've been having crashing issues with the PC my grandpa left me for months under weird circumstances and with their help we were able to narrow it down to a motherboard issue! now i can keep playing ts2 in 4k 😍
if there are any issues that you find with this set, please don't be afraid to let me know! happy simming, and when you download this, do keep in mind,
#sims 2 download#the sims 2 cc#ts2cc#s2cc#sims 2 cc#the sims 2#sims 2#4t2#4t2 buy#suggestions#sims 2 suggestions
2K notes
·
View notes
Text
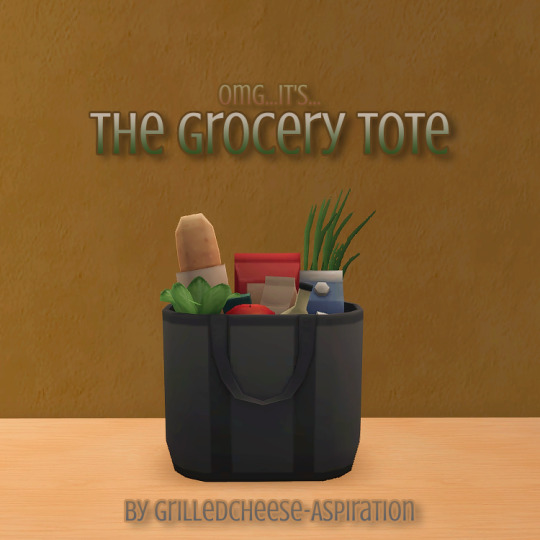
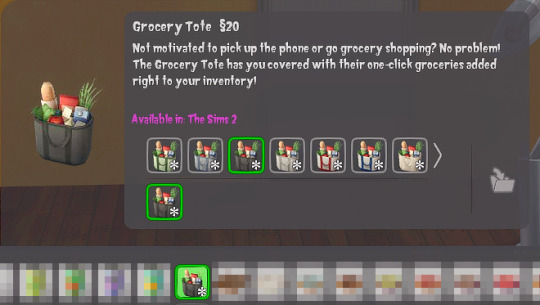
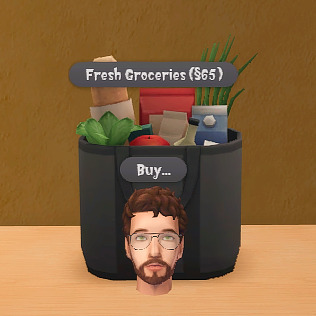

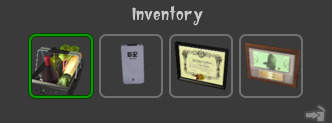
"Not motivated to pick up the phone or go grocery shopping? No problem! The Grocery Tote has you covered with their one-click groceries added right to your inventory!" Found in Kitchen > Misc for $20 (for the "tote"), when you buy groceries, it'll charge your household $65 each time. This can be adjusted to your liking!
Created out of necessity for my game, thought I'd share! Thanks to @morepopcorn for their assistance as well as converting the mesh from Sims 4!
Editing to add: Code ORIGINALLY by @fireflowersims / @sunmoon-starfactory as I followed a botched tutorial on youtube prior to knowing it was botched. This kiosk will eventually be reworked and corrected.
Download @ Patreon or SFS (1.2mb)
539 notes
·
View notes
Text
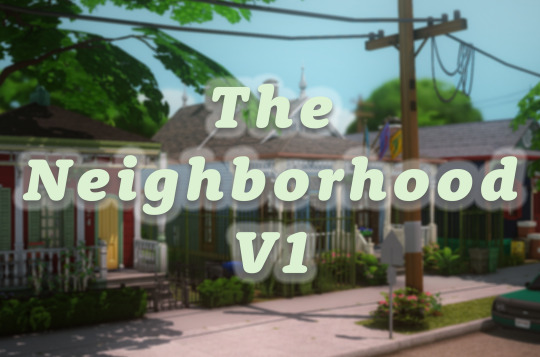
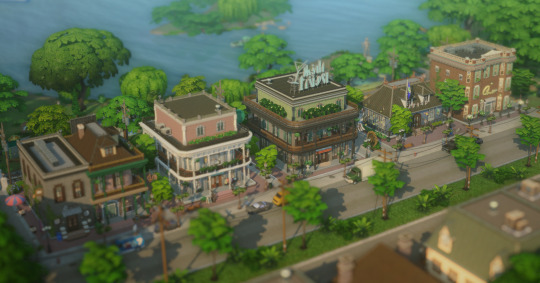
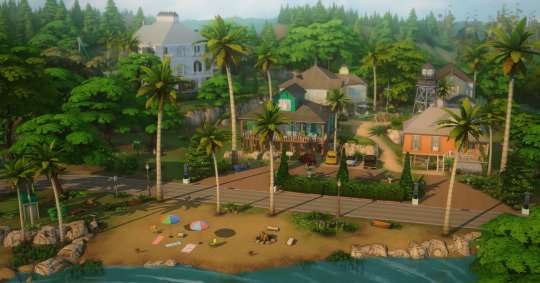
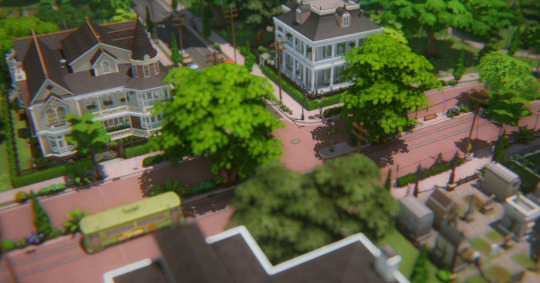
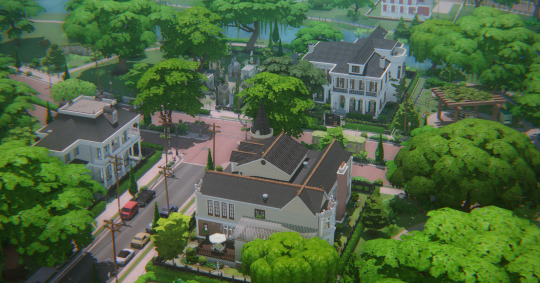
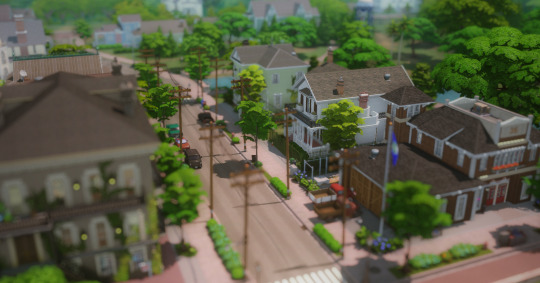
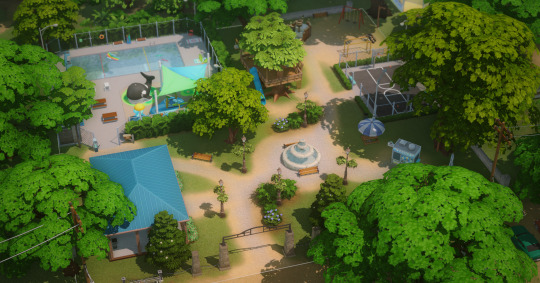
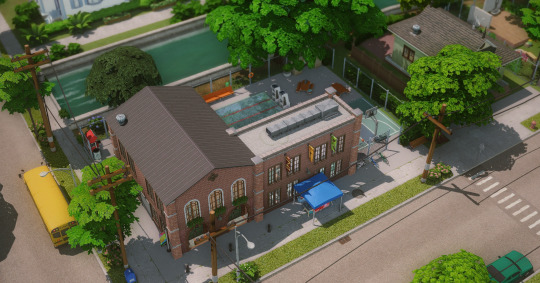
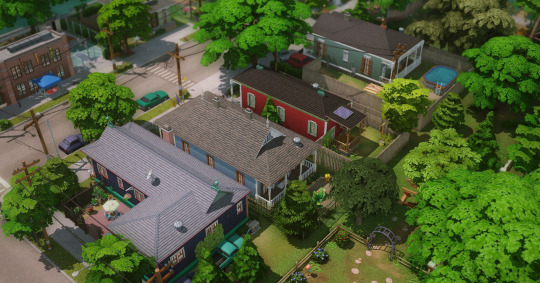
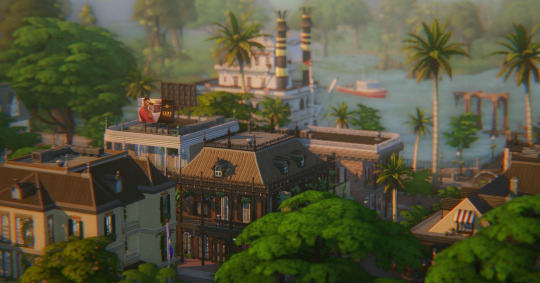
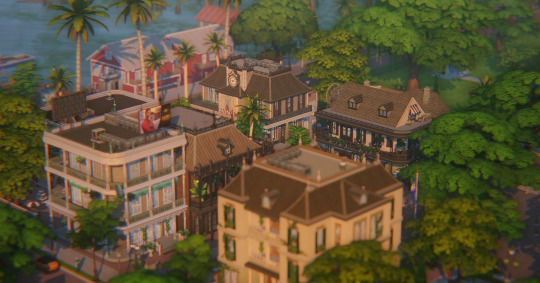
V1: Willow Creek + Magnolia Promenade 🏠
The Neighborhood is a CC-free save file that explores the concept of home. V1 celebrates the vibrant communities of the U.S. Gulf Coast. ❤️
This is what comes in V1:
13 community lots
22 total residences (includes 3 multi-family rental lots, 9 single family homes)
New High School & Auditorium in Copperdale (+8 school staff townies)
Secret lot (Sylvan Glade) reimagined
17 unique households with skills, jobs, relationships, and stories that tie into the town
New clubs and holidays
Download, screenshots & more info below ↪

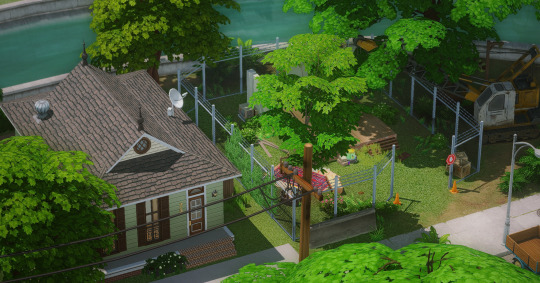
The wonderful Ly family in Willow Creek was lovingly created for the save by @cowplant-snacks. All other neighbors were made by me, you can meet all of them here! Pets are from Pugowned, misc. townies from @cowplant-snacks and @simsontherope on the gallery.
There's lots of little details and things to explore, both around the world and relationship wise, so I'm excited to see what y'all uncover. Please feel free to @theneighborhoodsave in your posts or tag #theneighborhoodsave. I'd love to see what your sims are up to!
I also want to say thank you to anyone who's appreciated this creative journey with me. This save feels like home to me and y'all have supported me every step of the way!

Download the The Neighborhood save on SFS
Alt: Google Drive
The save is 100% CC free! Please note that I do have all expansions, packs, and kits (except for Castle Estate, Goth Galore + Crystal Creations.) For any items you don't own the game will try to auto find replacements for those items. The file is mostly blank this time around but does include the original EA builds in university and vacation type worlds (sans Granite Falls.)
Included is a folder of completely optional skin details/eyelashes for the neighbor sims. Thank you to @faaeish, @pyxiidis, @tamo-sim, and @landgraabbed! There are 4 pieces of CC I cannot include in the folder due to creator TOU. Please check the included "Read Me" file for more information.
All builds and families are up on the gallery (@sweetbeagaming) + tray files have been shared here.
If you've never used a save file and need help installing it, I highly recommend this tutorial by @leeleebsimming.
⚠️ A couple of disclaimers here due to some existing EA bugs. EDIT 4/25: Included in that link are directions on how to avoid TOOL'd items from disappearing. If you want to keep powerlines and such please check this out! ⚠️
Everything was tested to work around these, but I wanted to put them out there as an FYI.
TOU: Please don't reupload my save/builds/sims, claim as your own, and absolutely do not paywall them. Other than that feel free to build your own Neighborhood stories however you'd like!
#neighborhood save#the neighborhood save#sims community#ts4#sims 4#sims save file#simblr#ts4 simblr#ts4 save file#sims 4 save file#the sims 4#sims 4 gameplay#cc free#no cc#ts4 no cc#no cc build#no cc lot#sims 4 no cc#sims#ts4 gameplay#ts4 screenshots#save file#sims build
4K notes
·
View notes