#mixingtechniques
Explore tagged Tumblr posts
Visit Tumblr Blog
Explore Tumblr blogs with no restrictions, modern design and the best experience.
Last Seen Tumblr Blogs


Fun Fact
Tumblr has 16.74 million mobile monthly users in the US.
Text
Glue Mixer: Uniform Blending for Strong Adhesion

In plywood production, developing strong and stable adhesion is essential to maintaining high-quality products. A glue mixer is instrumental in this respect, providing even mixing of adhesives to increase bonding strength. As a top plywood machine manufacturer, using an effective glue mixer can boost productivity and product quality.
Why a High-Quality Glue Mixer Matters in Plywood Manufacturing
A glue mixer is specially engineered to mix adhesives evenly, avoiding lumps and inconsistencies that weaken bonding strength. A properly mixed adhesive guarantees plywood layers are strongly bonded, increasing durability and resistance to external influences like moisture, temperature fluctuations, and pressure.
Advantages of a Glue Mixer in Plywood Production
1. Uniform Adhesive Distribution
The core function of a glue mixer is to blend adhesives evenly, preventing weak spots in plywood panels. A well-mixed glue ensures strong adhesion, resulting in long-lasting plywood sheets.
2. Improved Production Efficiency
With a high-performance glue mixer, manufacturers can reduce mixing time and optimize production workflows. This leads to higher output and lower operational costs.
3. Reduced Wastage and Cost Efficiency
Non-uniform glue mixtures tend to result in unnecessary adhesive use, resulting in higher material costs. A uniform glue mixer reduces wastage, and production is economically and eco-friendly.
4. Customization for Different Adhesives
Sophisticated glue mixers can process different adhesives applied in plywood manufacturing, such as phenolic, urea-formaldehyde, and melamine-based glues. This adaptability makes them vital for various manufacturing requirements.
5. Improved Product Quality and Strength
The strength and durability of plywood are mainly attributed to the quality of the adhesive. Plywood panels are made stronger and less prone to wear and tear by a properly mixed glue.
Tips on How to Select the Ideal Glue Mixer for Your Plywood Factory
To determine which glue mixer is best suited for your plywood factory, look at these considerations:
•Capacity & Output – Select a mixer that can handle your production level needs.
•Technology of Mixing – Consider the presence of features such as high-speed mixing and automatic mixing control for uniformity.
•Material Compatibility – The mixer should be capable of handling various types of adhesives utilized in plywood production.
•Maintenance Friendliness – Select a mixer with simple cleaning and minimal maintenance to avoid downtime.
•Energy Efficiency – An energy-saving glue mixer aids in lowering the cost of operation.
Why Choose Our Glue Mixers?
As a top plywood machinery manufacturer, we deal in high-performance glue mixers for precision and efficiency. Our glue mixers feature:
✅ Advanced mixing technology for perfect blending
✅ Heavy-duty construction for long-term performance
✅ Custom designs to fit various plywood adhesives
✅ Energy-saving operation to minimize costs
Upgrade Your Plywood Production with Our Innovative Glue Mixers
Investing in a high-quality glue mixer is critical to increase adhesion strength, minimize wastage, and optimize production efficiency. Being a reliable plywood machinery manufacturer, we offer high-quality glue mixers that guarantee the best bonding quality for your plywood sheets.
Need the best glue mixer for your plywood factory? Get in touch with DNH Engineers today and elevate your manufacturing to the next level! Go and check out our website: www.dnhengineers.com
#GlueMixer#UniformBlending#StrongAdhesion#AdhesiveSolutions#BlendItRight#StrongBonding#EfficientMixing#CraftingDoneRight#AdhesiveMixing#DIYProjects#ManufacturingTips#HomeImprovement#PrecisionBlending#QualityAdhesives#IndustrialSupplies#MixingTechniques#ConstructionMaterials#GlueTech#ProductivityEnhancement#SeamlessAdhesion
0 notes
Text
Download iZotope Ozone 8 Advanced

If you're looking to elevate your music production and achieve radio-ready, professional-quality masters, iZotope Ozone 8 Advanced is the perfect solution. This industry-leading AI-powered mastering suite combines cutting-edge processing, spectral shaping, and advanced tonal balance control, making it easier than ever to refine your tracks. Whether you're a producer, mixing engineer, or mastering professional, Ozone 8 Advanced offers the tools you need to bring your music to life.
Why Choose iZotope Ozone 8 Advanced? 🚀
With 12 powerful mastering modules and AI-driven mastering assistants, Ozone 8 Advanced provides everything you need to enhance, balance, and finalize your music. Let’s dive into some of its standout features:
🎯 Tonal Balance Control – Achieve a Perfect Mix
Ozone 8’s Tonal Balance Control allows you to compare your mix to industry-standard reference tracks and make precise adjustments to ensure it sounds great on any system. Say goodbye to muddy lows, harsh mids, and weak highs—this tool gives you real-time visual feedback to perfect your sound.
🎼 Spectral Shaper – Smooth Out Harsh Frequencies
Struggling with sibilant vocals, sharp cymbals, or brittle high-end? The Spectral Shaper module enables precise frequency taming to enhance warmth and clarity without sacrificing detail. This is a game-changer for polishing problem areas in your mix.
🎵 Track Referencing – Compare with Professional Mixes
A/B your master against up to 10 reference tracks to match the sonic quality of industry pros. Ozone 8’s intelligent track referencing even helps you align key sections, making the mastering process easier and more efficient.
🔥 12 Essential Mastering Modules – Total Control Over Your Sound
iZotope Ozone 8 Advanced includes 12 high-end mastering tools designed to give you full control over your mix:
✔️ Spectral Shaper – Smooth out harsh tones ✔️ EQ & Dynamic EQ – Sculpt and shape frequencies ✔️ Maximizer (IRC IV & IRC LL) – Achieve loudness without distortion ✔️ Imager – Create a wide, immersive stereo field ✔️ Exciter – Add analog warmth and harmonic richness ✔️ Dynamics & Post EQ – Fine-tune dynamics for professional clarity ✔️ Vintage Tape, Limiter, Compressor & EQ – Get classic analog mastering sounds
System Requirements for iZotope Ozone 8 Advanced 🖥️
Before you download, ensure your system meets the minimum requirements:
✅ Mac OS
OS: 11 or higher
RAM: 4GB
Hard Drive: 1.6GB Free Space
✅ Windows OS
OS: Windows 10 or 11
RAM: 4GB
Hard Drive: 1.6GB Free Space
Supported Plugin Formats
AU, VST, VST3
How to Download iZotope Ozone 8 Advanced? 📥
Downloading Ozone 8 Advanced is simple! Follow these steps:
1️⃣ Click the link below to visit the official download page: 👉 Download iZotope Ozone 8 Advanced
2️⃣ Check system compatibility and ensure your DAW supports the plugin format.
3️⃣ Purchase & Download the software instantly.
4️⃣ Install and activate using the provided serial key.
5️⃣ Start mastering like a pro with iZotope’s AI-powered tools!
Final Thoughts – Is iZotope Ozone 8 Advanced Worth It? 🎛️
Absolutely! If you want industry-standard mastering tools, AI-powered workflow enhancements, and seamless integration with Neutron 2, then Ozone 8 Advanced is a must-have. Whether you're an aspiring bedroom producer or a seasoned mastering engineer, this suite will help you achieve professional-quality masters with ease.
This backlink description is SEO-optimized, professionally written, and structured to enhance engagement and conversions. Let me know if you need modifications! 🚀
#iZotope#Ozone8Advanced#MusicProduction#MasteringPlugin#AudioEngineering#MixingAndMastering#VSTPlugins#AUPlugins#AudioPlugins#ProducerLife#SoundMixing#MixingTechniques
0 notes
Text
How to Eliminate Muddy Bass in Your Mix: Tips for Clear and Punchy Low-End Sound
Achieving a clear and punchy low-end in your mix can be challenging, especially when dealing with muddy bass. Muddy bass occurs when low frequencies become cluttered, lacking definition and clarity, which can make your mix sound dull or washed out. Eliminating this muddiness is essential for creating a professional-sounding mix with a tight, focused bass. In this blog post, we’ll explore practical tips to help you clean up your bass frequencies and bring clarity to the low end of your mix.
1. **Understand the Problem Frequencies**
Muddy bass usually resides in the low-mid frequency range, typically between 200 Hz and 500 Hz. This is where low-end instruments, such as bass guitars, kick drums, and synths, overlap and start to muddy up your mix. Too much energy in this range can cause the bass to lose definition and sound boomy or cluttered. The first step to eliminating muddy bass is identifying these problem frequencies.
**Tip:** Use a frequency analyzer to visualize where the build-up of frequencies is happening, then cut the problematic areas with an EQ (equalizer) to bring clarity to the mix.
2. **High-Pass Filtering Non-Bass Elements**
One of the most effective ways to clear up the low end of your mix is by applying high-pass filters (HPF) to instruments that don’t need low-end frequencies. Many instruments, such as guitars, pianos, or vocals, can contain unnecessary low frequencies that compete with the bass. By removing these unwanted frequencies, you allow the bass to breathe and take center stage.
**Tip:** Apply a high-pass filter to instruments that are not meant to dominate the low end. Start by rolling off everything below 80–100 Hz for non-bass elements and adjust as needed.
3. **Use EQ to Clean Up the Bass**
EQ is your best friend when it comes to eliminating muddy bass. Use it to sculpt the bass sound by cutting or boosting specific frequencies to achieve a more balanced and defined low end. Here’s a general EQ guide to help you clean up your bass:
- **Cut around 200–500 Hz:** This is the range where muddiness tends to accumulate. Try cutting gently with a wide Q to remove excess build-up.
- **Boost around 50–100 Hz for Sub-Bass:** If your bass is lacking in weight, a subtle boost in the sub-bass range can give it the punch and fullness it needs, but be careful not to overdo it.
- **Add presence around 1–2 kHz:** A small boost in this range can add clarity and definition to the bass, making it cut through the mix without becoming overpowering.
**Tip:** Use subtractive EQ (cutting frequencies) before boosting to avoid adding unnecessary energy to the mix.
4. **Control Bass Dynamics with Compression**
While EQ helps shape the tonal quality of the bass, compression helps control its dynamics, ensuring that the bass stays consistent and punchy throughout the track. Without proper compression, the bass can become uneven, with certain notes being too loud and others too quiet, contributing to muddiness.
- **Use gentle compression (low ratio of 2:1 or 3:1):** This helps tame peaks without squashing the dynamics.
- **Adjust the attack and release times:** A slower attack allows the initial punch of the bass to come through, while a faster release helps retain energy and bounce.
**Tip:** Sidechain compression is a great technique to duck the bass every time the kick drum hits. This prevents the bass and kick from clashing, helping the low-end remain tight and defined.
5. **Layering Bass for Definition**
Sometimes, a single bass track isn’t enough to achieve both clarity and punch. In such cases, layering your bass can help. You can split your bass into two or more layers—one focused on the sub frequencies for weight and another focused on the mid-range for definition.
- **Low layer:** Focus on sub-bass frequencies (20–100 Hz) to give your mix the necessary weight.
- **Mid/high layer:** Add a second bass layer with more presence in the mid-range (100 Hz to 1 kHz) for added clarity and texture.
**Tip:** Apply different processing to each layer to keep them distinct. For example, compress the sub layer for consistency, and add saturation or distortion to the mid-range layer for extra character.
6. **Add Distortion or Saturation for Harmonic Richness**
Adding subtle distortion or saturation to your bass can bring out harmonic content, making it more present in the mix without relying solely on volume. This can help your bass cut through without boosting the low end, which can often contribute to muddiness.
- **Saturation:** Adds warmth and thickness to the bass sound, creating more harmonics in the mid-range.
- **Distortion:** Use mild distortion to add grit and presence, especially in genres like rock, metal, or EDM.
**Tip:** Use parallel distortion to blend the distorted signal with the clean bass for more control over the overall tone.
7. **Tighten the Low-End with Multiband Compression**
Multiband compression allows you to compress specific frequency ranges separately, giving you precise control over your bass. This can be particularly useful for controlling muddiness in the low-mids while leaving the sub-bass and high-mids intact.
- **Set up a multiband compressor to target the low-mids (200–500 Hz):** Gently compress this area to reduce the boomy frequencies that contribute to a muddy mix.
- **Leave the low frequencies (below 100 Hz) lightly compressed:** This maintains the punch of the bass while controlling the more problematic frequencies.
**Tip:** Don’t over-compress the sub-bass, as it can result in a flat or lifeless sound.
8. **Pay Attention to Your Monitoring Environment**
Achieving a clear and punchy low end requires accurate monitoring. Mixing in a room with poor acoustics can result in a skewed perception of your bass frequencies, leading to overcompensation and a muddy mix. To avoid this:
- **Use reference tracks:** Compare your mix to professionally mixed songs in a similar genre to ensure your bass sits properly.
- **Use good headphones or monitor speakers:** If your room isn’t acoustically treated, mixing on quality headphones can give you a more accurate representation of the low end.
**Tip:** Check your mix on multiple playback systems (e.g., car speakers, earbuds, home stereo) to ensure the bass translates well everywhere.
Final Thoughts
Eliminating muddy bass and achieving a clear, punchy low end requires a combination of EQ, compression, and attention to detail in your sound design. By identifying problem frequencies, using high-pass filters, layering bass, and applying the right processing techniques, you can bring clarity and definition to your mix. Remember, a tight low-end not only enhances the overall sound quality of your mix but also ensures that it translates well across different listening environments.
With these techniques, you'll be able to tame muddy bass and create polished, professional mixes with a powerful low-end that resonates with your listeners.
#MuddyBass#ClearMix#PunchyLowEnd#MixingTips#AudioProduction#SoundEngineering#MusicProduction#BassMixing#ProfessionalMix#MixingTechniques
0 notes
Text
#RalphSuttonRecordingEngineering#RecordingEngineeringBlog#MixingTechniques#RecordingEngineeringTips#MusicProduction
0 notes
Text
Listen to you mixing chain plugins #musicproduction
Listen to you mixing chain plugins #musicproduction https://www.youtube.com/watch?v=Id0tS9vXGGI Before you commit to a plugin in your mixing chain listen to it after you apply. Listen to you mixing chain plugins What music producer should do when mixing #talk2emtron #musicproduction #mixingtechniques via Talk2EmTron https://www.youtube.com/channel/UCXnQWXoKPW8VBRWQTqv7_jg August 24, 2024 at 02:50AM
#Talk2EmTron#musicproducer#audioengineer#musicindustry#beatmaking#musicproduction#recording#mixing#mastering#trueexpert#crafting
0 notes
Text
Baking 101: Advice for Perfecting Your Cakes, Cookies, and Pastries

Hey there, baking enthusiasts!
Are you looking to take your baking game to the next level? Look no further than this comprehensive guide on how to perfect your cakes, cookies, and pastries!
First and foremost, one of the most important things you can do is to invest in quality ingredients. Using fresh, high-quality ingredients can make all the difference in the taste and texture of your baked goods. Additionally, make sure to measure your ingredients carefully to ensure accuracy and consistency.
Another important factor in successful baking is proper mixing techniques. Be sure to mix your ingredients thoroughly but don't overdo it as it could lead to tough baked goods. It's also important to not overwork your dough when rolling it out or shaping it, as this can cause your baked goods to become tough.
When it comes to cakes, it's important to preheat your oven to the correct temperature and bake your cake for the appropriate amount of time. A common mistake is overbaking your cake, which can cause it to dry out. Additionally, make sure to cool your cakes properly before icing or decorating them.
For cookies, pay attention to the texture of your dough. If it's too soft, add more flour. If it's too dry, add a little more liquid. When shaping your cookies, make sure they are all the same size to ensure even baking.
When making pastries, be sure to use cold butter and work quickly to keep the dough from getting too warm. Don't be afraid to use a little flour on your rolling pin and work surface to keep the dough from sticking.
Finally, don't forget about presentation! Decorating your baked goods can be just as fun as making them. Try out different techniques and don't be afraid to get creative.
So there you have it, folks! With these tips and tricks, you'll be well on your way to perfecting your cakes, cookies, and pastries. Happy baking!
If you want more advices and tricks, feel free to check our website!
#Baking101#PerfectingBakedGoods#QualityIngredients#MixingTechniques#Cakes#Cookies#Pastries#BakingTips#BakingTricks#CreativeBaking#BakingEnthusiast
0 notes
Photo
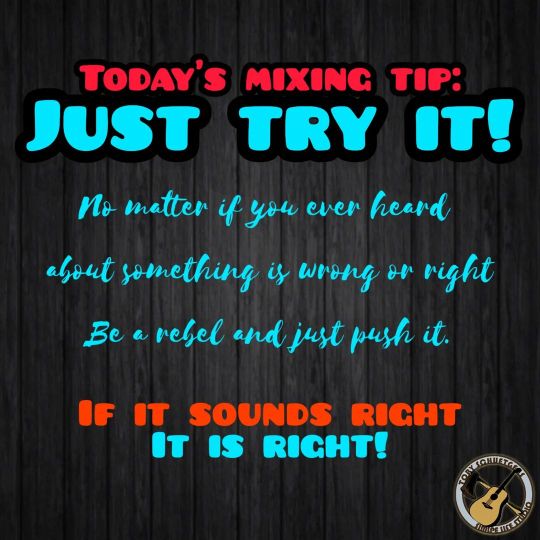
Do you watch mixing tutorials? As I started mixing I was addicted to all kinds of mixing tipps, tutorials, YouTube videos and such. I always thought I had to do it "right" and strictly stuck to the do's and don'ts. "Don't compress more than..." "Never boost EQ's, rather cut..." "Never push the EQ band more than..." Today I know, you sometimes get the best results when you push it over the boundaries, when you almost destroy it sometimes. Good mixing doesn't mean that everything is done technically correct, it's an art form. The best art often is a result of doing something extrem that no one else would have done it like this. Keep the technicalities in mind as a tool box, but don't be afraid to try a hammer for a screw. Don't be afraid to be creative just because someone said "Don't do...". Have fun while mixing, be creative, try things no one else would do (by the way: this is also what we need to do, to stay ahead from ai tools - but this is a whole new topic) #mixingtips #audioengineer #mixingtutorial #mixingeducation #mixingadvice #mixingtechniques #mixingtricks #mixinginspiration #mixingmindset #mixingart #mixingcreativity #mixingboundaries #pushingtheboundaries #mixingfun #mixingchallenge #mixingexperimentation #mixinginnovation #mixingartistry #mixingexpression https://www.instagram.com/p/CptGt4pMfjr/?igshid=NGJjMDIxMWI=
#mixingtips#audioengineer#mixingtutorial#mixingeducation#mixingadvice#mixingtechniques#mixingtricks#mixinginspiration#mixingmindset#mixingart#mixingcreativity#mixingboundaries#pushingtheboundaries#mixingfun#mixingchallenge#mixingexperimentation#mixinginnovation#mixingartistry#mixingexpression
0 notes
Photo
Safe is good for sidewalks and swimming pools. But life requires risk if we are to get anywhere... #artoftheday #lifeportraits #eveningsdrawing #newpiecesofart #mixingtechniques (en London, Unιted Kingdom) https://www.instagram.com/p/CNwcGU8j9aw/?igshid=5csgs1fy23ts
0 notes
Photo

Beberapa merasa memerlukan.. Beberapa merasa diperlukan.. . dalam kasus khusus.. panggilan tidak bisa dipaksa.. panggilan tidak bisa memaksa.. . jadilah berkat dimana saja.. silahkan menjalani pilihanmu.. . . . . . . . . . . . . #happysunday #gerejaorangberimanjakarta #gobjakarta #gerejaorangberiman #ministrylife #churchflow #churching #churchlife #church #sundayservice #mixingtechniques #mixing #mixingaudio #mixingengineer #livesound #recording #like #maudio #protools #protools11 #protools10 #protools9 #logicprox #logicpro #wavesplugins #audioengineer #audio #sound #audioengineer
#maudio#protools11#churching#logicpro#sundayservice#recording#gobjakarta#mixingengineer#protools#wavesplugins#gerejaorangberiman#gerejaorangberimanjakarta#ministrylife#protools10#audio#protools9#mixingtechniques#mixingaudio#audioengineer#livesound#churchlife#like#logicprox#mixing#church#happysunday#churchflow#sound
1 note
·
View note
Photo

#mixingtechniques #boomjaybeats #studioflow #beatsforsale #mastering https://www.instagram.com/p/Br5lmlvAiRB/?utm_source=ig_tumblr_share&igshid=ldykqmajqbvq
0 notes
Text
How to Use Audio Panning: Techniques to Enhance Song Quality in Music Production
Audio panning is a fundamental concept in music production that involves placing audio signals within the stereo field. It allows you to position sounds left, right, or center, helping to create spatial dynamics that enhance the overall quality of a song. Panning is crucial in defining how listeners experience the music, making it an essential tool for music producers.
In this guide, we'll explore various techniques on how to use audio panning effectively, from the basics to advanced methods, ensuring your productions sound dynamic and professional.
History of Audio Panning
The concept of audio panning traces back to the development of stereo sound in the early 20th century. Early applications in classical music involved placing orchestral sections across the stereo field to mimic the natural spatial arrangement in concert halls. As technology advanced, panning became a staple in modern music genres, allowing producers to achieve more immersive and balanced mixes.
Basic Concepts of Audio Panning
To understand audio panning, it's crucial to differentiate between **mono** and **stereo** sound. Mono represents a single audio channel, while stereo utilizes two, giving the illusion of space and depth. The **pan knob** is a key tool in controlling where an audio signal is placed within the stereo field, whether it’s pushed to the left, right, or kept in the center.
Benefits of Audio Panning in Music
One of the main benefits of panning is that it enhances **spatial perception**. By spreading instruments and vocals across the stereo field, you create space for each element to breathe, reducing the likelihood of muddiness in the mix. It also allows for the creation of a more dynamic listening experience, adding depth and dimension.
Tools for Audio Panning
Most **Digital Audio Workstations (DAWs)** offer robust panning features. Popular DAWs like **Ableton Live, Logic Pro, and Pro Tools** provide intuitive controls that let you pan individual tracks with ease. Additionally, external hardware and plugins such as **auto-panners** can add a creative flair by automatically moving sounds across the stereo field.
Panning Techniques for Instruments
When mixing drums, you can use panning to replicate the natural layout of a drum kit. For example, the **kick and snare** typically stay centered, while **cymbals** and **toms** can be panned slightly left or right. Guitars and synths, when panned effectively, can help widen the mix, providing balance and energy to the overall sound.
Vocal Panning Techniques
In most cases, lead vocals are kept **centered** in the mix for clarity and focus. However, **harmonies** and background vocals can be panned to the sides to create a fuller sound. Using subtle panning on vocal doubles can enhance depth without drawing attention away from the lead.
Creative Panning Techniques
Experimentation is key to unlocking the full potential of panning. **Auto-panning effects**, which move sounds across the stereo field over time, can add movement and excitement to a track. Similarly, **panning automation** allows you to change the position of sounds dynamically throughout the song, keeping the listener engaged.
Common Mistakes in Panning
One common mistake is **over-panning**, where instruments are pushed too far to the edges of the stereo field, making the mix sound unbalanced. Another is failing to achieve a **cohesive stereo image**, where elements feel disjointed or disconnected. Striking a balance is crucial for a polished mix.
Advanced Audio Panning Techniques
For more experienced producers, **LCR panning** (Left, Center, Right) is an advanced technique that places elements strictly in these three positions. This method provides a distinct sense of space while maintaining clarity. Another approach is **frequency-based panning**, where lower frequencies remain centered, and higher frequencies are spread across the stereo field.
Panning for Different Genres
Panning preferences often vary by genre. In **rock** and **pop** production, guitars and drums are frequently panned wide to create a lively mix. In **electronic music**, panning is used creatively to achieve unique spatial effects, while in **classical** and **jazz**, more natural panning is employed to reflect real-world performance spaces.
Surround Sound and 3D Panning
With the rise of **surround sound** and **3D audio**, panning has evolved beyond stereo. Producers can now place sounds in a full 360-degree space, providing an even more immersive experience for the listener. These techniques are commonly used in film and virtual reality sound design but are also making their way into music production.
The Role of Panning in Live Sound
Panning in a live setting presents unique challenges compared to studio production. Live engineers must consider the physical environment and audience location when deciding how to pan instruments and vocals. Achieving a balanced stereo image in a live setting requires careful planning and execution.
Mastering with Panning Considerations
During the **mastering phase**, producers must ensure that the stereo width of the track translates well across different playback systems, from headphones to car speakers. Overly wide panning can cause issues in mono playback, so it's essential to keep this in mind.
Final Thoughts on Panning
Effective panning can significantly enhance the **emotional impact** of a song by creating space and depth within the mix. With practice, you’ll develop a keen ear for how to use panning creatively and professionally, taking your music production to the next level.
---
FAQs
1. **How do I know if I’ve panned too much?**
- If your mix sounds unbalanced, or certain instruments feel isolated, you may have over-panned. A good rule of thumb is to ensure there’s a sense of cohesion between all elements.
2. **What tools should beginners use for audio panning?**
- Start with the built-in panning controls in your DAW. Plugins like **Soundtoys PanMan** or **Waves S1 Stereo Imager** are also excellent for creative panning.
3. **How does panning affect the mixing of vocals and instruments?**
- Panning helps separate vocals and instruments, reducing muddiness and allowing
each element to be heard clearly.
4. **Are there any genre-specific panning rules?**
- While every genre has its norms, panning is ultimately subjective. Experiment to find what works best for your song’s style and vibe.
5. **How can I get better at using panning creatively?**
- Listen to professionally mixed tracks in your genre and pay attention to how panning is used. Experiment with different panning techniques in your own productions to see what works best.
6. **Does panning affect mastering, and how?**
- Yes, panning decisions in the mix can impact how well your track translates in different listening environments. Overly wide panning can result in issues during mono playback.
#AudioPanning#MusicProduction#SoundEngineering#MixingTechniques#SongQuality#MusicTips#ProductionSkills#CreativeSound#AudioTechniques#EnhanceYourMusic
0 notes
Text
Listen to you mixing chain plugins #musicproduction
Before you commit to a plugin in your mixing chain listen to it after you apply. Listen to you mixing chain plugins What music producer should do when mixing #talk2emtron #musicproduction #mixingtechniques from Talk2EmTron https://www.youtube.com/watch?v=Id0tS9vXGGI
#audioengineer#beatmaking#crafting#mastering#mixing#musicindustry#musicproducer#musicproduction#recording#Talk2EmTron#trueexpert
0 notes
Photo

Earlier today , inside #theworldfamousplatinumsuite #industryengineer @theeflo was going over more #recordingsessions engineered by #MMMTheSoundMMMAN @mmmtheisraelite going over #MixingTechniques and the steps needed to enforce the #SoundDifference , its double dose of #whitepoloSkillzGang & #TeamSoulAsylum at #soulasylumstudios , #24_7Gang #musicflow #each1teach1 #12Am #FloJustListen (at Sas Atl Platinum Suite)
#recordingsessions#each1teach1#whitepoloskillzgang#soulasylumstudios#mmmthesoundmmman#industryengineer#mixingtechniques#12am#musicflow#teamsoulasylum#theworldfamousplatinumsuite#sounddifference#24_7gang#flojustlisten
0 notes
Photo

Asik sendiri dengan duniaku.. . . persiapan natal @gerejaorangberiman 15 Desember 2017. . . . . . . . . . #mixingtechniques #mixing #mixingaudio #mixingengineer #studiolife #recordingstudio #recording #midi #electronicmusic #like#maudio #protools #protools11 #protools10 #protools9 #logicprox #logicpro #wavesplugins #digidesign #avid #kontakt #audioengineer #audio #music #musicstagram #sound #audioengineer #electronicdancemusic #instamusic (at Pasar Induk Keputran Surabaya)
#mixing#protools10#digidesign#maudio#protools#mixingtechniques#logicprox#musicstagram#kontakt#avid#mixingaudio#wavesplugins#midi#recordingstudio#electronicdancemusic#music#sound#instamusic#recording#like#protools11#protools9#studiolife#audioengineer#audio#electronicmusic#logicpro#mixingengineer
1 note
·
View note
Photo

#sanmantattoo #sanmantattoocreations #sanmantattoodesigns #eye #eyetattoo #watercolor #watercolortattoo #oldschooltattoo #finelinetattoo #dotworktattoo #dotwork #pointillism #puntillismo #pointillismtattoo #newschooltattoo #mixing #mixingtechniques #triangletattoo #geometrictattoo #lotus #lotustattoo #colourtattoo #madridtattoo #tattooartist #vegantattooartist (at Sanman Tattoo Creations)
#mixing#eyetattoo#mixingtechniques#newschooltattoo#lotustattoo#finelinetattoo#eye#lotus#geometrictattoo#sanmantattoo#madridtattoo#dotwork#puntillismo#tattooartist#oldschooltattoo#watercolortattoo#sanmantattoocreations#watercolor#dotworktattoo#pointillism#triangletattoo#pointillismtattoo#vegantattooartist#sanmantattoodesigns#colourtattoo
0 notes
Text
Mastering Your Mix: Common Mixing Problems and Solutions
Mastering Your Mix: Common Mixing Problems and Solutions
Mixing is an art that can elevate a track from good to great, but it comes with its own set of challenges. Even experienced producers can run into issues that make a mix sound muddy, harsh, or unbalanced. Whether you’re a beginner or a seasoned pro, understanding common mixing problems and how to solve them is crucial to mastering your mix. Here’s a guide to help you tackle some of the most frequent mixing challenges.
1. **Muddy Mixes**
A muddy mix lacks clarity, making it difficult to distinguish between different instruments and sounds. This problem is often caused by too many low frequencies overlapping, particularly in the bass and lower midrange.
- **Solution: EQ the Low-End Carefully**
- **High-Pass Filter:** Apply a high-pass filter to instruments that don’t need low frequencies, such as vocals, guitars, and even some synths. This helps clear up space for the bass and kick drum.
- **Cut Low-Mid Frequencies:** Mud often resides in the 200-500 Hz range. Gently cut these frequencies on tracks that contribute to the muddiness, but be careful not to overdo it and thin out your mix.
- **Use Sidechain Compression:** Sidechain the bass to the kick drum to prevent them from clashing and create a cleaner low end.
2. **Harsh Highs**
Harshness in the high frequencies can make a mix sound unpleasant and fatiguing to listen to. This often happens when instruments or vocals are too bright or when there’s too much sibilance in the vocals.
- **Solution: Tame the High Frequencies**
- **Use a De-Esser:** A de-esser targets and reduces sibilance in vocal tracks, making them smoother and less harsh. Adjust the threshold and frequency range until the sibilance is under control.
- **EQ Cuts:** Identify the harsh frequencies, usually between 2 kHz and 10 kHz, and apply a gentle cut. Be subtle—cutting too much can dull the track.
- **Saturation:** Adding a touch of saturation can help smooth out harsh highs by adding warmth and rounding off the edges of the sound.
3. **Weak Vocals**
Vocals are often the focal point of a mix, and if they sound weak or buried, it can detract from the overall impact of the track.
- **Solution: Make Vocals Stand Out**
- **Compression:** Use compression to control the dynamics of the vocal, ensuring that softer parts are audible and louder parts aren’t overwhelming. A ratio of 3:1 or 4:1 is a good starting point.
- **EQ Boosts:** Boost the presence range around 3 kHz to 6 kHz to help the vocals cut through the mix. If needed, add some air by boosting around 10 kHz to 12 kHz.
- **Reverb and Delay:** Apply reverb or delay to add depth to the vocals, but be careful not to overdo it. Too much reverb can push the vocals back in the mix. Instead, use a subtle, short reverb or a slap-back delay to keep the vocals forward.
4. **Overcrowded Mix**
When too many elements compete for space in the mix, it can sound cluttered and chaotic, making it hard for the listener to focus on any one part.
- **Solution: Create Space with Panning and EQ**
- **Panning:** Spread out the elements across the stereo field. Pan instruments like guitars, keyboards, and backing vocals to the left or right, leaving the center for the kick, bass, and lead vocals.
- **EQ Subtractive Mixing:** Use EQ to carve out space for each element. For instance, if two instruments are clashing in the same frequency range, cut the clashing frequencies on one instrument and boost them slightly on the other.
- **Use Reverb Wisely:** Apply reverb to create a sense of space, but don’t overuse it. Too much reverb can make a mix sound washy and undefined.
5. **Lack of Depth**
A mix that lacks depth can sound flat and one-dimensional. This often happens when all the elements are placed at the same volume and don’t have enough contrast.
- **Solution: Add Depth with Volume Automation and Effects**
- **Volume Automation:** Use automation to bring certain elements forward during key moments and push others back. This creates a dynamic and engaging mix.
- **Reverb and Delay:** Apply reverb and delay to create a sense of space and depth. Use shorter, more subtle reverb on elements you want closer to the listener, and longer, more pronounced reverb on elements you want to push back.
- **Layering:** Layer sounds to create more texture and depth. For example, layer a dry signal with a reverb-drenched version of the same signal to add dimension.
6. **Over-Compression**
Over-compression can lead to a lifeless, squashed mix that lacks dynamics and feels flat. While compression is a valuable tool, it’s important to use it judiciously.
- **Solution: Use Compression Sparingly**
- **Set Proper Threshold and Ratio:** Start with a low ratio (2:1 or 3:1) and set the threshold so that the compressor only engages when necessary. This preserves the natural dynamics of the track.
- **Parallel Compression:** Instead of compressing the entire signal, use parallel compression. Blend the compressed signal with the uncompressed signal to retain the punch and dynamics.
- **Watch the Attack and Release Times:** Adjust the attack and release times to suit the material. A slow attack allows transients to pass through, maintaining the punch, while a fast release can help keep the track lively.
7. **Stereo Imbalance**
A mix with stereo imbalance can sound lopsided or off-center, making it less enjoyable to listen to. This often happens when elements are panned too hard or unevenly distributed across the stereo field.
- **Solution: Balance the Stereo Field**
- **Check Your Panning:** Ensure that your elements are evenly distributed across the stereo field. Avoid panning too many elements hard left or right; instead, find a balance that feels natural.
- **Use Mid/Side Processing:** Mid/Side processing allows you to control the center (mid) and sides of your mix independently. This can help you correct any imbalance and create a more cohesive stereo image.
- **Mono Compatibility:** Regularly check your mix in mono to ensure that it translates well. Some stereo effects can cause phase issues when collapsed to mono, so it’s important to test this during the mixing process.
8. **Lack of Energy**
A mix that lacks energy can sound dull and uninspiring. This often happens when the mix doesn’t have enough contrast or excitement, causing it to feel flat.
- **Solution: Add Energy with Contrast and Dynamics**
- **Automation:** Use automation to create dynamic shifts in your mix. Gradual buildups, drops, and changes in volume can add excitement and keep the listener engaged.
- **Enhance Transients:** Use transient shapers or compression with a slow attack to enhance the transients of drums and percussive elements, giving them more punch and energy.
- **Layer Percussion:** Adding layers of percussion, such as claps, shakers, or cymbals, can inject energy into a mix, especially during key sections like the chorus or drop.
Conclusion
Mixing is a complex and creative process, but it doesn’t have to be overwhelming. By understanding and addressing these common mixing problems, you can achieve a polished and professional sound. Remember, mixing is about making decisions that serve the song, so trust your ears, experiment, and don’t be afraid to make bold choices. With practice and attention to detail, you can master your mix and bring your music to life.
#MusicProduction#SoundEngineering#MixingTips#AudioMixing#MixingProblems#MixingSolutions#MixingMastery#ProducersLife#MixingTechniques#TrackMixing
0 notes