#mysql 8 installation and configuration
Explore tagged Tumblr posts
Visit Tumblr Blog
Explore Tumblr blogs with no restrictions, modern design and the best experience.
Last Seen Tumblr Blogs


Fun Fact
Tumblr has been banned in Indonesia for providing people with access to pornographic content.
Text
You can learn NodeJS easily, Here's all you need:
1.Introduction to Node.js
• JavaScript Runtime for Server-Side Development
• Non-Blocking I/0
2.Setting Up Node.js
• Installing Node.js and NPM
• Package.json Configuration
• Node Version Manager (NVM)
3.Node.js Modules
• CommonJS Modules (require, module.exports)
• ES6 Modules (import, export)
• Built-in Modules (e.g., fs, http, events)
4.Core Concepts
• Event Loop
• Callbacks and Asynchronous Programming
• Streams and Buffers
5.Core Modules
• fs (File Svstem)
• http and https (HTTP Modules)
• events (Event Emitter)
• util (Utilities)
• os (Operating System)
• path (Path Module)
6.NPM (Node Package Manager)
• Installing Packages
• Creating and Managing package.json
• Semantic Versioning
• NPM Scripts
7.Asynchronous Programming in Node.js
• Callbacks
• Promises
• Async/Await
• Error-First Callbacks
8.Express.js Framework
• Routing
• Middleware
• Templating Engines (Pug, EJS)
• RESTful APIs
• Error Handling Middleware
9.Working with Databases
• Connecting to Databases (MongoDB, MySQL)
• Mongoose (for MongoDB)
• Sequelize (for MySQL)
• Database Migrations and Seeders
10.Authentication and Authorization
• JSON Web Tokens (JWT)
• Passport.js Middleware
• OAuth and OAuth2
11.Security
• Helmet.js (Security Middleware)
• Input Validation and Sanitization
• Secure Headers
• Cross-Origin Resource Sharing (CORS)
12.Testing and Debugging
• Unit Testing (Mocha, Chai)
• Debugging Tools (Node Inspector)
• Load Testing (Artillery, Apache Bench)
13.API Documentation
• Swagger
• API Blueprint
• Postman Documentation
14.Real-Time Applications
• WebSockets (Socket.io)
• Server-Sent Events (SSE)
• WebRTC for Video Calls
15.Performance Optimization
• Caching Strategies (in-memory, Redis)
• Load Balancing (Nginx, HAProxy)
• Profiling and Optimization Tools (Node Clinic, New Relic)
16.Deployment and Hosting
• Deploying Node.js Apps (PM2, Forever)
• Hosting Platforms (AWS, Heroku, DigitalOcean)
• Continuous Integration and Deployment-(Jenkins, Travis CI)
17.RESTful API Design
• Best Practices
• API Versioning
• HATEOAS (Hypermedia as the Engine-of Application State)
18.Middleware and Custom Modules
• Creating Custom Middleware
• Organizing Code into Modules
• Publish and Use Private NPM Packages
19.Logging
• Winston Logger
• Morgan Middleware
• Log Rotation Strategies
20.Streaming and Buffers
• Readable and Writable Streams
• Buffers
• Transform Streams
21.Error Handling and Monitoring
• Sentry and Error Tracking
• Health Checks and Monitoring Endpoints
22.Microservices Architecture
• Principles of Microservices
• Communication Patterns (REST, gRPC)
• Service Discovery and Load Balancing in Microservices
1 note
·
View note
Text
dizzy Nulled Script 5.0

Download dizzy Nulled Script – The Ultimate Content Monetization Platform Are you looking for a powerful, versatile, and free way to build a revenue-generating platform for content creators? The dizzy Nulled Script is your gateway to launching a full-featured digital marketplace without spending a fortune. With this free script, you can empower creators, sell exclusive content, and generate income—all from a beautifully designed and professionally coded system. What is dizzy Nulled Script? The dizzy is a premium PHP-based solution developed to help users create a content-sharing and monetization platform similar to OnlyFans, Patreon, or Buy Me a Coffee. It allows creators to upload images, videos, stories, and other digital content, offer subscriptions, and interact with their followers through a feature-rich dashboard. Best of all, you can now access the dizzy for free and take full advantage of its powerful tools—without paying for a license. Technical Specifications of dizzy Nulled Script Framework: Laravel 8+ Database: MySQL Frontend: Bootstrap 5, jQuery File Uploads: Amazon S3 and local storage support Payment Gateways: PayPal, Stripe, Bank Transfer, and more Languages: Multi-language support Device Compatibility: Fully responsive on all devices Top Features and Benefits By choosing the dizzy Nulled Script, you’ll gain access to an incredible suite of features that will take your content-sharing platform to the next level: Subscription System: Creators can set monthly fees and offer exclusive content to paying subscribers. Live Notifications: Users receive real-time alerts for messages, follows, and interactions. Private Messaging: Secure one-on-one communication between users and creators. Multi-Currency Support: Sell content globally without limitations. Content Scheduling: Creators can schedule posts for maximum engagement. Monetization Tools: Tips, pay-per-view content, and donation buttons. Who Can Benefit from dizzy Nulled Script? The dizzy Nulled Script is ideal for developers, entrepreneurs, and digital marketers who want to create a personalized space for creators. Whether you’re launching a new niche platform or offering creators a new way to earn, this script offers flexibility, performance, and control. It’s also perfect for influencers, educators, coaches, and artists who want to share exclusive content with a loyal community—and get paid for their creativity. How to Install and Use dizzy Nulled Script Getting started with the dizzy is straightforward, even for beginners. Simply download the package, upload it to your server, and follow the built-in installation wizard. Here's a quick overview: Unzip the downloaded package to your web server directory. Set up a MySQL database and configure your .env file with the appropriate credentials. Run the installation script by visiting your domain. Follow the on-screen instructions to complete setup. Log in to your admin dashboard and start customizing your platform! No advanced coding skills? No problem. The script is well-documented and user-friendly, making it easy to configure even for non-developers. FAQs About dizzy Nulled Script Is dizzy Nulled Script safe to use? Yes, when downloaded from a trusted source, the dizzy Nulled Script is thoroughly tested and secure. Always ensure you're using the latest version for optimal performance and safety. Can I customize the dizzy Script? Absolutely. The script is fully open-source and built on Laravel, giving you full control over its appearance, features, and integrations. Is it legal to use the nulled version? While using a nulled script may violate licensing agreements with the original developer, many users choose to explore nulled options to evaluate the platform before purchasing. We encourage you to support developers if the tool adds value to your business. Conclusion If you’re serious about launching a content monetization platform without the hefty price tag, the dizzy is your ideal solution.
Rich in features, easy to use, and completely free when downloaded from our trusted source, this script will help you build a thriving community of creators and subscribers in no time. Ready to expand your digital toolkit? Explore more nulled plugins to power up your web projects with ease. For an advanced WordPress page builder, check out the elementor nulled pro version—also available for free!
0 notes
Text
TYPO3 Programming Made Simple: Your First Step

If you’re looking to build powerful, flexible websites, TYPO3 CMS is a great place to start. It’s an open-source content management system (CMS) built for serious projects—think multilingual corporate sites, secure web platforms, and custom features that go far beyond a simple blog. This guide will walk you through the basics of TYPO3 programming, so you can start your development journey with confidence.
What is TYPO3 CMS?
TYPO3 is a CMS written in PHP that’s designed for high-performance websites. Unlike basic CMS tools, TYPO3 is built for large-scale projects. It gives you control over how your website works and looks, using tools like TypoScript, Fluid templates, and extensions.
Getting Your TYPO3 Development Environment Ready
Before you start coding, you need to prepare your setup. Don’t worry—it’s pretty straightforward.
System Requirements: Make sure your system has PHP 8.x, MySQL or MariaDB, Apache or Nginx, and Composer installed.
Install TYPO3 with Composer: Open your terminal and run: bashCopyEditcomposer create-project typo3/cms-base-distribution my-project
Set Up the Database: Once TYPO3 is installed, visit your project in a browser. The built-in installer will guide you through setting up the database and finishing the configuration.
TYPO3 Programming Basics
Let’s look at the key tools TYPO3 gives you to build your site.
TypoScript
TypoScript is TYPO3’s configuration language. It tells TYPO3 how to render content on the page. You don’t need to write PHP—TypoScript lets you control layout and behavior using simple rules.
Fluid Templates
Fluid is TYPO3’s templating engine. It helps separate your HTML design from the backend logic, so you can focus on layout while keeping your code clean and maintainable. It’s especially useful if you're working with designers or frontend developers.
Extensions
In TYPO3, almost everything is built as an extension. Need a blog? An online store? A custom form? There’s probably an extension for that. You can install ready-made ones from the TYPO3 Extension Repository—or build your own for full control.
How to Build Custom Features
Here’s how developers add advanced features to TYPO3:
Creating Extensions: You can use the Extension Builder tool or create one manually by setting up controllers, models, and views. TYPO3 uses the MVC (Model-View-Controller) pattern, which keeps your code structured and easy to work with.
Custom Content Elements: Want content blocks tailored to your exact needs? Use a tool like Mask or write your own to create reusable, flexible elements for editors.
Backend Modules: TYPO3 lets you build tools inside the admin area—like custom dashboards or management panels—to improve the editing experience.
Debugging and Best Practices
No project runs perfectly all the time. Here’s how to handle issues the TYPO3 way:
Turn on debugging in the LocalConfiguration.php file or the Admin Panel.
Use TYPO3’s built-in logging and error reporting to catch problems early.
Follow TYPO3’s coding standards to keep your project clean, consistent, and easy to maintain—especially if you're working in a team.
Why TYPO3?
Built to Scale: TYPO3 handles huge websites with thousands of pages and users.
Multilingual Ready: It makes managing content in multiple languages straightforward and efficient.
Secure by Design: TYPO3 includes strong access controls and gets regular security updates.
Helpful Community: With detailed documentation, active forums, and tutorials, help is always within reach.
Final Thoughts
TYPO3 isn’t just another CMS—it’s a developer’s toolset for building professional, scalable websites. Once you understand TypoScript, Fluid templates, and extensions, you’ll be ready to create just about anything. Whether it’s a small custom feature or a full-blown enterprise website, TYPO3 gives you the structure and power to bring your ideas to life.
0 notes
Text
What are the steps to install OpenEMR for a clinic?
Introduction
Healthcare practitioners use OpenEMR as a strong open-source application that functions as an Electronic Medical Records (EMR) system together with practice management capabilities. The clinic needs to follow several vital steps to install OpenEMR, which we will describe in the following section. As a step-by-step guide, it will provide you with a straightforward path to set up OpenEMR while maximizing its available features.
Step 1: Download and Extract OpenEMR
1.Download OpenEMR
Users should retrieve the most up-to-date version of OpenEMR (openemr-7.0.2.zip) through Source Forge from the OpenEMR website.
You should enable your browser to allow downloading files without interruption.
2.Extract the OpenEMR Archive
Right-click and open the downloaded zip file through the Properties dialogue box available on your operating system.
The file extraction process depends on selecting "Unblock" in the Windows Properties box in order to prevent file blocking.
Extract the zip file to a folder on your computer (e.g., C:\OpenEMR).
3.Rename the Directory (Optional)
You should rename the directory to openemr if you wish to simplify its name.
Step 2: Download and Install XAMPP
1.Download XAMPP
Users should navigate to the Apache Friends official website and retrieve the newest version of Windows XAMPP from this page.
2.Install XAMPP
Launch the XAMPP installer through the download and execute the built-in instructions to perform the setup.
The default installation settings should remain selected unless you require custom modifications.
Step 3: Move OpenEMR to the XAMPP Directory
You need to place OpenEMR files at the XAMPP home directory.
1.Navigate to the XAMPP Directory
The XAMPP is typically located at C:\xampp\htdocs.
2.Move OpenEMR Files
After extracting the OpenEMR folder, you should cut it before placing it inside XAMPP's htdocs directory.
The openemr directory should be located at C:\xampp\htdocs\openemr.
Step 4: Configure XAMPP
1.Start XAMPP Services
Users should start the XAMPP Control Panel to begin the Apache and MySQL services.
2.Verify Services
The services must operate without producing any errors.
Step 5: OpenEMR Setup via Web GUI
Users can establish OpenEMR through the web.
1.Access OpenEMR Setup
You should access OpenEMR through the web browser by going to http://localhost/openemr.
2.Follow Setup Instructions
Multiple steps of the setup process installation include the creation of a new database and configuration tasks.
Check all file system permissions for correctness before continuing forward.
3.Create Database
When prompted, you will decide to either establish a new database or pick one from the existing collection.
Perform the necessary actions using the instructions provided by the interface.
4.Finalize Configuration
You must finish the setup operations by creating your first login details, including username and password.
Step 6: Clinic Setup
1.Enter Global Settings
Users should configure the application settings of OpenEMR through these steps to establish the interface theme and date/time presentation.
2.Enter Facility-Specific Settings
During setup, users must provide practice and business identifiers together with tax information and insurance numbers.
3.Create User Accounts
All users accessing OpenEMR need to receive accounts during the setup process.
4.Enter Contact Information
The user can add their contact information and business account contact details.
5.Practice Settings
Configure pharmacy and insurance company information, along with accepted document formats.
Step 7: External Data Loads
1.Load Codesets
The implementation of ICD10, RXNORM, and SNOMED and CQM_VALUSET codesets through import processes will enhance the clinical documentation system.
2.Calendar Configuration
The system requires configuration to define appointment types together with the providers' planned availability times.
Step 8: Useful Configurations
1.Customize Templates
Tailor notes templates to your practice’s needs.
2.Integrate with Other Systems
OpenEMR should be connected to lab systems, billing software, and telehealth platforms.
Troubleshooting Tips
The Apache server must possess correct permissions that allow file reading and writing operations in the OpenEMR directory.
Check MySQL settings to resolve any database connection issues by verifying proper database configuration.
Service disruptions of XAMPP require users to reset both Apache and MySQL components.
Real-World Examples and Case Studies
The clinic based in Vermont utilized OpenEMR Cloud on AWS, which resulted in a 70% reduction in server maintenance expenses while also enabling better scalability during busy patient periods.
A Texas-based large hospital decided to run OpenEMR on-premises for customized data security which delivered smooth integration with their hospital infrastructure.
Conclusion
To implement OpenEMR at a clinic, administrators need to follow multiple steps that start with software download and then proceed through configuration and clinic-specific setup. OpenEMR users can achieve operational streamlining and patient care improvement while maintaining regulatory standards through their robust features and by following the specified guidelines.
FAQs
Q1: What are the system requirements for installing OpenEMR on Windows?
Your system requirements for OpenEMR installation are Windows Server 2012 and later versions or Windows 10/11 together with XAMPP or WampServer and Apache HTTP Server running PHP 7.4 or higher with essential extensions alongside MySQL version 5.6 or above.
Q2: How do I troubleshoot common issues during OpenEMR installation?
Verify the system permissions while also checking for database configuration accuracy before restarting XAMPP service operations.
Q3: Can I use OpenEMR on other platforms besides Windows?
The OpenEMR system functions on Linux and macOS operating systems with server setups that include XAMPP and LAMP.
0 notes
Text
How to Move Your WordPress Site from Localhost to a Live Server
Developing a WordPress site on localhost is a great way to build and test your website in a controlled environment. However, the real challenge arises when it's time to move the site from your local server to a live hosting environment. If not done correctly, you could encounter broken links, missing images, or even database errors.
In this blog, we'll guide you through a step-by-step process to successfully move your WordPress site from localhost to a live server.

Step 1: Choose the Right Hosting Provider
Your first step is to select a reliable web hosting provider that meets your website’s needs. Look for:
Server Speed: Fast servers for better performance.
Uptime Guarantee: At least 99.9% uptime to ensure availability.
Ease of Use: User-friendly dashboards and tools.
WordPress Support: Hosting optimized for WordPress websites.
Popular options include Bluehost, SiteGround, and WP Engine.
Step 2: Export Your Local WordPress Database
The database is the backbone of your WordPress site. To export it:
Open phpMyAdmin on your local server (e.g., XAMPP or WAMP).
Select your WordPress database.
Click on the Export tab and choose the Quick Export method.
Save the .sql file to your computer.
Step 3: Upload Your WordPress Files to the Live Server
To move your files:
Compress Your WordPress Folder: Zip your local WordPress installation folder.
Access Your Hosting Account: Use a file manager or an FTP client like FileZilla.
Upload the Files: Transfer the zipped folder to your hosting server's root directory (usually public_html).
Unzip the Folder: Extract the files once uploaded.
Step 4: Create a Database on the Live Server
Now, set up a new database on your live hosting server:
Log in to your hosting control panel (e.g., cPanel).
Navigate to the MySQL Databases section.
Create a new database, database user, and password.
Assign the user to the database with full privileges.
Step 5: Import the Database to the Live Server
Open phpMyAdmin in your hosting control panel.
Select the new database you created.
Click the Import tab.
Choose the .sql file you exported from your localhost.
Click Go to import the database.
Step 6: Update the wp-config.php File
To connect your site to the live database:
Locate the wp-config.php file in your WordPress installation.
Open the file in a text editor.
Update the following lines: define('DB_NAME', 'your_live_database_name'); define('DB_USER', 'your_live_database_user'); define('DB_PASSWORD', 'your_live_database_password'); define('DB_HOST', 'localhost'); // Keep this unless your host specifies otherwise.
Save the file and upload it to your server via FTP.
Step 7: Update URLs in the Database
Your localhost URLs need to be replaced with your live site URLs.
Use a tool like Search Replace DB or run SQL queries in phpMyAdmin.
In phpMyAdmin, run the following query: UPDATE wp_options SET option_value = 'http://your-live-site.com' WHERE option_name = 'siteurl'; UPDATE wp_options SET option_value = 'http://your-live-site.com' WHERE option_name = 'home';
Step 8: Test Your Live Website
Once everything is uploaded and configured, check your website by entering its URL in a browser. Test for:
Broken Links: Fix them using plugins like Broken Link Checker.
Missing Images: Ensure media files were uploaded correctly.
Functionality: Verify forms, buttons, and features work as expected.
Step 9: Set Up Permalinks
To ensure proper URL structure:
Log in to your WordPress admin dashboard on the live site.
Go to Settings > Permalinks.
Choose your preferred permalink structure and click Save Changes.
Step 10: Secure Your Live Website
After migrating, secure your site to prevent vulnerabilities:
Install an SSL Certificate: Most hosting providers offer free SSL certificates.
Update Plugins and Themes: Ensure everything is up to date.
Set Up Backups: Use plugins like UpdraftPlus for regular backups.
Conclusion
Moving your WordPress site from localhost to a live server may seem daunting, but by following these steps, you can ensure a smooth and error-free migration. A successful move allows you to showcase your site to the world, engage your audience, and achieve your goals.
Start today and take your WordPress project live with confidence!
0 notes
Text
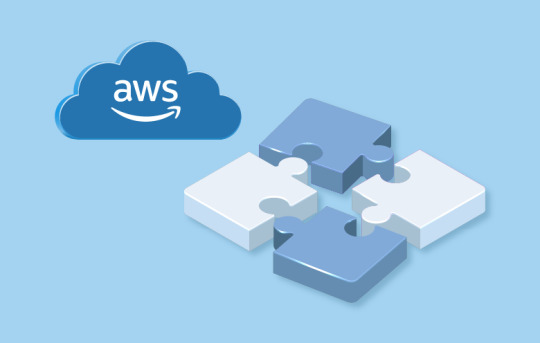
How to Build Your First Application on AWS
Amazon Web Services (AWS) provides a robust platform for building, deploying, and scaling applications. Whether you're a developer or a beginner in cloud computing, AWS offers tools and services to simplify the process. This guide will walk you through building your first application on AWS step by step.
Why Build Applications on AWS?
Scalability: Handle traffic spikes effortlessly.
Cost-Efficiency: Pay only for what you use.
Reliability: AWS ensures uptime with its global infrastructure.
Ease of Use: User-friendly services like Elastic Beanstalk and Lightsail simplify development.
Step 1: Set Up Your AWS Account
Before you begin, create an AWS account if you don’t already have one.
Go to AWS Signup Page.
Enter your email, set up your password, and provide payment details (the Free Tier allows free usage for many services).
Enable MFA (Multi-Factor Authentication) for added security.
Step 2: Choose Your Application Type
Define the type of application you want to build:
Web Application: A dynamic website or backend for mobile apps.
API: Create RESTful APIs using AWS Lambda or API Gateway.
Static Website: Host HTML, CSS, and JavaScript files.
Step 3: Select the Right AWS Services
AWS offers numerous services, but for a basic application, these are the essentials:
1. Compute Service (EC2 or Elastic Beanstalk):
Amazon EC2: Virtual machines for full control over deployment.
Elastic Beanstalk: Managed service to deploy web apps quickly.
2. Storage Service (S3):
Use Amazon S3 to store application assets, such as images and data files.
3. Database Service (RDS or DynamoDB):
RDS: For relational databases like MySQL or PostgreSQL.
DynamoDB: For NoSQL databases.
4. Networking (Route 53):
Manage DNS and custom domains for your app.
Step 4: Develop Locally
Build the initial version of your application on your local machine:
Tech Stack Suggestions:
Frontend: HTML, CSS, JavaScript, or frameworks like React and Angular.
Backend: Node.js, Python (Django/Flask), or Java (Spring Boot).
Database: SQLite for development, migrate to RDS or DynamoDB for production.
Step 5: Deploy Your Application
Once your app is ready, deploy it to AWS. Here's how:
Option 1: Using Elastic Beanstalk (Easiest Method):
Log in to the AWS Management Console.
Navigate to Elastic Beanstalk.
Create a new application, upload your app’s code (ZIP file), and launch it.
AWS automatically provisions EC2 instances, sets up a load balancer, and configures scaling.
Option 2: Using Amazon EC2 (Manual Method):
Launch an EC2 instance from the AWS Console.
SSH into the instance and install necessary dependencies (e.g., Node.js or Python).
Deploy your application files to the server.
Configure a web server like Nginx or Apache to serve your application.
Option 3: Using AWS Lightsail (For Beginners):
Navigate to AWS Lightsail.
Create a new instance with pre-configured blueprints like Node.js or WordPress.
Upload and run your application files.
Step 6: Connect Your Domain
Point your domain name to your application using Route 53:
Purchase or transfer a domain to AWS Route 53.
Set up an A record to point to your application’s public IP or load balancer.
Step 7: Test Your Application
Before going live, thoroughly test your application:
Functionality Testing: Ensure all features work as intended.
Load Testing: Simulate high traffic using tools like AWS CloudWatch or Locust.
Security Testing: Check for vulnerabilities using AWS Inspector.
Step 8: Monitor and Optimize
AWS provides tools to monitor performance and optimize your application:
AWS CloudWatch: Monitor app performance and resource usage.
AWS Trusted Advisor: Optimize costs, improve performance, and ensure security.
Auto Scaling: Scale resources automatically based on traffic.
Step 9: Scale and Grow
As your application gains users, AWS makes it easy to scale:
Horizontal Scaling: Add more servers via load balancers.
Vertical Scaling: Upgrade server specifications.
Global Distribution: Use AWS CloudFront to serve content globally with low latency.
Start your AWS journey today! Watch this step-by-step YouTube Live Session on AWS Application Development for detailed guidance and live demonstrations.
0 notes
Text
How do I install Active Intelligence Visualization on Windows?
To install Active Intelligence Visualization (AIV) on Windows, follow these steps:
Check Requirements: Ensure your system meets the following requirements: hardware (minimum 8 GB RAM 16+ GB recommended)15 GB disk space, and software (Java 8, PostgreSQL/MySQL/Oracle, Apache Tomcat 8.x).
Download AIV: To download the AIV installer, visit AIV Download. page
Choose Installation Method:
• With PostgreSQL: Run the installer, select PostgreSQL during setup, and follow prompts.
With Existing Database: Choose your existing database (MySQL/PostgreSQL/Oracle) during installation and enter database credentials.
4. Configure and Start: After installation, run the appropriate scripts to start the database and application server.
#business intelligence tool#aivhub#business intelligence and reporting tool#self service business intelligence tool in usa#jaspersoft consultancy#aiv reporting server#aiv consultant#birt training course
0 notes
Text
VoIP Engineer || Vice Process Company || Technical Support VoIP Engineer || Technical Support || NOC Engineer || Kolkata || West Bengal
About Company: Recruitment Company is a rapidly growing Business Process Outsourcing Company, headquartered in London, United Kingdom, and an outsourcing branch in Pune, India. They cover the fields of Business Solutions, Recruitment Solutions, and Designing Solutions as their Core Business. They are specialized and deal in inbound and out bound calls, consultancy, Design and marketing solutions.
Mission of the Company: To be a reliable partner for their clients and they intend to offer new solutions and technology to drive B2B and B2C services with great ease.
Hi we are from Ideal Career Zone: Where Your Skills Meet Your Passions. The ideal career zone is the sweet spot where your skills and passions intersect. It's the place where you can use your talents to make a difference in the world, while also feeling fulfilled and satisfied. Finding your ideal career zone can be a challenge, but it's worth it. When you're in the right zone, you'll be more productive, more motivated, and more likely to succeed.
Now the company need some staffs for the post of VOIP engineer.
Job Description
Profile: Technical Support VoIP Engineer / NOC Engineer
Location: Kolkata, West Bengal
Experience: 3+ Years
Profile: VoIP Support Engineer.
Salary Budget: 5 LPA to 11 LPA
Brief description:
Should have Good exposure to GSM, VOIP, SIP, MSRC, RTP, MSRP, RCS.
Should be adept in VOIP Trunk SIP Configuration, PRI Card Installation, Asterisk/ Dahdi/ FreePBX Installation / IP PBX /IP Telephony / IP phone configuration / EPBX /VOIP Gateway /Asterisk server management.
Troubleshooting of SIP and VOIP Based Call-center telephony Issues.
Experience in Installing, configuring and deployments of Asterisk, Asterisk-based applications like Vicidial, IVR and FreePBX.
Experience in Installing, configuring and deployment of Asterisk, GoAutoDial, Vicidial, IVR and FreePBX.
Sound knowledge of Asterisk Installation, Configuration, Dialplan, AGI, AMI, Call troubleshooting (SIP, ISDN, PSTN)
Configuration, Maintenance and troubleshooting of Asterisk Based Servers, VICIDIAL, FreePBX, Freeswitch.
Good verbal and written communication.
Excellent team player, ability to work in a global team and follow through on deadlines.
Strong technical and analytical skills.
Resolve Client issues through Skype and Remote Screen sharing.
Minimum 2+yearsexperience in Troubleshooting VoIP Required.
Proficiency in the following programming languages: MySQL, PHP, Perl. Preferred skills
Industry Type: Telcom, ISP, BPO.
Key Skills: Asterisk, Vici Dail, Free PBX IVR, VOIP, Wire Shark
Employment Type: Full Time
Note:- Many more Jobs available just search in Google “Ideal Career Zone” Kolkata.
You can find many more job details in various posts in various companies.
You may call us between 9 am to 8 pm
8 7 7 7 2 1 1 zero 1 6
9 3 3 1 2 zero 5 1 3 3
Or you can visit our office.
Ideal Career Zone
128/12A, Bidhan Srani Shyam Bazaar metro Gate No.1 Gandhi Market Behind Sajjaa Dhaam Bed Sheet Bed cover Show room Kolkata 7 lakh 4
Thank you for watching our channel Please subscribed and like our videos for more jobs opening. Thank You again.
VoIPEngineer, #ViceProcessCompany, #TechnicalSupportVoIPEngineer, #TechnicalSupport, #NOCEngineer, #Kolkata, #WestBengal, #FemalesJob, #BadaBazaar, #Howrah, #idealcareerzone, #kolkatajobs, #WestBengal, #Silliguri, #Asaam, #mizuram, #Tripura, #India, #Bihar, #Jharkhand, #PanIndia, #jobIndia, #kolkatajobcenter, #latestjobsinkolkata, Newjobsinkolkata,
0 notes
Text
How to deploying Laravel projects on a live server – Complete Step-by-Step Guide
Learn How to deploying Laravel projects on a live server with this comprehensive guide. Step-by-step instructions on setting up hosting, configuring files, and deploying your Laravel app smoothly.Read Laravel Docs
How to deploying Laravel projects on a live server, you’ll need to follow a structured process. Here’s a step-by-step guide to help you:

1. Purchase Domain and Hosting
Make sure you have a domain and a hosting plan. Most shared hosting plans (like cPanel-based ones) or a VPS will work for Laravel, but ensure your server supports PHP and MySQL and meets Laravel’s requirements (PHP version, required extensions, etc.).
2. Prepare Your Laravel Project
Make sure your Laravel project is working locally.
Run the following command to clear any cached configuration and to optimize the project:
php artisan cache:clear
php artisan config:clear
php artisan route:clear
php artisan view:clear
Set up your environment variables (.env file). Make sure they are correctly configured for the live server (e.g., database, mail, and app URL settings).
3. Zip and Upload Your Laravel Project
Compress your entire Laravel project folder (without the node_modules and vendor directories) into a .zip file.
Use FTP (with FileZilla or any other FTP client) or File Manager in cPanel to upload the .zip file to your server. Typically, upload the file to the public_html or a subdirectory within it if you want to run your Laravel app in a subdirectory.
4. Extract the Files
Once uploaded, use File Manager in your hosting control panel to extract the .zip file.
5. Set Up the Public Directory
By default, Laravel’s entry point is the public folder, which contains the index.php file. On a shared hosting server:
Move everything in the public folder (including the .htaccess and index.php files) to the root directory (usually public_html).
Edit the index.php file to update the paths:
Change:
require __DIR__.'/../vendor/autoload.php';
$app = require_once __DIR__.'/../bootstrap/app.php';
To:
require __DIR__.'/vendor/autoload.php';
$app = require_once __DIR__.'/bootstrap/app.php';
This ensures that Laravel can find the necessary files in the correct directory.
6. Set File Permissions
Ensure that the following directories are writable by the server:
/storage
/bootstrap/cache
Use the following command via SSH (if available) or through the hosting file manager:chmod -R 775 storage chmod -R 775 bootstrap/cache
7. Set Up a Database
Create a MySQL database and a user with privileges in cPanel (or via SSH if using VPS).
Update the .env file with your database credentials:
DB_HOST=localhost DB_DATABASE=your_database_name DB_USERNAME=your_database_username DB_PASSWORD=your_database_password
8. Install Composer Dependencies
If you have SSH access:
SSH into your server using a terminal or a tool like PuTTY.
Navigate to your project directory
cd /path/to/your/project
Run Composer to install the dependencies:
composer install --optimize-autoloader --no-dev
If you don’t have SSH access, you can run composer install locally, zip the vendor folder, and upload it to the server.
9. Run Migrations
If you have SSH access, run the following command to migrate the database:
php artisan migrate --force
If you don’t have SSH access, you can run the migrations locally and then export/import the database to the server via phpMyAdmin.
10. Set App Key
Generate a new application key if you haven’t already:php artisan key:generate
Ensure the key is set in the .env file:
Read Full Tutorials
0 notes
Text
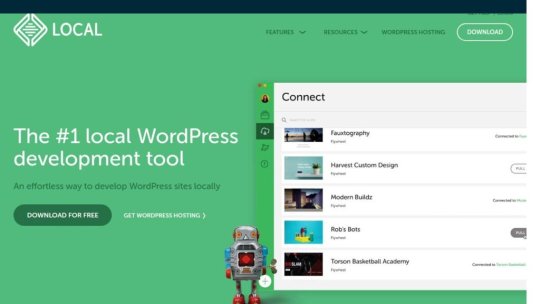
8 Best WordPress Development Tools (Free + Paid) in 2024
WordPress continues to stand out as a beacon for web developers and designers alike. Its flexibility, scalability, and user-friendly interface make it an ideal platform for building everything from simple blogs to complex e-commerce sites. However, to truly harness the power of WordPress, developers need the right tools at their disposal. This is where the best WordPress development tools come into play, offering capabilities that range from local server environments to sophisticated code editors, all designed to streamline the development process and enhance productivity. This article will navigate through the top WordPress development tools, both free and paid, that have proven indispensable in the digital toolkit of many developers. We will explore options like Local WP for setting up a local server environment, WPCode for managing code functions without hassle, Duplicator for site migration, and MAMP for cross-platform development. Additionally, innovative solutions like GitHub Copilot for code completion, XAMPP for a comprehensive local server solution, InstaWP for instant WordPress sites, and Theme Check for theme code validation will be covered. Each tool has its unique strengths, making them essential for anyone looking to elevate their WordPress development workflow. - 20 Best AnswerThePublic Alternatives & Competitors for 2024 - How to Install a WordPress Plugin (Step by Step for Beginners) - How to Remove Archive Pages in WordPress (4 Easy Methods) - 11 Best WordPress Affiliate Plugins (2024) - How to Easily Fix PHP Missing MySQL Extension Error in WordPress 1. Local WP Local WP stands out as a premier tool for WordPress developers looking to streamline their workflow and enhance productivity. This tool simplifies the process of setting up a local server environment, making it highly accessible even for those who are new to WordPress development. Setting Up Local WordPress Environments Local WP offers an incredibly user-friendly interface that allows developers to set up a new WordPress site with just a few clicks. Unlike traditional local server setups like WAMP, Local WP eliminates complex configurations and reduces setup time significantly. It supports both Nginx and Apache, providing flexibility depending on the developer's needs or preferences. Additionally, Local WP includes features like one-click SSL trust, which simplifies the process of running sites under HTTPS, a requirement for certain APIs like Stripe. Features for Streamlining Development Workflow Local WP is packed with features designed to optimize the development workflow: - Cloud Backups: Easily push and pull sites to cloud storage services like Google Drive or Dropbox, ensuring that all site files are safe and can be accessed from anywhere. - Image Optimizer: This tool enhances site performance by optimizing images for faster page loads on both mobile and desktop devices. - Local Connect: Streamline the process of editing offline and going live by pushing and pulling sites with services like Flywheel or WP Engine. - Live Links: Share secure, persistent URLs to showcase site developments to clients or team members without the need for deployment. - Hot Swap Environments: Effortlessly switch between multiple PHP environments or MySQL versions to test different configurations. - One-click Admin: Access WordPress dashboards with a single click, bypassing the usual login requirements. Pros and Cons Pros: - Quick setup and ease of use, even for beginners. - Extensive feature set enhances development efficiency. - Supports both Nginx and Apache, catering to a broad range of development preferences. Cons: - Higher memory usage compared to some alternatives like WAMP, which might be a concern for users with limited system resources. - The use of Nginx might require adjustments for developers accustomed to Apache-specific features like .htaccess. Local WP is recommended for its balance of advanced features and user-friendly design, making it an ideal choice for both novice and experienced WordPress developers. Its ability to simplify complex processes and integrate seamlessly with cloud services and other tools makes it a valuable addition to any developer's toolkit. 2. WPCode WPCode stands as a pivotal tool for WordPress developers who aim to streamline their workflow by managing custom code snippets directly from the WordPress dashboard. This plugin allows users to insert custom PHP, JavaScript, CSS, HTML, and text snippets without the need to edit theme files directly, which preserves the integrity of themes during updates. Custom Code Snippets Management WPCode simplifies the addition of custom code to your WordPress site. Users can manage their snippets through a user-friendly interface that categorizes code types and offers options for activation and deactivation. This management system ensures that snippets are easy to control and can be activated or deactivated as needed. Additionally, WPCode supports conditional logic, allowing snippets to be executed only on specific pages or under certain conditions, enhancing site performance and user experience. Syntax Highlighting and Code Editor The plugin features a robust code editor with syntax highlighting capabilities, making it accessible even for those with minimal coding knowledge. This editor supports various code types including PHP, JavaScript, and HTML. The syntax highlighting function helps in preventing common coding errors by allowing developers to easily read and write code, ensuring that custom snippets are added safely and efficiently. Pricing and Versions: Free + Paid WPCode offers both free and paid versions to accommodate different user needs. The free version, WPCode Lite, provides basic functionalities suitable for straightforward tasks. For more advanced features like priority support, extensive conditional logic options, and a broader range of code management tools, the premium version is available starting at $49 per year. This pricing structure makes WPCode accessible for both beginners and professional developers, ensuring that there is a version that fits every budget and requirement. By integrating WPCode into their development process, WordPress users gain a powerful tool for enhancing site functionality and user engagement without compromising site security or performance. 3. Duplicator Duplicator is a renowned WordPress plugin that excels in creating complete copies of WordPress sites, which can be used for migration or backup purposes. With its capability to bundle all site components into a single zip file called a "package," Duplicator simplifies the process of transferring a website to a new host, domain, or staging environment. This tool is especially valued for its straightforward approach and robust functionality, making it a top choice for over one million WordPress users. Site Migration and Backup Capabilities Duplicator is designed to facilitate easy site migrations with minimal downtime, ensuring a seamless transition between servers or domains. It handles complex tasks such as serialized and base64 serialized replacements, which are crucial for maintaining data integrity during the migration process. Users can migrate, copy, or clone their site with zero downtime, which is essential for maintaining continuous service and user experience. Additionally, Duplicator serves as a reliable backup utility, allowing users to create full site backups that can be restored in case of data loss or website failure. Creating Downloadable Site Packages The core functionality of Duplicator involves creating downloadable packages that contain all necessary site files and the WordPress database. This package can be easily transferred to any location, facilitating effortless migrations across different hosting environments. The process includes a few simple steps: setting up the package, running system checks, and building the archive. Once completed, the package is ready for download, which includes an installer file and the site archive. This method not only ensures that all components of the site are included but also simplifies the setup on the new server, as the installer automates the configuration and installation processes. User Experience and Efficiency Duplicator is praised for its user-friendly interface and efficient process management. It allows even those with minimal technical knowledge to perform complex migrations and backups without the need for professional assistance. The plugin's design focuses on simplifying each step, from creating a new package to executing the migration, thereby reducing the potential for errors and increasing the success rate of site transfers. For enhanced functionality, Duplicator Pro offers additional features like scheduled backups, cloud storage options, and multi-threaded support for larger websites, making it a robust solution for advanced users and developers. Duplicator's combination of powerful features, ease of use, and reliable performance makes it an indispensable tool for anyone looking to manage WordPress migrations and backups efficiently. Whether you are moving a site to a new host or creating a quick backup, Duplicator provides a streamlined, effective solution that safeguards your data and reduces the technical challenges associated with website management. 4. MAMP MAMP stands as a robust solution for developers seeking to establish a local server environment on macOS and Windows platforms. This tool is designed to simplify the process of running WordPress and other web applications directly from a desktop PC, making it an indispensable asset for testing and development purposes. Simplifying Local Server Setup for Development MAMP provides a straightforward installation process that allows developers to set up a local server environment with just a few clicks. Whether one prefers Apache or Nginx, MAMP caters to all by supporting multiple web server options alongside MySQL as the database server. Notably, MAMP includes the flexibility to work with various programming languages such as PHP, Python, Perl, or Ruby. This versatility ensures that developers can easily test their projects on mobile devices through the local DNS server, NAMO, enhancing the development workflow significantly. Support for Multiple PHP Versions One of the key features of MAMP is its support for multiple PHP versions, which is crucial for developers who need to test their applications across different environments. MAMP allows easy switching between PHP versions without the need to restart the server or alter configuration files extensively. This feature is available in both the free version of MAMP and MAMP PRO, the latter offering even more enhanced capabilities like setting up separate hosts for different projects and integrating with cloud services for seamless backups. Free and Open-Source Solution MAMP is available as a free tool, which provides a significant advantage for developers and small teams working on a tight budget. The open-source nature of MAMP means that it does not compromise any existing Apache installations on the system, and developers can add additional functionalities like the MAMP Cloud. This service enables users to backup their host and database data to Dropbox with a simple one-time payment, further adding to the tool's flexibility and utility. MAMP's combination of ease of use, comprehensive feature set, and robust support for multiple technologies makes it a recommended choice for anyone looking to enhance their WordPress development workflow. Its ability to run natively on both Intel and Apple CPUs ensures that MAMP remains a top choice for developers across different hardware platforms. 5. GitHub Copilot AI-Powered Coding Assistance GitHub Copilot stands out as an innovative tool designed to enhance coding efficiency and accuracy. It acts as an AI pair programmer, suggesting code snippets and entire functions based on the context of the work being done. This AI tool learns from a vast corpus of code available on GitHub, making it capable of understanding and predicting developer needs quite effectively. For instance, it can generate code for custom functions or suggest improvements and alternatives to existing code, significantly speeding up the development process. Integration with IDEs and Language Support GitHub Copilot integrates seamlessly with popular Integrated Development Environments (IDEs) such as Visual Studio Code, JetBrains IDEs, and Neovim, providing a wide range of support for various programming languages including Python, JavaScript, TypeScript, Ruby, Go, C#, and more. This broad compatibility ensures that developers can use Copilot in their preferred coding environments without hassle. The tool's ability to understand and provide suggestions for numerous frameworks and languages makes it an indispensable resource for developers looking to streamline their coding tasks. Subscription Costs and Free Trial GitHub Copilot offers various subscription plans to cater to different user needs. For individual developers, freelancers, students, and educators, the Copilot Individual plan is priced at $10 USD per month or $100 USD per year. There is also a free trial available which is particularly beneficial for verified students, teachers, and maintainers of popular open-source projects. For businesses and larger organizations, Copilot Business and Copilot Enterprise plans are available at $19 USD and $39 USD per user per month, respectively. These plans are designed to improve engineering velocity, code quality, and overall developer experience by integrating AI into the workflow. 6. XAMPP Comprehensive Local Server Environment XAMPP, an acronym for Apache, MariaDB, PHP, and Perl, provides a robust local server environment that is not specifically tailored to WordPress but is highly adaptable for various development needs. This open-source tool wraps the entire development stack into a minimalist interface, enabling developers to manage their projects with ease. Whether working on a WordPress site or any other web application, XAMPP offers a straightforward, no-frills environment that is perfect for developers who prefer a hands-on approach. Ease of Installation and Management Installing XAMPP is a streamlined process, thanks to its simple installer available for multiple operating systems including Windows, macOS, and Linux. During installation, users have the option to select the components they wish to install, with the ability to omit Perl if it's not required, as is the case with WordPress. Once installed, the XAMPP control panel facilitates easy management of its components, allowing users to start, stop, and configure settings as needed. Additionally, the dashboard provides access to useful tools such as the terminal and a local file explorer, enhancing the overall user experience. Open-Source and Free Development Tool As a free and open-source solution, XAMPP stands out as a popular choice among developers. It has been a reliable PHP development environment for over a decade, supported by a large community where users can engage through forums, social media platforms like Facebook, and Twitter. The inclusion of a Bitnami installer simplifies the process of setting up WordPress, although it does not provide additional management tools for handling multiple projects or more complex development environments. Despite these limitations, XAMPP's longevity and strong community support make it a valuable tool for developers looking for a cost-effective and flexible server solution. 7. InstaWP InstaWP is a comprehensive tool that significantly accelerates the WordPress development process, making it an essential asset for agencies and individual developers alike. This platform simplifies the creation, testing, and deployment of WordPress sites, providing a seamless experience from start to finish. Quick Setup of WordPress Environments InstaWP excels in its ability to quickly set up WordPress environments. Users can launch fully functional WordPress sites in seconds, thanks to its user-friendly interface. This rapid deployment is ideal for testing new features, plugins, or themes. Additionally, the platform supports the creation of staging sites, allowing developers to test and refine their websites in a controlled environment before going live. The integration of InstaWP with various hosting providers through the InstaWP Connect plugin further streamlines the process, enabling seamless migrations and updates. Template System for Consistent Development The template system in InstaWP stands out as a game-changer in web development. Templates allow developers to use pre-built designs and functionalities, which can be customized to meet specific needs without starting from scratch. This feature not only saves time but also ensures consistency across projects. Developers can create, share, and monetize their templates, providing a potential stream of income while fostering a collaborative community. The ability to quickly modify templates—adjusting colors, fonts, and layouts—empowers developers to maintain their unique style while leveraging the efficiency of pre-configured elements. Pricing Plans for Additional Features InstaWP offers various pricing plans that cater to different needs and scales of operation. From free options suitable for basic testing to advanced plans that include additional features like increased storage, enhanced support, and the ability to handle higher traffic volumes, there is a plan for every developer. Each tier is designed to provide specific benefits, such as the ability to create permanent sites on higher plans, which do not expire and offer more extensive resources. This flexible pricing structure ensures that developers can select a package that best fits their requirements, budget, and the scope of their projects. InstaWP's robust platform, with its quick setup, versatile templates, and scalable pricing plans, provides an invaluable tool for anyone involved in WordPress development, ensuring efficient workflows and high-quality results. 8. Theme Check Ensuring Themes Meet WordPress Standards Theme Check is a crucial plugin for WordPress theme developers, ensuring that themes adhere to the strict standards set by the WordPress Theme Review team. It is particularly significant because it is the same tool used by reviewers to approve themes for inclusion in the official WordPress theme repository. Themes that fail to pass the Theme Check tests may be rejected, highlighting the importance of this tool in the development process. Automated Testing for Quality and Compliance The plugin automates the testing of themes to identify coding and design mistakes before they are released. This automated process is vital for maintaining compatibility, especially following updates to the WordPress core. Theme Check helps to ensure that themes continue to function correctly with new versions of WordPress, preventing potential conflicts or issues that could arise from core changes. The tool tests for various elements crucial for a theme’s success, such as the presence of necessary WordPress functions like wp_footer and wp_head, adherence to safe coding standards, and the absence of unwanted features like embedded Adsense code. Free Tool for Theme Developers Theme Check is available for free, making it an accessible tool for all WordPress theme developers. Whether you are a seasoned developer or just starting, using Theme Check can provide insights into how well your theme meets the required standards. For developers aspiring to have their themes included in the WordPress.org Theme Directory, Theme Check acts as a pre-flight checklist that helps polish themes to meet the rigorous requirements of the review process. Read the full article
0 notes
Text
Database Automation
Database automation with Ansible can significantly streamline the management and deployment of databases. Here are some specific subtopics and tasks you could explore within database automation:
1. Database Installation and Configuration
Task: Automate the installation of MySQL/PostgreSQL.
Playbooks:
Install database packages.
Initialize the database.
Configure the database server (e.g., set up users, configure authentication, modify configuration files).
2. Automating Database Backups
Task: Set up automated backups for databases.
Playbooks:
Create backup scripts for MySQL/PostgreSQL.
Schedule regular backups using cron jobs.
Store backups in remote locations (e.g., S3, FTP servers).
3. Database Replication Setup
Task: Automate the setup of database replication.
Playbooks:
Configure master and replica databases.
Set up replication users and permissions.
Handle failover configurations and testing.
4. Automating Database Migrations
Task: Manage database schema changes and migrations.
Playbooks:
Apply schema changes using tools like Alembic or Flyway.
Rollback migrations in case of failures.
Version control database schema changes.
5. Database Performance Tuning
Task: Optimize database performance automatically.
Playbooks:
Apply performance tuning parameters to configuration files.
Set up monitoring and alerting for performance metrics.
Automate index creation and maintenance tasks.
6. User and Permission Management
Task: Automate the creation and management of database users and permissions.
Playbooks:
Create database users with specific permissions.
Automate role assignments.
Implement security best practices for database access.
7. Automating Database Security
Task: Enhance database security through automation.
Playbooks:
Apply security patches and updates.
Configure firewalls and access controls.
Monitor and log database activity for suspicious behavior.
8. Disaster Recovery Planning
Task: Automate disaster recovery processes.
Playbooks:
Automate backup and restore procedures.
Test failover and recovery plans regularly.
Ensure data integrity and consistency across backups.
Sample Playbook for MySQL Installation and Basic Configuration
- name: Install and configure MySQL
hosts: database_servers
become: yes
vars:
mysql_root_password: "securepassword"
mysql_database: "myappdb"
mysql_user: "myappuser"
mysql_password: "myapppassword"
tasks:
- name: Install MySQL server
apt:
name: mysql-server
state: present
- name: Start MySQL service
service:
name: mysql
state: started
enabled: yes
- name: Set root password
mysql_user:
name: root
password: "{{ mysql_root_password }}"
login_user: root
login_password: ''
host_all: yes
when: ansible_os_family == "Debian"
- name: Remove anonymous users
mysql_user:
name: ''
host_all: yes
state: absent
- name: Remove test database
mysql_db:
name: test
state: absent
- name: Create application database
mysql_db:
name: "{{ mysql_database }}"
state: present
- name: Create application user
mysql_user:
name: "{{ mysql_user }}"
password: "{{ mysql_password }}"
priv: "{{ mysql_database }}.*:ALL"
state: present
- name: Apply basic security settings
mysql_variables:
- name: bind-address
value: 0.0.0.0
- name: max_connections
value: 150
This is a basic example, but it can be expanded to include more complex configurations and tasks as needed. You can also explore using Ansible roles for better organization and reusability of your playbooks.
For more details www.qcsdclabs.com
#linux#redhatcourses#information technology#containerorchestration#kubernetes#dockerswarm#aws#docker#container#containersecurity
0 notes
Text
Flex Home Nulled Script 2.54.1

Unlock the Power of Real Estate Listings with Flex Home Nulled Script Are you searching for a dynamic, feature-rich platform to launch your real estate website without the burden of costly licenses? Flex Home Nulled Script is the perfect solution, offering you a professional-grade property listing system absolutely free. This Laravel-based script provides everything you need to build, manage, and scale a multilingual, user-friendly real estate portal—without breaking the bank. What is Flex Home Nulled Script? Flex Home Nulled Script is a premium real estate management platform built with Laravel and designed to empower developers and entrepreneurs. With its intuitive interface, advanced filtering system, and seamless multi-language support, this nulled version offers all the functionalities of the original script—minus the expensive price tag. Whether you're a freelancer, developer, or small agency, this script provides you with an edge in a competitive digital market. Technical Specifications Framework: Laravel 8+ Database: MySQL Language Support: Multilingual (RTL compatible) Admin Panel: Fully responsive dashboard SEO Optimization: Integrated meta tools and schema markup Security: CSRF Protection, input validation, and secure authentication Key Features and Benefits Multilingual & RTL Ready: Perfect for reaching a global audience, including Arabic and Hebrew speakers. Advanced Property Search: Filter by city, status, price, property type, and more. Agent Dashboard: Give agents the tools they need to list, edit, and manage properties seamlessly. Monetization Tools: Charge for premium listings and featured properties with built-in monetization options. Custom Fields: Add new property attributes without touching the code. Mobile Responsive: Optimized for mobile, tablet, and desktop users for maximum reach. How Flex Home Script Can Be Used This script is ideal for: Independent Realtors looking to showcase their listings with a professional website. Agencies aiming to create a multi-agent, scalable real estate portal. Entrepreneurs who want to launch real estate marketplaces in emerging markets without heavy investment. Developers building custom property management platforms for clients. Installation Guide Setting up Flex Home Nulled Script is simple and developer-friendly: Upload the script to your web hosting environment. Create a MySQL database and configure your .env file with the required credentials. Run the installation wizard or artisan commands to finalize the setup. Access your admin panel and start adding listings and categories. No technical expertise? Don’t worry. The admin dashboard is intuitive enough for beginners to handle efficiently. Frequently Asked Questions (FAQs) Is the Flex Home Nulled Script safe to use? Yes, this nulled version has been thoroughly scanned and tested for safety. However, it's always recommended to use it on a secured server and keep regular backups. Can I use this script for a multilingual real estate site? Absolutely! Flex Home Nulled Script supports multiple languages and even RTL layouts, making it perfect for global audiences. Do I need to know coding to use this? No coding skills are required for basic setup and property listing. Developers, however, can easily customize the codebase to fit any advanced requirement. Can I monetize my real estate website with this script? Yes, you can monetize via featured listings, ad placements, and premium packages directly within the admin panel. Why Choose Flex Home Nulled Script? With an extensive feature set, intuitive interface, and support for modern web standards, Flex Home Nulled Script is your gateway to launching a successful real estate platform. Best of all? You can download it for free right from our website—no subscriptions, no hidden fees. Pair it with tools like WP-Optimize Premium nulled for unbeatable performance, and you'll have a winning combination for your online real estate venture.
Final Thoughts Whether you're just starting or looking to expand your real estate offerings, Flex Home delivers powerful capabilities, flexibility, and zero licensing costs. Take the first step in transforming your real estate vision into reality—get your free download today and build with confidence.
0 notes
Text
A Guide to Local Laravel Development in 2024: Tools and Trends

Local Laravel development forms the foundation for building robust web applications, and in 2024, the landscape is evolving with new tools and trends that streamline and enhance the development experience. This guide explores the latest advancements and equips you to set up a powerful local Laravel environment.
The Rise of Containerization with Laravel Sail
One of the most significant trends in Laravel development is the rise of containerization. Traditionally, setting up Laravel environments involved manually configuring dependencies and virtual machines. Laravel Sail, introduced in Laravel 8, simplifies this process by leveraging Docker containers. Sail provides a pre-configured development environment with essential dependencies like PHP, MySQL, and Node.js.
Key Benefits of Laravel Sail:
Reduced Setup Time: No more manual configuration; start with a single command.
Consistent Environment: Ensures every developer has the same setup regardless of their machine.
Improved Reproducibility: Facilitates easy sharing and replication of development environments.
Leveraging Testing Tools for a Robust Development Workflow
In 2024, a robust testing strategy remains crucial. Here are some key tools to integrate into your local Laravel development workflow:
PHPUnit: Laravel’s built-in testing framework for unit and integration tests.
Laravel Dusk: For browser automation and end-to-end testing of Laravel applications.
Debugging Tools: Laravel Telescope and Laravel Debugbar for debugging and monitoring applications.
Setting Up Your Development Environment
Setting up a robust local development environment is essential for efficient Laravel development. Here are some popular tools in 2024:
Laravel Valet: A lightweight development environment for macOS users, offering a seamless experience for running Laravel applications locally.
Homestead: A pre-packaged Vagrant box for Laravel development, suitable for developers using all major operating systems.
Docker: Containerization technology that enables developers to create consistent environments across development, testing, and production.
Version Control and Collaboration
Version control is fundamental for collaborative development:
Git: The most widely used version control system, essential for managing code changes and collaborating with teams.
GitHub, GitLab, Bitbucket: Platforms for hosting Git repositories and managing projects, offering features like issue tracking and pull requests.
Laravel Project Structure
Understanding the structure of a Laravel development project is crucial for organizing your codebase effectively:
app/: Contains the core code of the application, including models, controllers, and middleware.
config/: Configuration files for various services and components.
resources/: Contains assets such as views, language files, and front-end assets.
routes/: Contains route definitions for the application.
database/: Contains database migrations, seeders, and factories.
Dependency Management
Laravel projects use Composer for dependency management:
composer.json: Specifies the dependencies required by the
project.composer.lock: Lock file ensuring consistent dependency versions across installations.
Ready to Build Exceptional Laravel Applications?
Panoramic Infotech offers cutting-edge Laravel Development Services, leveraging the power of this popular PHP framework to create robust and scalable web applications. Contact Panoramic Infotech today to discuss your project and how we can help you leverage the power of Laravel for your business.
Let’s Build Together! Reach out to us at Contact Us to start your Laravel Development with Panoramic Infotech.
This guide equips you with the knowledge to set up a powerful local Laravel development environment in 2024. Remember, the best approach depends on your specific needs. Stay updated with the latest trends to streamline your development workflow and build exceptional Laravel applications.
#Laravel development company#Laravel we Laravel development services#b development company#laravel development#Laravel development solutions
0 notes
Text
What Steps Should I Take for OpenEMR Installation Issues?
Introduction
The installation process of OpenEMR presents difficulties due to its power as an open-source Electronic Medical Records (EMR) system. The following section presents known OpenEMR installation issues with corresponding step-by-step solutions.
Common Installation Errors and Solutions
1.PHP Compatibility Issues
Error: OpenEMR installation fails due to compatibility issues with PHP version.
Solution: The installation process requires using PHP version 7.4 or newer versions. The php.ini file requires PHP configuration updates that match OpenEMR settings. Proper error prevention involves enabling Off for short_open_tag while setting the memory_limit to 512M in your php.ini file.
2.Database Connection Failure
Error: “Cannot connect to the MySQL database.”
Cause: This error arises when the OpenEMR installer cannot establish a connection to the MySQL database.
Solution:
· Ensure the MySQL service is running: sudo service mysql start.
· Verify that the credentials in the sqlconf.php file are correct:
Php: $host = 'localhost'; $port = '3306'; $login = 'your_username'; $pass = 'your_password'; $dbase = 'openemr';
3. Blank Page After Installation
Error: A blank screen is displayed after installing OpenEMR.
Cause: Typically caused by a missing PHP module or a permissions issue.
Solution:
· Check for missing PHP modules using php -m | grep -i <missing_module>.
· Install missing modules with sudo apt-get install php-<module_name>.
· Ensure correct file permissions: sudo chmod -R 755 /var/www/openemr.
4. Locale Errors
Error: “PHP Warning: Failed to setlocale…”
Cause: The locale settings on the server are not configured correctly.
Solution:
· Install the appropriate locales: sudo locale-gen en_US.UTF-8.
· Reconfigure locales: sudo dpkg-reconfigure locales.
5. SQL Error in OpenEMR Usage
Error: A fatal error occurred that showed “Uncaught Error: SQLSTATE[42S02]: Base table or view not found…”
Cause: The missing database table or improper database table creation process causes this error to appear.
Solution:
· Re-execute the SQL upgrade script through the command: mysql -u root -p openemr < sql/upgrade.sql.
· All database tables need to be imported correctly.
6. PDF Generation Failure
Error: The error message reads, “FPDF error: Unable to create output file.”
Cause: The file system write permissions create a cause that prevents OpenEMR from generating output files.
Solution:
· Users need write permissions in the sites/default/documents directory because of this command: sudo chmod -R777/var/www/openemr/sites/default/documents.
Common Mistakes During Setup
1.Inadequate System Requirements Assessment
· Performance problems emerge because organizations underestimate their hardware requirements along with their software needs.
· System requirements assessment needs to become a complete process done before any installation begins.
2.Neglecting Data Backup and Recovery Planning
· Failing to plan backup procedures and recovery strategies remains one of the main setup challenges.
· Planning for data backup becomes essential since the absence of planning may cause complete loss of information.
· Regular backups should be conducted either through OpenEMR’s tools or third-party scripting solutions.
3.Improper Configuration
· Incorrectly implemented settings result in both performance issues and system errors.
· Users should verify that both database and PHP settings align correctly with OpenEMR’s necessary requirements.
Real-World Examples and Case Studies
Cloud Success Story: Through OpenEMR Cloud on AWS, this Vermont clinic cut their server maintenance expenses by 70% and also gained better peak-season system capabilities.
On-Premises Example: A large Texas hospital chose on-premises deployment of OpenEMR to sustain whole authority over security standards while maintaining easy integration with current hospital information infrastructure.
Troubleshooting Tips for Windows Installation
· Check PHP settings because you must enable all required PHP extensions while following the correct settings in the php.ini configuration file.
· Check MySQL Connection by verifying the correct running of MySQL and sqlconf.php credentials.
· During installation, use a temporary disable of antivirus software to prevent interruptions.
· You should check OpenEMR directory permissions to stop unauthorized access to its files.
Future Trends in OpenEMR
OpenEMR will continue integrating modern features into its system as healthcare technology advances forward.
AI and Machine Learning
· OpenEMR will incorporate artificial intelligence-based clinical decision support systems and predictive analytics technology for patient care in future updates.
Telehealth Enhancements
· The telehealth system will receive updated modules that enable remote consultation access while offering better healthcare access to patients.
Interoperability Standards
· Additional FHIR technology support in the system will help different healthcare systems communicate their data more efficiently.
Conclusion
The resolution of OpenEMR installation problems requires a careful approach together with expertise in frequent installation barriers. Healthcare providers who focus on PHP compatibility along with database connections and permissions will establish a successful OpenEMR setup while maximizing its functionality. Continuous updates about the latest OpenEMR advancements enable healthcare professionals to achieve maximum performance and efficiency for their management tasks.
FAQs
What are the most common installation errors in OpenEMR?
During OpenEMR installation, you might encounter three major issues that include PHP version conflicts as well as database connection problems and unexplained blank pages showing up because of either missing components or access permission problems.
How do I troubleshoot a blank page error after OpenEMR installation?
Review both PHP module's presence and verify correct permissions for the OpenEMR directory files.
What are some common mistakes during OpenEMR setup?
The integration of insufficient system assessment with poor data backup and recovery planning along with unsuitable configuration represents the main mistakes that cause performance degradation and data loss.
0 notes
Text
How to Set Up Laravel 8 on Your Android Phone
Introduction
In today's fast-paced world, mobile devices have become an essential part of our lives, enabling us to stay connected and productive on the go. With the advancement of technology, it's now possible to set up a robust development environment on your Android phone, allowing you to work on projects even when you're away from your desktop. One such platform that empowers developers is Laravel 8, a popular PHP framework for web application development. In this tutorial, we will guide you through the process of setting up Laravel 8 on your Android phone using the Wama technology stack.
Why Laravel 8?
Laravel is renowned for its elegant syntax, powerful features, and comprehensive documentation. Laravel 8, the latest version at the time of writing, brings several improvements and new features that make it even more appealing for developers. Some of these enhancements include Laravel Jetstream for user authentication and scaffolding, enhanced job batching, dynamic Blade components, and improvements to the Artisan command-line interface.
Introducing Wama Technology
Wama technology is an innovative approach that enables you to create a development environment on your Android device. It combines Web Server for Android (WSA), a web server application for Android, with MySQL and PHP, to offer a complete stack for web development. With Wama technology, you can run web applications directly on your Android phone, allowing you to work on projects without the need for a traditional desktop setup.
Follow these steps to set up Laravel 8 on your Android phone using Wama technology:
Step 1: Install Wama Technology Stack
Open the Google Play Store on your Android phone.
Once installed, open the app and follow the instructions to start the server.
Step 2: Download Composer
Open the browser on your Android phone and navigate to https://getcomposer.org/download/.
Download the latest version of Composer.
Step 3: Install Laravel 8
Open the terminal in your Android device (you can use an app like Termux).
Navigate to the root directory of your web server (usually a folder named "htdocs" in the WSA directory).
Use the following command to install Laravel 8:
lua
Copy code
composer create-project --prefer-dist laravel/laravel myproject
Replace "myproject" with your preferred project name.
Step 4: Accessing Laravel 8 on Your Android Phone
Open the browser on your Android phone.
Enter the URL for your Laravel project. It will typically be something like http://localhost:8080/myproject/public/.
You should see the Laravel welcome page, indicating that your setup was successful.
Step 5: Configure the Database
Open the Web Server for Android app and click on the "MySQL" tab.
Open the .env file in your Laravel project and update the database configuration with the values you noted down.
Step 6: Start Developing
Congratulations! You now have Laravel 8 set up on your Android phone. You can start developing your web applications by editing the files in the "myproject" directory.
Tips for Efficient Development
While developing on your Android phone can be convenient, here are some tips to ensure an efficient workflow:
Use a Code Editor: Install a code editor app on your Android device for a better coding experience. Apps like "QuickEdit Text Editor" or "Dcoder, Compiler IDE" can be helpful.
You can set up Git on your Android phone using apps like "Termux."
Testing: Test your web applications on various devices and screen sizes to ensure responsiveness.
Backup: Regularly back up your projects to prevent data loss.
External Keyboard: Consider using an external keyboard for longer coding sessions to improve typing speed and comfort.
Conclusion
In this tutorial, we explored how to set up Laravel 8 on your Android phone using the Wama technology stack. This innovative approach empowers developers to work on web projects even when they are on the move. With the right tools and techniques, you can harness the power of Laravel 8 and create exceptional web applications, all from the convenience of your Android device. Embrace the flexibility and mobility that Wama technology offers and embark on your journey to efficient and productive laravel app development Services.
0 notes
Link
MySQL is the most well-known and widely used open-source database management system in the world. It is an RDBMS (Relational Database Management System) that is utilized in the background of websites and server applications. The most recent version of MySQL is 8.0, and it is accessible in CentOS 8 default DNF repository, so there is no need to add an MYSQL repository and then install it.
MySQL 8.0 has a number of new features designed to improve the speed of online applications. Knowing MySQL is a must-know database system if you are a web developer, mainly a back-end developer. The best approach to learn MySQL is to read the official MySQL documentation.
In this post, we will learn How to install and configure MySQL v8.0 on the CentOS 8 operating system, as well as how to use MySQL DB on CentOS 8. Let us begin by installing MySQL on CentOS 8.
0 notes