#raw vs jpeg
Explore tagged Tumblr posts
Visit Tumblr Blog
Explore Tumblr blogs with no restrictions, modern design and the best experience.
Last Seen Tumblr Blogs


Fun Fact
28.6 is the average number of monthly visits per US mobile user.
Note
What format do you recommend I save photographs in? Like raw or jpeg? I don't know the difference.
so it depends on what you wanna do with your photo!
if you want to post it right away, you want a jpg; raw files aren't web-ready and can't be viewed by various devices easily.
if you want to take a bazillion photos and keep all of them too look at regularly on your phone, you want a jpg; raw files are much, much bigger sized files and will fill up your storage way more quickly, and they don't actually look good out of the box.
if you like to post-process your photos on your phone or computer, you might prefer raw; jpg files contain only a fraction of the image data that a raw file does (hence the size difference) and it's much harder to adjust them in ways that look and feel like professional photography.
however: processing a raw file is not optional - you can't use it till it's processed, and processing them is a skill you'll need to give yourself time to practice. They also can require specific software to process them; famously lightroom and photoshop are the industry standards, and they're pretty $$$, but I bet folks can drop some cheaper options in the notes!
I never shoot only raw, personally, because I love to share photos with friends ASAP, but sometimes I do shoot jpeg & raw together. If you have never tried out shooting and processing raw photos before, this is my recommendation.
Also, shooting raw is great but it's super not necessary to do if you don't want to process all your images by hand. There's a bazillion reasons to take photos different ways, and "convenience" and "speed" are really good ones.
but also: post processing can be fun as heck. try it out! see what you think!
8 notes
·
View notes
Text
LensCraft Mastery: Elevate Your Photography Skills to the Next Level

Photography is more than just pressing a button; it’s an art, a science, and a means of storytelling. LensCraft Mastery is a comprehensive guide designed to help photographers—whether beginners or seasoned professionals—unlock their full creative potential. This tutorial series delves into the intricate aspects of photography, from mastering the fundamentals of exposure and composition to exploring advanced techniques in lighting, post-processing, and storytelling through imagery.
Why LensCraft Mastery?
The name LensCraft Mastery symbolizes the fusion of technical expertise (Lens) with artistic craftsmanship (Craft). Photography is both a technical discipline and an expressive medium, requiring a balance between understanding camera mechanics and developing an artistic vision. This tutorial series aims to bridge that gap by offering structured, easy-to-follow lessons that cater to all levels of experience.
1. Mastering the Basics of Photography
For those new to photography, LensCraft Mastery begins with the fundamental concepts that form the backbone of great photography:
Exposure Triangle: The Key to Perfectly Lit Photos
Aperture: Understanding how f-stops affect depth of field and light intake.
Shutter Speed: Capturing motion creatively, from freezing action to long exposures.
ISO: Controlling sensor sensitivity for optimal brightness without excessive noise.
Composition Techniques: Crafting Visually Stunning Images
Rule of Thirds: Placing subjects strategically for balanced compositions.
Leading Lines: Drawing the viewer’s eye to the subject.
Framing & Negative Space: Enhancing depth and focus in a photograph.
2. Advanced Photography Techniques
Once the basics are mastered, LensCraft Mastery delves into techniques that can take your photography to a professional level.
Understanding Light & Shadows
The role of natural light vs. artificial lighting in photography.
How to use soft light for flattering portraits and harsh light for dramatic effects.
Mastering golden hour and blue hour photography.
Camera Settings & Manual Mode
How to use manual focus for precision.
Customizing white balance for accurate color reproduction.
Shooting in RAW vs. JPEG and when to use each format.
3. Specialized Photography Genres
Photography is a vast field, and LensCraft Mastery explores different genres, allowing photographers to find their niche.
Portrait Photography
How to pose subjects naturally for candid and professional shots.
Best lenses for portrait photography (prime vs. zoom).
Background blur (bokeh) techniques for dreamy aesthetics.
Landscape Photography
Composition techniques for breathtaking vistas.
Use of ND (neutral density) filters for long exposures.
How to capture the perfect sunrise and sunset.
Street Photography
Capturing the essence of everyday life.
Ethical considerations in photographing strangers.
How to blend into the scene for natural compositions.
Wildlife & Macro Photography
Tips for photographing animals in motion.
Choosing the best gear for close-up macro shots.
Patience and planning for capturing rare moments.
4. The Power of Post-Processing
A great photo doesn’t always end with the camera—post-processing is essential for refining images. LensCraft Mastery provides in-depth tutorials on:
Adobe Lightroom & Photoshop Editing
Adjusting exposure, contrast, and white balance for balanced images.
Retouching techniques for portraits and landscapes.
Removing unwanted elements and enhancing details.
Mobile Editing for On-the-Go Photography
Best apps for editing (Snapseed, VSCO, Lightroom Mobile).
Color grading techniques for a unique aesthetic.
Quick retouching methods for social media-ready images.
5. Developing a Photographer’s Mindset
Photography is more than just technical skill—it requires creativity, patience, and an eye for detail. LensCraft Mastery helps photographers develop a storytelling approach, teaching how to:
Capture emotions and narratives within a single frame.
Use minimalism and abstract photography to create intriguing images.
Experiment with angles and perspectives to bring a fresh outlook to everyday scenes.
6. Monetizing Your Photography Skills
For those looking to turn their passion into a profession, LensCraft Mastery includes insights on:
How to start a photography business and build a portfolio.
Selling photos online (stock photography, prints, NFTs).
Social media strategies to grow an audience and attract clients.
Final Thoughts
Whether you’re just starting or looking to refine your craft, LensCraft Mastery offers a structured, engaging, and practical way to enhance your photography skills. By blending technical knowledge, artistic creativity, and real-world applications, this tutorial series is designed to empower photographers at every stage of their journey.
Start mastering your craft today and turn your vision into reality—one frame at a time. 📸✨
2 notes
·
View notes
Text
WTYP: The Shandor Building, Part 1 [take 2, the long post vs Tumblr's formatting]
[Do you like the colour of the fanfic? This is long and if you expand it you're gonna get the whole thing, because Tumblr hates you. Don't say I didn't warn you!]
[Beware of strong language, mention of all kinds of death, gore, and Lovecraftian horror.]
Part 1: Hello and Welcome to Shandor Studios (it's weird)
[TRANSCRIBER'S NOTE: The moon was waning and a raven was tapping on my window when I discovered a heretofore unknown tier at the WTYP Patreon page. It was called "Pazuzu" and cost $6.66 USD. It had one listed benefit "bonus bonus episode." I unlocked a single unnumbered bonus episode titled "Ibo Shanor" and subtitled "train bad actually." Judging from the dialogue, it dates to summer 2023. Since it lacked any closed-captioning, I took the liberty of transcribing it, and coping most of the slides for your edification. (Not really, this is a work of fiction.) I have styled Ms. Caldwell-Kelly as "Alice" since she still seems to be using that in podcast land at this time. Please support WTYP!]

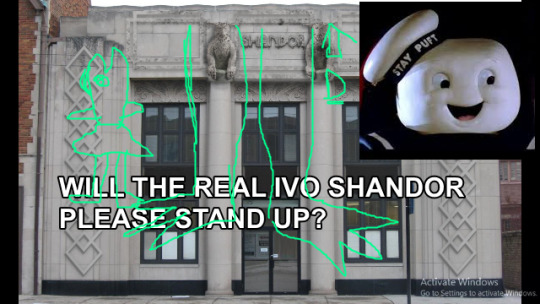
[SLIDE: Shandor Studios, an art deco style building with some familiar-looking gargoyles perched on it, and poor JPEG compression, with an inset of the Stay-Puft Marshmallow Man. Captioned: Will the Real Ivo Shandor Please Stand Up?]
JUSTIN ROCZNIAK (R): Hello, and welcome to Well There’s Your Problem, a podcast about engineering disasters with…
LIAM ANDERSON (L) [chanting]: Studio! Studio! Studio!
R: …with slides.
L: Studio! Suck it, Discord!
ALICE CALDWELL-KELLY (A): It’s quite nice, actually. There’s a little break room, and somebody left us one of those edible arrangements, and a paperback Necronomicon…
DEVON (D) [text over slide]: IT WAS ACTUALLY VERY NICE. I HAD MY OWN CONTROL ROOM. BUT IT WAS NOT WORTH IT.
L [distorted, too close to the mic]: My audio sounds amazing! This bonus episode is about Liam’s cool mic!
A [obligingly]: Yay, Liam’s cool mic.
R: It’s made of meat, though.
L: What, my cool mic?
R: No, the edible arrangement in the break room. They’re usually made of fruit, this one is made of meat. Raw meat.
A: Yes, I was wondering if that was an American thing. [laughter] I’ve never been to Massachusetts before!
L: It’s Innsmouth, Alice. Nobody’s ever been to Innsmouth. It doesn’t technically exist.
R: It’s not even on Google Maps.
A: Is it sort of a, er, township? Unincorporated township?
R: It’s more of a, uh, cult.
A: Like an MLM?
L: Like Christianity!
R: Well, a bunch of fish people founded it in the late eighteen hundreds…
L: Fucking fish.
R: …and let’s say they got up to some questionable activities.
A: Anything I should be worried about?
R: Well…
A: I did travel here by interdimensional portal and that’s just a bit… off-putting? It’s very convenient, but…
L: Swimming, having gills…
R: I took the train.
L: Just breathe air, you little shits!
A: Did they not offer you an interdimensional portal, then?
R: No, they did, I just said I’d rather take the train.
A: How was it?
R: Not bad. It was made of meat, though. The train. Smooth ride. Turns out meat is an excellent shock absorber, just not very practical. There was a flock of ravens trying to eat us the whole way.
A: That’s… a bit odd.
L: Brian Phelps.
R: Brian Phelps is made of meat?
L: No, Brian Phelps is a fucking fish. [shouting, too close to mic again] You’re not fooling anyone, Brian! God, I could go for some salami. Is there any salami in the meat bouquet?
R: There is definitely not any salami in the meat bouquet.
L: I’m gonna make myself a sandwich!
[scraping sound, footsteps, door opens and closes]
A: It’s nice having a studio, though.
R: It’s not bad. I like these chairs with the wheels. Good lumbar support. How was the portal?
A: Terrifying, but brief. Very brief. It materialised right under me in the dairy aisle of Tesco’s, then I was in this howling green tunnel for about five seconds, and then I was here. On the one hand, I didn’t have to show my passport or go through security, but on the other hand, I’m just slightly concerned I might have cancer. Or a prion disease. [nervous laugh] Or maybe I’ll turn into a fish person. Did you mean literal fish people?
R: Yes.
A: I suppose… Someone got very lonely and fucked a fish, or…?
R: Yes.
A: What? Are you being serious? What kind of a fish… Do you mean mermaids?
R: No. In fact, mermaids have a notorious design flaw when it comes to sexual congress with us human types. What you’re after, as a lonely sailor, is an animal known as the “reverse-mermaid,” which is widely regarded as a joke, and depicted as the head and torso of a fish, with human legs, and presumably genitalia, underneath… [drawing a reverse-mermaid on the slide, with the mouse, badly] But which is in fact more of an elder god by the name of Dagon, which does indeed have legs and genitalia, but is more of a fully-anthropomorphic monstrous fish. [drawing monstrous legs and feet] He’s a bit larger and taller. Here, I’ll put a “D” for Dagon. [draws arrow] And the rest of him is up there.
A: As a lonely sailor myself, I don’t see how something like that is any more fuckable than a regular fish. Or a manatee. Frankly, I’d rather fuck a manatee. At least it’s a mammal.
R: Yeah, but you’d be violating the Endangered Species Act.
A [laughing]: I’m sorry, aren’t they endangered? We want them to fuck! You told me to save the manatees, well I’m out there doing it! And then I’m going to save the whales!
R: Debatable whether creating a race of half-human, half-manatee hybrids is saving the species…
A: Are you some kind of fucking manatee eugenicist? If the manatee and I are both consenting adults, and we fancy each other, then leave us the fuck alone! This is how evolution works!
R: In the mind of Donald Trump, yes.
[door opening and closing]
D [text over slide]: I COULD EDIT THAT OUT BUT I’M TOO TRAUMATISED AND DRUNK.
L: You guys… Is that supposed to be a fucking fish?
R: No. It’s the legendary reverse-mermaid.
L: Well, I only respect half of it! Here. The meat bouquet started screaming when I cut into it, so I grabbed some doughnuts.
A: Oh, are there doughnuts? The meat bouquet has a way of…
L: You didn’t hear it?
R: The meat bouquet?
A: …of arresting one’s attention…
L [excited]: The soundproofing in here is fucking incredible!
D [text over slide]: IN RETROSPECT, THAT SHOULD HAVE BEEN A RED FLAG.
A: Out of sheer, morbid curiosity, did the doughnut scream?
L: Doughnuts don’t scream.
R: Do the doughnuts scream in… in the UK?
A: …No, not usually. Perhaps, perhaps on the continent, but not usually in Britain. They’re very stuffy and well-behaved.
L: And transphobic.
A: Of course.
L: Do you want one of these?
A: Er, I rather think… I’d better not eat or drink anything until another portal opens up and sends me home. Just in case this is a Persephone sort of situation…
R: Probably a good idea.
L: Low blood sugar kills, Alice. [muffled, chewing]
R: You’ll wind up married to Hades and having to spend six months out of the year in Massachusetts.
L: I’m spending twelve months out of the year in this studio, I don’t care if it’s in Massachusetts. If I have to, I will marry Hades twice.
R: Nah, you see, that’s not legal in Massachusetts. You’d be in a bigamous relationship with yourself.
L: Well, then one of you has to do it. Daddy needs his new mic. These chairs are awesome too!
[rumbling, squeaking]
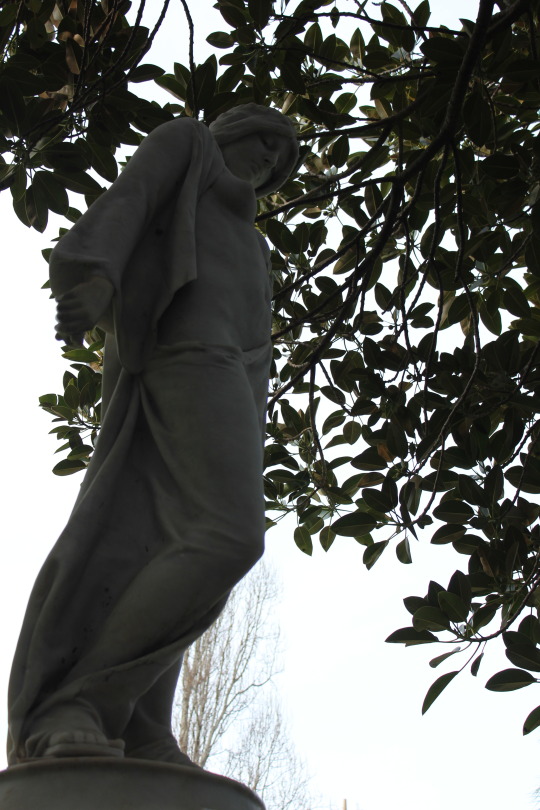
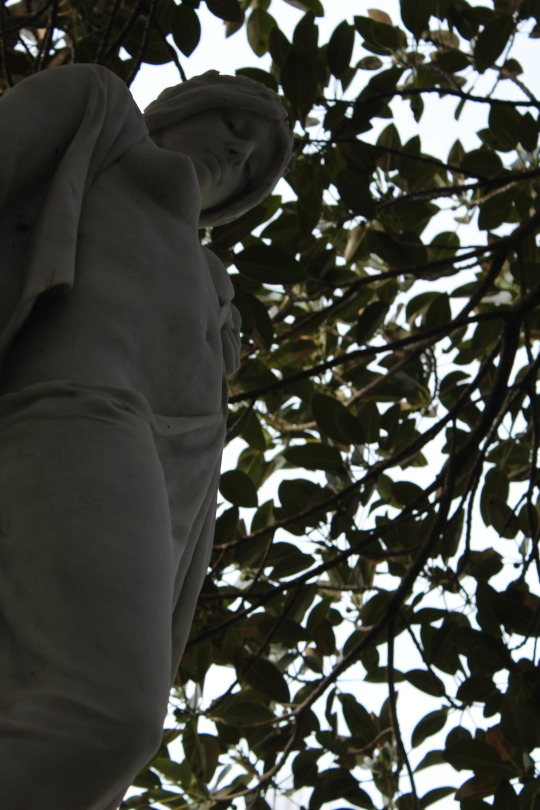
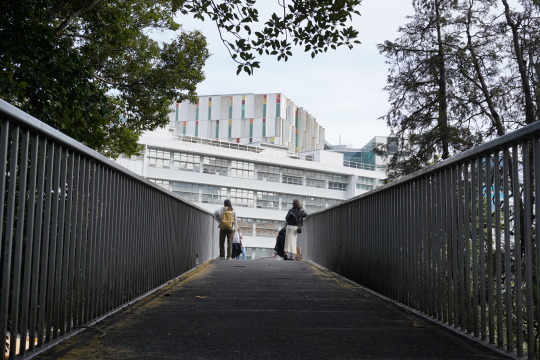
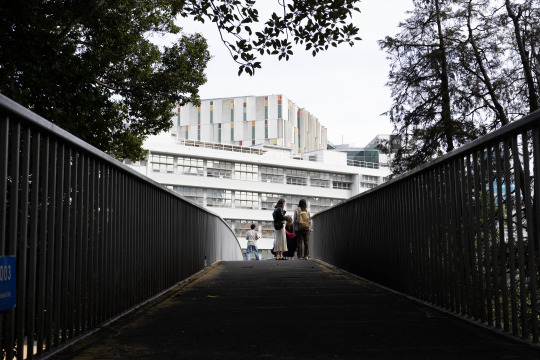
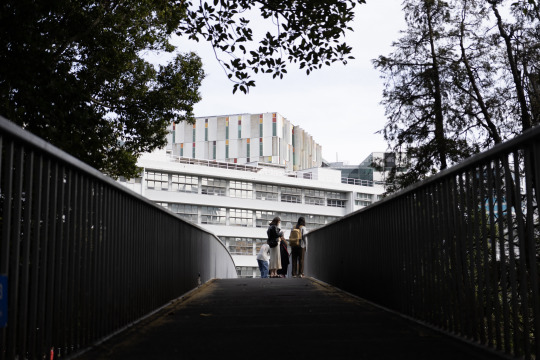
A: I’m already in a very committed relationship with the Mothman, actually. We go around collapsing bridges and making appearances just out of camera frame. It’s quite fun.
R: Alice is actually a cryptid wanted across several New England states.
A: Yes, I’d like very much to get back to it, and not get cancer or die! [nervous laughter] Ah, shall we get on with the episode?
L: I’m never leaving this studio. You will pry this microphone from my cold, dead hand.
A: Intros? Did we do intros?
R: It’s a bonus episode, they already know us.
D [text over slide]: HONESTLY IF WE’D JUST DONE THE INTROS, IT WOULD’VE SAVED US A LOT OF TROUBLE.
A: Right…
R: But we do have [news drop] the God Damn News.
Part 2 will be another post, give me a minute and I'll link it...
#wtyp#well there's your problem#ghostbusters#long reads#fanfic#fanfiction#crossover fic#gozer the gozerian#alice caldwell-kelly#liam anderson#justin roczniak#devon#engineering disasters#podcast
44 notes
·
View notes
Text
Photo Editing Services: The Invisible Hand That Can Make or Break Your E-Commerce Empire

The Dirty Little Secret of Every Failed E-Commerce Store
Here’s an uncomfortable truth: Your $10,000/month ad budget means NOTHING if your product photos look like they were shot in a dark basement with a potato.
Fact: 93% of online shoppers consider visual appearance the #1 factor in purchasing decisions. Yet most stores use:
☑️ Overexposed iPhone pics ☑️ Cluttered backgrounds that distract ☑️ Inconsistent lighting across products ☑️ Zero color correction
At Ecommservices India, we don’t just “edit” photos – we perform visual alchemy that makes products irresistible. Here’s how the magic happens.
1. Why “Good Enough” Photos Are Costing You 62% in Lost Sales
Think your product images are fine? Check these conversion killers:
🩸 Shadow Monsters: Harsh shadows make products look dirty/used 🩸 White Background Betrayal: Grayish “white” backgrounds scream amateur 🩸 Perspective Distortion: That slightly tilted angle makes sizing impossible to judge 🩸 Color Lies: Screen-to-real life color mismatch = instant returns
Case Study: A jewelry client saw 37% fewer returns after we fixed their gold chain colors to match reality.
2. Our image Editing Services – More Than Just Background Removal
We’re the Navy SEALs of image optimization:
✅ Ghost Mannequin Magic: Make apparel look worn by invisible models ✅ 360° Product Spin Creation: Increase conversions by 47% (verified) ✅ Pixel-Perfect Color Correction: Pantone-matched accuracy ✅ Shadow Creation: Natural-looking dropshadows that “pop” products ✅ Damage Control: Fix scratches/dents on second-hand items
Pro Tip: Pair with our product photography services for start-to-finish visual domination
3. The 7 Deadly Sins of DIY Photo Editing (And How We Fix Them)
Most store owners/VA’s commit these unforgivable sins:
☠ Sin #1: Using free background removers (those jagged edges haunt customers) ☠ Sin #2: Overusing HDR (your products look radioactive) ☠ Sin #3: Ignoring color profiles (sRGB vs Adobe RGB disaster waiting) ☠ Sin #4: Inconsistent image sizes (makes your store look chaotic) ☠ Sin #5: Watermark atrocities (branding shouldn’t mean vandalism) ☠ Sin #6: Wrong DPI (72dpi for web, 300dpi for print - yes it matters) ☠ Sin #7: Over-compressing (that JPEG artifacting is gross)
Our Exorcism Process:
Advanced clipping paths with 0.5px feathering for natural edges
Frequency separation for flawless skin/fabric retouching
Non-destructive editing so we can revert any change anytime
4. Beyond Basics: The Ninja Edits You Didn’t Know You Needed
Our photo editing services include next-level tricks:
🔥 Reflection Creation: Make products appear on marble/glass surfaces 🔥 Multi-Angle Composites: Show front/back/side in single hero image 🔥 Seasonal Adaptation: Turn summer wear into winter collection with snow effects 🔥 Augmented Reality Previews: Edit products into room scenes for decor stores
Client Result: A furniture store increased AOV by $87 using our room-scene composites
5. “But Can’t I Just Use AI Tools?”
Oh sweet summer child…
🤖 AI Fails At:
Precise color matching (will turn #FF0000 red into #FD5E53)
Complex object removal (say goodbye to necklace chains)
Understanding brand guidelines (consistency = trust)
Human Advantage: Our editors spot:
That single strand of hair on the black sweater
The barely-visible price tag reflection in glasses
The subtle fabric pilling that screams “low quality”
6. How It Works: From Meh to Magnificent in 24 Hours
1️⃣ You Upload: Send raw images via Drive/Dropbox (we accept even WhatsApp-quality pics) 2️⃣ We Transform: 3-tier quality check process (editor → supervisor → client manager) 3️⃣ You Profit: Get web-ready + print-ready files with perfect naming conventions
Turnaround Time:
Basic edits: 12 hours
Advanced composites: 48 hours
100+ image batches: 72 hours
Final Warning: Your Competitors Are Editing Right Now
While you’re reading this:
✔️ Amazon sellers are using pro editing to steal your buyers ✔️ DTC brands are investing $5k/month in visual storytelling ✔️ Your visitors are bouncing due to “unprofessional” images
Time to fight back with images that:
Load faster than 2 seconds (compressed without quality loss)
Look consistent across all devices (responsive-ready)
Make shoppers click “Add to Cart” instinctively
📢 DM “PHOTO FIX” for a FREE edit of your worst product image (see the difference instantly)
CTA: “Stop letting bad photos sabotage your sales. Professional photo editing services can 10X your conversions overnight!”
0 notes
Text
Professional Photography and Smartphone Shots: Is Quality Important?
Photography is now a vital part of storytelling, branding, and self-expression in our fast-paced digital age. With the development of sophisticated smartphone cameras, the question on everyone's lips is whether professional photography is really needed anymore or if smartphone shots are good enough. Both have their benefits, yet the issue remains: is quality important?
The Evolution of Smartphone Photography

Those days are over when smartphone cameras used to snap pixelated, low-quality photos. Smartphone cameras now have powerful lenses, AI-powered boosts, and high-resolution sensors that in most cases can rival traditional cameras. Portrait mode, night shots, and computational photography are some of the technologies that have bridged the gap between smartphone photos and professional photographs.
Yet, there are still enormous gaps between smartphone photos and professionally shot photographs.
Key Differences: Professional Photography vs. Smartphone Shots
Let's discuss the significance of quality by breaking down some key points that distinguish professional photography from smartphone photographs:

1. Image Quality & Resolution
Professional cameras, particularly DSLRs and mirrorless, have more resolution, dynamic range, and color accuracy. Smartphone cameras may improve over time, but they tend to depend on AI and software processing to make up for their smaller sensor size.
2. Lens Versatility
Professional photographers can choose from more than one lens, such as wide-angle, macro, and telephoto, which allow different perspectives and artistic compositions. Smartphones generally resort to digital zooming, which yields poor quality.
3. Control Over Settings
Professional cameras offer complete manual control over features like ISO, shutter speed, and aperture. This level of accuracy allows photographers to control exposure, depth of field, and motion blur—something that only smartphones can do in part.
4. Low-Light Performance
One of the most apparent differences is low-light performance. Low-light performance is easy for commercial cameras because they have larger sensors and more sensitivity to light. Smartphone cameras that have night modes have difficulty with grain and decreased definition.
5. Depth and Detail
Fine details, texture, and depth are important to capture in high-end photography. Smartphones have good portrait modes but lack professional camera natural depth and sharpness.
6. Post-Processing & Editing
Professional photographers shoot in RAW, so they can do huge post-processing without compromising the quality of the image. Smartphone photographs are typically shot in compressed formats such as JPEG or HEIC and are less editable.
When Does Quality Matter?
While smartphone camera phones are handy and produce excellent results, there are still certain situations where professional photography is needed:
Branding & Marketing: Companies need good-quality photographs for advertisements, product images, and branding. Low image quality affects credibility and interest.
Weddings & Events: Single events need to be captured by professional photography in order to record emotions, details, and memories properly.
Fine Art & Print Media: In order to retain high resolution and sharpness for exhibitions, magazines, and large prints, professional cameras are necessary.
Real Estate & Architecture: Professional photography is more visually attractive and sells homes better.
The Case for Smartphone Photography
While professional cameras are great, smartphone photography has its advantages:
Social Media & Instant Sharing: Fast uploading and in-the-moment editing make smartphones perfect for social media.
Casual Photography: For casual events, holiday photos, and personal use, phone photography is easier and convenient.
Affordability & Convenience: Not everybody can invest in costly camera equipment, and smartphones offer an inexpensive alternative.
Conclusion: Do You Need Professional Photography?
Finally, the decision between smartphone photography and professional photography depends on the use of the photo. If quality, detail, and control are the issue, then professional photography is still the ideal option. But for convenience and daily use, today's smartphones are more than sufficient to capture incredible photos.
No matter what business you're in, wanna be photographer, or just photography enthusiast, understanding where quality is most important will allow you to make your best decision. The trick is to pair tool with need—because in some cases the best camera will be one that's with you wherever you go.
📧 [email protected] 🌐 www.smokestudioz.com 📍 Delhi-Based | Serving India & International Clients
0 notes
Text
How to Price Your Photos for Maximum Photo Sales Success
If you are a photographer looking to sell your photos, pricing them right is crucial. Set the price too high, and buyers may look elsewhere. Set it too low, and you may not make a profit. The key is to find a balance that attracts customers while ensuring good earnings. Here’s how to price your photos effectively for maximum photo sales success on Kwikpic.

1. Understand Your Market
Before setting a price, research the market. Different platforms and customers have different price expectations.
Stock photography websites have standard pricing, ranging from $1 to $50 per photo.
Fine art photography can sell for hundreds or even thousands of dollars.
Personal and commercial licenses affect pricing. A photo for personal use will cost less than one for business purposes.
2. Determine Your Costs
To make a profit, you must consider your costs:
Equipment: Camera, lenses, lighting, and editing software.
Editing Time: Time spent enhancing images.
Marketing Costs: Website hosting, advertisements, and promotions.
Printing Costs: If you offer physical prints, include the cost of printing and shipping.
3. Choose a Pricing Strategy
There are different ways to price your photos. Pick the one that best suits your work:
Cost-Plus Pricing: Add up all costs and add a profit margin.
Competitive Pricing: Check what others charge and price accordingly.
Value-Based Pricing: Charge based on how valuable your photo is to the buyer.
4. Offer Different Pricing Options
Giving buyers multiple options can increase your photo sales.
Royalty-Free vs. Rights-Managed:
Royalty-Free: Buyers pay once and use the image multiple times.
Rights-Managed: Buyers pay based on usage (e.g., print ads, websites, social media).
Digital vs. Print: Offer both digital downloads and high-quality prints.
Bundles: Sell multiple photos as a package at a discounted rate.
5. Set Competitive Prices on Kwikpic
Since you are selling on Kwikpic, you can set your prices without worrying about platform commissions. Here’s how to determine a good price:
Check competitor websites to see what other photographers are charging.
Offer exclusive deals or discounts for first-time buyers.
Provide premium pricing for high-resolution or commercial-use licenses.
Use tiered pricing, where larger prints or higher-resolution files cost more.
6. Test and Adjust Your Prices
Start with a reasonable price and analyze sales trends:
If you get many sales quickly, consider raising prices.
If sales are slow, try reducing the price slightly.
Offer limited-time discounts to attract new customers.
7. Add Value to Increase Prices
Buyers are willing to pay more if they see extra value:
Offer high-resolution files.
Provide different formats (JPEG, PNG, RAW).
Include customization options (color correction, cropping).
Give a commercial license option.
8. Keep an Eye on Industry Trends
Stay updated on photography trends and demand:
Seasonal and trending themes (e.g., holiday photos, and travel photography) can affect pricing.
Emerging markets like NFTs and digital art may offer new pricing opportunities.
9. Promote Your Work on Kwikpic for More Sales
Since you are selling on Kwikpic, marketing is essential to attract buyers.
Use SEO strategies to rank your portfolio higher on search engines.
Promote your photos through social media and email campaigns.
Collaborate with influencers and photography communities to drive traffic.
Offer discounts and referral bonuses to encourage repeat buyers.
Conclusion
Pricing your photos correctly on Kwikpic takes research and adjustments. By understanding the market, covering your costs, offering multiple pricing options, and continuously testing, you can maximize your photo sales. Start with a strategy that fits your work and refine it as you grow your photography business. Kwikpic gives you full control over pricing and profit—use it to your advantage!
0 notes
Text
RAW vs JPEG
Understanding the differences between RAW and JPEG image formats is essential for photographers aiming to optimize their workflow and image quality. Each format has its unique characteristics, advantages, and potential drawbacks. This article delves into the distinctions between RAW and JPEG, guiding you on when to use each to achieve the best photographic results.

What is a RAW File?
A RAW file is an uncompressed and unprocessed image captured directly by a camera’s sensor. It retains all the data without any in-camera adjustments, providing a digital negative that offers maximum flexibility during post-processing.
Advantages of RAW:
High-Quality Images: RAW files contain all the data from the camera sensor, resulting in high-quality images with greater detail and dynamic range.
Flexibility in Post-Processing: With RAW files, photographers can adjust exposure, white balance, and other settings without degrading image quality.
Non-Destructive Editing: Editing a RAW file doesn’t alter the original data, allowing for multiple edits without losing the original quality.
Disadvantages of RAW:
Large File Sizes: RAW files are significantly larger than JPEGs, consuming more storage space and requiring more processing power.
Compatibility Issues: Not all devices or software can open RAW files without specific codecs or plugins.
Need for Post-Processing: RAW images often appear flat out of the camera and require editing to achieve the desired look.
What is a JPEG File?
JPEG (Joint Photographic Experts Group) is a commonly used image format that compresses and processes image data within the camera. This results in smaller file sizes and images that are ready to use straight from the camera.
Advantages of JPEG:
Smaller File Sizes: JPEGs are compressed, making them easier to store and share.
Immediate Usability: JPEG images are processed in-camera, providing ready-to-use photos without the need for post-processing.
Widespread Compatibility: JPEG is a universal format compatible with almost all devices and software.
Disadvantages of JPEG:
Loss of Detail: Compression can lead to a loss of image detail and reduced dynamic range.
Limited Editing Flexibility: Adjusting exposure or white balance in JPEGs can degrade image quality due to the lossy nature of the format.
Potential for Compression Artifacts: High compression levels can introduce artifacts, affecting image quality.
RAW vs. JPEG: Key Differences
Image Quality: RAW files maintain all captured data, offering superior image quality. JPEGs apply compression, which can result in some loss of detail.
File Size: RAW files are larger, requiring more storage space. JPEGs are smaller and more manageable.
Editing Flexibility: RAW provides extensive flexibility in post-processing without quality loss, whereas JPEGs have limited editing potential.
Workflow Speed: JPEGs allow for a faster workflow with immediate usability, while RAW files necessitate additional time for processing.
When to Use RAW
Professional Photography: When maximum image quality and editing flexibility are paramount, such as in commercial shoots or high-end portraits.
Challenging Lighting Conditions: RAW files allow for better correction of exposure and white balance issues encountered in difficult lighting.
Detailed Post-Processing: If extensive editing is anticipated, RAW files provide a robust foundation without compromising quality.
When to Use JPEG
Casual Photography: For everyday snapshots where immediate sharing and smaller file sizes are preferred.
Fast Turnaround Needs: Events requiring quick delivery of images benefit from the immediacy of JPEGs.
Limited Storage Scenarios: When storage capacity is a concern, JPEGs offer a space-saving solution.
FAQs
Q: Can I convert a RAW file to JPEG?
A: Yes, RAW files can be converted to JPEGs after processing, allowing for easier sharing and reduced file sizes.
Q: Do all cameras support RAW format?
A: Most DSLRs and mirrorless cameras support RAW; however, many point-and-shoot cameras may not offer this option.
Q: Is there a noticeable difference between RAW and JPEG for amateur photographers?
A: For casual use, the differences might be subtle. However, for critical applications or extensive editing, RAW’s advantages become more apparent.
Q: Does shooting in RAW slow down my camera?
A: Shooting in RAW can slow down the camera’s burst rate due to larger file sizes, potentially affecting continuous shooting performance.
Q: Are RAW files better for printing?
A: RAW files provide higher quality for editing before printing, but the final print is typically made from a processed JPEG or TIFF file.
Conclusion
Choosing between RAW and JPEG depends on your specific photography needs and workflow preferences. Understanding the strengths and limitations of each format enables you to make informed decisions, ensuring optimal results for your photographic endeavors.
Thank you for reading this. You are welcome to visit my website
Ylioppilaskuvaus. Valmistujaiskuvat Lappeenranta | Kuvaajankulma
And here you can find boudoir photos
Boudoirkuvaus | Huomenlahjakuvaus | Kuvaajankulma Lappeenranta
0 notes
Text
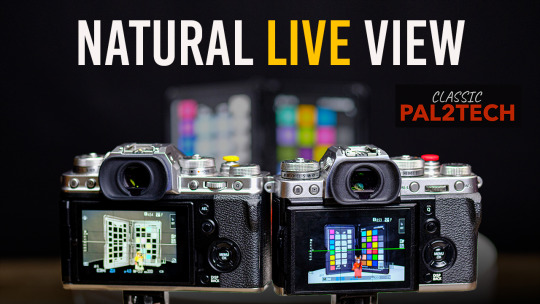
NEW VIDEO: https://www.youtube.com/watch?v=zIxF4pD_4AQ
Understanding Fujifilm Natural Live View and how it can affect JPEG vs RAW files. Also discussed is Preview Exposure and White Balance in camera screen settings.
0 notes
Text
Understanding Bitmap Images: The Foundation of Effective Photo Editing in Photoshop
Image Recreate: Common Questions Answered
1.How do I maximize image quality in Photoshop?
To maximize image quality in Photoshop, start with a high-resolution source image. Use the “Save As” option to choose formats like PNG for lossless quality. Adjust image dimensions using “Image Size” while maintaining the resolution (300 DPI for print). Utilize adjustment layers for non-destructive editing and avoid excessive compression when saving files.
2. Where is Super Resolution in Photoshop?
Super Resolution in Photoshop is found in the Adobe Camera Raw (ACR) interface. To access it, open an image in ACR, right-click on the image, and select "Enhance." In the Enhance dialog box, check the "Super Resolution" option, and then click "Enhance" to apply it and increase the image resolution.
3. What is the maximum image size in Photoshop?
The maximum image size in Photoshop depends on the version and the system architecture. For 64-bit versions, the maximum dimensions are approximately 300,000 by 300,000 pixels. However, the total file size can be limited by available RAM and disk space, with a maximum file size of 2 gigabytes for PSD files and up to 4 gigabytes for PSB files.
4. How many GB is Photoshop?
The size of Adobe Photoshop varies by version and operating system, but the installation typically requires around 2 to 4 GB of space. Additional space may be needed for scratch disk files and plugins. Always check the system requirements on Adobe's website for the most accurate and up-to-date information.
5. What is bitmap in Photoshop?
A bitmap in Photoshop refers to a type of image composed of pixels, where each pixel represents a specific colour. This format is commonly used for detailed images, such as photographs, but can lose quality when scaled. Bitmaps are typically saved in formats like BMP, JPEG, or PNG, and are ideal for rich, colourful visuals but not for scalability.

Visit: VS Website See: VS Portfolio
0 notes
Text


raw vs jpeg…i need a crash course in photography immediately
1 note
·
View note
Text
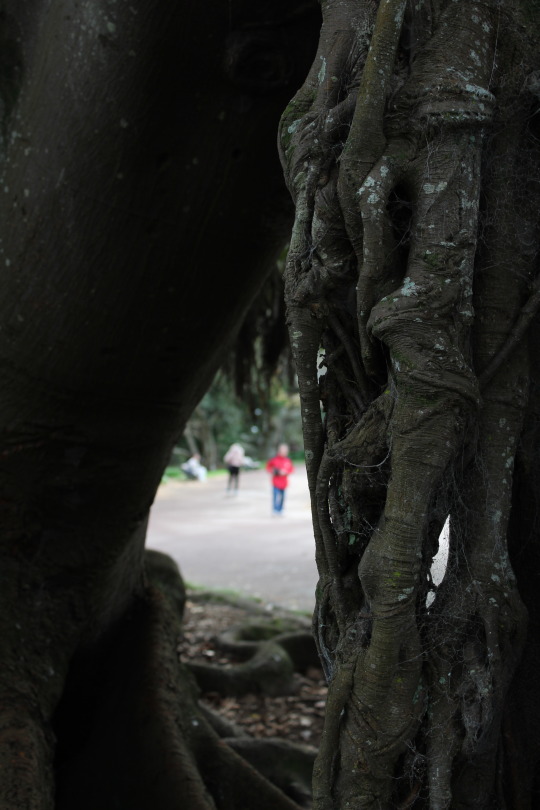
Here is a basic how to guide for cameras and phones to capture the auroras.
I've been receiving so many comments on how to capture them on camera, and as a professional photographer, I figured I would share some tricks to help most people capture the lights (I've included multiple images of the Auroras I've captured). A tripod is recommended for everything below. These settings are subject to chance based on conditions so adjust as needed.
CAMERAS:
- Find and select manual mode on your camera
- Shutter speed: Around 10 seconds is best if the auroras are far away and not moving fast. If the auroras are directly overhead and moving fast, 2 - 4 seconds is best.
- F stop: As low as it possibly goes for the lens that you are using. For example, my primary aurora lens goes down to F 2.8, and that's what I keep it at.
- ISO: This will depend on the quality of your camera. My ISO is normally between 800 - 1600 but you might have go higher if your images are darker. Be aware that the higher your ISO is, the "grainier" your picture will look.
- RAW vs JPEG. I always use RAW if you are doing any real editing. JPEG is fine for those who don't plan on doing much to the photo.
- Turn off autofocus. Manually focus your lens to just below the crosshairs of infinity. This will give you better control to get sharp images.
- Unless you have a remote shutter, turn on a 2 second timer to avoid any camera shake.
That is the basic starting point for your cameras. From there, you can adjust the settings to get your images perfect.
IPHONE SETTINGS:
- Use Night mode (iPhone 11 and later) or manual mode (third-party apps).
- Set exposure: 3-10 seconds
- ISO: Start between 400 - 600 and adjust as needed
- Turn off flash
- Focus: Manual or Infinity
- Use a 3-second timer to avoid any camera shake
- Turn on RAW Max if it is available on your phone to get the best quality
ANDROID SETTINGS:
- Use Pro/Manual/Night mode
- Set exposure: 3 - 10 seconds.
- ISO: Start between 400 - 600 and adjust as needed
- Turn off flash
- Focus: Manual or Infinity
- Use a 3-second timer to avoid any camera shake
- Turn on RAW if it is available on your phone to get the best quality
Info originally created by Tony Bendele with extra info and modifications by myself.

0 notes
Text
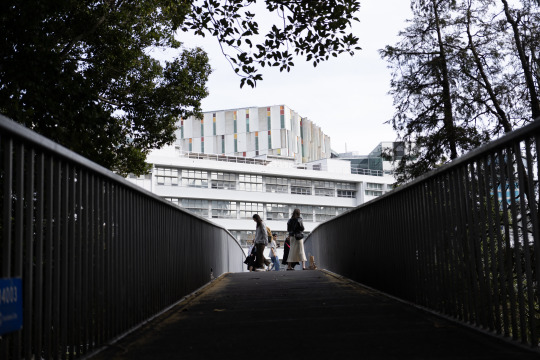
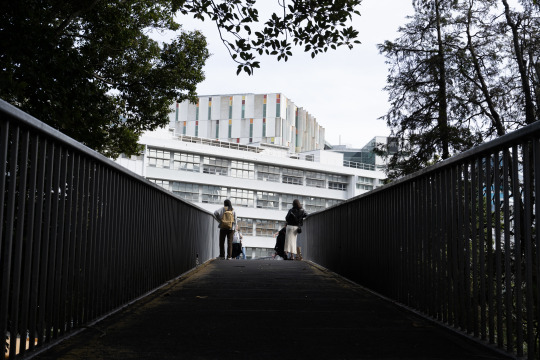
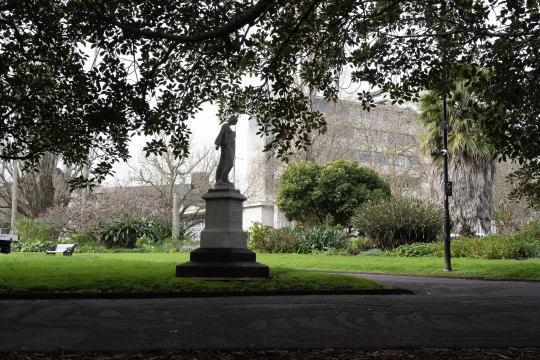
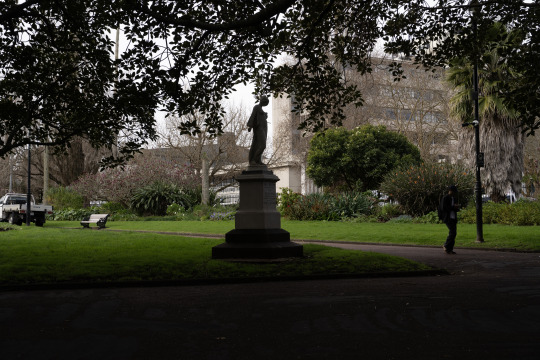
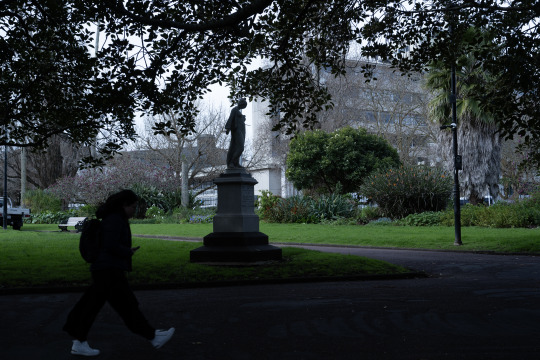
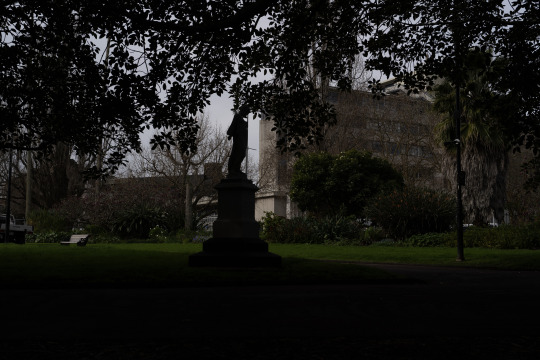
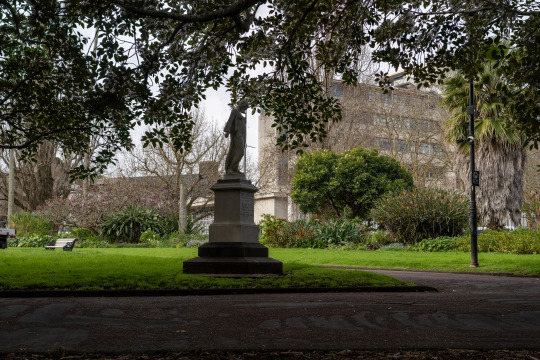
Workshop: DSLR | Week Two.
Task 1 : JPEG vs RAW. -> Take three different photographs, varying the light situation and the proximity of subject matter. -> Process the RAW files and compare these to the JPEG files, ensuring that you are examining these at 100%. -> Write a brief account of the differences in the three instances. Note also the sizes of these images: what is the maximum size these can be printed out at 300dpi?

Task 2 : Manual. -> Select an outdoor daylight situation with middle-ground and distant elements. Take the same photograph, using a tripod, in the following ways: a) shoot programmed auto setting b) shoot shutter speed priority at 100 ISO c) Shoot aperture priority at 100 ISO d) Shoot using the manual setting to obtain the maximum amount of detail across the image.
Task 3 : White Balance. Why might you not ‘correct’ white balance? -> Shoot, using a tripod, a house (from outside) with its lights on at twilight: a) auto white balance b) setting the temperature using the K colour temperature setting (try three different Kelvin temperatures)
Task 4 : HDR Imaging. -> Set up your camera on a tripod in a variable light situation; a situation with both shadow and sun-lit areas. -> Set your camera’s drive mode to continuous shoot, and select Auto Exposure Bracketing with 1 stop increments. -> Hold down the shutter release button until you have heard it take the three exposures in a row. Repeat this process (same photograph) with the Auto Exposure Bracketing with 2 stop increments.
+
-> Then use either Lightroom’s HDR and Photoshop’s HDR to combine these files. Notice the many decisions you make at this point and how easily the photograph starts to look unconvincing. -> Your aim in this exercise is to produce an HDR composite image that you find ‘convincing’ as a photograph and to write a brief account of your reasoning i.e. what you consider to be a ‘convincing’ HDR photograph and to compare this HDR image to the ‘correct’ exposure image (the first shot in the burst of three).
Task 5 : Explore. -> Release modes such as the self-timer and continuous high speed.
0 notes
Text


Workshop 2 - DSLR Taking Charge - Task 1
Shooting in JPEG vs RAW:
When comparing the two types of photos there isn't much difference between them, but I can see a subtle difference with the brightness and darkness of the photos. In the raw photos they are more amplified and the shadows and highlights appear brighter and darker than the jpegs. The raw photos look a slightly higher quality image than the jpegs.
0 notes
Text
Week 2
Compare jpeg to RAW. Set your camera to record both a large RAW + a large JPEG file simultaneously, and take three different photographs, varying the light situation and the proximity of subjectmatter. Process the RAW files and compare these to the JPEG files, ensuring that you are examining these at 100%. Write a brief account of the differences in the three instances. Note also the sizes of these images: what is the maximum size these can be printed out at 300dpi


What I find the difference between RAWs vs JPEGs is a couple of things.
When zooming into the images between JPEGs vs RAWs, RAWs has more fine detail compared to JPEGs.
When unedited, RAWs have a very flat look to them.
Much easier to pull highlights/shadows and tweak colours to your desired tastes compared to JPEGs.
2. Shooting modes – Manual Select an outdoor daylight situation with middle-ground and distant elements. Take the same photograph, using a tripod, in the following ways: a) shoot programmed auto setting b) shoot shutter speed priority at 100 ISO c) Shoot aperture priority at 100 ISO d) Shoot using the manual setting to obtain the maximum amount of detail across the image.
From Top to Bottom No. 1 - No. 4
Settings:
Photo #1: F/5.0, iso 100, 1/200
Photo #2: F/2.8, iso 100, 1/1000
Photo #3: F/2.5, iso 100, 1/1000
Photo #4: F/8.0, iso 200, 1/200
Shooting on these automatic modes, I notice that these automatic modes tend to not stop the apeature down/ not stop down enough. It was only during the manual mode (Photo #4) when I was able to stop the apeature down from F/2.5 to f/8 to get everything in focus.
3. White balance Why might you not ‘correct’ white balance? Shoot, using a tripod, a house (from outside) with its lights on at twighlight:
a) autowhite balance
Colour Temp: 5500K
b) setting the temperature using the K colour temperature setting (try three different Kelvin temperatures)

From Warm to Cold temp photos
#1: 8400K
#2: 6300K
#3: 4350K
4. HDR imaging
Set up your camera on a tripod in a variable light situation; a situation with both shadow and sun-lit areas. Set your camera’s drive mode to continuous shoot, and select Auto Exposure Bracketing with 1 stop increments. Hold down the shutter release button until you have heard it take the three exposures in a row. Repeat this process (same photograph) with the Auto Exposure Bracketing with 2 stop increments.
Then use either Lightroom’s HDR and Photoshop’s HDR to combine these files. Notice the many decisions you make at this point and how easily the photograph starts to look unconvincing. Your aim in this excercise is to produce an HDR composite image that you find ‘convincing’ as a photograph and to write a brief account of your reasoning i.e. what you consider to be a ‘convincing’ HDR photograph and to compare this HDR image to the ‘correct’ exposure image (the first shot in the burst of three).


Sadly my camera doesn't have a built in HDR stacking feauture, so I had to take each shot carefully ensuring that each shot gets the shadows, midtones and the highlights. For lightroom HDR stacking to work, you need a minimum of 3 photos.
HDR should only be used when absolutely necesary, such as this area where there is a difference between the highlight areas and the shadow areas. This turned out pretty good I feel.
5.
Explore release modes such as the self-timer and continous high speed.
For my Camera, continious high speed shooting can be set through the menu, or for me, I've set it up as a custom button on my camera for easier accessibility, espeically when I am on the fly shooting and don't have time going through the menus.

In the manual for the Sony A7iii, it explains different burst speeds that can be used depending on what is important to the user. I personally always keep it on HI+ (10fps), as the autofocus tracking on Sony cameras are fantastic.
Self-timer on the A7iii can be accessed in the same selection area as the drive mode. Located all the way in the bottom, you can pick from 2s, 5s and 10s.
0 notes
Text
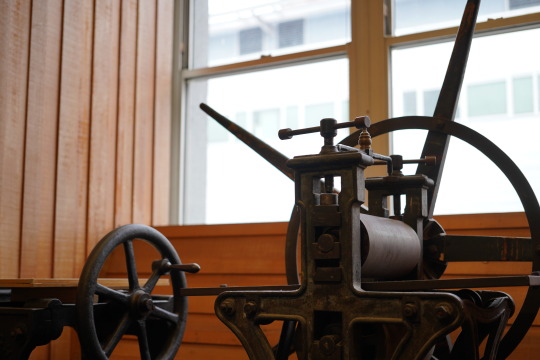
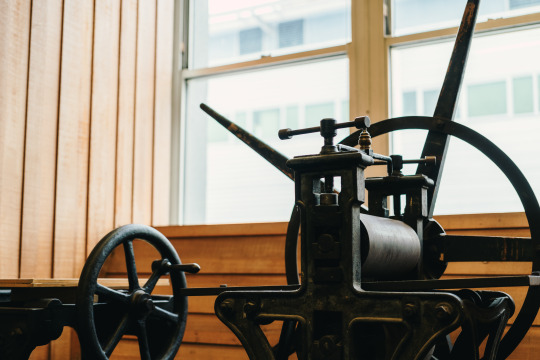
Art Filter Vs RAW
Though I rarely use them, the in-camera filters on the PEN-F are fun and you can see the effect through the viewfinder or screen while you take the image. This is a great advantage, especially for working in mono. I have my camera set up to save the camera edited Jpeg and also the RAW image – with color and more detail, just in case I change my mind or want to edit in post – which is what I…

View On WordPress
#art filters#black and white#editing#faces#mono#olympus#OM Workspace#Pen-F#People#portrait#street photography#Tasmania
0 notes