#rock space wifi extender setup
Explore tagged Tumblr posts
Visit Tumblr Blog
Explore Tumblr blogs with no restrictions, modern design and the best experience.
Last Seen Tumblr Blogs


Fun Fact
The Tumblr office adopted Tommy, an 11-year-old Pomeranian.
Text
Re.rockspace.local
The private web address re.rockspace.local is responsible to let you interact with your WiFi extender. If you have a Rockspace range extender, you can get access to it through this private web address. The URL can help you configure or manage your extender’s wifi network without any cables or wires.
All you have to do is, connect to the extender and go to the re.rockspace.local web page. The web-based interface does not even ask for an active internet connection in order to get inside your device. Want to learn how to login to the Rockspace range extender through this address, follow the steps below:
Firstly, ensure that your extender is plugged into the power outlet.
Go to a web browser on a device connected to the extender.
Type http://re.rockspace.local in the browser and hit Enter.
Put down the username and password upon reaching the re rockspace local login page.
Make sure you enter the login credentials carefully.
Click Login. You will log into the Rockspace wifi extender successfully.
That was all about the Rockspace WiFi extender and how to login to it using the private web address.
0 notes
Text
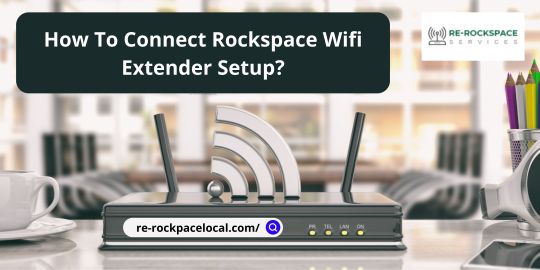
How To Connect Rockspace Wifi Extender Setup?
Rockspace wifi extenders are the most convenient and quick solution to increase the range of your existing Wifi.
To connect your rockspace wifi range exetnder to your phone or laptop, follow these steps:
Before connecting, switch off your mobile network.
Then, connect the WIFI extender to an electrical outlet.
Wait until the indication remains solid on.
Open WIFI on your Android, iPhone, or PC now.
To connect, select ROCKSPACE WIFI EXTENDER.
After a successful connection, open the web page and enter re.rockspace.local to configure the WIFI extender's password.
Locate the existing WIFI network that you want to expand, and then type on the existing WIFI network.
Finally, it has been linked.
You can now relocate it to a location where the networks are poor (dead zone area) or where you want to expand your network.
Default Login for Rockspace Wifi Range Extender
Before proceeding with the extender device configuration, you must have the login credentials for your ROCKSPACE booster device in order to conveniently access settings and control it swiftly. In addition, the default Login IP address, username, and password are printed on the ROCKSPACE Sticker, and a simple user manual is supplied with the box.
The default login URL is re.rockspace.local, and the IP address is 192.168.10.1**.**
Default username: NA
ROCKSPACE password- For the first time you log in, you must create a new password.
When you have everything ready to set up a range extender device, it is time to move on to the next stages.
Open your WEB BROWSER and navigate to re.rockspace.local or 192.16810.1, then wait for the login screen to load. During the initial configuration of the range extender, you must now generate a new login password. So enter a strong login password and then click the next button.
Final Words
These were the steps to assist you set up and log in to the Rockspace wifi Extender dashboard. If you are having trouble logging in, you may contact our customer service, we will assist you with your problem.
Visit: https://re-rockpacelocal.com/rock-space-wifi-extender-setup/
#rock space wifi extender#rockspace wifi extender setup#rock space wifi extender setup#re.rockspace.local#re rockspace.local#rockspace login#http://re.rockspace.local#rockspace wifi extender#http //re.rockspace.local
1 note
·
View note
Link
Use your IP address to log in to the internet:
It's linked to a clandestine network. The SSID name of the switch is shown on the device's bottom and can be altered in simultaneous settings.
Open your program on your device and type 192.168.0.1 into the address box, then press Start on the first page.
Select a connection type. The switch has three connection methods: PPPoE, Dynamic IP Address, and Static IP Address.
You'll find autoconfiguration here. You can choose the precise type of link in your network by giving data as needed. The next button should be pressed.
Keep in mind that if you're using a PPPoE connection, you'll need to provide your PPPoE client name and password before pressing Next.
#rockspace wifi extender setup#re.rockspace.local not working#re.rockspace.local#rockspace wifi extender#rock space wifi extender#rock space wifi extender setup#rockspace local#how to set up rockspace wifi extender#rock space extender#rockspace extender setup#rockspace extender#rock space setup#setting up rockspace wifi extender#connect rockspace wifi extender#rockspace wifi extender set up
0 notes
Text
How to Setup Rockspace Extender
Rock space extenders are well known in the market when it comes to best affordable extenders without compromising with the quality of wifi Connection. If you are on this page because you wanted to Setup Rockspace Extender then just follow the below given instructions. First of all make sure that your Rockspace Extender is plugged in to the wall near your router then only start the Re.Rockspace.Local Setup process. Before we start Setup its important to make sure extender have solid light on power.
Read more about Re rock space Extender....
#how to connect rock space wifi extender#rockspace wifi extender setup instructions#rock space ac1200 wifi range extender#rock space ac1200#rock space extender setup#how to set up rockspace wifi extender
1 note
·
View note
Link
Only the offline method at re.rockspace.local / http://re.rockspace.local can be used to configure the rockspace ac2100 extender setup
#Extender AC2100 Installation#Rock Space AC2100 Wi-Fi extender features#Rockspace Wi-Fi Range Extender#Setup of a rockspace ac2100 extender#wifi extender has the longest range
0 notes
Link
0 notes
Link
Rock Space gives a portable application to both Android and iPhones that permits you to deal with your organization and makes the arrangement interaction unbelievably simple. Directly from the application you can likewise make visitor organizations should you need to give restricted admittance or an alternate arrangement of qualifications to your visitors. Also, the course of action from the site re.rockspace.local can be successfully done on your wifi engaged device after you partner your wifi go extender properly. When the Rockspace extender a game plan you can move it to another zone where the wifi signals are satisfactory so the extender will spread the framework similarly to all the zones of the house.
1 note
·
View note
Link
Rock Space provides a mobile app for both Android and iPhones that allows you to manage your network and makes the setup process incredibly easy. Right from the app you can also create guest networks should you want to provide limited access or a different set of credentials to your guests. Secondly, the arrangement from the site re.rockspace.local can be effectively done on your wifi empowered gadget after you associate your wifi go extender appropriately. Once the Rockspace extender an arrangement you can move it to another area where the wifi signals are acceptable so that the extender will spread the system equally to all the zones of the house.
1 note
·
View note
Link
Re.rockspace.local is a setup link. If you have had a little bit of exposure to routers you may already know how they are supposed to be setup. They can be connected to your router via a link that allows you to feed the router’s details into the extender so that it can easily connect to your router and then relay the network without any hassle. Rockspace AC 1200 is a dual-band extender of 2.4GHz and 5GHz. It comes with strong signals which can penetrate walls and other obstacles effortlessly.The setup procedures to the majority of the extenders available in the market are quite simple and easy to figure out and so is the rock space setup. Just to diminish any sorts of confusion in the mechanism of the setup we shall go ahead and see in detail how we can set up our own rock space extender in a very convenient and simple way.
1 note
·
View note
Link
0 notes
Text
0 notes
Text
Rockspace Extender General Guide

Rockspace Extender General Guide
Network dead zones are always a headache for those using a wireless connection. The best solution for this problem is to use a Wireless Extender. It's harder to pick a good Extender from the whole lineup with the value for money as well. One of the best manufacturers who create the best Wireless Extender is Rockspace. Each consumer can pick Extender from a huge lineup in various price sectors. Re rock space local wifi extender boost your signals and make your workplace no dead zone area.
Rockspace local wifi extender works at single 2.4 GHz and the most famous model from Rockspace Extender is AC1200 which supports dual-band too. These Wireless Extenders are very easy to setup device. Rockspace Extender can set up with the single press via WPS and also setup via online through their official setup page http://re.rockspace.local. or 192.168.0.254. We can go through a detailed step by step process in the following sections
Features On Rockspace Extender
* High Signal boost.
* Full signal coverage
* Easy setup via WPS and Web UI
* Almost compatible with all devices.
* Smart signal indicator helps to find the perfect spot easily.
* Most models support dual-band which is future proof.
* Some models support Access Point Mode.
Things inside the Box
* Rockspace Wireless Extender
* Power cable and adaptor
* Quick Guide / Manual
* Warranty Card
Important Extender Models from Rockspace
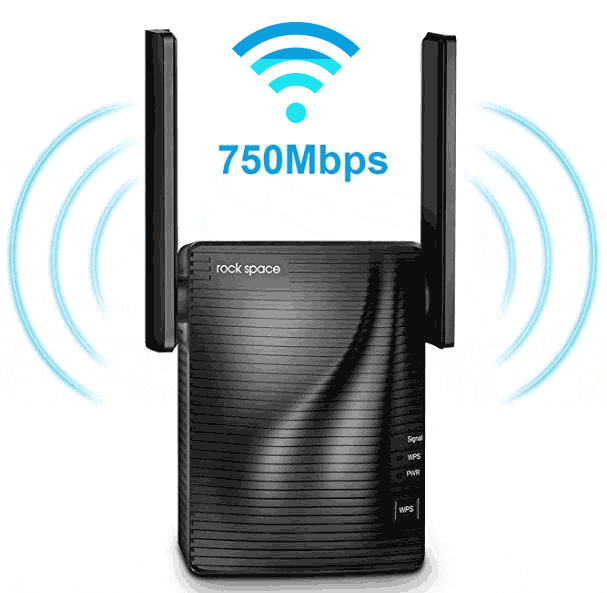
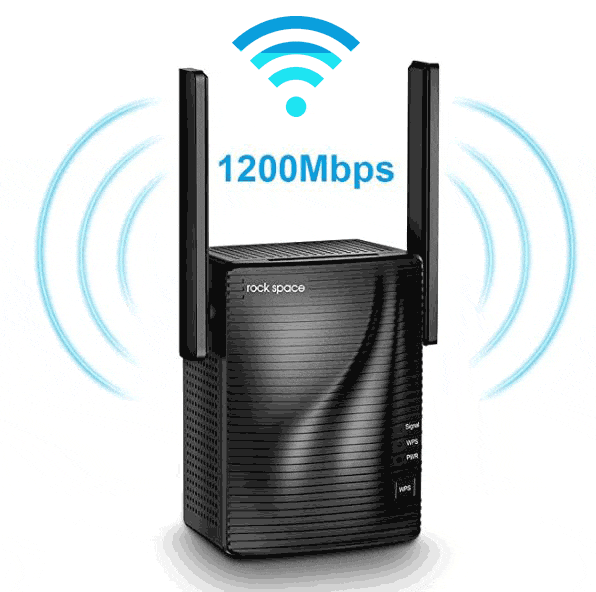
Rockspace Extenders comprises of various single-band and dual-band Extenders in 2.4GHz and 5GHz. Most important model from Rockspace is AC-1200 Dual Band Repeater. AC750 is another model within a more budget section. Different models come with different features as well. All models include single press WPS setup but your router should also support WPS connection. Rockspace AC-1200 also works in triple mode; it can work as an Access point as well. The important part of Extenders is to proper positioning of Wireless Extenders. The position must be midpoint from the router as well as a dead zone to get maximum coverage and maximum performance. Some models come with a smart signal indicator as well. This shows the signal level graphically which is easier to find the perfect spot.
Rockspace Extender Setup
As we mentioned before, there are two ways to set up your Rockspace Extender. You can set up with the single press via WPS and you can set up in online through re.rockspace.local. or 192.168.0.254.
We can briefly go through each setup in the following steps.
Rockspace Extender Setup with Web UI
To set up your Extender via Web UI, you need a web browser installed. We prefer Google Chrome and Mozilla Firefox. There is a specific website as well to do this setup, Connect to http://re.rockspace.local or 192.168.0.254. from the connected device.
1. Power your Rock space Extender.
2. Connect your device Wi-Fi device to rockspace_EXT WiFi network.
3. Open any above-mentioned web browser from the connected device.
4. Open the above-mentioned link from the device via a web browser.
6. Select the WiFi Network.
7. Enter your Wi-Fi Password from the connected device.
8. Reposition your Wireless Extender to any better spot.
9. Start Enjoying your Extended Network connection.
Rockspace Extender Setup with WPS
Rockspace Extender also comprises of another easy method. In this method, the only requirement is the ability of your router for WPS. For all those devices which don't support WPS can use the above method. We can go through this method steps now.
1. Power your Extender through an AC outlet.
2. After turning ON, Press WPS button on your router.
Note: If there's no WPS button, go for the above method.
3. Now press WPS button on your Rockspace Wireless Extender
4. Reposition your Rockspace Extender which prescribed in the description.
5. Connect your device as your comfort.
6. Start Enjoying your Network connection.
Rock space Extender setup as Access Point
Rockspace Extender can be used as an Access Point instead of working as an Extender. We can go through step by step process for Access Point setup now. re.rockspace.local login is needed in the official Website.
1. Power your Rockspace repeater via Electrical outlet.
2. Connect your Rock space Extender to your Router using any compatible Ethernet cable.
3. Now follow the steps as mentioned above.
4. Open any web browser and open Rockspace Extender Webpage via websites mentioned in the Web browser.
5. In the website, change the connection mode as Access Point and start using your Rockspace Extender as Access Point.
FAQ
There are lots of doubts regarding Rockspace Extender. We can go through some questions now.
1. Important Question is my rock space wifi extender not working.
A. If you go through the above steps correctly, there will be no problem. If there is no power in your Extender, then you can demand a replace or repair from the manufacturer.
2. After Extending, do we need new SSID and password?
A. No, you can use the same SSID and password of your Wi-Fi router.
3. Which connections Rockspace Extenders work?
A. Almost all models work in WPA, WPA2.
4. What do the colours from the device represent?
A. Blue colour indicates a good connection, Red colour indicates poor connection and no colour indicate No connection at all.
5. Rock space Extender support dual-band or single band?
A. Rock space Extender supports the single band in some models and dual-band in some other models. Most famous AC 1200 supports dual-band.
6. Is there a mobile application for rockspace Extender?
A. No, but there is a website for remote managing the Extender and set up process as well.
As a whole, Rock space Extenders is the best option for anyone looking for a good Wireless Extenders in any price point. It comes with good enough features and also budget-friendly as well. Rock space works hard to make you worth every penny External antennas help to give the best coverage available in the market. Even though there is no stand-alone mobile application for Rockspace, Website is good enough to forget that negative. The Best Wireless Extender or the best value for money Wireless Extender from Rockspace is definitely the Rockspace Wireless dual-band Extender AC-1200.
Read more… https://re-rockspace-local.com/
#Rockspace_ext setup#re.rockspace.local#Rockspace RSD0607 extender setup#rockspace firmware upgrade#how to set up rockspace wifi extender#Rockspace RSD0608 extender setup#rockspace wifi extender setup#rock space wifi extender manual#re rockspace local setup#rock space extender setup
0 notes
Text
Rock Space WiFi Extender Setup: Ultimate Guide
If you are struggling with the coverage of the wireless signal in your home or office, access the re.rockspace.local setup page and follow the steps mentioned in it. Here, you will get to know the Rock Space WiFi Extender Setup Ultimate Guide.

1 note
·
View note
Text
How to Easily Install the Rockspace Extender Setup?
Rockspace WiFi range extender is the great gadget used to store the settings on which you can get to the home WiFi network. Along these lines, to change the settings of the Rockspace extender then access the re.rockspace.local or 192.168.0.254 web address. From that point, rename the WiFi network, modify the administrator password of the Rockspace extender and change the security as per the prerequisite. Here, you can likewise make the visitor WiFi network and set or supplant the other security choices.
However, the majority of the users are confused about how to do the extender settings. Assuming that you are the person who is likewise searching for the directions to change or install the Rockspace extender setup settings then, at that point, don't overreact! You simply have to look down till the end and look at the means as referenced in it. We should get everything rolling right away.
Go through the mentioned points for the Rockspace WiFi range extender setup:
Step 1: Once you get the IP address of the Rockspace range extender then close the order brief window by tapping on the left button at the brief or by tapping on "x" on the spring up.
Step 2: Launch the web program from your framework. From that point onward, type the IP address in the location bar of the web program. Click on the enter button.
Step 3: Next, you will be approached to enter the username and password to get to the extender programming or firmware.
Step 4: It is both the default username and password for the Rockspace range extender or an extraordinary username and password assuming you have made it during the installation of Rockspace extender setup.
Step 5: in the event that you have made the extraordinary username and password then make a point to note them at the protected spot. In the event that you didn't recall the login certification subtleties then reset the extender to the manufacturing plant default settings.
Step 6: Write down the default login qualification subtleties of the Rockspace range extender. Enter the username and password into the fitting fields of the Rockspace window.
Step 7: Thereafter, you can see the firmware settings of the Rockspace extender.
Step 8: On every one of the Rock space WiFi range extender setup, you need to apply the progressions before proceeding with the further interaction.
Step 9: Once you are finished with the above advances, then sign in again to the Rockspace WiFi range extender web interface. At the point when you complete the entire setup process, you really want to close the internet browser.
With the previously mentioned guidelines, you can undoubtedly finish the re.rockspace.local setup and after that entrance and change the settings as per your necessities. In the event that you are confronting any trouble in adjusting the settings of the extender then you can contact our professionals or visit our website for more information while accessing re.rockspace.local login.
0 notes
Text
SECURE CONFIGURATION STEPS OF THE VERY TD WLAN RANGE EXTENDER
SECURE CONFIGURATION STEPS OF THE RANGEXTD WIFI RANGE EXTENDER
The RangeXTD Wifi Range Extender is employed for wireless networks at your homes and offices. Here you’ll be able to simply get the configuration steps.
The RangeXTD Wifi Range Extender is the next-generation Wifi extender. The extender has powerful options which will supercharge your electronic network. therefore you’ll be able to stream your favorite movies and play online games with a high speed of up to three hundred Mbps two.4 GHz band. Also, it’s 2 intrinsic antennas that give a high variety of network connections. it’s AN light-emitting diode signal indicator that helps to scan the signal vary and tells you the particular speed of the Wifi extender. The wireless signal reach will reach each space of your house which will eliminate the dead spots by reaching everywhere in your house.
You can conjointly place the RangeXTD Wifi Range Extender in any space and obtain uninterrupted high-range knowledge. it’s conjointly utilized in little offices in addition to inducing higher operating expertise. It will simply be connected together with your existing router. therefore you don’t have to be compelled to purchase additional routers or new modems for your Wifi vary extender.
Secure and straightforward Configuration Steps of the RangeXTD Wifi Range Extender
The RangeXTD Wifi Range Extender is employed for providing Wifi all told areas and is right for your homes and offices. The extender will take AN existing 802.11n wireless signal router to increase the variety of the Wifi signal. The RangeXTD extender supports a two.4 gigacycle per second Wifi association that transmits the Wifi speed of up to three hundred Mbps. Also, its super-powerful antennas will give super wonderful Wifi performance. It mechanically avoids conflicting problems with its advanced options.
In this article, we’ll follow some directions for ranged setup. The setup of the extender is straightforward and straightforward. you’ll be able to got wind of the extender in 5 simple ways in which. Configuration with the assistance of the WPS button, wirelessly configuration of the extender, or configuration with Rj45 cable, with AP mode or router mode.
CONFIGURATION WITH THE ASSISTANCE OF THE WPS BUTTON
This is the simplest and fastest thanks to tacking your wireless extender with the assistance of the WPS button. Firstly, you have got to examine whether or not your existing router will support the system or not. If you would like a stable and robust net association between your router ANd wireless extender then install the router in an acceptable position. The wireless router shouldn’t be thus far from the extender. If you produce an extended distance between your connected devices then it’ll produce a drag for you to induce a stable net association.
CHECK THE LIGHT-EMITTING DIODE STANDING OF YOUR EXTENDER
You need to search out a replacement place for your router if the light-emitting diode light-weight doesn’t blink. Then you only have to be compelled to set the position of the repeater into the repeater mode. Then plug your extender into the electrical outlet and router in addition. once your extender or router is steam-powered on, then activate the WPS Button. you may get the WPS button at the rock bottom of the router. Then watch for 2 or 3 minutes till the light-emitting diode light-weight of the router starts flashing. Then scan the on-screen directions once the router is steam-powered.
CONFIGURE THE RANGEXTD EXTENDER WIRELESSLY
For the configuration of the vary xtd extender setup. Firstly, the mode of the repeater ought to be selected into the repeater position. Then power on your extender by plugging it into the ability socket. subsequently, click on the icons that square measure offered on the proper screen of the desktop. you may realize a RANGEXTD named Wifi association. faucet on it and it’ll connect mechanically once some seconds.
After that launch, any application program and kind the default information science address within the address bar and look for the device. once your login screen seems on your desktop screen you would like to follow the steps like getting into your username and Wifi watchword. currently enter as AN admin.
Now log in to the online page and choose your network SSID with a selected watchword of your router.
CONFIGURATION WITH RJ45 CABLE
In this step, you would like to tack your extender with the assistance of the Rj45 cable. therefore initial of all, plug your extender within the power supply and switch on your computers or laptops with the assistance of AN Rj45 cable. subsequently, follow the A3 to A6 method for the configuration of your device.
CONFIGURE WITH AP MODE
In this method, you may use AP mode for the setup of the trifi booster. This method is additionally called a wireless access purpose. it’ll use the tip device to attach to the router in AP mode. So firstly, you must choose the access purpose position for the setup of AP mode. Then plug the device into the electrical power socket and follow A2 to A5 directions. once doing this step, click on the apply button. The device can restart itself. currently attend your Wifi settings and hook up with your new SSID network name.
CONFIGURE WITH WIFI ROUTER MODE
In this technique, the device is connected with the assistance of a DSL or cable electronic equipment. it’ll begin operating as your regular router. during this mode, it ought to be selected to the route position because it is about up by router model. currently, plug your device into the ability socket and follow A3 to A6 directions. At last, click on the router button for no-hit configuration with the Wifi router mode.
REVIEW OF THE RANGEXTD WIFI RANGE EXTENDER
This device is simply like plug-and-play. you’ll be able to place this device wherever you got wind of your main systems like your lounge or little workplace. It merely starts once plugging into the ability socket and it’ll be able to use. You don’t want any technical support for the setup of the rangextd extender. it’s one amongst the good things in this you’ll be able to invest your cash with none additional discussion and therefore the worth is additionally terribly low if it’s compared to alternative extenders.
0 notes