#which includes installing linux on it as my daily OS and partitioning it or using a vr for windows.....
Explore tagged Tumblr posts
Visit Tumblr Blog
Explore Tumblr blogs with no restrictions, modern design and the best experience.
Last Seen Tumblr Blogs


Fun Fact
Tumblr.com rank in the US is 25.
Text
the irony of the fact that if i worked and/or had money i would be able to buy a computer for myself which would mean i would be able to switch to linux.... an OS that is completely free.....
#z xarre#every time i see someone talking abt using linux i just look really sad with puppy eyes. why cant that be me...#i just want a gaming laptop for myself which i can modify as i see fit.#which includes installing linux on it as my daily OS and partitioning it or using a vr for windows.....
0 notes
Text
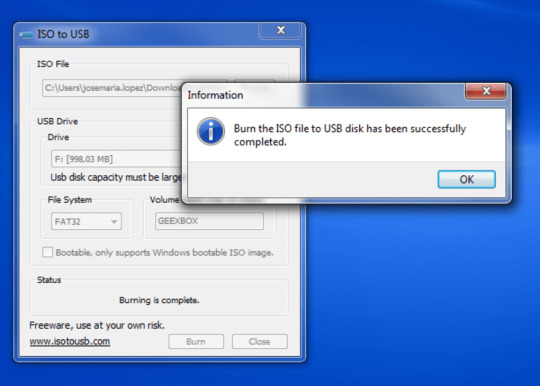
Iso Burn Usb For Mac

Download Rufus, a free tool that will correctly prepare the USB drive, automatically extract the.
Wondershare DVD Creator, a helpful ISO burner for both Windows and Mac computers, is ready to help you burn ISO files to data discs with ease. This program is an all-in-one solution for all DVD burning tasks in your daily life, such as burning videos to DVD, burning music to CD, backing up DVD t ocomputer, and more.
Wondershare DVD Creator for Mac (Non-bootable CD/DVD) As its name tells, This software was.
With a bootable Ubuntu USB stick, you can:
Install or upgrade Ubuntu, even on a Mac
Test out the Ubuntu desktop experience without touching your PC configuration
Boot into Ubuntu on a borrowed machine or from an internet cafe
Use tools installed by default on the USB stick to repair or fix a broken configuration
Creating a bootable USB stick is very simple, especially if you’re going to use the USB stick with a generic Windows or Linux PC. We’re going to cover the process in the next few steps.

Apple hardware considerations
There are a few additional considerations when booting the USB stick on Apple hardware. This is because Apple’s ‘Startup Manager’, summoned by holding the Option/alt (⌥) key when booting, won’t detect the USB stick without a specific partition table and layout. We’ll cover this in a later step.
According to Wikipedia, an ISO file is a disk image of an optical disc. It is also an archive file that contains everything ripped from your DVD disc. You can make a bootable DVD from an ISO file. In other word, you need to mount and burn ISO files to DVD to play ISO files on Mac.
This article introduces different ways to burn disk image on Mac. You can use the built-in ISO to DVD burning feature or third-party DVD burner to burn DVD ISO files on Mac. Which is the best way to burn ISO on Mac? We will discuss it later.
Part 1: How to Burn ISO to DVD on Mac without Quality Loss
You can create a DVD disc with ISO files by using AnyMP4 DVD Copy for Mac with 100% original quality. Being equipped with the advanced technology, you can burn DVD ISO image file to a blank DVD with the fastest speed and the best output quality. All DVD discs, DVD players and burners are supported. You can choose from 3 DVD copy modes to burn DVD on Mac with any content you like. Moreover, you can edit and define the output files freely. In a word, AnyMP4 DVD Copy for Mac is capable to make an ISO file bootable with simple steps.
1. Burn an ISO file to a DVD+R, DVD-R, DVD+RW, DVD-RW, DVD RAM and other DVD discs, as well as most DVD players and burners.
2. Copy DVD ISO image file to DVD disc with zero quality loss and fast burning speed.
3. Copy full movie, main movie or special customized chapter according to your needs.
4. Select the audio track, add/remove subtitles, remove/skip menu and define the output effects as you like.
5. Burn ISO on Mac Mojave, High Sierra and other OS X 10.6 or above (macOS Catalina included).
Step 1
Download and install the ISO to DVD burner for Mac software. Insert a blank DVD disc into your optical drive. Turn the disc label toward you.
Click In the Source section, browse and import your ISO file. You can click the small folder icon beside. Make sure there is enough free space for burning an ISO file to DVD on Mac. DVD Copy for Mac can recognize your ISO file and play it in the Preview window. Later, select your inserted DVD disc from the Target list.
Step 3

Choose the DVD copy mode from Full Copy, Main Movie and Customize. You can also adjust Volume, Writing Speed, Copies and Target Size near the bottom. At last, click Next to burn ISO to DVD on Mac.
Part 2: How to Burn ISO to DVD on Mac with Finder
Finder is the default application for all Apple Mac OS X users. Actually, you can use Finder as the ISO burner software too.
Open Finder. Navigate and choose your ISO image file.
Step 2
Select Burn Disk Image ** to Disc from the File drop-down list. You can also get the same disk image to DVD burning option from the right-click menu.

Put a blank DVD disc into the optical drive.
Step 4
Click Burn to start making a bootable DVD from ISO file with Finder on Mac.
Wait until the ISO to DVD burning process ends. You will see a notification when it finishes.
Part 3: How to Burn ISO to DVD on Mac with Terminal
If you are familiar with Terminal, you can burn .iso to DVD on Mac with command lines too. Be aware that Terminal will auto start burning ISO to the inserted DVD disc after running the command. If it is not the disc you want to burn with ISO files, you need to remove it from the optical drive.
Step 1
Download an ISO file from the Internet. Or you can move the ISO file to the desktop from elsewhere.

Put a blank disc into your Mac OS X computer.
Step 3
Run Finder. Choose Applications. Double-click on Terminal in the Utilities folder.
Copy and paste hdiutil burn ~/Path/To/DiskImageFile.iso in the Terminal window. Remember to replace DiskImageFile with the real name of your DVD ISO file.
Step 5
After pressing the Enter key, you can find that Mac OS X burn ISO image to DVD immediately.
After that, you can play the DVD files with the DVD player on Mac conveniently.
Part 4: How to Burn ISO to DVD on Mac with Disk Utility
If you are running Mac OS X 10.10 or earlier operating systems, you can get one more tool to burn an ISO image file on Mac. No third-party ISO burner required. You can burn ISO to DVD with Disk Utility on Mac for free.
Insert an empty DVD disc into the optical drive. In the popping-up window, choose Action followed by Open Disk Utility. Then click OK to move on. You can also find Disk Utility in the Utilities folder. Just run Finder and open the Applications folder first.
Step 2
You can put your ISO file to the desktop. Later, drag and drop the ISO file into the left pane. You can see other hard drives in the same list.
Click Burn on the top toolbar. The Burn Disc dialog will be activated.
Step 4
Head to the After Burning section. Mark before Verify burned data. Click Eject disc to eject your bootable DVD disc safely.
Click Burn to save changes and exit the window. Just leave your computer alone to complete the ISO to DVD burning process.
Burn Iso To Usb Mac Os
Part 5: FAQs of Burning ISO to DVD on Mac
1. What is the best DVD burning software for Mac?
Iso Burn Usb For Mac Installer
We have picked up 4 DVD burning software on Mac and show the detailed steps of creating to DVD. How to pick up the best one? Which one is the best DVD burning software? Find the answer in this post: Best Free DVD Burning Review.
2. How do I get my Mac to recognize my external DVD drive?
There are some basic rules that you should follow to connect DVD drive to Mac while burning ISO to DVD. Firstly, you should turn on your Mac computer, then plug the USB cable into the Mac and to the device, after that, do not use the hub-plug your device directly into your Mac’s port, and finally, turn on the external drive when the USB cable is connected.
3. How can I get Mac backup DVD to ISO?
Actually, Mac offers the built-in tools, which let you backup DVD to ISO and stores the files on your Mac safely. For the detailed steps of backing up DVD to ISO on Mac, you can check it here.
4. How can I play a DVD on my MacBook Pro?
If your Mac has a built-in DVD drive, then you just insert the DVD into the drive, and DVD Player will open automatically. Moreover, you can plug an external DVD player like Apple USB SuperDrive into MacBook Pro for DVD playback. Besides, you can use the DVD player software to open the DVD files directly.
Conclusion
Depending on the file size of the ISO file, the DVD burning process may take for several hours. If you want to get the superfast burning speed, you should not miss AnyMP4 DVD Copy for Mac. The ISO burner software is capable to burn ISO files to DVD in batch quickly and losslessly. It has the ability to create DVD disc with ISO image files in perfect 1:1 ratio. You can also get customizable options to decide whether to burn DVD completely or flexibly. By the way, you can backup DVD disc to DVD folder or ISO files on Mac within the program in clicks too.
That’s all for how to burn ISO to DVD on Mac Catalina, Mojave and other versions. If you have any other professional or free ISO burners on Mac, you can share with us in the comments below. It is also welcome to share your experience of burning ISO files with Disk Utility, Terminal, Finder and AnyMP4 DVD Copy for Mac.
What do you think of this post?
Excellent
Iso Burn Usb For Mac Catalina
Rating: 4.8 / 5 (126 Votes)
0 notes
Text
Rufus
Create bootable USB drives the easy way Rufus is an application that helps format and creates bootable USB flash drives, consisting of USB keys/pen drives, memory sticks, etc.
It can be especially beneficial for instances where:
you want to create USB set up media from bootable ISOs (Windows, Linux, UEFI, and so forth.) you need to paintings on a system that does not have an OS installed you want to flash a BIOS or different firmware from DOS you need to run a low-degree application Despite its small length, Rufus offers everything you need!
Oh, and Rufus is speedy. For example, it is approximately two times as speedy as UNetbootin, Universal USB Installer or Windows 7 USB download tool, at the creation of a Windows 7 USB set up a drive from an ISO. It is likewise marginally faster on the advent of Linux bootable USB from ISOs. (1) A non-exhaustive listing of Rufus supported ISOs is also provided at the bottom of this web page. (2)
Download
Last updated 2019.09.16:
Rufus three.Eight (1.1 MB) Rufus three.8 Portable (1.1 MB) Other variations (GitHub) Other versions (FossHub) Supported Languages:
Bahasa Indonesia , Bahasa Malaysia , Български , Čeština , Dansk , Deutsch , Ελληνικά , English , Español , Français , Hrvatski , Italiano , Latviešu , Lietuvių , Magyar , Nederlands , Norsk , Polski , Português , Português do Brasil , Русский , Română , Slovensky , Slovenščina , Srpski , Suomi , Svenska , Tiếng Việt , Türkçe , Українська , 简体中文 , 正體中文 , 日本語 , 한국어 , ไทย , עברית , العربية , پارسی . System Requirements: Windows 7 or later, 32 or sixty-four bit doesn't count. Once downloaded, the utility is prepared to apply.
I will take this possibility to express my gratitude to the translators who made it feasible for Rufus, in addition to this webpage, to be translated in various languages. If you discover that you could use Rufus on your very own language, you should certainly thank them!
Usage
Download the executable and run it – no installation is essential.
The executable is digitally signed and the signature needs to country:
"Akeo Consulting" (v1.3.Zero or later) "Pete Batard - Open Source Developer" (v1.2.Zero or in advance) Notes on DOS help: If you create a DOS bootable drive and use a non-US keyboard, Rufus will attempt to choose a keyboard format in keeping with the locale of your system. In that case, FreeDOS, which is the default choice, is recommended over MS-DOS, because it helps more keyboard layouts.
Notes on ISO Support: All versions of Rufus on account that v1.1.0 permit the creation of a bootable USB from an ISO image (.Iso).
Creating an ISO photograph from a bodily disc or from a fixed of documents could be very clean to do but, through the use of a CD burning application, along with the freely available CDBurnerXP or ImgBurn.
Frequently Asked Questions (FAQ) A Rufus FAQ is available HERE.
To provide remarks, document a computer virus or request an enhancement, please use the Github trouble tracker. Or you can send an e-mail.
License GNU General Public License (GPL) model 3 or later. You are free to distribute, regulate or maybe sell the software, insofar as you admire the GPLv3 license.
Rufus is produced in a 100% transparent manner, from its public source, the usage of MinGW32 surroundings.
Changelog Version three.Eight (2019.09.Sixteen) [BUGFIX RELEASE] Fix regression in which a few ISOs (Debian) might produce a Syslinux mistake whilst booting in BIOS mode Fix capability 0xC0030057 mistakes while seeking to create chronic walls on a non-FIXED power
Version three.7 (2019.09.09) Finalize continual partition guide for Debian and Ubuntu [EXPERIMENTAL]: Debian with patients must work out of the container with any latest Debian Live ISO.
Ubuntu with staying power ought to also work IF using a put up 2019.08.01 ISO (which includes daily-live). Note that, due to trojan horse #1489855, seeking to use persistence with Ubuntu ISOs that had been launched before August 2019 will most effectively bring about rescue mode for the duration of the boot - You have been warned! Other distros may work with patients as long as they use a Debian-like or Ubuntu-like technique, and, in the case of Ubuntu-like, if they use Casper with the #1489855 bugfix. Important: Persistence and ext formatting support ought to nonetheless be considered EXPERIMENTAL at this degree. Add cheat mode (Alt) to switch between percentage/velocity/ETA on some operations [EXPERIMENTAL] Report SuperSpeed+ gadgets in the log (Come on USB-IF, simply add "Ludicrous Speed" already!) Fix UI checkboxes (Extended label, Fixes for vintage BIOSes) being cleared on START Fix Can't mount GUID extent regression when creating Windows To Go drives Fix Volume label is invalid mistakes with empty labels on Windows 7 Fix stale development bar during standalone ext2/ext3 formatting Fix an extraction failure with R-Drive Image bootable ISOs Disable ISO mode for Pop!_OS Other beauty and internal improvements
Other versions Source Code Rufus 3.Eight (3.2 MB) Alternatively, you can clone the git repository the usage of: $ git clone git://github.Com/pbatard/rufus For greater records, see the Github mission. If you are a developer, you are very a whole lot recommended to tinker with Rufus and put up patches. Donations Since I'm getting asked approximately this on a regular basis, there may be no donation button on this page.
The principal motive is that I sense that the donation gadget does not definitely help software program development and worse, maybe guilt-inducing for customers who select not to donate.
Instead, I suppose that "mécénat"; or developer patronage, from companies that benefit maximum from a wholesome FLOSS environment, is what we must be aiming for. This is because, except they're subsidized through an organization, developers who want to offer fine Open Source software can not realistically maintain complete-time development, irrespective of how generous their software program customers are.
Also, except you're blockading them (hint, hint), you'll observe that there are advertisements in this web page, which I consider sufficient revenue sufficient.
Finally, the fact that I have the liberty to develop Free Software in my spare time needs to indicate that I'm well-off enough, and therefore which you need to direct your generosity towards folks that want it loads extra than I do. If you in reality insist, you could always make a donation to the Free Software Foundation, as they're the primary reason software program like Rufus is viable.
At any price, I'll take this possibility to say thank you to your persevering with help and exuberance approximately this little program: it is a lot appreciated!
But please continue to feel free to use Rufus with none guilt approximately now not contributing for it financially – you must never!
(1) Speed contrast among Rufus and other applications The following assessments have been carried out on a Windows 7 x64 Core 2 duo/4 GB RAM platform, with a USB 3.Zero controller and a 16 GB USB 3.0 ADATA S102 flash pressure.
• Windows 7 x64 : en_windows_7_ultimate_with_sp1_x64_dvd_618240.Iso
Windows 7 USB/DVD Download Tool v1.Zero.30 00:08:10 Universal USB Installer v1.8.7.5 00:07:10 UNetbootin v1.1.1.1 00:06:20 RMPrepUSB v2.1.638 00:04:10 WiNToBootic v1.2 00:03:35 Rufus v1.1.1 00:03:25 • Ubuntu 11.10 x86 : ubuntu-eleven.10-desktop-i386.Iso
UNetbootin v1.1.1.1 00:01:forty five RMPrepUSB v2.1.638 00:01:35 Universal USB Installer v1.Eight.7.Five 00:01:20 Rufus v1.1.1 00:01:15 • Slackware 13.37 x86 : slackware-thirteen.37-installation-dvd.Iso
UNetbootin v1.1.1.1 01:00:00+ Universal USB Installer v1.8.7.Five 00:24:35 RMPrepUSB v2.1.638 00:22:45 Rufus v1.1.1 00:20:15
0 notes