When Life gives you Lemons, make them into a stop-mo animation
Don't wanna be here? Send us removal request.
Statistics
We looked inside some of the posts by tenshianimates and here's what we found interesting.
Average Info
Notes Per Post
0
Likes Per Post
0
Reblog Per Post
0
Reply Per Post
0
Time Between Posts
37 minutes
Number of Posts By Type
Text
14
Video
3
Last Seen Tumblr Blogs


Fun Fact
Tumblr has a low social media market share in South America.
Text
Animated sketchbook - 9
I have now completely finished with the panoramic task, and I am so relieved and proud of myself for doing it and surviving.


I’m truly glad I went with the water colours, as it works so well with it all and gives it a vintage feel. I could of added more people to this and given the existing people faces, however, one; I don’t really like drawing people, two; thought that to many figures would be overwhelming not only for me to draw and figure out, but also for the viewer, and three; I felt like leaving the faces blank to kind of make the viewers more involved in some kind of way, like in fairy tales the characters don’t have set names so the readers can connect more and put themselves in their shoes.
Although the process of it all was tough at times, in the end I had fun and am glad I was able to finish and see my work as a whole piece finally.
0 notes
Text
Animated sketchbook - 8
I’ve finally drawn out the pencil outlines and it didn’t take me as long as I thought it would have, as I had a pretty good idea of what to draw in my head.


The pencil outlining is quite light, so you can’t see them very well in the images, but the first three and a half pages will be the war ships and the fishing boats and the docks, the next three and half are dedicated to the village and scenery, and the last page is a forest scene.
I was also able to start painting this week as well and got quite a lot finished. I started with the background first and made my way forward. I’m already really proud of how it’s all turning out, although I wasn’t quite able to get it done before reading week as planned, as I still have the boats and house to complete.


0 notes
Text
Animated sketchbook - 7
I didn’t do anything for animated sketchbook last week, so I didn’t write a blog, as I was under many piles of other work to do. However, I have finally started to draw out some reference drawings, and have practiced a bit with water colours to see which colours would work and to just get a feel for them again.


I like the effect that the water colours give this drawings, as it kind of makes them look old, which is a good thing, as it goes quite well with the viking idea of mine. I aim to start drawing it all out and finishing the panoramic by next week before the reading week starts.
0 notes
Video
tumblr
This is my finished flour sack animation.
I’m happy that it came out how I wanted it too, as I wasn’t quite sure if i was able to pull off the twists and turns of the flour sack. Although I did have trouble making it look like it was turning at one point, which I sorted with some motion lines and smear frames.
I really enjoyed this task and challenging myself by choosing to animate a tornado kick and getting the flour sack to look humanized in a way. The animation could have been longer, although it is over 50 frames, I just feel like it goes too quickly.
Overall, the progress and skills I have learnt from doing these three tasks is clear in my work, and I am happy with how much I have improved and learnt so far. I cannot wait to learn more in future lesson!
0 notes
Video
tumblr
My final video of the Harry Potter morph animation.
I’m truly pleased with how this turned out and really like the whole colour scheme we were given to work with. I think the transition from the letter to the snitch, by the letter twisting and crumpling up went really well, and by adding in the suggested hold of when the paper is smallest and shaking, adds more anticipation than I had originally added and works really well.
When the snitch turns back into the letter I could have added more growing frames, as it goes a bit quickly and you can’t see how the snitch turns back very well.
Overall, I am really proud with myself and how this whole morph animation turned out, as it went better than I had originally expected.
0 notes
Video
tumblr
This Is my final animation for the silhouette task. I am quite pleased with how it turned out, although the ending part of the animation could of had a smoother transition, as the jump looks a bit off.
I will practice more in the future to avoid any more of my future animations looking stiff and not true to life. One thing I am proud of is that the proportions of the figure stay the same, which I had a bit of trouble with whilst animating, but as you can see I was able to fix that by resizing the frames to all be the same.
Overall, I have mixed feelings about this final animation and note that I need to work on some more things to make future animations better and believable.
0 notes
Text
Principles - 4
This lesson we started our final animation, which is the flour sack animation. I decided to make my flour sack do a tornado kick, and kick and apple off a pedestal into the background. I chose to do a tornado kick, as it will allow me to use more of the principles we are:
Squash and stretch
Twist
Line of action
Asymmetry
Timing and spacing
Arcs
This is my storyboard I will be referring to whilst animating:

The frames 9 and 10 are at the bottom as I added them in after I had drawn out all the keyframes before realising that there should be a couple more between 8 and 11.
I will also try and add more principles into the final animation.
In this lesson I was able to get all key frames done and most of the in between done as well. I kept to the storyboard and tried to make the flour sack as proportionate as possible throughout the whole thing. Although I wasn’t able to complete it completely in this lesson, I will work on it during my free time to get it done as quickly as possible.
Overall, this lesson was quite productive, and I enjoyed animating what i was able to animate this lesson, and cannot wait for the final outcome.
0 notes
Text
Principles -wk 3
In the first lesson back from winter break, we started the silhouette animation on Tv Paint, which will be part of our submission in February.
I chose to go with the emotions, cautious to Shocked, with curious as the transition emotion, as it had the most dynamic poses and also included more of the principles we are supposed to add to this animation.

Before the class ended, we were given a short brief on what our third task would be, and what we will be working on next week. The third task is to create an animation of a flour sack pushing, or colliding, with another object. It is to be a minimum of 50 frames, and may also include a second flour sack if we wish.
Here are a couple of my ideas that I have so far:
Flour sack jumping on a chair to reach a cookie jar
The flour sack running and crashing through a door
Two flour sack running and crashing into each other, then exploding into flour
Flour sack doing a rugby tackle on a tackle bag (the object used to practice rugby tackles)
Before I start animating I will choose one of these Ideas and draw up the basic key frames for it, so I have a basic Idea of how the flour sack and object it interacts with will move.
I enjoyed this lesson, and had fun starting my silhouette animation and using Tv Paint. I also cannot wait until we start with our next project, and to improve my 2D animation skills more.
0 notes
Text
Animated sketchbook - 5
I’ve finally started my second book and have primarily focused on anatomy and singular body parts that I need to work on, such as hands and eyes. I’ve use google images for most of my references, but have mainly used some of my own pictures that I have taken as reference as well.

Again I am happy with my improvement and hope to increase my skill even more with things like anatomy and quick drawings as well. I hope that one day I’ll be quick at drawing and won’t erase sketches as much when using pencil and to do that I need to keep practicing.
I haven’t started on the given task yet, apart from to gather and find reference images of a viking village and viking clothing, as I have been busy with other pressing matters as well as this.
0 notes
Text
Animated sketchbook - group tutorial
Our second lesson this week was a 45 minute group tutorial, which allowed us to talk about our ideas and get not only ideas from our teacher, but also our group as well.
This lesson really helped me in terms of how was going to set out my idea in the panoramic form, my idea being Viking settlement.
I got great feedback on my idea and what improvements I could do, and what I should show in the panoramic, as this was the thing I was stuck on the most. The ideas I got were:
Show how they progressed through history - so a timeline of how their building would have changed, how the settlement would have started and looked like when finished
Have it set out as a story, with a story arc, of how they attacked villages, and took over
Make it an informative panoramic of how they did things in their village
I preferred the last idea, as not did I come up with more ideas for this point, but it would also show how vikings lived daily. With this new idea, I started thinking how the scene would be set out in the panoramic form, ad came up with that each panel, or two panels, would show a different subject, for example, how they hunted for food, which would involve showing how they fished and farmed food, and then from this it would move onto how they would practice fighting. This different changes won’t just show different aspects of their life, but it will also show their different clothes, such as armor, and hunting gear, as well as their normal everyday clothing.
The medium I hope to use for this project is watercolours on watercolour paper, which I will practice using and see if I will be able to complete it in the alloted time. Also I will research more into viking clothing and what their villages looked like, and use my sketchbook to practice drawing the building, clothing, etc., but also practice with watercolours more.
This session was very helpful in terms of helping me finalize my ideas and actually come up with a complete plan that I can now work on to finish the project. I am excited to see the finished product and also learn more about anther culture, and how to use watercolours more.
0 notes
Text
Animated sketchbook - 4
The first animated sketchbook lesson after the winter holidays, and we spent the three hours discussing the new topic and showing Robert Ramsden our sketchbooks, and what we had worked on over the holidays.
Our new project is to create a panoramic story, on 8 A4 pages, that can be set out like a scroll, or a constantine book.

(image is an example of a scroll panoramic. This one is the Garibaldi Panoramic)
We are to take inspiration and source material from the ‘life’ around us, but we can also take research from history.
The panoramic we do can be of, the world around us, our own life and our experiences, another person’s life, for example, the people who work in the marketplace or the museum. They can be fictional, or nonfiction, and the can be done in any style we like, so it can be cartoony mixed with real life, or include mythical creatures.
In the lesson he also gave us some ideas that we could possibly use for our panoramic, such as, we could follow a singular person throughout the different panels, or we could have many different people in the panels, or even none at all and we could have the main figure as an animal of vehicle. He also said we could use Freytag’s story pyramid and create a story arc in our work.
After we were given this information, we were left to work on coming up with some ideas. Here are mine:
A viking settlement/ village scene - maybe following a raven through the docks and houses.
Past and present of Norwich, or Southend.
A person travelling through the wilderness - each panel being a different setting., and each panel, the person would be wearing different clothing, suitable for the climate.
Half underwater, half above water Panoramic - including different animals, fish and birds.
As people were working on ideas, he came around to those that wanted their sketchbooks to be looked at, and gave out tips of how to improve some of the work we had done. When he looked at mine, he gave me some tips on how to improve my anatomical drawings, for example, eyes and hands, and suggested a book that will help in this process, which was, Sarah Simblet - Anatomy.
This lesson was fun, and also very helpful. I am excited to start the new project and to see the end product of everyone’s panoramic pieces, and the end product of my own. I also can’t wait to improve more on my perspective drawings, and also different scenic drawings. I will use the advice he gave us, and will also find the anatomy book to help with my sketchbook.
0 notes
Text
Animated sketchbook - 3
The first lesson of this week was not very enjoyable for me, as we used the whole three hours doing portraits with the help of a mirror, which I did not like doing, but knew it was important for the sketchbook, so did as many as I could, before I felt too frustrated to do anymore.
We started with a basic self-portrait, then moved on to being given random emotions that we would express and then draw in our books. I got the emotion ‘salty’, which wasn’t the best emotion to try an express in my opinion, so I looked up the definition and worked from that. The portrait I drew for satly came out okay, but I do need to work on making my portraits more accurate.


After we did these, Ramsden gave us free rein on what to draw, and said we could do some cartoony, and to just try and draw more expression. I did another full page of portraits, before the end of the lesson.
Our second lesson of the week. We went to the castle museum, to do some more life drawings and to work on perspective and how to draw people in rooms, to work on scale, and people in our eye-level.
I found this lesson fun, as I liked the change of environment, and the challenge of drawing people in a different setting. My first drawing of people in the room, didn’t go to well, as the scales of them were off and the perspective of the room wasn’t right. Our teacher helped me, by giving me some helpful tips, and my second attempt was better. I then went on to draw some of the exhibits they had, and worked on drawing animals more. Before we left, I drew the cafe from the second floor, and I am proud of how it turned out.


I felt liked my work with perspectives and portraits has increased this week, which I am very proud of, and will try and work on them more. I will also try and finish my whole sketchbook, so I a move onto my second one.
0 notes
Text
Animated sketchbook - 2
The second lesson on animated sketchbook was mainly focusing on new ways to fill our books and different ideas and techniques to use. We also looked at how practice was important, as we were tasked to draw a car in 5 minutes, then then time decreased until we only had 30 seconds to draw a car. This was to show that repetition helps improve our memory and how quickly we can draw something out.

Ramsden had us draw a bear from memory, than from picture reference, but this was only a warm up for when we started drawing from a video reference of a bear, which I found very difficult, as the bear wasn’t only moving around, but the images would cut out and move to the next scene.


Overall, this lesson was helpful, and I know now how important it is to at least draw once everyday, which I will try and do in my free time. However, I found drawing bears from moving images slightly frustrating, as the reference video kept changing to fast, so this is something I definitely need to work on.
0 notes
Text
Animated sketchbook -
Today we started a completely new topic for this unit, Animated Sketchbook, and we will be looking at different ways to fill up a sketchbook, and ways to show our progress through drawings.
Our new teacher for this topic, Robert Ramsden, also told us what we would need for the submission date, and when the deadline was: 1 A4 32 paged sketchbook to be completed, which is the minimum requirement, as we can fill more than one sketchbook, and it’s all due in for the 26th February.
To get started we looked at why sketchbooks are important, and the different ways they are used, for example, they can be used for recording ideas, thoughts, observations, responses, note details, and can help to explore different ways of drawing, capture life, and improve focus.
An artist called Pep Carrio once said this about sketchbooks:
“A portable laboratory, A space to mark with reference, To capture the immediate, To experiment, A memory warehouse, I can return whenever I am searching for an idea.”
I think this really sums up what a sketchbook is, as it holds memories of what happened that day you drew something, and it allows your own take on an image, whereas, cameras and photos sometimes lack the personality of the capturer.
Another artist, Fumie Kamijo, said, that a sketchbook was “the perfect place to document my strange day-dreams”, which I find very true.
We then went on to look at what it meant when we said sketchbook, as why don’t we just say drawing or mark-making instead of sketch. Drawing is a more serious form of penciling down ideas, and mark-making is less pressure than sketching. We use book as well as it’s like documenting a story, but without using words.
Ramsden then went on to show us some sketchbook artists, so we could look back at them for reference and ideas whenever we get stuck.
Serge Bloch
Benji Davies
Wendy Mcnaughten
Pam Sny
George Butler
Paul Hogarth
Rembrandt
Da vinci
Theophile Alexandre Steilen
Henry moore
An idea that Ramsden gave us for when we work on our sketchbooks in a daily diary, an idea he got from an artist named Lynda Barry, where you draw and fill four panels a day, or whenever you have an interesting day and what to draw it down. For the first panel you draw something that caught your eye, and in the second panel, you can draw your reaction; observation; or your thought about what happened in the first. The third would be your response, and the fourth could also be your response or a change in POV.
I like this idea and will use it when filling up my sketchbook, but will use it whenever I find a day interesting, or if something of significance happened that day.
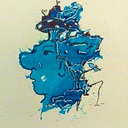
The afternoon session, we used ink to create inkblots that we would use to create drawing, and we also made a mind map, using a word of our own choice. With the finished mind map, He got us to choose two words that were furthest apart, that we will use to create a drawing. My word was Greed, and the two words I chose from the map was Demon, and Hoarder. With inkblots still on my mind, I decided to create a big ink blot on a page, which i will use to create my Demon hoarder drawing.
The three images below are of the inkblots I did in lesson:


This is my final outcome of the inkblot mind-map task:

This was the result of my demon Hoarder drawing. I’m very proud of how it turned out, and enjoyed experimenting with the ink and white wax pencil.
I really enjoyed this first lesson on Animated sketchbook and cannot wait to start mine. I will aim to fill more than one, as the sketchbook I have is exactly 32 pages, and want to challenge myself to draw more. I also want to increase the speed at which I draw, and try and find my own art style to draw in.
0 notes
Text
Principles - wk 2
After two weeks to work on the morphing project ourselves, we had our second lesson, where we were given feedback to hat we had done so far, and were given tips of how to improve if need be.
The feedback he gave me was to include more principles and make the ones I had included more noticeable. Other than that what I had done so far was good. With the tips I was given I used the rest of the lesson to add more principles, such as, Anticipation and follow through, and exaggerate the squash and stretch I had.
Before our class disbanded for the end of lesson, our teacher Jon Dunleavy, gave us the brief to our second project, and gave us some helpful tips of how to go about making the new animation. The second project is to create an animation of a person expressing emotions, but in silhouette form, in TV paint. We were given a new project folder to download, which included an expression sheet we have to fill out and complete over the Christmas holidays. Dunleavy told us we could use GIF’s, such as Disney, or DreamWorks, as reference, and to see how the characters express their emotions.
I found this lesson and the feedback useful, and cannot wait to start the new project, of animated emotion in silhouette form, as it will be a challenge to show expressions when the person is only a silhouette.
0 notes
Text
12 Principles
The list below is of all the 12 principles of animation.
Squash and stretch
Anticipation
Staging
Straight ahead and pose to pose
Follow through and overlapping
Slow in slow out (ease in ease out)
Arcs
Secondary action
Timing
Exaggeration
Solid drawing
Appeal
Here’s a YouTube link to a playlist by someone who discuss and explains the 12 principles:
https://www.youtube.com/user/AlanBeckerTutorials/playlists
0 notes
Text
Principles - 1
For our first principles lesson, we were introduced to all 12 principles and what we would be doing for our first project. Our first project that we were being set is to create a Morphing animation in Tv Paint.
A morphing animation is where one object turns into another in an interesting way, for example, a hat breaks apart and turns into a ring and then the ring turns back into the hat in a different way.

The GIF above is an example of a morph animation
To create ours, we had to choose two objects to morph, from a film or tv show that we like, and then after downloading the project folder, we created a storyboard of how the objects would morph, and what principles we will show in said animation.
I chose to animate two objects from Harry Potter and the Philosopher's Stone. I picke to use the Hogwarts acceptance letter and the golden snitch.
Once I had chosen my movie and two objects, I went on to decide how I would have the morph into each other and what principles to include into it as well.
Below is a screenshot of my basic storyboard of the morph animation:

I went for the Letter scrunching up whilst turning and then popping into the snitch, and the snitch flying around and then stretching back into the letter. After finally deciding this, I got to drawing the rough keyframes first, so I had a basic Idea of how to work in the in-between frames.
We didn’t have very long to work on our morphing projects this lesson, as we went through the principles and the information on the project. However, I enjoyed this lesson a lot, and was able to get all my keyframes done, and some of the in-between’s as well.
0 notes