1921681881wirelessextendersetup
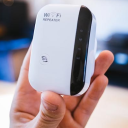
Repeater Setup
Login and setup your repeater using the correct IP Address. For errors, chat to our experts and get ultimate solutions
162 posts
Don't wanna be here? Send us removal request.
Last Seen Blogs

galarsteel
Steel-type Angharad

shelter-13
Shelter 13

smexypencil
shut up and get in the van!

sonak-chan-blog
Sonak Art

ctoastwrites
words
Text
#192.168.188.1#192.168.188.1 repeater#192.168.188.1 Admin Setup vs. Other Router Interfaces#192.168.188.1 Admin Setup#router setup#wifi repeater 192.168.188.1 setup wizard#192.168.188.1 wifi repeater#192.168.188.1 login#192.168.188.1 not working
1 note
·
View note
Text
Don't let technical glitches hold you back. Fix your Netgear extender issues today and enjoy the full range of your WiFi network! Our comprehensive guide on 192.168.188.1 setup provides you with step-by-step instructions to fix common issues and ensure a seamless internet connection.
#192.168.188.1 setup#192.168.188.1#192.168.188.1 admin setup#wifi repeater 192.168.188.1 admin setup#192.168.188.1 wireless extender setup#192168111.net
0 notes
Text
Unlock Seamless Connectivity with Our Comprehensive Guide to 192.168.188.1 Admin Setup
Dive into our detailed and easy-to-follow guide to mastering the 192.168.188.1 admin setup for WiFi repeaters and wireless extenders. Whether you're a tech novice or a seasoned pro, this guide simplifies the process, ensuring you can enhance your network's reach and reliability effortlessly.
#192.168.188.1 Admin Setup#192.168.188.1#wifi repeater 192.168.188.1 admin setup#192.168.188.1 wireless extender setup#192.168.188.1 repeater#192.168.188.1 login
1 note
·
View note
Text
How to Reset a Device Using IP Address 192.168.10.1
To reset a device configured with the IP address 192.168.10.1, follow these steps:
Locate the reset button on your device. This button is typically found as a small hole or a button situated on the rear or underside of the device.
Using a paperclip or a pin, press and hold the reset button for approximately 10–15 seconds.
Release the reset button and allow the device to reboot. This process may take a few minutes.
After the device has restarted, it will have reverted to its factory default settings. This includes resetting the default username, password, IP address, and other network configurations.
Resetting your device to factory settings will erase all personalized settings such as network name (SSID), password, and security settings. Refer to the user manual or contact the manufacturer for further assistance with the reset process.
0 notes
Text
#How to Fix the 192.168.188.1 Not Working Issue#192.168.188.1 Not Working#192168111.net#192.168.188.1#192.168.188.1 login#192.168.188.1 setup#192.168.188.1 repeater
0 notes
Text
Troubleshooting 192.168.1.254: Steps to Resolve Connection Issues
If you encounter an error message when attempting to access your router's settings at 192.168.1.254, despite entering the correct username and password, follow these troubleshooting steps to resolve the issue:
1. Check Physical Connections:
- Ensure you are using a reliable Ethernet cable to connect your router and PC.
- If connecting wirelessly, verify that the Wi-Fi signal is strong and stable.
2. Reboot Devices:
- Restart all devices connected to your router to refresh the network connections.
- Unplug the router or modem for a few seconds, then plug them back in.
3. Firewall Settings:
- Temporarily disable any firewall settings on your device, as they may interfere with the connection. Retry accessing the router after disabling the firewall.
4. Reset the Router:
- If the above steps do not resolve the issue, perform a full reset of the router. Press and hold the reset button on the router for several seconds until it restarts.
By following these steps, you should be able to troubleshoot and resolve common issues related to accessing your router at 192.168.1.254.
#192.168.188.1#192.168.1.254#192.168.188.1 admin setup#192.168.188.1 repeater#192.168.188.1 setup#wifi repeater 192.168.188.1 admin setup
0 notes
Text
#Common Queries and Solutions for Extender Setup#192.168.188.1 Setup#192.168.188.1#192168111.net#192.168.188.1 admin setup#192.168.188.1 wifi repeater
0 notes
Text
#192.168.188.1#192.168.188.1 wireless extender setup#192.168.188.1 setup#wifi repeater 192.168.188.1 admin setup#192.168.188.1 login#192.168.188.1 admin setup
0 notes
Text
How to Resolve Netgear Default Password Issues
If you are experiencing issues with your Netgear default password, follow these steps to troubleshoot and resolve the problem:
1. Verify the Admin Password Status
Before delving into more complex solutions, ensure that you have checked the status of the admin password for your Netgear WiFi extender. Confirm that you are using the correct default password or any updated password you might have set previously.
2. Disable Third-Party Applications
Turn off any third-party applications installed on your device. These applications can sometimes interfere with the router and extender settings, leading to connectivity issues. Disabling them can help restore normal function and improve connectivity.
3. Perform the Setup Correctly
When setting up your Netgear WiFi extender using the IP address 192.168.188.1, stay attentive throughout the process. Careful attention can help minimize errors and ensure a smooth setup. By following these steps, you can effectively tackle issues related to your Netgear default password and ensure a successful setup of your WiFi extender.
0 notes
Text
#192.168.188.1#192.168.188.1 repeater#wifi repeater 192.168.188.1 admin setup#192.168.188.1 setup#192.168.188.1 admin setup#wifi repeater 192.168.188.1 setup wizard#192.168.188.1 login
0 notes
Text
Reliable Router Setup with 192.168.1.254 IP Address - Quick and Easy!
Unlock the full potential of your home or office network with our comprehensive guide to the 192.168.1.254 IP address. Learn how to access and configure your router settings for improved security, enhanced performance, and seamless connectivity. Perfect for both beginners and tech enthusiasts, this resource will help you troubleshoot common issues and optimize your network setup effortlessly. Visit 192.168.1.254 IP Address Guide for step-by-step instructions and expert tips!
#192.168.1.254#192.168.1.254 router#192.168.1.254 router setup#192.168.188.1 login#192.168.188.1 wireless extender setup#wifi repeater 192.168.188.1 admin setup#192.168.188.1 repeater#192.168.188.1 admin setup
1 note
·
View note
Text
Effortless 192.168.188.1 Wireless Extender Setup Guide: Boost Your Network Signal!
Looking to enhance your Wi-Fi coverage? Dive into our comprehensive guide for setting up a wireless extender using 192.168.188.1! With easy-to-follow steps, you'll amplify your network signal in no time.
Step 1: Connect to the Extender
Access the extender by typing 192.168.188.1 into your browser's address bar. Follow the prompts to connect your device to the extender's network.
Step 2: Configuration
Once connected, access the extender's settings interface. Here, you can customize network preferences, including SSID and password settings, ensuring seamless integration with your existing network.
Step 3: Placement
Optimization Position your extender strategically to maximize coverage. Locate areas with weak Wi-Fi signals and place the extender midway between your router and these areas for optimal performance.
Step 4: Testing
After setup, perform a speed test to ensure your extended network is delivering the desired performance boost. Adjust placement if necessary to achieve the best results.
Step 5: Enjoy Enhanced Connectivity!
With your extender configured and optimally placed, revel in extended Wi-Fi coverage throughout your home or office. Say goodbye to dead zones and hello to uninterrupted connectivity!
In conclusion, setting up a wireless extender using 192.168.188.1 is a straightforward process that can significantly improve your network's reach and performance. Follow these steps and experience the benefits of a robust Wi-Fi signal wherever you go!
#192.168.188.1 wireless extender setup#192.168.188.1 admin setup#wifi repeater 192.168.188.1 admin setup#192.168.188.1 repeater#192.168.188.1 wifi repeater#192.168.188.1 login#192.168.188.1
0 notes
Text
Dive into our comprehensive guide on 192.168.0.1 admin setup and configuration. Learn how to efficiently manage your network settings, enhance security, and optimize performance with step-by-step instructions tailored for both beginners and advanced users. Visit us now to master your router's admin panel and unlock the full potential of your home or office network.
1 note
·
View note
Text
Expand the reach of your Wi-Fi network effortlessly with a TP-Link wireless extender, accessible via 192.168.188.1. Follow straightforward setup instructions to ensure strong, reliable Wi-Fi connectivity throughout your home.
#TP-Link WiFi extender#192.168.188.1#192.168.188.1 wireless extender setup#192168111.net#192.168.188.1 repeater
0 notes
Text
How To Change Your Local IP Address
1. Open Router Settings: Use a web browser on a device connected to your router and type in the router's IP address like 192.168.188.1
2. Login to Router: Enter your username and password. If you haven't changed them, check the router's manual for default credentials.
3. Find Network Settings: Look for a section called "Settings" or "Setup" in the menu.
4. Locate IP Address Settings: Inside the settings, find the section for "Network" or "LAN" settings.
5. Change IP Address: You'll see a field for the current IP address. Click or tap on it to change it to a new one.
6. Enter New IP Address: Type in the new IP address you want to use. Make sure it's unique and doesn't conflict with other devices on your network.
7. Save Changes: Save the new settings. The router might need to restart.
8. Check Connection: After the router restarts, make sure your devices can still connect to the internet. If not, double-check the IP address settings and consult the router's manual if needed.
Following these simple steps should help you change your router's IP address without any hassle.
0 notes