
Don't wanna be here? Send us removal request.
Statistics
We looked inside some of the posts by 2023-512laurenpomfrett and here's what we found interesting.
Average Info
Notes Per Post
2
Likes Per Post
2
Reblog Per Post
0
Reply Per Post
0
Time Between Posts
18 days
Number of Posts By Type
Text
17
Last Seen Tumblr Blogs


Fun Fact
China blocked Tumblr because of pornography and censorship problems in 2013.
Text
Photo Lab Workshop 1


This workshop was intense with new terminology and technology to learn. I knew it would be a struggle to remember everything for the future, so I made sure to note down the key pieces of information I picked up on. Previously, I have made referral notes and have been unsure of what my past self was trying to express. To make it easier to understand, I included drawings. I drew the power boxes, the light metre, the boom lights, the product table, the sandbag and more. This meant I could draw diagrams and label the parts of the sketch to make it easier to refer back to.
0 notes
Text
Rationale:
Over the course of this paper, I have enhanced my refining skills, to ensure that the typeface is the focal point of every page. Before, I had a tendency to over-decorate with colourful graphics and intricate visuals, prioritising display over legibility, which took attention away from Sirenia. My previous mindset was that I needed to add more in order to show my effort, fearing that less on the page would give off the impression that little time and care was put into its creation. I communicated with my peers, recognised this habit and mindset of mine, and then redesigned my book to better allow Sirenia to shine. By reducing and simplifying the information and elements on the page, my type specimen book appears cleaner, more polished and professional with the typeface, Sirenia, as the hero.
The pepeha, an introduction of oneself, is crafted to highlight the life cycle of water. Flowing from the river to the lake, to the ocean, it showcases our history and the places to which we feel the deepest connection. This cycle shows my changing environment, growing up living in the rural Kaipara region, then moving to urban Browns Bay. At the moment, Browns Bay is my current place of significance. It is where I reside, work, and spend time with friends and family. At Browns Bay Beach, I enjoy the native flora, local community, eateries, clubs and shops. This beach creates a pathway to my ocean, the Pacific. Being born and raised in New Zealand, the Pacific will always have significance to me, no matter where I live. These places have shaped who I am today for my experiences and day-to-day life, surrounded by water, have moulded my character. My connection to water has inspired my discovery of Sirenia, for it is ‘designed by nature’ and its forms are inspired by flowing water. Without water, life would cease to exist and so it is important to me to take a step back and appreciate its beauty. I aim to be flexible with my ever-changing life, appreciating the journey, and flowing like water throughout it all.
0 notes
Text
Audio Credits
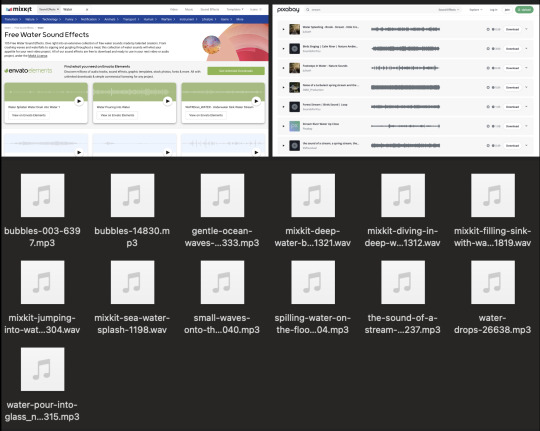
Above are all of the clips I downloaded to try and use for my animation audio. I compiled the audio that I downloaded myself, however, the sound clips themselves were not my own. I downloaded free audio clips from mixkit and pixabay searching using key words such as streams, splash, waves, pouring, bubbles, ocean, flood, water drops etc.
0 notes
Text
This update on my animation (outside of the audio) will be the last for I have edited up until the end credits and have reached 30 seconds! I am quite surprised that I managed to make it 30 seconds because I knew I wanted a fast paced animation but I am happy with it nontheless!
To summarise the new features, I animated some simple waves that travel up the screen in three different intervals using the wave warp distort effect on solid shape layers. These were then simply raised and animated to overshoot with easy ease of position keyframes.
I also introduced the third water cycle stage of my pepeha, the ocean, being Browns Bay Beach. I used the same wave warp effect on the text in order for it to flow and follow along the background.
The three tiered ocean then fades (decreased opacity) and the time lapse I made of Browns Bay Beach plays! I watched a tutorial where the creator talked about how they often have the time lapsed zoomed in at the beginning for it to then slowly zoom out until it reaches the actual video size in order to create more motion. I picked up on that and I used that simple but effective tip myself.
I used a sideways wave that sweeps in and out like a real wave using turbulent displace but twist instead of the usual turbulent to create this effect. I duplicated this shape layer and staggered their entry and exit in order to create a simple layered look that mimics that of wave foam. This also contains 'Te Moana' which follows this path to indicate the Browns Bay Beach refers to the ocean.
Finally we arrive at the end credits where I used yet again the turbulent displace to create water drops that act like ink bleeds. I did this by having the opacity very low and the scale very high at the beginning, to then have those extremes switched to create the illusion that the circular shape drops in from above the view of the screen. These drops then fade out as if being absorbed by the paper. These droplets contain text that start off with 'Forever flowing', the title of the animation, to the credits that include my name, class code and music compiler credits, being myself.
I had not created my audio at this stage but knew I was going to be creating it myself to have it fit. These then all fade away to show the dark blue that was present in the very beginning with the bubbles to have the animation be a loop, referring to the endless circular cycle of water.
0 notes
Text
In order to make my timelapse tinted blue/teal/cream like my colour palette for my animation, I used Premiere Pro! I had to follow along a tutorial in order to figure out how to tint the video (credit below). I decided on using the 4 Colour gradient method as I wanted the video to have dark and light values without it looking like I just added a flat and solid colour filter on top. I colour picked the exact colours from my colour palette in order for it to be cohesive and recognisable.
Justin Odisho. (2021, May 21). How to add Color Lens Filter Tint Effects to your Videos in Adobe Premiere Pro CC (Tutorial). [Video]. https://www.youtube.com/watch?v=oB1vxE8CSTY
0 notes
Text
Tutorial Referencing:
Ben Marriott. (2021, October 15). Ultimate Text Morph Animation in After Effects. [Video]. https://www.youtube.com/watch?v=5mu8Iku7xMA
Adobe in a minute. (2017, October 16). After Effects CC : How to Animate Text Kerning/Tracking (Expanding Space Between Letters). [Video]. https://www.youtube.com/watch?v=-itfRonTf_s
Spark Point. (2021, June 21). Super Easy Liquid Flow & Splash Animations in After Effects! (Tutorial). [Video]. https://www.youtube.com/watch?v=TF6_7Wq3WSI&t=129s
Ni3 Designs. (2023, February 13). Liquid Transition in After Effects - Tips & Tricks. [Video]. https://www.youtube.com/watch?v=x81R6z7ga_U
0 notes
Text
I wanted to try a unique way of merging and morphing the text in order to reveal the next part to the Pepeha 'Te Roto', meaning 'The Lake'. This transition used a number of effects such as Gaussian Blur, Levels and Turbulent Displace. I also adjusted the Opacity and used the Track Type animation feature in order to reduce the Kerning between the letters and have the text smush inwards on itself. All of these were then used on 'Lake Pupuke' and then were reversed on 'Te Roto' in order for it to create a smooth animation.
0 notes
Text
I edited the droplet the fills the 'Lake Pupuke' text. I wanted it to look more organic so I changed the pathway to be from a pen tool so that I could make the tip rounded and so that I could taper the stream to be thinner at the top and thicker at the bottom, giving off the effect of gravity on the water.
I also animated a couple small splashes using another new feature to me, Trim Paths. This allowed me to have the splash extend outwards, but have the behind catch up to the extension, rather than just a solid shape that has limited motion.
0 notes
Text
Referencing of Tutorials:
CGStrik. (2019, February 29). Rising Water, Rain, and Splashes with After Effects. [Video]. https://www.youtube.com/watch?v=4sTdqrrtbU4&t=17s
Michael Tierney. (2020, July 20). Animated Brush Strokes in After Effects. [Video]. https://www.youtube.com/watch?v=Yzlznw3L27I
Ben Marriott. (2019, March 28). Liquid Text in After Effects Tutorial - Melt Anything!. [Video]. https://www.youtube.com/watch?v=MVeVkawiHd4
iraFX Studio. (2020, September 18). Moving Object along the Shape Path - Adobe After Effects Tutorial. [Video]. https://www.youtube.com/watch?v=jAhl-z-E1bs
Manuel does motion. (2021, November 16). Animate text along a path in After Effects. [Video]. https://www.youtube.com/shorts/K89H7TxlXvE
0 notes
Text
A big update of my kinetic animation! I have been focusing on churning out my animation and progressing through the story as I have a lot of elements I wish to include in a small time frame.
To summarise what additions I have made, I added letters that spelt out 'MOANA' onto the bubbles in order to include the typeface early on and to provide visual interest to the bubbles (eyes move across the page reading the letters).
Then I made a reference back to my type specimen book by using the front/back cover background as an overlayed layer on a dripping transition. This is where I first applied effects, using the Turbulent Displace to warp the background, making it move and flow around the page.
To add the text 'KAIPARA', I experimented with making the text a 3D layer, adjusting the x, y and z axis to have it flip into frame. Following a youtube tutorial, I used another effect, this time Smear, to create the illusion that the text drips which connects to the previous drip transition. I varied the times in which the drip takes place, the radius of the drip, how far off the screen it stretches, and the speed time graph for it to drip fast and recoil slowly. This was to create a more organic movement that represented the physics of water. I then tilted the text and had it fall behind a masked layer, hiding it. Next, I used the pen tool and created a shape that looked like a puddle, adjusted the size to grow as more of the text is hidden, creating the illusion that the text is melting and a puddle of water pools as a result.
After, the puddle is scaled up and shifted to the top of the page, where a water stream creates the shape of the Kaipara river. This stream was created using the echo effect onto a circle that follows along the path. By increasing the echo to 400, it made the many circles hold their position after passing through the path, to create the illusion of a stream flowing and growing over time. Without the echo, it would have looked like a single circle that follows a path, leaving no trace behind.
I used the typeface again with 'Te Awa' to follow the river stream to make the clear connection of Kaipara being a river, as many would be unsure of what 'Kaipara' referred to without this indication.
The stream then continues straight down the page where it causes the water level to rise up towards the top of the screen. I made a solid coloured gradient of teal to cream which would be revealed using a mask. I used the Stroke effect to add the look of the water's surface and to create depth. I created this movement of the water again using the Turbulent Displace to create the effect of water thats moving and being impacted by the perimeter boundary.
1 note
·
View note
Text
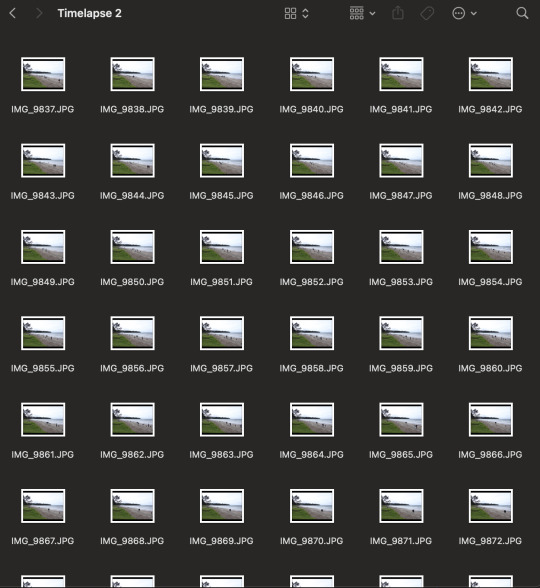
I went back to the beach later in the day to re film my time lapse. This time, I took photos every 3 seconds for 11 minutes. This produced a time lapse that is 4 seconds long! I am much happier with this length of footage.
The tide is out for this shot, which originally I was unhappy with as I had preferred the dynamic waves, however, it meant that more people were enjoying this side of the beach as there was more sand available to walk on. Plus, the waves can still be viewed but just from further back. I like that each time you watch the time lapse, you can focus on the movement of something different such as the clouds moving, the light fading, the people walking, the waves crashing, the grass moving in the wind and others!
This time, I made a point of holding my tripod still as my first two attempts had been a bit shaky due to the wind from the beach. This made a noticeable difference and the movement of the camera between the beginning to end is very minor.
1 note
·
View note
Text
When filming, I seriously underestimated how many photos are needed to make a long enough time lapse. The first video, I shot for 5 minutes, taking a photo every 5 seconds, the second was a 3 minute shoot with a 3 second interval between photos. I took approximately 100 photos for both, which sounded like plenty! This was until I put them into Premiere Pro with a 30fps video setting. So, my time lapses are only 2 seconds and 1 second long, which was not enough for my liking.
What I did like was the tide being in, it made for a dynamic shot as the waves show the progression of time well. I also preferred the 3 second interval time lapse, as it made for a smoother video when people are walking by. To me, 5 seconds was too jumpy when people are in the shot. I also liked the first angle (that references to my type specimen book), as I feel the view is more interesting with the cliff, angled shore, Rangitoto in the background and smaller patch of grass.
After this experiment, I decided that I needed to re film my time lapse using a 3 second interval, and to shoot for longer.
0 notes
Text
Referencing - Timelapse Research
Jerad Hill Photo. (2022, March 10). How to shoot a Timelapse on the Canon EOS R6. [Video]. https://www.youtube.com/watch?v=bI3wsKSw1i8&t=651s
Shutterbug 101. (2021, March 4). Tips & Tricks - Canon's Camera Connect App. [Video]. https://www.youtube.com/watch?v=6LEaldeUDyY
Daniel Henry. (2020, July 28). how to make a timelapse video with pictures [Video]. https://www.youtube.com/watch?v=5BGR7DqxaJw&t=165s
0 notes
Text
Timelapse - Browns Bay Beach


These were my first two attempts at creating a time lapse of Browns Bay Beach! This was new to me as I have not made a time lapse using photos, only having experience with videos. I wanted my timelapse to be of Browns Bay Beach to connect to my pepeha and also as a reference to my type specimen book as I featured a photo of Browns Bay Beach as the background. I was planning on using the same view that was used for my specimen book (image on the left), as I felt that my reference back to the book would be clearer. However, majority of the people who were on the beach at the time where in the other direction (image on the right), so I made two time lapses of both for more options when editing.
I had done some research prior to filming. I learnt that a tripod would be ideal to use as it would reduce the shakiness that of a handheld time lapse would produce. For this shoot, I used my own camera (Canon 1500D) and tripod. Next, I learnt that if Auto Focus (AF) is turned on, then the camera will try to refocus for every single photo, and as the light levels change over time, the camera will focus in different spots. This makes the video jittery and less smooth, so it is advised to focus the lens for the first shot using AF, then switch to Manual Focus (MF). Additionally, I learnt that I could use the Remote Live Shooting feature on my Canon Connect App, to capture photos using my phone, without having to touch my camera and change the viewpoint. These tips that I picked up on helped me to create a smooth time lapse that was easy on the eyes of the viewer.
0 notes
Text
Notes from class


In these notes I was making notes about time lapsing, frame rates and how to adjust footage to fit the requirement. Learning this new information has interested me and I wish to try using timelapsing in my own animation. I have an idea to film Browns Bay beach when people are walking along the beach with their dogs and families to show the lively atmosphere and popularity. Unfortunately the weather recently has been poor and so I was unable to film but will keep an eye on my schedule and the weather, in order to find a time where the beach will be busy, I am free, and the weather is suitable for videoing.
Next I made notes of the sequencing I wanted to take for my animation. I spoke to David and we decided that Browns Bay, (my local beach) which featured in my Specimen Book on the 3rd page would make for a good finale and also ties into the water cycle for it connects to the last stage of the cycle, being the ocean and the pacific. It also will tie back into the beginning with 'Moana' meaning the ocean as well in Maori.
The rest of the notes are more technical requirements for the hand in as these are very important to note and I can refer back to these points rather than my memory. I am aware that the brief contains old information that has been changed since and so I wanted to make notes of the current dates.
0 notes
Text
Youtube Tutorials credit:
I had ideas of transitions and effects but was unsure of how to execute them, I searched youtube for these specific alterations I wanted to create such as dripping text and a waterfall transition. Therefore, I thought I would credit and share the link of the tutorials I followed as these discoveries were not mine:
Manuel does Motion. (2020, June 17). Quick & easy liquid transitions in After Effects | Animation Tutorial [Video]. YouTube. https://www.youtube.com/watch?v=OR5BBKukRO8
Smertimba Graphics. (2023, February 20). Dripping Liquid Text Tutorial in After Effects | Drip Effect [Video]. YouTube. https://www.youtube.com/watch?v=MP5bqOgMr6E
0 notes
Text
This is the video from class that we made when learning how to using Premiere Pro! I had never used Premiere Pro before this class but I felt more confident in this programme than how I had first felt when learning After Effects. I believe this to be because of my video making history using iMovie. I am aware that iMovie is not as complicated as Premiere Pro, but the usage of both programmes being video editing and compiling can be cross-related. At the moment, I am unsure of how I could use Premiere Pro for my animation as I had not considered using raw video footage in my plan, however, I would like to use this programme to show a range of skills in my animation. I may create a new story board that includes having to use tools from this programme.
0 notes